- 直接用命令 sudo apt install gitlab-ce 安装最新版
也可以用sudo apt-get install gitlab-ce=15.10.2-ce.0 指定要安装的版本,具体参考https://forum.gitlab.com/t/installing-older-versions-of-gitlab-on-ununtu/29507
如果已经安装,可以把原来版本卸载掉:
This worked for me in Ubuntu 16 and let me install an older version of gitlab: https://askubuntu.com/questions/824696/is-it-fine-to-remove-the-opt-gitlab-directory-manually-after-removing-the-gitl 735

Remove services
sudo gitlab-ctl uninstall

Clean any data generated by usage of the package
sudo gitlab-ctl cleanse

You may also want to remove any accounts you configured. To do so
sudo gitlab-ctl remove-accounts

Then remove the package using
sudo dpkg -P gitlab-ce

Furthermore, gitlab-ce uses these directories (as described here 1.6k)

/opt/gitlab holds application code for GitLab and its dependencies.

/var/opt/gitlab holds application data and configuration files that gitlab-ctl reconfigure writes to.

/etc/gitlab holds configuration files for omnibus-gitlab. These are the only files that you should ever have to edit manually.

/var/log/gitlab contains all log data generated by components of omnibus-gitlab.

So, First remove the package recommended way (Even if you need to reinstall it). You can then remove those data using rm safely.

Information found from omnibus-gitlab README page 1.6k
- 修改gitlab的端口:sudo vi /etc/gitlab/gitlab.rb
`…
GitLab URL
##! URL on which GitLab will be reachable.
##! For more details on configuring external_url see:
##! https://docs.gitlab.com/omnibus/settings/configuration.html#configuring-the-external-url-for-gitlab
##!
##! Note: During installation/upgrades, the value of the environment variable
##! EXTERNAL_URL will be used to populate/replace this value.
##! On AWS EC2 instances, we also attempt to fetch the public hostname/IP
##! address from AWS. For more details, see:
##! https://docs.aws.amazon.com/AWSEC2/latest/UserGuide/instancedata-data-retrieval.html
external_url ‘http://192.168.1.157:9091’
…`
3.启动GitLab实例
sudo gitlab-ctl reconfigure
sudo gitlab-ctl start
sudo gitlab-ctl status
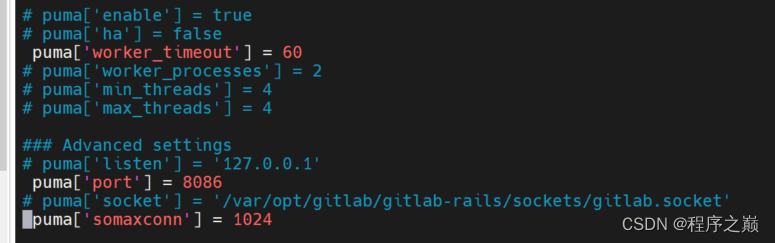
- 用浏览器登录http://192.168.1.157/的时候出现如下错误,主要原因是puma的默认端口8080 被(Jenkins)占用了。
可以用下面的命令修改默认端口:
sudo vi /etc/gitlab/gitlab.rb
GitLab is taking too much time to respond
解决办法:
5. 查看GitLab默认root初始密码(尽快修改root密码)
sudo cat /etc/gitlab/initial_root_password
- GitLab项目域名或IP设置及修改
sudo vim /opt/gitlab/embedded/service/gitlab-rails/config/gitlab.yml
1 ## GitLab settings
2   gitlab:
3     ## Web server settings (note: host is the FQDN, do not include http://)
4     host: 127.0.0.1
5     port: 80
6     https: false
-
CentOS 的gitlab安装请参考:https://blog.csdn.net/weixin_56270746/article/details/125427722
-
利用root初始密码登录后,可以通过页面修改初始密码
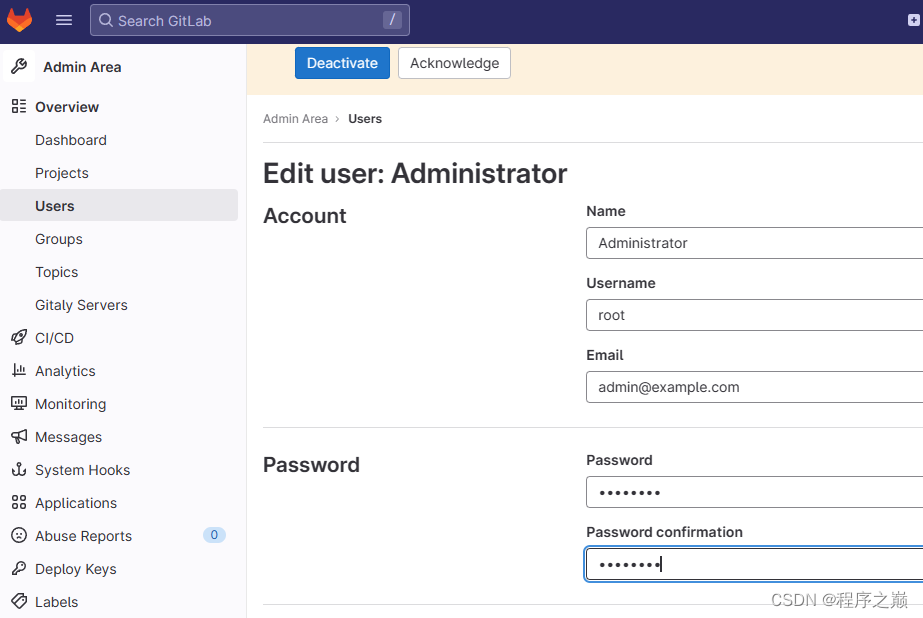
-
root 初始密码的修改,请参考:https://blog.csdn.net/weixin_56270746/article/details/125427722
参考链接:
安装命令:https://www.digitalocean.com/community/tutorials/how-to-install-and-configure-gitlab-on-ubuntu-20-04
https://www.jianshu.com/p/6cd5eecd85db
解决问题:https://blog.csdn.net/qq_41332844/article/details/126837301