一、前言
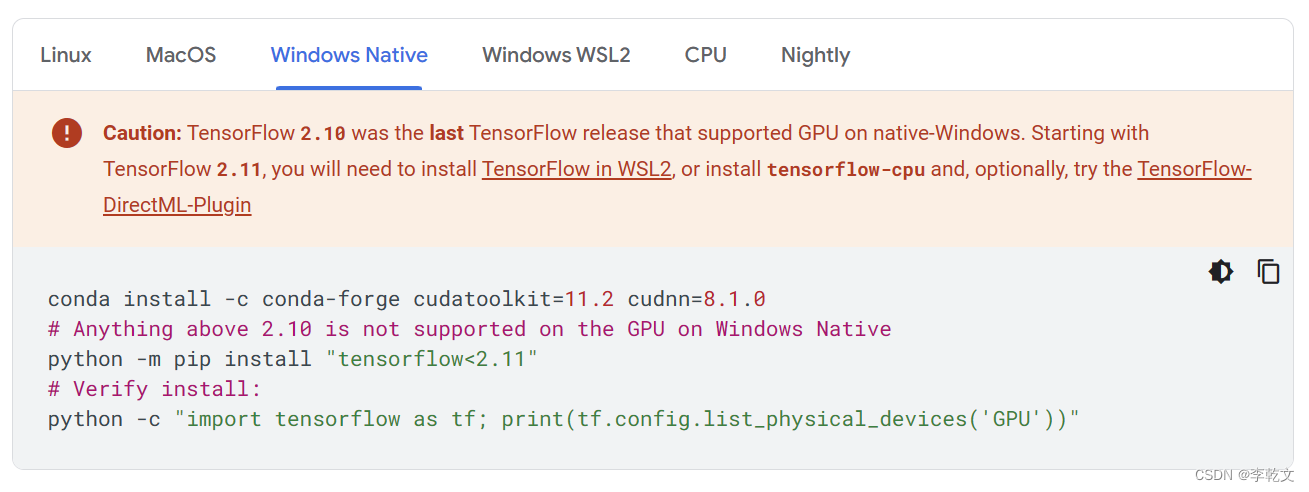
首先需要说明,按照官方中文文档安装是无法正常检测到GPU的。因为TensorFlow 2.10是支持原生Windows系统GPU环境的最后版本,默认安装的版本都比较高。
中文文档没有说明,英文文档是有提到的:
(我在GitHub上找了半天都没找到中文文档的修改方法,翻译项目里没有这个页面 emmm,有参与相关流程的朋友烦请跟进下,大家可能会在这上面浪费了大量时间,而且系统环境也会弄得乱七八糟)
所以,我们在安装的时候,需要指定低于2.11的TensorFlow版本。最方便的方法是使用conda进行安装,两行命令搞定,不用再去NVIDIA官网下载CUDA、cudnn等软件(网速慢要注册,还会安装一大堆用不到的东西)。
二、安装miniconda
打开地址下载miniconda并安装:https://docs.conda.io/en/latest/miniconda.html
我下载的是Python 3.8版本的miniconda,安装好后查看conda中的python具体版本号:

不习惯把软件放C盘占空间的朋友,可以修改虚拟环境和下载缓存库的保存路径:
conda config --add envs_dirs D:\ProgramData\CondaEnvs
conda config --add pkgs_dirs D:\ProgramData\CondaPkgs
三、创建虚拟环境
作者环境里有多个python版本,所以指定了python版本号,tensorflow为自己取的虚拟环境名称。
conda create -n tensorflow python=3.8.16
删除虚拟环境:
conda env remove --name your_env_name
用conda激活当前虚拟环境:
conda activate tensorflow
四、安装GPU支持库
安装cudatoolkit和cudnn:
conda install -c conda-forge cudatoolkit=11.2 cudnn=8.1.0
五、安装Tensorflow
安装tensorflow:
python -m pip install "tensorflow<2.11"
验证是否安装成功:
python -c "import tensorflow as tf; print(tf.config.list_physical_devices('GPU'))"
作者用vs code写代码的,将vs code内核切换tensorflow虚拟环境,运行代码测试:
import tensorflow as tf
a = tf.constant(1.)
b = tf.constant(2.)
print(a+b)
print(tf.__version__)
print(tf.test.gpu_device_name())
print('GPU:',tf.config.list_physical_devices('GPU'))
print('CPU:',tf.config.list_physical_devices('CPU'))
print(tf.test.is_gpu_available())
运行效果如下,可以看到GPU能够成功调用。
tf.Tensor(3.0, shape=(), dtype=float32)
2.10.1
/device:GPU:0
GPU: [PhysicalDevice(name='/physical_device:GPU:0', device_type='GPU')]
CPU: [PhysicalDevice(name='/physical_device:CPU:0', device_type='CPU')]
True

