文章目录
- 1. 前言
- 2. 创建7台虚拟机
- 3. 部署 git
- 3.1 dnf 安装
- 3.2 tar 安装
- 4. 下载 kubespray 介质
- 5. 配置 zsh 终端
- 6. 配置互信
- 7. 安装 docker-ce
- 8. 安装 ansible
- 9. 安装其他依赖
- 10. 配置内核参数
- 11. 安装 k8s
- 利用官方默认镜像部署 k8s 集群
- 利用自定义构建镜像部署 k8s 集群
- 12. 配置 kubecofnig
- 13. 检查集群状态
- 14. 清理集群
- 重新部署
- 报错
- etcd 命令
- kubectl 命令
1. 前言
Kubespray 是 Kubernetes incubator 中的项目,目标是提供 Production Ready Kubernetes 部署方案,该项目基础是通过 Ansible Playbook 来定义系统与 Kubernetes 集群部署的任务,具有以下几个特点:
- 可以部署在 AWS, GCE, Azure, OpenStack 以及裸机上.
- 部署 High Available Kubernetes 集群.
- 可组合性 (Composable),可自行选择 Network Plugin (flannel, calico, canal, weave) 来部署.
- 支持多种 Linux distributions(CoreOS, Debian Jessie, Ubuntu 16.04, CentOS/RHEL7).
本篇将说明如何通过 Kubespray 部署 Kubernetes 至裸机节点,安装版本如下所示:
Kubernetes v1.24.10kubespray v2.21.0docker-ce 23.0.2
2. 创建7台虚拟机
通过 vSphere client 创建虚拟机,vSphere client 如何创建虚拟机请看这里。
需求:
-
系统: Rocky Linux 9.1
-
CPU: 4
-
MEM: 8G
-
DISK: 30G
-
Rocky Linux 9.1 新手入门指南
配置地址与主机名分别为:
192.168.10.105   bastion01
192.168.10.106   master01
192.168.10.107   control01
192.168.10.108   prom01
192.168.10.109   109node
192.168.10.110   110node
192.168.10.111   111node
注意:以下操作内容均为:192.168.10.105(bastion01) 节点
3. 部署 git
3.1 dnf 安装
默认最快安装
dnf -y install git
3.2 tar 安装
自定义较新版本安装
- 安装依赖
sudo yum -y install make autoconf automake cmake perl-CPAN libcurl-devel libtool gcc gcc-c++ glibc-headers zlib-devel git-lfs telnet lrzsz jq expat-devel openssl-devel
- 安装 Git
cd /tmp
wget --no-check-certificate https://mirrors.edge.kernel.org/pub/software/scm/git/git-2.38.1.tar.gz
tar -xvzf git-2.38.1.tar.gz
cd git-2.38.1/
./configure
make
sudo make install
按照上面的步骤安装好之后,我们要把 Git 的二进制目录添加到 PATH 路径中,不然 Git 可能会因为找不到一些命令而报错。你可以通过执行以下命令添加目录:
tee -a $HOME/.bashrc <<'EOF'
# Configure for git
export PATH=/usr/local/libexec/git-core:$PATH
EOF
source  $HOME/.bashrc
$ git --version          # 输出 git 版本号,说明安装成功
git version 2.38.1
git config --global user.name "ghostwritten"    # 用户名改成自己的
git config --global user.email "1zoxun1@gmail.com"    # 邮箱改成自己的
git config --global credential.helper store    # 设置 Git,保存用户名和密码
git config --global core.longpaths true # 解决 Git 中 'Filename too long' 的错误
除了按照上述步骤配置 Git 之外,我们还有几点需要注意。
首先,在 Git 中,我们会把非 ASCII 字符叫做 Unusual 字符。这类字符在 Git 输出到终端的时候默认是用 8 进制转义字符输出的(以防乱码),但现在的终端多数都支持直接显示非 ASCII 字符,所以我们可以关闭掉这个特性,具体的命令如下:
git config --global core.quotepath off
其次,GitHub 限制最大只能克隆 100M 的单个文件,为了能够克隆大于 100M 的文件,我们还需要安装 Git Large File Storage,安装方式如下:
git lfs install --skip-repo
好啦,现在我们就完成了依赖的安装和配置。
4. 下载 kubespray 介质
git clone https://github.com/Ghostwritten/k8s-install.git
5. 配置 zsh 终端
dnf -y install util-linux-user zsh
chsh -s $(which zsh)
sudo dnf -y install curl
sh -c "$(curl -fsSL https://raw.github.com/ohmyzsh/ohmyzsh/master/tools/install.sh)"
zsh-autosuggestions 自动补全插件
$ git clone git://github.com/zsh-users/zsh-autosuggestions $ZSH_CUSTOM/plugins/zsh-autosuggestions
$ git clone https://github.com/romkatv/powerlevel10k.git $ZSH_CUSTOM/themes/powerlevel10k

$ vim /root/.zshrc

$ vim /root/.zshrc
export ZSH="$HOME/.oh-my-zsh"
ZSH_THEME="powerlevel10k/powerlevel10k"
plugins=(git zsh-autosuggestions)
source $ZSH/oh-my-zsh.sh
$ source /root/.zshrc
powerlevel10k 配置主题参数看这里。
6. 配置互信
for i in 192.168.10.{105..111};do ssh-copy-id root@$i;done
...
7. 安装 docker-ce
- How To Install and Use Docker on Rocky Linux 8
sudo dnf check-update
sudo dnf config-manager --add-repo https://download.docker.com/linux/centos/docker-ce.repo
sudo dnf -y install docker-ce docker-ce-cli containerd.io
sudo systemctl start docker
sudo systemctl status docker
sudo systemctl enable docker
拉取镜像
docker pull quay.io/kubespray/kubespray:v2.18.1
我们将在该镜像创建的容器内执行 ansible-playbook 进行集群部署。
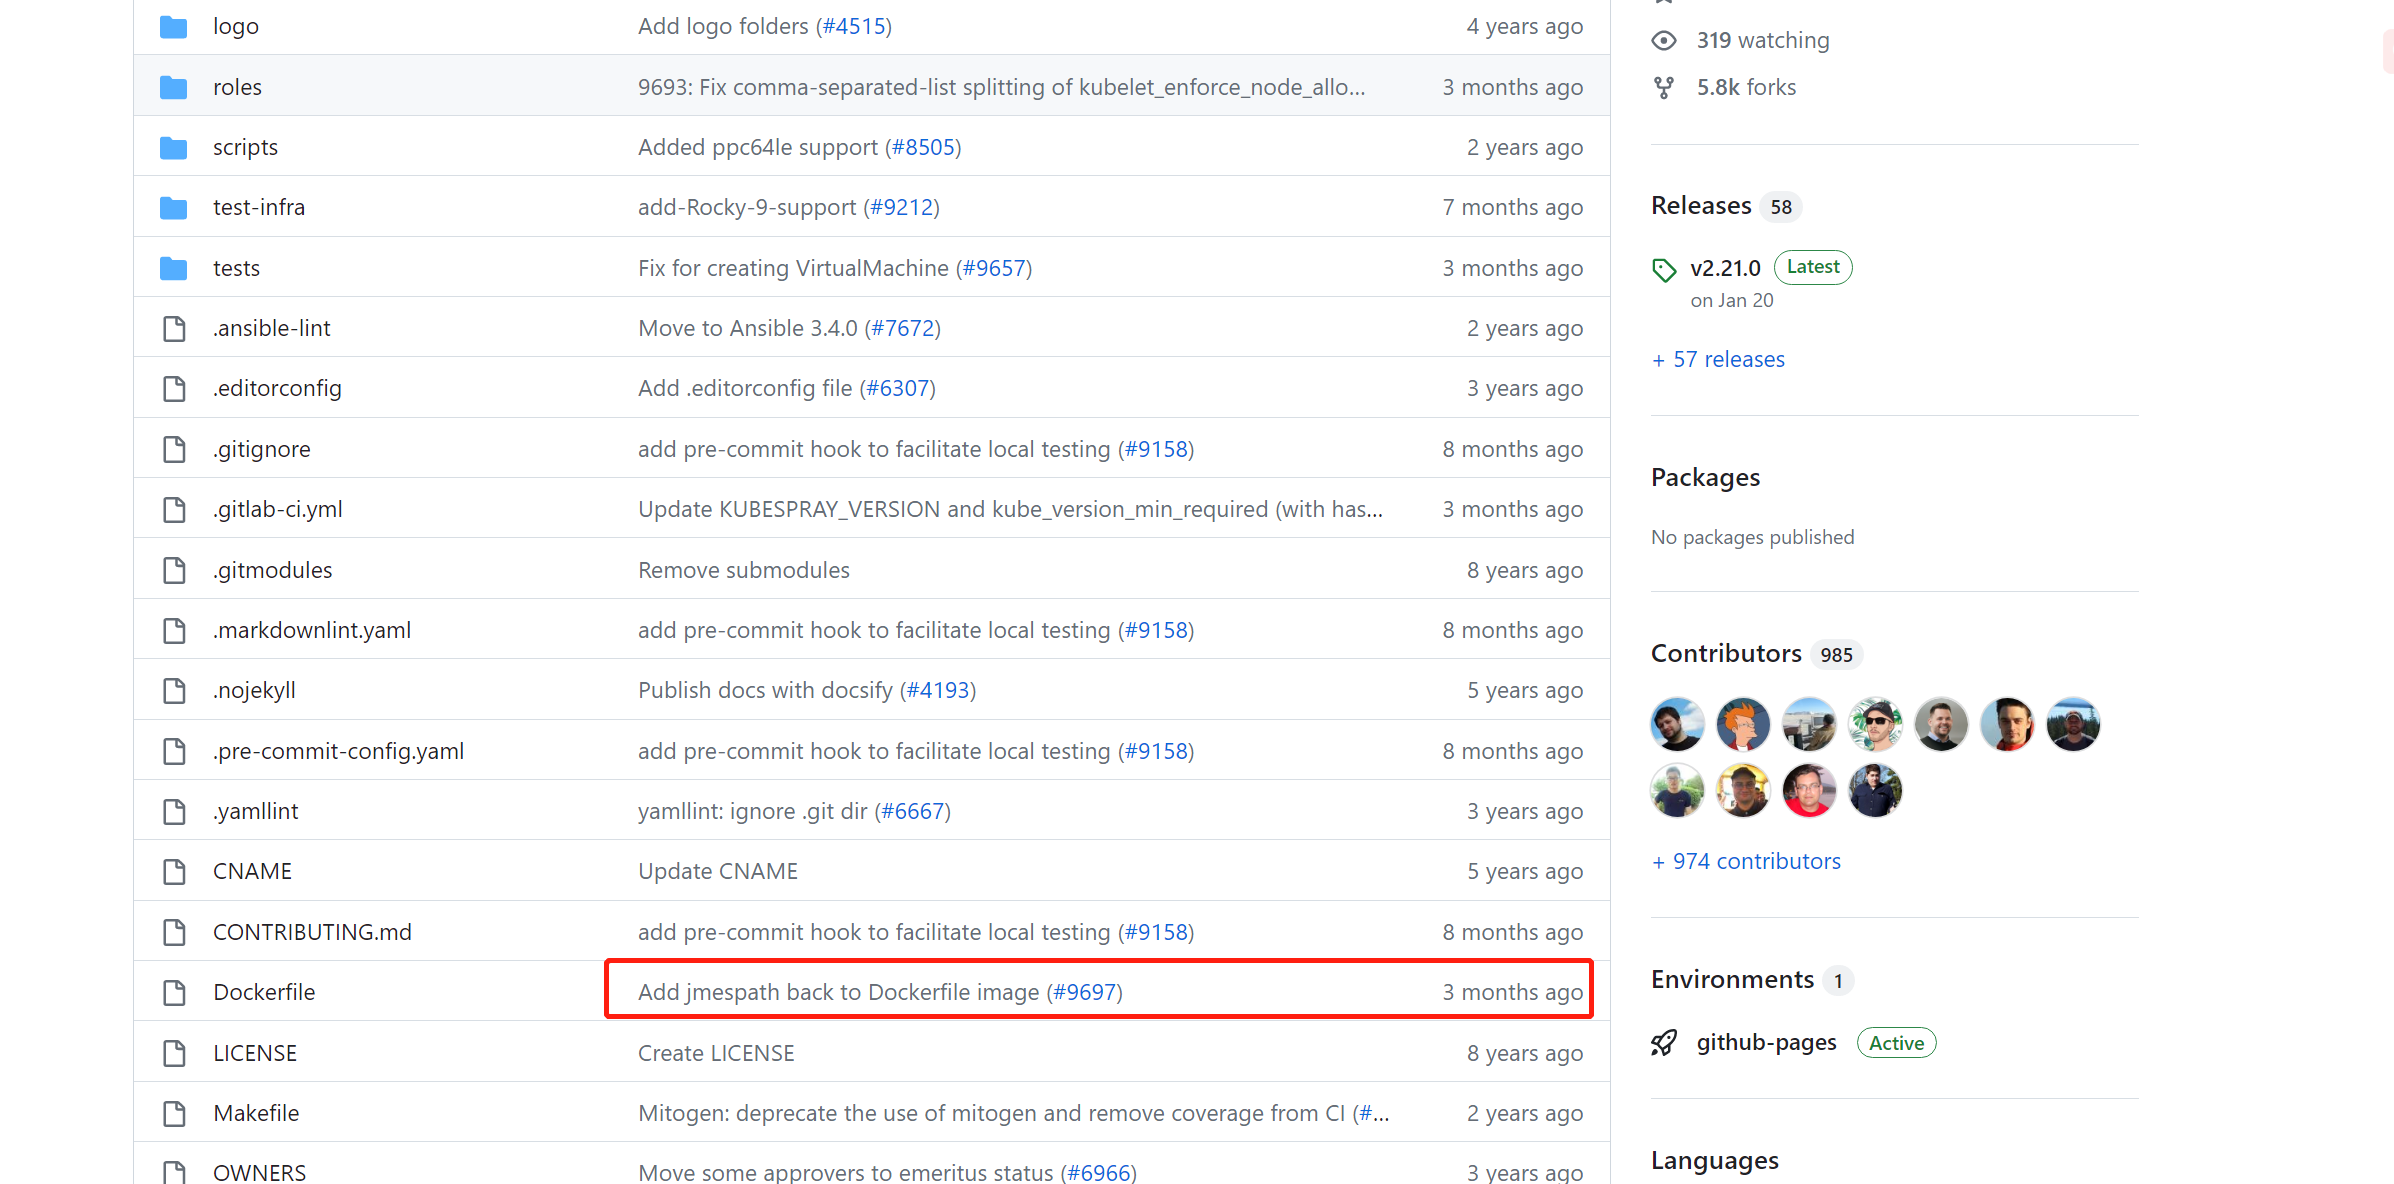
构建安装镜像
git clone https://github.com/kubernetes-sigs/kubespray.git
cd kubespray
docker build -t "docker.io/ghostwritten/kubespray:$(git symbolic-ref --short -q HEAD)-$(git rev-parse --short HEAD)" .
docker login docker.io
docker push docker.io/ghostwritten/kubespray:v2.21-a94b893e2
8. 安装 ansible
sudo dnf update
sudo dnf -y install epel-release
sudo dnf -y install ansible
配置 inventory.ini
$ cd k8s-install/kubespray-2.21.0/rocky9.1-calico-cluster
$ vim inventory/cluster-local/inventory.ini
# ## Configure 'ip' variable to bind kubernetes services on a
# ## different ip than the default iface
# ## We should set etcd_member_name for etcd cluster. The node that is not a etcd member do not need to set the value, or can set the empty string value.
[all]
master01 ansible_host=192.168.10.106
control01 ansible_host=192.168.10.107
prom01 ansible_host=192.168.10.108
109node ansible_host=192.168.10.109
110node ansible_host=192.168.10.110
111node ansible_host=192.168.10.111


# ## configure a bastion host if your nodes are not directly reachable
# [bastion]
# bastion ansible_host=x.x.x.x ansible_user=some_user

[kube_control_plane]
master01

[etcd]
master01

[kube_node]
control01
prom01
109node
110node
111node

[calico_rr]

[k8s_cluster:children]
kube_control_plane
kube_node
calico_rr
测试节点连通性
ansible -i inventory/cluster-local/inventory.ini all -m ping
control01 | SUCCESS => {
    "ansible_facts": {
        "discovered_interpreter_python": "/usr/bin/python3"
    },
    "changed": false,
    "ping": "pong"
}
master01 | SUCCESS => {
    "ansible_facts": {
        "discovered_interpreter_python": "/usr/bin/python3"
    },
    "changed": false,
    "ping": "pong"
}
109node | SUCCESS => {
    "ansible_facts": {
        "discovered_interpreter_python": "/usr/bin/python3"
    },
    "changed": false,
    "ping": "pong"
}
prom01 | SUCCESS => {
    "ansible_facts": {
        "discovered_interpreter_python": "/usr/bin/python3"
    },
    "changed": false,
    "ping": "pong"
}
110node | SUCCESS => {
    "ansible_facts": {
        "discovered_interpreter_python": "/usr/bin/python3"
    },
    "changed": false,
    "ping": "pong"
}

111node | SUCCESS => {
    "ansible_facts": {
        "discovered_interpreter_python": "/usr/bin/python3"
    },
    "changed": false,
    "ping": "pong"
}
统一 /etc/hosts配置
$ vim /etc/hosts
127.0.0.1   localhost localhost.localdomain localhost4 localhost4.localdomain4
::1         localhost localhost.localdomain localhost6 localhost6.localdomain6
192.168.10.105   bastion01
192.168.10.106   master01
192.168.10.107   control01
192.168.10.108   prom01
192.168.10.109   109node
192.168.10.110   110node
192.168.10.111   111node
批量分发
$ ansible -i inventory/cluster-local/inventory.ini all -m copy -a " src=/etc/hosts dest=/etc/ho
sts"
master01 | CHANGED => {
    "ansible_facts": {
        "discovered_interpreter_python": "/usr/bin/python3"
    },
    "changed": true,
    "checksum": "74840b904cef4720e8a61bb192c5d8c476dba86d",
    "dest": "/etc/hosts",
    "gid": 0,
    "group": "root",
    "md5sum": "880b15d87341a8fa8e7ca3caab2ef728",
    "mode": "0644",
    "owner": "root",
    "size": 337,
    "src": "/root/.ansible/tmp/ansible-tmp-1680599677.670036-32718-205093298554858/source",
    "state": "file",
    "uid": 0
}
.....
9. 安装其他依赖
- kubectl 安装
dnf -y install golang
curl -LO https://dl.k8s.io/release/v1.24.10/bin/linux/amd64/kubectl
chmod 755 kubectl
mv kubectl /usr/local/bin
最好安装与集群版本一致的 kubctl 命令。
10. 配置内核参数
modprobe bridge
modprobe br_netfilter
$ cat <<EOF>> /etc/sysctl.conf
net.ipv4.ip_forward = 1
net.bridge.bridge-nf-call-iptables=1
net.bridge.bridge-nf-call-ip6tables = 1
EOF
$ sysctl -p /etc/sysctl.conf
11. 安装 k8s
利用官方默认镜像部署 k8s 集群
$ ./install-cluster.sh
 欢迎使用 Kubespray 工具部署 k8s!

容器 kubespray-v2.21.0 创建成功!

 现在你可以开始安装 k8s:

   1. docker attach kubespray-v2.21.0
   2. pip3 install jmespath
   3. ansible-playbook -i /inventory/inventory.ini --private-key /root/.ssh/id_rsa cluster.yml
如果不执行命令:
python3.8 install jmespath报错1:
- Ansible: “You need to install ‘jmespath’ prior to running json_query filter”, but it is
installed- https://github.com/kubernetes-sigs/kubespray/issues/9826,该 bug 计划在 2.21.1版本修复
最终部署成功:
TASK [network_plugin/calico : Check kdd calico_datastore if calico_apiserver_enabled] **********************************
skipping: [master01]

TASK [network_plugin/calico : Check kdd calico_datastore if typha_enabled] *********************************************
skipping: [master01]

TASK [network_plugin/calico : Check ipip mode is Never for calico ipv6] ************************************************
skipping: [master01]

PLAY RECAP *************************************************************************************************************
109node                    : ok=481  changed=4    unreachable=0    failed=0    skipped=770  rescued=0    ignored=1
110node                    : ok=481  changed=4    unreachable=0    failed=0    skipped=770  rescued=0    ignored=1
111node                    : ok=481  changed=4    unreachable=0    failed=0    skipped=770  rescued=0    ignored=1
control01                  : ok=481  changed=4    unreachable=0    failed=0    skipped=771  rescued=0    ignored=1
localhost                  : ok=3    changed=0    unreachable=0    failed=0    skipped=0    rescued=0    ignored=0
master01                   : ok=724  changed=17   unreachable=0    failed=0    skipped=1261 rescued=0    ignored=3
prom01                     : ok=481  changed=4    unreachable=0    failed=0    skipped=770  rescued=0    ignored=1
利用自定义构建镜像部署 k8s 集群
 docker run --name=kubespray-v2.21 --network=host --rm -itd --mount type=bind,source="$(pwd)"/inventory/cluster-local,dst=/inventory \
 --mount type=bind,source="${HOME}"/.ssh,dst=/root/.ssh \
 --mount type=bind,source=/etc/hosts,dst=/etc/hosts \
 docker.io/ghostwritten/kubespray:v2.21-a94b893e2 bash

docker attach kubespray-v2.21
ansible-playbook -i /inventory/inventory.ini --private-key /root/.ssh/id_rsa cluster.yml
12. 配置 kubecofnig
mkdir /root/.kube
cp inventory/cluster-local/artifacts/admin.conf /root/.kube/config
13. 检查集群状态
$  kubectl get ns
NAME              STATUS   AGE
default           Active   3h4m
kube-node-lease   Active   3h4m
kube-public       Active   3h4m
kube-system       Active   3h4m

$ kubectl get node -owide
NAME        STATUS   ROLES           AGE    VERSION    INTERNAL-IP      EXTERNAL-IP   OS-IMAGE                      KERNEL-VERSION                 CONTAINER-RUNTIME
109node     Ready    <none>          3h2m   v1.24.10   192.168.10.109   <none>        Rocky Linux 9.1 (Blue Onyx)   5.14.0-162.18.1.el9_1.x86_64   containerd://1.6.15
110node     Ready    <none>          3h2m   v1.24.10   192.168.10.110   <none>        Rocky Linux 9.1 (Blue Onyx)   5.14.0-162.18.1.el9_1.x86_64   containerd://1.6.15
111node     Ready    <none>          3h2m   v1.24.10   192.168.10.111   <none>        Rocky Linux 9.1 (Blue Onyx)   5.14.0-162.18.1.el9_1.x86_64   containerd://1.6.15
control01   Ready    <none>          3h2m   v1.24.10   192.168.10.107   <none>        Rocky Linux 9.1 (Blue Onyx)   5.14.0-162.18.1.el9_1.x86_64   containerd://1.6.15
master01    Ready    control-plane   3h5m   v1.24.10   192.168.10.106   <none>        Rocky Linux 9.1 (Blue Onyx)   5.14.0-162.18.1.el9_1.x86_64   containerd://1.6.15
prom01      Ready    <none>          3h2m   v1.24.10   192.168.10.108   <none>        Rocky Linux 9.1 (Blue Onyx)   5.14.0-162.18.1.el9_1.x86_64   containerd://1.6.15


$ kubectl get pod -A
NAMESPACE     NAME                                       READY   STATUS    RESTARTS        AGE
kube-system   calico-kube-controllers-7f679c5d6f-vn95c   1/1     Running   0               11m
kube-system   calico-node-4q2nx                          1/1     Running   0               3h1m
kube-system   calico-node-7hs2c                          1/1     Running   0               3h1m
kube-system   calico-node-dm8hh                          1/1     Running   0               3h1m
kube-system   calico-node-llq24                          1/1     Running   0               3h1m
kube-system   calico-node-ncm6p                          1/1     Running   0               3h1m
kube-system   calico-node-sw75s                          1/1     Running   0               3h1m
kube-system   coredns-5867d9544c-mz45n                   1/1     Running   0               10m
kube-system   coredns-5867d9544c-t4jsl                   1/1     Running   0               9m55s
kube-system   dns-autoscaler-59b8867c86-r6vtw            1/1     Running   0               10m
kube-system   kube-apiserver-master01                    1/1     Running   1               3h5m
kube-system   kube-controller-manager-master01           1/1     Running   2 (143m ago)    3h5m
kube-system   kube-proxy-2kbpg                           1/1     Running   0               14m
kube-system   kube-proxy-f7g7l                           1/1     Running   0               14m
kube-system   kube-proxy-fjsj7                           1/1     Running   0               14m
kube-system   kube-proxy-kmln6                           1/1     Running   0               14m
kube-system   kube-proxy-qrls8                           1/1     Running   0               14m
kube-system   kube-proxy-rd4wq                           1/1     Running   0               14m
kube-system   kube-scheduler-master01                    1/1     Running   2 (143m ago)    3h5m
kube-system   metrics-server-58d8b4f7cd-xjgng            1/1     Running   1 (7m10s ago)   9m10s
kube-system   nginx-proxy-109node                        1/1     Running   0               3h2m
kube-system   nginx-proxy-110node                        1/1     Running   0               3h2m
kube-system   nginx-proxy-111node                        1/1     Running   0               3h2m
kube-system   nginx-proxy-control01                      1/1     Running   0               3h2m
kube-system   nginx-proxy-prom01                         1/1     Running   0               3h2m
kube-system   nodelocaldns-d8lr6                         1/1     Running   0               9m57s
kube-system   nodelocaldns-dkxd7                         1/1     Running   0               9m57s
kube-system   nodelocaldns-jww7q                         1/1     Running   0               9m57s
kube-system   nodelocaldns-qh86g                         1/1     Running   0               9m57s
kube-system   nodelocaldns-s5vpk                         1/1     Running   0               9m57s
kube-system   nodelocaldns-slmkq                         1/1     Running   0               9m57s
14. 清理集群
ansible-playbook -i /inventory/inventory.ini --private-key /root/.ssh/id_rsa reset.yml
输出:
PLAY [localhost] *******************************************************************************************************

TASK [Check 2.11.0 <= Ansible version < 2.13.0] ************************************************************************
ok: [localhost] => {
    "changed": false,
    "msg": "All assertions passed"
}

TASK [Check that python netaddr is installed] **************************************************************************
[DEPRECATION WARNING]: Use 'ansible.utils.ipaddr' module instead. This feature will be removed from ansible.netcommon
in a release after 2024-01-01. Deprecation warnings can be disabled by setting deprecation_warnings=False in
ansible.cfg.
ok: [localhost] => {
    "changed": false,
    "msg": "All assertions passed"
}

TASK [Check that jinja is not too old (install via pip)] ***************************************************************
ok: [localhost] => {
    "changed": false,
    "msg": "All assertions passed"
}
[WARNING]: Could not match supplied host pattern, ignoring: kube-master

PLAY [Add kube-master nodes to kube_control_plane] *********************************************************************
skipping: no hosts matched
[WARNING]: Could not match supplied host pattern, ignoring: kube-node

PLAY [Add kube-node nodes to kube_node] ********************************************************************************
skipping: no hosts matched
[WARNING]: Could not match supplied host pattern, ignoring: k8s-cluster

PLAY [Add k8s-cluster nodes to k8s_cluster] ****************************************************************************
skipping: no hosts matched
[WARNING]: Could not match supplied host pattern, ignoring: calico-rr

PLAY [Add calico-rr nodes to calico_rr] ********************************************************************************
skipping: no hosts matched
[WARNING]: Could not match supplied host pattern, ignoring: no-floating

PLAY [Add no-floating nodes to no_floating] ****************************************************************************
skipping: no hosts matched
[WARNING]: Could not match supplied host pattern, ignoring: bastion

PLAY [bastion[0]] ******************************************************************************************************
skipping: no hosts matched

PLAY [Gather facts] ****************************************************************************************************

TASK [Gather minimal facts] ********************************************************************************************
[WARNING]: Platform linux on host control01 is using the discovered Python interpreter at /usr/bin/python3.9, but
future installation of another Python interpreter could change the meaning of that path. See
https://docs.ansible.com/ansible-core/2.12/reference_appendices/interpreter_discovery.html for more information.
ok: [control01]
[WARNING]: Platform linux on host master01 is using the discovered Python interpreter at /usr/bin/python3.9, but future
installation of another Python interpreter could change the meaning of that path. See https://docs.ansible.com/ansible-
core/2.12/reference_appendices/interpreter_discovery.html for more information.
ok: [master01]
[WARNING]: Platform linux on host 110node is using the discovered Python interpreter at /usr/bin/python3.9, but future
installation of another Python interpreter could change the meaning of that path. See https://docs.ansible.com/ansible-
core/2.12/reference_appendices/interpreter_discovery.html for more information.
ok: [110node]
[WARNING]: Platform linux on host prom01 is using the discovered Python interpreter at /usr/bin/python3.9, but future
installation of another Python interpreter could change the meaning of that path. See https://docs.ansible.com/ansible-
core/2.12/reference_appendices/interpreter_discovery.html for more information.
ok: [prom01]
[WARNING]: Platform linux on host 109node is using the discovered Python interpreter at /usr/bin/python3.9, but future
installation of another Python interpreter could change the meaning of that path. See https://docs.ansible.com/ansible-
core/2.12/reference_appendices/interpreter_discovery.html for more information.
ok: [109node]
[WARNING]: Platform linux on host 111node is using the discovered Python interpreter at /usr/bin/python3.9, but future
installation of another Python interpreter could change the meaning of that path. See https://docs.ansible.com/ansible-
core/2.12/reference_appendices/interpreter_discovery.html for more information.
ok: [111node]

TASK [Gather necessary facts (network)] ********************************************************************************
ok: [master01]
ok: [control01]
ok: [110node]
ok: [109node]
ok: [prom01]
ok: [111node]

TASK [Gather necessary facts (hardware)] *******************************************************************************
ok: [control01]
ok: [110node]
ok: [109node]
ok: [master01]
ok: [prom01]
ok: [111node]
Are you sure you want to reset cluster state? Type 'yes' to reset your cluster. [no]: yes
重新部署
需要手动再次激活
modprobe br_netfilter
报错
etcd 命令
TASK [etcd : Get currently-deployed etcd version] **********************************************************************************************************************************
fatal: [master01]: FAILED! => {"changed": false, "cmd": "/usr/local/bin/etcd --version", "msg": "[Errno 2] No such file or directory: b'/usr/local/bin/etcd'", "rc": 2, "stderr": "", "stderr_lines": [], "stdout": "", "stdout_lines": []}
...ignoring
kubectl 命令
TASK [kubernetes-apps/ansible : Kubernetes Apps | Register coredns deployment annotation `createdby`] ******************************************************************************
fatal: [master01]: FAILED! => {"changed": false, "cmd": ["/usr/local/bin/kubectl", "--kubeconfig", "/etc/kubernetes/admin.conf", "get", "deploy", "-n", "kube-system", "coredns", "-o", "jsonpath={ .spec.template.metadata.annotations.createdby }"], "delta": "0:00:00.256776", "end": "2023-04-07 12:05:30.373468", "msg": "non-zero return code", "rc": 1, "start": "2023-04-07 12:05:30.116692", "stderr": "Error from server (NotFound): deployments.apps \"coredns\" not found", "stderr_lines": ["Error from server (NotFound): deployments.apps \"coredns\" not found"], "stdout": "", "stdout_lines": []}
...ignoring

TASK [kubernetes-apps/ansible : Kubernetes Apps | Register coredns service annotation `createdby`] *********************************************************************************
fatal: [master01]: FAILED! => {"changed": false, "cmd": ["/usr/local/bin/kubectl", "--kubeconfig", "/etc/kubernetes/admin.conf", "get", "svc", "-n", "kube-system", "coredns", "-o", "jsonpath={ .metadata.annotations.createdby }"], "delta": "0:00:00.253063", "end": "2023-04-07 12:05:32.672255", "msg": "non-zero return code", "rc": 1, "start": "2023-04-07 12:05:32.419192", "stderr": "Error from server (NotFound): services \"coredns\" not found", "stderr_lines": ["Error from server (NotFound): services \"coredns\" not found"], "stdout": "", "stdout_lines": []}
...ignoring
参考:
- https://github.com/kubernetes-sigs/kubespray.git
- 使用 Kubespray 安装 Kubernetes
- https://kubespray.io/