微信小程序-组件化
自定义组件
业务描述:代码中有多处需要引用同一段代码,需要把他封装成一个组件
流程
- 在根目录创建components用于存放通用组件
- 在创建组件文件夹
- 选择新建components 会自动生成4个文件
- json文件 会出现"component": true, 即组件创建成功
通用组件创建
section-info.wxml
<view>
  <view>我是标题</view>
  <view>我是内容</view>
</view>
index.wxml
主页面直接引用
<!--pages/05_learn_cpns/index.wxml-->
<!-- 自定义组件 -->
<section-info/>
<section-info/>
index.json
直接引用路径配置
{
  "usingComponents": {
    "section-info":"/components/section-info/section-info"
  }
}
也可在全局配置app.json中进行配置其好处就是配置后所有的page页面都可使用
 "usingComponents": {
    "section-info":"/components/section-info/section-info"
  },
组件的样式
- 组件内不能使用id选择器,属性选择器,标签选择器
- 组建的class只对组件内有用
组件通信
类似于vue 的props
properties
往组件内传递数据
index.wxml
<!--pages/05_learn_cpns/index.wxml-->
<!-- 自定义组件 -->
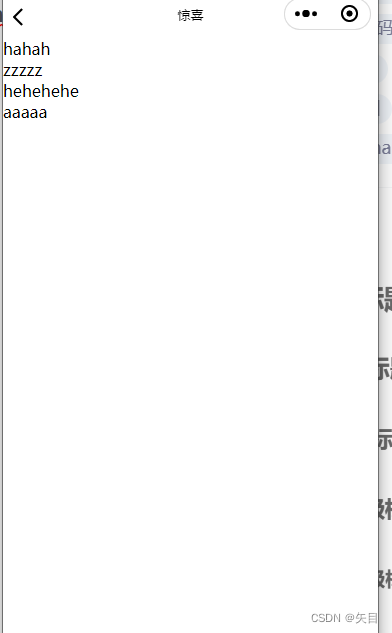
<section-info title="hahah" content="zzzzz" />
<section-info title="hehehehe" content="aaaaa"/>
section-info.js
组件内
properties: {
    title:{
      type:String,
      value:"标题"

    },
    content:{
      type:String,
      value:"内容"
    }
  },

  /**
   * 组件的初始数据
   */
  data: {

  },
section-info.wxml
<view>
  <view>{{title}}</view>
  <view>{{content}}</view>
</view>
组件往外传递事件-自定义事件triggerEvent
section-info.wxml
组件bindtap绑定事件
<view>
  <view bindtap="ontab">{{title}}</view>
  <view>{{content}}</view>
</view>
section-info.js
组件写逻辑在methods中
methods: {
    ontab(){
     this.triggerEvent("titleclick","bbbb")
    }
  }
index.wxml
要传递的外部页面
<!--pages/05_learn_cpns/index.wxml-->
<!-- 自定义组件 -->
<section-info title="hahah" content="zzzzz" bind:titleclick="oninfo" />
<section-info title="hehehehe" content="aaaaa"/>
index.js
 oninfo(event){
    // console.log("q111");
    console.log(event.detail);
  },

练习:
创建组件 navigation
navigation.wxml
<!--components/navigation/navigation.wxml-->
<!-- tab例子 -->
<view class="tab">
  <block wx:for="{{titles}}" wx:key="*this">
    <view
    class="item"
    bindtap="itemtap"
    data-index="{{index}}"
    class="item {{index === currentIndex ? 'active': ''}}"
    >
      {{item}}
    </view>
  </block>
</view>
navigation.wxss
.tab{
  display: flex;
  height: 40px;
  line-height: 40px;
  text-align: center;
}
.active{
  border-bottom: 3px solid #ff8189;
  padding: 5px;
}
.tab .item{
  flex: 1;
}
navigation.js
// components/navigation/navigation.js
Component({
  /**
   * 组件的属性列表
   */
  properties: {
    titles:{
      type:Array,
      value:[]
    }
  },

  /**
   * 组件的初始数据
   */
  data: {
    currentIndex:0
  },

  /**
   * 组件的方法列表
   */
  methods: {
    itemtap(event){
      //console.log(event.currentTarget.dataset);
      const currentIndex = event.currentTarget.dataset.index
      this.triggerEvent("titleclick",currentIndex)
      this.setData({currentIndex})
    }
  }
})
页面
导入组件
index.json
{
  "usingComponents": {
    "section-info":"/components/section-info/section-info",
    "navigation":"/components/navigation/navigation"
  }
}
index.wxml
<!--pages/05_learn_cpns/index.wxml-->
<!-- 自定义组件 -->

<navigation titles='{{arr1}}' bind:titleclick="oninfo11" />
index.js
// pages/05_learn_cpns/index.js
Page({

  /**
   * 页面的初始数据
   */
  data: {
    arr1:["蔬菜","水果","青菜"]
  },

  oninfo11(event){
    console.log(event.detail);
  },

})

插槽的使用
单个插槽的使用
创建组件my-slot
<view>
  <view>header</view>
  <view>
  <slot></slot>
  </view>
  <view>footer</view>
</view>
index.json
{
  "usingComponents": {
    "my-solt":"/components/my-solt/my-solt"
  }
}
index.html
<my-solt>
  <button>按钮</button>
</my-solt>
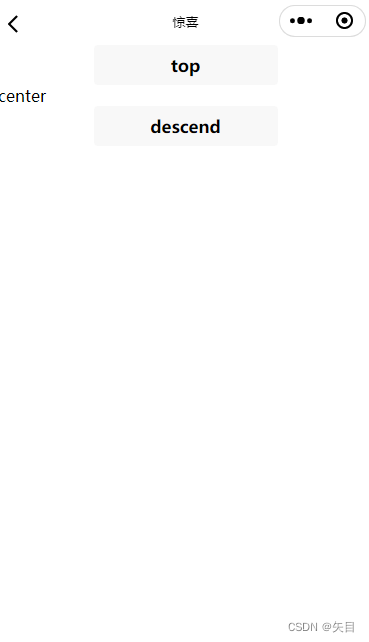
多个插槽
my-solt.wxml
在组件中预留多个插槽
<!--components/my-solt/my-solt.wxml-->
<view>
    <view>
      <slot name="top" ></slot>
    </view>
    <view>
    <slot name="center"></slot>
    </view>
    <view>
    <slot name="descend"></slot>
    </view>
</view>
my-solt.js
开启多个插槽配置
Component({

  options: {
    multipleSlots: true
  },


})
index.wxml
页面进行使用
<my-solt>
  <button slot="top">top</button>
  <view slot="center">center</view>
  <button slot="descend">descend</button>
</my-solt>
组件的生命周期
指的是组件自身的一些函数,这些函数在特殊的时间点或遇到一些特殊的框架事件被自动触发
自小程序基础库2.2.3起,组件的生命周期也可以在lifetimes里进行声明
lifetimes:{
    created(){
      console.log("created在组件实例刚刚被创建时执行");
    },
    attached(){
      console.log("attached 在组件实例进入页面节点树时执行");
    },
    ready(){
      console.log("ready在组件在视图层完成后执行");
    },
    moved(){
      console.log("moved在组件实例被移动到节点树另一个位置时执行");
    },
    detached(){
      console.log("detached在组件实例被从页面节点树中移除");
    },
    error(){
      console.log("error每当组件方法抛出错误时执行");
    }

  },


