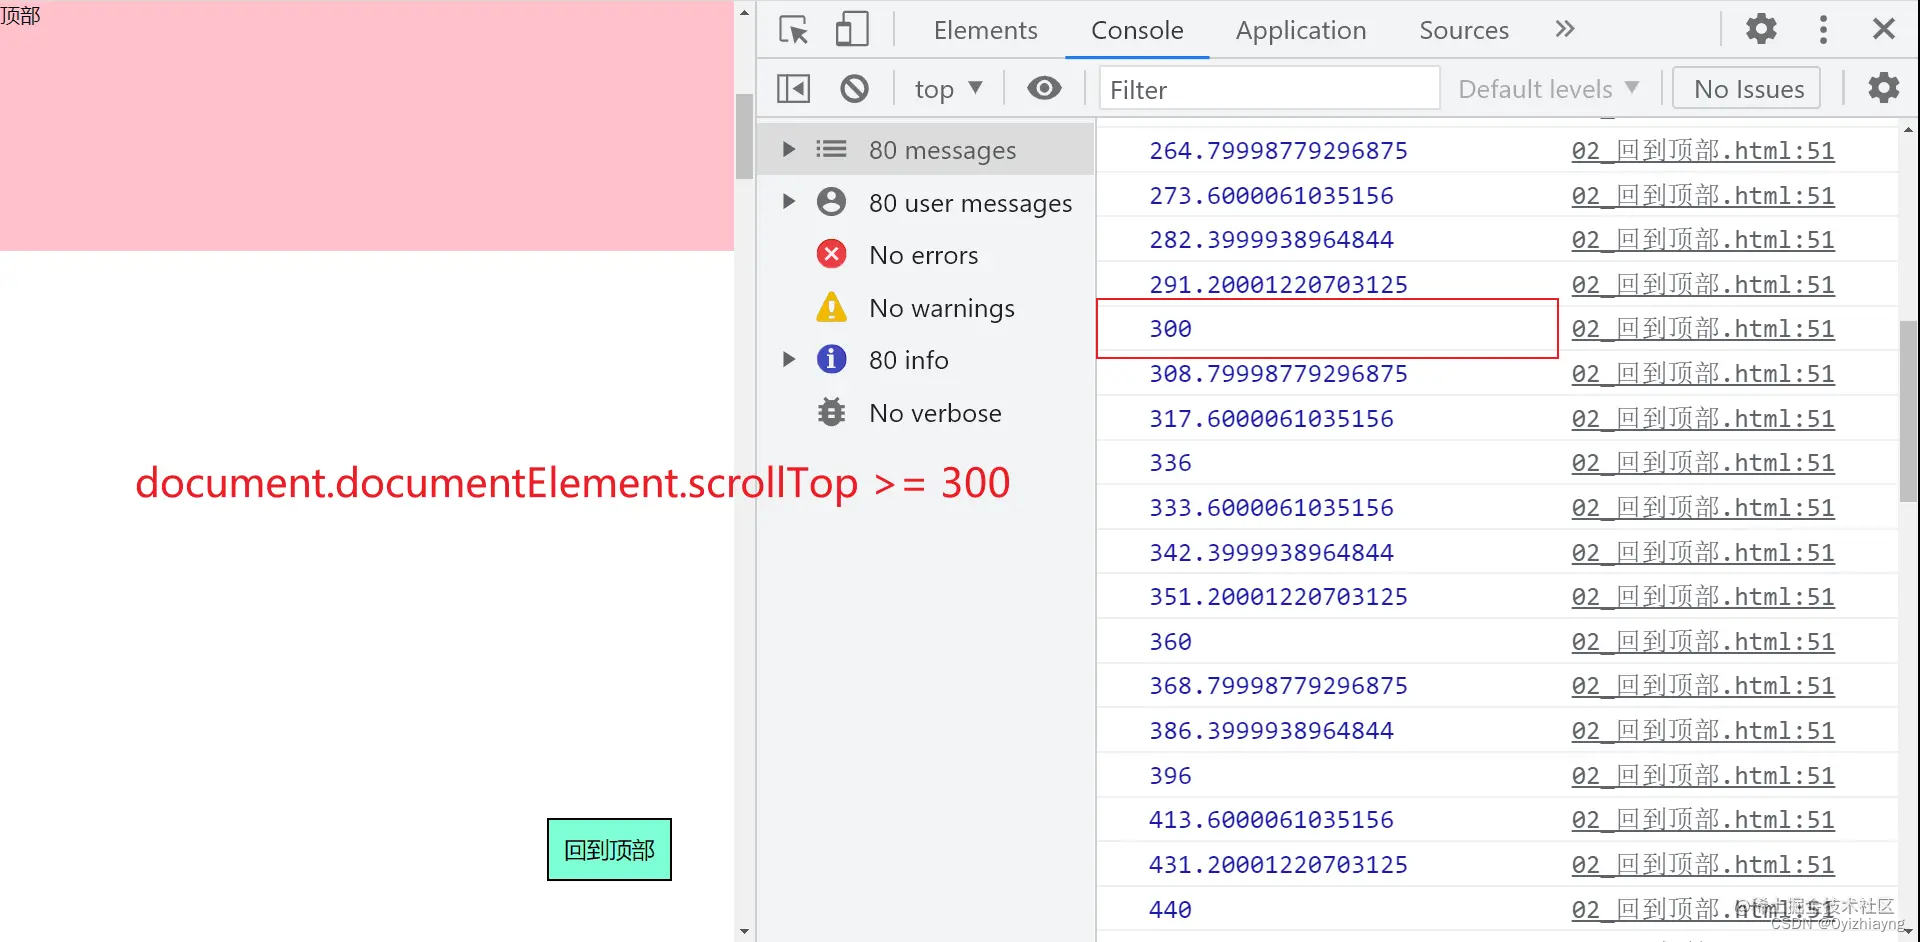
一、回到顶部
- 我们在浏览页面的时候,当我们浏览到一个页面的底部的时,一般都会有一个返回
底部

(一)案例分析
1、当页面滚动的距离大于300的时候,让herder和btn展示
- header的top设置为0的时候就能看到
- btn的display设置为block的时候就能看到
2、当页面滚动的距离小于300的时候,让header和btn取消展示
- header的top设置为-200px的时候就看不到
- btn的display设置为none的时候就能看到
(二)HTML和css代码
        <div id="header">顶部</div>
        <button id="btn">回到顶部</button>
    <style>
        * {
            padding: 0;
            margin: 0;
        }

        body{
            height: 8000px;
        }

        #header {
            width: 100%;
            height: 200px;
            background-color: pink;
            position: fixed;
            top: -200px;
            transition: top 0.5s;
        }

        #btn {
            width: 100px;
            height: 50px;
            font-size: 18px;
            background-color: aquamarine;
            position: fixed;
            right: 50px;
            bottom: 50px;
            display: none;
        }
    </style>
(三)JS代码
        // 0. 获取标签对象
        var oDiv = document.querySelector('div');
        var oBtn = document.querySelector('button');

        // 1. 监听页面的滚动距离 从而决定页面的header和bun是否展示
        window.onscroll = function(){
            // console.log(document.documentElement.scrollTop);

            // 当页面大于300的时候让herder和btn展示
            if( document.documentElement.scrollTop >= 300 ){
                // 此时让header和btn展示
                oDiv.style.top = 0
                oBtn.style.display = 'block';

            }else{
                // 否则不让header和btn展示
                oDiv.style.top = -200 + 'px';
                oBtn.style.display = 'none';
            }
        }

        // 3. 回到顶部:监听but按钮的点击事件,点击时,让页面滚回到 scrollTop === 0
        oBtn.addEventListener('click', function(){
            // console.log(1111);

            document.documentElement.scrollTop = 0;
        })
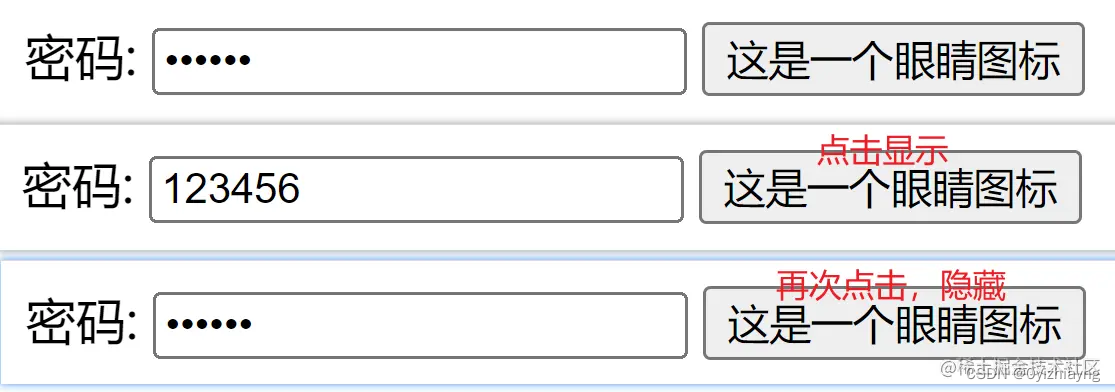
二、密码可视化
(一)案例分析
1、监听button的点击事件
- oBut.addEventListener(‘click’, function(){})
2、点击的时候判断input框的type
- 如果type==password —> 那就给他赋值text
- 如果type == text —> 那就给他赋值password
(二)HTML代码
    密码: <input type="password" id="inp">
    <button id="btn">这是一个眼睛图标</button>
(三)JS代码
        // 获取标签对象
        var oPwd = document.querySelector('input');
        var oBut = document.querySelector('button');

        // 点击事件
        oBut.addEventListener('click', function () {
            /* 方法一:比较麻烦 */
            // if(oPwd.getAttribute('type') === 'password'){

            //     oPwd.setAttribute('type', 'text');
            // }else if(oPwd.getAttribute('type') === 'text'){

            //     oPwd.setAttribute('type', 'password');
            // }

            /* 方法二 */
            // console.dir(inp.type);
            if (oPwd.type === 'password') {

                oPwd.type = 'text';
            } else if (oPwd.type === 'text') {

                oPwd.type = 'password';
            }
        })
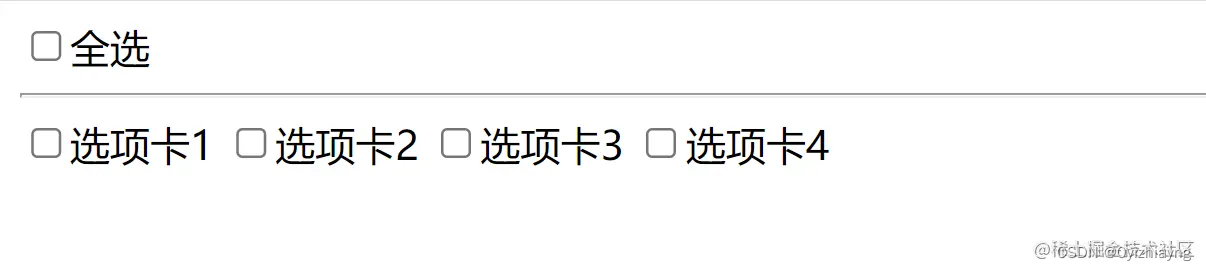
三、全选按钮
(一)案例分析
功能1:点击全选按钮的时候, 让选项1~4这几个按钮选中
- 点击全选按钮
- 判断我当前全选按钮的选中状态 ----> checked
- 根据全选按钮的选中状态, 决定是否让 1~4这几个按钮被选中
功能2:选项1~4全被选中的时候, 让全选按钮被选中
- 点击选项1~4其中一个按钮
- 判断当前选中1~4的选中状态是否都为选中
- 如果都是选中的, 将全选按钮选中
(二)HTML代码
    <input type="checkbox" name="" id="" class="All">全选
    <hr>
    <input type="checkbox" name="" id="" class="other">选项卡1
    <input type="checkbox" name="" id="" class="other">选项卡2
    <input type="checkbox" name="" id="" class="other">选项卡3
    <input type="checkbox" name="" id="" class="other">选项卡4
(三)JS代码
1、功能一的实现

代码的实现
        oIptAll.addEventListener('click', function () {
            // console.log(oIptAll.checked);

            if( oIptAll.checked === true){
                oIptOthers.forEach(function(item){
                    item.checked = true;
                })
            }else{
                oIptOthers.forEach(function(item){
                    item.checked = false;
                })
            }
        })
优化一
        oIptAll.addEventListener('click', function () {
            // console.log(oIptAll.checked);

            if( oIptAll.checked === true){
                oIptOthers.forEach(function(item){
                    item.checked = oIptAll.checked;
                })
            }else{
                oIptOthers.forEach(function(item){
                    item.checked = oIptAll.checked;
                })
            }
        })
优化二
        oIptAll.addEventListener('click', function () {
            // console.log(oIptAll.checked);

            oIptOthers.forEach(function (item) {
                item.checked = oIptAll.checked;
            })
        })
2、功能二的实现
        // oIptOther[0].addEventListener('click', function(){})
        // oIptOther[2].addEventListener('click', function(){})
        // oIptOther[3].addEventListener('click', function(){})
        // oIptOther[4].addEventListener('click', function(){})

        // oIptOther是伪数组 我们需要通过循坏获取每个值
        oIptOther.forEach(function (item1) {
            // 点击其中一个按钮时,判断其他几个的选中状态是否为true
            // 如果都是true 那么选中全选 否则不选中全选
            item1.addEventListener('click', function () {

                oIptAll.checked = oIptOther.every(function (item2) {

                    return item2.checked;
                })
            })
        })
3、最终代码
        // 获取元素
        var oIptAll = document.querySelector('.All');
        var oIptOther = [...document.querySelectorAll('.other')];

        // 功能一
        oIptAll.addEventListener('click', function () {
            console.log(oIptAll.checked);

            oIptOthers.forEach(function (item) {
                item.checked = oIptAll.checked;
            })
        })

        // 功能二
        oIptOther.forEach(function (item1) {
            // 点击其中一个按钮时,判断其他几个的选中状态是否为true
            // 如果都是true 那么选中全选 否则不选中全选
            item1.addEventListener('click', function () {

                oIptAll.checked = oIptOther.every(function (item2) {

                    return item2.checked;
                })
            })
        })
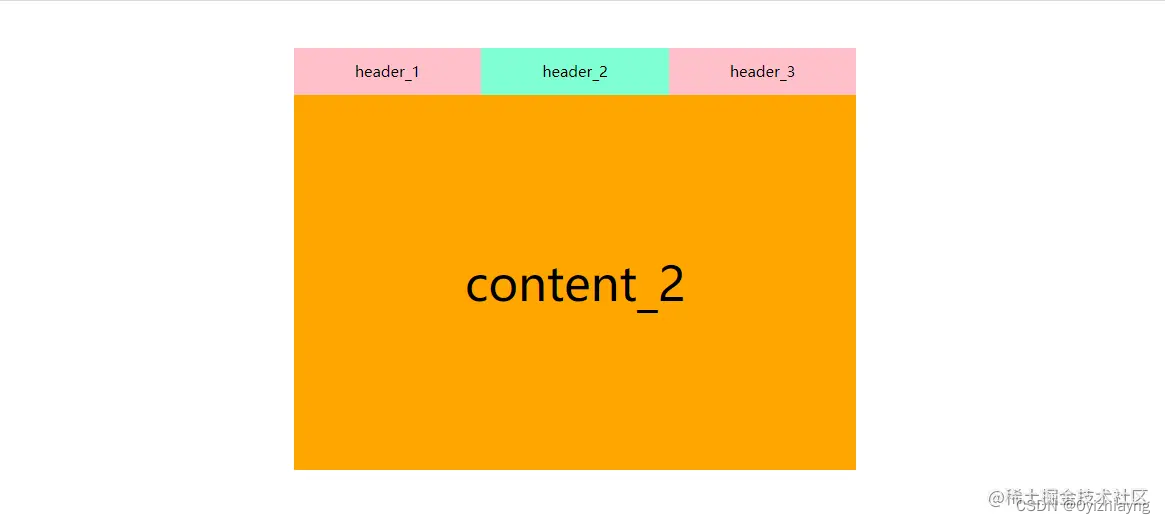
四、选项卡
(一)案例分析
1、header
点击其中一个li的时候, 给点击的li添加一个类名, 然后给其他的li取消类名
2、content
根据选中哪一个header下的 li, 展示自身下的哪一个li
(二)HTML和css代码
    <ul class="header">
        <li>header_1</li>
        <li class="active">header_2</li>
        <li>header_3</li>
    </ul>
    <ol class="content">
        <li>content_1</li>
        <li class="active">content_2</li>
        <li>content_3</li>
    </ol>
    <style>
        * {
            padding: 0;
            margin: 0;
        }

        ul,
        ol {
            list-style: none;
        }

        .header {
            width: 600px;
            height: 50px;
            line-height: 50px;
            text-align: center;
            background-color: pink;
            display: flex;
        }

        .header li {
            width: 200px;
        }

        .content {
            width: 600px;
            height: 400px;
            line-height: 400px;
            text-align: center;
        }

        .header .active {
            background-color: aquamarine;
        }

        .content li {
            display: none;
            font-size: 50px;
        }

        .content .active {
            display: block;
            background-color: orange;
        }
    </style>
(三)JS代码
        oUl.forEach(function(item1, index1){
            item1.addEventListener('click' , function(){

                oUl.forEach(function(item2, index2){
                    // 把所有的li取消类名
                    item2.classList.remove('active');
                    oOl[index2].classList.remove('active');
                })

                // 给自己添加类名
                item1.classList.add('active');
                oOl[index1].classList.add('active');
            })

        })
五、渲染页面
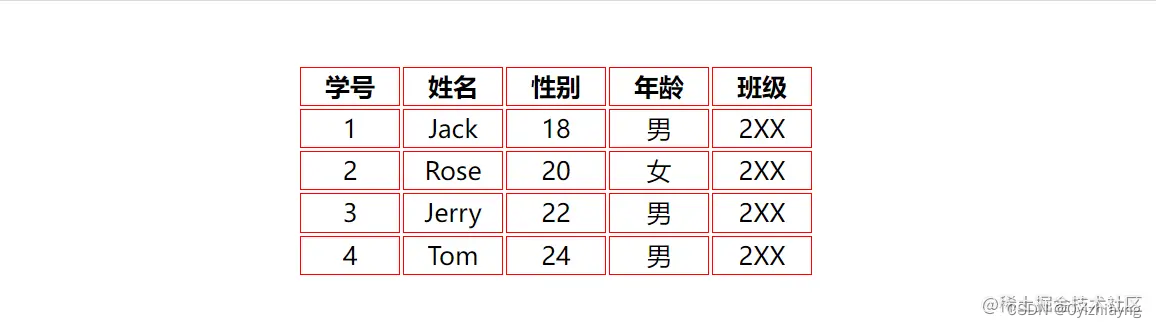
(一)案例需求
- 接收到后端给到的数据
- 将数据渲染到页面
(二)HTML和css代码
    <table>
        <thead>
            <tr>
                <th>学号</th>
                <th>姓名</th>
                <th>性别</th>
                <th>年龄</th>
                <th>班级</th>
            </tr>
        </thead>
        <tbody></tbody>
    </table>
<style>
    th,td{
        width: 60px;
        height: 30pxs;
        border: 1px solid red;
        text-align: center;
    }
</style>
(三)JS代码
1、方法一
        var users = [
            { id: 1, name: 'Jack', age: 18, gender: '男', classRoom: '2XX' },
            { id: 2, name: 'Rose', age: 20, gender: '女', classRoom: '2XX' },
            { id: 3, name: 'Jerry', age: 22, gender: '男', classRoom: '2XX' },
            { id: 4, name: 'Tom', age: 24, gender: '男', classRoom: '2XX' }
        ]

        var oTbody = document.querySelector('tbody');
        var str = '';
        users.forEach(function(item){
            str += `
            <tr>
                <td>${item.id}</td>
                <td>${item.name}</td>
                <td>${item.age}</td>
                <td>${item.gender}</td>
                <td>${item.classRoom}</td>
            </tr>
            `;
        })
        oTbody.innerHTML = str;
2、方法二
        var users = [
            { id: 1, name: 'Jack', age: 18, gender: '男', classRoom: '2XX' },
            { id: 2, name: 'Rose', age: 20, gender: '女', classRoom: '2XX' },
            { id: 3, name: 'Jerry', age: 22, gender: '男', classRoom: '2XX' },
            { id: 4, name: 'Tom', age: 24, gender: '男', classRoom: '2XX' }
        ]

        var str = users.reduce(function(prev, item){
            return prev + `
                <tr>
                    <td>${item.id}</td>
                    <td>${item.name}</td>
                    <td>${item.age}</td>
                    <td>${item.gender}</td>
                    <td>${item.classRoom}</td>
                </tr>
            `
        }, '')
        oTbody.innerHTML = str;