Spring boot开启定时任务的三种方式(内含源代码+sql文件)
源代码+sql文件下载链接地址:https://download.csdn.net/download/weixin_46411355/87486580
目录
- Spring boot开启定时任务的三种方式(内含源代码+sql文件)
- `源代码+sql文件下载链接地址:`[https://download.csdn.net/download/weixin_46411355/87486580](https://download.csdn.net/download/weixin_46411355/87486580)
- 零、前言
- 第一种也就是最简单的一种:基于注解 (@Scheduled)的方式;
- 第二种:基于接口 (SchedulingConfigurer);
- 第三种:基于注解设定多线程定时任务。
- 一、基于@Scheduled注解的方式
- 1.1 cron
- 1.1.1 定时任务的方法在启动类里面
- 1.1.2 定时任务的方法在启动类之外
- 1.2 fixedDelay
- 1.3 fixedRate
- 1.4 initialDelay
- 一点五 cron解释
- 结构
- 取值范围
- 常例
- 二、基于SchedulingConfigurer接口的方式
- 2.1数据库准备
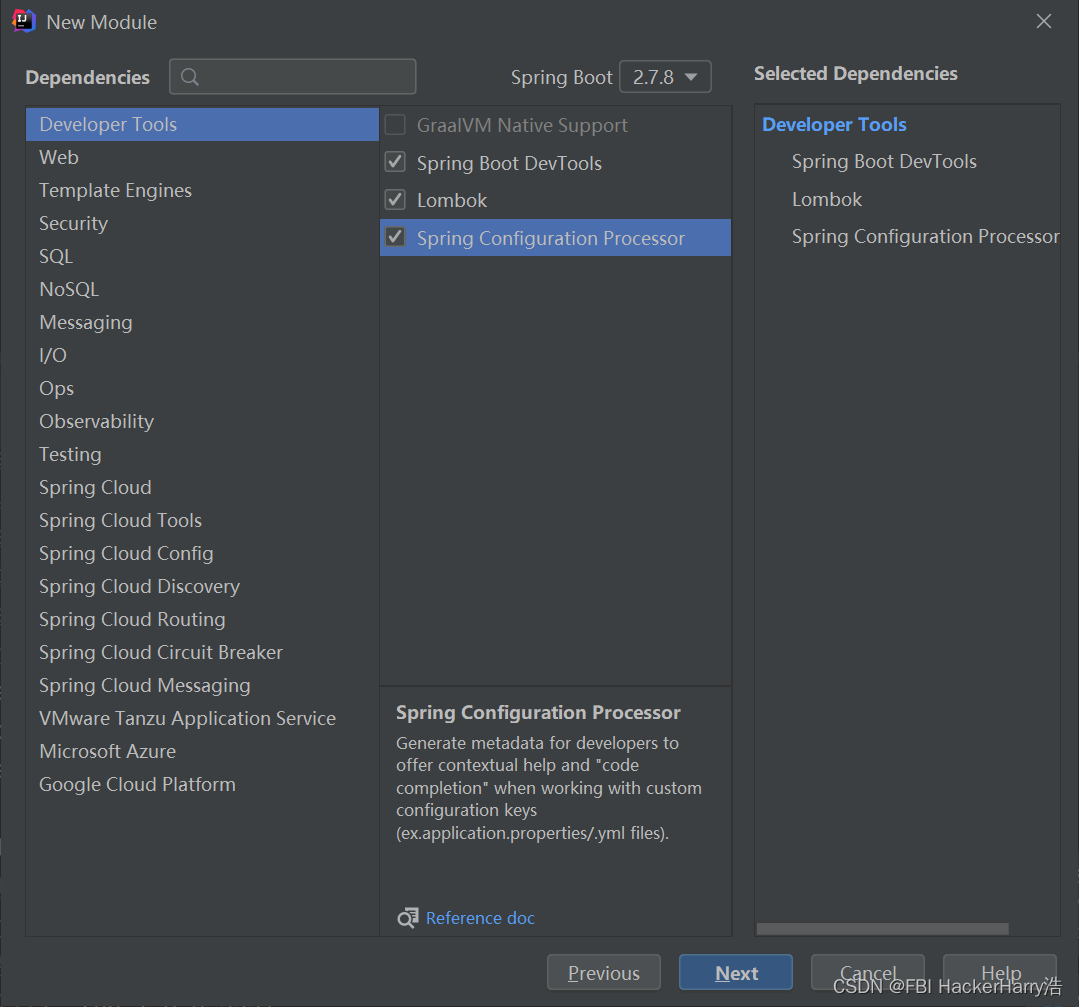
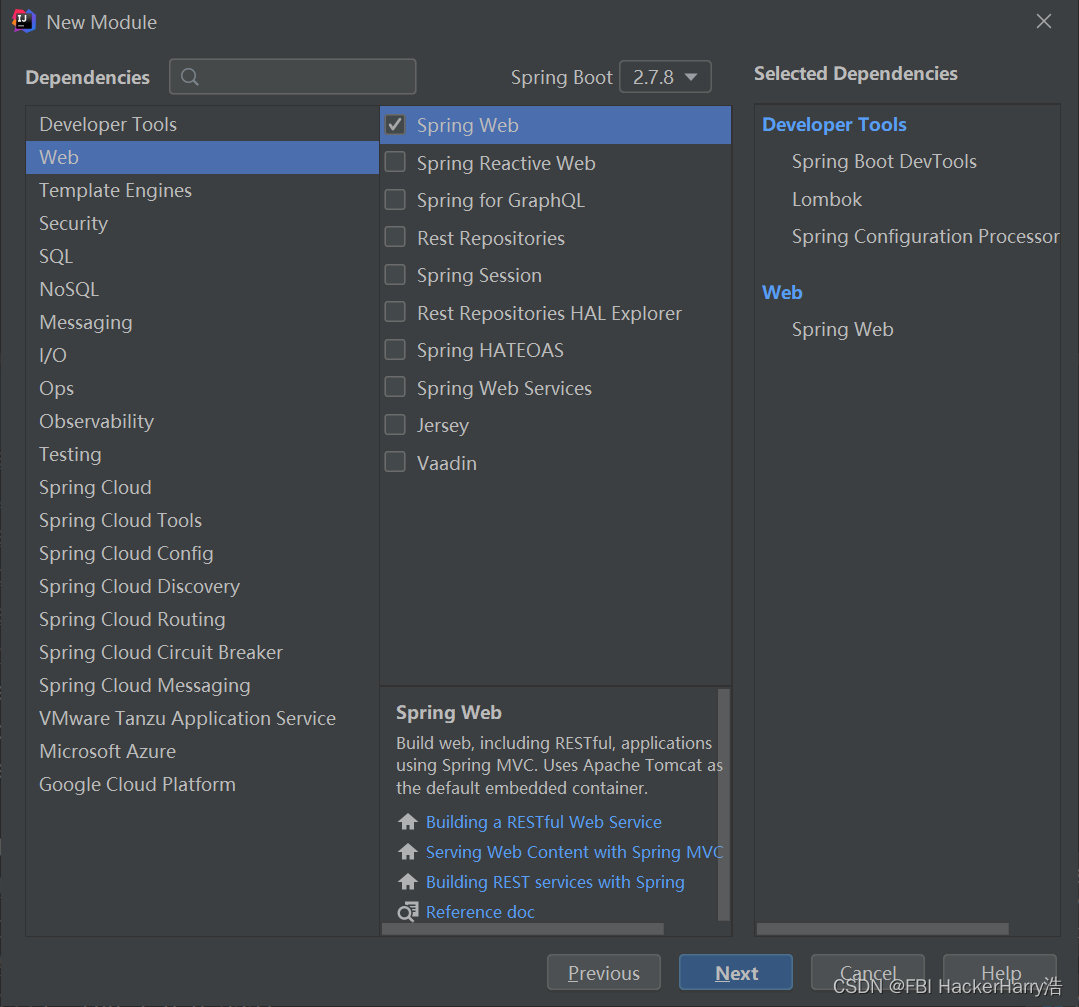
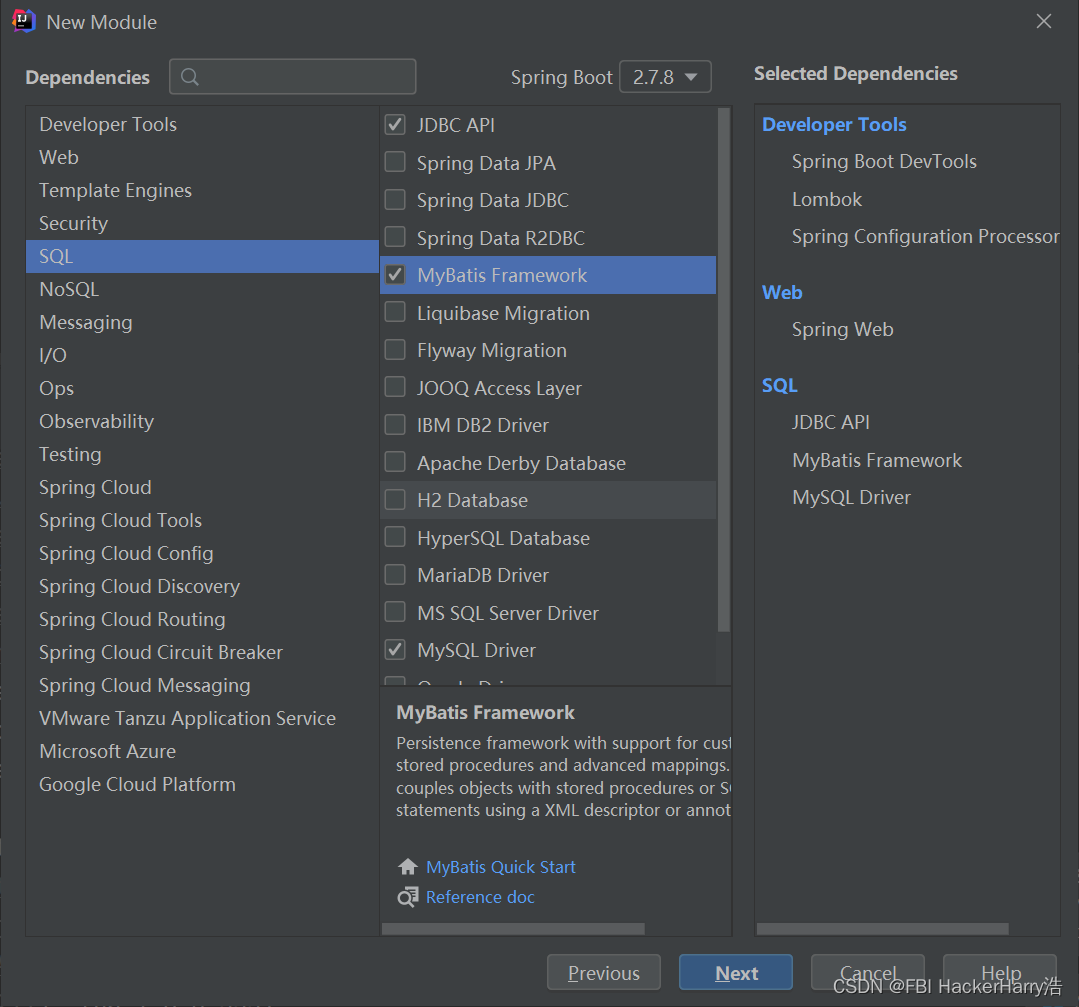
- 2.2. 创建一个SpringBoot项目
- 2.3 项目结构
- 2.4 数据源基本配置:application.properties
- 2.5 mapper也就是dao:
- 2.6 task类:MyTask.java
- 2.7 使用上之前学的SpringBoot整合logback
- 2.7.1 创建logback-spring.xml
- 2.7.2 修改task类:MyTask.java
- 2.8 运行结果:
- 三、 基于注解设定多线程定时任务
- 四、总结
零、前言
spring boot进行定时任务一共有三种方式。
第一种也就是最简单的一种:基于注解 (@Scheduled)的方式;
第二种:基于接口 (SchedulingConfigurer);
第三种:基于注解设定多线程定时任务。
一、基于@Scheduled注解的方式
1.1 cron
首先,打开idea,创建springboot项目,无需引入任何jar,springboot自带定时。
然后,在启动类中用注解@EnableScheduling进行标注,表明此类 存在定时任务。
1.1.1 定时任务的方法在启动类里面
在定时执行的方法之上添加注解@Scheduled(cron =“*/6 * * * * ?”)。
package com.bjpowernode.springboottimedtask01at_scheduled_annotation;
import org.springframework.boot.SpringApplication;
import org.springframework.boot.autoconfigure.SpringBootApplication;
import org.springframework.scheduling.annotation.EnableScheduling;
import org.springframework.scheduling.annotation.Scheduled;
@EnableScheduling
@SpringBootApplication
public class SpringbootTimedtask01AtScheduledAnnotationApplication {
public static void main(String[] args) {
SpringApplication.run(SpringbootTimedtask01AtScheduledAnnotationApplication.class, args);
}
@Scheduled(cron ="*/6 * * * * ?")
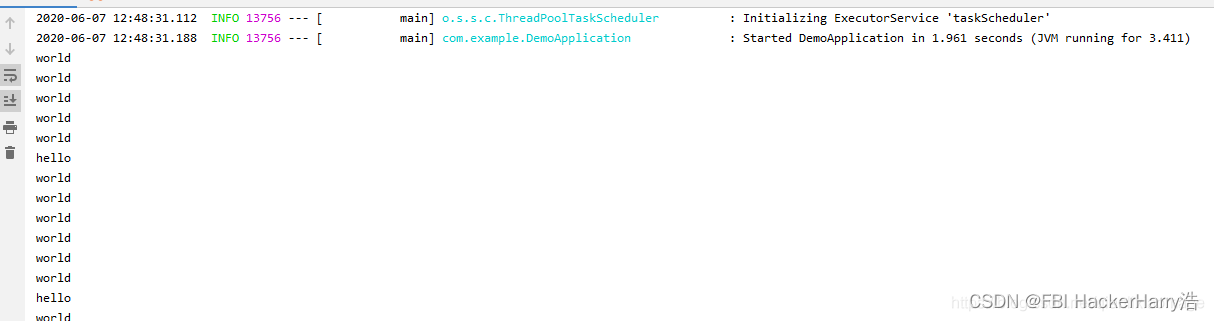
public void sayHello() {
System.out.println("hello");
}
}
点击启动,即可看到控制台6秒输出一次“hello”。
1.1.2 定时任务的方法在启动类之外
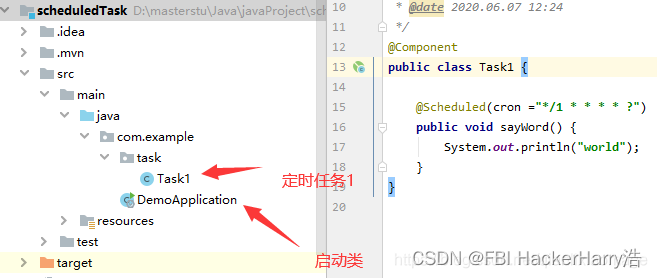
当然,定时任务也可以放在其他类中。例如创建类Task1。
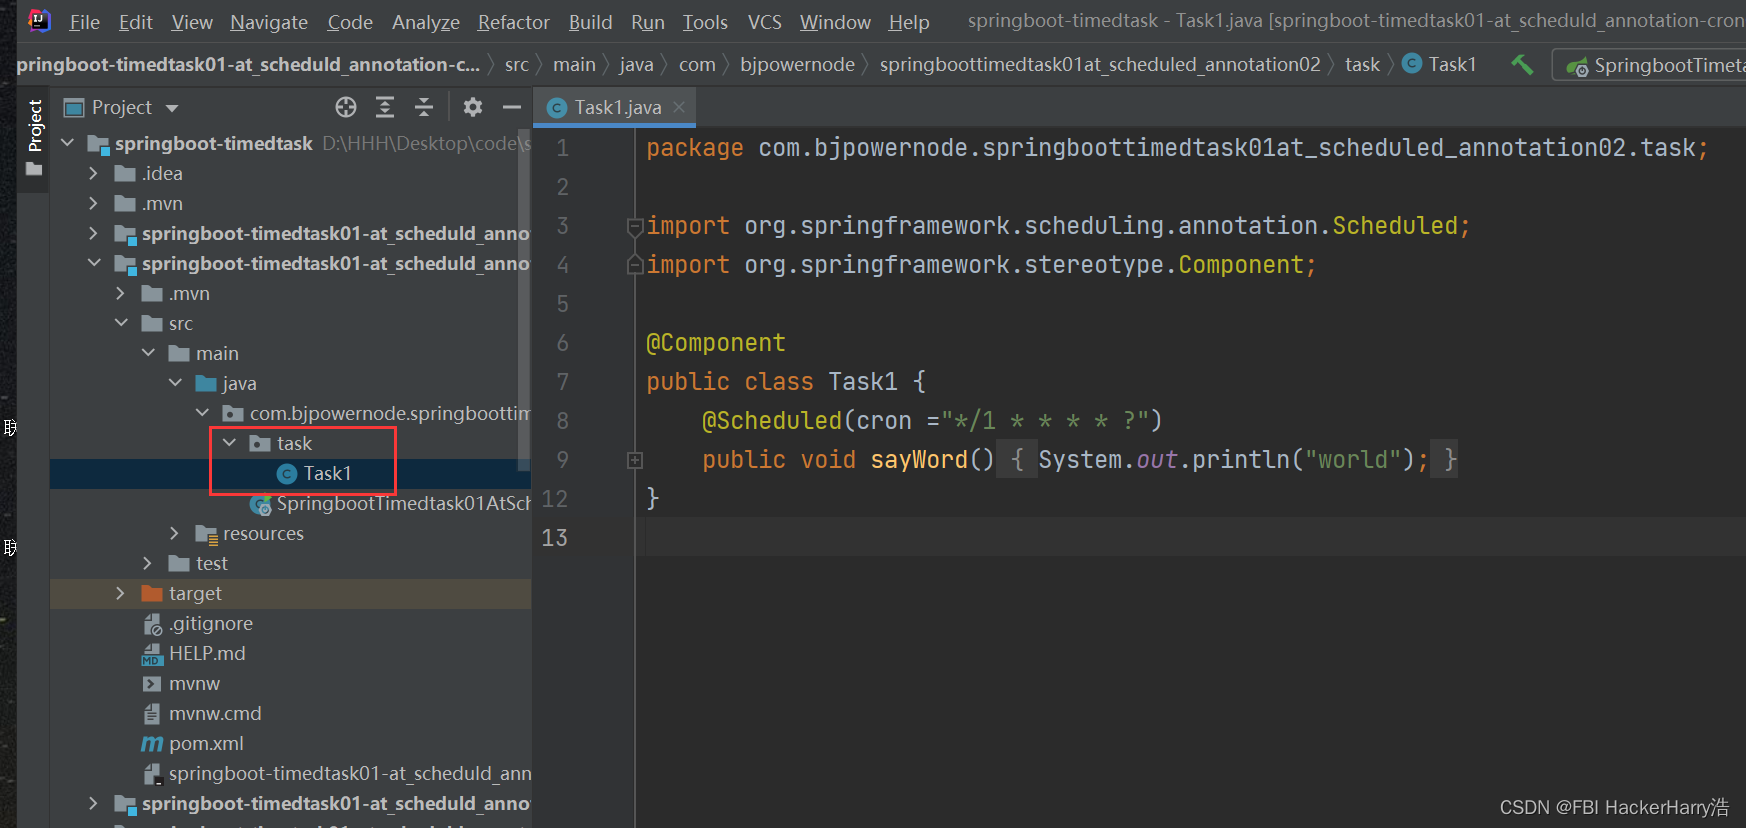
package com.bjpowernode.springboottimedtask01at_scheduled_annotation02.task;

import org.springframework.scheduling.annotation.Scheduled;
import org.springframework.stereotype.Component;

@Component
public class Task1 {
    @Scheduled(cron ="*/1 * * * * ?")
    public void sayWord() {
        System.out.println("world");
    }
}
然后可以看到控制台的输出结果:
这里有个要注意的细节,就是启动类需要能扫描到定时任务类,否则定时任务启动不起来。不仅需要@Component注解,也需要将启动类位置位于定时任务类之上。如下图:
笔者就是犯了这样的错,一直没启动起来。
@Scheduled除过cron还有三种方式:fixedRate,fixedDelay,initialDelay
cron:表达式可以定制化执行任务,但是执行的方式是与fixedDelay相近的,也是会按照上一次方法结束时间开始算起。
1.2 fixedDelay
fixedDelay:控制方法执行的间隔时间,是以上一次方法执行完开始算起,如上一次方法执行阻塞住了,那么直到上一次执行完,并间隔给定的时间后,执行下一次。
package com.bjpowernode.springboottimedtask01at_scheduld_annotationfixeddelay.task;

import org.springframework.context.annotation.Configuration;
import org.springframework.scheduling.annotation.EnableScheduling;
import org.springframework.scheduling.annotation.Scheduled;

@EnableScheduling//开启定时任务
@Configuration
public class ScheduleTask1 {
    //每3秒执行一次
    @Scheduled(fixedDelay = 3000)
    private void myTask(){
        System.out.println("I do myself per third seconds");
    }
}
1.3 fixedRate
fixedRate:是按照一定的速率执行,是从上一次方法执行开始的时间算起,如果上一次方法阻塞住了,下一次也是不会执行,但是在阻塞这段时间内累计应该执行的次数,当不再阻塞时,一下子把这些全部执行掉,而后再按照固定速率继续执行。
package com.bjpowernode.springboottimetask01at_scheduld_annotationfixedrate.task;

import org.springframework.scheduling.annotation.EnableScheduling;
import org.springframework.scheduling.annotation.Scheduled;
import org.springframework.stereotype.Component;

@Component
@EnableScheduling//开启定时事务
public class ScheduleTask2 {
    //每10s执行一次
    @Scheduled(fixedRate = 10000)
    public void myTask2(){
        System.out.println("我是一个定时任务");
    }
}
1.4 initialDelay
initialDelay:initialDelay = 10000 表示在容器启动后,延迟10秒后再执行一次定时器。
package com.bjpowernode.springboottimedtask01at_scheduld_annotationinitdelay.task;

import org.springframework.scheduling.annotation.EnableScheduling;
import org.springframework.scheduling.annotation.Scheduled;
import org.springframework.stereotype.Component;

@EnableScheduling//开启定时任务
@Component
public class ScheduleTask3 {

    //容器启动后,延迟10秒再执行一次定时器,以后每10秒再执行一次定时器
    @Scheduled(initialDelay = 10000,fixedRate = 10000)
    private void myTask3(){
        System.out.println("我是一个定时任务");
    }

}
一点五 cron解释
cron
cron 用法跟linux下是一摸一样的,如果你搞过linux下的定时,那么必然很熟悉。
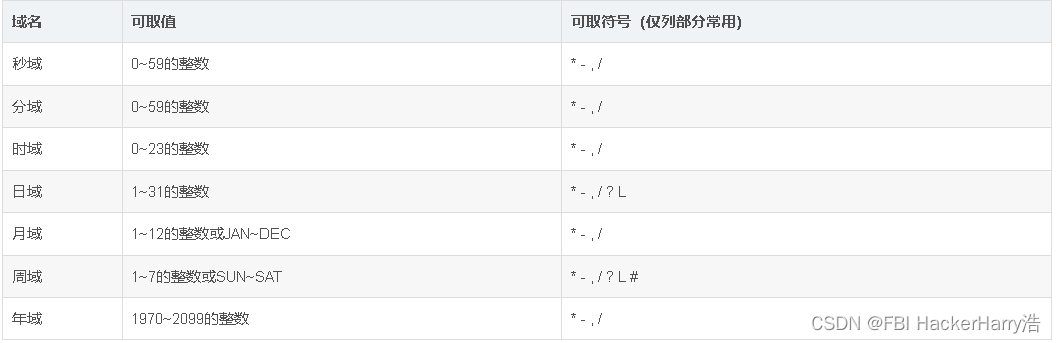
结构
cron表达式是一个字符串,分为6或7个域,每两个域之间用空格分隔,
其语法格式为:“秒域 分域 时域 日域 月域 周域 年域”
取值范围
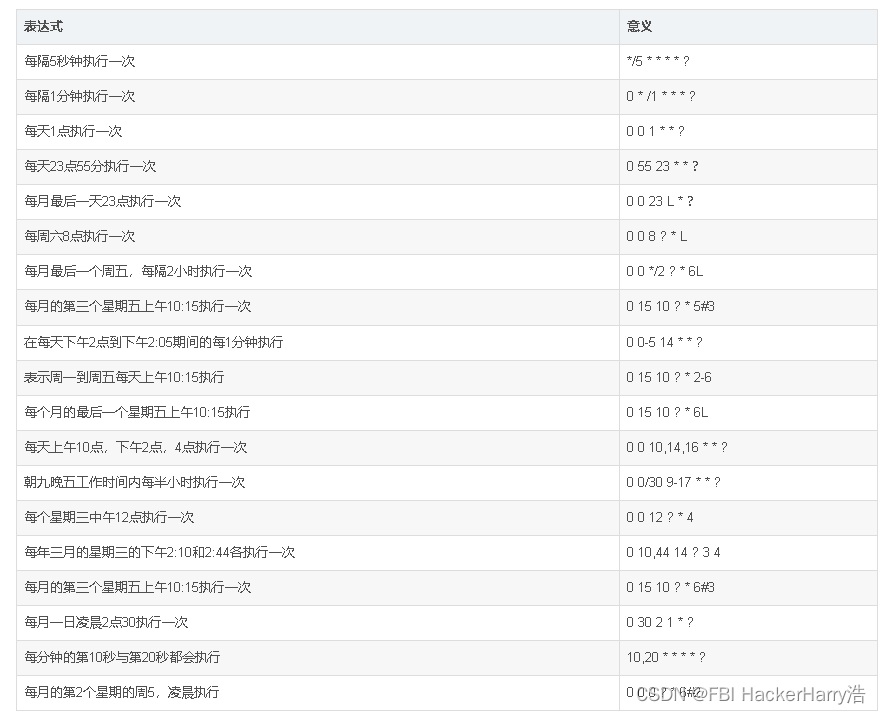
常例
本方法的demo地址: GitHub - SUST-MaZhen/scheduledTask: 基于注解@Scheluded的方式实现定时任务
二、基于SchedulingConfigurer接口的方式
使用@Scheduled 注解很方便,但缺点是当我们调整了执行周期的时候,需要重启应用才能生效,这多少有些不方便。为了达到实时生效的效果,那么可以使用接口来完成定时任务,统一将定时器信息存放在数据库中。
2.1数据库准备
在mysql中创建一个数据库
在mysql中执行一下脚本插入定时任务:
drop table if exists `scheduled`;
create table `scheduled` (
 `cron_id` varchar(30) NOT NULL primary key,
 `cron_name` varchar(30) NULL,
 `cron` varchar(30) NOT NULL
);
insert into `scheduled` values ('1','定时器任务一','0/6 * * * * ?');
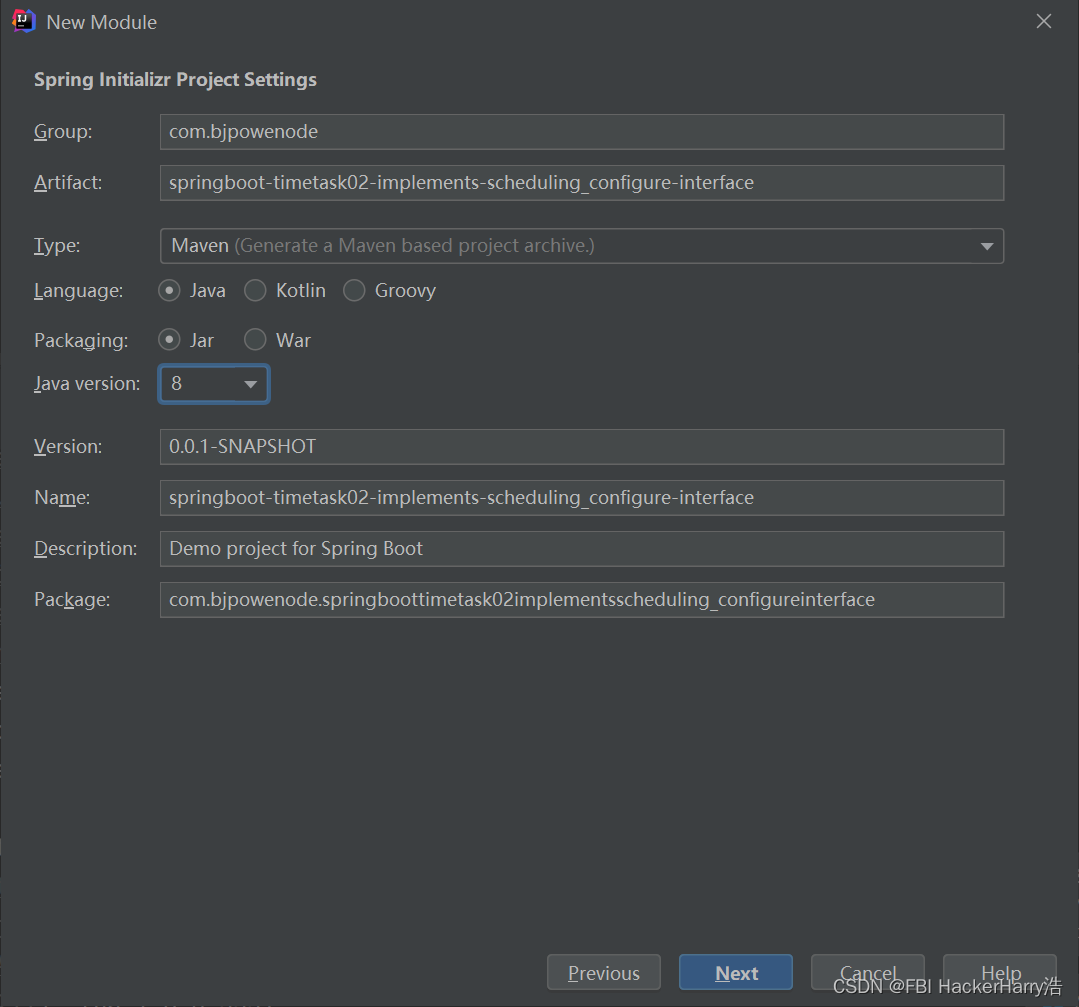
2.2. 创建一个SpringBoot项目
创建一个springboot 项目:我们这里只添加一个mapper,不要bean也不要service以及controller,只是为了演示定时功能而已。
2.3 项目结构
demo结构:

2.4 数据源基本配置:application.properties
application.properties
## mysql数据源配置
spring.datasource.url=jdbc:mysql://localhost:13306/powernode_scheduledtask?useUnicode=true&serverTimezone=Asia/Shanghai
spring.datasource.username=root
spring.datasource.password=root
spring.datasource.driver-class-name=com.mysql.cj.jdbc.Driver
2.5 mapper也就是dao:
package com.bjpowenode.springboottimetask02implementsscheduling_configureinterface.mapper;

import org.apache.ibatis.annotations.Mapper;
import org.apache.ibatis.annotations.Select;
import org.springframework.stereotype.Repository;

@Mapper
@Repository
public interface CronMapper {
    @Select("select cron from scheduled where cron_id = #{id}")
    public String getCron(int id);
}
2.6 task类:MyTask.java
package com.bjpowenode.springboottimetask02implementsscheduling_configureinterface.scheduled;

import com.bjpowenode.springboottimetask02implementsscheduling_configureinterface.mapper.CronMapper;
import org.springframework.beans.factory.annotation.Autowired;
import org.springframework.scheduling.annotation.EnableScheduling;
import org.springframework.scheduling.annotation.SchedulingConfigurer;
import org.springframework.scheduling.config.ScheduledTaskRegistrar;
import org.springframework.scheduling.support.CronTrigger;
import org.springframework.stereotype.Component;

@EnableScheduling
@Component
public class MyTask implements SchedulingConfigurer{

    @Autowired
    protected CronMapper cronMapper;


    @Override
    public void configureTasks(ScheduledTaskRegistrar scheduledTaskRegistrar) {
        scheduledTaskRegistrar.addTriggerTask(
                //执行定时任务
                ()->process(),

                //初始化定时任务周期
                triggerContext -> {
                    String cron = cronMapper.getCron(1);
                    if(cron.isEmpty()){
                        System.out.println("cron is null");
                    }
                    return new CronTrigger(cron).nextExecutionTime(triggerContext);
                }
                );
    }

    private void process(){
        System.out.println("基于接口定时任务");
    }
}
2.7 使用上之前学的SpringBoot整合logback
2.7.1 创建logback-spring.xml
<?xml version="1.0" encoding="UTF-8"?>
<!-- 日志级别从低到高分为TRACE < DEBUG < INFO < WARN < ERROR < FATAL,如果设置为WARN,则低于WARN的信息都不会输出 -->
<!-- scan:当此属性设置为true时,配置文件如果发生改变,将会被重新加载,默认值为true -->
<!-- scanPeriod:设置监测配置文件是否有修改的时间间隔,如果没有给出时间单位,默认单位是毫秒。当scan为true时,此属性生效。默认的时间间隔为1分钟。 -->
<!-- debug:当此属性设置为true时,将打印出logback内部日志信息,实时查看logback运行状态。默认值为false。 -->
<configuration  scan="true" scanPeriod="10 seconds">

    <!--<include resource="org/springframework/boot/logging/logback/base.xml" />-->

    <contextName>logback</contextName>
    <!-- name的值是变量的名称,value的值时变量定义的值。通过定义的值会被插入到logger上下文中。定义变量后,可以使“${}”来使用变量。 -->
    <property name="log.path" value="D:/mylogs/" />

    <!-- 彩色日志 -->
    <!-- 彩色日志依赖的渲染类 -->
    <conversionRule conversionWord="clr" converterClass="org.springframework.boot.logging.logback.ColorConverter" />
    <conversionRule conversionWord="wex" converterClass="org.springframework.boot.logging.logback.WhitespaceThrowableProxyConverter" />
    <conversionRule conversionWord="wEx" converterClass="org.springframework.boot.logging.logback.ExtendedWhitespaceThrowableProxyConverter" />
    <!-- 彩色日志格式 -->
    <property name="CONSOLE_LOG_PATTERN" value="${CONSOLE_LOG_PATTERN:-%clr(%d{yyyy-MM-dd HH:mm:ss.SSS}){faint} %clr(${LOG_LEVEL_PATTERN:-%5p}) %clr(${PID:- }){magenta} %clr(---){faint} %clr([%15.15t]){faint} %clr(%-40.40logger{39}){cyan} %clr(:){faint} %m%n${LOG_EXCEPTION_CONVERSION_WORD:-%wEx}}"/>


    <!--输出到控制台-->
    <appender name="CONSOLE" class="ch.qos.logback.core.ConsoleAppender">
        <!--此日志appender是为开发使用,只配置最低级别,控制台输出的日志级别是大于或等于此级别的日志信息-->
        <filter class="ch.qos.logback.classic.filter.ThresholdFilter">
            <level>info</level>
        </filter>
        <encoder>
            <Pattern>${CONSOLE_LOG_PATTERN}</Pattern>
            <!-- 设置字符集 -->
            <charset>UTF-8</charset>
        </encoder>
    </appender>


    <!--输出到文件-->

    <!-- 时间滚动输出 level为 DEBUG 日志 -->
    <appender name="DEBUG_FILE" class="ch.qos.logback.core.rolling.RollingFileAppender">
        <!-- 正在记录的日志文件的路径及文件名 -->
        <file>${log.path}/log_debug.log</file>
        <!--日志文件输出格式-->
        <encoder>
            <pattern>%d{yyyy-MM-dd HH:mm:ss.SSS} [%thread] %-5level %logger{50} - %msg%n</pattern>
            <charset>UTF-8</charset> <!-- 设置字符集 -->
        </encoder>
        <!-- 日志记录器的滚动策略,按日期,按大小记录 -->
        <rollingPolicy class="ch.qos.logback.core.rolling.TimeBasedRollingPolicy">
            <!-- 日志归档 -->
            <fileNamePattern>${log.path}/debug/log-debug-%d{yyyy-MM-dd}.%i.log</fileNamePattern>
            <timeBasedFileNamingAndTriggeringPolicy class="ch.qos.logback.core.rolling.SizeAndTimeBasedFNATP">
                <maxFileSize>100MB</maxFileSize>
            </timeBasedFileNamingAndTriggeringPolicy>
            <!--日志文件保留天数-->
            <maxHistory>15</maxHistory>
        </rollingPolicy>
        <!-- 此日志文件只记录debug级别的 -->
        <filter class="ch.qos.logback.classic.filter.LevelFilter">
            <level>debug</level>
            <onMatch>ACCEPT</onMatch>
            <onMismatch>DENY</onMismatch>
        </filter>
    </appender>

    <!-- 时间滚动输出 level为 INFO 日志 -->
    <appender name="INFO_FILE" class="ch.qos.logback.core.rolling.RollingFileAppender">
        <!-- 正在记录的日志文件的路径及文件名 -->
        <file>${log.path}/log_info.log</file>
        <!--日志文件输出格式-->
        <encoder>
            <pattern>%d{yyyy-MM-dd HH:mm:ss.SSS} [%thread] %-5level %logger{50} - %msg%n</pattern>
            <charset>UTF-8</charset>
        </encoder>
        <!-- 日志记录器的滚动策略,按日期,按大小记录 -->
        <rollingPolicy class="ch.qos.logback.core.rolling.TimeBasedRollingPolicy">
            <!-- 每天日志归档路径以及格式 -->
            <fileNamePattern>${log.path}/info/log-info-%d{yyyy-MM-dd}.%i.log</fileNamePattern>
            <timeBasedFileNamingAndTriggeringPolicy class="ch.qos.logback.core.rolling.SizeAndTimeBasedFNATP">
                <maxFileSize>100MB</maxFileSize>
            </timeBasedFileNamingAndTriggeringPolicy>
            <!--日志文件保留天数-->
            <maxHistory>15</maxHistory>
        </rollingPolicy>
        <!-- 此日志文件只记录info级别的 -->
        <filter class="ch.qos.logback.classic.filter.LevelFilter">
            <level>info</level>
            <onMatch>ACCEPT</onMatch>
            <onMismatch>DENY</onMismatch>
        </filter>
    </appender>

    <!-- 时间滚动输出 level为 WARN 日志 -->
    <appender name="WARN_FILE" class="ch.qos.logback.core.rolling.RollingFileAppender">
        <!-- 正在记录的日志文件的路径及文件名 -->
        <file>${log.path}/log_warn.log</file>
        <!--日志文件输出格式-->
        <encoder>
            <pattern>%d{yyyy-MM-dd HH:mm:ss.SSS} [%thread] %-5level %logger{50} - %msg%n</pattern>
            <charset>UTF-8</charset> <!-- 此处设置字符集 -->
        </encoder>
        <!-- 日志记录器的滚动策略,按日期,按大小记录 -->
        <rollingPolicy class="ch.qos.logback.core.rolling.TimeBasedRollingPolicy">
            <fileNamePattern>${log.path}/warn/log-warn-%d{yyyy-MM-dd}.%i.log</fileNamePattern>
            <timeBasedFileNamingAndTriggeringPolicy class="ch.qos.logback.core.rolling.SizeAndTimeBasedFNATP">
                <maxFileSize>100MB</maxFileSize>
            </timeBasedFileNamingAndTriggeringPolicy>
            <!--日志文件保留天数-->
            <maxHistory>15</maxHistory>
        </rollingPolicy>
        <!-- 此日志文件只记录warn级别的 -->
        <filter class="ch.qos.logback.classic.filter.LevelFilter">
            <level>warn</level>
            <onMatch>ACCEPT</onMatch>
            <onMismatch>DENY</onMismatch>
        </filter>
    </appender>


    <!-- 时间滚动输出 level为 ERROR 日志 -->
    <appender name="ERROR_FILE" class="ch.qos.logback.core.rolling.RollingFileAppender">
        <!-- 正在记录的日志文件的路径及文件名 -->
        <file>${log.path}/log_error.log</file>
        <!--日志文件输出格式-->
        <encoder>
            <pattern>%d{yyyy-MM-dd HH:mm:ss.SSS} [%thread] %-5level %logger{50} - %msg%n</pattern>
            <charset>UTF-8</charset> <!-- 此处设置字符集 -->
        </encoder>
        <!-- 日志记录器的滚动策略,按日期,按大小记录 -->
        <rollingPolicy class="ch.qos.logback.core.rolling.TimeBasedRollingPolicy">
            <fileNamePattern>${log.path}/error/log-error-%d{yyyy-MM-dd}.%i.log</fileNamePattern>
            <timeBasedFileNamingAndTriggeringPolicy class="ch.qos.logback.core.rolling.SizeAndTimeBasedFNATP">
                <maxFileSize>100MB</maxFileSize>
            </timeBasedFileNamingAndTriggeringPolicy>
            <!--日志文件保留天数-->
            <maxHistory>15</maxHistory>
        </rollingPolicy>
        <!-- 此日志文件只记录ERROR级别的 -->
        <filter class="ch.qos.logback.classic.filter.LevelFilter">
            <level>ERROR</level>
            <onMatch>ACCEPT</onMatch>
            <onMismatch>DENY</onMismatch>
        </filter>
    </appender>

    <!--
        <logger>用来设置某一个包或者具体的某一个类的日志打印级别、
        以及指定<appender>。<logger>仅有一个name属性,
        一个可选的level和一个可选的addtivity属性。
        name:用来指定受此logger约束的某一个包或者具体的某一个类。
        level:用来设置打印级别,大小写无关:TRACE, DEBUG, INFO, WARN, ERROR, ALL 和 OFF,
              还有一个特俗值INHERITED或者同义词NULL,代表强制执行上级的级别。
              如果未设置此属性,那么当前logger将会继承上级的级别。
        addtivity:是否向上级logger传递打印信息。默认是true。
    -->
    <!--<logger name="org.springframework.web" level="info"/>-->
    <!--<logger name="org.springframework.scheduling.annotation.ScheduledAnnotationBeanPostProcessor" level="INFO"/>-->
    <!--
        使用mybatis的时候,sql语句是debug下才会打印,而这里我们只配置了info,所以想要查看sql语句的话,有以下两种操作:
        第一种把<root level="info">改成<root level="DEBUG">这样就会打印sql,不过这样日志那边会出现很多其他消息
        第二种就是单独给dao下目录配置debug模式,代码如下,这样配置sql语句会打印,其他还是正常info级别:
     -->


    <!--
        root节点是必选节点,用来指定最基础的日志输出级别,只有一个level属性
        level:用来设置打印级别,大小写无关:TRACE, DEBUG, INFO, WARN, ERROR, ALL 和 OFF,
        不能设置为INHERITED或者同义词NULL。默认是DEBUG
        可以包含零个或多个元素,标识这个appender将会添加到这个logger。
    -->

    <!--开发环境:打印控制台-->
    <springProfile name="dev">
        <logger name="com.nmys.view" level="debug"/>
    </springProfile>

    <root level="info">
        <appender-ref ref="CONSOLE" />
        <appender-ref ref="DEBUG_FILE" />
        <appender-ref ref="INFO_FILE" />
        <appender-ref ref="WARN_FILE" />
        <appender-ref ref="ERROR_FILE" />
    </root>

    <!--生产环境:输出到文件-->
    <!--<springProfile name="pro">-->
    <!--<root level="info">-->
    <!--<appender-ref ref="CONSOLE" />-->
    <!--<appender-ref ref="DEBUG_FILE" />-->
    <!--<appender-ref ref="INFO_FILE" />-->
    <!--<appender-ref ref="ERROR_FILE" />-->
    <!--<appender-ref ref="WARN_FILE" />-->
    <!--</root>-->
    <!--</springProfile>-->

</configuration>
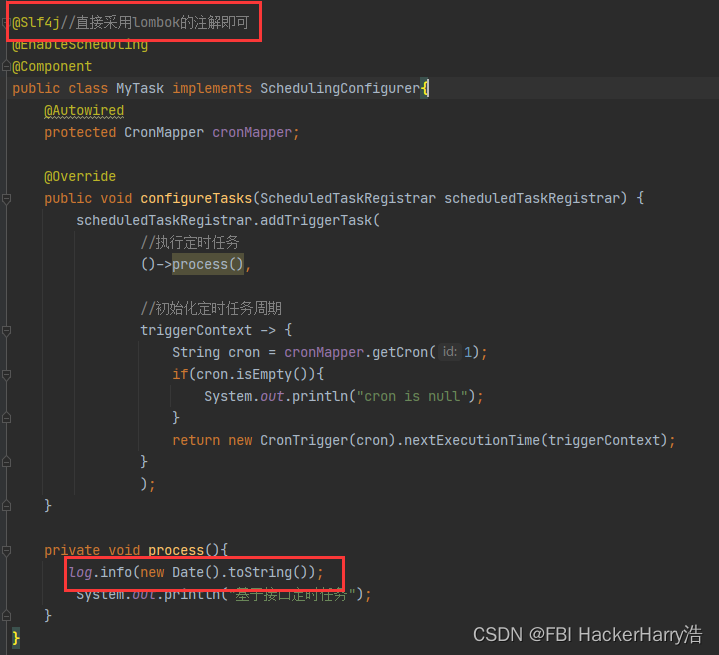
2.7.2 修改task类:MyTask.java
package com.bjpowenode.springboottimetask02implementsscheduling_configureinterface.scheduled;

import com.bjpowenode.springboottimetask02implementsscheduling_configureinterface.mapper.CronMapper;


import lombok.extern.slf4j.Slf4j;
import org.slf4j.Logger;
import org.slf4j.LoggerFactory;
import org.springframework.beans.factory.annotation.Autowired;
import org.springframework.scheduling.annotation.EnableScheduling;
import org.springframework.scheduling.annotation.SchedulingConfigurer;
import org.springframework.scheduling.config.ScheduledTaskRegistrar;
import org.springframework.scheduling.support.CronTrigger;
import org.springframework.stereotype.Component;

import java.util.Date;

@Slf4j//直接采用lombok的注解即可
@EnableScheduling
@Component
public class MyTask implements SchedulingConfigurer{
    @Autowired
    protected CronMapper cronMapper;

    @Override
    public void configureTasks(ScheduledTaskRegistrar scheduledTaskRegistrar) {
        scheduledTaskRegistrar.addTriggerTask(
                //执行定时任务
                ()->process(),

                //初始化定时任务周期
                triggerContext -> {
                    String cron = cronMapper.getCron(1);
                    if(cron.isEmpty()){
                        System.out.println("cron is null");
                    }
                    return new CronTrigger(cron).nextExecutionTime(triggerContext);
                }
                );
    }

    private void process(){
       log.info(new Date().toString());
        System.out.println("基于接口定时任务");
    }
}
2.8 运行结果:
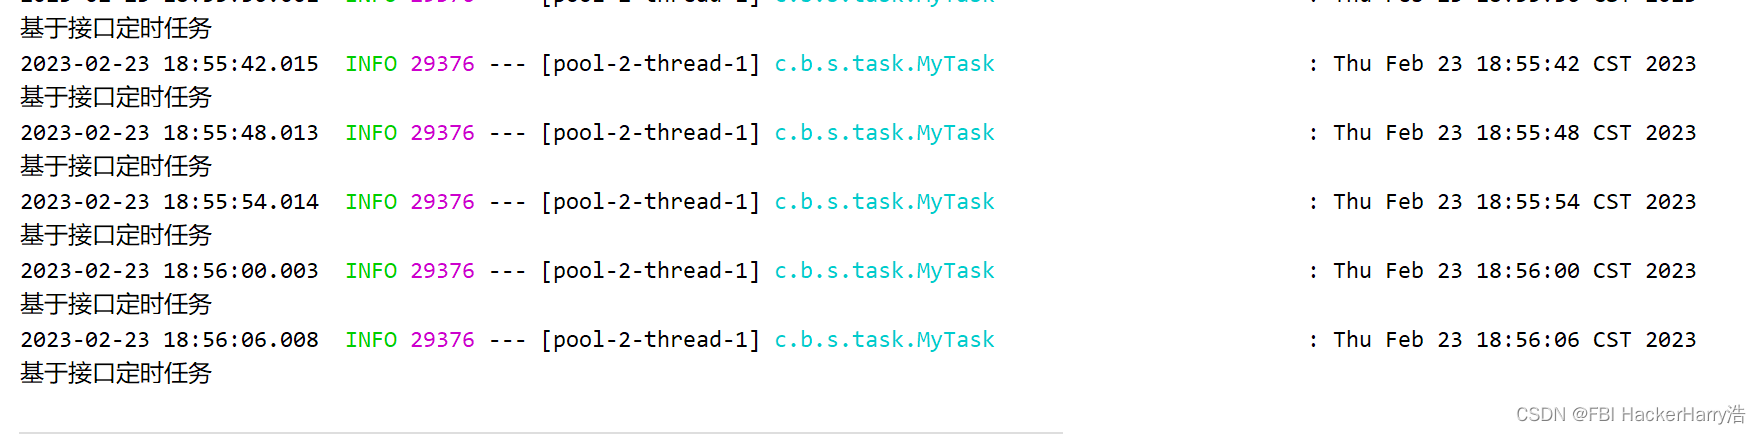
从结果中可以看出,是按照每6秒也就是数据库中查询的结果来进行的。
需求:我现在需要每10秒执行一次定时任务,该怎么办呢?对!只需要修改数据库值即可,server无需重启。观察修改后的结果。

demo地址:GitHub - SUST-MaZhen/scheduledtask2: springboot基于接口的定时任务
三、 基于注解设定多线程定时任务
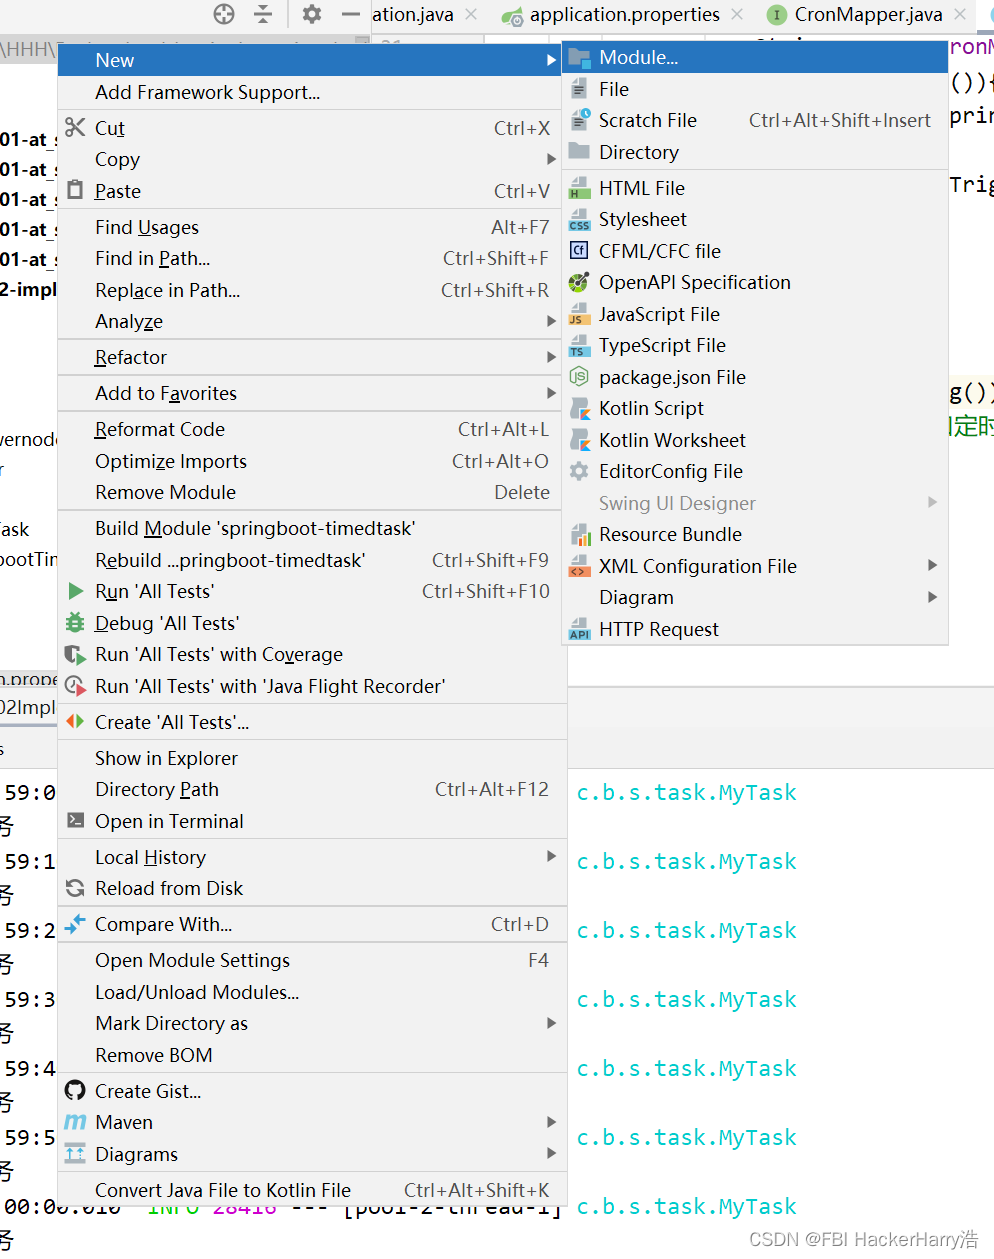
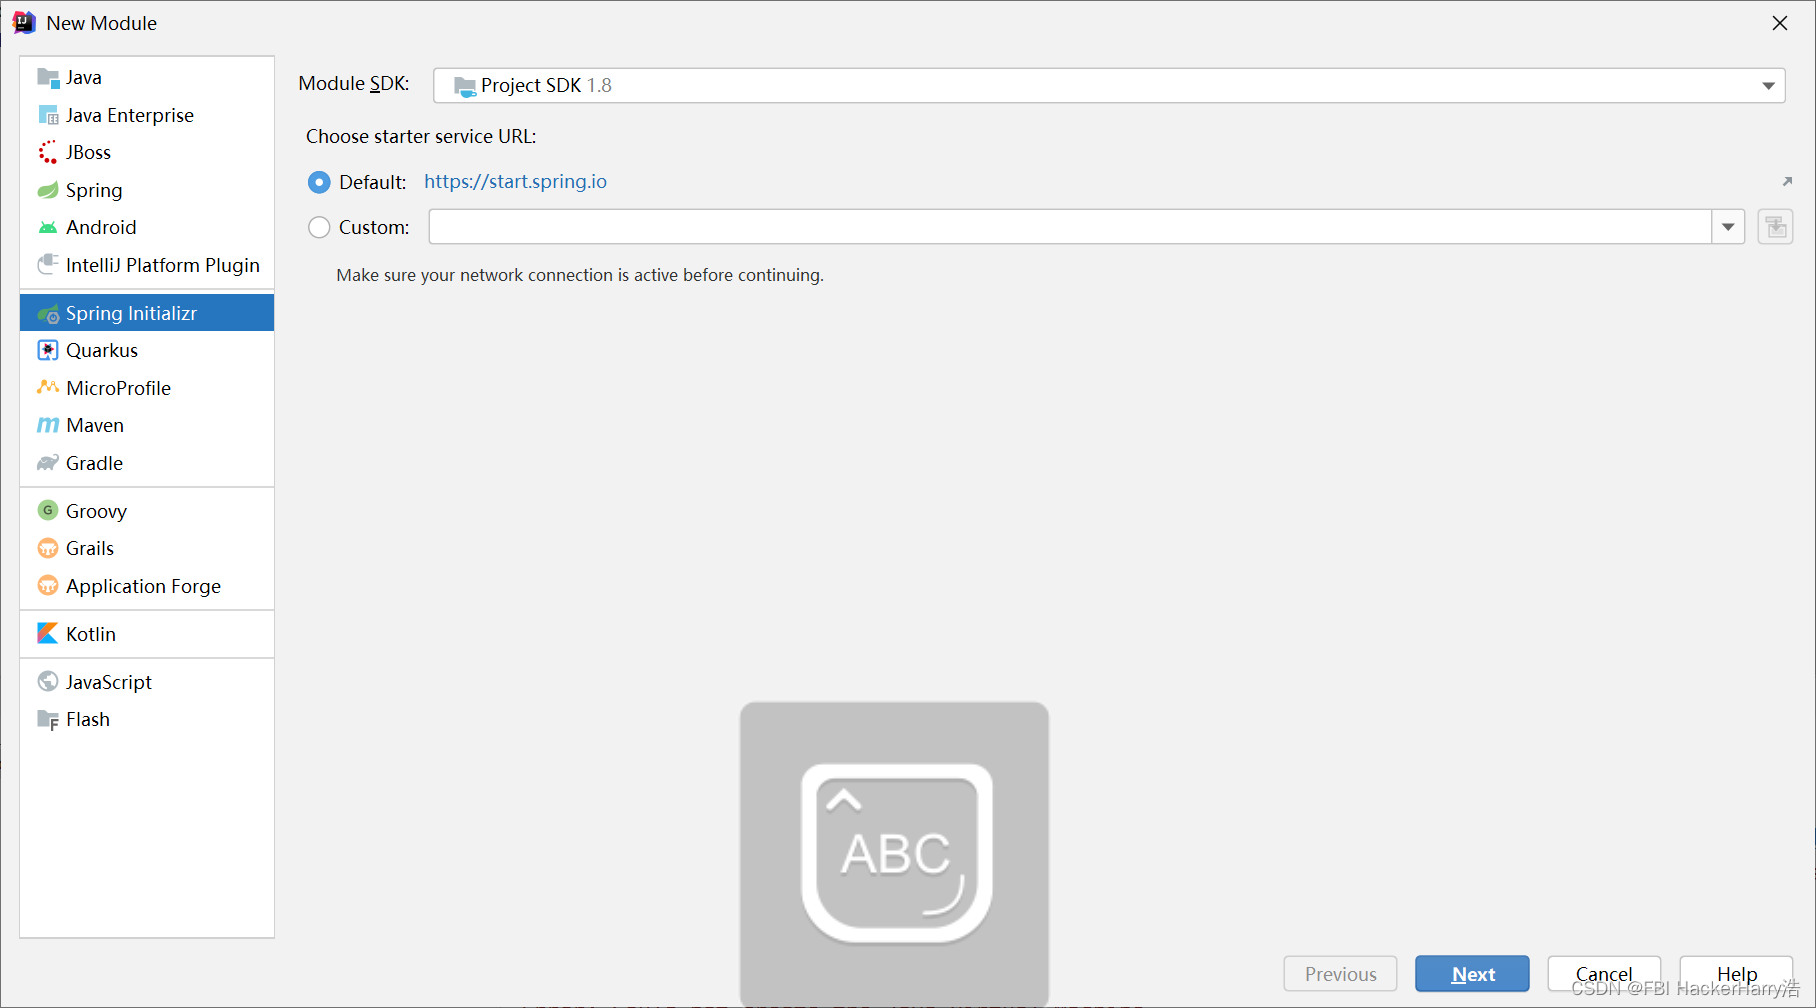
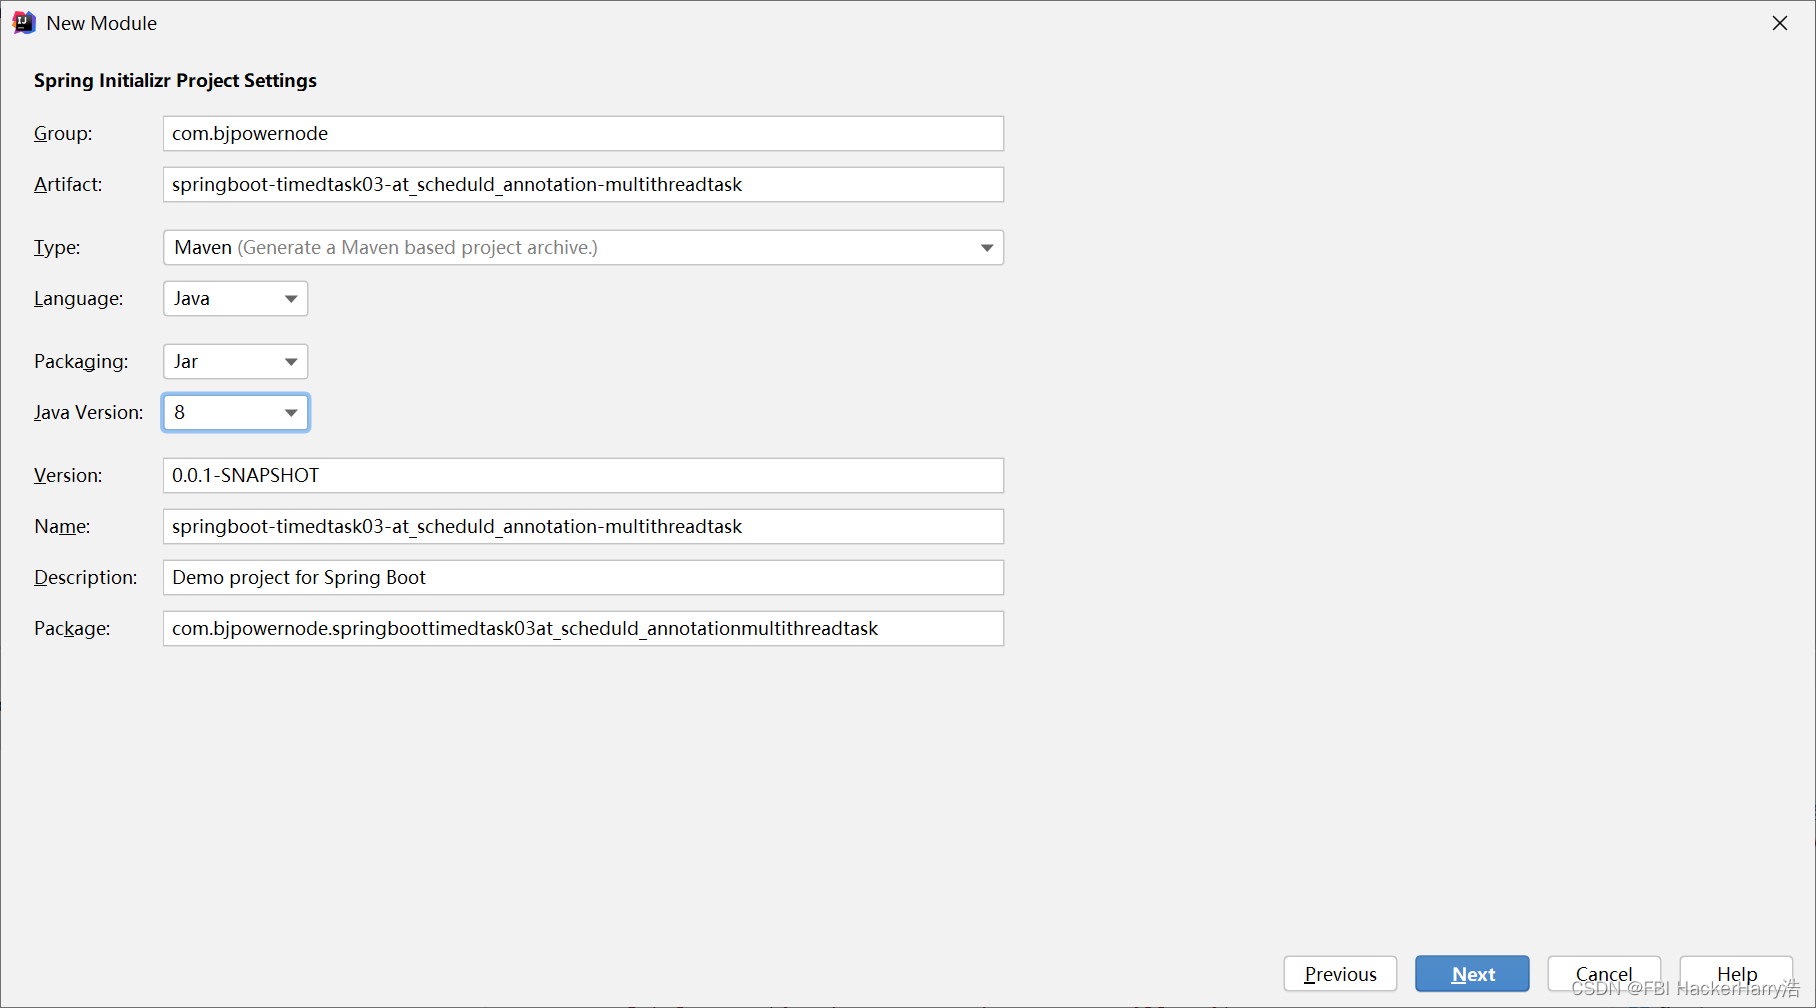
前面讲到了@Scheduled执行周期任务会受到上次一个任务的执行时间影响。那么可以开启多线程执行周期任务。
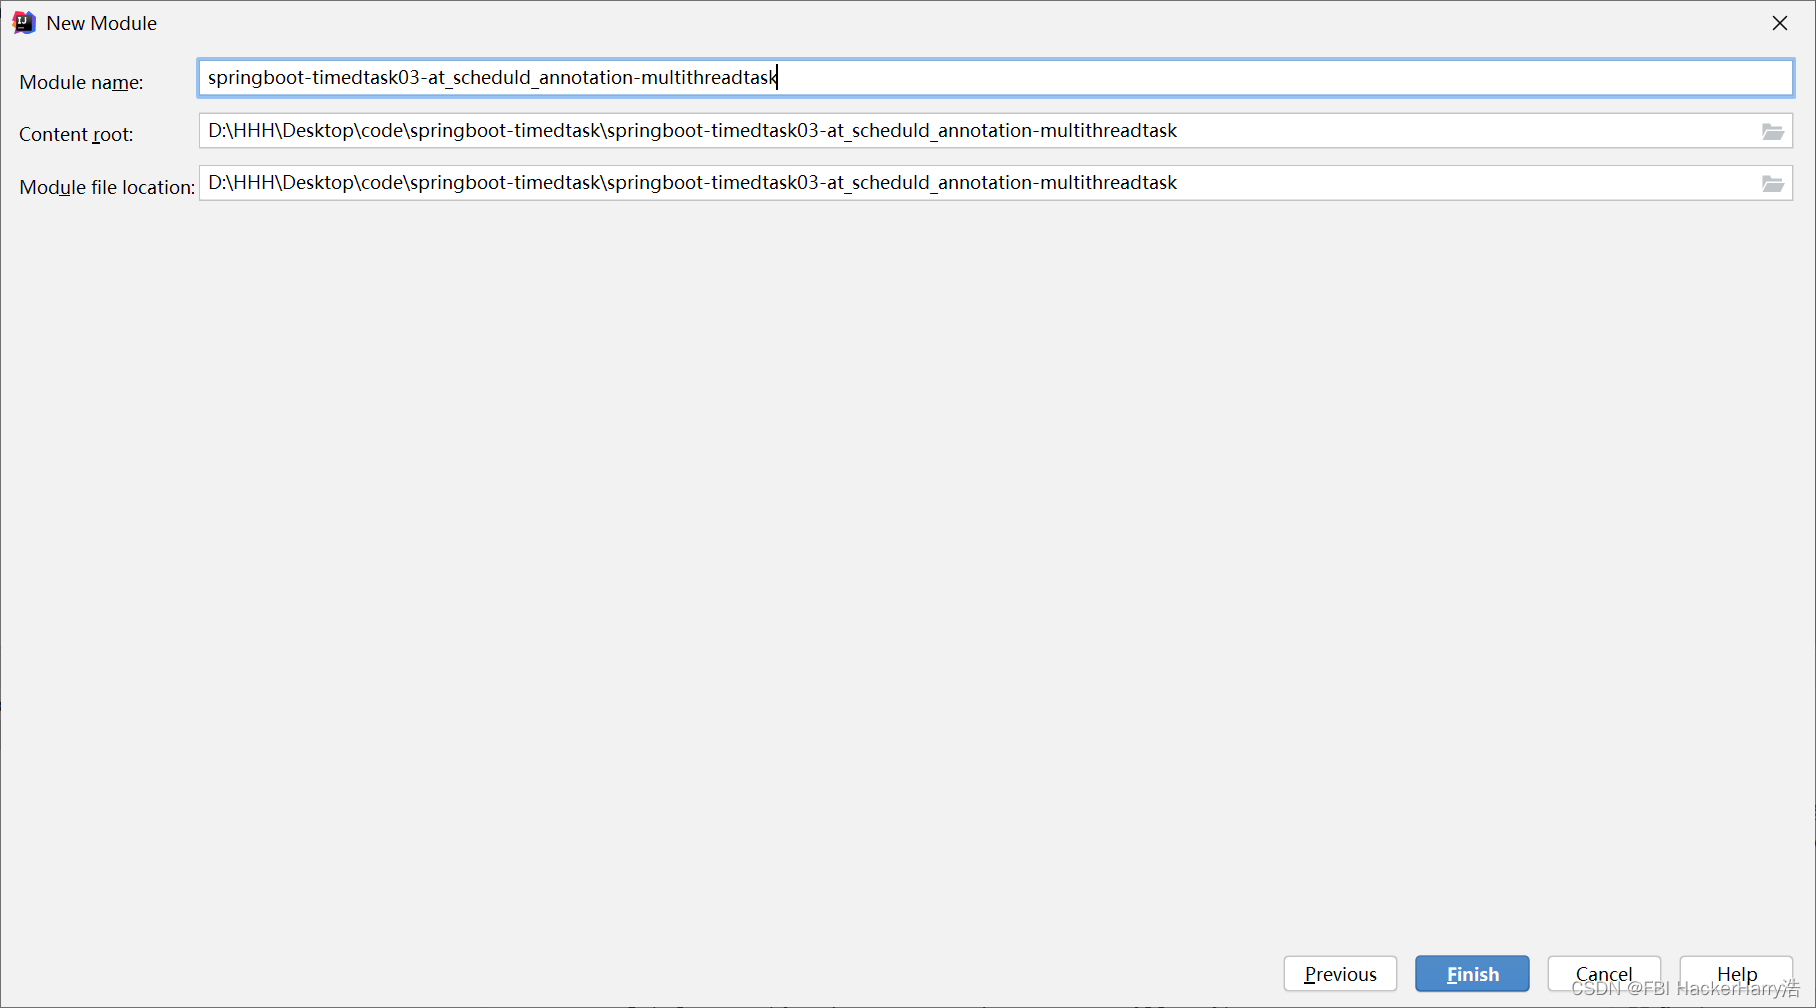
创建springboot项目
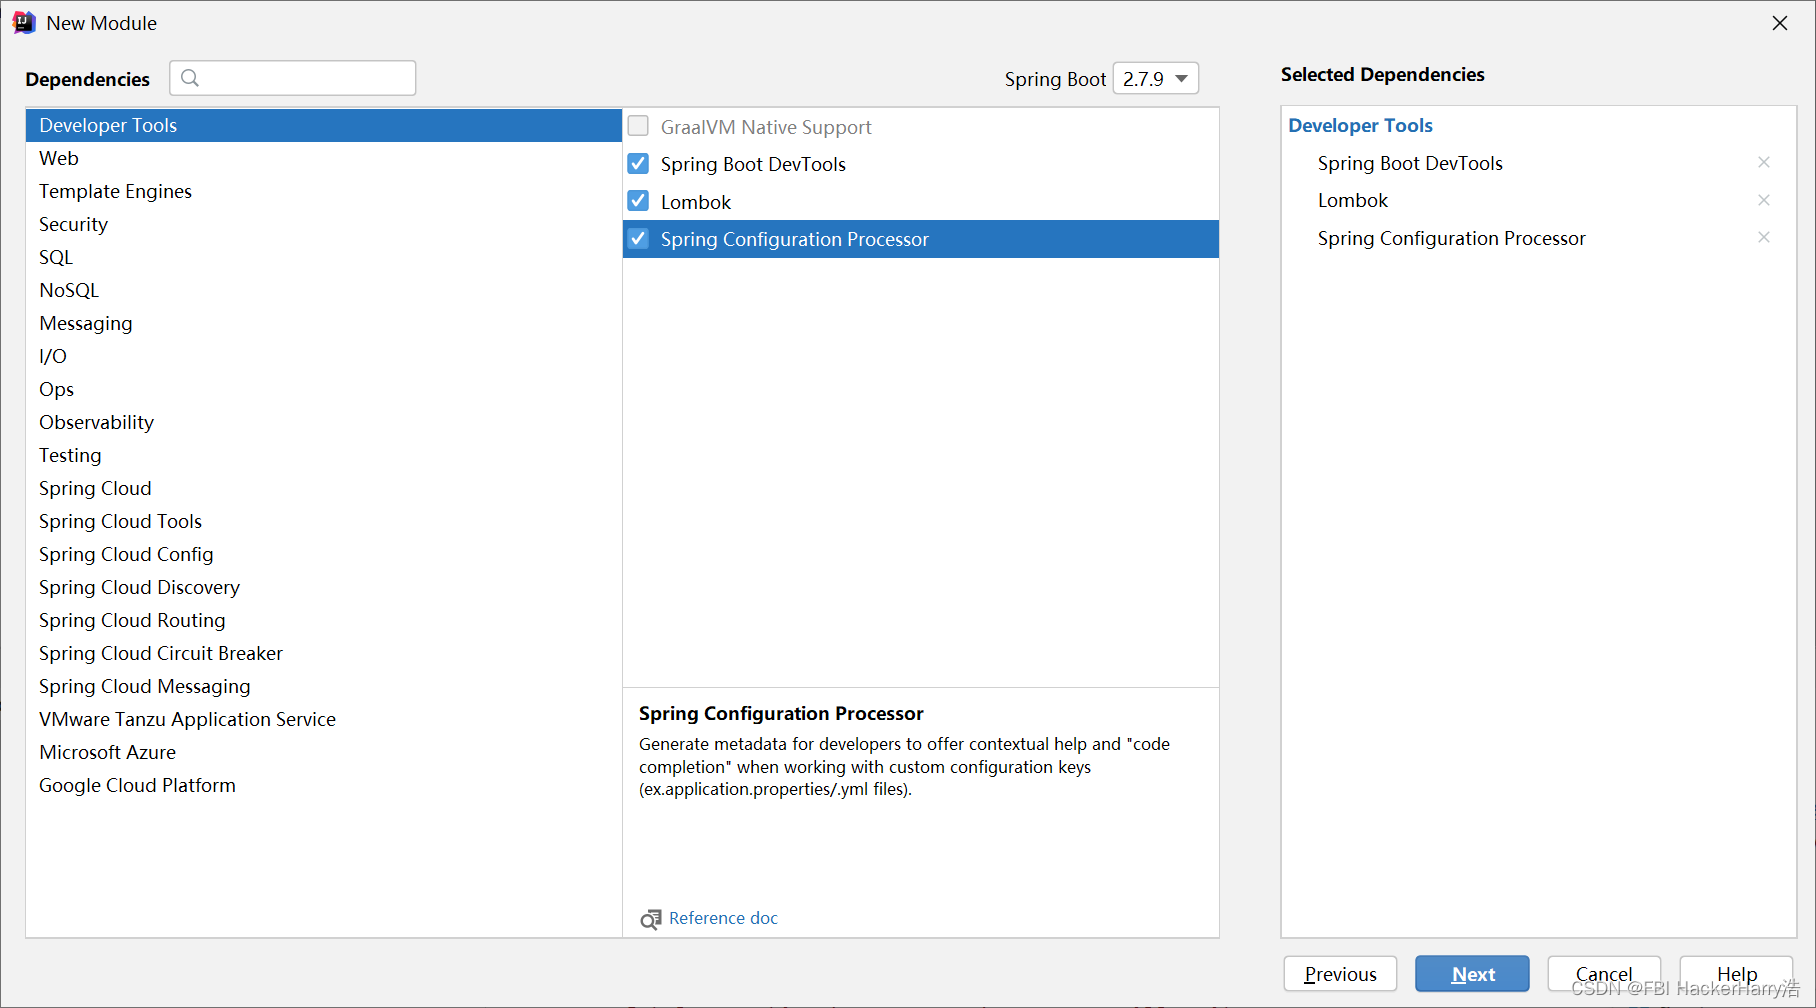
创建一个多线程定时任务类如下:
package com.bjpowernode.springboottimedtask03at_scheduld_annotationmultithreadtask.task;

import org.springframework.scheduling.annotation.Async;
import org.springframework.scheduling.annotation.EnableAsync;
import org.springframework.scheduling.annotation.EnableScheduling;
import org.springframework.scheduling.annotation.Scheduled;
import org.springframework.stereotype.Component;

import java.time.LocalDateTime;

@EnableAsync//2.开启多线程
@EnableScheduling//1.开启定时任务
@Component
public class MultiThreadTask {
    @Async
    @Scheduled(fixedDelay = 1000)  //间隔1秒
    public void first() throws InterruptedException {
        System.out.println("第一个定时任务开始 : " + LocalDateTime.now().toLocalTime() + "\r\n线程 : " + Thread.currentThread().getName());
        Thread.sleep(1000 * 10);
    }

    @Async
    @Scheduled(fixedDelay = 2000)
    public void second() {
        System.out.println("第二个定时任务开始 : " + LocalDateTime.now().toLocalTime() + "\r\n线程 : " + Thread.currentThread().getName());
    }
}
执行结果如下:
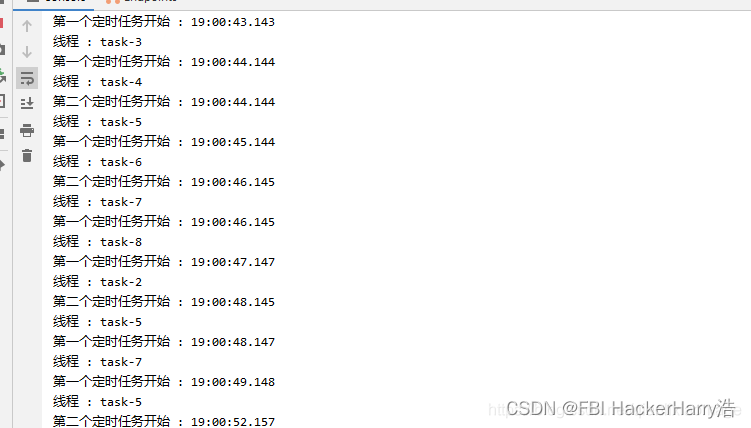
从结果可以看出:第一个任务的执行时间也不受其本身执行时间的限制。两个任务也互不影响。
demo地址: GitHub - SUST-MaZhen/scheduledtash3: spring boot基于多线程的定时任务
四、总结
本文介绍了spring boot创建定时任务的三种方式,当然还有其他方式,