目录
一、快速搭建SpringBoot-Web工程脚手架。
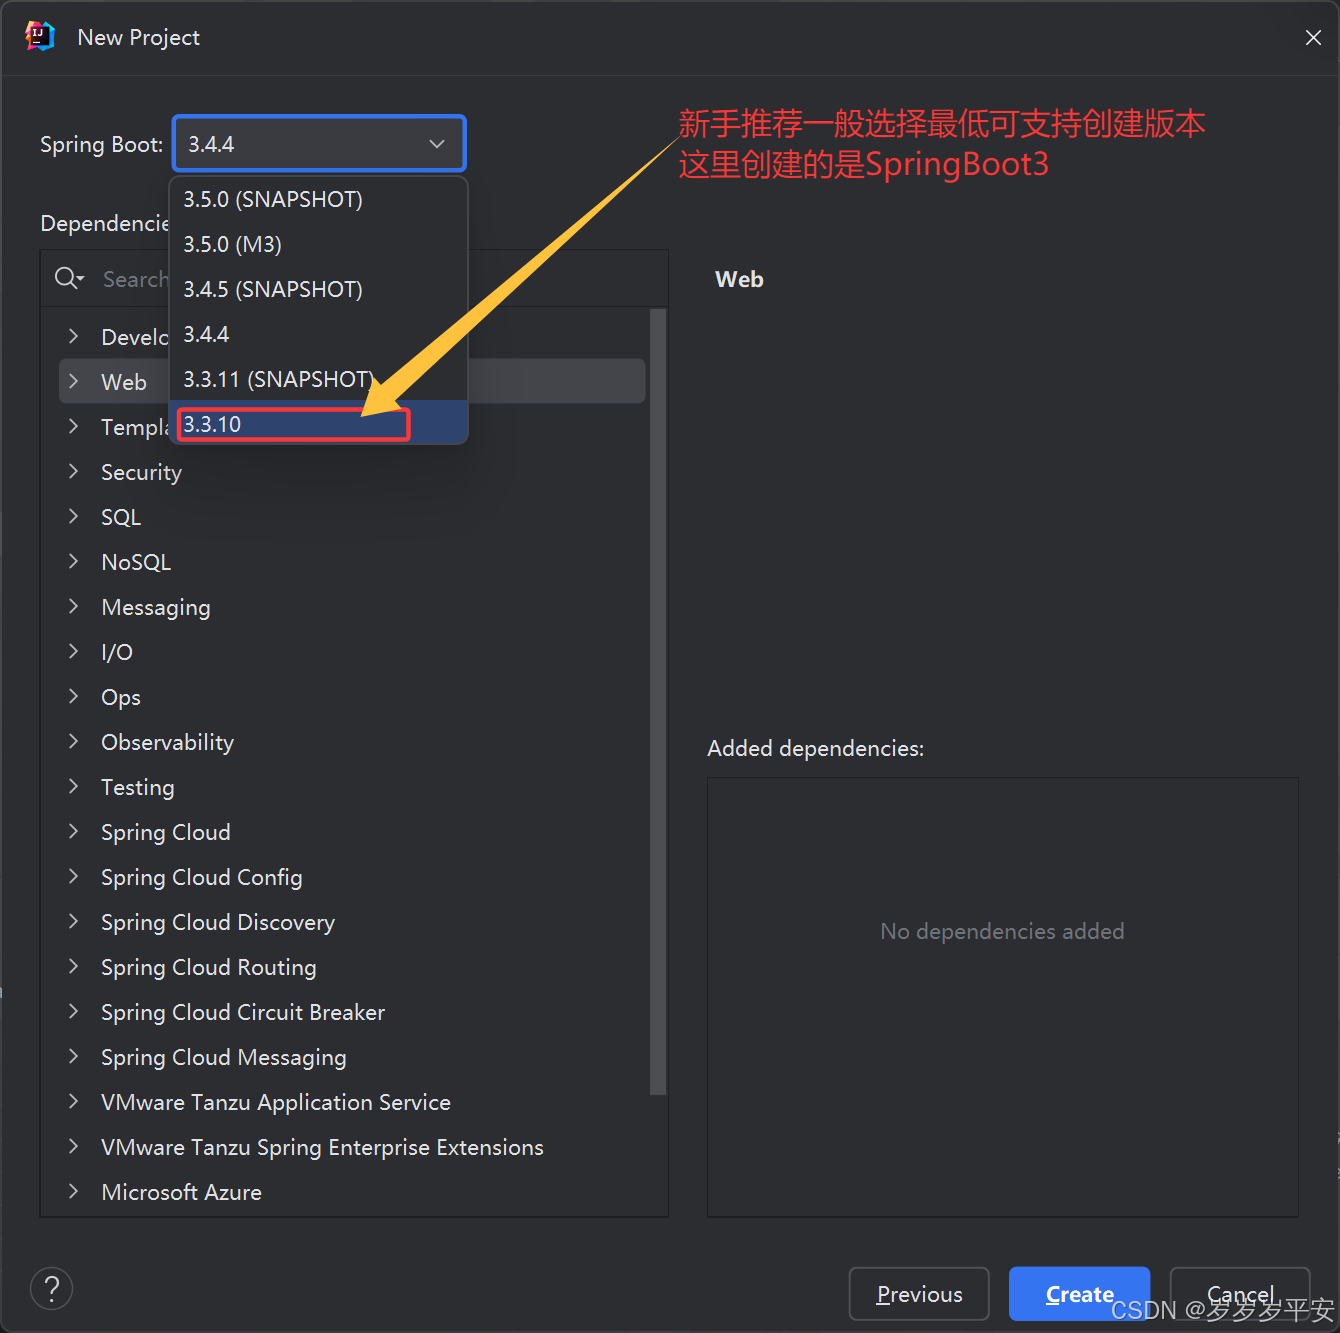
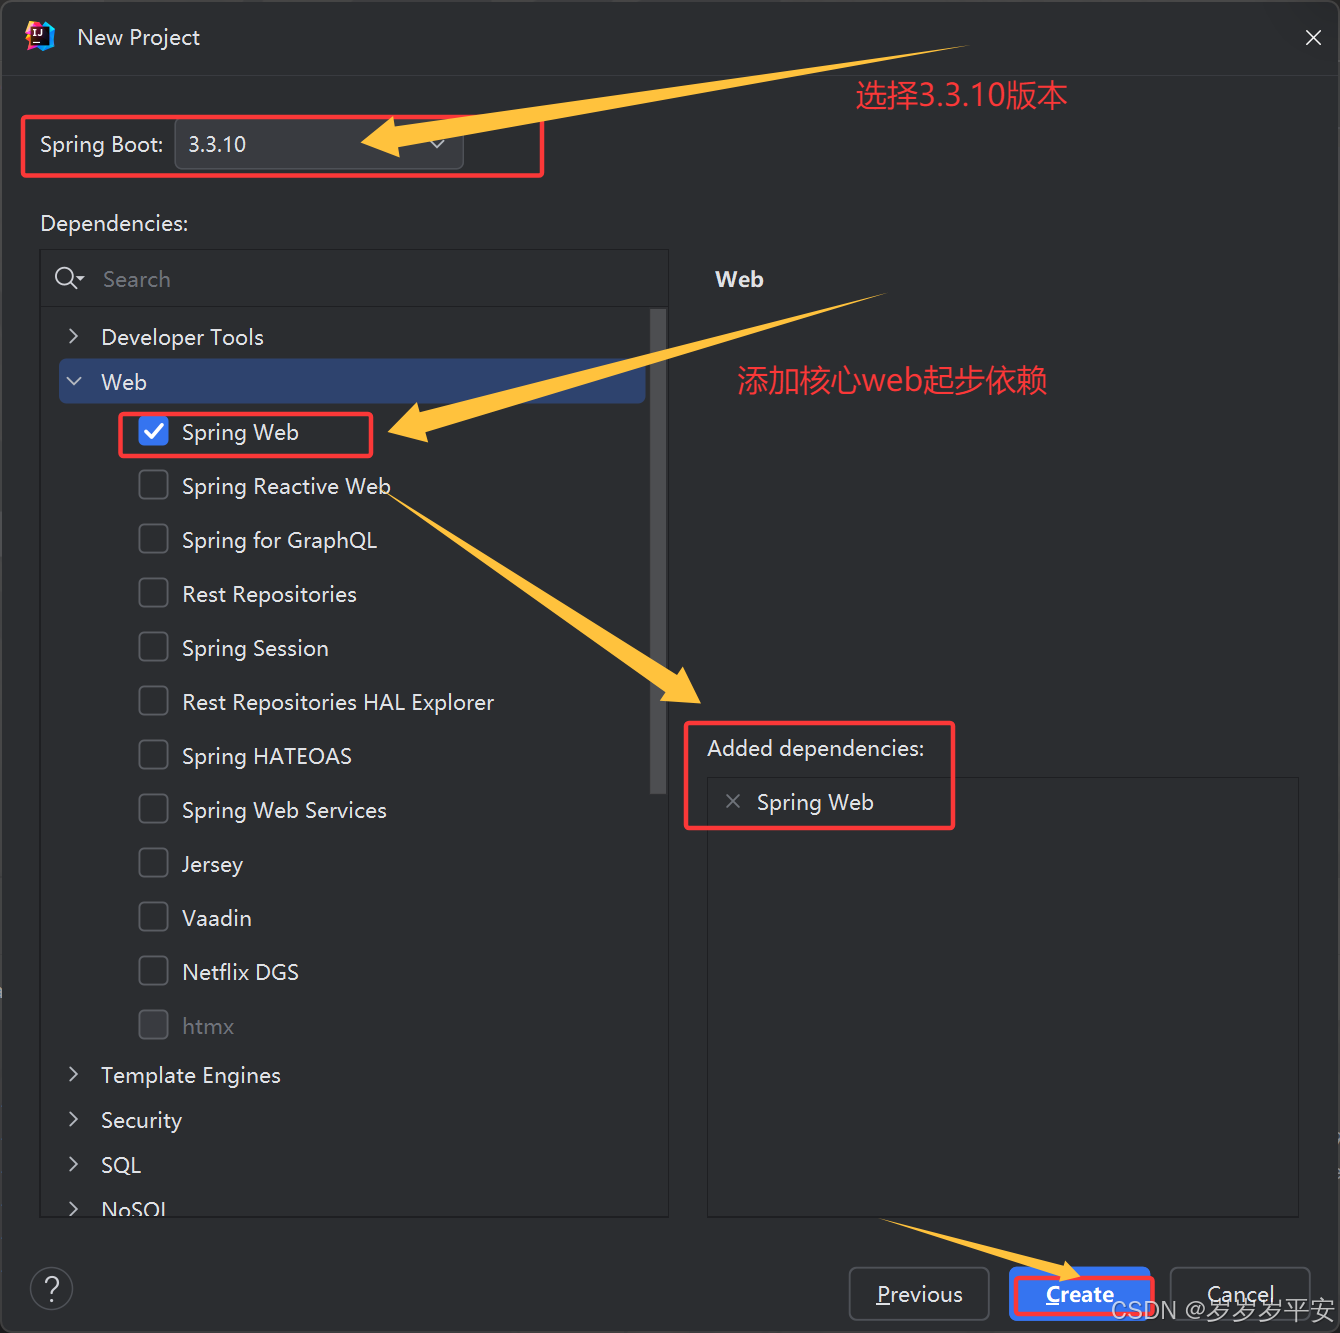
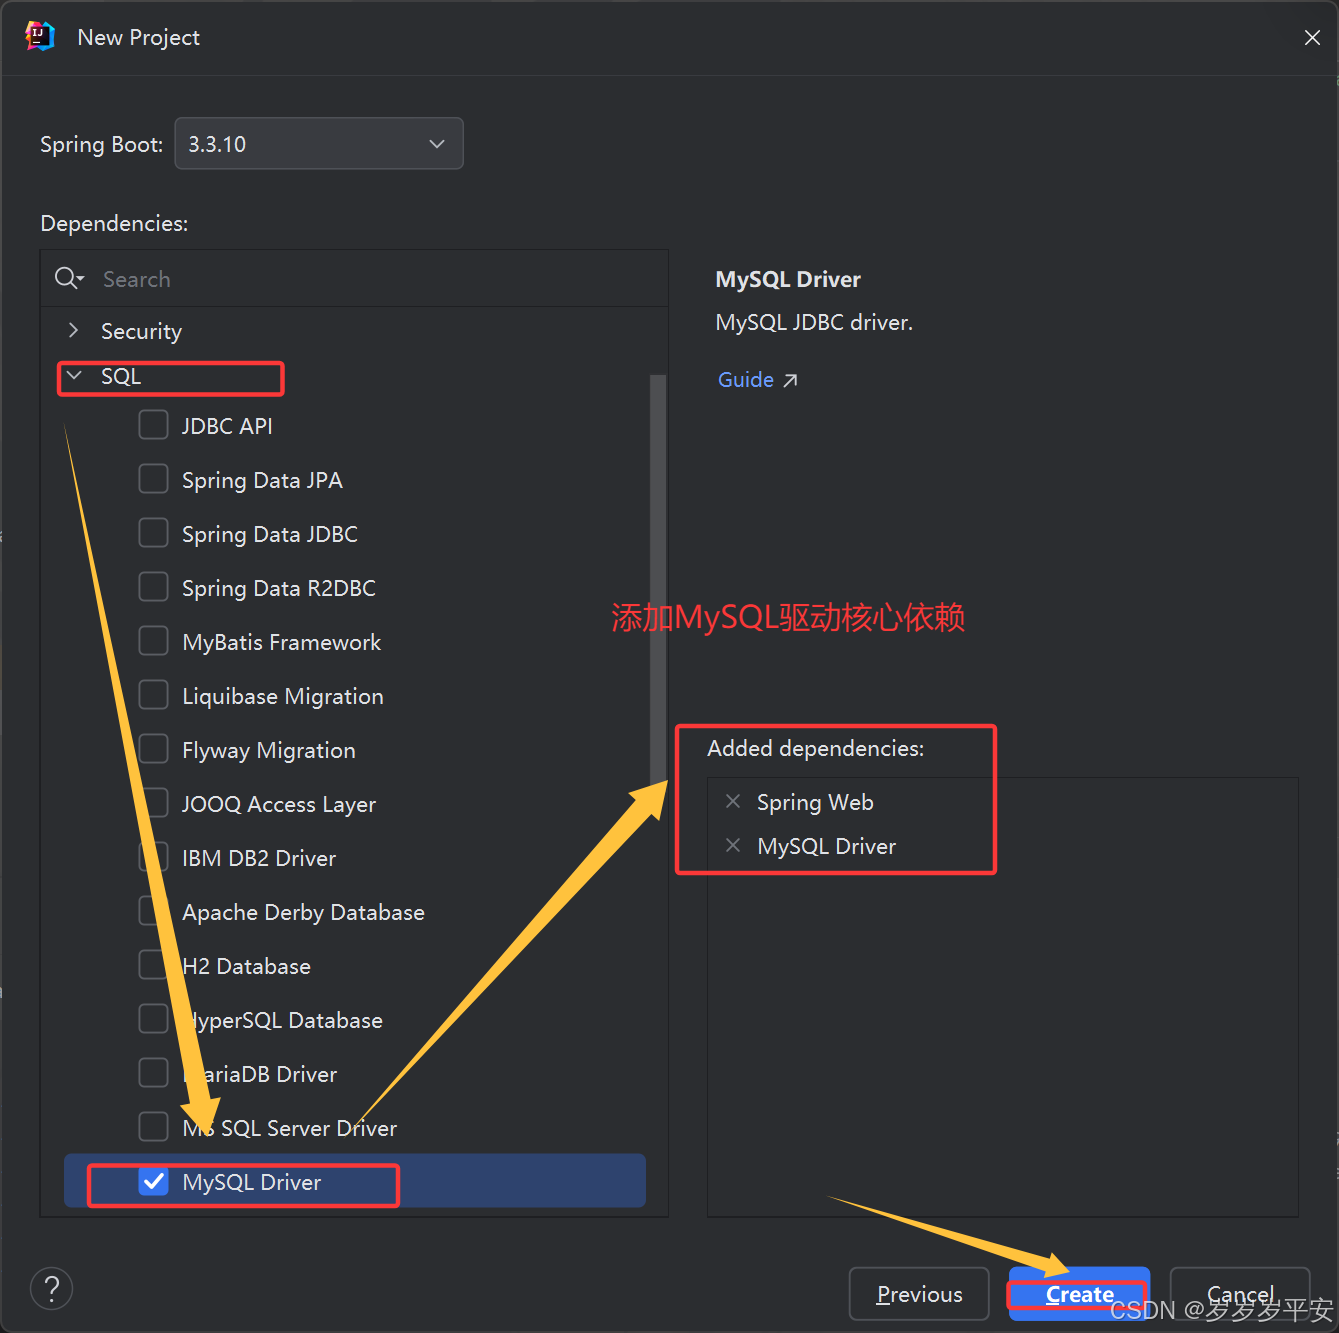
1.1 Spring Initializr 初始化工程。(官方提供)
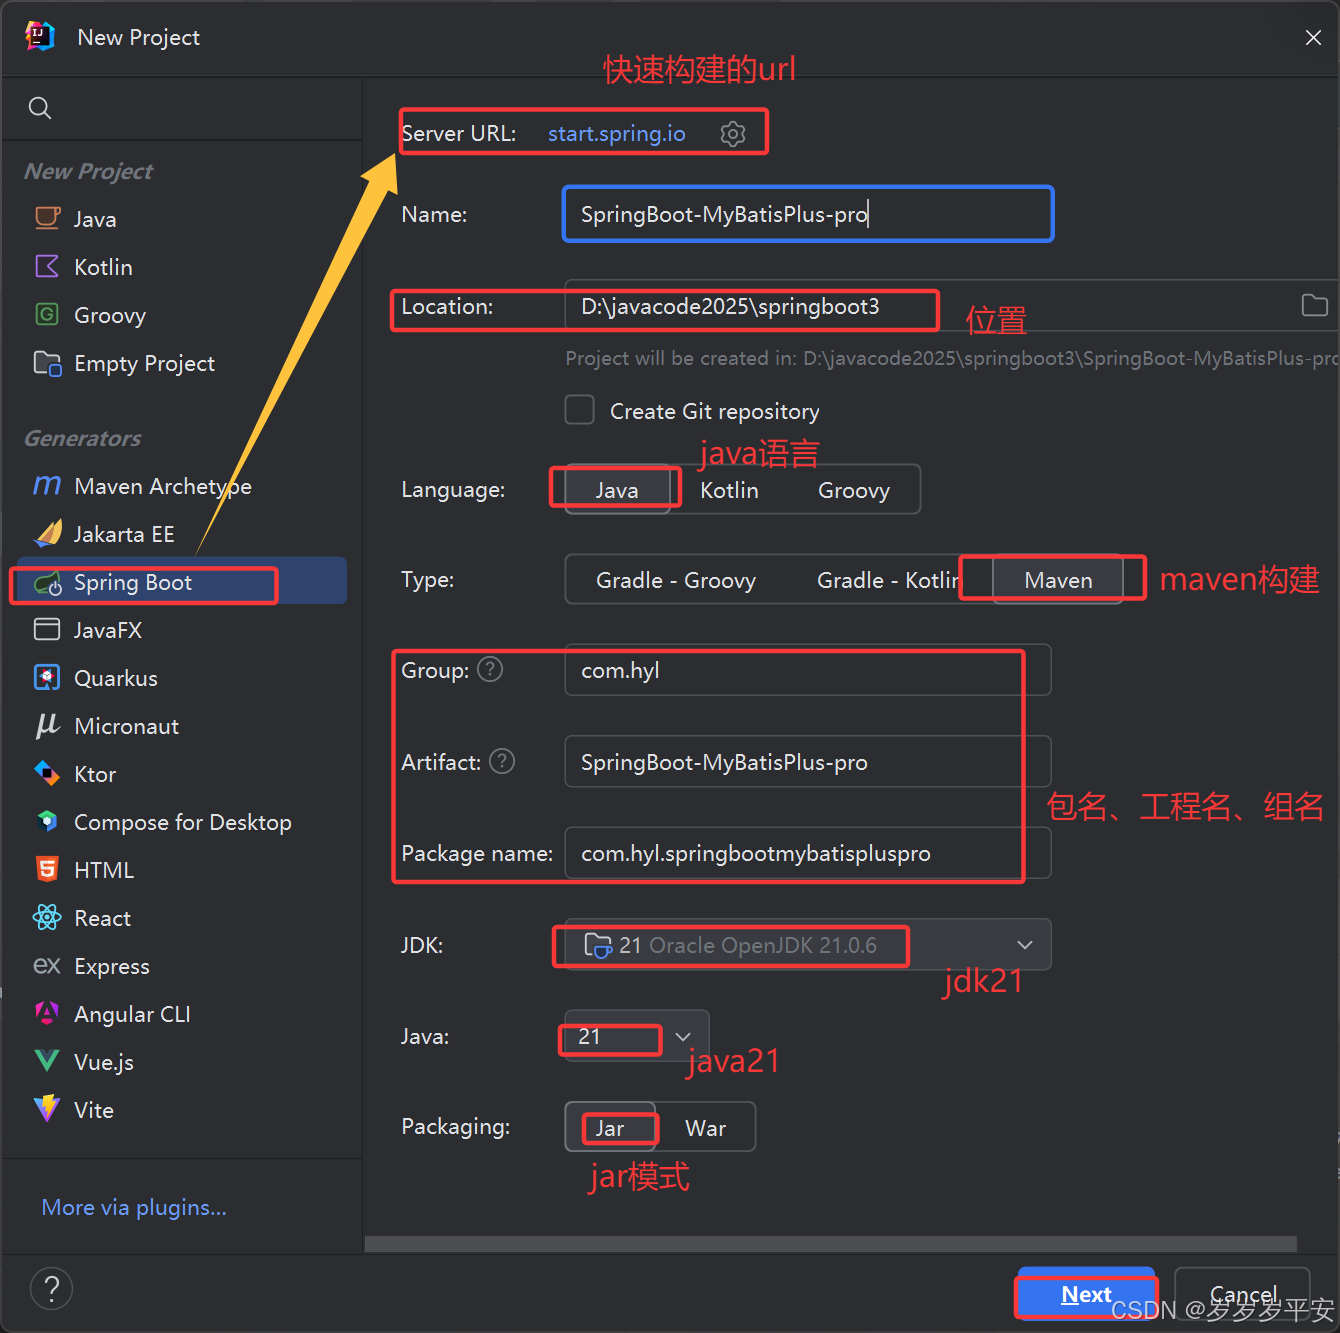
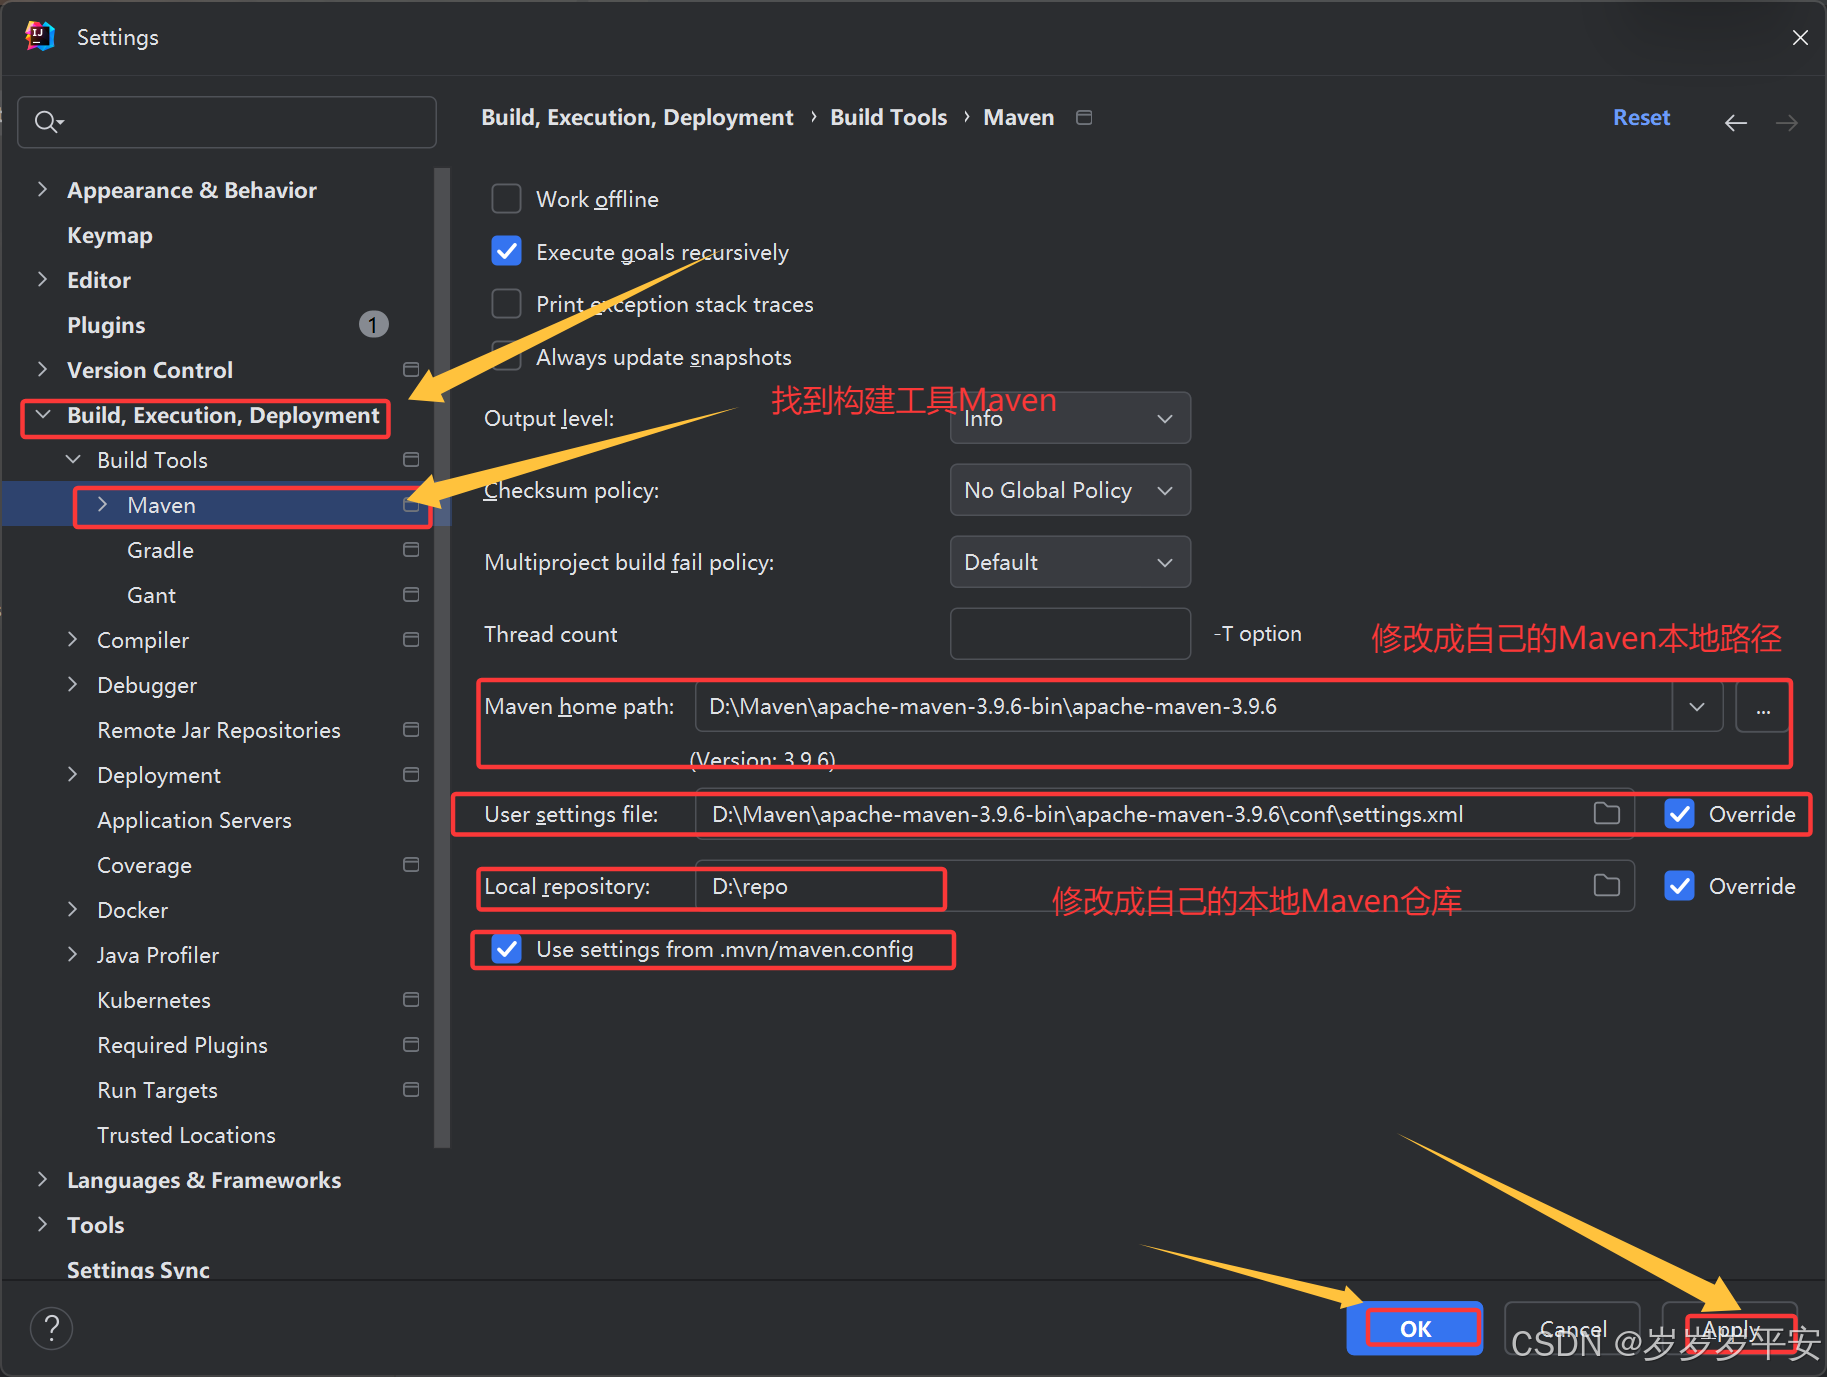
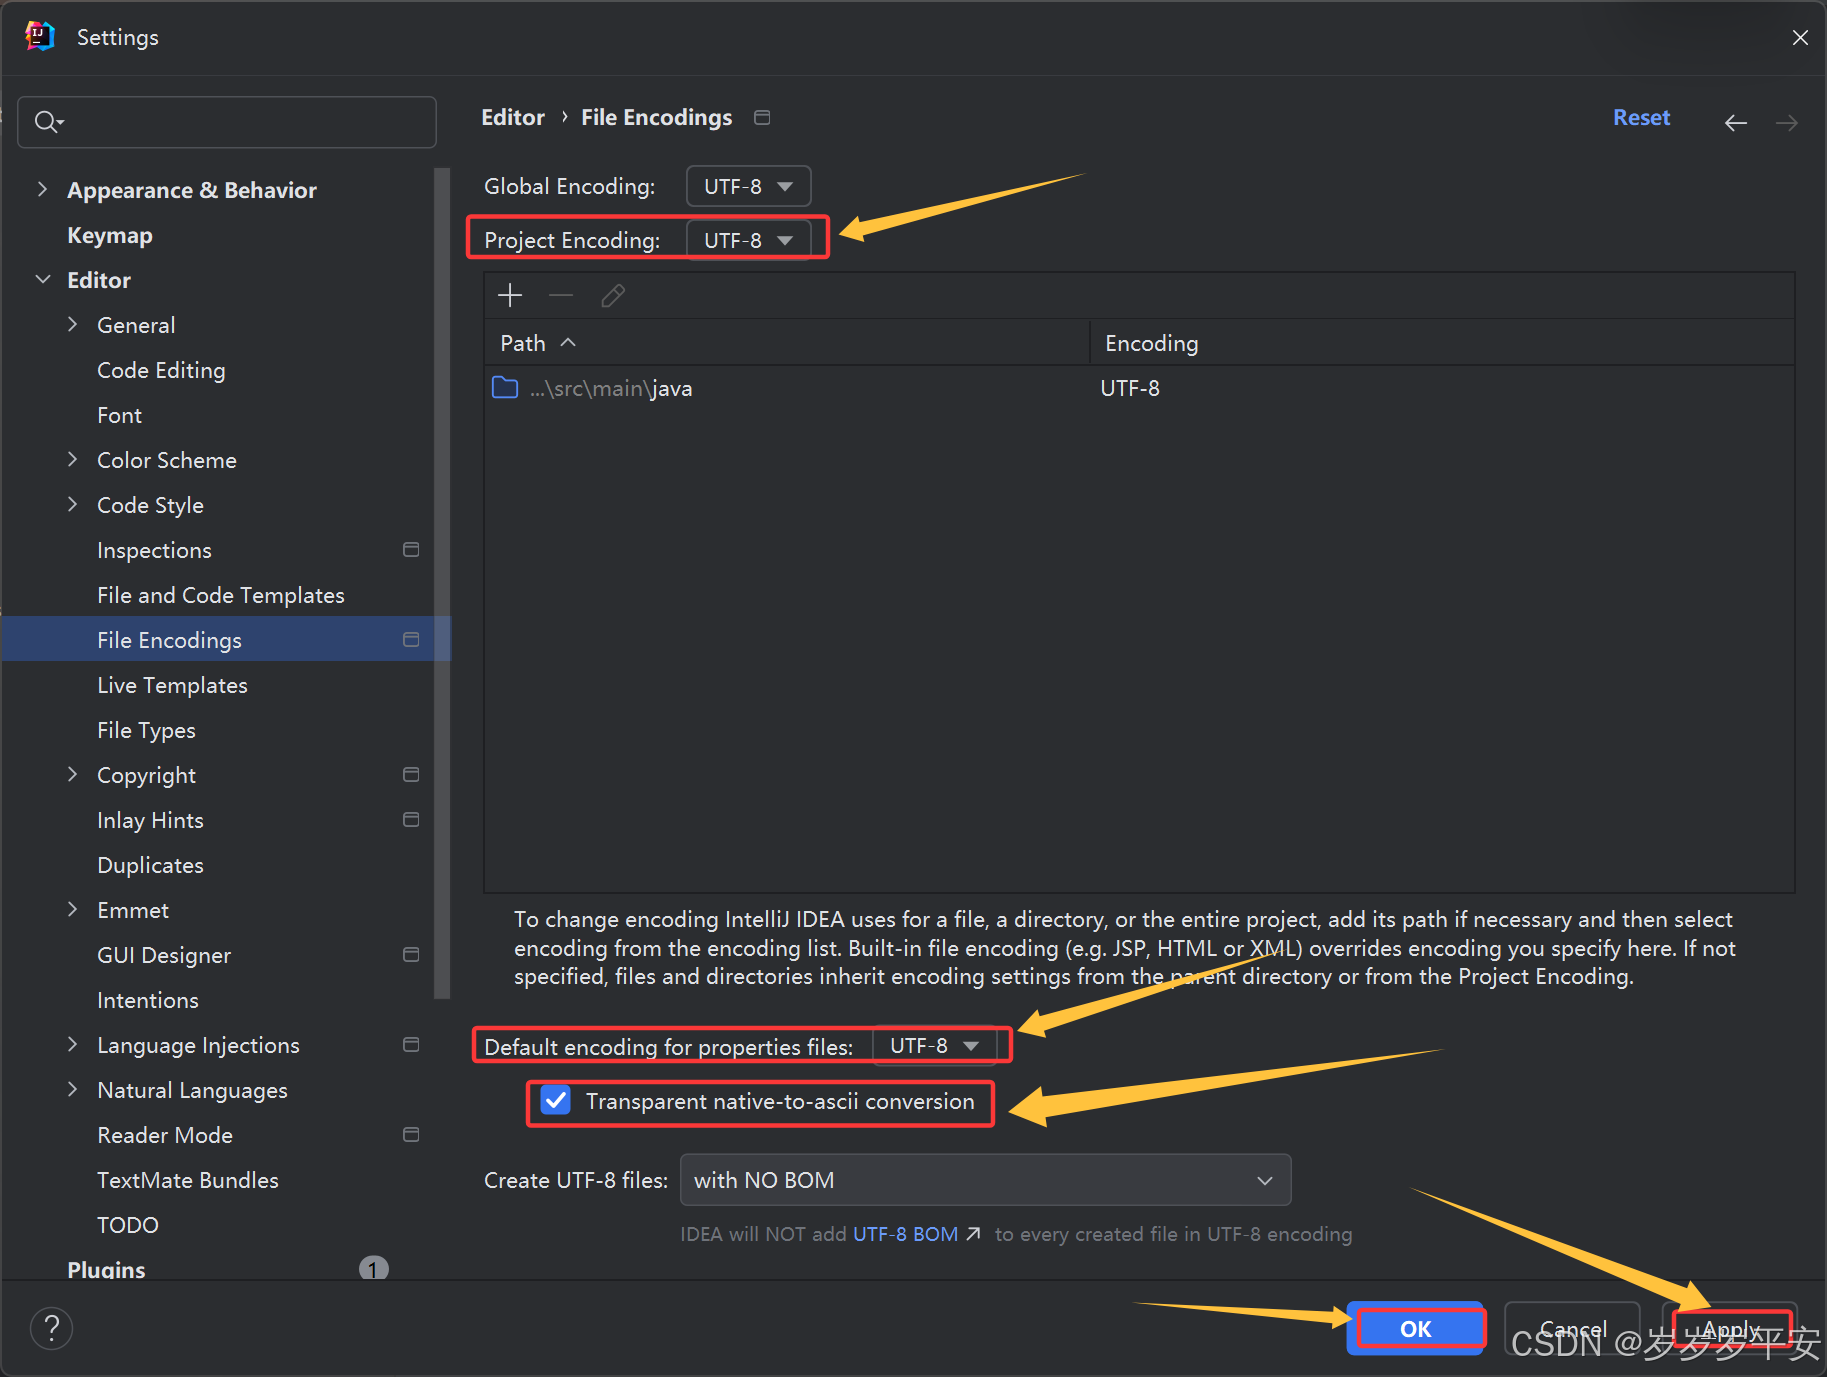
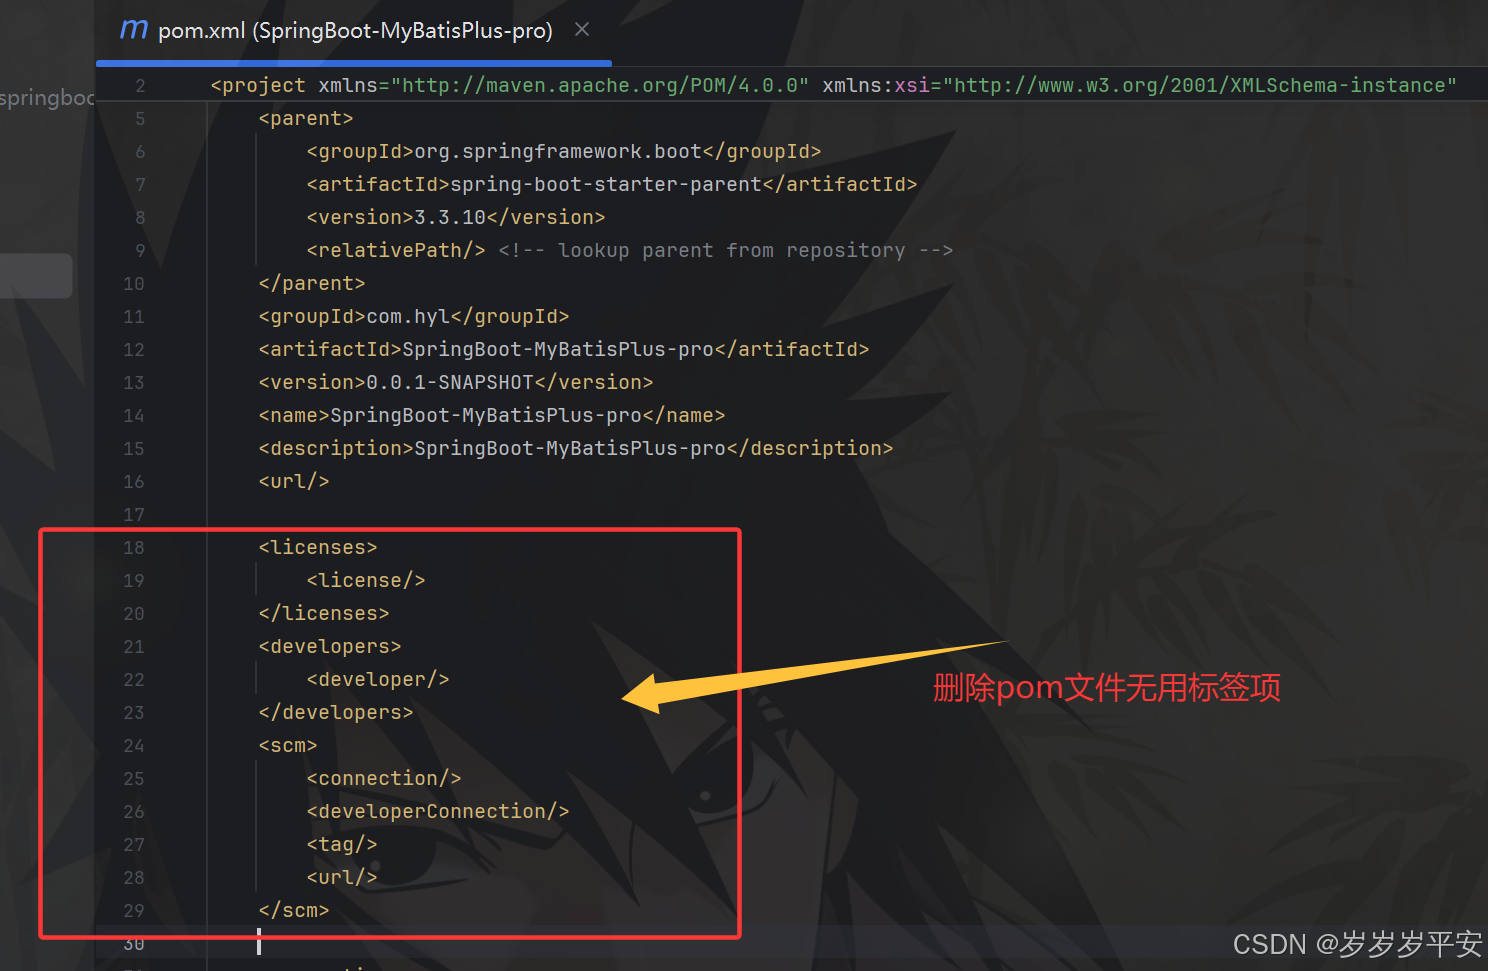
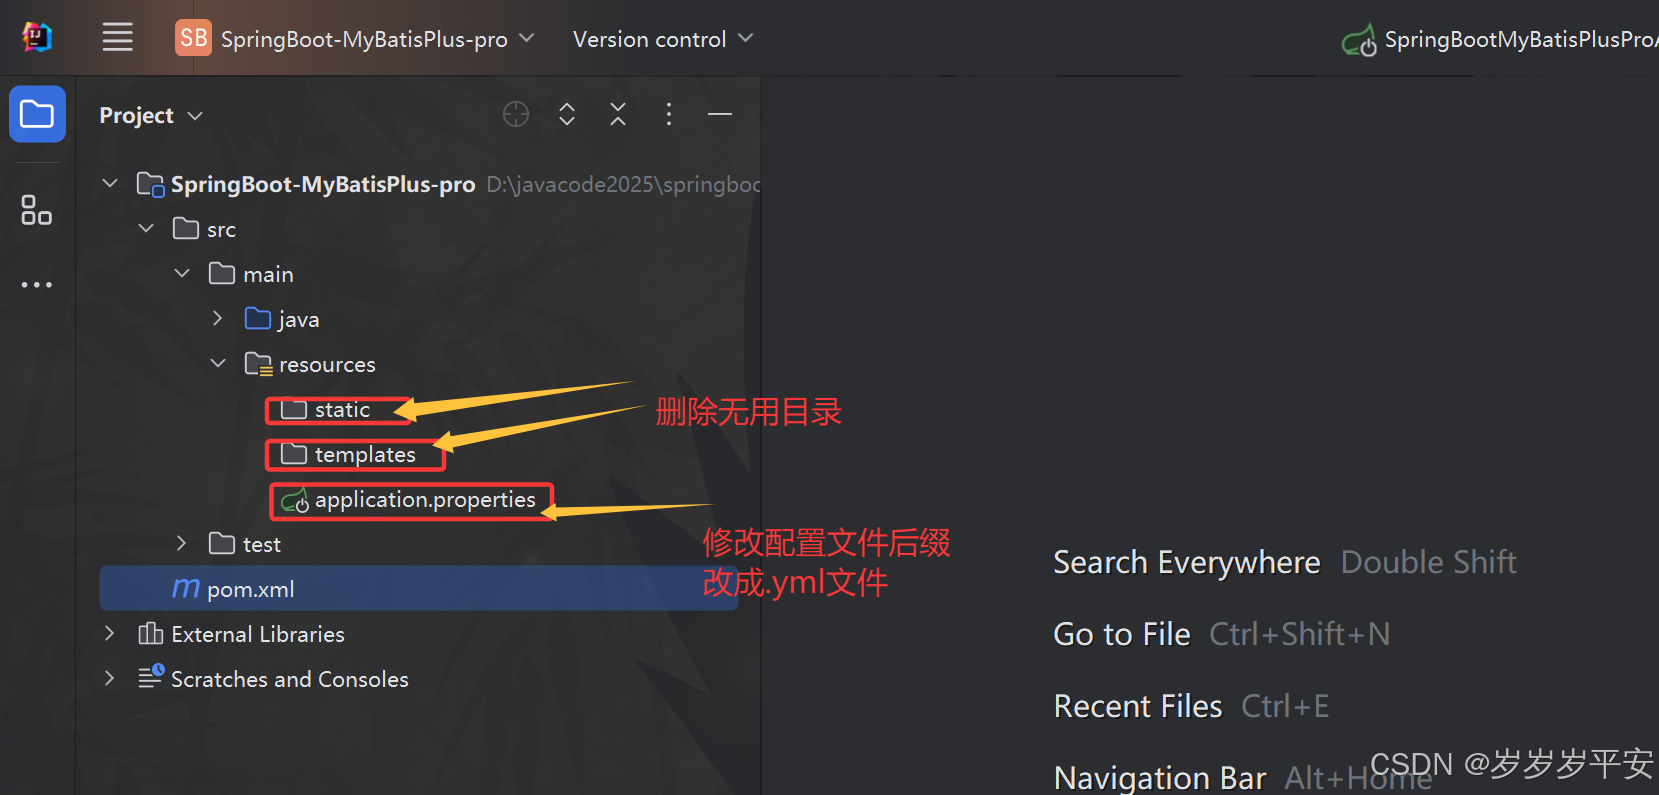
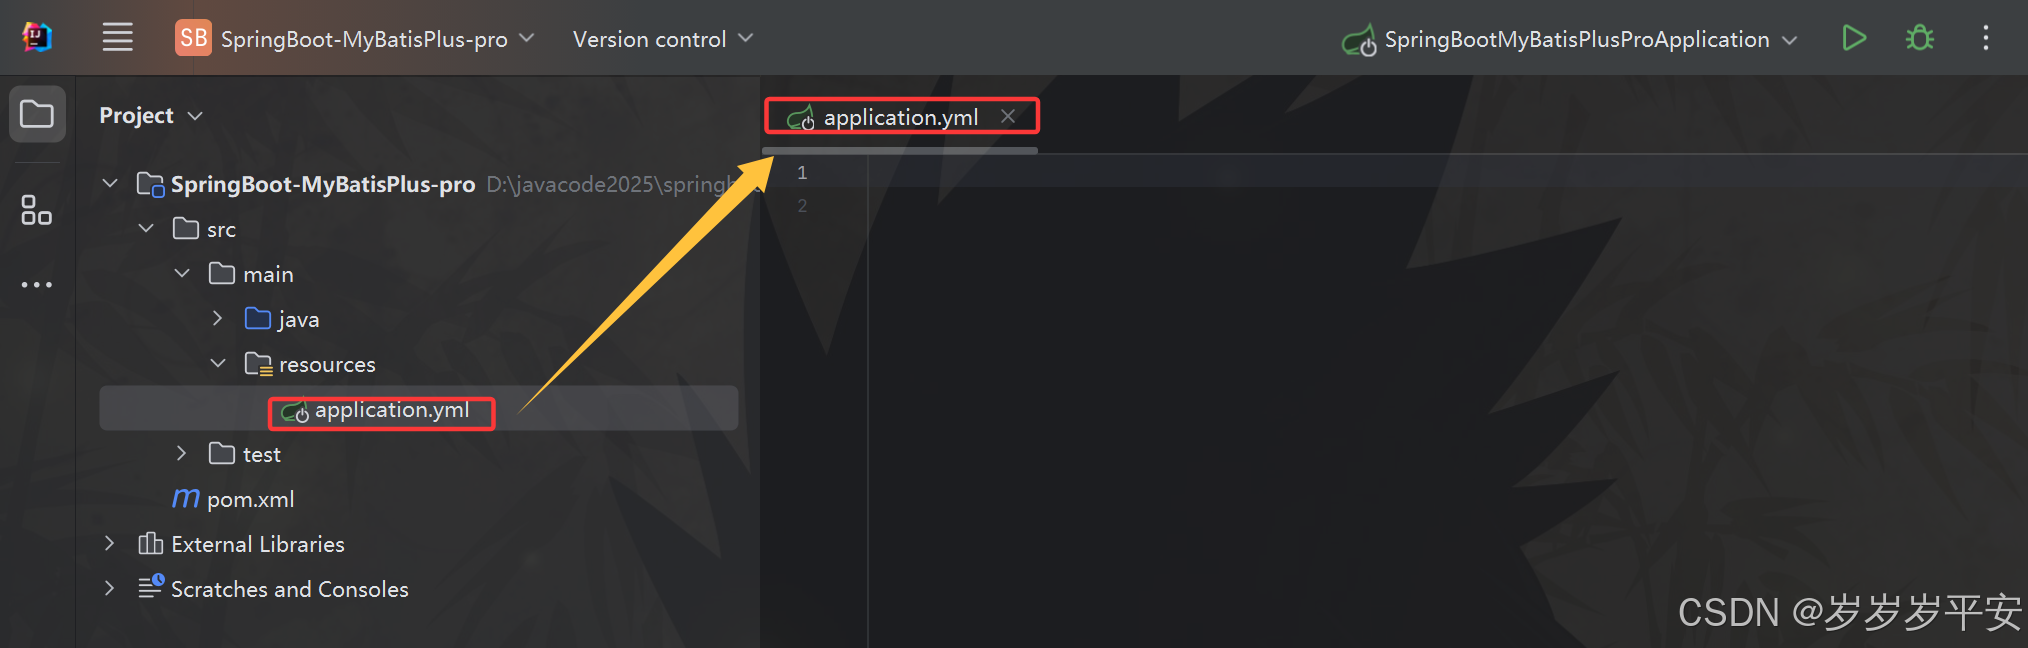
1.2 工程脚手架初始化详细步骤。(IDEA2024.1.1)
二、MyBatis-Plus的特性与快速上手。
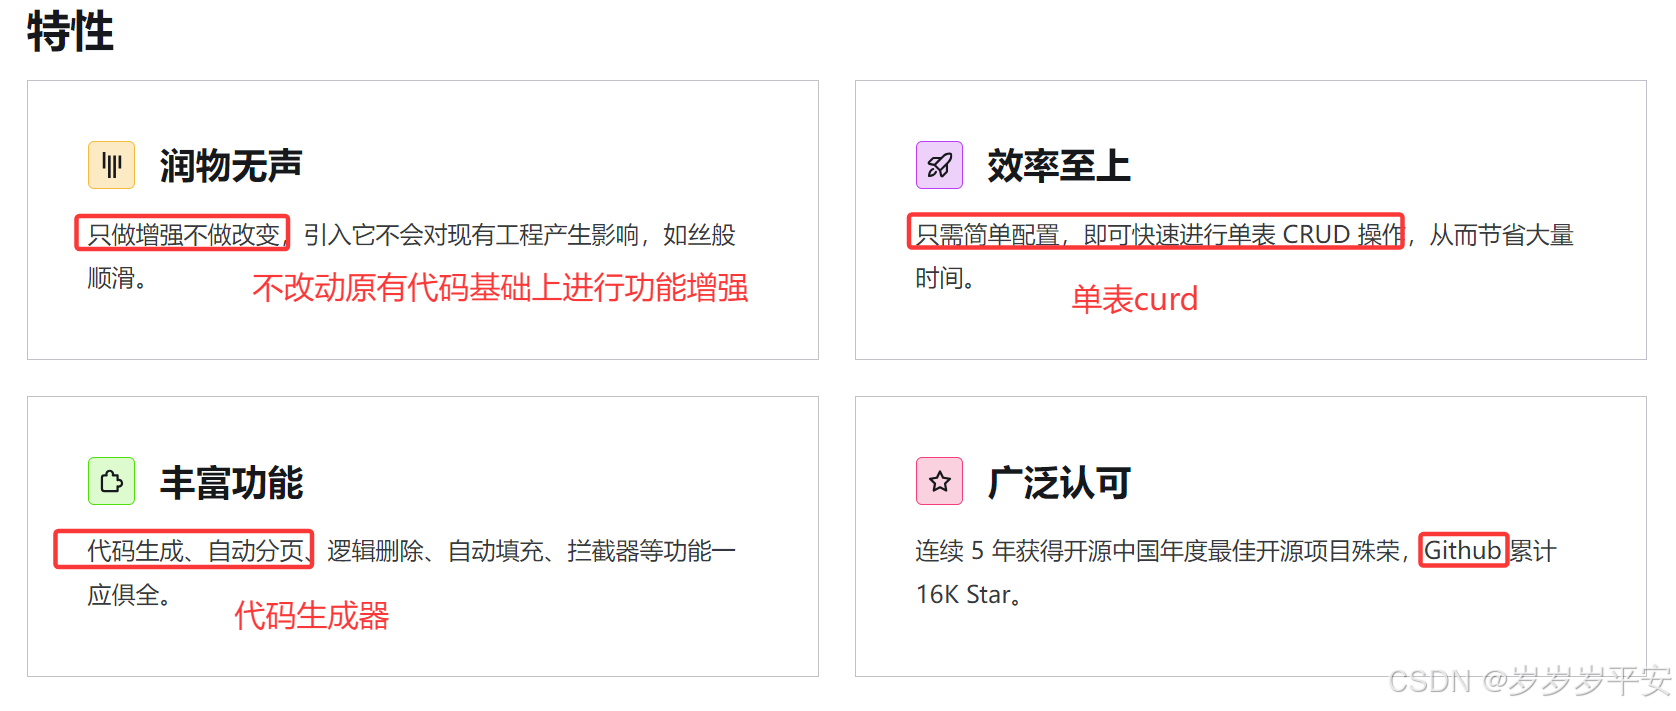
2.1 官网地址与基本特性。
2.2 快速上手技术栈基础。
2.3 Spring Boot2 的 MyBatis-Plus Starter 依赖。
2.4 Spring Boot3 的 MyBatis-Plus Starter 依赖。(当前使用)
三、基于SpringBoot实现SSMP整合入门CURD步骤。
3.1 引入Lombok、Druid核心起步依赖。
3.2 编写application.yml配置文件。
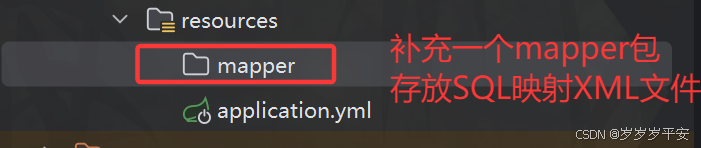
3.3 包结构创建与分层。
3.4 实体类Student。
3.5 controller层。(RESTful风格的增删改查请求接口)
3.6 service层。(MyBatis-Plus开发极简化)
<1>StudentService。(继承 IService 接口)
<2>StudentServiceImpl。(继承 ServiceImpl 类。实现 StudentService 接口)
3.7 mapper层。(MyBatis-Plus开发极简化)
<1>StudentMapper。(继承 BaseMapper 接口)
3.8 封装响应结果类Result。
3.9 增删改查接口的测试与响应。
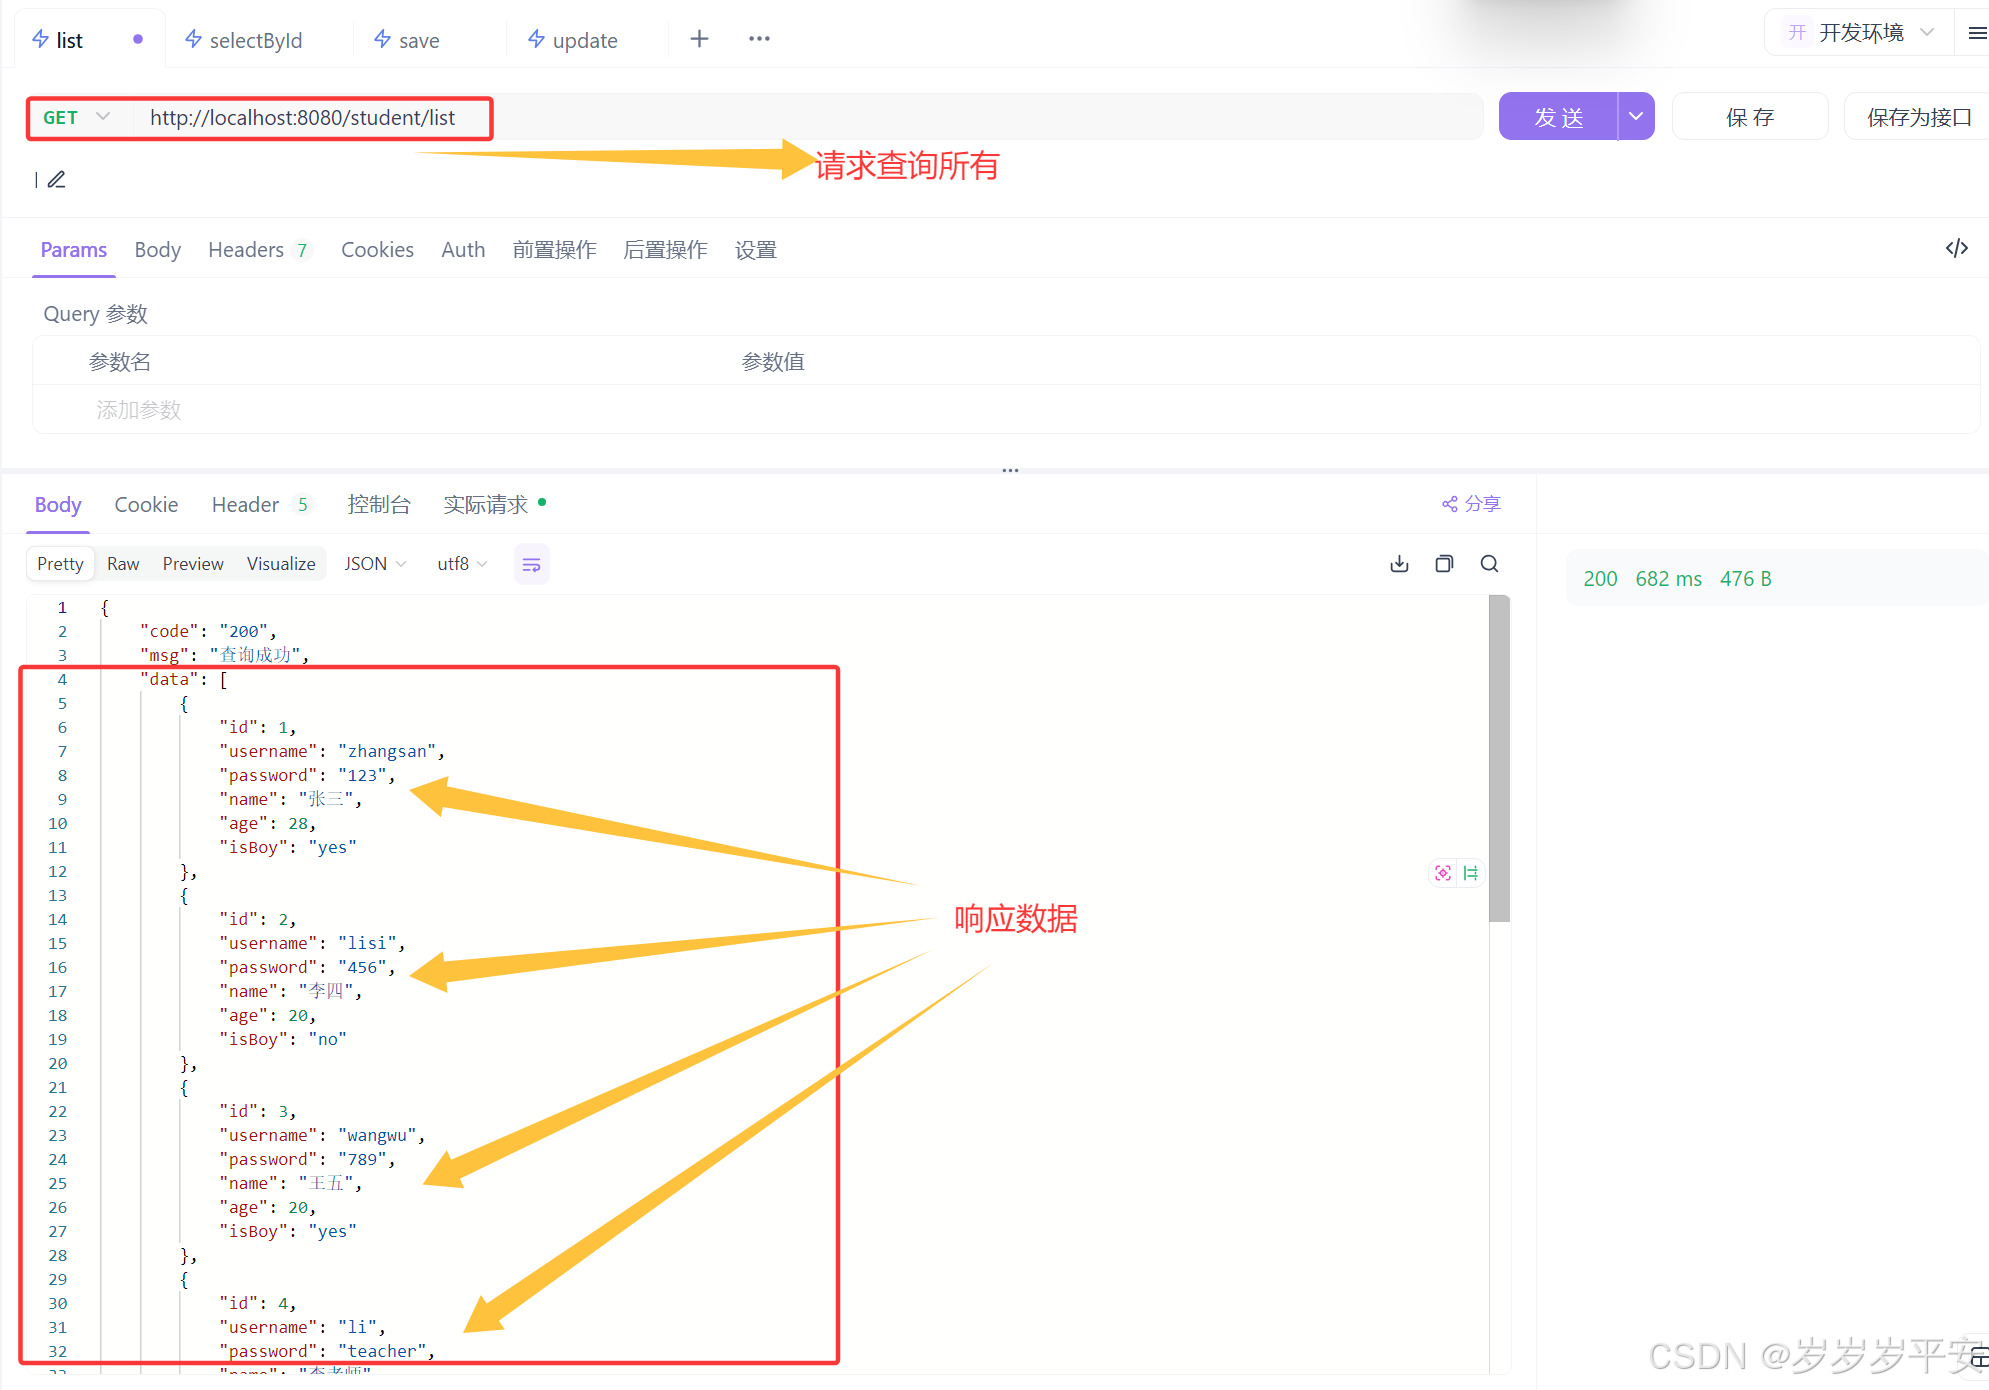
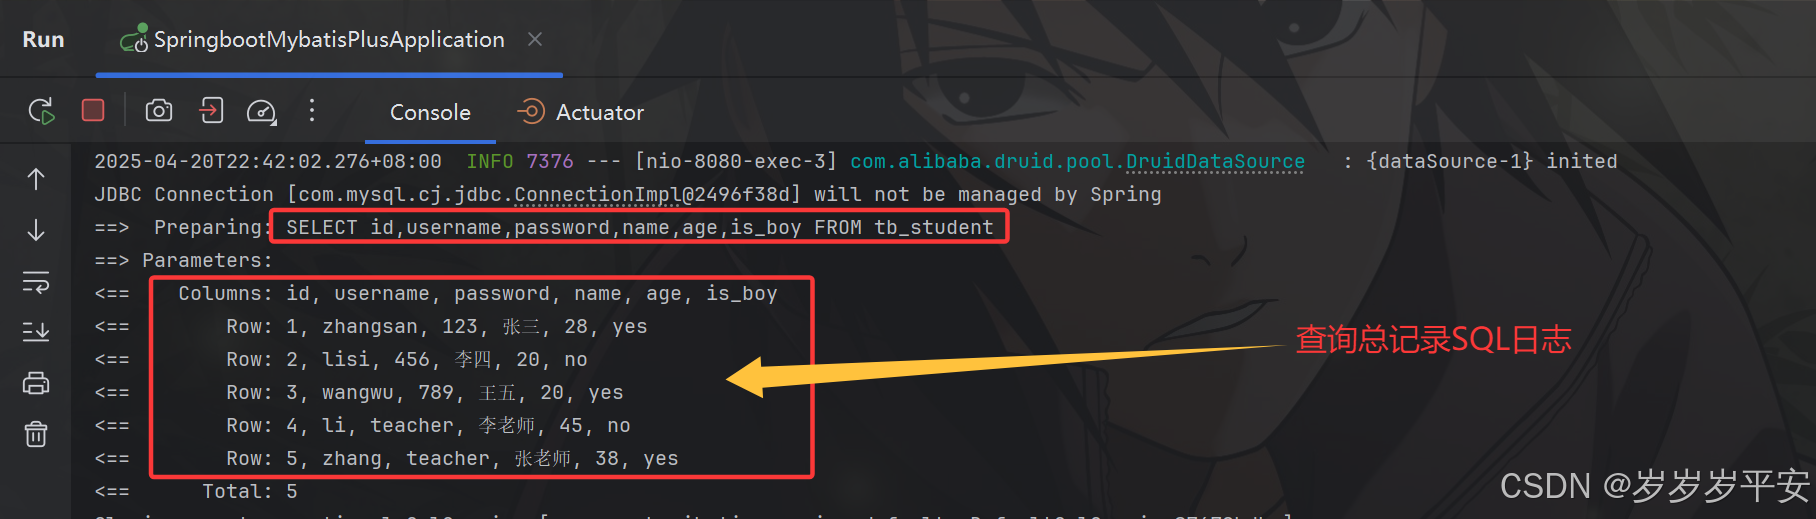
<1>http://localhost:8080/student/list。(查询所有)
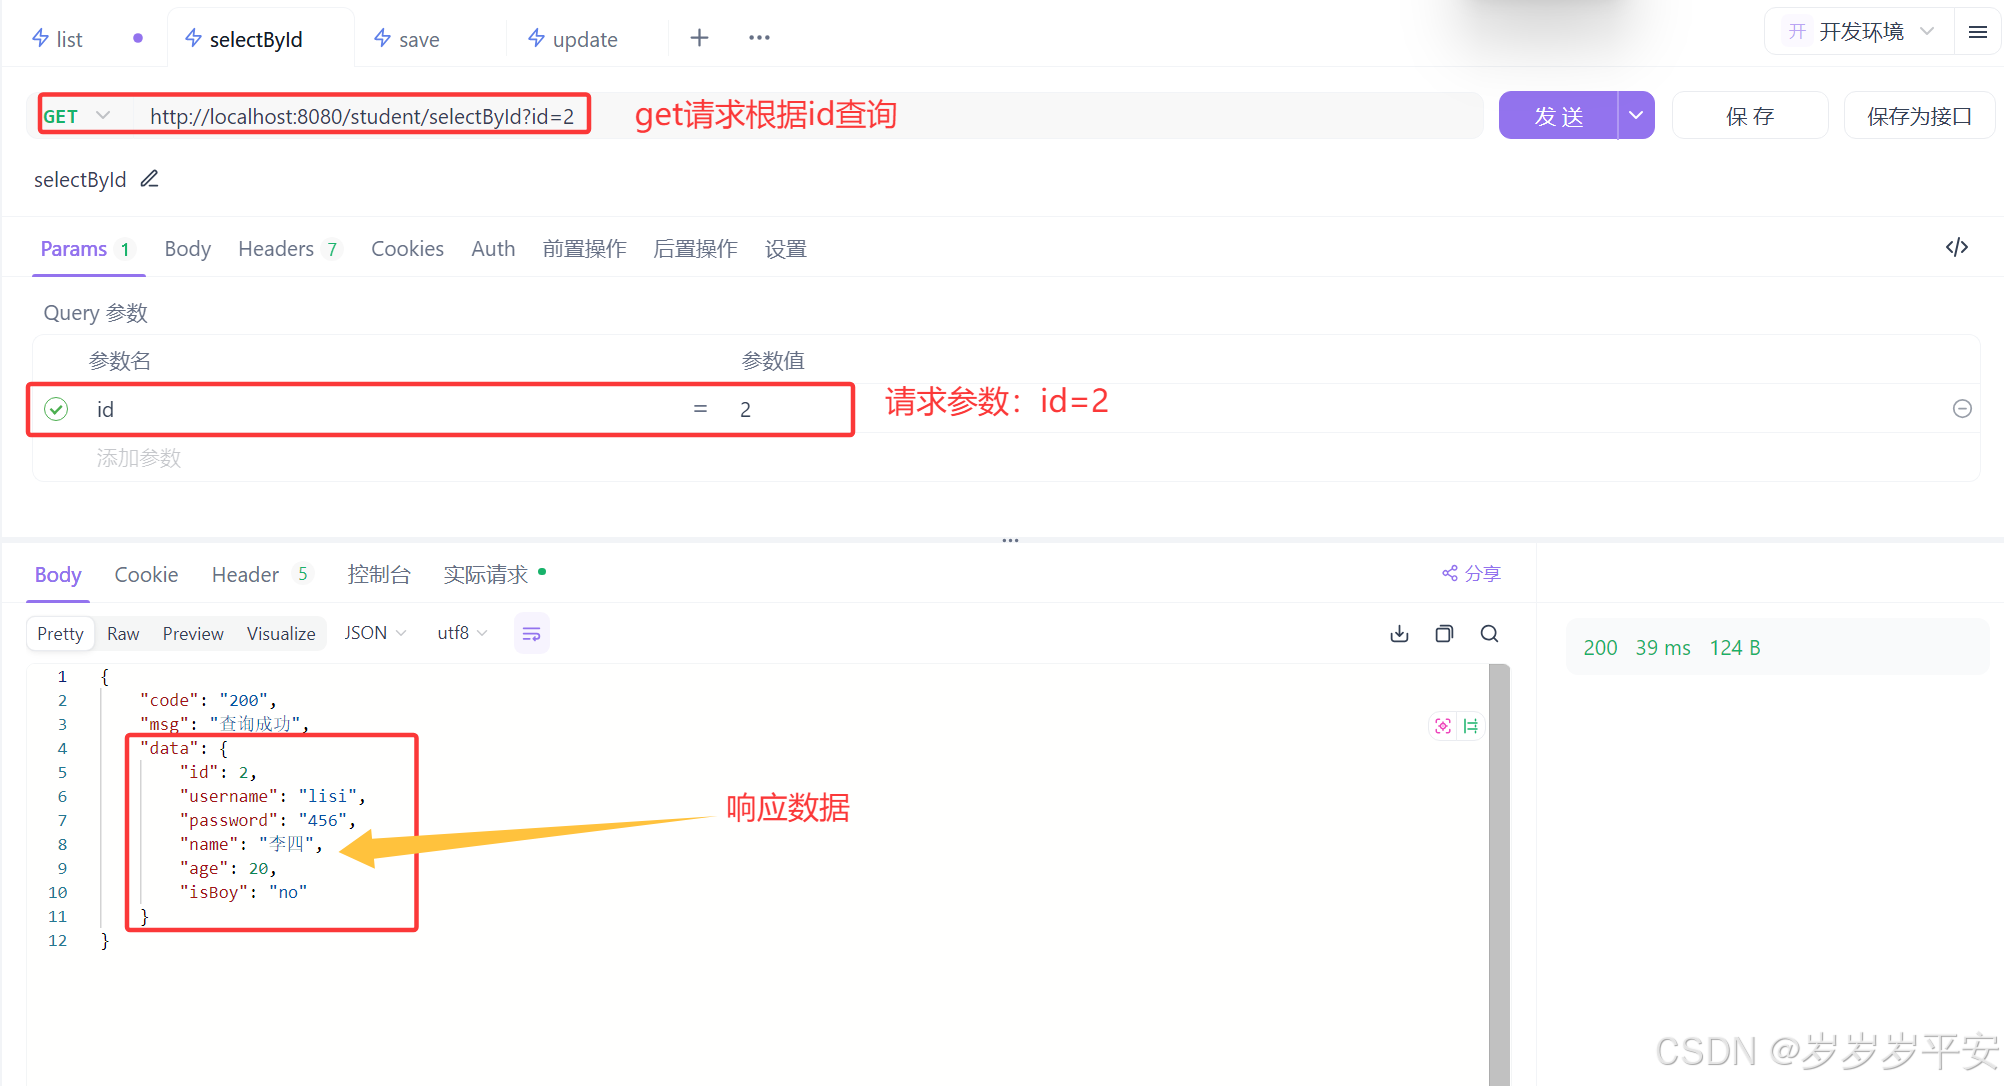
<2>http://localhost:8080/student/selectById。(根据id查询)
<3>http://localhost:8080/student/save。(新增)
修改配置文件中连接池的空闲检测参数。
<4>http://localhost:8080/student/update。(修改)
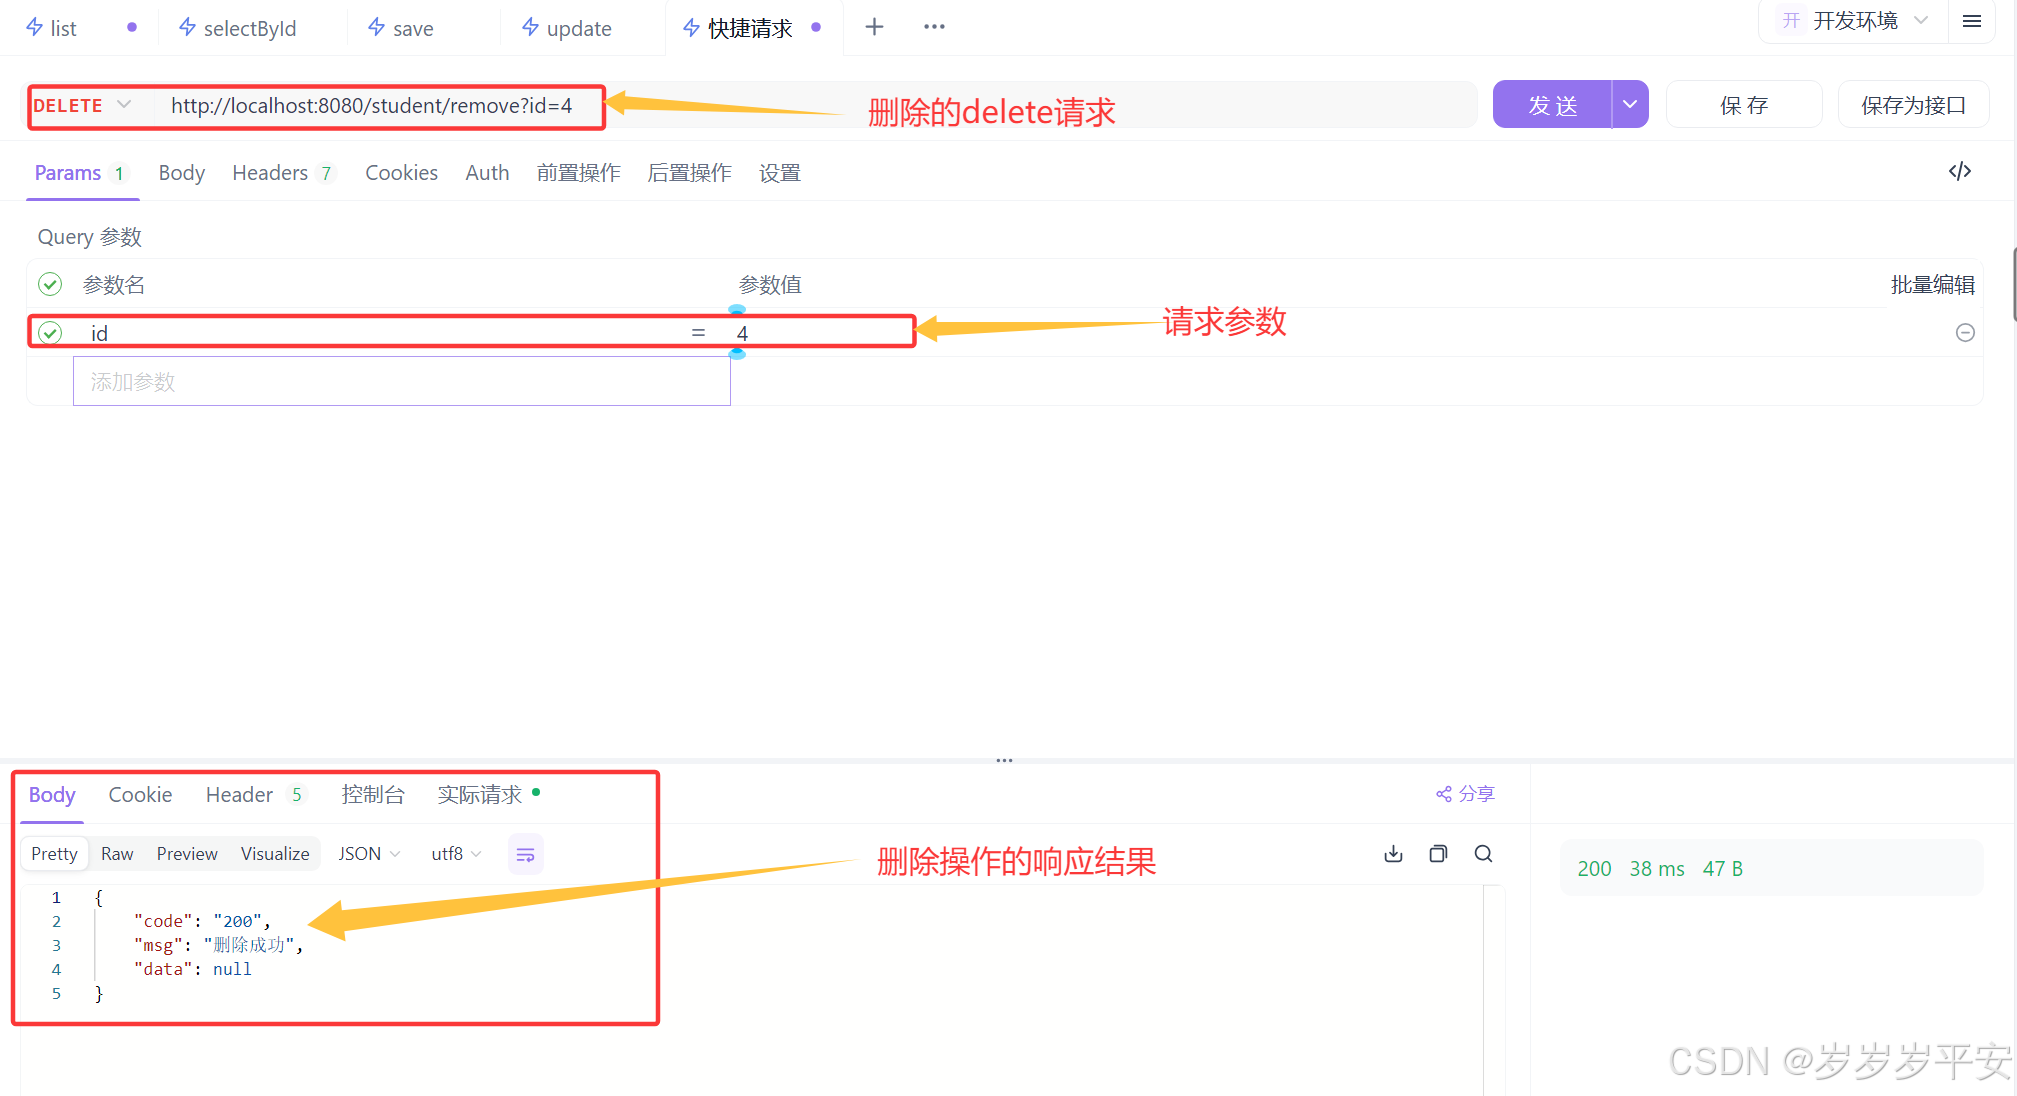
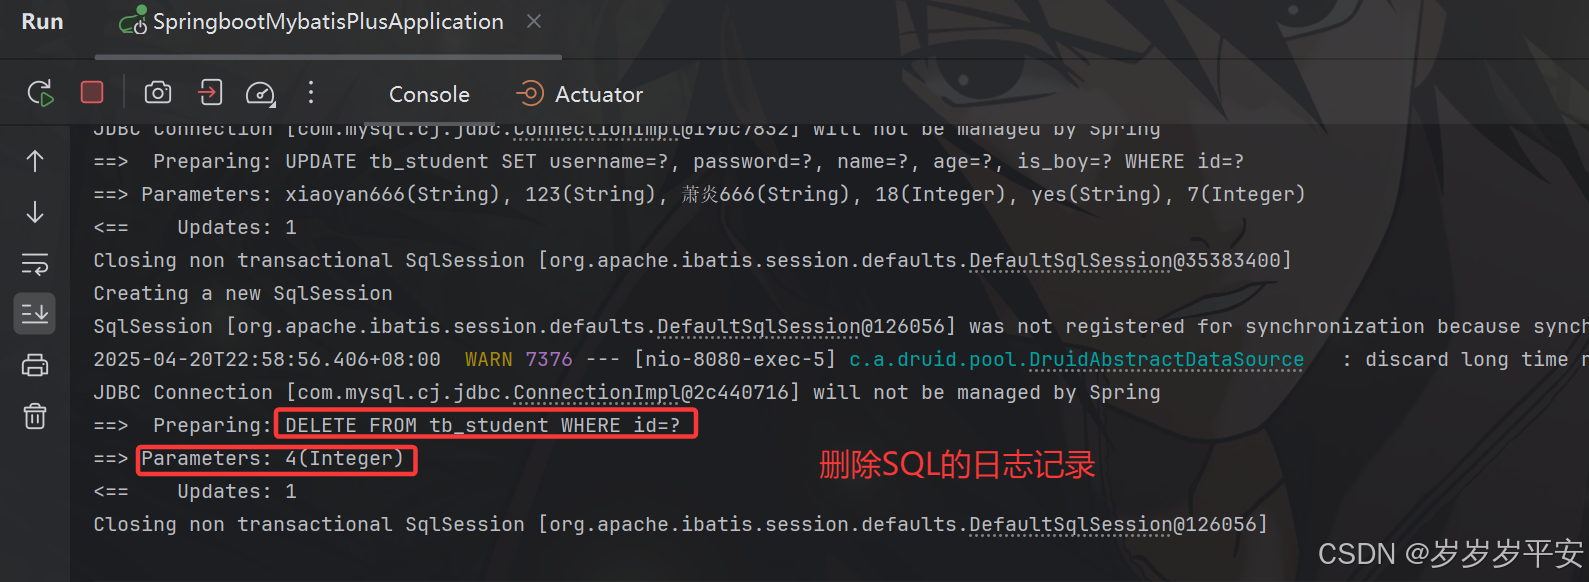
<5>http://localhost:8080/student/remove。(删除)
一、快速搭建SpringBoot-Web工程脚手架。
1.1 Spring Initializr 初始化工程。(官方提供)


1.2 工程脚手架初始化详细步骤。(IDEA2024.1.1)

二、MyBatis-Plus的特性与快速上手。
2.1 官网地址与基本特性。
- MyBatis-Plus 🚀 为简化开发而生
2.2 快速上手技术栈基础。

2.3 Spring Boot2 的 MyBatis-Plus Starter 依赖。
<dependency>
    <groupId>com.baomidou</groupId>
    <artifactId>mybatis-plus-boot-starter</artifactId>
    <version>3.5.11</version>
</dependency>
2.4 Spring Boot3 的 MyBatis-Plus Starter 依赖。(当前使用)
<dependency>
    <groupId>com.baomidou</groupId>
    <artifactId>mybatis-plus-spring-boot3-starter</artifactId>
    <version>3.5.11</version>
</dependency>
三、基于SpringBoot实现SSMP整合入门CURD步骤。
3.1 引入Lombok、Druid核心起步依赖。
        <dependency>
            <groupId>org.projectlombok</groupId>
            <artifactId>lombok</artifactId>
            <optional>true</optional>
        </dependency>

        <!-- https://mvnrepository.com/artifact/com.alibaba/druid-spring-boot-starter -->
        <dependency>
            <groupId>com.alibaba</groupId>
            <artifactId>druid-spring-boot-starter</artifactId>
            <version>1.2.8</version>
        </dependency>
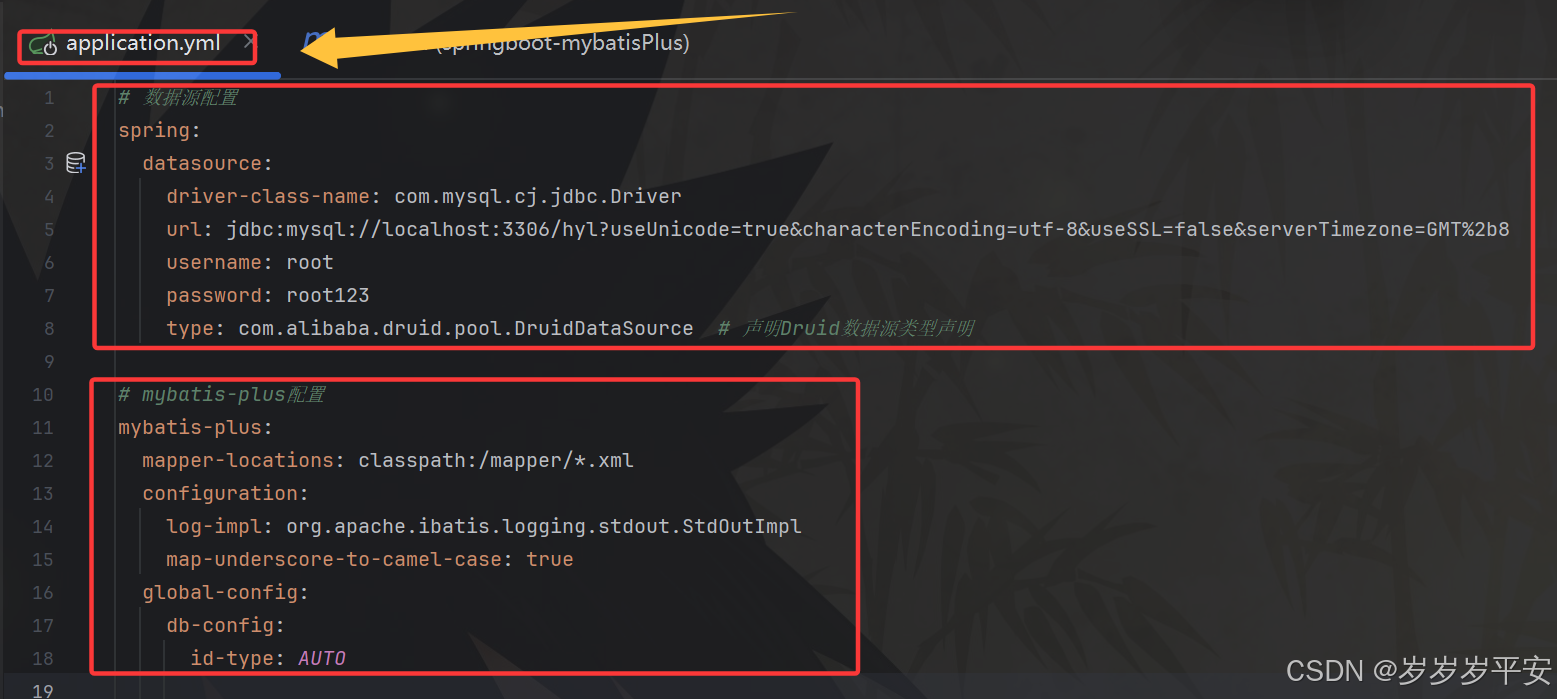
3.2 编写application.yml配置文件。
# 数据源配置
spring:
  datasource:
    driver-class-name: com.mysql.cj.jdbc.Driver
    url: jdbc:mysql://localhost:3306/hyl?useUnicode=true&characterEncoding=utf-8&useSSL=false&serverTimezone=GMT%2b8
    username: root
    password: root123
    type: com.alibaba.druid.pool.DruidDataSource  # 声明Druid数据源类型声明

# mybatis-plus配置
mybatis-plus:
  mapper-locations: classpath:/mapper/*.xml
  configuration:
    log-impl: org.apache.ibatis.logging.stdout.StdOutImpl
    map-underscore-to-camel-case: true
  global-config:
    db-config:
      id-type: AUTO
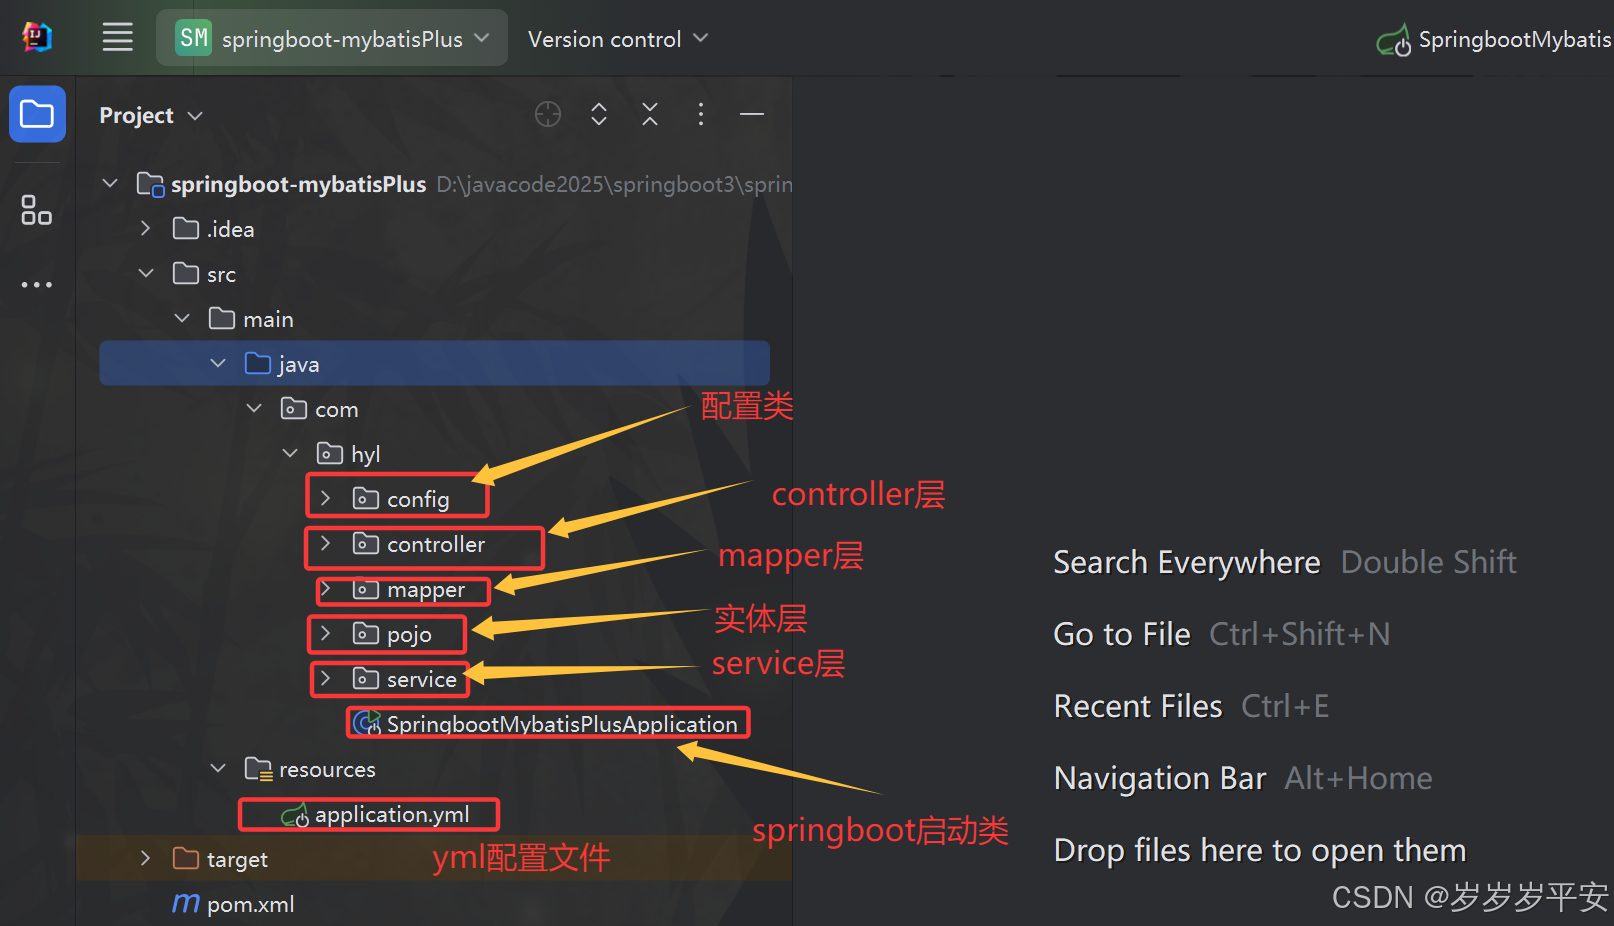
3.3 包结构创建与分层。
3.4 实体类Student。
- 实体类 Student 与数据库表 tb_student 对应,每个属性对应表中的一个字段。
- @TableName 注解指定了表名,@TableField 注解指定了属性对应表中的字段名。
- 代码示例。
package com.hyl.pojo;

import com.baomidou.mybatisplus.annotation.TableField;
import com.baomidou.mybatisplus.annotation.TableName;
import lombok.Data;

@TableName("tb_student")  // 表明该类对应数据库中的 tb_student 表
@Data
public class Student {
    private Integer id;
    private String username;
    private String password;
    private String name;
    private Integer age;
    @TableField("is_boy")  // 表明该属性对应数据库表中的 is_boy 字段
    private String isBoy;
}
3.5 controller层。(RESTful风格的增删改查请求接口)
- http://localhost:8080/student/list。(查询所有)
- http://localhost:8080/student/selectById。(根据id查询)
- http://localhost:8080/student/save。(新增)
- http://localhost:8080/student/update。(修改)
- http://localhost:8080/student/remove。(删除)
package com.hyl.controller;

import com.hyl.pojo.Result;
import com.hyl.pojo.Student;
import com.hyl.service.StudentService;
import jakarta.annotation.Resource;
import org.springframework.web.bind.annotation.*;

import java.util.List;

@RestController
@RequestMapping("/student")
public class StudentController {

    @Resource
    private StudentService studentService;

    /**
     * 查询所有信息
     * @return
     */
    @GetMapping("/list")
    public Result selectList(){
        List<Student> list = studentService.list();
        return Result.success("查询成功",list);
    }

    /**
     * 根据id查询
     * @param id
     * @return
     */
    @GetMapping("selectById")
    public Result selectById(@RequestParam Integer id){
        Student student = studentService.getById(id);
        return Result.success("查询成功",student);
    }

    /**
     * 新增
     * @param student
     * @return
     */
    @PostMapping("/save")
    public Result save(@RequestBody Student student){
        boolean flag = studentService.save(student);
        return flag ? Result.success("新增成功") : Result.error();
    }

    /**
     * 修改
     * @param student
     * @return
     */
    @PutMapping("/update")
    public Result update(@RequestBody Student student){
        boolean flag = studentService.updateById(student);
        return flag ? Result.success("修改成功") : Result.error();
    }

    /**
     * 删除
     * @param id
     * @return
     */
    @DeleteMapping("/remove")
    public Result delete(@RequestParam Integer id){
        boolean flag = studentService.removeById(id);
        return flag ? Result.success("删除成功") : Result.error();
    }

}
3.6 service层。(MyBatis-Plus开发极简化)
<1>StudentService。(继承 IService 接口)
- 注意:IService<Student实体类>。
package com.hyl.service;

import com.baomidou.mybatisplus.extension.service.IService;
import com.hyl.pojo.Student;

public interface StudentService extends IService<Student> {
}
<2>StudentServiceImpl。(继承 ServiceImpl 类。实现 StudentService 接口)
- 注意:ServiceImpl<StudentMapper接口,Student实体类>。
package com.hyl.service.impl;

import com.baomidou.mybatisplus.extension.service.impl.ServiceImpl;
import com.hyl.mapper.StudentMapper;
import com.hyl.pojo.Student;
import com.hyl.service.StudentService;
import org.springframework.stereotype.Service;

@Service
public class StudentServiceImpl extends ServiceImpl<StudentMapper, Student> implements StudentService {
}
3.7 mapper层。(MyBatis-Plus开发极简化)
<1>StudentMapper。(继承 BaseMapper 接口)
- 注意:BaseMapper<Student实体类>。
package com.hyl.mapper;

import com.baomidou.mybatisplus.core.mapper.BaseMapper;
import com.hyl.pojo.Student;

public interface StudentMapper extends BaseMapper<Student> {
}
3.8 封装响应结果类Result。
package com.hyl.pojo;

import lombok.Data;

//封装响应结果类
@Data
public class Result {
    private String code;
    private String msg;
    private Object data;

    public Result() {
    }

    public Result(String code, String msg) {
        this.code = code;
        this.msg = msg;
    }

    public Result(String code, String msg, Object data) {
        this.code = code;
        this.msg = msg;
        this.data = data;
    }

    //响应success(无数据返回)
    public static Result success(){
        return new Result("200","操作成功");
    }
    //响应success(无数据返回)
    public static Result success(String msg){
        return new Result("200",msg);
    }
    //响应success(有数据返回)
    public static Result success(Object data) {
        return new Result("200","操作成功",data);
    }
    //响应success(有数据返回)
    public static Result success(String msg,Object data) {
        return new Result("200",msg,data);
    }

    //响应error(无数据返回)
    public static Result error(){
        return new Result("500","操作失败");
    }
    //响应error(自定义异常信息提示)
    public static Result error(String code, String msg){
        Result result = new Result();
        result.setCode(code);
        result.setMsg(msg);
        return result;
    }

}
3.9 增删改查接口的测试与响应。
<1>http://localhost:8080/student/list。(查询所有)
<2>http://localhost:8080/student/selectById。(根据id查询)
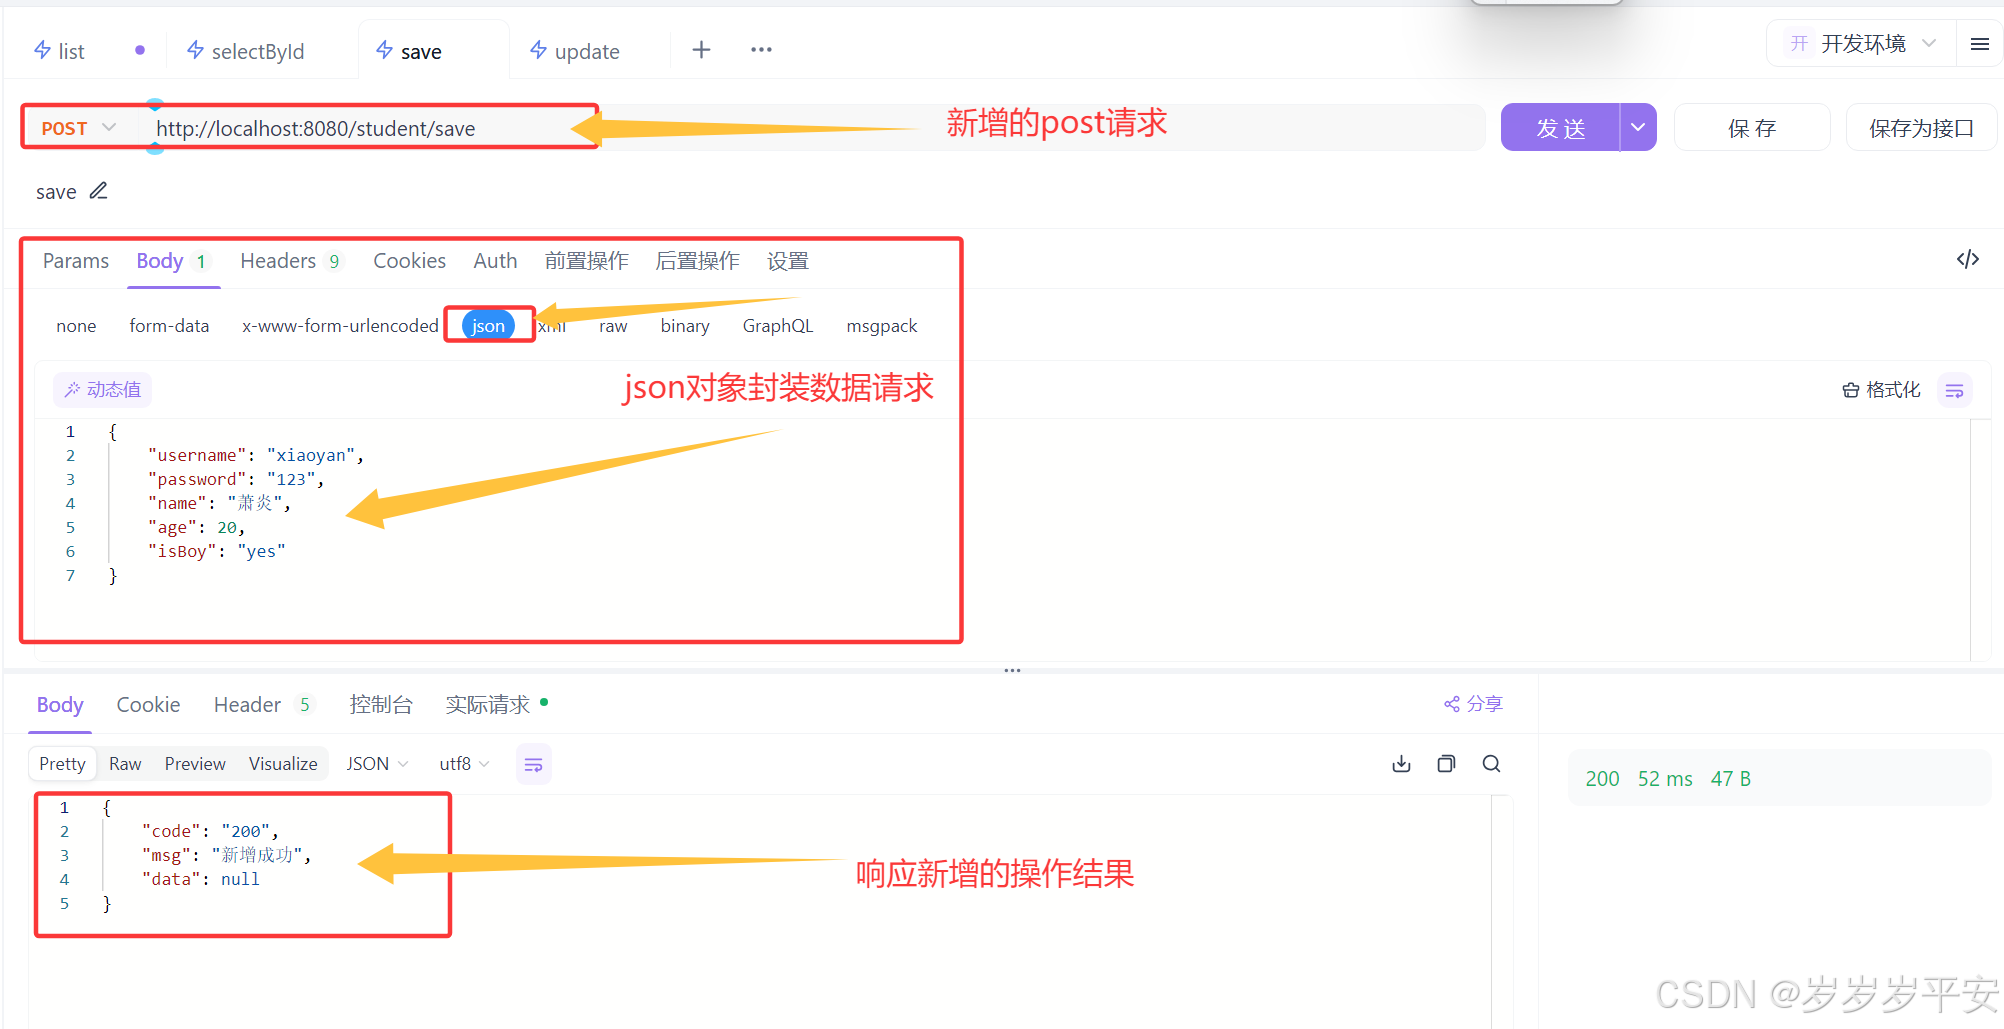
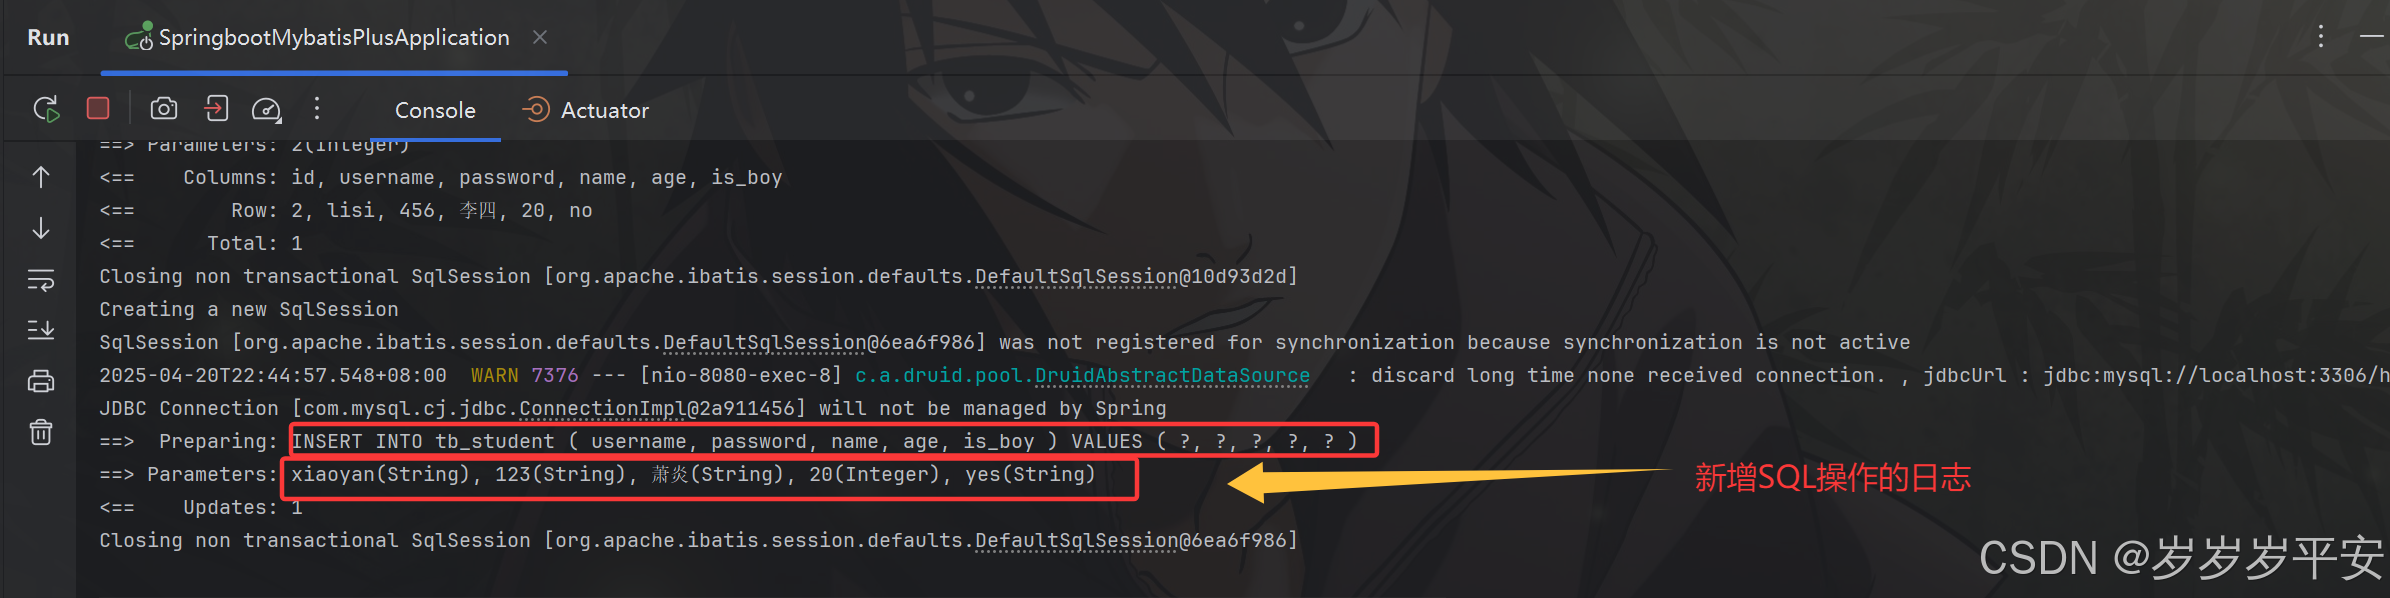
<3>http://localhost:8080/student/save。(新增)
修改配置文件中连接池的空闲检测参数。
- WARN Druid的日志暂时不需要管。因为这是 Druid 的正常机制,用于清理无效连接,避免连接泄漏。
- 可以在 application.yml 中修改连接池的空闲检测参数,避免过早关闭正常连接。
spring:
  datasource:
    druid:
      # 配置连接空闲时间(单位:毫秒),默认 30 分钟(1800000ms),可适当延长
      min-evictable-idle-time-millis: 1800000
      # 检测空闲连接的间隔时间(单位:毫秒),默认 60 秒(60000ms)
      time-between-eviction-runs-millis: 60000
      # 申请连接时是否检测有效性(开启后,避免获取到无效连接)
      test-on-borrow: true
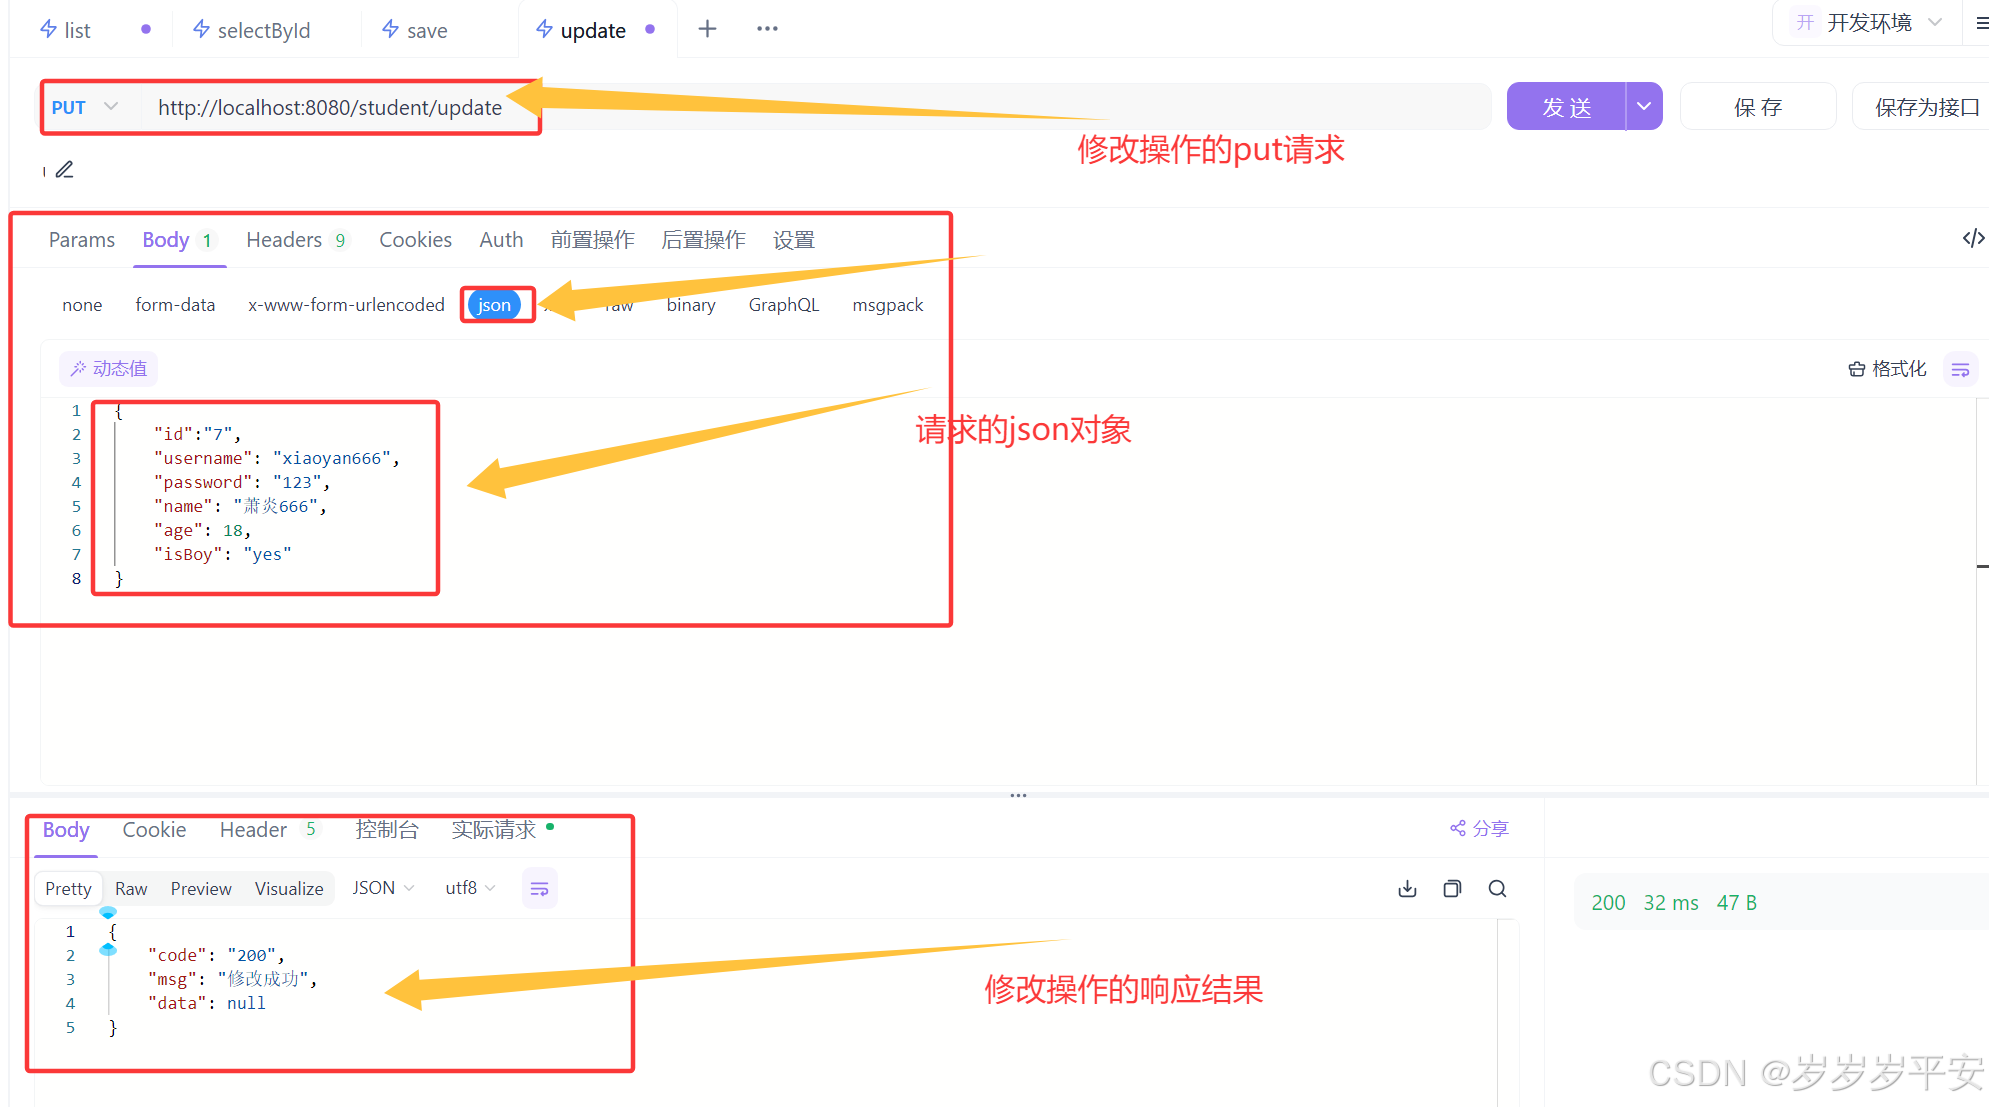
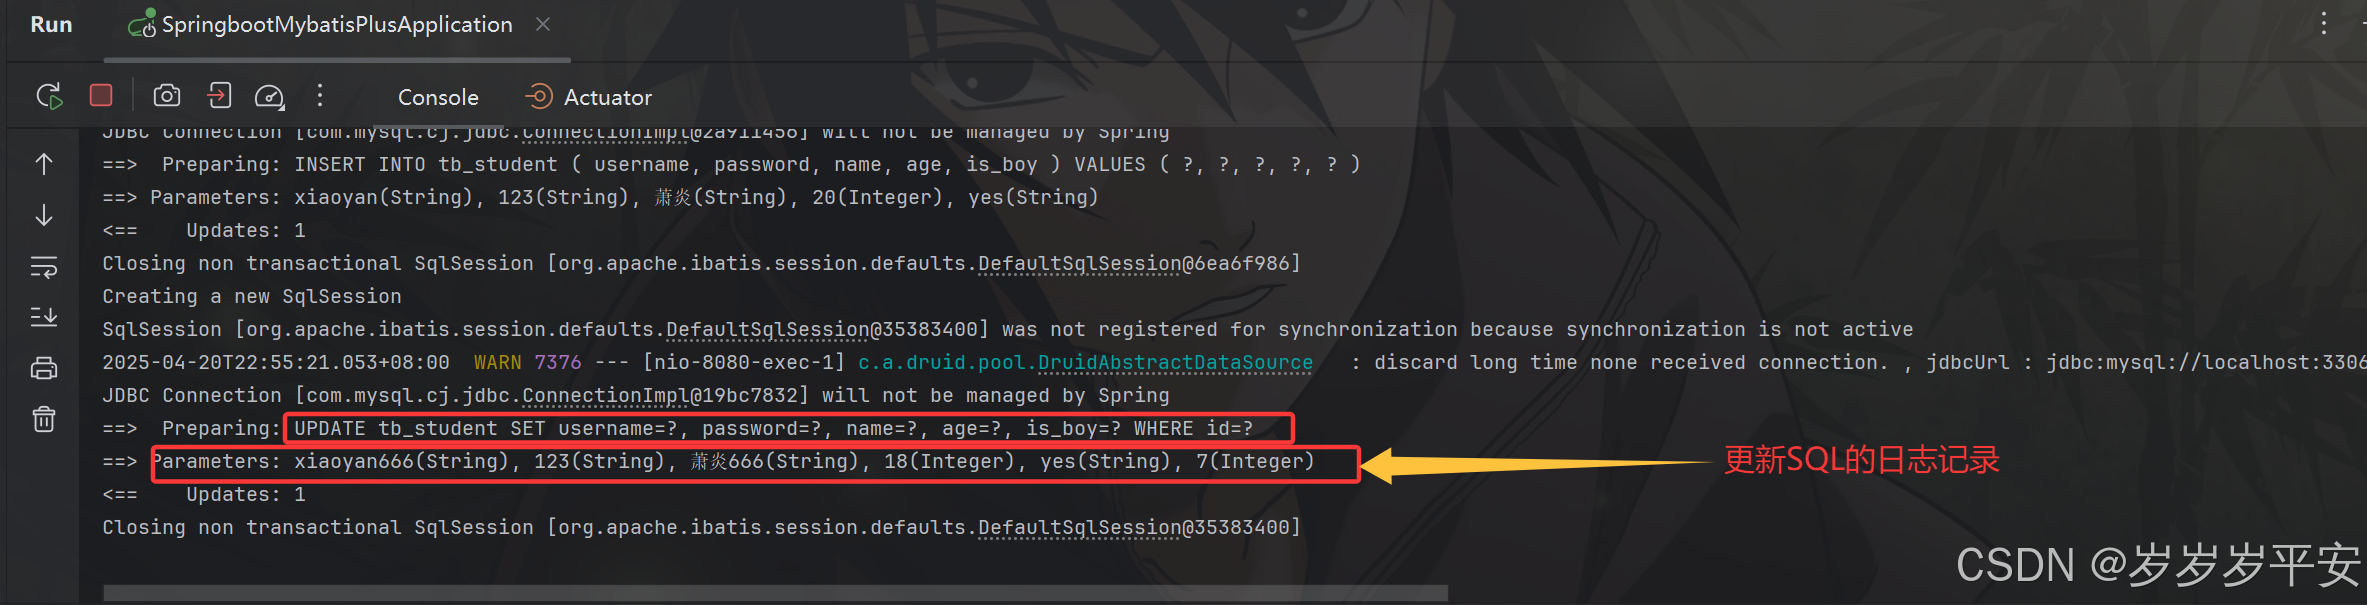
<4>http://localhost:8080/student/update。(修改)
<5>http://localhost:8080/student/remove。(删除)


![BUUCTF-[GWCTF 2019]re3](https://i-blog.csdnimg.cn/img_convert/730b9bfcf31517e9d5835f9bdcf201f9.png)