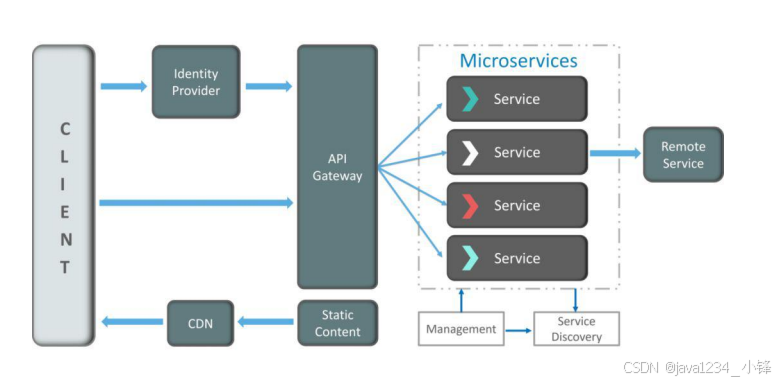
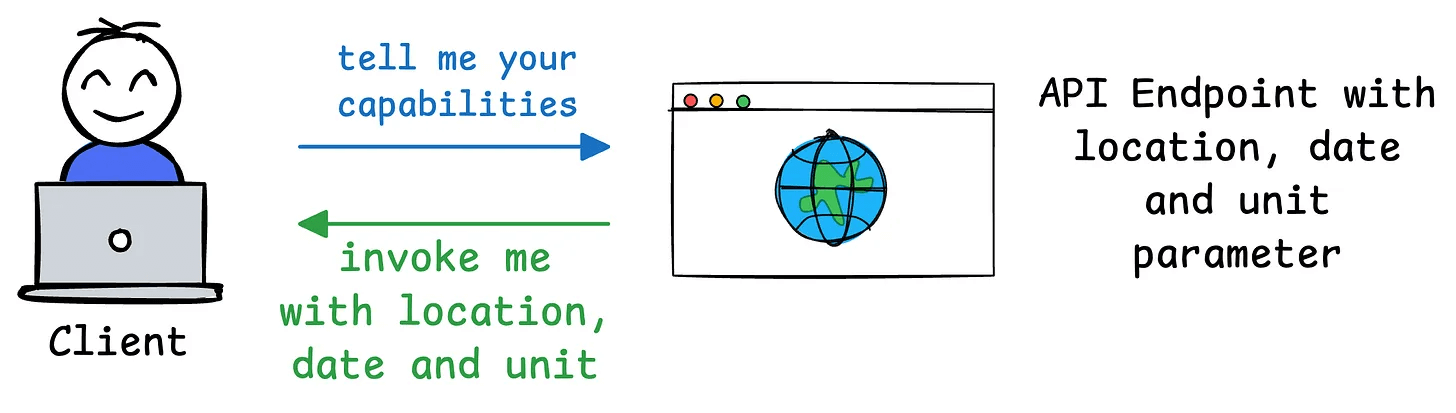
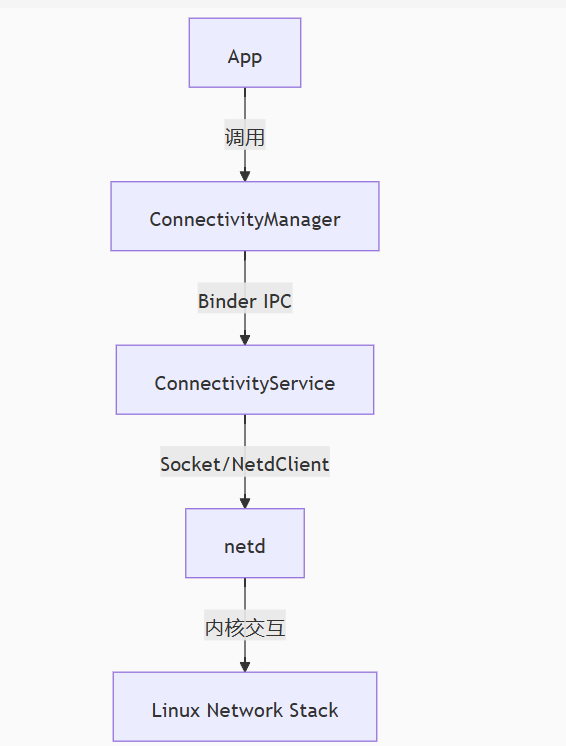
1 整体架构
(出处见水印)
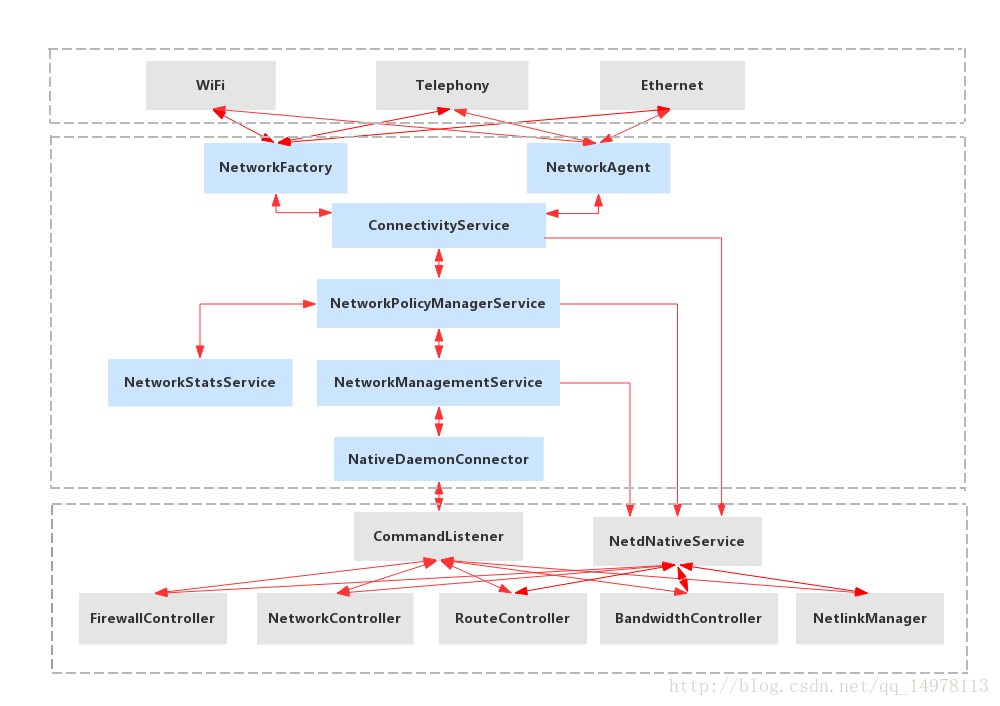
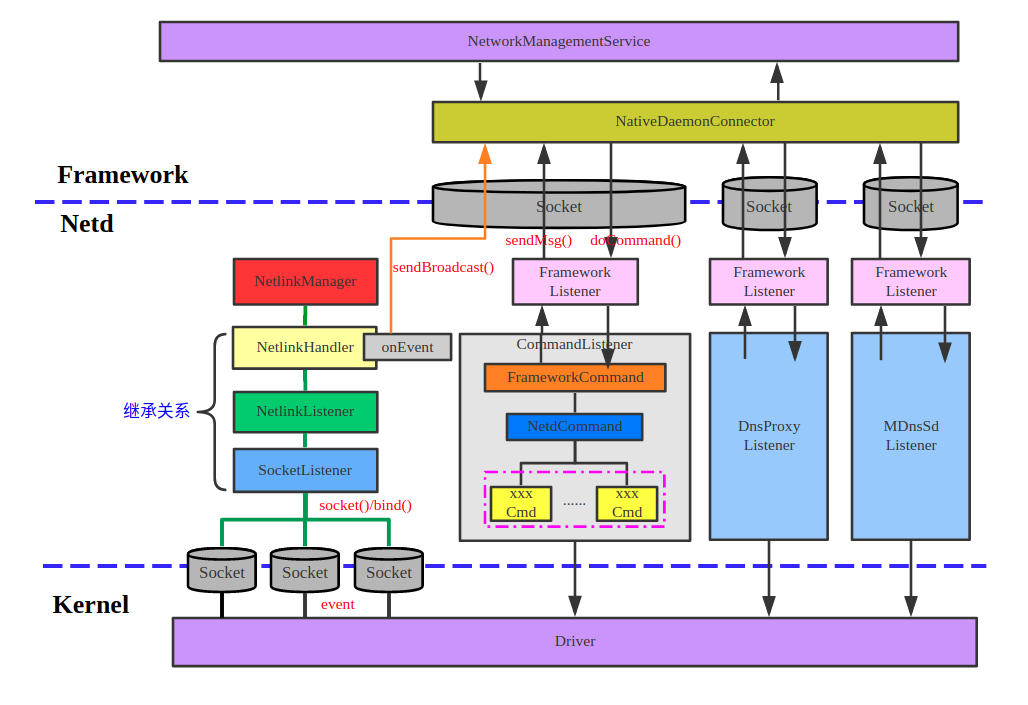 这两张是能找到的比较清楚的图。目前可以看出,底层的网络业务,还是传统的linux内核提供。(注:这两个图我个人觉得不是非常对。。。)
在安卓上增加的两个比较重要的部分分别是ConnectivityService和netd。这两个都是在system分区。通过socket和底层通信。
system分区和vendor分区区别如下:
| 分区 | 功能 |
|---|---|
system(AOSP) | 提供标准的网络服务,如 ConnectivityService。同时,传统的linux网络服务比如DNS,iptables,routers等也在system分区。 |
vendor | 实现 HAL,比如 Wifi HAL、RIL(Radio Interface Layer),5G HAL |
init.rc | 控制 netd 启动、网络接口初始化 |
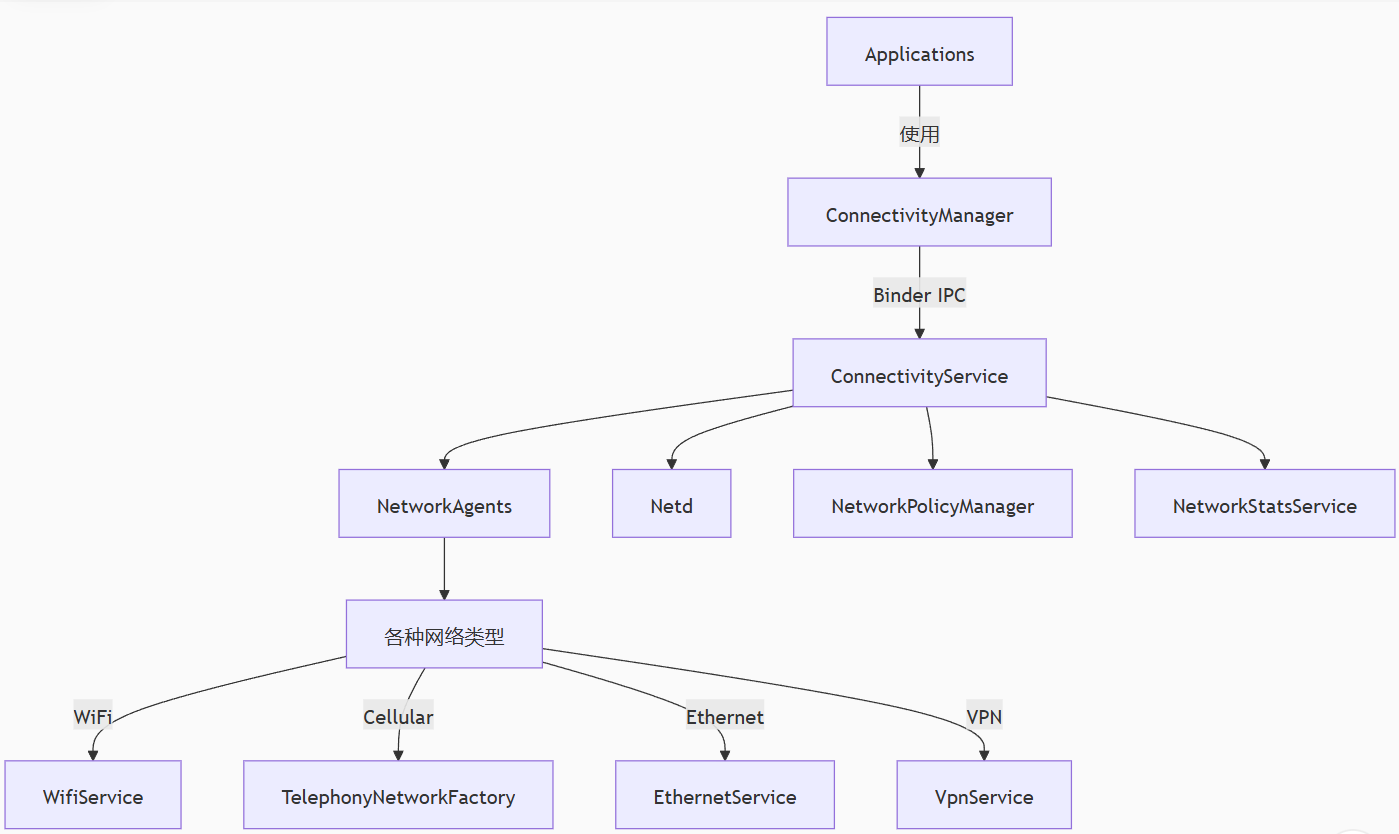
ConnectivityService提供上层封装给app,通过binder连接netd,netd封装了底层网络功能和驱动HAL。
2 ConnectivityManager/ConnectivityService
2.1 ConnectivityManager

使用还是比较简单,在app层主要就是ConnectivityManager,不过这里只能获取一些网络信息。
API文档:https://developer.android.com/reference/android/net/ConnectivityManage
下面是一些示例代码。
package com.example.connectivitytest;

import android.net.ConnectivityManager;
import android.net.Network;
import android.net.NetworkInfo;
import android.os.Bundle;
import android.content.Context;
import android.widget.TextView;
import androidx.appcompat.app.AppCompatActivity;
import android.net.NetworkCapabilities;

public class MainActivity extends AppCompatActivity {
    private TextView networkStatus;
    private TextView networkStatus1;
    private TextView networkStatus2;

    @Override
    protected void onCreate(Bundle savedInstanceState) {
        super.onCreate(savedInstanceState);
        setContentView(R.layout.activity_main);

        networkStatus = findViewById(R.id.network_status);

        ConnectivityManager cm = (ConnectivityManager) getSystemService(Context.CONNECTIVITY_SERVICE);
        if (cm != null) {
            NetworkInfo activeNetwork = cm.getActiveNetworkInfo();
            boolean isConnected = activeNetwork != null && activeNetwork.isConnected();

            if (isConnected) {
                String type = activeNetwork.getType() == ConnectivityManager.TYPE_WIFI ? "Wi-Fi" : "Mobile Data";
                networkStatus.setText("Connected via: " + type);
            } else {
                networkStatus.setText("Not Connected");
            }
        } else {
            networkStatus.setText("ConnectivityManager unavailable");
        }

        NetworkCapabilities capabilities = cm.getNetworkCapabilities(cm.getActiveNetwork());
        boolean hasInternet = capabilities != null &&
                capabilities.hasCapability(NetworkCapabilities.NET_CAPABILITY_INTERNET);

        networkStatus1 = findViewById(R.id.network_status1);
        if(hasInternet) {
            networkStatus1.setText("Has Internet");
        }

        networkStatus2 = findViewById(R.id.network_status2);
        Network[] allNetworks = cm.getAllNetworks();
        String info = "Network Info :";
        for (Network network : allNetworks) {
            NetworkCapabilities caps = cm.getNetworkCapabilities(network);
            //Log.d("Network Info", caps.toString());
            info += caps.toString();
        }
        networkStatus2.setText(info);
    }
}
在上层还有一些,比如WifiManager、TelephonyManager。
2.2 ConnectivityService
提供了上层很多自动控制功能。比如自动网络切换,自动VPN,节省流程等等。很多针对网络的控制逻辑是在这个部分处理。
这下面内容还是挺多。
常用命令
# 查看当前网络状态
adb shell dumpsys connectivity

# 监控网络事件
adb shell dumpsys connectivity event

# 检查NetworkPolicy
adb shell dumpsys netpolicy
3 netd
3.1 整体说明
在安卓的网络结构中,netd处在更核心的位置。netd的位置大致如下:
netd 提供的内容如下:
防火墙配置(iptables):netd 负责配置和管理防火墙规则。它通过 iptables 命令来处理传入和传出的网络流量。
它还管理 NAT(网络地址转换)和数据包过滤功能。
DNS 配置:netd 负责管理 DNS 配置,包括配置 DNS 服务器和处理 DNS 查询。
IP 地址管理:它管理设备的网络接口,分配和管理 IP 地址等。例如,当设备连接到 Wi-Fi 或蜂窝网络时,netd 会分配 IP 地址。
网络路由管理:netd 配置并管理网络路由规则,确定数据包的转发路径。
VPN 管理:它处理与 VPN 相关的操作,包括路由网络流量、配置 VPN 接口等。
网络统计和监控:netd 提供了对网络连接、数据流量、接口状态等的统计和监控能力。
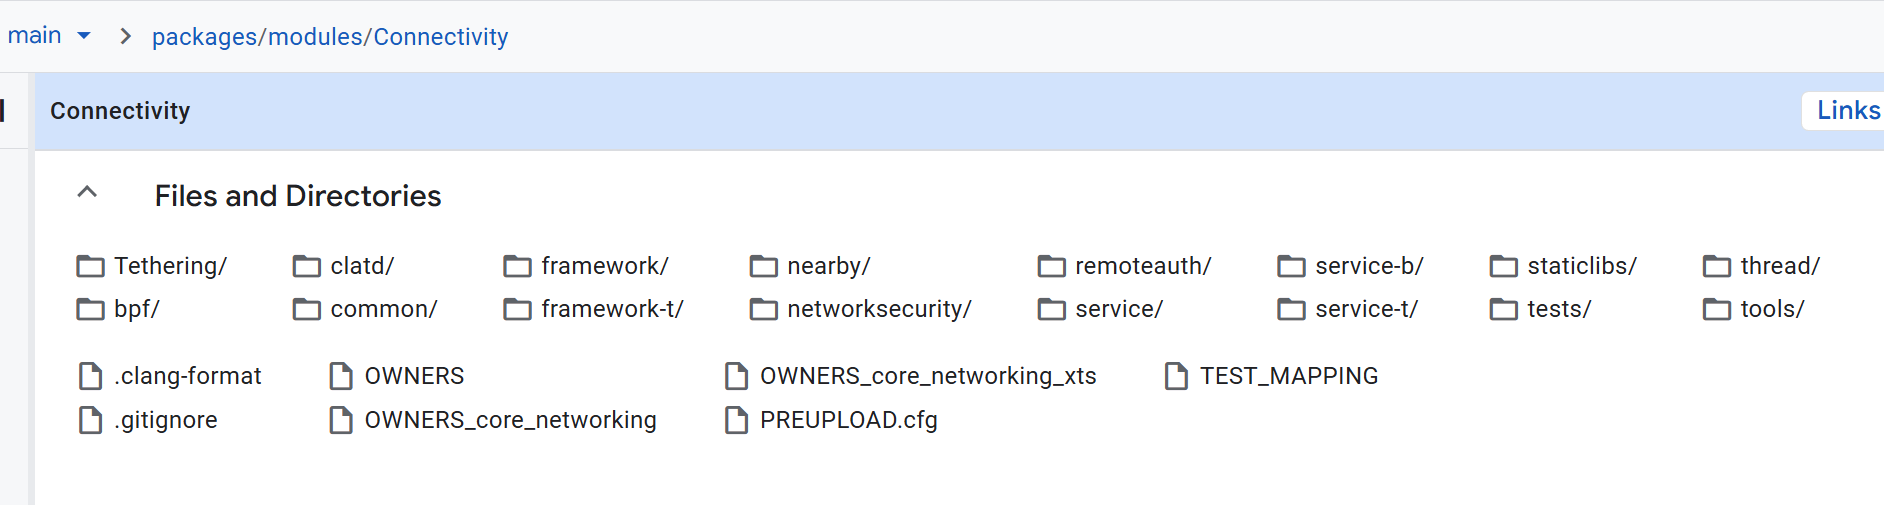
代码是在system/netd/,下载了一下代码,也不是太多东西,如下:
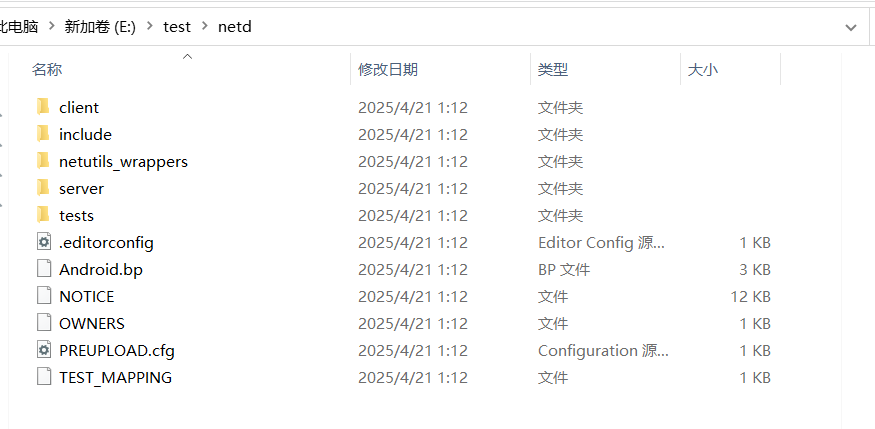
主要还是server里面的东西
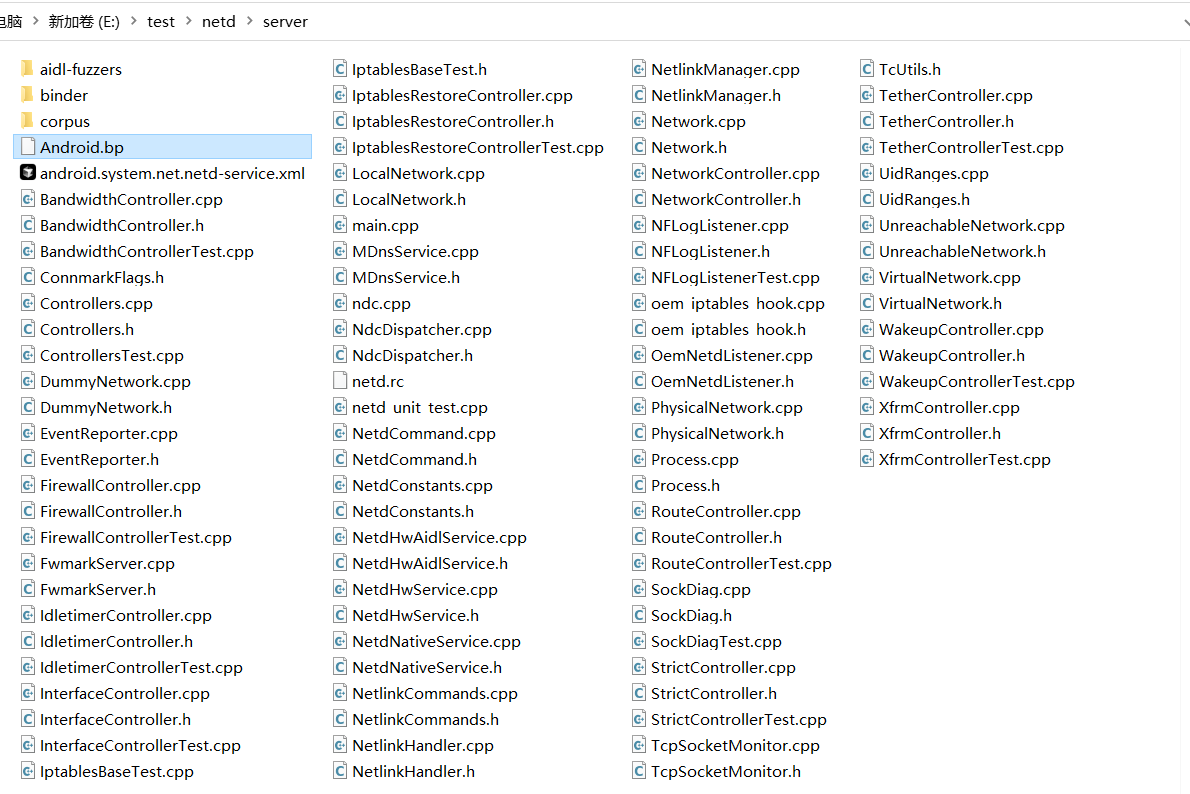
瞟了一眼大概就是除了binder的内容,就是firewall,interface,iptables,netlink,router这就几个老同志。
3.2 iptables
IptablesProcess* IptablesRestoreController::forkAndExec(const IptablesProcessType type) {
    const char* const cmd = (type == IPTABLES_PROCESS) ?
        IPTABLES_RESTORE_PATH : IP6TABLES_RESTORE_PATH;

    // Create the pipes we'll use for communication with the child
    // process. One each for the child's in, out and err files.
    int stdin_pipe[2];
    int stdout_pipe[2];
    int stderr_pipe[2];

    // Assumes stdin, stdout, stderr are already in use.
    if (pipe2(stdin_pipe,  O_CLOEXEC) == -1 ||
        pipe2(stdout_pipe, O_NONBLOCK | O_CLOEXEC) == -1 ||
        pipe2(stderr_pipe, O_NONBLOCK | O_CLOEXEC) == -1) {

        ALOGE("pipe2() failed: %s", strerror(errno));
        return nullptr;
    }

    const auto& sys = sSyscalls.get();
    StatusOr<pid_t> child_pid = sys.fork();
    if (!isOk(child_pid)) {
        ALOGE("fork() failed: %s", strerror(child_pid.status().code()));
        return nullptr;
    }

    if (child_pid.value() == 0) {
        // The child process. Reads from stdin, writes to stderr and stdout.

        // stdin_pipe[0] : The read end of the stdin pipe.
        // stdout_pipe[1] : The write end of the stdout pipe.
        // stderr_pipe[1] : The write end of the stderr pipe.
        // Note: dup2 does not set O_CLOEXEC. std*_pipe[*] is closed by execl.
        if (dup2(stdin_pipe[0], 0) == -1 ||
            dup2(stdout_pipe[1], 1) == -1 ||
            dup2(stderr_pipe[1], 2) == -1) {
            ALOGE("dup2() failed: %s", strerror(errno));
            abort();
        }

        if (execl(cmd,
                  cmd,
                  "--noflush",  // Don't flush the whole table.
                  "-w",         // Wait instead of failing if the lock is held.
                  "-v",         // Verbose mode, to make sure our ping is echoed
                                // back to us.
                  nullptr) == -1) {
            ALOGE("execl(%s, ...) failed: %s", cmd, strerror(errno));
            abort();
        }

        // This statement is unreachable. We abort() upon error, and execl
        // if everything goes well.
        return nullptr;
    }

    // The parent process.

    if (close(stdin_pipe[0]) == -1 ||
        close(stdout_pipe[1]) == -1 ||
        close(stderr_pipe[1]) == -1) {
        ALOGW("close() failed: %s", strerror(errno));
    }

    // stdin_pipe[1] : The write end of the stdin pipe.
    // stdout_pipe[0] : The read end of the stdout pipe.
    // stderr_pipe[0] : The read end of the stderr pipe.
    return new IptablesProcess(type,
            child_pid.value(), stdin_pipe[1], stdout_pipe[0], stderr_pipe[0]);
}
可以看出就是调用的iptables-restore命令。
3.3 interface接口
// Run @fn on each interface as well as 'default' in the path @dirname.
void forEachInterface(
const std::string& dirname,
const std::function<void(const std::string& path, const std::string& iface)>& fn) {
// Run on default, which controls the behavior of any interfaces that are created in the future.
fn(dirname, "default");
DIR* dir = opendir(dirname.c_str());
if (!dir) {
ALOGE("Can't list %s: %s", dirname.c_str(), strerror(errno));
return;
}
while (true) {
const dirent *ent = readdir(dir);
if (!ent) {
break;
}
if ((ent->d_type != DT_DIR) || !isInterfaceName(ent->d_name)) {
continue;
}
fn(dirname, ent->d_name);
}
closedir(dir);
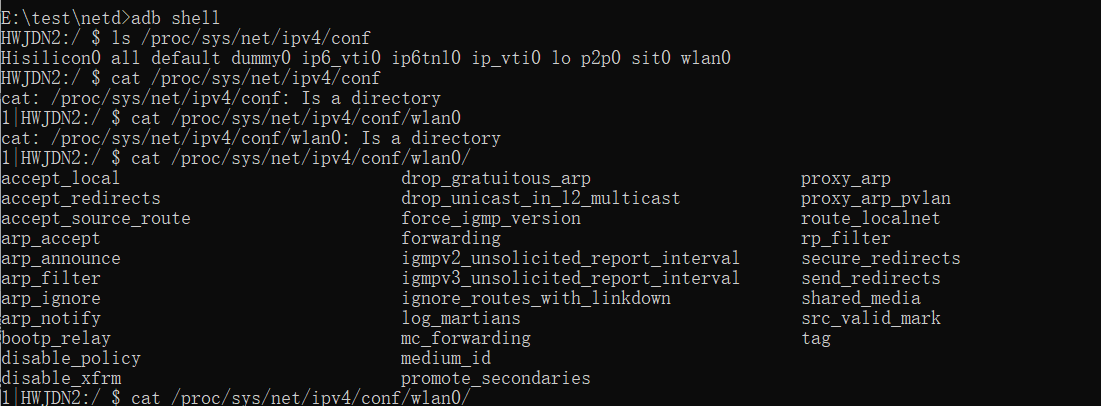
}可以看出,还是直接用的linux的网络接口,从/proc/sys/net/ipv4/conf去获取数据
3.4 NDC
这个就是命令行下的netd操作工具。
网络接口
ndc interface list
ndc interface show eth0
ndc interface setcfg eth0 192.168.1.2 24 up
ndc interface getcfg eth0
ndc interface clearaddrs eth0
DNS
ndc resolver setnetdns <netId> <domain> <dns1> [dns2] ...
ndc resolver getnetdns <netId>
ndc resolver flushdefaultif
防火墙
ndc firewall enable
ndc firewall disable
ndc firewall set_interface_rule wlan0 allow
ndc firewall set_uid_rule standby 1000 allow
网络策略
ndc bandwidth enable
ndc bandwidth disable
ndc bandwidth addnaughtyapps 10064
ndc bandwidth removenaughtyapps 10064
Tethering(共享网络)
ndc tether interface add rndis0
ndc tether interface remove rndis0
ndc tether start
ndc tether stop
其它。。。
4 其它的命令
| 工具 | 用途 |
|---|---|
ip / ifconfig | 传统网络命令,底层操作网络接口 |
iptables / ip6tables | 控制防火墙规则 |
netstat / ss | 查看网络连接状态 |
ping / traceroute | 测试网络连通性 |
setprop / getprop | 设置和读取系统属性(部分 netd 配置通过属性控制) |
logcat | 查看 netd 输出日志 |
strace / lsof | 调试辅助工具,查看 netd 打开的文件、socket 等 |
好了,就是简单看看,先这样吧。。。