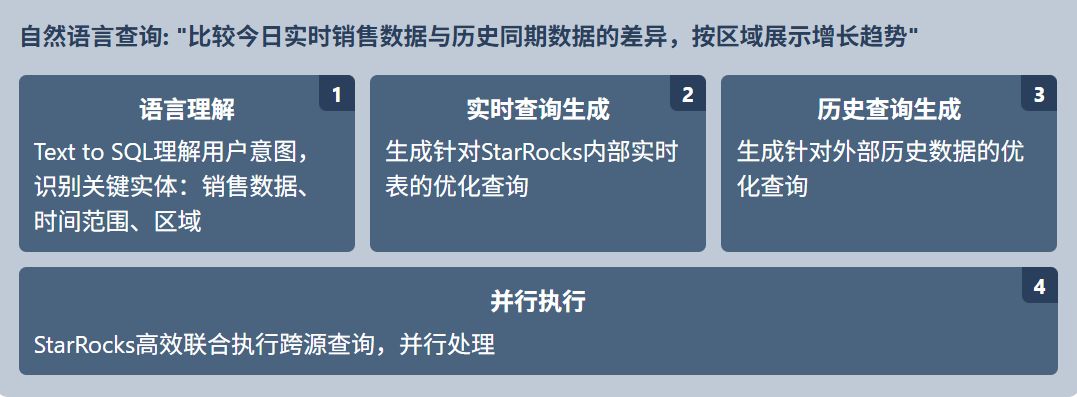
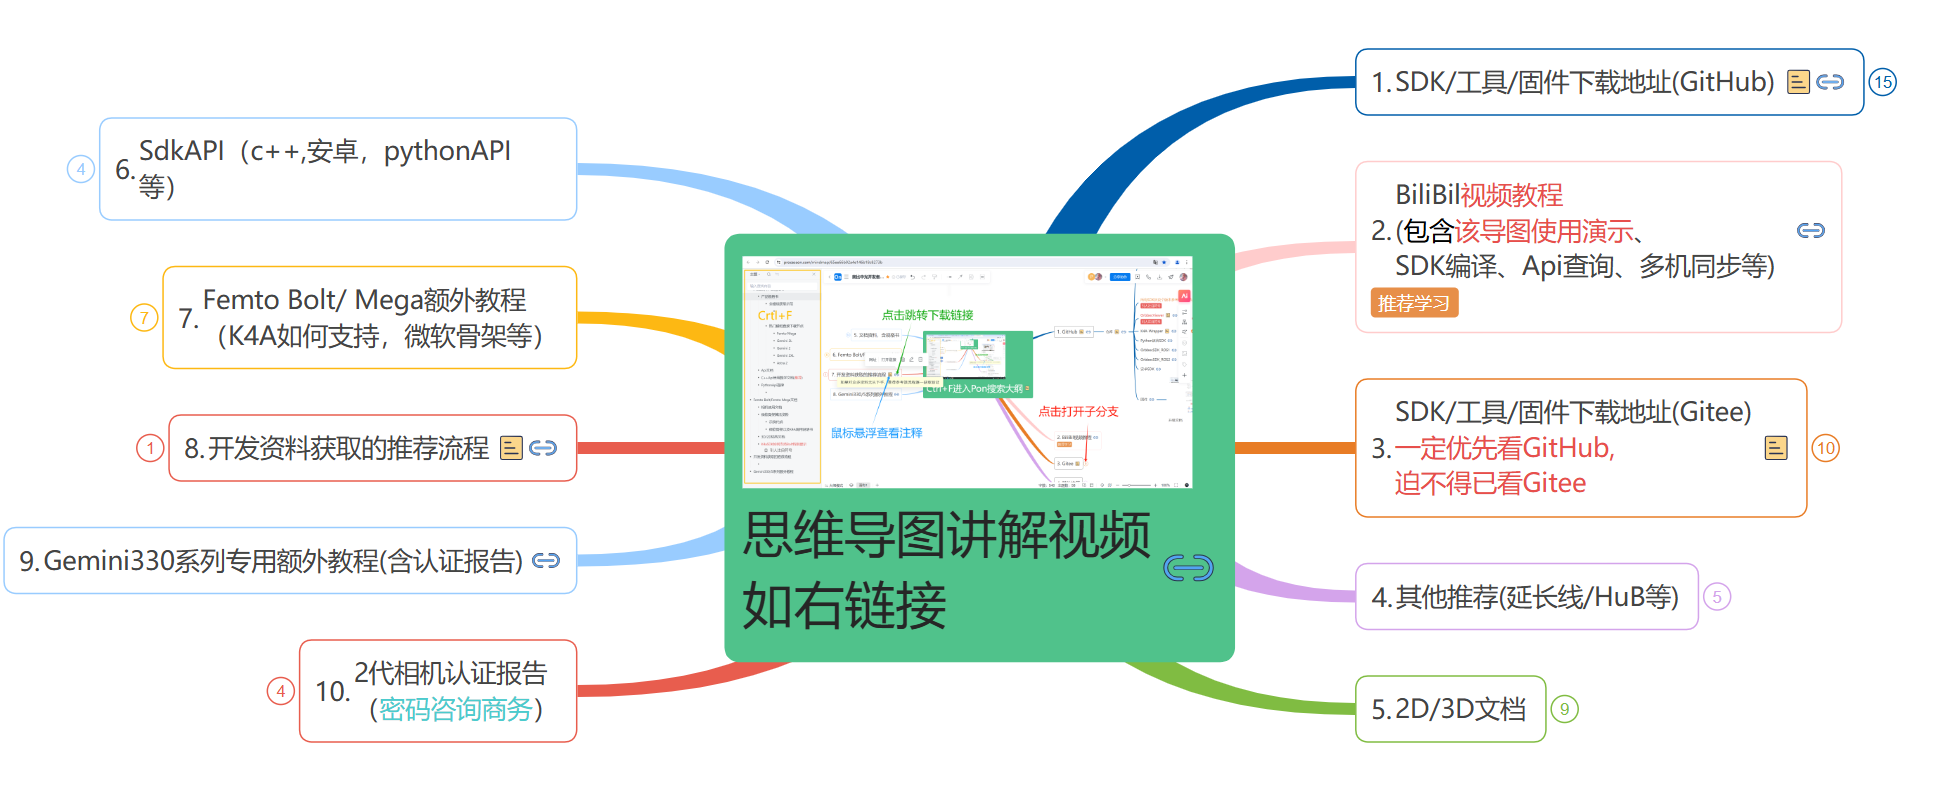
针对奥比中光 tof相机,官方提供的资料如下ProcessOn Mindmap|思维导图
Orbbec SDK Python Wrapper基于Orbbec SDK进行设计封装,主要实现数据流接收,设备指令控制。下面就其开发适配进行如下总结:
(1)系统配置
下面以win10 x64系统为例,首先需要提前配置好cmake,vs2019等软件,然后根据相机型号下载对应的源码版本
git clone https://github.com/orbbec/pyorbbecsdk.gitcmake安装路径:Download CMake
vs安装路径:Visual Studio 2022 IDE - 适用于软件开发人员的编程工具
(2)sdk编译安装
这一步在B站上up主有分享,但是速度很快也很粗糙,对于第一次使用确实比较麻烦。下面简单记录一下我的操作过程:
- cmake编译
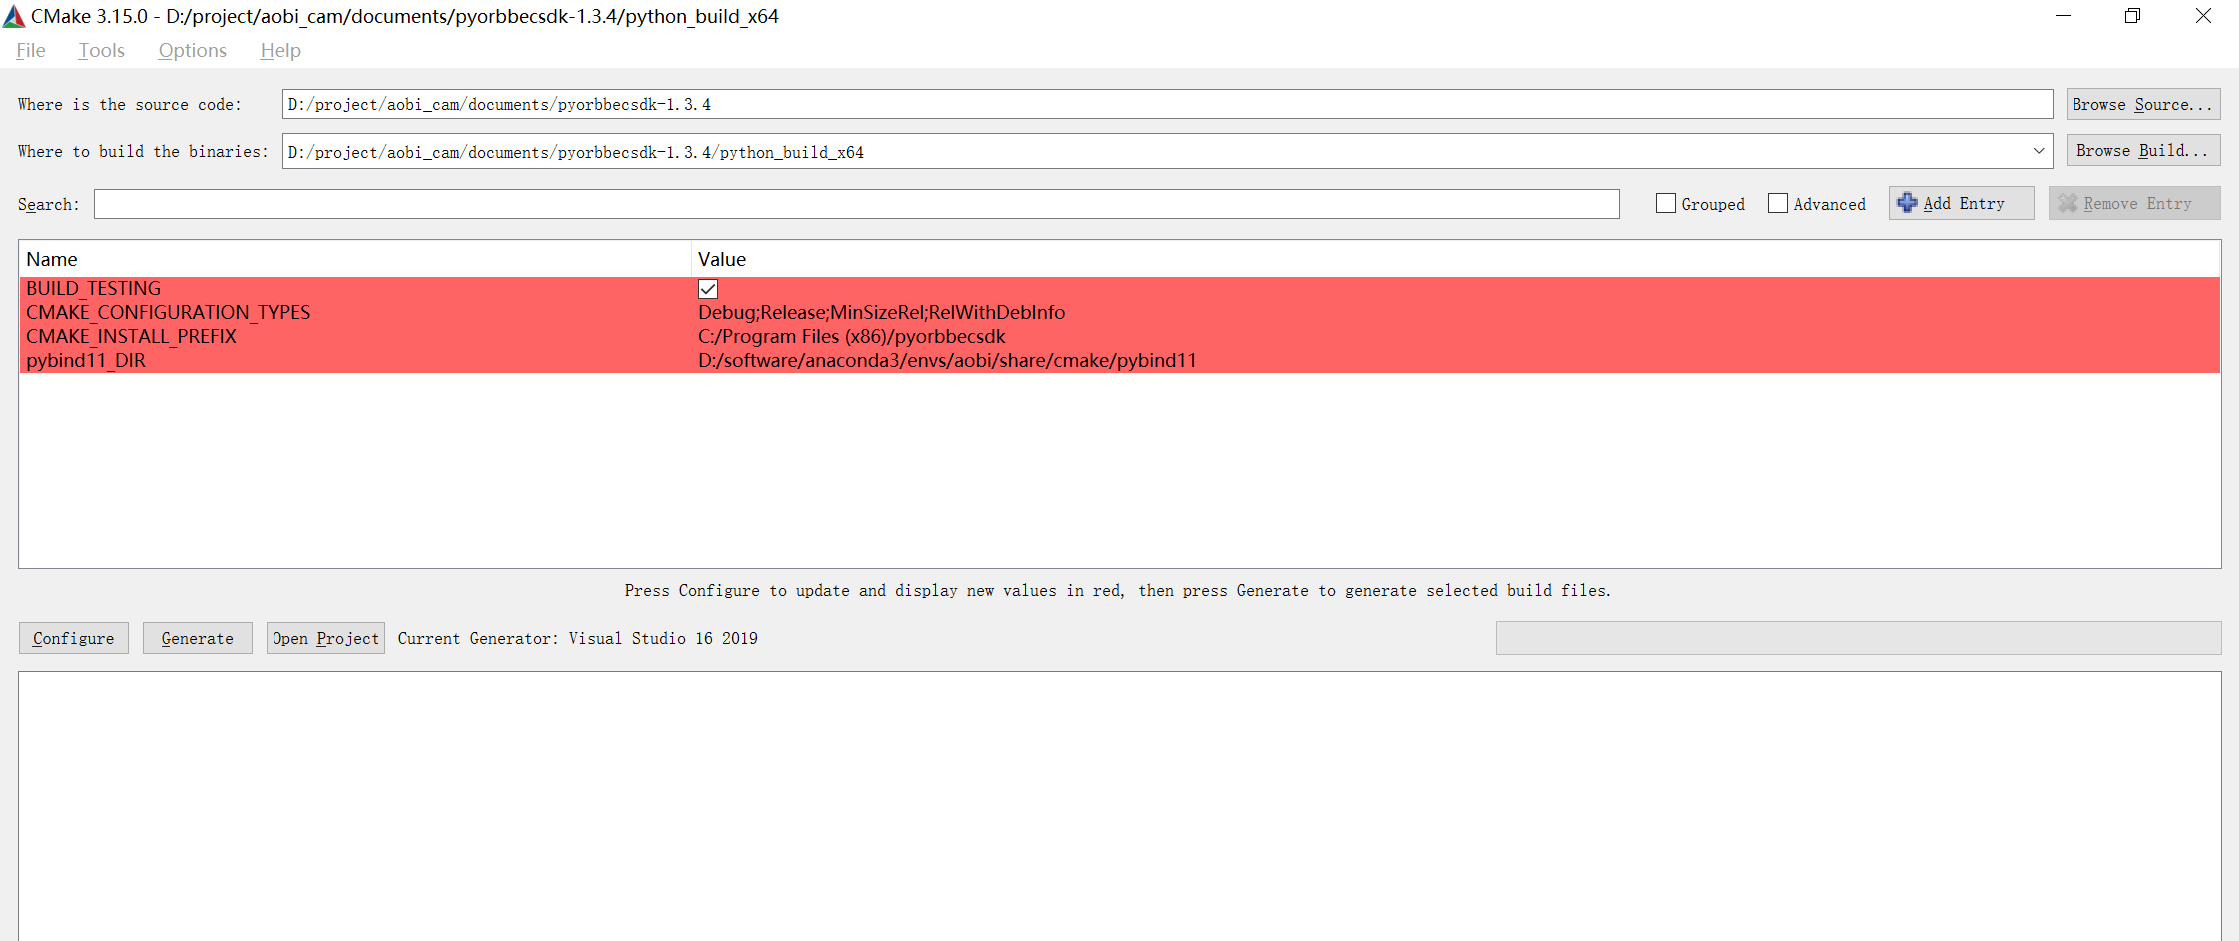
按照源码路径进行基本设置,其中点击“Configure”并选择对应的Visual Studio版本和平台版本后,点击“Finish”,
这个过程中如果出现下面错误
CMake Error at lib/(our project name)/CMakeLists.txt:30 (find_package):
  By not providing "Findpybind11.cmake" in CMAKE_MODULE_PATH this project has
  asked CMake to find a package configuration file provided by "pybind11",
  but CMake did not find one.

  Could not find a package configuration file provided by "pybind11" with any
  of the following names:

    pybind11Config.cmake
    pybind11-config.cmake

  Add the installation prefix of "pybind11" to CMAKE_PREFIX_PATH or set
  "pybind11_DIR" to a directory containing one of the above files.  If
  "pybind11" provides a separate development package or SDK, be sure it has
been installed.这是因为pybind11_DIR路径没有正确找到,没有定位到pybind11文件的位置。选择对应虚拟环境安装,然后注意在该虚拟环境下利用cmd来启动cmake,这样就可以解决虚拟环境找不到包的问题。
当Configuring done成功后,点击Generate显示Generating done后,点击Open Project会跳到vs打开整个编译项目
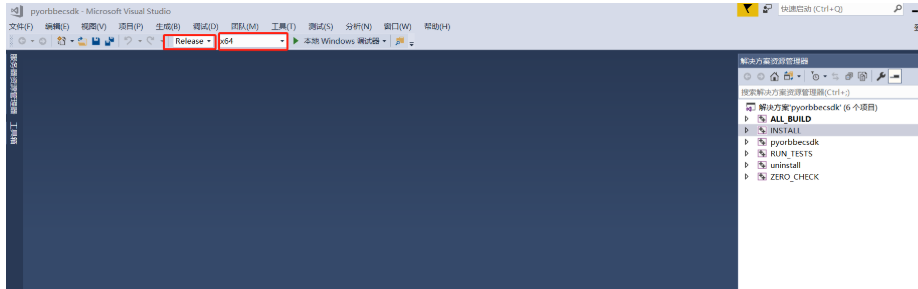
注意选择Release模式和x64系统,然后依次选择pyorbbecsdk 右键重新生成编译,和INSTALL右键重新生成编译,接下来就会在整个项目目录下生成build和install文件夹,
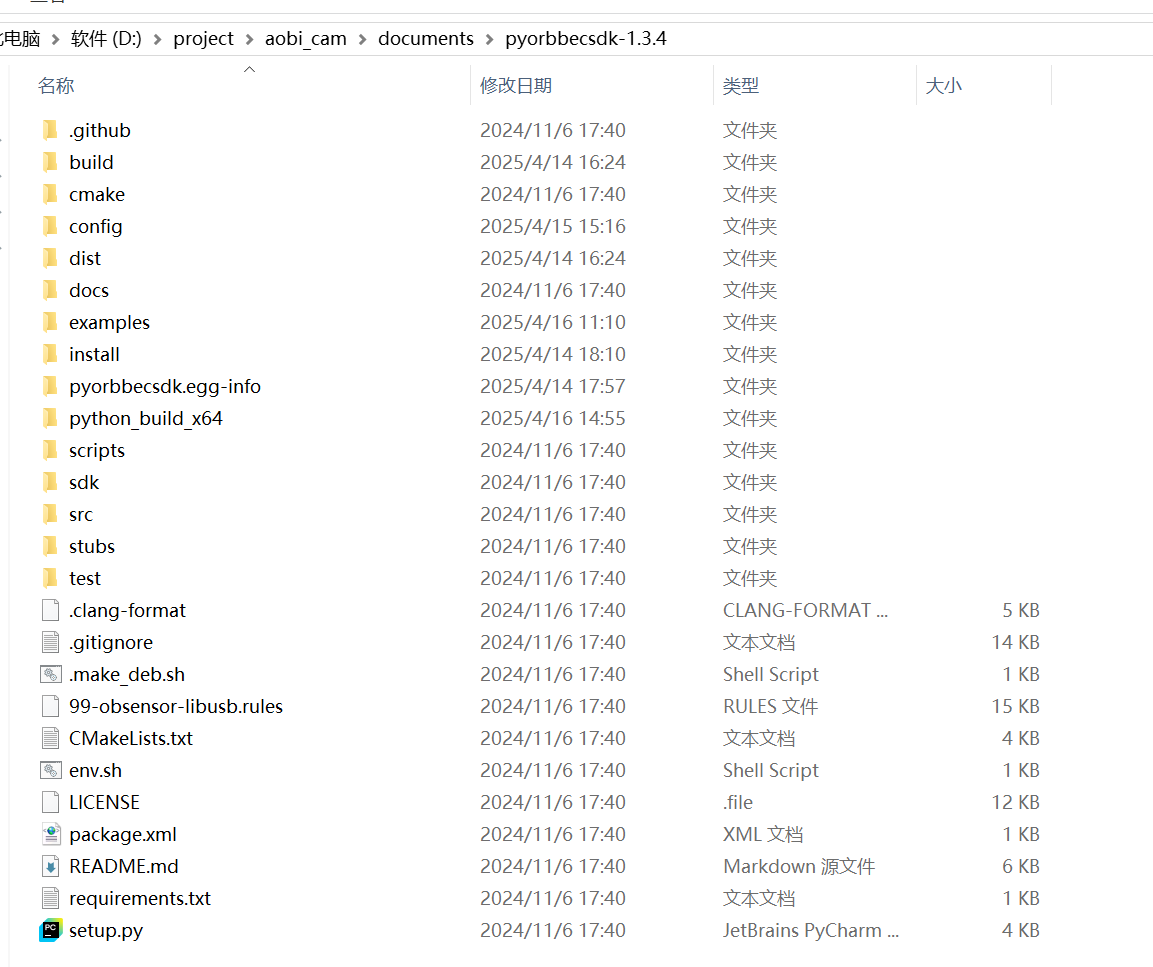
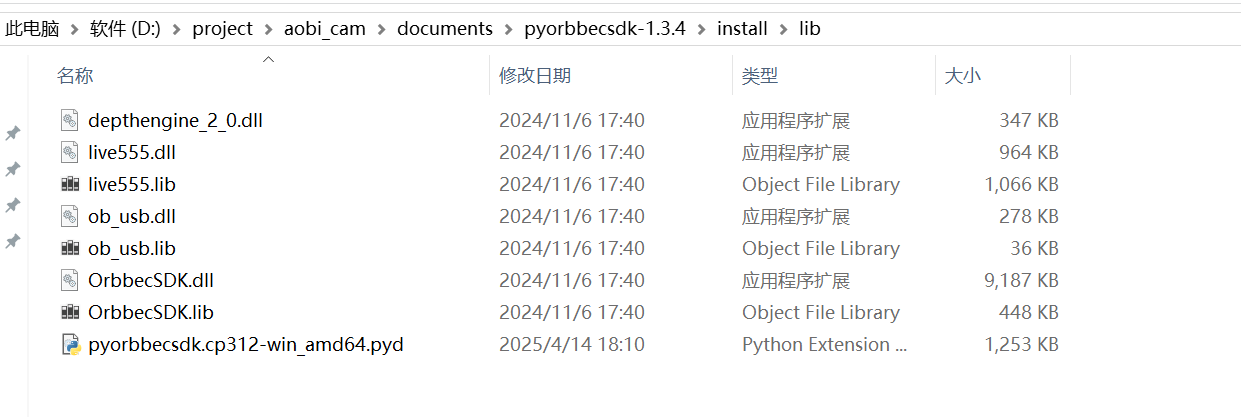
在install/lib文件夹下会生成一些库文件
到这里就算编译好了。
(3)测试
pyorbbecsdk自带了很多实例,为了检验是否编译可用,可以基于这些demo进行测试。首先需要将install/lib下编译生成的所有文件全部拷贝到examples下,
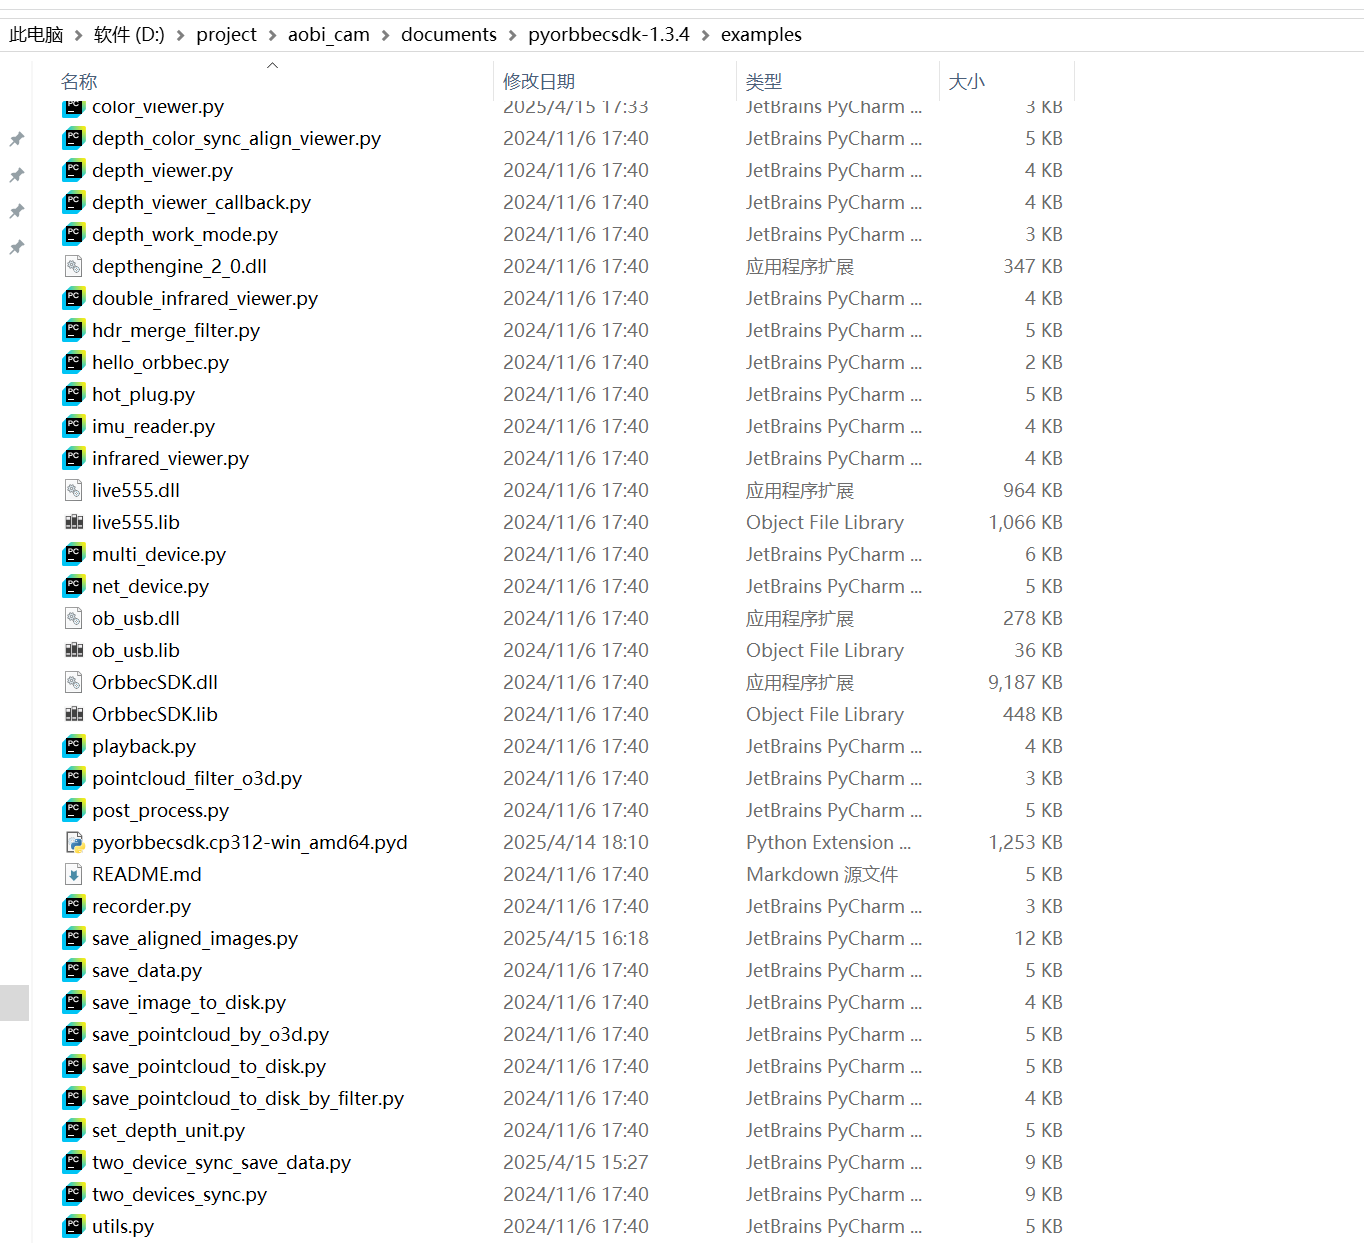
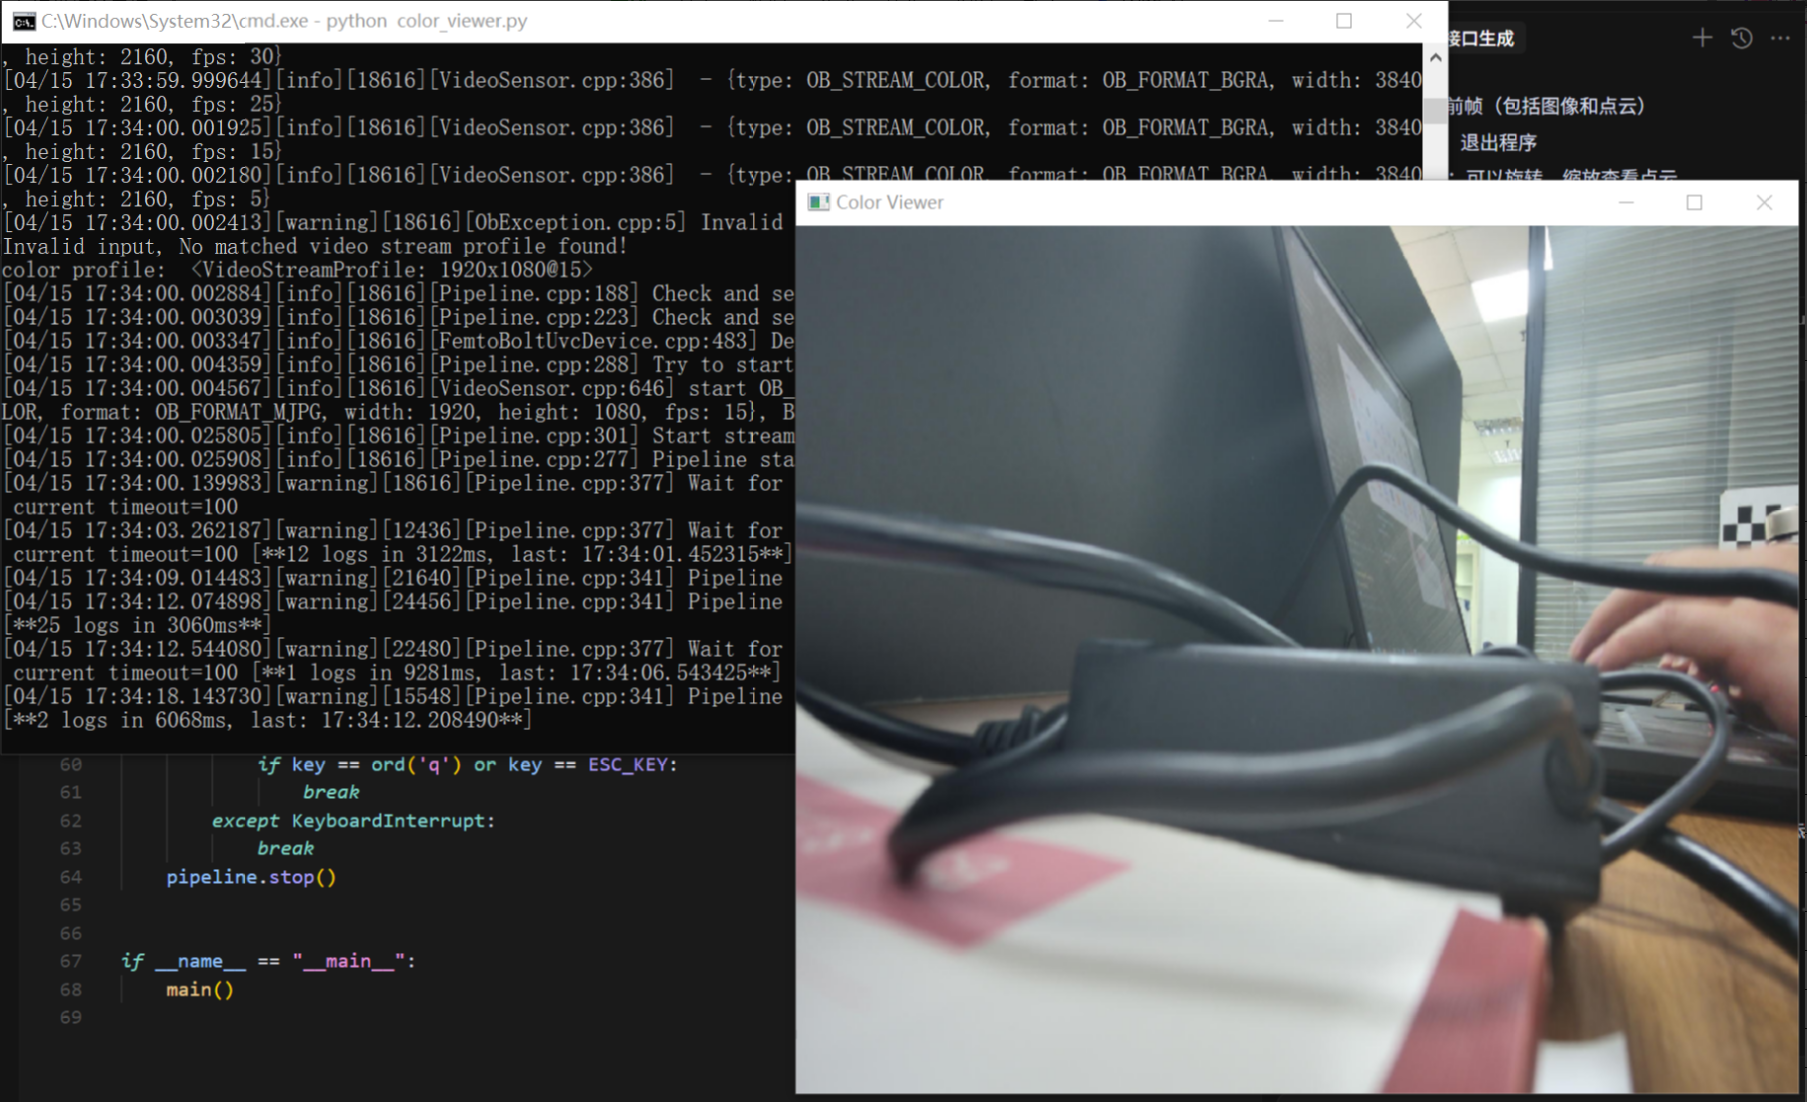
这里需要注意的是刚才生成pyorbbecsdk.cp312-win_amd64.pyd是针对python3.12版本的,你需要再创建一个该版本的虚拟环境,然后在该路径下运行得到如下结果
参考链接:
1、pyorbbecsdk/docs/README_CN.md at main · orbbec/pyorbbecsdk
2、pyorbbecsdk奥比中光python版本SDK在Windows下环境配置笔记-CSDN博客