从PPT到PNG:Python实现的高效PPT转图工具
在日常工作中,PPT(PowerPoint)文件是我们常用的演示工具。然而,有时候我们需要将PPT的内容提取为图片格式(如PNG)以便于展示或保存。手动将每一页PPT保存为图片不仅繁琐且容易出错。为了提高工作效率,我们可以通过编程自动化这一过程。本篇文章将详细介绍如何使用Python语言开发一款PPT转PNG工具,基于Tkinter图形界面和win32com库,支持批量PPT转图片及图像网格拼接功能。
1. 概述
本工具的目标是将PPT文件的每一页转换为高质量的PNG图片,并提供一个图形化界面,帮助用户快速选择PPT文件并完成转换操作。该工具的实现基于以下几个核心技术:
- Tkinter:Python标准库中的GUI工具,用于构建用户界面。
- win32com:通过调用PowerPoint的COM接口来操作PPT文件,实现文件转换。
- PIL(Pillow):Python Imaging Library,用于处理图像,包括图像的读取、修改和保存。
- psutil:用于检查并确保PowerPoint进程的安全退出,避免进程残留导致的错误。
核心功能
- PPT转PNG:将PPT中的每一页转换为PNG格式的图片。
- 图像网格拼接:将转换后的PNG图片按特定规则排列为一张大图,尽量保证输出图像的比例接近4:3。
- 图形界面:提供简洁直观的用户界面,支持文件选择、转换进度显示及转换状态提示。
2. 功能使用
2.1 安装依赖
首先,需要安装一些必要的Python库。在命令行中运行以下命令:
pip install pillow psutil pywin32
2.2 使用步骤
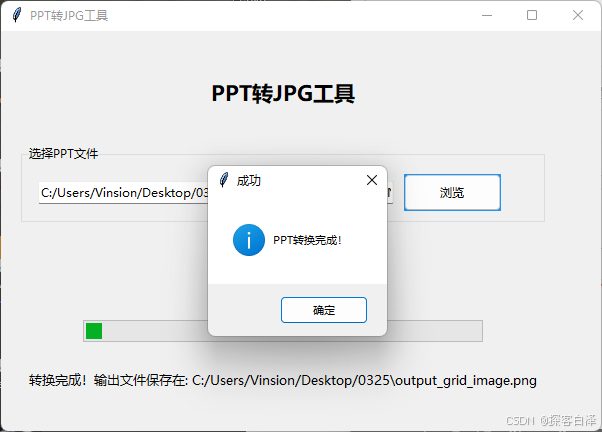
- 启动工具:运行程序后,打开的GUI界面包含了文件选择、进度条以及状态提示区域。
- 选择PPT文件:点击“浏览”按钮选择需要转换的PPT文件。只支持
.ppt和.pptx文件格式。 - 开始转换:选择文件后,点击“开始转换”按钮,程序会自动将PPT的每一页转换为PNG图片并保存到临时目录中。
- 创建网格图:转换完成后,程序会根据指定的列数将所有图片拼接为一张大图。最终输出图像的比例尽量接近4:3。
- 查看结果:转换完成后,程序会显示输出文件的保存路径,并提供成功提示。
2.3 代码实现
2.3.1 PPT转换为PNG
PPT文件的转换操作依赖于PowerPoint的COM接口。通过win32com.client.DispatchEx我们可以启动PowerPoint应用,加载PPT文件并提取每一页为PNG图片。
def ppt_to_images(ppt_path, output_dir):
    """将PPT转换为图片"""
    if not os.path.exists(output_dir):
        os.makedirs(output_dir)

    ppt_path = os.path.abspath(ppt_path)

    try:
        for proc in psutil.process_iter(['name']):
            if proc.info['name'] and 'powerpnt' in proc.info['name'].lower():
                proc.kill()
    except:
        pass

    time.sleep(1)

    max_retries = 3
    retry_count = 0
    last_error = None
    powerpoint = None

    while retry_count < max_retries:
        try:
            powerpoint = win32com.client.DispatchEx("PowerPoint.Application")
            powerpoint.Visible = 1
            powerpoint.DisplayAlerts = 0
            presentation = powerpoint.Presentations.Open(ppt_path, WithWindow=False)
            total_slides = presentation.Slides.Count
            for i in range(1, total_slides + 1):
                image_path = os.path.join(output_dir, f'slide_{i:03d}.png')
                slide = presentation.Slides(i)
                slide.Export(image_path, "PNG", 1920, 1080)
                time.sleep(0.5)
            presentation.Close()
            return
        except Exception as e:
            retry_count += 1
            last_error = e
            if retry_count >= max_retries:
                raise Exception(f"PowerPoint转换失败,已重试{max_retries}次。错误信息: {str(last_error)}")
            time.sleep(2)
2.3.2 图像网格拼接
对于转换后的每一张PNG图片,程序将尝试按不同的列数排列,以获得接近4:3的图像比例。
def create_grid_image(image_dir, output_path, target_width=1920):
    """将图片紧凑排列,并使最终图片比例接近4:3"""
    image_files = sorted([f for f in os.listdir(image_dir) if f.endswith('.png')])
    if not image_files:
        raise Exception("没有找到转换后的图片文件!")
    images = [Image.open(os.path.join(image_dir, img_file)) for img_file in image_files]

    best_cols = 1
    best_ratio_diff = float('inf')
    best_layout = None

    for num_cols in range(1, 6):
        layout, row_heights = [], []
        current_row, max_row_height = [], 0

        for img in images:
            scale = (target_width / num_cols) / img.width
            new_width = int(img.width * scale)
            new_height = int(img.height * scale)
            current_row.append((new_width, new_height))
            max_row_height = max(max_row_height, new_height)

            if len(current_row) == num_cols:
                layout.append(current_row)
                row_heights.append(max_row_height)
                current_row, max_row_height = [], 0

        if current_row:
            layout.append(current_row)
            row_heights.append(max_row_height)

        total_width = target_width
        total_height = sum(row_heights)
        target_ratio = 4/3
        actual_ratio = total_width / total_height
        ratio_diff = abs(target_ratio - actual_ratio)

        if ratio_diff < best_ratio_diff:
            best_ratio_diff = ratio_diff
            best_cols = num_cols
            best_layout = (layout, row_heights)

    layout, row_heights = best_layout
    canvas = Image.new('RGB', (target_width, sum(row_heights)), 'white')

    y = 0
    img_index = 0
    for row, row_height in zip(layout, row_heights):
        x = 0
        for width, height in row:
            if img_index < len(images):
                img = images[img_index].resize((width, height), Image.Resampling.LANCZOS)
                canvas.paste(img, (x, y))
                x += width
                img_index += 1
        y += row_height

    canvas.save(output_path, quality=95)
2.4 GUI界面
GUI使用Tkinter构建,包含了文件选择框、转换进度条、状态标签和按钮,确保用户能够直观地使用该工具进行PPT转换。
class PPTConverterGUI:
    def __init__(self, root):
        self.root = root
        self.root.title("PPT转JPG工具")
        self.root.geometry("600x400")
        ...

    def browse_file(self):
        file_path = filedialog.askopenfilename(filetypes=[("PowerPoint文件", "*.ppt;*.pptx")])
        if file_path:
            self.file_path.set(file_path)
            logging.info(f"选择了文件: {file_path}")

    def start_conversion(self):
        ppt_path = self.file_path.get()
        ...
        thread = threading.Thread(target=self.convert_ppt, args=(ppt_path,))
        thread.start()
3.效果展示

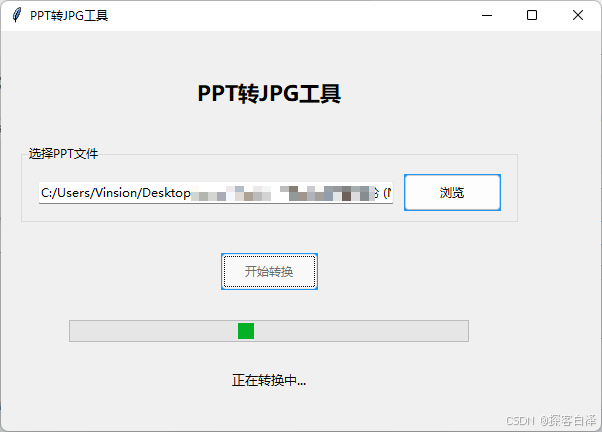
生成jpg图片效果图:
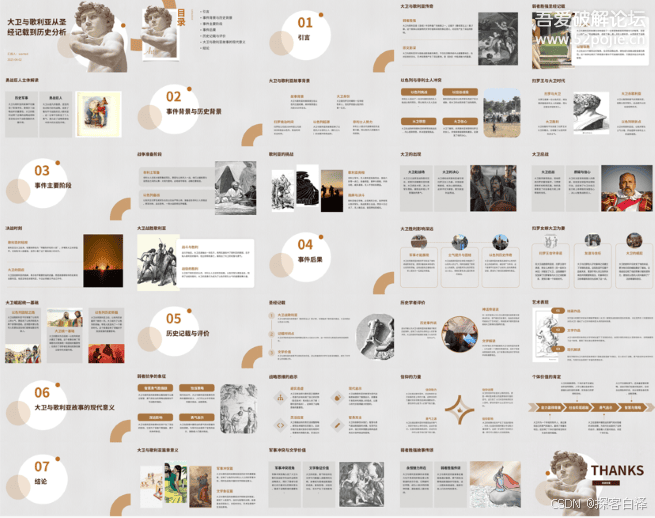
4.相关源码
import os
from PIL import Image
import tempfile
import win32com.client
import time
import math
import tkinter as tk
from tkinter import filedialog, ttk, messagebox
import threading
import traceback
import logging
import psutil

# 配置日志
logging.basicConfig(
    filename='ppt_converter.log',
    level=logging.DEBUG,
    format='%(asctime)s - %(levelname)s - %(message)s'
)

def ppt_to_images(ppt_path, output_dir):
    """将PPT转换为图片"""
    # 创建临时目录
    if not os.path.exists(output_dir):
        os.makedirs(output_dir)

    # 确保使用绝对路径
    ppt_path = os.path.abspath(ppt_path)

    # 确保PowerPoint进程已完全退出
    try:
        for proc in psutil.process_iter(['name']):
            if proc.info['name'] and 'powerpnt' in proc.info['name'].lower():
                proc.kill()
    except:
        pass

    time.sleep(1)  # 等待进程完全退出

    max_retries = 3
    retry_count = 0
    last_error = None
    powerpoint = None

    while retry_count < max_retries:
        try:
            # 使用PowerPoint COM对象
            powerpoint = win32com.client.DispatchEx("PowerPoint.Application")


            try:
                # 设置PowerPoint为可见(有些系统必须设置为可见才能工作)
                powerpoint.Visible = 1
                powerpoint.DisplayAlerts = 0

                # 打开演示文稿
                presentation = powerpoint.Presentations.Open(
                    ppt_path,
                    WithWindow=False  # 尝试不显示窗口
                )

                # 遍历每一页并保存为图片
                total_slides = presentation.Slides.Count
                for i in range(1, total_slides + 1):
                    image_path = os.path.join(output_dir, f'slide_{i:03d}.png')
                    slide = presentation.Slides(i)
                    slide.Export(image_path, "PNG", 1920, 1080)  # 指定分辨率
                    time.sleep(0.5)  # 给PowerPoint一些时间来处理

                # 正常关闭
                presentation.Close()
                return  # 成功完成,退出函数

            finally:
                # 确保清理资源
                if powerpoint:
                    try:
                        powerpoint.Quit()
                    except:
                        pass
                    finally:
                        powerpoint = None

        except Exception as e:
            retry_count += 1
            last_error = e

            # 确保PowerPoint被关闭
            if powerpoint:
                try:
                    powerpoint.Quit()
                except:
                    pass
                finally:
                    powerpoint = None

            if retry_count >= max_retries:
                error_msg = f"PowerPoint转换失败,已重试{max_retries}次。错误信息: {str(last_error)}"
                logging.error(error_msg)
                raise Exception(error_msg)

            logging.info(f"第{retry_count}次尝试失败,等待后重试...")
            time.sleep(2)  # 等待一段时间后重试

    raise Exception("PowerPoint转换失败,超过最大重试次数")

def create_grid_image(image_dir, output_path, target_width=1920):
    """将图片紧凑排列,并使最终图片比例接近4:3"""
    # 获取所有图片文件
    image_files = sorted([f for f in os.listdir(image_dir) if f.endswith('.png')])

    if not image_files:
        raise Exception("没有找到转换后的图片文件!")

    # 读取所有图片
    images = []
    for img_file in image_files:
        img = Image.open(os.path.join(image_dir, img_file))
        images.append(img)

    # 找到最佳的列数,使最终图片比例最接近4:3
    best_cols = 1
    best_ratio_diff = float('inf')
    best_layout = None

    # 尝试不同的列数(1到5列)
    for num_cols in range(1, 6):
        # 计算这个列数下的布局
        layout = []
        current_row = []
        row_heights = []
        max_row_height = 0

        for img in images:
            # 计算缩放后的尺寸
            scale = (target_width / num_cols) / img.width
            new_width = int(img.width * scale)
            new_height = int(img.height * scale)

            current_row.append((new_width, new_height))
            max_row_height = max(max_row_height, new_height)

            if len(current_row) == num_cols:
                layout.append(current_row)
                row_heights.append(max_row_height)
                current_row = []
                max_row_height = 0

        # 处理最后一行
        if current_row:
            layout.append(current_row)
            row_heights.append(max_row_height)

        # 计算总宽度和高度
        total_width = target_width
        total_height = sum(row_heights)

        # 计算与4:3比例的差异
        target_ratio = 4/3
        actual_ratio = total_width / total_height
        ratio_diff = abs(target_ratio - actual_ratio)

        # 更新最佳列数
        if ratio_diff < best_ratio_diff:
            best_ratio_diff = ratio_diff
            best_cols = num_cols
            best_layout = (layout, row_heights)

    # 使用最佳列数创建最终图片
    layout, row_heights = best_layout
    canvas_width = target_width
    canvas_height = sum(row_heights)
    canvas = Image.new('RGB', (canvas_width, canvas_height), 'white')

    # 拼接图片
    y = 0
    img_index = 0
    for row, row_height in zip(layout, row_heights):
        x = 0
        for width, height in row:
            if img_index < len(images):
                img = images[img_index]
                img = img.resize((width, height), Image.Resampling.LANCZOS)
                canvas.paste(img, (x, y))
                x += width
                img_index += 1
        y += row_height

    # 裁剪掉多余的空白部分
    bbox = canvas.getbbox()
    if bbox:
        canvas = canvas.crop(bbox)

    # 保存最终图片
    canvas.save(output_path, quality=95)

class PPTConverterGUI:
    def __init__(self, root):
        self.root = root
        self.root.title("PPT转JPG工具")
        self.root.geometry("600x400")

        # 设置主题样式
        style = ttk.Style()
        style.configure("TButton", padding=6, relief="flat", background="#2196F3")
        style.configure("TLabel", padding=6, font=('微软雅黑', 10))

        # 创建主框架
        main_frame = ttk.Frame(root, padding="20")
        main_frame.grid(row=0, column=0, sticky=(tk.W, tk.E, tk.N, tk.S))

        # 标题
        title_label = ttk.Label(main_frame, text="PPT转JPG工具", font=('微软雅黑', 16, 'bold'))
        title_label.grid(row=0, column=0, columnspan=2, pady=20)

        # 文件选择区域
        file_frame = ttk.LabelFrame(main_frame, text="选择PPT文件", padding="10")
        file_frame.grid(row=1, column=0, columnspan=2, sticky=(tk.W, tk.E), pady=10)

        self.file_path = tk.StringVar()
        self.file_entry = ttk.Entry(file_frame, textvariable=self.file_path, width=50)
        self.file_entry.grid(row=0, column=0, padx=5)

        browse_button = ttk.Button(file_frame, text="浏览", command=self.browse_file)
        browse_button.grid(row=0, column=1, padx=5)

        # 转换按钮
        self.convert_button = ttk.Button(main_frame, text="开始转换", command=self.start_conversion)
        self.convert_button.grid(row=2, column=0, columnspan=2, pady=20)

        # 进度条
        self.progress = ttk.Progressbar(main_frame, length=400, mode='indeterminate')
        self.progress.grid(row=3, column=0, columnspan=2, pady=10)

        # 状态标签
        self.status_label = ttk.Label(main_frame, text="")
        self.status_label.grid(row=4, column=0, columnspan=2, pady=10)

        # 配置网格权重
        main_frame.columnconfigure(0, weight=1)
        main_frame.columnconfigure(1, weight=1)

    def browse_file(self):
        file_path = filedialog.askopenfilename(
            filetypes=[("PowerPoint文件", "*.ppt;*.pptx")]
        )
        if file_path:
            self.file_path.set(file_path)
            logging.info(f"选择了文件: {file_path}")

    def start_conversion(self):
        ppt_path = self.file_path.get()
        if not ppt_path:
            messagebox.showerror("错误", "请先选择PPT文件!")
            return

        if not os.path.exists(ppt_path):
            messagebox.showerror("错误", "文件不存在!")
            return

        # 禁用按钮并显示进度条
        self.convert_button.state(['disabled'])
        self.progress.start()
        self.status_label.config(text="正在转换中...")

        # 在新线程中执行转换
        thread = threading.Thread(target=self.convert_ppt, args=(ppt_path,))
        thread.start()

    def convert_ppt(self, ppt_path):
        temp_dir = None
        try:
            logging.info(f"开始转换PPT文件: {ppt_path}")

            # 创建临时目录
            temp_dir = tempfile.mkdtemp()
            logging.info(f"创建临时目录: {temp_dir}")

            output_path = os.path.join(os.path.dirname(ppt_path), "output_grid_image.png")
            logging.info(f"输出路径: {output_path}")

            # 转换PPT为图片
            logging.info("开始转换PPT为图片...")
            ppt_to_images(ppt_path, temp_dir)
            logging.info("PPT转图片完成")

            # 创建网格图
            logging.info("开始创建网格图...")
            create_grid_image(temp_dir, output_path)
            logging.info("网格图创建完成")

            # 清理临时文件
            logging.info("清理临时文件...")
            for file in os.listdir(temp_dir):
                os.remove(os.path.join(temp_dir, file))
            os.rmdir(temp_dir)
            logging.info("临时文件清理完成")

            # 更新UI
            self.root.after(0, self.conversion_complete, output_path)

        except Exception as e:
            error_msg = f"转换失败: {str(e)}\n{traceback.format_exc()}"
            logging.error(error_msg)
            self.root.after(0, self.conversion_error, error_msg)
        finally:
            # 确保清理临时文件
            if temp_dir and os.path.exists(temp_dir):
                try:
                    for file in os.listdir(temp_dir):
                        os.remove(os.path.join(temp_dir, file))
                    os.rmdir(temp_dir)
                except Exception as e:
                    logging.error(f"清理临时文件失败: {str(e)}")

    def conversion_complete(self, output_path):
        self.progress.stop()
        self.convert_button.state(['!disabled'])
        self.status_label.config(text=f"转换完成!输出文件保存在: {output_path}")
        messagebox.showinfo("成功", "PPT转换完成!")

    def conversion_error(self, error_msg):
        self.progress.stop()
        self.convert_button.state(['!disabled'])
        self.status_label.config(text="转换失败!")
        messagebox.showerror("错误", f"转换过程中出现错误: {error_msg}")

def main():
    root = tk.Tk()
    app = PPTConverterGUI(root)
    root.mainloop()

if __name__ == "__main__":
    main()
5. 总结
通过本篇文章,您已经了解了如何使用Python编写一款PPT转图片的工具。我们通过Tkinter构建了一个简洁的GUI界面,通过win32com调用PowerPoint的COM接口进行文件转换,并通过Pillow处理图像拼接。无论是用于日常的文件转换,还是处理多个PPT文件,本工具都能大大提高工作效率。
此工具的扩展性也很强,您可以根据需要进一步优化图像的处理过程,或者增加更多的自定义功能,例如支持更多格式的转换,添加批量处理功能等。希望本教程能帮助您更好地实现PPT转图片的自动化,提升工作效率。