1. 项目目标
- 生成艺术作品:利用 AI 模型(如 Stable Diffusion)生成具有艺术风格的图像。
- 自定义风格:通过文本提示(prompt)控制图像的艺术风格(如赛博朋克、印象派、超现实主义等)。
- 后处理:使用 Python 进行图像增强或风格迁移,增加独特性。
- 工具:Python, Stable Diffusion (Hugging Face), PyTorch, Pillow, OpenCV。
2. 技术路线
以下是实现步骤:
- 安装必要的库:
- 安装 Python 环境(推荐 Python 3.8+)。
- 安装 AI 和图像处理相关库。
- 使用预训练模型生成图像:
- 使用 Stable Diffusion 模型通过文本提示生成基础艺术图像。
- 图像后处理:
- 使用 Pillow 或 OpenCV 添加滤镜、调整颜色或进行风格迁移。
- 保存和展示:
- 将生成的艺术作品保存为高分辨率图像。
3. 环境准备
安装依赖
确保你有以下库:
pip install diffusers transformers torch pillow opencv-python numpy
硬件要求
- GPU(推荐):Stable Diffusion 在 GPU 上运行更快(需要 NVIDIA GPU 和 CUDA 支持)。
- CPU(可选):如果没有 GPU,可以用 CPU,但生成速度较慢。
Hugging Face 登录
Stable Diffusion 模型需要从 Hugging Face 下载,并可能需要登录:
pip install huggingface_hub
huggingface-cli login
输入你的 Hugging Face 令牌(在 Hugging Face 官网获取)。
4. 代码实现
以下是一个完整的 Python 脚本,结合 Stable Diffusion 生成艺术图像,并进行后处理。
import torch
from diffusers import StableDiffusionPipeline
from PIL import Image
import cv2
import numpy as np
import os

# 1. 初始化 Stable Diffusion 模型
model_id = "runwayml/stable-diffusion-v1-5"
pipe = StableDiffusionPipeline.from_pretrained(model_id, torch_dtype=torch.float16)
pipe = pipe.to("cuda")  # 使用 GPU(如果没有 GPU,注释此行)

# 2. 定义艺术风格的文本提示
prompt = "A surreal painting of a futuristic city at sunset, vibrant colors, in the style of Salvador Dali"
negative_prompt = "low quality, blurry, text, watermark"  # 避免生成低质量图像

# 3. 生成图像
image = pipe(
    prompt,
    negative_prompt=negative_prompt,
    num_inference_steps=50,  # 推理步数,控制生成质量
    guidance_scale=7.5,     # 提示引导强度
).images[0]

# 4. 保存原始生成图像
output_dir = "art_output"
os.makedirs(output_dir, exist_ok=True)
image.save(os.path.join(output_dir, "original_art.png"))

# 5. 图像后处理:添加艺术滤镜
def apply_artistic_filter(image_pil, filter_type="edge_enhance"):
    # 将 PIL 图像转换为 OpenCV 格式
    image_np = np.array(image_pil)
    image_cv = cv2.cvtColor(image_np, cv2.COLOR_RGB2BGR)

    if filter_type == "edge_enhance":
        # 增强边缘,模拟手绘效果
        kernel = np.array([[0, -1, 0], [-1, 5, -1], [0, -1, 0]])
        image_cv = cv2.filter2D(image_cv, -1, kernel)
    elif filter_type == "color_boost":
        # 增强颜色鲜艳度
        image_cv = cv2.convertScaleAbs(image_cv, alpha=1.2, beta=10)

    # 转换回 PIL 格式
    image_filtered = cv2.cvtColor(image_cv, cv2.COLOR_BGR2RGB)
    return Image.fromarray(image_filtered)

# 6. 应用滤镜并保存
filtered_image = apply_artistic_filter(image, filter_type="edge_enhance")
filtered_image.save(os.path.join(output_dir, "filtered_art.png"))

print("艺术作品已生成并保存至 art_output 目录!")
5. 代码说明
- Stable Diffusion:
- 使用
runwayml/stable-diffusion-v1-5模型,通过文本提示生成图像。 prompt定义了图像的内容和风格,例如“超现实的未来城市,达利风格”。negative_prompt避免生成不需要的元素(如模糊或低质量图像)。num_inference_steps和guidance_scale控制生成质量和提示的遵循程度。
- 使用
- 后处理:
apply_artistic_filter函数使用 OpenCV 实现两种滤镜:edge_enhance:增强图像边缘,模拟手绘效果。color_boost:提升颜色鲜艳度,增加艺术感。
- 可以根据需要扩展更多滤镜(如模糊、素描效果等)。
- 输出:
- 生成的原始图像和滤镜处理后的图像保存至
art_output目录。
- 生成的原始图像和滤镜处理后的图像保存至
6. 扩展与优化
为了让作品更独特,可以尝试以下方法:
- 自定义提示:
- 尝试不同的艺术风格,如:
- “A cyberpunk cityscape in the style of Van Gogh”
- “An abstract portrait of a woman, vibrant watercolor style”
- 使用更复杂的提示,结合艺术家风格或艺术流派。
- 尝试不同的艺术风格,如:
- 风格迁移:
- 使用预训练的神经风格迁移模型(如 PyTorch 的
torchvision.models或neural-style-transfer)将生成的图像与特定艺术风格(如毕加索、莫奈)融合。 - 示例库:
pytorch-CycleGAN-and-pix2pix。
- 使用预训练的神经风格迁移模型(如 PyTorch 的
- 批量生成:
- 编写循环,生成多个图像并挑选最佳作品:
for i in range(3):
    image = pipe(prompt, negative_prompt=negative_prompt).images[0]
    image.save(os.path.join(output_dir, f"art_{i}.png"))
- 编写循环,生成多个图像并挑选最佳作品:
- 交互界面:
- 使用
Streamlit或Gradio构建一个 Web 界面,让用户输入提示并实时预览生成的艺术作品。 - 示例:
pip install gradioimport gradio as gr def generate_art(prompt): image = pipe(prompt).images[0] return image gr.Interface(fn=generate_art, inputs="text", outputs="image").launch()
- 使用
7. 常见问题与解决方案
- 显存不足:
- 如果 GPU 显存不足,尝试:
- 降低
torch_dtype为torch.float16。 - 减少
num_inference_steps(如 30)。 - 使用 CPU(注释
pipe.to("cuda"))。
- 降低
- 如果 GPU 显存不足,尝试:
- 生成图像质量不高:
- 增加
num_inference_steps(如 100)。 - 调整
guidance_scale(7.5~12.5 通常效果较好)。 - 使用更详细的提示词。
- 增加
- 模型下载慢:
- 确保网络稳定,或提前下载模型到本地:
pipe = StableDiffusionPipeline.from_pretrained(model_id, cache_dir="./models")
- 确保网络稳定,或提前下载模型到本地:
8. 其他 AI 艺术生成工具
如果你想探索更多 AI 艺术生成工具,可以尝试:
- DALL·E 3:通过 OpenAI API 生成高质量图像(需要付费)。
- MidJourney:专注于艺术风格的生成(通过 Discord 操作)。
- Artbreeder:基于 GAN 的图像混合与生成。
- VQ-VAE-2:生成像素艺术或低分辨率风格图像。
这些工具可以通过 API 或 Python 脚本集成到你的工作流中。
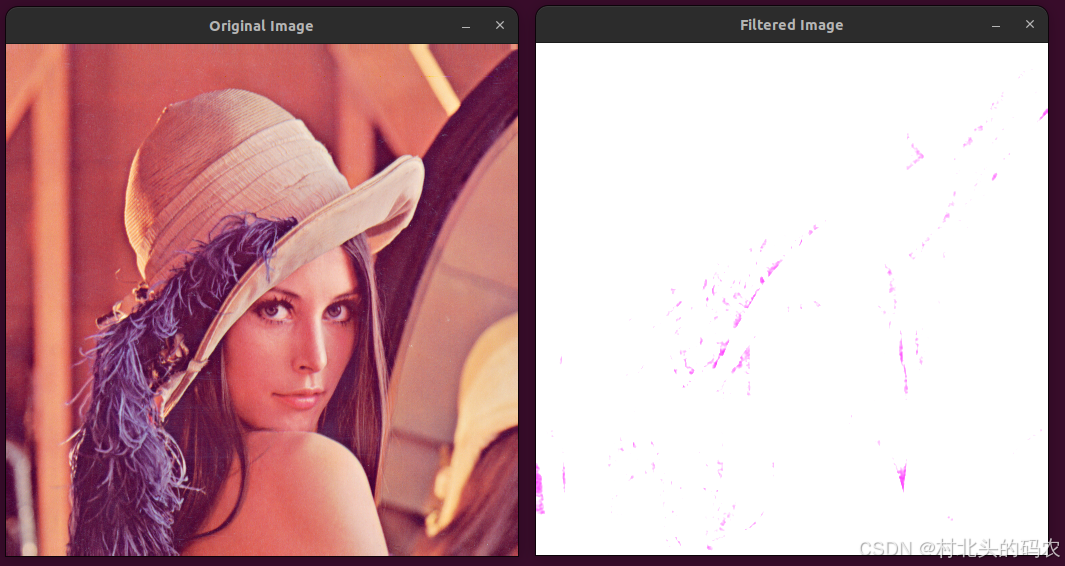
9. 成果展示
运行上述代码后,你将得到:
- 一张原始的 AI 生成图像(如超现实的未来城市)。
- 一张经过滤镜处理的艺术图像(边缘增强或颜色提升)。
- 保存路径:
art_output/original_art.png和art_output/filtered_art.png。
你可以进一步将这些图像用于:
- 数字艺术展览。
- NFT 创作。
- 个性化壁纸或印刷品。
10. 总结
通过 Python 和 Stable Diffusion,你可以快速生成独特的艺术图像,并通过后处理增加个性化效果。上述代码提供了从生成到增强的完整流程,且易于扩展。