类设计原则:
- 单一职责原则(Single Responsibility Principle,SRP):实现类要职责单一
- 开闭原则(Open Close Principle,OCP):对扩展开放,对修改关闭
- 里氏替换原则(Liskov Substitution Principle,LSP):不要破坏继承体系
- 接口隔离原则(Interface Segregation Principle,ISP):设计接口的时候要精简单一
- 依赖倒置原则(Dependence Inversion Principle,DIP):面向接口编程
- 迪米特法则(Law Of Demeter):降低耦合
1. 类设计原则
(1)单一职责原则
(Single Responsibility Principle,SRP)
原则定义:应该有且仅有一个原因引起类的变更
原则描述:
- 问题由来:类T负责两个不同的职责,即职责P1,职责P2。当由于职责P1需求发生改变而需要修改类T时,有可能会导致原本运行正常的职责P2功能发生故障
- 解决方案:遵循单一职责原则。分别建立两个类T1、T2,使T1完成职责P1功能,T2完成职责P2功能。这样,当修改类T1、T2时,不会使P1、P2相互影响

使用单一职责原则之前:
public interface IHuman {
    //身高
    void setShengao(double height);
    double getShengao();
    //体重
    void setTizhong(double weight);
    double getTizhong();
    //吃饭
    boolean chiFan(boolean hungry);
    //上网
    boolean shangWang(boolean silly);
}
public class Human implements IHuman {
private double height;
private double weight;
@Override
public double getShengao() {
return height;
}
@Override
public double getTizhong() {
return weight;
}
@Override
public void setShengao(double height) {
this.height = height;
}
@Override
public void setTizhong(double weight) {
this.weight = weight;
}
@Override
public boolean chiFan(boolean hungry) {
if(hungry)
{
System.out.println("去吃火锅...");
return true;
}
return false;
}
@Override
public boolean shangWang(boolean silly) {
if(silly)
{
System.out.println("好无聊啊,上会网...");
return true;
}
return false;
}
}使用单一职责原则之后:
public interface IHumanBO {

	//身高
    void setShengao(double height);
    double getShengao();
    //体重
    void setTizhong(double weight);
    double getTizhong();
}
public interface IHumanBL {
//吃饭
boolean chiFan(boolean hungry);
//上网
boolean shangWang(boolean silly);
}public class HumanBO implements IHumanBO {
private double height;
private double weight;
@Override
public double getShengao() {
return height;
}
@Override
public double getTizhong() {
return weight;
}
@Override
public void setShengao(double height) {
this.height = height;
}
@Override
public void setTizhong(double weight) {
this.weight = weight;
}
}public class HumanBL implements IHumanBL {
@Override
public boolean chiFan(boolean hungry) {
if(hungry)
{
System.out.println("去吃火锅...");
return true;
}
return false;
}
@Override
public boolean shangWang(boolean silly) {
if(silly)
{
System.out.println("好无聊啊,上会网...");
return true;
}
return false;
}
}(2)开闭原则
(Open Close Principle,OCP)
原则定义:一个软件实体如类、模块和函数应该对扩展开放,对修改关闭
原则描述:
- 问题由来:对软件原有代码进行修改时,可能会给旧代码中引入错误
- 解决方案:当软件需要变化时,尽量通过扩展软件实体的行为来实现变化,而不是通过修改已有的代码来实现变化

使用开闭原则前:
public interface IFindGirl {

	//年龄
    public int getAge();
    //姓名
    public String getName();
}
public class FindGirl implements IFindGirl {
private String name;
private int age;
public FindGirl(String name, int age)
{
this.name = name;
this.age = age;
}
@Override
public int getAge() {
return age;
}
@Override
public String getName() {
return name;
}
}public class Main {
private final static ArrayList<IFindGirl> girls = new ArrayList<IFindGirl>();
//静态初始化块
static
{
girls.add(new FindGirl("A",23));
girls.add(new FindGirl("B",33));
girls.add(new FindGirl("C",19));
}
public static void main(String args[])
{
for(IFindGirl girl:girls)
{
System.out.println("姓名:"+girl.getName()+" 年龄:"+girl.getAge());
}
}
}使用开闭原则后:
public interface IFindGirl {

	//年龄
    public int getAge();
    //姓名
    public String getName();
}
public interface IForeigner extends IFindGirl {
//国籍
public String getCountry();
}public class ForeignerGirl implements IForeigner {
private String name;
private int age;
private String country;
public ForeignerGirl(String name, int age, String country)
{
this.name = name;
this.age = age;
this.country = country;
}
@Override
public String getCountry() {
return country;
}
@Override
public int getAge() {
return age;
}
@Override
public String getName() {
return name;
}
}public class Main {
private final static ArrayList<IForeigner> girls = new ArrayList<IForeigner>();
static
{
girls.add(new ForeignerGirl("A",23, "USA"));
girls.add(new ForeignerGirl("B",33, "Japan"));
girls.add(new ForeignerGirl("C",19, "England"));
}
//静态初始化块
public static void main(String args[]){
System.out.println("----------美女在这里----------");
for(IForeigner girl:girls)
{
System.out.println("姓名:"+girl.getName()+" 年龄:"+girl.getAge() + " 国籍:"+girl.getCountry());
}
}
}(3)里氏替换原则
(Liskov Substitution Principle,LSP)
继承的三大问题:
① 代码侵入性:只要继承,就必须拥有父类的所有属性和方法
② 降低代码的灵活性:子类必须拥有父类的属性和方法,让子类自由的世界中多了些约束
③ 增强耦合性:当父类的常量、变量和方法被修改时,必须要考虑子类的修改,而且在缺乏规范的环境下,这种修改可能带来非常糟糕的结果:大片的代码需要重构
原则定义:所有引用基类的地方必须能透明地使用其子类的对象
原则描述:
- 问题由来:有一功能P1,由类A完成。现需要将功能P1进行扩展,扩展后的功能为P,其中P由原有功能P1与新功能P2组成。新功能P2由类A的子类B来完成,则子类B在完成新功能P2的同时,有可能会导致原有功能P1发生故障
- 解决方案:当使用继承时,遵循里氏替换原则。类B继承类A时,除添加新的方法完成新增功能P2外,尽量不要重写父类A的方法,也尽量不要重载父类A的方法
输入:
public class Father {

	public Collection say(HashMap map) {//HashMap
        System.out.println("父类被执行...");
        return map.values();
    }
}
public class Son extends Father {
//方法输入参数类型
public Collection say(Map map)
{
System.out.println("子类被执行...");
return map.values();
}
}public class Home {
public static void main(String args[])
{
invoke();
}
public static void invoke()
{
//父类存在的地方,子类就应该能够存在
Father f = new Father();
Son s = new Son();
HashMap hashMap = new HashMap();
Map map = new HashMap();//HashMap是Map的子类
f.say(hashMap);
s.say(map);
}
}运行结果:

输出:
public abstract class Father {

	public abstract Map say();
}
public class Son extends Father {
@Override
public HashMap say() {
HashMap h = new HashMap();
h.put("h", "执行子类...");
return h;
}
}public class Home {
public static void main(String args[])
{
invoke();
}
public static void invoke()
{
Father f = new Son();
System.out.println(f.say());
}
}运行结果:
![]()
代码示例要点:当子类覆盖或实现父类的方法时,方法的前置条件(即方法的形参)要比父类方法的输入参数更宽松;当子类的方法实现父类的抽象方法时,方法的后置条件(即方法的返回值)要比父类更严格
实现注意点:子类的所有方法必须在父类中声明,或子类必须实现父类中声明的所有方法;尽量把父类设计为抽象类或者接口,让子类继承父类或实现父接口,并实现在父类中声明的方法;尽量避免子类重写父类的方法
(4)接口隔离原则
(Interface Segregation Principle,ISP)
原则定义:客户端不应该依赖它不需要的接口;一个类对另一个类的依赖应该建立在最小的接口上
原则描述:
- 问题由来:类A通过接口I依赖类B,类C通过接口I依赖类D,如果接口I对于类A和类B来说不是最小接口,则类B和类D必须去实现他们不需要的方法
- 解决方案:将臃肿的接口I拆分为独立的几个接口,类A和类C分别与他们需要的接口建立依赖关系
public interface IPrettyGirl {

	//长相好
    public void greatLooks();
    //好身材
    public void greatFigure();
    //气质佳
    public void greatTemperament();
}
public class PrettyGirl implements IPrettyGirl {
private String name;
//构造函数,美女名字
public PrettyGirl(String name)
{
this.name = name;
}
//好身材
@Override
public void greatFigure() {
System.out.println(name+":身材非常好");
}
//好长相
@Override
public void greatLooks() {
System.out.println(name+":长相非常好");
}
//好气质
@Override
public void greatTemperament() {
System.out.println(name+":气质非常好");
}
}public abstract class AMan {
protected IPrettyGirl prettyGirl;
public AMan(IPrettyGirl prettyGirl)
{
this.prettyGirl = prettyGirl;
}
//帅哥开始找美女啦
public abstract void findGirl();
}public class Man extends AMan {
public Man(IPrettyGirl prettyGirl) {
super(prettyGirl);
}
@Override
public void findGirl() {
System.out.println("美女在这里:----------------------");
super.prettyGirl.greatLooks();
super.prettyGirl.greatFigure();
super.prettyGirl.greatTemperament();
}
}public class Main {
public static void main(String args[])
{
IPrettyGirl jiajia = new PrettyGirl("佳佳");
AMan man = new Man(jiajia);
man.findGirl();
}
}运行结果:

(5)依赖倒置原则
(Dependence Inversion Principle,DIP)
原则定义:高层模块不应该依赖低层模块,二者都应该依赖其抽象;抽象不应该依赖细节,细节应该依赖抽象
原则描述:
- 问题由来:类A直接依赖类B,假如要将类A改为依赖类C,则必须通过修改类A的代码来达成。直接修改类A,会给程序带来不必要的风险
- 解决方案:将类A修改为依赖接口I,类B和类C各自实现接口I,类A通过接口I间接与类B或者类C发生联系,则会大大降低修改类A的几率

使用依赖倒置原则前:
public class Noodles {

	//吃面条
    public void eat()
    {
        System.out.println("吃面条...");
    }
}
public class Human {
public void cook(Noodles noodles)
{
noodles.eat();
}
}public class Main {
public static void main(String args[])
{
Human human = new Human();
Noodles food = new Noodles();
human.cook(food);
}
}
使用依赖倒置原则后:
public interface IFood {

	public void eat();
}
public class Noodles implements IFood {
@Override
public void eat() {
System.out.println("吃面条...");
}
}public class Rice implements IFood {
@Override
public void eat() {
System.out.println("吃米饭(终于吃上米饭了)...");
}
}public interface IHuman {
//这样就会做很多饭菜了
public void cook(IFood food);
}public class Human implements IHuman {
@Override
public void cook(IFood food) {
food.eat();
}
}public class Main {
public static void main(String args[])
{
IHuman human = new Human();
//实例化米饭,可以吃米饭了
IFood rice = new Rice();
//吃面条
IFood noodles = new Noodles();
human.cook(noodles);
human.cook(rice);
}
}
(6)迪米特法则
(Law Of Demeter)
原则定义:一个对象应该对其他对象保持最少的了解
原则描述:
- 问题由来:类与类之间的关系越密切,耦合度越大,当一个类发生改变时,对另一个类的影响也越大
- 解决方案:尽量降低类与类之间的耦合
使用迪米特法则之前:
public class Inmates {

	public void weAreFriend()
    {
        System.out.println("狱友说:我们是狱友...");
    }
}
public class Prisoners {
private Inmates inmates = new Inmates();
public Inmates helpEachOther()
{
System.out.println("家人说:你和狱友之间应该互相帮助...");
return inmates;
}
}public class Family {
//家人探望犯人
public void visitPrisoner(Prisoners prisoners)
{
//家人希望犯人与狱友互帮互助
Inmates inmates = prisoners.helpEachOther();
//狱友说,我们是盟友
inmates.weAreFriend();
}
}public class Main {
public static void main(String args[]) {
Family family = new Family();
family.visitPrisoner(new Prisoners());
}
}运行结果:

使用迪米特法则之后:
public class Inmates {

	public void weAreFriend()
    {
        System.out.println("我们是狱友...");
    }
}
public class Prisoners {
private Inmates inmates = new Inmates();
public Inmates helpEachOther()
{
System.out.println("犯人和狱友之间应该互相帮助...");
System.out.print("犯人说:");
inmates.weAreFriend();
return inmates;
}
}public class Family {
public void visitPrisoner(Prisoners prisoners)
{
System.out.print("家人说:");
prisoners.helpEachOther();
}
}public class Main {
public static void main(String args[])
{
Family family = new Family();
family.visitPrisoner(new Prisoners());
}
}运行结果:

DDD中的聚合概念是迪米特法则的典型应用方式
注意事项:
- 在类的结构设计上,每一个类都应当尽量降低成员的访问权限
- 在类的设计上,只要有可能,一个类应当设计成不变类
- 在对其他类的引用上,一个对象对其它对象的引用应当降到最低
- 尽量降低类的访问权限
- 谨慎使用序列化功能
- 不要暴露类成员,而应该提供相应的访问器(属性)
2. 设计模式
创建型模式:工厂方法、抽象工厂、单例、原型、建造者
结构型模式:代理、桥接、装饰者、享元/蝇量、适配器、组合、门面
行为型模式:模板方法、策略、责任链、命令、状态、观察者、中介者、迭代器、访问者、备忘录、解释器
(1)工厂方法
⼯⼚⽅法是⼀种创建型设计模式,它提供了在⽗类中创建对象的接口,但允许⼦类改变将要创建的对象的类型。⼯⼚⽅法(Factory Method)的核⼼⽬标是解耦对象创建与使⽤逻辑。
场景:

问题:

① 直接依赖具体实现
LogisticsManager直接通过new Truck()硬编码创建对象,客户端代码与Truck类强耦合。新增Ship类时必须修改transportCargo方法的逻辑。
② 违反开闭原则
每添加一种新的运输工具,例如Ship或Airplane,都需要:
- 修改transportCargo方法,新增条件分支;
- 引入对其他具体类的依赖;
- 导致核心业务逻辑频繁变更。
③ 条件分支泛滥
if-else或switch语句扩散到多个位置(例如支付方式、日志记录等其他模块重复出现类似代码),维护成本指数级增长。
④ 代码重复风险
若其他模块(如计费系统)也需要根据运输类型创建对象,必须重复编写相同的条件分支逻辑,系统复杂度失控。
解决:
子类可以修改工厂方法返回的对象类型:

所有产品都必须使用同一接口:

完整类图:

说明:
① 实现关系:Truck / Ship 实现 Transport接口
② 继承关系:RoadLogistics / SeaLogistics继承Logistics抽象类
③ 依赖关系:Logistics依赖Transport接口(虚线箭头)
核心优势:
① 快速扩展能力:新增空运只需要添加AirLogistics类和Plane产品类,零/少修改现有代码
② 核心业务稳定:planDelivery()模板方法与运输工具实现完全解耦
③ 统一接口调用:客户端通过Logistics基类操作所有物流类型,符合里氏替换原则(在使用集成的过程中,子类可以完全替换掉父类,并且软件的功能不受到影响,这个原则是保证代码的健壮性和可扩展性的重要原则之一)
// 抽象产品接口:所有运输工具必须实现此接口
interface Transport {
    void deliver();
}

// 具体产品实现:卡车类
class Truck implements Transport {
    @Override
    public void deliver() {
        System.out.println("陆地运输:卡车配送");
    }
}

// 具体产品实现:船舶类
class Ship implements Transport {
    @Override
    public void deliver() {
        System.out.println("海运:船舶配送");
    }
}

// 抽象工厂类(核心工厂方法)
abstract class Logistics {
    // 模板方法:组合核心逻辑与工厂方法
    public void planDelivery() {
        Transport transport = createTransport();
        transport.deliver();
    }

    // 工厂方法声明:延迟具体运输工具创建到子类
    public abstract Transport createTransport();
}

// 具体工厂类:陆地物流
class RoadLogistics extends Logistics {
    @Override
    public Transport createTransport() {
        return new Truck(); // 无需判读条件的直接构造
    }
}

// 具体工厂类:海洋物流
class SeaLogistics extends Logistics {
    @Override
    public Transport createTransport() {
        return new Ship();
    }
}

// 客户端调用示例
public class FactoryMethod {
    public static void main(String[] args) {
        FactoryMethod client = new FactoryMethod();
        client.clientMethod("road");
    }
    public void clientMethod(String logisticsType) {
        Logistics logistics;

        // 通过简单映射选择具体工厂
        if ("road".equals(logisticsType)) {
            logistics = new RoadLogistics();
        } else {
            logistics = new SeaLogistics();
        }

        // 统一调用接口(核心业务逻辑无需修改)
        logistics.planDelivery();
    }
}

// 优化
// 创建对象注册表
class LogisticsRegistry {
    private static Map<String, Supplier<Logistics>> registry = new HashMap<>();

    static {
        registry.put("road", RoadLogistics::new); // 配置化绑定, 可以从配置文件中加载
        registry.put("sea", SeaLogistics::new);
    }

    public static Logistics getLogistics(String type) {
        return registry.getOrDefault(type, SeaLogistics::new).get();
    }
}

// 客户端无需任何条件判断
class ClientV2 {
    public void clientMethod(String logisticsType) {
        Logistics logistics = LogisticsRegistry.getLogistics(logisticsType);
        logistics.planDelivery();
    }
}
总结:

(2)抽象工厂
抽象⼯⼚是⼀种创建型设计模式,可以⽣成相关对象系列,⽽⽆需指定它们的具体类。
场景:


问题:

① 风格一致性失控:客户端直接创建不同风格的对象(现代椅子+维多利亚沙发)

结果:客户收到风格冲突的家具套装
② 对象创建硬编码:每当新增风格时(如新增ArtDeco),强制修改所有客户端代码

③ 产品族管理实效:缺乏统一约束机制,易出现类型错误

解决:

// 接口约束产品规格
 interface Chair {
    void sit();
}

 interface Sofa {
    void lieDown();
}

 interface CoffeeTable {
    void placeItem();
}
// 确保现代系列组件统一
 class ModernChair implements Chair {
    @Override
    public void sit() {
        System.out.println("Modern chair designed seating");
    }
}

 class ModernSofa implements Sofa {
    @Override
    public void lieDown() {
        System.out.println("Modern sofa clean lines design");
    }
}

 class ModernCoffeeTable implements CoffeeTable {
    @Override
    public void placeItem() {
        System.out.println("Modern geometric table surfaces");
    }
}

// 保证维多利亚风格一致性
 class VictorianChair implements Chair {
    @Override
    public void sit() {
        System.out.println("Classic carved wood chair");
    }
}

 class VictorianSofa implements Sofa {
    @Override
    public void lieDown() {
        System.out.println("Antique fabric sofa");
    }
}

 class VictorianCoffeeTable implements CoffeeTable {
    @Override
    public void placeItem() {
        System.out.println("Ornate marble-top table");
    }
}

 interface FurnitureFactory {
    Chair createChair();
    Sofa createSofa();
    CoffeeTable createCoffeeTable();
}

// 现代风格产品线工厂
 class ModernFactory implements FurnitureFactory {
    @Override
    public Chair createChair() {
        return new ModernChair();
    }
    @Override
    public Sofa createSofa() {
        return new ModernSofa();
    }
    @Override
    public CoffeeTable createCoffeeTable() {
        return new ModernCoffeeTable();
    }
}

// 维多利亚风格产品线工厂
 class VictorianFactory implements FurnitureFactory {
    @Override
    public Chair createChair() {
        return new VictorianChair();
    }
    @Override
    public Sofa createSofa() {
        return new VictorianSofa();
    }
    @Override
    public CoffeeTable createCoffeeTable() {
        return new VictorianCoffeeTable();
    }
}

class FurnitureStore {
    private FurnitureFactory factory;

    // 动态绑定具体工厂
    public FurnitureStore(FurnitureFactory factory) {
        this.factory = factory;
    }

    public void showcaseSet() {
        Chair chair = factory.createChair();
        Sofa sofa = factory.createSofa();
        CoffeeTable table = factory.createCoffeeTable();

        System.out.println("展示完整风格套件:");
        chair.sit();
        sofa.lieDown();
        table.placeItem();
    }
}

public class AbstractFactory {
    public static void main(String[] args) {
        // 创建现代风格商店
        FurnitureStore modernStore = new FurnitureStore(new ModernFactory());
        modernStore.showcaseSet();

        // 创建维多利亚风格商店
        FurnitureStore victorianStore = new FurnitureStore(new VictorianFactory());
        victorianStore.showcaseSet();
    }
}
总结:

(3)建造者
Builder是⼀种创建型设计模式,可让你逐步构建复杂对象。该模式允许你使⽤相同的构造代码⽣成对象的不同类型和表示形式。
场景:

问题:
问题1:
class IssueHouse1 {
    // 基础参数
    protected int wallCount;
    protected boolean hasDoor;

    // 扩展参数(部分子类不使用)
    protected boolean hasSwimmingPool;
    protected boolean hasGarage;
    protected boolean hasGarden;

    // 分层构造函数(引发参数冗余)
    public IssueHouse1(int wallCount, boolean hasDoor) {
        this.wallCount = wallCount;
        this.hasDoor = hasDoor;
    }

    // 参数爆炸式重载(违反单一职责原则)
    public IssueHouse1(int wallCount, boolean hasDoor, boolean hasSwimmingPool) {
        this(wallCount, hasDoor);
        this.hasSwimmingPool = hasSwimmingPool;
    }

    public IssueHouse1(int wallCount, boolean hasDoor,
                 boolean hasSwimmingPool, boolean hasGarage) {
        this(wallCount, hasDoor, hasSwimmingPool);
        this.hasGarage = hasGarage;
    }

    // 更多构造函数组合...
    public IssueHouse1(int wallCount, boolean hasDoor,
                       boolean hasSwimmingPool, boolean hasGarage, boolean aaa) {
        this(wallCount, hasDoor, hasSwimmingPool);
        this.hasGarage = hasGarage;
    }
}

// 基础房屋(必须调用父类构造传递无效参数)
class BasicHouse extends IssueHouse1 {
    public BasicHouse() {
        super(4, true, false, false); // 强制填写无用参数
    }
}

// 带泳池房屋
class HouseWithSwimmingPool extends IssueHouse1 {
    public HouseWithSwimmingPool() {
        super(4, true, true, false);
    }
}

// 带车库房屋
class HouseWithGarage extends IssueHouse1 {
    public HouseWithGarage() {
        super(4, true, false, true);
    }
}

// 混合组合场景需创建新子类(类数量激增)
class LuxuryHouse extends IssueHouse1 {
    public LuxuryHouse() {
        super(6, true, true, true, true); // 需要修改父类构造函数签名
    }
}

public class NoBuilder1 {
    public static void main(String[] args) {
        // 类型强制转换问题
        IssueHouse1 basic = new BasicHouse();
        IssueHouse1 luxury = new LuxuryHouse();

        // 新增类型无法动态组合(需预定义所有子类)
        boolean needHeatedPool = true;
        if(needHeatedPool) {
            // 必须创建新的HeatedPoolHouse子类
        }
    }
}
问题2:
class IssueHouse2 {
    // 核心参数
    private int wallCount;
    private int doorCount;

    // 可选设施
    private boolean hasSwimmingPool; // 90%场景无用参数
    private boolean hasSolarPanels;
    private boolean hasUndergroundBunker;

    // 装饰参数
    private String roofMaterial;
    private String wallPaintColor;
    private boolean hasLandscaping;

    // 电器系统
    private boolean hasSmartHomeSystem;
    private boolean hasCentralAir;

    /**
     * 万能的构造函数(包含18个参数)
     * @param wallCount 墙体数量(必须)
     * @param doorCount 门数量(必须)
     * @param hasSwimmingPool 泳池存在性(90%为false)
     * @param solarPanels 太阳能板(特殊设施)
     * ...其他参数省略...
     */
    public IssueHouse2(
            int wallCount,
            int doorCount,
            boolean hasSwimmingPool,
            boolean hasSolarPanels,
            boolean hasUndergroundBunker,
            String roofMaterial,
            String wallPaintColor,
            boolean hasLandscaping,
            boolean hasSmartHomeSystem,
            boolean hasCentralAir
            // ...还有8个额外参数...
    ) {
        this.wallCount = wallCount;
        this.doorCount = doorCount;
        this.hasSwimmingPool = hasSwimmingPool; // 参数浪费
        this.hasSolarPanels = hasSolarPanels;
        // ...剩余参数初始化逻辑...
    }
}

// 客户端被迫填写无用参数
public class NoBuilder2 {
    public static void main(String[] args) {
        // 基础住宅实例化(需要填写7个默认false)
        IssueHouse2 basicHouse = new IssueHouse2(
                4, 1,
                false, false, false, // 泳池/太阳能/地堡
                "Asphalt", "White", false, false, false
        );

        // 豪华住宅调用(所有参数必须显式指定)[^3]
        IssueHouse2 mansion = new IssueHouse2(
                12, 6,
                true, true, true,
                "Slate", "Ivory", true,
                true, true
                // ...仍需补全所有参数...
        );
    }
}
解决:
① Builder核心接口定义
② 产品类(简化结构)
③ 具体建造者实现
④ 导演类(统一建造流程)
⑤ 客户端调用模式
// Product类代表复杂对象
class House {
    private String wallMaterial;
    private int doors;
    private int windows;
    private String roofType;
    private boolean hasSwimmingPool;

    public void setWallMaterial(String material) { /*...*/ }    // 墙体材料设置
    public void setDoors(int count) { /*...*/ }
    public void setWindows(int count) { /*...*/ }
    public void setRoofType(String type) { /*...*/ }
    public void setSwimmingPool(boolean has) { /*...*/ }        // 可选游泳池配置
}

// Builder接口定义建造步骤
interface HouseBuilder {
    void reset();
    void buildWalls();
    void buildDoors(int count);              // 参数化建造方法
    void buildWindows(int count);
    void buildRoof(String type);
    void buildSwimmingPool();
    House getResult();
}

// 石头房屋建造者
class StoneHouseBuilder implements HouseBuilder {
    private House house = new House();

    @Override
    public void reset() {
        this.house = new House();            // 重置构建状态
    }

    @Override
    public void buildWalls() {               // 实现具体建造逻辑
        house.setWallMaterial("花岗岩");
    }

    @Override
    public void buildDoors(int count) {

    }

    @Override
    public void buildWindows(int count) {

    }

    @Override
    public void buildRoof(String type) {     // 参数化方法示例
        house.setRoofType(type + "石质屋顶");
    }

    @Override
    public void buildSwimmingPool() {        // 实现可选配置
        house.setSwimmingPool(true);
    }

    @Override
    public House getResult() {
        return null;
    }

    // 其他方法实现...
}

// 木屋建造者
class WoodHouseBuilder implements HouseBuilder {
    @Override
    public void reset() {

    }

    @Override
    public void buildWalls() {

    }

    @Override
    public void buildDoors(int count) {

    }

    @Override
    public void buildWindows(int count) {

    }

    @Override
    public void buildRoof(String type) {

    }

    @Override
    public void buildSwimmingPool() {

    }

    @Override
    public House getResult() {
        return null;
    } /* 类似实现 */ }

// 可扩展第三类建造者(例如现代玻璃房屋)
class ModernHouseBuilder implements HouseBuilder {
    private House currentHouse = new House();
    @Override
    public void reset() {

    }

    @Override
    public void buildWalls() {
        currentHouse.setWallMaterial("钢化玻璃");
    }

    @Override
    public void buildDoors(int count) {

    }

    @Override
    public void buildWindows(int count) {

    }

    @Override
    public void buildRoof(String type) {
        currentHouse.setRoofType("透明生态屋顶");
    }

    @Override
    public void buildSwimmingPool() {

    }

    @Override
    public House getResult() {
        return null;
    }
}


// Director控制建造流程
class ConstructionDirector {                // 封装常见建造方案
    public void constructFamilyHouse(HouseBuilder builder) {
        builder.reset();
        builder.buildWalls();
        builder.buildDoors(3);               // 标准流程步骤
        builder.buildWindows(6);
        builder.buildRoof("斜顶");
    }

    public void constructLuxuryVilla(HouseBuilder builder) {
        builder.reset();
        builder.buildWalls();
        builder.buildDoors(5);
        builder.buildWindows(10);
        builder.buildRoof("平顶");
        builder.buildSwimmingPool();         // 添加可选设施
    }
}

// Client使用示例
public class Builder {
    public static void main(String[] args) {
        ConstructionDirector director = new ConstructionDirector();

        // 建造石头别墅
        HouseBuilder stoneBuilder = new StoneHouseBuilder();
        director.constructLuxuryVilla(stoneBuilder);    // 调用导演建造逻辑
        House stoneVilla = stoneBuilder.getResult();    // 获取产品

        // 建造木屋
        HouseBuilder woodBuilder = new WoodHouseBuilder();
        woodBuilder.buildSwimmingPool();                // 客户端自定义步骤
        director.constructFamilyHouse(woodBuilder);
        House woodHouse = woodBuilder.getResult();
    }
}
总结:

(4)原型
原型是⼀种创建型设计模式,它允许你复制现有对象,⽽不使你的代码依赖于它们的类。
场景:

示例:

abstract class Shape implements Cloneable {
    protected int xCoord;
    protected int yCoord;
    protected String fillColor;

    // 基础构造方法
    public Shape() {
        this.xCoord = 0;
        this.yCoord = 0;
        this.fillColor = "#FFFFFF";  // 默认填充颜色
    }

    // 原型构造方法(拷贝构造核心)
    protected Shape(Shape prototype) {
        this.xCoord = prototype.xCoord;         // 坐标克隆
        this.yCoord = prototype.yCoord;         // 实现位置复制
        this.fillColor = prototype.fillColor;   // 颜色属性继承
    }

    public void setPosition(int x , int y) {
        this.xCoord = x;
        this.yCoord = y;
    }

    public void move(int x , int y) {
        this.xCoord = x;
        this.yCoord = y;
    }
    public void setColor(String color) {
        this.fillColor = color;
    }

    public abstract Shape clone();
}

class Rectangle extends Shape {
    private int width;
    private int height;

    public Rectangle(Rectangle source) {
        super(source);             // 调用父类拷贝构造
        this.width = source.width;       // 特有属性复制
        this.height = source.height;     // 包括宽高参数
    }

    public Rectangle(int w, int h) {
        this.width = w;
        this.height = h;
    }

    @Override
    public Rectangle clone() {     // 返回具体子类类型
        return new Rectangle(this);     // 原型引导构造
    }
}

class Circle extends Shape {
    private int radius;

    public Circle(Circle source) {
        super(source);           // 父类属性初始化
        this.radius = source.radius;   // 半径参数拷贝
    }

    public Circle(int r) {
        this.radius = r;
    }

    public void setRadius(int r) {
        this.radius = r;          // 半径独立可变
    }

    @Override
    public Circle clone() {
        return new Circle(this);      // 生成新实例
    }
}

public class Prototype {
    public static void main(String[] args) {
        Shape prototype = new Circle(10);
        prototype.setPosition(15, 20);
        prototype.setColor("#FFA500");

// 快速生成克隆体
        Shape clonedCircle = prototype.clone();  // 无需知道具体类型
        clonedCircle.move(5, 5);                 // 获得独立坐标

// 构造矩形原型
        Shape rectProto = new Rectangle(100,200);
        Shape clonedRect = rectProto.clone();   // 完美复制属性
    }
}
总结:

(5)单例
单例是⼀种创建型设计模式,它可以确保⼀个类只有⼀个实例,同时为该实例提供全局访问点。
问题:
① 确保⼀个类只有⼀个实例
② 为该实例提供全局访问点
解决:所有Singleton的实现都有以下两个共同的步骤:
① 将默认构造函数设置为私有,以防止其他对象使用new带有Singleton类的运算符;
② 创建一个充当构造函数的静态方法。在底层,此方法调用私有构造函数来创建一个对象并将其保存在静态字段中,对此方法的所有后续调用都会返回缓存的对象。
示例:数据库连接
重构前:

重构后:
public class Singleton {
}
public class Database {
    private static volatile Database instance;
    private Connection connection;

    // 私有化构造并建立物理连接
    private Database() {
        this.connection = DriverManager.getConnection(JDBC_URL); // 真实连接建立
    }

    // 双重检查锁定实现线程安全
    public static Database getInstance() {
        if (instance == null) {
            synchronized (Database.class) {
                if (instance == null) {
                    instance = new Database();
                }
            }
        }
        return instance;
    }

    // 统一入口方法(可扩展缓存逻辑)
    public ResultSet query(String sql) {
        return connection.createStatement().executeQuery(sql); // 所有SQL通过单连接执行
    }
}
总结:

(6)适配器
使接口不兼容的类实现协同⼯作,通过引入中间层将客户端接口转换为服务端接口标准。典型场景如整合第三⽅类库或遗留系统时保持代码兼容。
场景:

问题:
① 接口不匹配:客户端调用规则与现有服务类接口无法直接通信(如XML接口需转JSON请求)
② 保护现有代码:无法修改第三方/遗留代码的接口,实现时避免侵入性改造(例如封闭系统或缺乏源码)
解决:
① 适配器实现了一个与现有对象之一兼容的接口
② 使用这个接口,现有的对象可以安全地调用适配器的方法
③ 接收到调用后,适配器将请求传递给第二个对象,但采用第二个对象期望的格式和顺序

定义客户端协议接口,强制适配器实现该约定:

适配器持有服务实例引用,委托调用并进行数据转换:

总结:

(7)桥接器
桥接器是⼀种结构型设计模式,可将⼀个⼤类或⼀系列紧密相关的类拆分为抽象和实现两个独⽴ 的层次结构,从⽽能在开发时分别使⽤。
问题:

解决:

示例:

/* 实现层级:设备接口规范 */
interface Device {
    // 状态检测基础方法
    boolean isEnabled();
    void enable();    // Device接口定义
    void disable();

    // 媒体控制方法
    int getVolume();
    void setVolume(int percent);
    int getChannel();
    void setChannel(int channel);
}

/* 具体设备实现 */
class Tv implements Device {         // TV实现
    private boolean on = false;
    private int volume = 50;
    private int channel = 1;

    public boolean isEnabled() { return on; }
    public void enable() { on = true; }  // TV特有启动过程
    public void disable() { on = false; }

    public int getVolume() { return volume; }
    public void setVolume(int percent) {
        volume = Math.max(0, Math.min(100, percent));
    }
    public int getChannel() { return channel; }
    public void setChannel(int ch) {
        channel = Math.max(1, ch);
    }
}

class Radio implements Device {     // Radio实现
    private boolean active = false;
    private int level = 30;

    public boolean isEnabled() { return active; }
    public void enable() { active = true; }
    public void disable() { active = false; }

    public int getVolume() { return level; }
    public void setVolume(int percent) {
        level = (percent > 100) ? 100 : Math.max(0, percent);
    }
    public int getChannel() { return 0; }  // 收音机无频道
    public void setChannel(int ch) {}      // 空实现
}

/* 抽象层级:遥控器抽象 */
class RemoteControl {
    // 持有实现层对象的引用(关键结构)
    protected Device device;

    public RemoteControl(Device device) {
        this.device = device;
    }

    // 电源切换核心逻辑
    public void togglePower() {
        if (device.isEnabled()) {
            device.disable();
        } else {
            device.enable();
        }
    }

    public void volumeUp() {
        device.setVolume(device.getVolume() + 10);
    }

    public void volumeDown() {
        device.setVolume(device.getVolume() - 10);
    }

    public void channelUp() {
        device.setChannel(device.getChannel() + 1);
    }

    public void channelDown() {
        device.setChannel(device.getChannel() - 1);
    }
}

/* 扩展抽象:高级遥控器(扩展功能) */
class AdvancedRemoteControl extends RemoteControl {
    public AdvancedRemoteControl(Device device) {
        super(device);
    }

    public void mute() {      // 新增静音功能
        device.setVolume(0);  // 通过接口操作设备
    }
}

// 客户端使用示例
public class Bridge {
    public static void main(String[] args) {
        Device tv = new Tv();
        RemoteControl basicRemote = new RemoteControl(tv);
        basicRemote.togglePower();   // 开启电视

        Device radio = new Radio();
        AdvancedRemoteControl advancedRemote = new AdvancedRemoteControl(radio);
        advancedRemote.mute();       // 设置静音
    }
}
总结:

(8)组合模式
组合模式是⼀种结构型设计模式,你可以使⽤它将对象组合成树状结构,并且能像使⽤独⽴对象⼀样使⽤它们。组合模式以递归方式处理对象树中的所有项目。
问题:

解决:

public class Composite {
}
/* 组合元素基类(公共接口) */
interface OrderComponent {
    double calculatePrice();  // 核心计算方法定义
}

/* 商品项实现类 */
class ProductItem implements OrderComponent {
    private double unitPrice;
    private int quantity;

    public ProductItem(double price, int qty) {
        this.unitPrice = price;
        this.quantity = qty;
    }

    @Override
    public double calculatePrice() {
        return unitPrice * quantity;  // 基本商品价格计算逻辑
    }
}

/* 组合容器(有包装附加费) */
class CompositeBox implements OrderComponent {
    private List<OrderComponent> contents = new ArrayList<>();
    private double packagingFee;

    public CompositeBox(double fee) {
        this.packagingFee = fee;  // 包装费扩展
    }

    public void add(OrderComponent item) {
        contents.add(item);
    }

    @Override
    public double calculatePrice() {
        double total = packagingFee;  // 包装费基数
        for (OrderComponent item : contents) {
            // 递归计算嵌套内容(树形结构处理)
            total += item.calculatePrice();
        }
        return total;
    }
}

// 使用示例(典型场景)
class Client {
    public static void main(String[] args) {
        // 创建基础商品
        OrderComponent phone = new ProductItem(2999.0, 2);
        OrderComponent earphone = new ProductItem(199.0, 1);

        // 构建礼品套装盒子(含子包装)
        CompositeBox giftBox = new CompositeBox(50.0);
        giftBox.add(new ProductItem(399.0, 1)); // 赠品数据线
        giftBox.add(earphone);

        // 主订单容器(包含嵌套包装)
        CompositeBox mainOrder = new CompositeBox(20.0);
        mainOrder.add(phone);
        mainOrder.add(giftBox);

        System.out.println("总金额:" + mainOrder.calculatePrice());
    }
}
总结:

(9)装饰者
装饰是⼀种结构型设计模式,允许你通过将对象放⼊包含⾏为的特殊封装对象中来为原对象绑定新的⾏为。
场景:程序可以使用通知器类向预定义的邮箱发送重要事件通知:

每种通知类型都将作为通知器的一个子类得以实现:

问题:

解决:

// 抽象构件 - 通知接口
interface Notification {
    void send(String message);
}

// 具体构件 - 短信通知
class SMSNotification implements Notification {
    @Override
    public void send(String message) {
        System.out.println("发送短信通知:" + message);
    }
}

// 具体构件 - 微信通知
class WeChatNotification implements Notification {
    @Override
    public void send(String message) {
        System.out.println("发送微信通知:" + message);
    }
}

// 具体构件 - 邮件通知
class EmailNotification implements Notification {
    @Override
    public void send(String message) {
        System.out.println("发送邮件通知:" + message);
    }
}

// 具体构件 - 系统通知
class SystemNotification implements Notification {
    @Override
    public void send(String message) {
        System.out.println("发送系统通知:" + message);
    }
}

// 装饰器 - 抽象装饰器类
abstract class NotificationDecorator implements Notification {
    protected Notification notification;

    public NotificationDecorator(Notification notification) {
        this.notification = notification;
    }

    @Override
    public void send(String message) {
        notification.send(message);
    }
}

// 具体装饰器 - 短信通知装饰器
class SMSNotificationDecorator extends NotificationDecorator {
    public SMSNotificationDecorator(Notification notification) {
        super(notification);
    }

    @Override
    public void send(String message) {
        super.send(message);
        sendSMS(message);
    }

    private void sendSMS(String message) {
        System.out.println("额外发送短信通知:" + message);
    }
}

// 具体装饰器 - 微信通知装饰器
class WeChatNotificationDecorator extends NotificationDecorator {
    public WeChatNotificationDecorator(Notification notification) {
        super(notification);
    }

    @Override
    public void send(String message) {
        super.send(message);
        sendWeChat(message);
    }

    private void sendWeChat(String message) {
        System.out.println("额外发送微信通知:" + message);
    }
}

public class Decorator {
    public static void main(String[] args) {
        // 创建基础通知对象
        Notification notification = new SystemNotification();

        // 使用装饰器动态添加短信通知和微信通知
        notification = new SMSNotificationDecorator(notification);
        notification = new WeChatNotificationDecorator(notification);

        // 发送通知
        notification.send("您有新的消息,请注意查收!");

        // 输出:
        // 发送系统通知:您有新的消息,请注意查收!
        // 额外发送短信通知:您有新的消息,请注意查收!
        // 额外发送微信通知:您有新的消息,请注意查收!
    }
}
总结:

(10)外观/门面模式
外观是⼀种结构型设计模式,能为程序库、框架或其他复杂类提供⼀个简单的接口。
问题:如果必须在代码中使用某个复杂的库或框架中的众多对象,正常情况下,需要负责所有对象的初始化工作、管理其依赖关系并按照正确的顺序执行方法等。最终,程序中类的业务逻辑将与第三方类的实现细节紧密耦合,使得理解和维护代码的工作很难进行。
示例:

// 视频文件抽象(第三方类模拟)
class VideoFile {
    private String filename;

    public VideoFile(String name) {
        this.filename = name;
    }

    public String getCodecType() {
        // 伪代码提取类型逻辑
        return filename.contains(".ogg") ? "ogg" : "unknown";
    }
}

// 编解码抽象
interface CompressionCodec {}
class MPEG4CompressionCodec implements CompressionCodec {}  // MP4编解码
class OggCompressionCodec implements CompressionCodec {}    // Ogg编解码

// 编解码工厂实现(提取逻辑)
class CodecFactory {
    public static CompressionCodec extract(VideoFile file) {
        String type = file.getCodecType();
        return type.equals("ogg") ? new OggCompressionCodec() : null;
    }
}

// 码率处理组件(转换逻辑)
class BitrateReader {
    public static VideoFile read(String filename, CompressionCodec codec) {
        System.out.println("解码原始文件: " + filename);
        return new VideoFile(filename);
    }

    public static VideoFile convert(VideoFile buffer, CompressionCodec codec) {
        System.out.println("转换编码格式: " + codec.getClass().getSimpleName());
        return new VideoFile(buffer + "_converted");
    }
}

// 音频混合组件(后处理步骤)
class AudioMixer {
    public VideoFile fix(VideoFile result) {
        System.out.println("标准化音频轨道");
        return new VideoFile(result + "_mixed");
    }
}

/* 核心外观类(完整转换流程封装) */
class VideoConverter {
    public File convert(String filename, String format) {
        VideoFile file = new VideoFile(filename);
        CompressionCodec sourceCodec = CodecFactory.extract(file);  // 源编码识别

        // 目标编码选择(条件分支)
        CompressionCodec destinationCodec;
        if (format.equalsIgnoreCase("mp4")) {
            destinationCodec = new MPEG4CompressionCodec();
        } else {
            destinationCodec = new OggCompressionCodec();
        }

        // 转换处理链条(标准流程)
        VideoFile buffer = BitrateReader.read(filename, sourceCodec);
        VideoFile intermediateResult = BitrateReader.convert(buffer, destinationCodec);
        VideoFile finalResult = new AudioMixer().fix(intermediateResult);

        return new File(finalResult.toString());
    }
}

// 客户端调用(典型使用示例)
public class Facade {
    public static void main(String[] args) {
        VideoConverter converter = new VideoConverter();
        File mp4File = converter.convert("presentation.ogg", "mp4");
//        mp4File.save();
    }
}
总结:

(11)享元/蝇量
享元是⼀种结构型设计模式,它摒弃了在每个对象中保存所有数据的⽅式,通过共享多个对 象所共有的相同状态,让你能在有限的内存容量中载⼊更多对象。
场景:

解决:外部状态存储;享元与不可变性;享元工厂


public class Flyweight {
}
// 粒子内在状态(游戏特效属性)
final class ParticleType {
    private final String color;  // 不可变特征
    private final String sprite;
    private final String effectType;

    public ParticleType(String color, String sprite, String effectType) {
        this.color = color;
        this.sprite = sprite;
        this.effectType = effectType;
    }

    public void render(String position, double velocity) {
        System.out.printf("绘制%s特效: 位置%s | 速度%.1fm/s | 材质[%s]%n",
                effectType, position, velocity, sprite);
    }
}

// 粒子外在状态载体
class Particle {
    private double x, y;
    private double velocity;
    private final ParticleType type; // 共享引用

    public Particle(double x, double y, double v, ParticleType type) {
        this.x = x;
        this.y = y;
        this.velocity = v;
        this.type = type;
    }

    public void display() {
        type.render(String.format("(%.1f, %.1f)", x, y), velocity);
    }
}

// 享元工厂
class ParticleFactory {
    private static final Map<String, ParticleType> pool = new HashMap<>();

    public static ParticleType getType(String color, String sprite, String effect) {
        String key = color + "_" + sprite + "_" + effect;
        // 池化检测逻辑(资料5的核心机制)[^5]
        if (!pool.containsKey(key)) {
            pool.put(key, new ParticleType(color, sprite, effect));
        }
        return pool.get(key);
    }
}

// 粒子系统管理
class ParticleSystem {
    private List<Particle> particles = new ArrayList<>();

    public void addParticle(double x, double y, double v,
                            String color, String sprite, String effect) {
        ParticleType type = ParticleFactory.getType(color, sprite, effect);
        particles.add(new Particle(x, y, v, type));
    }

    public void simulate() {
        particles.forEach(Particle::display);
    }
}

// 运行示例(参照[资料4]的客户端调用方式)[^4]
class GameEngine {
    public static void main(String[] args) {
        ParticleSystem system = new ParticleSystem();

        // 添加火焰粒子
        system.addParticle(10.5, 20.3, 5.2, "橙红", "fire_tex", "火焰");
        system.addParticle(15.1, 18.7, 4.8, "橙红", "fire_tex", "火焰");

        // 添加冰雪粒子
        system.addParticle(30.0, 50.0, 2.1, "冰蓝", "snow_tex", "冰霜");

        system.simulate();
    }
}
总结:

(12)代理
代理是⼀种结构型设计模式,让你能够提供对象的替代品或其占位符。代理控制着对于原对象的访问,并允许在 将请求提交给对象前后进⾏⼀些处理。
问题:数据库查询有可能会非常缓慢。

解决:代理将自己伪装成数据库对象,可在客户端或实际数据库对象不知情的情况下处理延迟初始化和缓存查询结果的工作。

核心设计要点:
① 代理类与现实服务实现相同接口
② 第一次查询延迟初始化真实连接(虚拟代理模式)
③ 哈希表缓存重复查询结果(缓存优化)
④ 客户端代码不需感知代理存在(透明访问)
public class Proxy {
}
// 服务接口
interface Database {
    String executeQuery(String sql);
}

// 真实服务对象
class RealDatabase implements Database {
    public RealDatabase() {
        initializeConnection(); // 耗时的连接初始化
    }

    private void initializeConnection() {
        System.out.println("正在建立数据库连接...");
    }

    @Override
    public String executeQuery(String sql) {
        System.out.println("执行真实查询: " + sql);
        return "结果数据"; // 示例返回值
    }
}

// 代理类(延迟加载和缓存)
class DatabaseProxy implements Database {
    private RealDatabase realDatabase;
    private Map<String, String> cache = new HashMap<>(); // 查询结果缓存

    @Override
    public String executeQuery(String sql) {
        // 延迟初始化(虚拟代理模式)
        if (realDatabase == null) {
            realDatabase = new RealDatabase();
        }

        // 结果缓存逻辑(缓存代理)
        if (cache.containsKey(sql)) {
            System.out.println("[Proxy] 返回缓存结果: " + sql);
            return cache.get(sql);
        }

        String result = realDatabase.executeQuery(sql);
        cache.put(sql, result);
        return result;
    }
}

// 客户端交互
class Application {
    public static void main(String[] args) {
        Database proxy = new DatabaseProxy();

        // 第一次查询触发真实连接
        System.out.println(proxy.executeQuery("SELECT * FROM users"));

        // 重复查询使用缓存
        System.out.println(proxy.executeQuery("SELECT * FROM users"));

        // 新查询继续代理
        System.out.println(proxy.executeQuery("SELECT COUNT(*) FROM products"));
    }
}
总结:

(13)责任链
责任链是⼀种⾏为设计模式,允许你将请求沿着处理者链进⾏发送。收到请求后,每个处理者均可对请 求进⾏处理,或将其传递给链上的下个处理者。
问题:

解决:处理者依次排列,组成一条链

核心改进点:
① 解耦检查逻辑:每个安全检查独立成类,通过setNext组合链式结构
② 动态扩展性:新增日志检查仅需创建LogHandler并插入链中任意位置
③ 复用性增强:在PaymentService中可重用UserAuthHandler而不用重复验证代码
public class ChainOfResponse {
}

class AuthException extends RuntimeException {

    private static final long serialVersionUID = 1L;

    public AuthException(String msg) {
        super(msg);
    }

}

class PermissionException extends RuntimeException {

    private static final long serialVersionUID = 1L;

    public PermissionException(String msg) {
        super(msg);
    }

}
// Handler接口定义处理契约
interface Handler {
    void handle(Request request) throws AuthException;
}

// BaseHandler实现链式传递逻辑
abstract class BaseHandler implements Handler {
    private Handler next;

    public BaseHandler setNext(Handler next) {
        this.next = next;
        return this;
    }

    protected void passToNext(Request request) throws AuthException {
        if (next != null) next.handle(request);  // 核心链式调用逻辑[^1]
    }
}

// 具体处理者1:用户认证
class UserAuthHandler extends BaseHandler {
    @Override
    public void handle(Request request) throws AuthException {
        int userId = 0; // request.getUserId()
        if (!validateUser(userId)) {
            throw new AuthException("用户未登录");
        }
        passToNext(request);  // 验证成功移交后续处理
    }

    private boolean validateUser(int userId) {
        return true;
    }
}

// 具体处理者2:权限校验
class PermissionHandler extends BaseHandler {
    @Override
    public void handle(Request request) throws AuthException {
        int userId = 0; // request.getUserId()
        if (!checkAdminPermission(userId)) {
            throw new PermissionException("权限不足");
        }
        passToNext(request);
    }
    private boolean checkAdminPermission(int userId){
        return false;
    }
}

// Client动态组合处理链
class OrderService {
    private Handler chain;

    public OrderService() {
        this.chain = new UserAuthHandler()
                .setNext(new PermissionHandler());  // 灵活配置处理顺序
    }

    public void createOrder(Request request) {
        chain.handle(request);  // 统一入口触发处理链
        // 执行业务逻辑...
    }
}
总结:

(14)命令
命令是⼀种⾏为设计模式, 它可将请求转换为⼀个包 含与请求相关的所有信息的独⽴对象。该转换让你 能根据不同的请求将方法参数化、延迟请求执⾏或将其放⼊队列中,且能实现可撤销操作。
问题:

解决:

public class CommandCode {
}
// 1.Receiver 编辑器核心
class Editor {
    private StringBuilder content = new StringBuilder();

    public String getSelection() {
        return content.toString(); // 实际应按选区范围获取
    }

    public void deleteSelection() {
        content.setLength(0); // 清空选区
    }

    public void replaceSelection(String text) {
        content.replace(0, content.length(), text); // 替换选区
    }

    public String getContent() {
        return content.toString();
    }
}

// 2.Command 接口层
interface Command {
    void execute();
}

// 3.具体命令实现
class CopyCommand implements Command {
    private Editor editor;
    private String clipboard;  // 仿系统剪贴板

    public CopyCommand(Editor editor) {
        this.editor = editor;
    }

    @Override
    public void execute() {
        clipboard = editor.getSelection(); // 获取选区存入剪贴板
    }
}

class PasteCommand implements Command {
    private Editor editor;
    private String clipboard;

    public PasteCommand(Editor editor, String clipboard) {
        this.editor = editor;
        this.clipboard = clipboard;
    }

    @Override
    public void execute() {
        editor.replaceSelection(clipboard); // 用剪贴板内容覆盖选区
    }
}

// 4.Invoker触发器
class Toolbar {
    private Command command;

    public void setCommand(Command cmd) { // 动态绑定命令
        this.command = cmd;
    }

    public void onClick() {
        if(command != null) command.execute();
    }
}

// 5.Client组装结构
class App {
    public static void main(String[] args) {
        // 创建核心模块
        Editor doc = new Editor();
        doc.replaceSelection("Hello");

        // 建立命令纽带
        Toolbar copyBtn = new Toolbar();
        copyBtn.setCommand(new CopyCommand(doc)); // 绑定复制行为

        Toolbar pasteBtn = new Toolbar();
        pasteBtn.setCommand(new PasteCommand(doc, "World")); // 粘贴命令携带参数

        // 用户点击按钮时
        copyBtn.onClick(); // 将Hello存入剪贴板
        pasteBtn.onClick(); // 文档内容变为World
    }
}
总结:

(15)迭代器
迭代器是⼀种⾏为设计模式,让你能在不暴露集合底层表现形式(列表、栈和树等)的情况下遍历集合中所有的元素。
场景:

解决:

// 1.Iterator接口 (定义遍历标准)
interface TreeIterator<T> {
    boolean hasNext();
    T next();
}

// 2.Concrete Iterator(实现广度优先遍历)
class BfsIterator implements TreeIterator<TreeNode> {
    private Queue<TreeNode> queue = new LinkedList<>();

    public BfsIterator(TreeNode root) {
        if(root != null) queue.add(root);
    }

    public boolean hasNext() {   // 判断是否有下一节点
        return !queue.isEmpty();
    }

    public TreeNode next() {     // 按层遍历树节点
        TreeNode current = queue.poll();
        for(TreeNode child : current.getChildren()) {
            queue.add(child);
        }
        return current;
    }
}

// 3.Collection接口(树结构抽象)
interface TreeCollection {
    TreeIterator<TreeNode> createBfsIterator(); // 创建特定迭代器
}

// 4.Concrete Collection(树节点实现)
class TreeNode implements TreeCollection {
    private String data;
    private List<TreeNode> children = new ArrayList<>();

    public TreeNode(String data) {
        this.data = data;
    }

    public void addChild(TreeNode node) {
        children.add(node);
    }

    public List<TreeNode> getChildren() {
        return children;
    }

    public TreeIterator<TreeNode> createBfsIterator() {
        return new BfsIterator(this); // 自身作为遍历起点
    }

    public String getData() {
        return this.data;
    }
}

// 5.Client使用示例
public class Iterator {
    public static void main(String[] args) {
        /* 构建树结构:
           A
          / \
         B   C
            / \
           D   E
        */
        TreeNode root = new TreeNode("A");
        TreeNode nodeB = new TreeNode("B");
        TreeNode nodeC = new TreeNode("C");
        root.addChild(nodeB);
        root.addChild(nodeC);
        nodeC.addChild(new TreeNode("D"));
        nodeC.addChild(new TreeNode("E"));

        // 获取BFS迭代器
        TreeIterator<TreeNode> iterator = root.createBfsIterator();

        // 遍历树节点
        while(iterator.hasNext()) {
            System.out.println(iterator.next().getData());
            // 依次输出 A → B → C → D → E
        }
    }
}
总结:

(16)中介者
中介者是⼀种⾏为设计模式, 能让你减少对象之间混乱⽆序的依赖关系。该模式会限制对象之间 的直接交互,迫使它们通过⼀个中介者对象进⾏合作。
问题:

解决:

① 解耦组件:各组件仅依赖中介对象,无直接关联
② 集中控制:表单验证逻辑统一在validateForm()处理
③ 扩展灵活:新增密码强度校验组件时不影响现有结构
// 1.Mediator接口
interface DialogMediator {
    void notify(Component sender, String event); // 统一事件通知口[^2]
}

// 2.Concrete Mediator(登录对话框)
class LoginDialogMediator implements DialogMediator {
    private CheckBox rememberMeBox;   // ComponentA
    private TextBox usernameTextBox;  // ComponentB
    private TextBox passwordTextBox;  // ComponentC
    private Button submitButton;      // ComponentD

    public LoginDialogMediator() {
        // 组件在中介内创建并建立双向引用[^5]
        rememberMeBox = new CheckBox(this);
        usernameTextBox = new TextBox(this);
        passwordTextBox = new TextBox(this);
        submitButton = new Button(this);
    }

    @Override
    public void notify(Component sender, String event) {
        if (sender == rememberMeBox && event.equals("check")) {
            toggleRememberMeConfig();
        } else if ((sender == usernameTextBox || sender == passwordTextBox)
                && event.equals("keypress")) {
            validateForm(); // 实时校验表单[^3]
        } else if (sender == submitButton && event.equals("click")) {
            handleSubmit();
        }
    }

    private void toggleRememberMeConfig() {
        System.out.println("记住密码配置更改:" + rememberMeBox.isChecked());
    }

    private void validateForm() {
        boolean isValid = !usernameTextBox.getText().isEmpty() &&
                passwordTextBox.getText().length() >= 6;
        submitButton.setEnabled(isValid); // 联合控制按钮状态[^3]
    }

    private void handleSubmit() {
        System.out.println("提交用户:" + usernameTextBox.getText());
    }
}

// 3.Components实现
abstract class Component {
    protected DialogMediator dialog; // 持中介引用

    public Component(DialogMediator dialog) {
        this.dialog = dialog;
    }

    public abstract void triggerEvent(String event);
}

class CheckBox extends Component { // ComponentA
    private boolean checked;

    public CheckBox(DialogMediator dialog) { super(dialog); }

    public void toggle() {
        checked = !checked;
        dialog.notify(this, "check"); // 通知中介[^2]
    }
    public boolean isChecked() { return checked; }

    @Override
    public void triggerEvent(String event) { toggle(); }
}

class TextBox extends Component { // ComponentB/C
    private String text = "";

    public TextBox(DialogMediator dialog) { super(dialog); }

    public void input(String text) {
        this.text = text;
        dialog.notify(this, "keypress"); // 实时反馈输入[^2]
    }
    public String getText() { return text; }

    @Override
    public void triggerEvent(String event) { input(event); }
}

class Button extends Component { // ComponentD
    private boolean enabled = false;

    public Button(DialogMediator dialog) { super(dialog); }

    public void click() {
        if(enabled) dialog.notify(this, "click");
    }
    public void setEnabled(boolean state) {
        enabled = state;
        System.out.println("按钮状态:" + (state?"可用":"禁用"));
    }

    @Override
    public void triggerEvent(String event) { click(); }
}

// 4.Client使用
public class Mediator {
    public static void main(String[] args) {
        LoginDialogMediator dialog = new LoginDialogMediator();

        /* 模拟用户交互流程
        dialog.getUsernameTextBox().triggerEvent("john");     // 输入用户名
        dialog.getPasswordTextBox().triggerEvent("123456");   // 输入密码
        dialog.getSubmitButton().triggerEvent("click");       // 成功提交

        dialog.getRememberMeBox().triggerEvent("check");      // 切换"记住我"
        dialog.getPasswordTextBox().triggerEvent("123");      // 触发按钮禁用

         */
    }
}
总结:

(17)备忘录
备忘录是⼀种⾏为设计模式,允许在不暴露对象实现细节的情况下保存和恢复对象之前的状态。
问题:

解决:

关键实现要点:
① 严格封装:Memento的构造器和访问方法仅对Originator可见
② 状态融合:Originator内部维护状态恢复逻辑
③ 历史管理:Caretaker用栈结构实现撤销机制
④ 数据安全:Memento对象不可变,确保快照完整性
// Originator:文本编辑器核心类
class TextEditor {
    private String content; // 当前编辑内容
    private int cursorPosition; // 光标位置

    public void type(String words) {
        content = (content == null) ? words : content.substring(0, cursorPosition)
                + words + content.substring(cursorPosition);
        cursorPosition += words.length();
    }

    public void setCursor(int position) {
        cursorPosition = Math.min(position, content.length());
    }

    public String getContent(){
        return this.content;
    }

    // 创建备忘录
    public EditorMemento createMemento() {
        return new EditorMemento(content, cursorPosition);
    }

    // 从备忘录恢复
    public void restoreFromMemento(EditorMemento memento) {
        this.content = memento.getSavedContent();
        this.cursorPosition = memento.getSavedCursorPosition();
    }

    // Memento作为内部类(封装状态细节)
    public static class EditorMemento {
        private final String content;
        private final int cursorPosition;

        private EditorMemento(String content, int cursor) { // 仅Originator可创建实例
            this.content = content;
            this.cursorPosition = cursor;
        }

        private String getSavedContent() { return content; } // 包权限访问
        private int getSavedCursorPosition() { return cursorPosition; }
    }
}

// Caretaker:历史记录管理器
class History {
    private final Stack<TextEditor.EditorMemento> mementos = new Stack<>();

    public void save(TextEditor.EditorMemento memento) {
        mementos.push(memento); // 保存状态快照
    }

    public TextEditor.EditorMemento undo() {
        mementos.pop(); // 移除当前状态
        return mementos.peek(); // 返回前一次状态
    }
}

// Client使用示例
public class Memento {
    public static void main(String[] args) {
        TextEditor editor = new TextEditor();
        History history = new History();

        // 第一次输入并保存
        editor.type("Hello");
        history.save(editor.createMemento());

        // 第二次输入并保存
        editor.type(" World");
        history.save(editor.createMemento());

        // 执行撤销操作(状态退回第一次保存点)
        editor.restoreFromMemento(history.undo());
        System.out.println(editor.getContent()); // 输出 "Hello"
    }
}
总结:

(18)观察者
观察者是⼀种⾏为设计模式, 允许你定义⼀种订阅机制,可在对象事件发⽣时通知多个“观察”该对象的其他对象。
问题:前往商店和发送垃圾邮件

解决:

关键实现说明:
① IPhoneStore作为具体发布者,实现订阅管理和产品到货通知
② 通过接口解耦使得新订阅者类型可以扩展而不影响发布者
③ 客户端通过subscribe() / unsubscribe() 动态维护订阅列表
// Publisher 接口
interface StorePublisher {
    void subscribe(CustomerSubscriber subscriber);
    void unsubscribe(CustomerSubscriber subscriber);
    void notifySubscribers(String product);
}

// 具体 Publisher 类
class IPhoneStore implements StorePublisher {
    private List<CustomerSubscriber> customers = new ArrayList<>();

    @Override
    public void subscribe(CustomerSubscriber subscriber) {
        customers.add(subscriber);
    }

    @Override
    public void unsubscribe(CustomerSubscriber subscriber) {
        customers.remove(subscriber);
    }

    @Override
    public void notifySubscribers(String product) {  // 触发所有订阅者更新 [^1]
        for (CustomerSubscriber customer : customers) {
            customer.update(product);
        }
    }

    public void restockProduct(String product) {
        System.out.println("新品到货:" + product);
        notifySubscribers(product);
    }
}

// Subscriber 接口 [^4]
interface CustomerSubscriber {
    void update(String product);
}

// 具体 Subscriber 类
class PremiumCustomer implements CustomerSubscriber {
    private String name;

    public PremiumCustomer(String name) {
        this.name = name;
    }

    @Override
    public void update(String product) {  // 实现标准通知接口
        System.out.println("[尊享客户]" + name + ",您关注的" + product + "已到店");
    }
}

// Client 客户端配置 [^6]
public class Observer {
    public static void main(String[] args) {
        IPhoneStore store = new IPhoneStore();

        CustomerSubscriber alice = new PremiumCustomer("Alice");
        CustomerSubscriber bob = new PremiumCustomer("Bob");

        // 动态添加订阅 [^3]
        store.subscribe(alice);
        store.subscribe(bob);

        // 模拟到货事件
        store.restockProduct("iPhone15");

        // 动态移除订阅
        store.unsubscribe(bob);
        store.restockProduct("iPhone15 Pro");
    }
}
总结:

(19)状态
状态是⼀种⾏为设计模式,让你能在⼀个对象的内部状态变化时改变其⾏为,使其看上去就像改 变了⾃⾝所属的类⼀样。
问题:

解决:

关键优化点:
① 状态自管理:每个具体状态类自行控制下一步状态转换
② 上下文访问:通过传递文档引用获取当前用户角色(简化私有字段访问)
③ 可扩展性:新增状态只需要创建类并实现接口,无需修改现有代码
④ 消除条件逻辑:完全移除switch / case结构,使用多台分发
// Context 类
class DemoDocument {
    private DocumentState currentState;
    private String currentUserRole;

    public DemoDocument() {
        this.currentState = new DraftState();  // 初始化为草稿状态
    }

    // 设置当前用户角色
    public void setCurrentUserRole(String role) {
        this.currentUserRole = role;
    }

    public String getCurrentUserRole() {
        return this.currentUserRole;
    }

    // 状态转移方法
    void transitionTo(DocumentState state) {  // 支持状态自我转换
        this.currentState = state;
    }

    // 发布入口方法
    public void publish() {
        currentState.handlePublish(this);  // 委托给当前状态处理
    }
}

// State 接口
interface DocumentState {
    void handlePublish(DemoDocument context);  // 参数传递上下文引用
}

// 具体状态实现
class DraftState implements DocumentState {
    @Override
    public void handlePublish(DemoDocument doc) {  // 草稿状态转审核
        System.out.println("提交文档进入审核状态");
        doc.transitionTo(new ModerationState());  // 状态自我转换
    }
}

class ModerationState implements DocumentState {
    @Override
    public void handlePublish(DemoDocument doc) {  // 根据管理员权限处理
        if ("admin".equals(doc.getCurrentUserRole())) {  // 获取上下文中的角色信息
            System.out.println("管理员发布文档");
            doc.transitionTo(new PublishedState());
        } else {
            System.out.println("非管理员无法发布");
        }
    }
}

class PublishedState implements DocumentState {
    @Override
    public void handlePublish(DemoDocument doc) {  // 终态不处理
        System.out.println("文档已发布,无法重复操作");
    }
}

// Client(客户端)
public class State {
    public static void main(String[] args) {
        DemoDocument doc = new DemoDocument();

        // 测试普通用户场景
        doc.setCurrentUserRole("user");
        doc.publish();  // Draft → Moderation
        doc.publish();  // 保留Moderation

        // 测试管理员场景
        doc.setCurrentUserRole("admin");
        doc.publish();  // Moderation → Published

        // 检查终态稳定性
        doc.publish();  // 保持Published状态
    }
}
总结:

(20)策略
策略是⼀种⾏为设计模式,它能让你定义⼀系列算法,并将每种算法分别放⼊独⽴的类中, 以使算法的对象能够相互替换。
问题:

解决:

关键实现细节说明:
① 策略切换机制:通过setStrategy方法动态绑定策略对象
② 算法封装:每个具体策略类自行实现路径生成算法
③ 正交扩展:新增导览策略无需修改现有代码(如可添加BicycleStrategy)
④ 接口统一:所有策略实现相同的buildRoute方法签名
// Strategy 接口
interface NavigationStrategy {
    List<String> buildRoute(String start, String end);  // 路由算法接口
}

// 具体策略实现
class WalkingStrategy implements NavigationStrategy {
    @Override
    public List<String> buildRoute(String start, String end) {  // 步行策略
        return Arrays.asList(start, "→ Central Park", "→ 5th Ave", end);  // 步行路线
    }
}

class BusTourStrategy implements NavigationStrategy {
    @Override
    public List<String> buildRoute(String start, String end) {  // 巴士路线策略
        return Arrays.asList(start, "→ Bus Stop A", "→ Bus Terminal", end);  // 公交路线
    }
}

class HelicopterStrategy implements NavigationStrategy {
    @Override
    public List<String> buildRoute(String start, String end) {  // 飞行路线策略
        return Arrays.asList(start, "→ Airport", "→ "+end+" Airspace", end);  // 空中路线
    }
}

// 上下文类
class TourGuide {
    private NavigationStrategy strategy;

    public void setStrategy(NavigationStrategy strategy) {  // 运行时切换策略
        this.strategy = strategy;
    }

    public void showRoute(String start, String end) {  // 统一入口方法
        if(strategy == null) {
            System.out.println("请先选择导览策略");
            return;
        }

        List<String> checkpoints = strategy.buildRoute(start, end);  // 委托策略执行
        System.out.println("建议路线:");
        checkpoints.forEach(point -> System.out.println("▪ " + point));
    }
}

// 客户端示例
public class Strategy {
    public static void main(String[] args) {
        TourGuide app = new TourGuide();
        Scanner input = new Scanner(System.in);
        System.out.println("请选择导览模式:\n1.步行 2.巴士 3.直升机");

        int choice = input.nextInt();  // 动态选择策略
        switch(choice) {
            case 1:
                app.setStrategy(new WalkingStrategy());  // 绑定步行策略
                break;
            case 2:
                app.setStrategy(new BusTourStrategy());
                break;
            case 3:
                app.setStrategy(new HelicopterStrategy());
                break;
            default:
                throw new IllegalArgumentException("无效选择");
        }

        app.showRoute("时代广场", "自由女神像");  // 执行所选策略
    }
}
总结:

(21)模版方法
模板⽅法是⼀种⾏为设计模式,它在超类中定义了⼀个算法的框架,允许⼦类在不修改结构的情况下重写算 法的特定步骤。
问题:数据挖掘类中包含许多重复代码。

解决:

关键优化点:
① 固定流程:不可重写的processDocument()确保流程一致
② 职责分离:各子类仅需实现格式相关解析逻辑
③ 扩展能力:通过钩子方法实现可选扩展(如CSV格式验证)
public class TemplateMethod {
}
// 抽象类定义模板方法
abstract class DataMiner {
    // 模板方法(不可被覆盖)[^2]
    public final void processDocument() {
        openDocument();
        extractRawData();
        parseData();           // 抽象步骤[^1]
        analyzeData();         // 通用实现
        generateReport();      // Hook方法[^6]
    }

    // 文档打开基础实现
    protected void openDocument() {
        System.out.println("打开文档...");
    }

    // 数据抽取基础实现
    protected void extractRawData() {
        System.out.println("抽取原始数据...");
    }

    // 解析算法必须子类实现[^1]
    protected abstract void parseData();

    // 通用分析实现
    protected void analyzeData() {
        System.out.println("执行数据聚类分析...");
    }

    /* 钩子方法(可选覆盖)[^6] */
    protected void generateReport() {
        System.out.println("生成基础统计报表");
    }
}

// 具体子类实现
class PDFDataMiner extends DataMiner {
    @Override
    protected void parseData() {  // 实现特定解析逻辑
        System.out.println("解析PDF版式结构");
        System.out.println("提取PDF文本流");
    }
}

class CSVDataMiner extends DataMiner {
    @Override
    protected void parseData() {
        System.out.println("识别CSV分隔符");
        System.out.println("映射CSV字段");
    }

    @Override
    protected void generateReport() {  // 自定义Hook实现[^6]
        super.generateReport();
        System.out.println("追加CSV格式验证结果");
    }
}

// 客户端调用示例
class Client {
    public static void main(String[] args) {
        System.out.println("处理PDF文档:");
        DataMiner pdfProcessor = new PDFDataMiner();
        pdfProcessor.processDocument();  // 执行完整流程[^1]

        System.out.println("\n处理CSV文档:");
        DataMiner csvProcessor = new CSVDataMiner();
        csvProcessor.processDocument();
    }
}
总结:

(22)访问者
访问者是⼀种⾏为设计模式,它能将算法与其所作⽤的对象隔离开来。
场景:
 解决:
解决:

模式核心实现要点:
① 双分派机制:通过element.accept() 调用visitor特定方法
② 开放扩展:新增数据操作只需要添加访问者类
③ 数据结构稳定:元素类无需修改即可支持新业务逻辑
// Visitor 接口定义地理信息操作规范
interface GeoVisitor {
    void visitCity(CityElement city);     // 城市节点访问接口
    void visitIndustry(IndustryElement industry); // 工业区访问接口
    void visitSightseeing(SightseeingElement sight); // 景区访问接口
}

// 具象访问者(统计信息导出)
class StatisticsExporter implements GeoVisitor {
    @Override
    public void visitCity(CityElement city) {  // 处理城市数据
        System.out.printf("统计城市[%s]: 人口%d万 | ",
                city.getName(), city.getPopulation());  // 访问节点属性
        System.out.println("GDP " + city.getGdp() + "亿元");
    }

    @Override
    public void visitIndustry(IndustryElement industry) {  // 处理工业区
        System.out.printf("工业区评估: %s 类型 | 占地面积%.1f平方公里\n",
                industry.getIndustryType(), industry.getArea());
    }

    @Override
    public void visitSightseeing(SightseeingElement sight) {  // 处理景点
        System.out.printf("景点分级: %s(%dA景区)\n",
                sight.getLandmark(), sight.getRating());
    }
}

// 地理元素抽象接口(使用双分派机制)
interface GeoElement {
    void accept(GeoVisitor visitor);  // 关键接收方法
}

// 城市实体类
class CityElement implements GeoElement {
    private String name;
    private int population;
    private double gdp;

    public CityElement(String name, int pop, double gdp) {  }

    @Override
    public void accept(GeoVisitor visitor) {  // 双分派入口
        visitor.visitCity(this);
    }

    public String getName() {
        return name;
    }

    public int getPopulation() {
        return population;
    }

    public double getGdp() {
        return gdp;
    }
}

// 工业园区实体类
class IndustryElement implements GeoElement {
    private String industryType;
    private double area;

    public IndustryElement(String type, double area) {  }

    @Override
    public void accept(GeoVisitor visitor) {
        visitor.visitIndustry(this);  // 调用工业区专门方法
    }

    public String getIndustryType() {
        return industryType;
    }

    public double getArea() {
        return area;
    }
}

// 旅游景区实体类
class SightseeingElement implements GeoElement {
    private String landmark;
    private int rating;

    public SightseeingElement(String name, int stars) {  }

    @Override
    public void accept(GeoVisitor visitor) {
        visitor.visitSightseeing(this); // 调用景区处理逻辑
    }

    public String getLandmark() {
        return landmark;
    }

    public int getRating() {
        return rating;
    }
}

// 客户端使用
public class Visitor {
    public static void main(String[] args) {
        // 构建地理数据模型(复杂对象结构)
        List<GeoElement> geoGraph = Arrays.asList(
                new CityElement("上海", 2487, 43214),
                new IndustryElement("化工", 58.3),
                new SightseeingElement("外滩", 5)
        );

        // 应用统计访问者
        GeoVisitor exporter = new StatisticsExporter();
        geoGraph.forEach(element -> element.accept(exporter));  // 统一访问入口
    }
}
总结:

(23)解释器
解释器设计模式提供了⼀种解释和评估语⾔中的句⼦或表达式的⽅法。因为场景⽐较单⼀,所以 放在最后来讲。此模式定义了⼀种语⾔语法,以及⼀个可以解析和执⾏表达式的解释器。
优点:
① 可扩展性:解释器模式允许通过创建新的表达式类来添加新的语法规则或语言结构,这使得它灵活且可扩展,以适应新的语言特性。
② 关注点分离:该模式将解释逻辑与语言表达式分离。每个表达式类专注于解释其特定的语法规则,从而提高代码的模块化和可维护性。
③ 简化的语法表示:解释器模式使用面向对象的类和递归算法提供了一种清晰简洁的方式来表示复杂的语法。
④ 易于实现新的解释器:该模式提供了一种为不同语言或领域特定语言(DSL)创建解释器的结构化方法。
public class Interpretor {
}
// Abstract Expression
interface Expression {
    int interpret(Context context);
}
// Terminal Expressions
class NumberExpression implements Expression {
    private int number;
    public NumberExpression(int number) {
        this.number = number;
    }
    @Override
    public int interpret(Context context) {
        return number;
    }
}
class AddExpression implements Expression {
    private Expression leftExpression;
    private Expression rightExpression;
    public AddExpression(Expression leftExpression, Expression rightExpression) {
        this.leftExpression = leftExpression;
        this.rightExpression = rightExpression;
    }
    @Override
    public int interpret(Context context) {
        return leftExpression.interpret(context) + rightExpression.interpret(context);
    }
}
// Context
class Context {
    // Additional context information, if needed
}
// Client
public class Application {
    public static void main(String[] args) {
        // Create the expression: (2 + 3) + 4
        Expression expression = new AddExpression(
                new AddExpression(new NumberExpression(2), new NumberExpression(3)),
                new NumberExpression(4)
        );
        // Create the context, if needed
        Context context = new Context();
        // Interpret the expression
        int result = expression.interpret(context);
        System.out.println("Result: " + result); // Output: Result: 9
    }
}
总结:
3. API设计方法
API设计的需求:分布式环境下的组件交互;自定义的工具服务/组件/框架;人人都在设计API
API设计的价值:API是对功能和组件内部实现的抽象;利用API避免了解第三方组件的细节;API用户交流和沟通
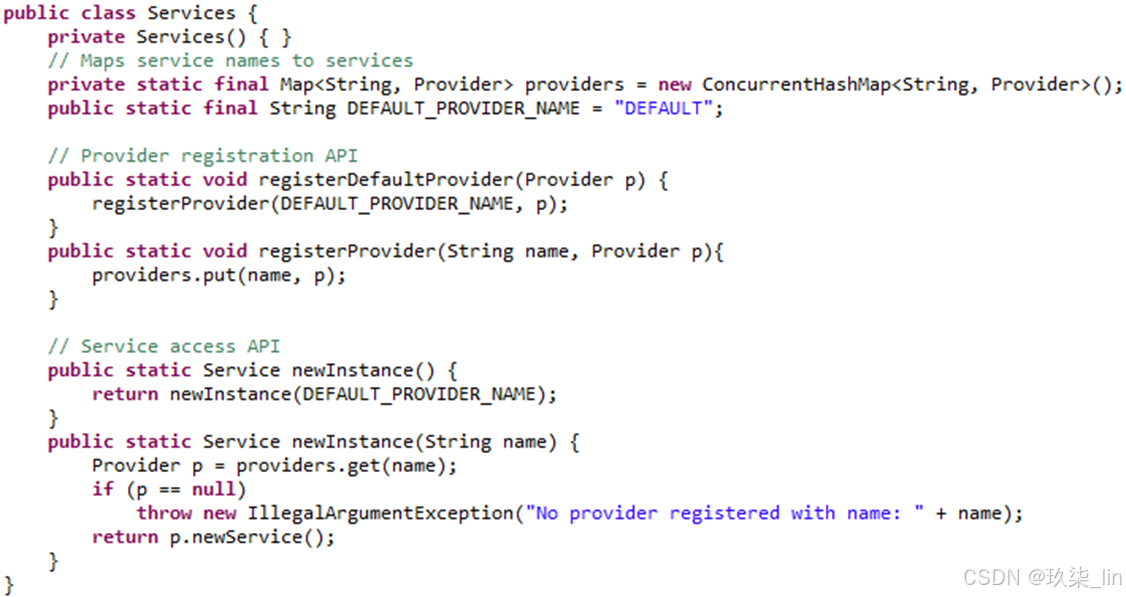
(1)静态工厂代替构造器
静态工厂有名称:valueOf/getInstance/newType/…
不需要每次调用时都创建一个新对象:缓存实例重复利用
可以返回任何子类型对象:更大的灵活性

(2)使用Builder替代多个构造器
场景:当构造器需要一些必选参数、又需要大量可选参数时
解决方案:① 多个构造器或静态工厂;② API使用代码难以编写和阅读
更好的解决方案:① Builder设计模式;② 链式API

(3)使可访问性最小化
基本原则:API公开的内容越少越好
实践:
- 方法优于字段
- getter:计算;数据延迟加载;同步访问
- setter:数据合法性校验;发送字段变更通知
- 应对API的潜在变动
- 工厂方法优于构造函数
- 让所有内容不可修改
- 避免滥用setter方法
- API中getter应远远多于setter
- 很多setter操作应该封装到上下文内部进行
- 很多setter公开给所有开发人员调用时没有必要的
- 很多setter方法通可以过getter方法获取结果:setVisible/isVisible
(4)使可变性最小化
- 原则:
- 不要提供任何会修改对象状态的方法
- 保证类不会被扩展
- 所有域都是final
- 所有域都是私有的
- 确保对于任何可变组件的互斥访问
- 不可变对象的特点:
- 线程安全,不要求同步
- 每个值都需要一个实例变量
(5)检查参数的有效性
- fast-fail:应该在发生错误之后尽快检测出错误
- 方法和构造器需要限制参数值:
- 抛出异常
- 异常转译
- 使用断言(Assertion)


(6)谨慎设计方法签名
- 选择方法的名称:中文->英文/通用术语/统一风格
- 不要过于追求便利的方法
- 避免过长的参数:分解方法/帮助类/Builder模式;参数类型中尽量使用接口而非类
(7)慎用重载和可变参数
重载:里氏替换原则;保守做法(不要设计两个具有相同参数数量的重载方法)
可变参数:API中尽量不要使用可变参数
(8)返回零长度的数组或集合
习惯的做法:

更好的做法:

4. 组件设计原则
(1)无环依赖原则
认为在组件之间不应该存在循环依赖关系。通过将系统划分为不同的可发布组件,对某一个组件的修改所产生的影响不应该扩展到其他组件
(2)稳定抽象原则
认为组件的抽象程度应该与其稳定程度保持一致。即一个稳定的组件应该也是抽象的,这样该组件的稳定性就不会无法扩展。另一方面,一个不稳定的组件应该是具体的,因为他的不稳定性使其内部代码更易于修改
(3)稳定依赖原则
认为被依赖者应该比依赖者更稳定。一个好的设计中的组件之间的依赖应该朝着稳定的方向进行。一个组件只应该依赖那些比自己更稳定的组件
组件稳定性度量:I = Ce / (Ca + Ce)
- I代表Instability,即不稳定性,它的值处于[0,1]之间
- Ce代表离心耦合(Efferent Coupling),表示被该组件依赖的外部组件的数量
- Ca代表向心耦合(Afferent Coupling),表示依赖该组件的外部组件数量
组件抽象度度量:A = AC / (AC + CC)
- A代表抽象度(Abstractness)
- AC(Abstract Class)表示组件中抽象类的数量
- CC(Concrete Class)表示组件中非抽象类的总和
一个系统中多数的组件位于依赖链的中间,也就是说它们即具备一定的稳定性也表现出一定的抽象度。如果一个组件的稳定度和抽象度都是1,意味着该组件里面全是抽象类且没有任何组件依赖它,那么这个组件就没有任何用处。相反,如果一个组件稳定度和抽象度都是0,那么意味着这个组件不断在变化,不具备维护性,这也是我们不想设计的组件。所以,在稳定度和抽象度之间应该保持一种平衡,这条平衡线有一个专业的名称,即主序列(Main Sequence)


