1、安装langchain
#安装langchain环境
pip install langchain==0.3.3 openai -i https://mirrors.aliyun.com/pypi/simple
#灵积模型服务
pip install dashscope -i https://mirrors.aliyun.com/pypi/simple
#安装第三方集成,就是各种大语言模型
pip install langchain-community==0.3.2 -i https://mirrors.aliyun.com/pypi/simple
#加载环境的工具
pip install python-dotenv
2、前期准备工作
第一个准备工作:Websocket服务接口认证信息
传送门:讯飞开放平台-以语音交互为核心的人工智能开放平台
2.1.登录或者注册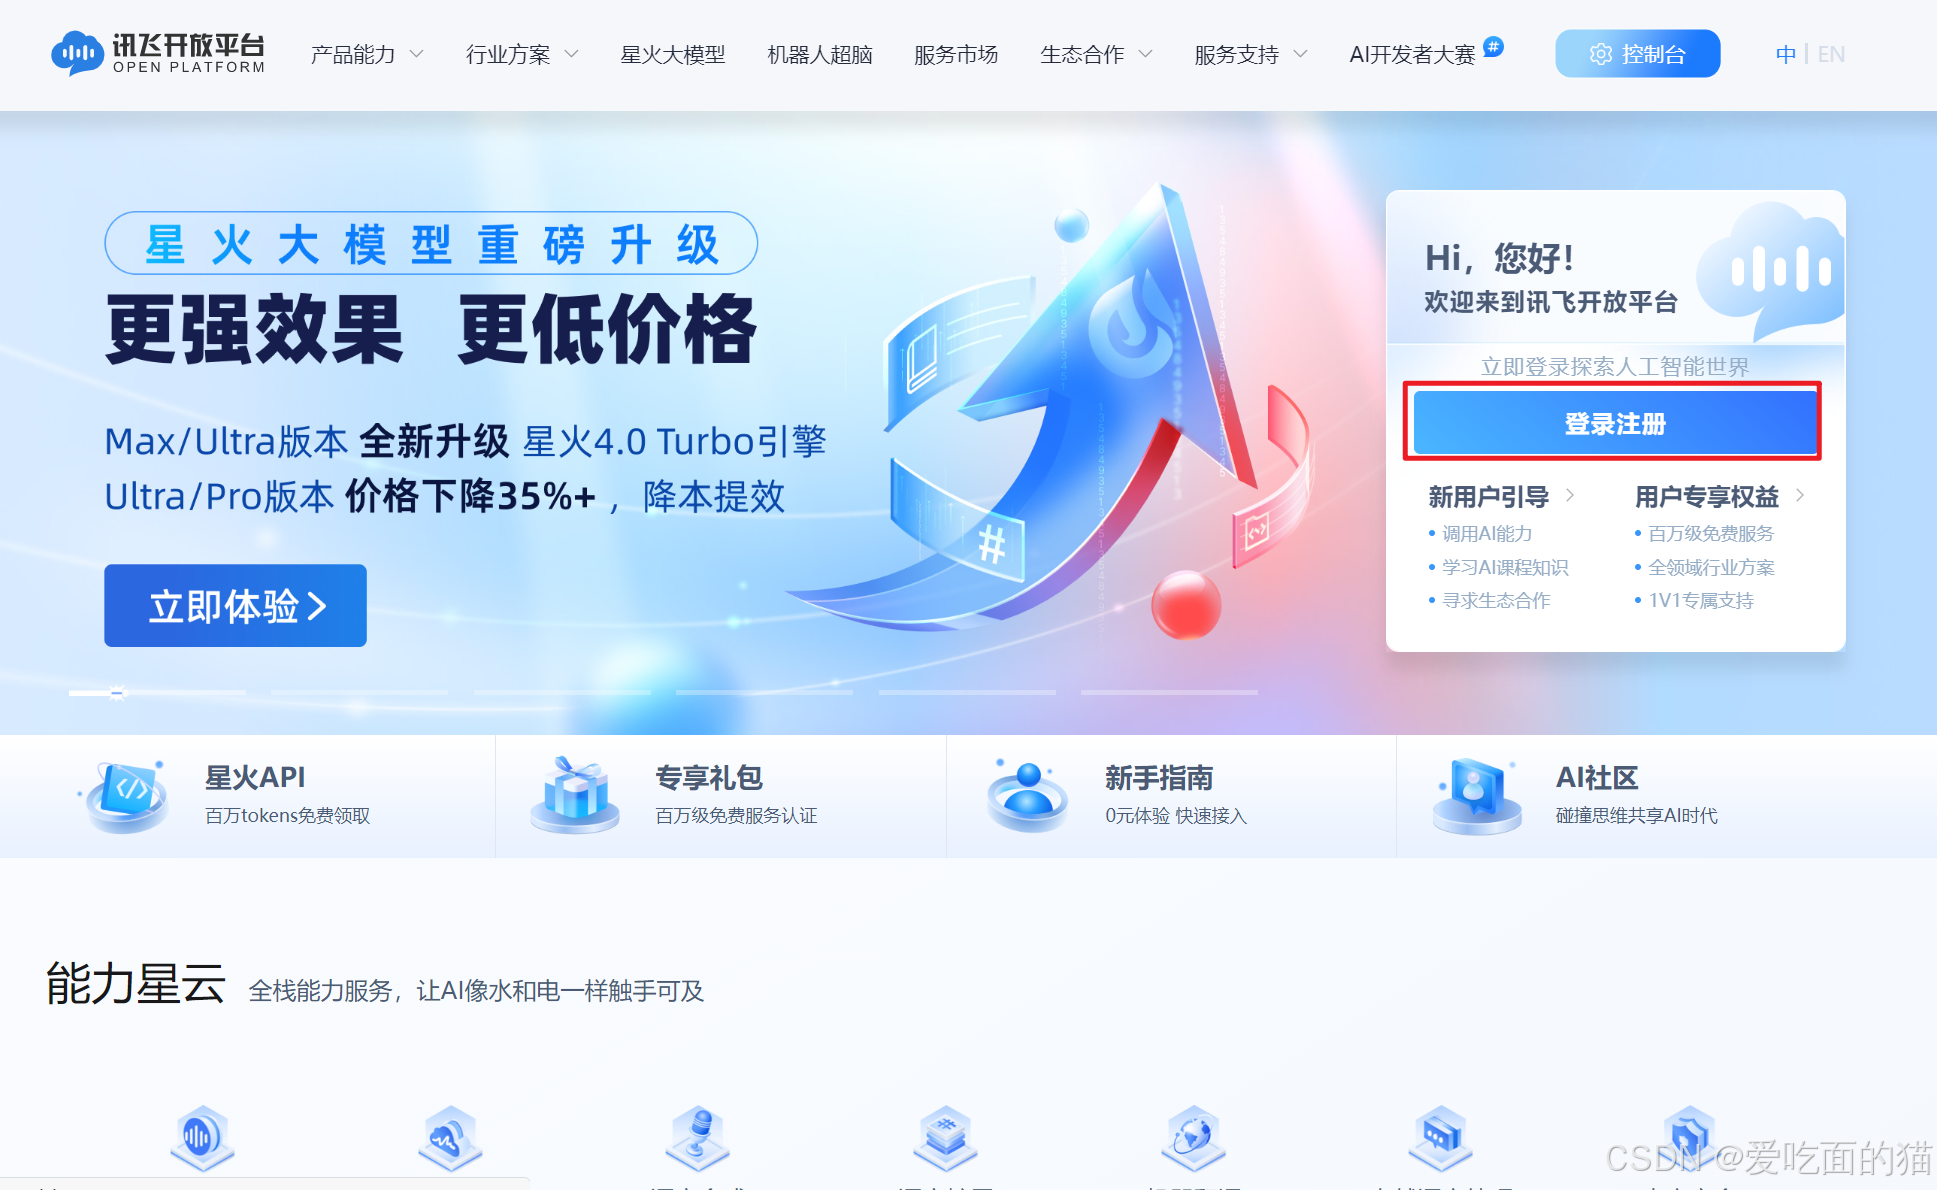
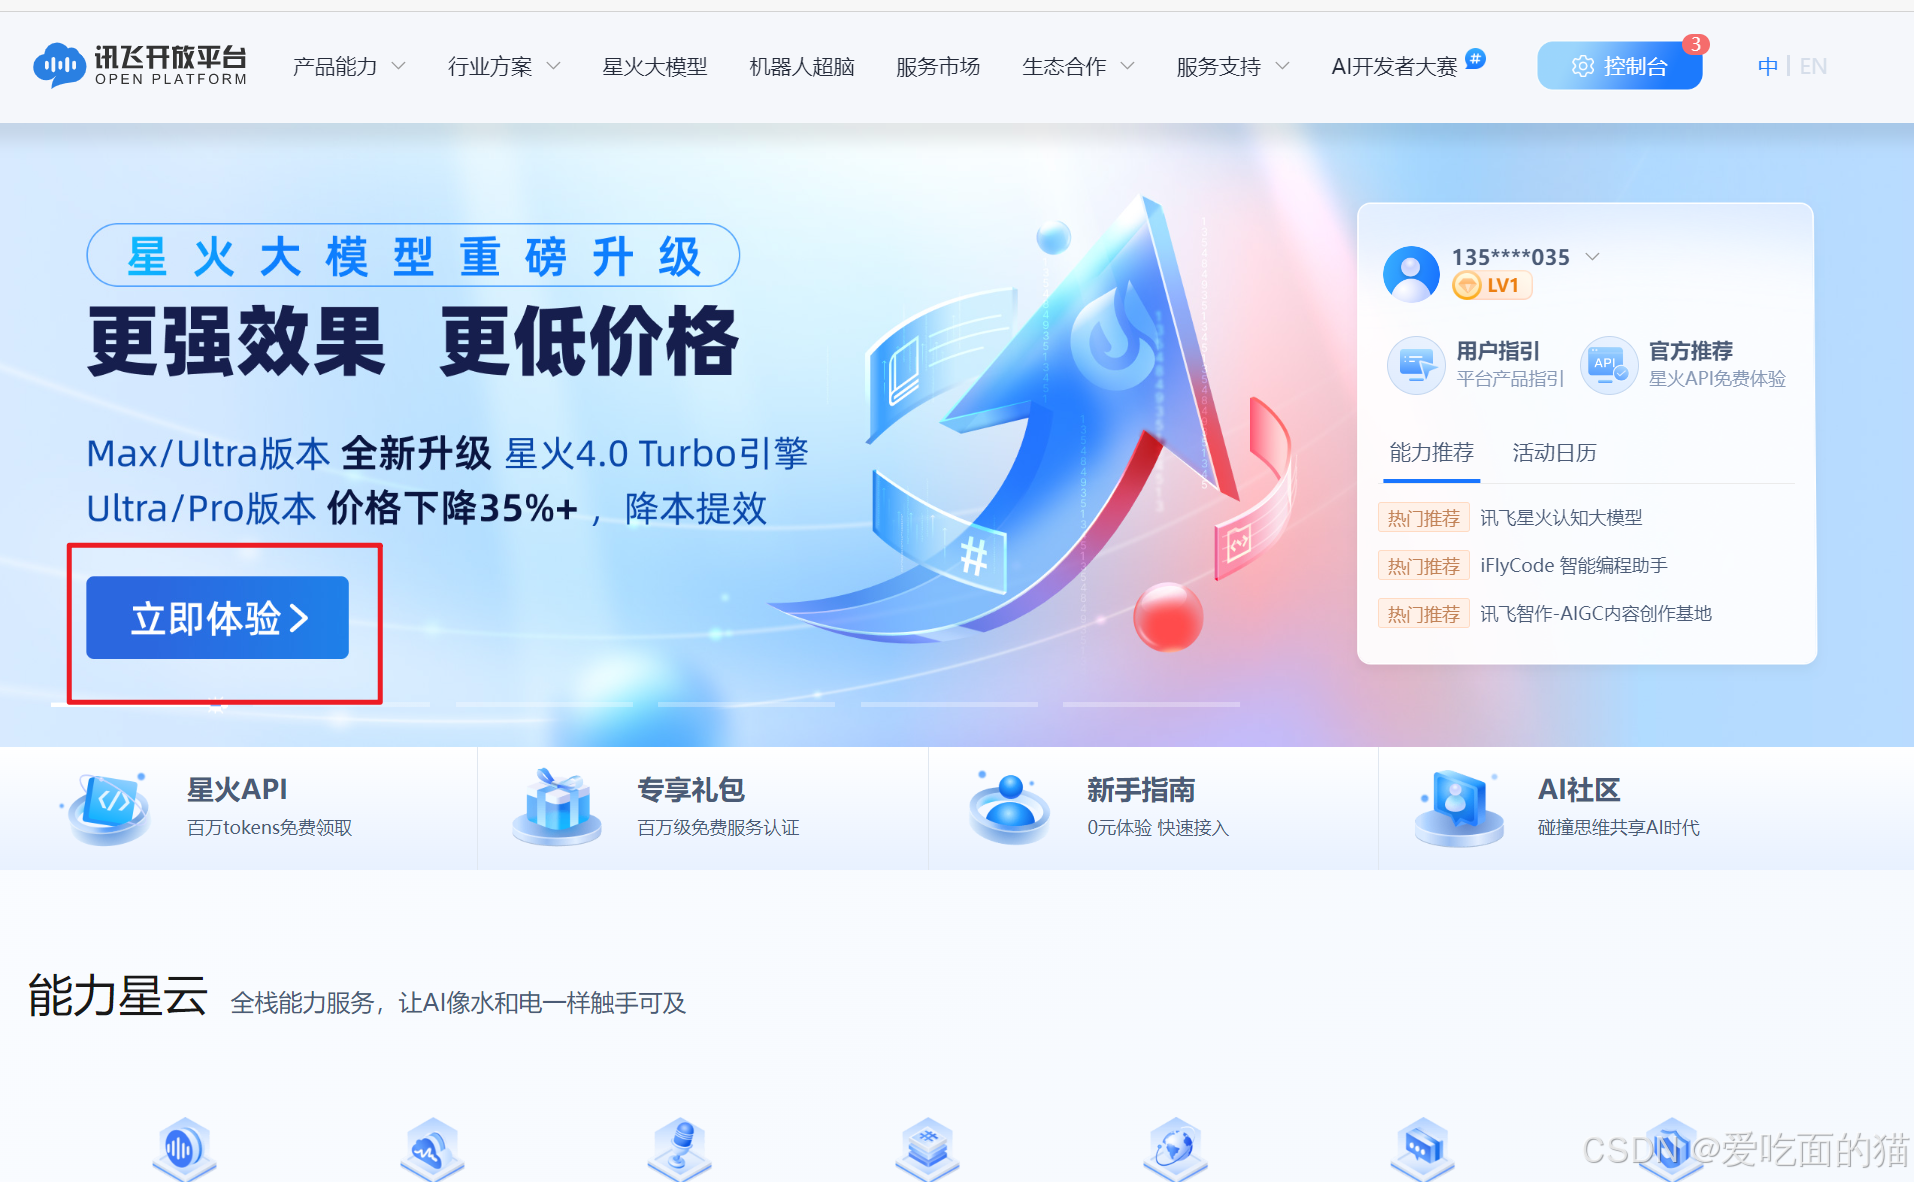
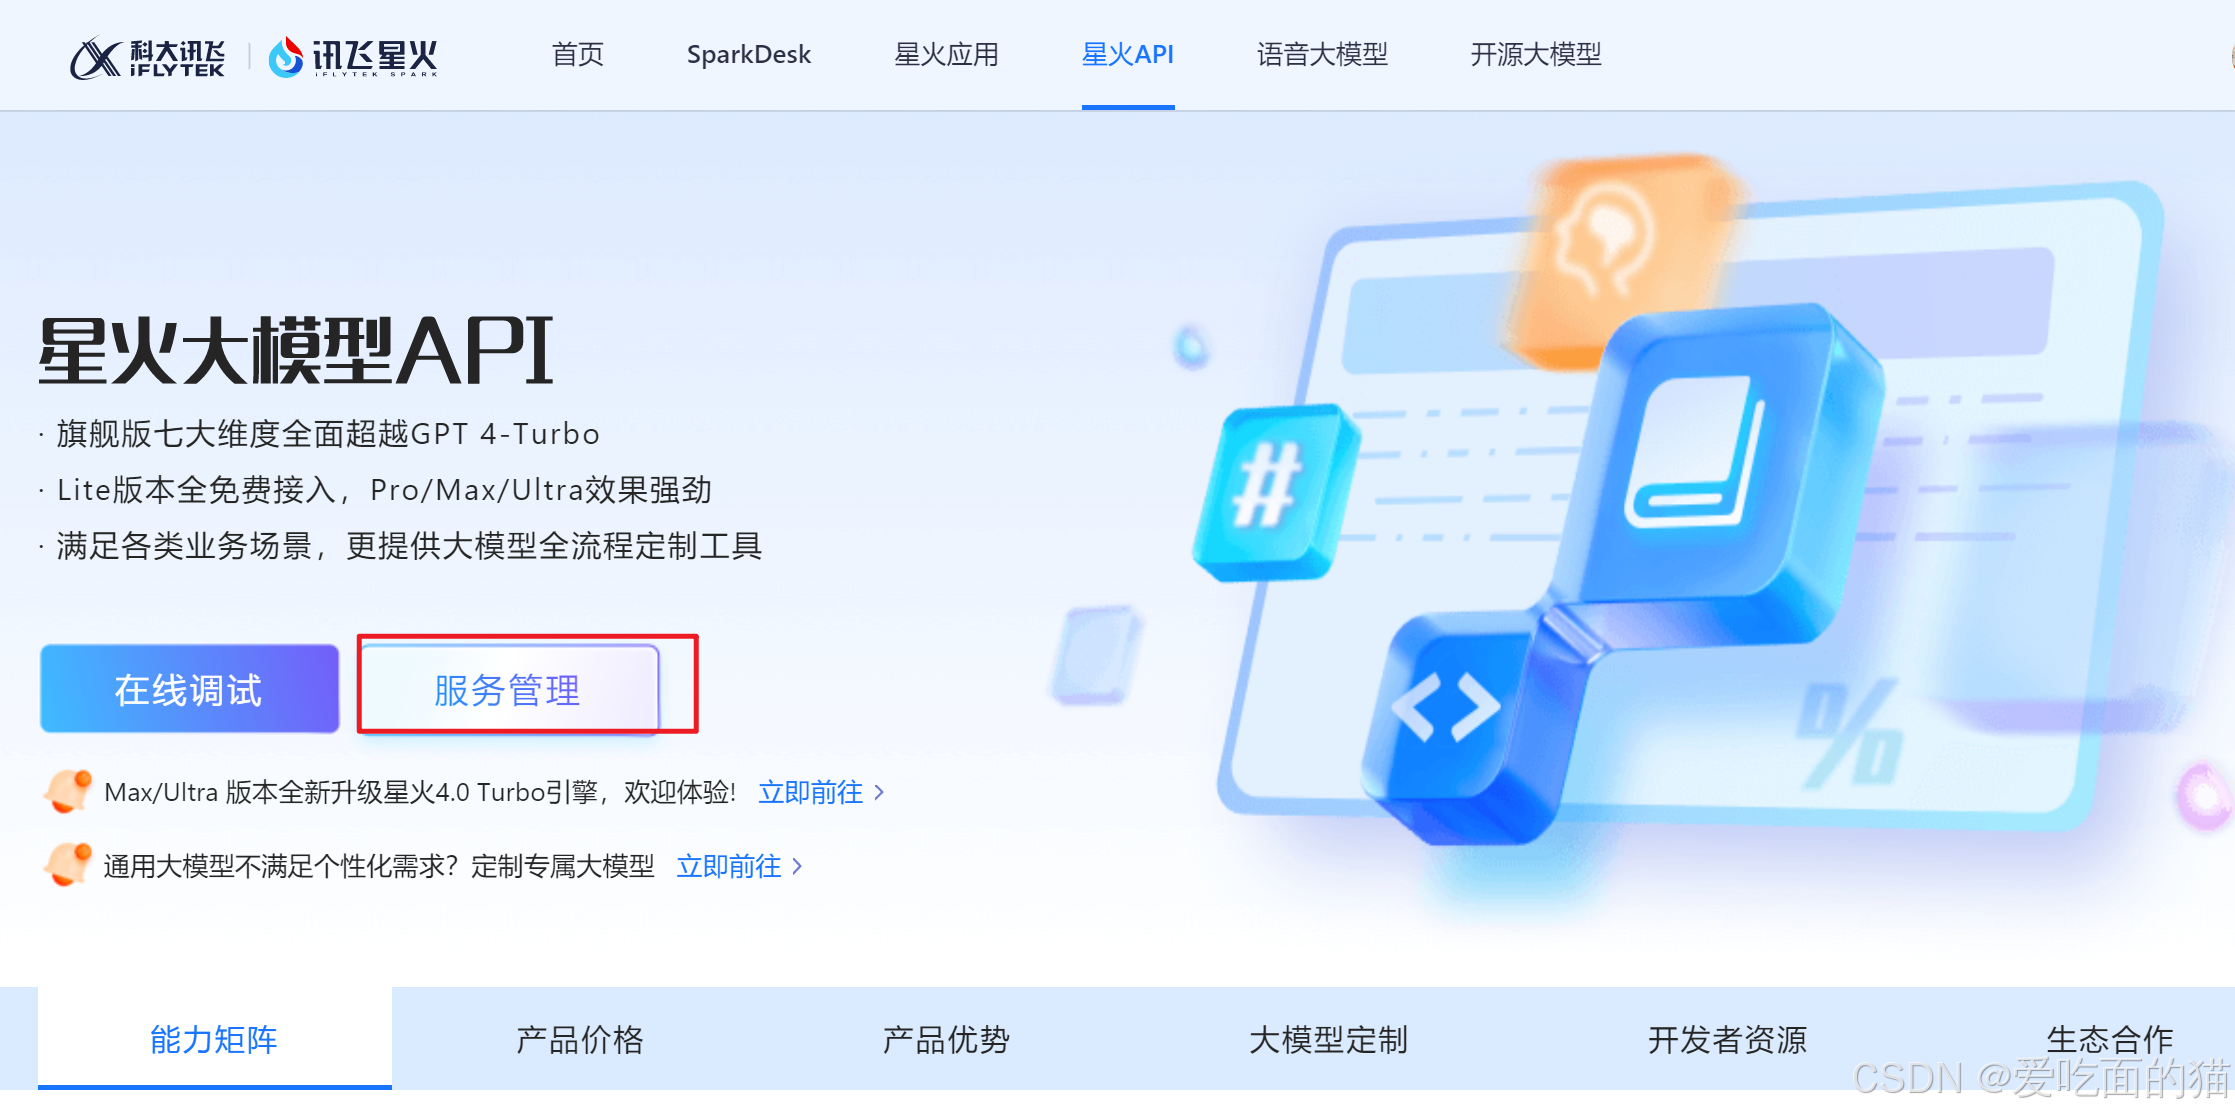
2.2 创建建新应用
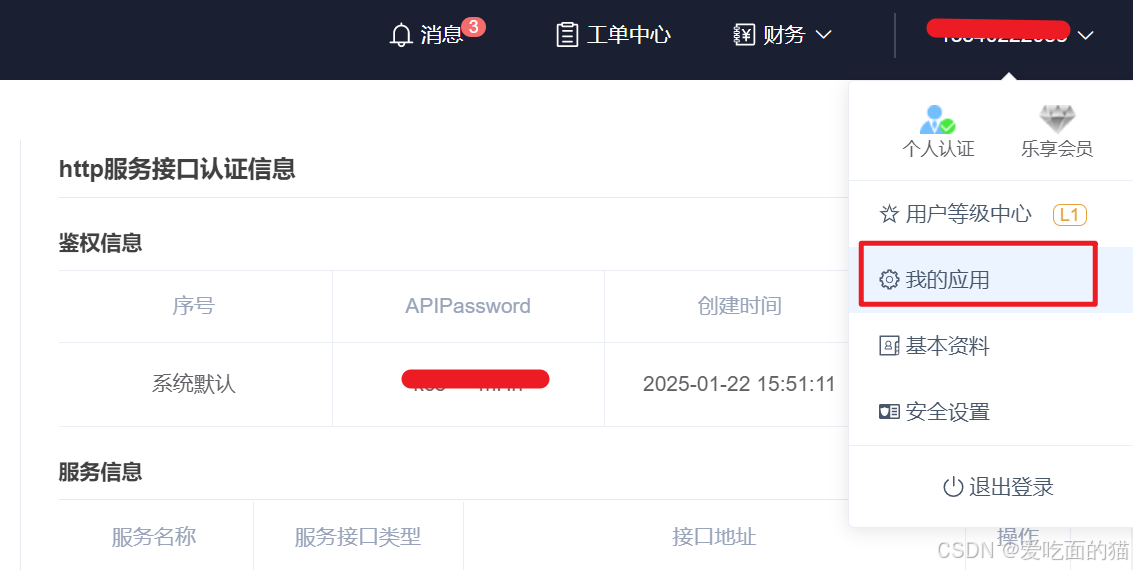

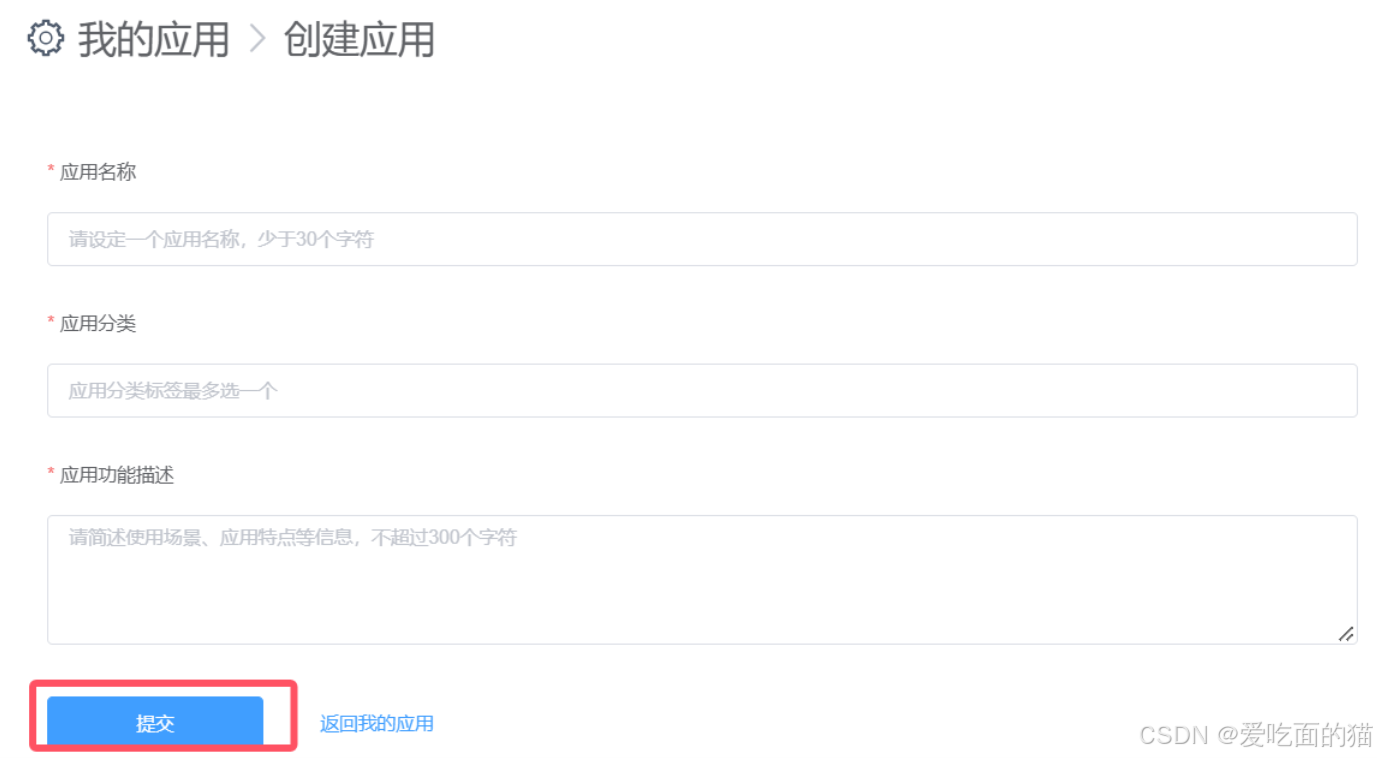
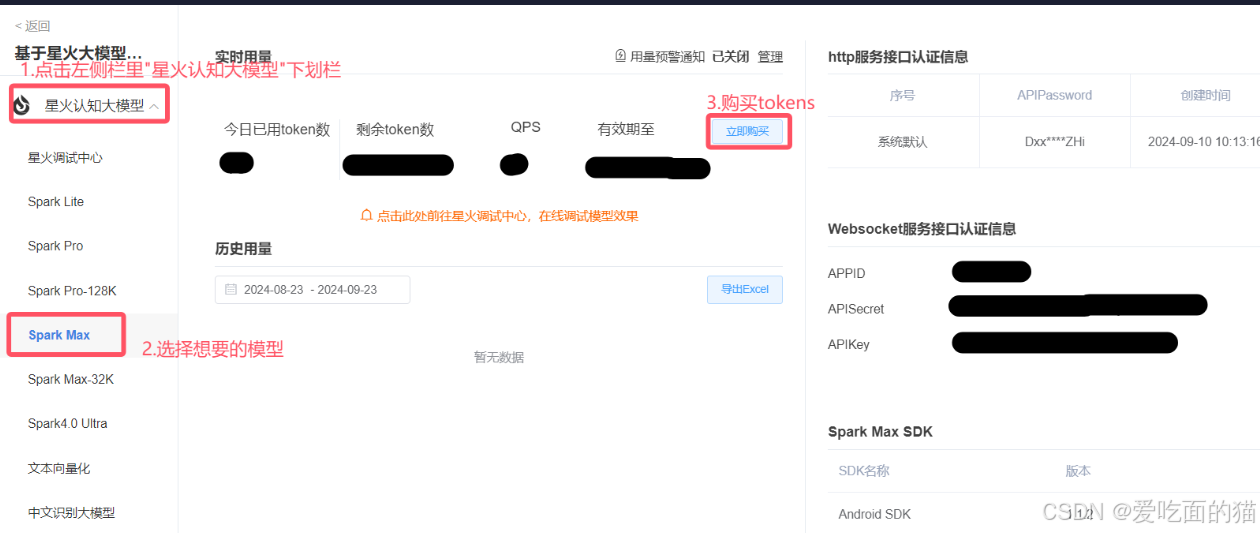
2.3 领取tokens
选择自己想要的模型,免费领tokens
2.4 申请免费token
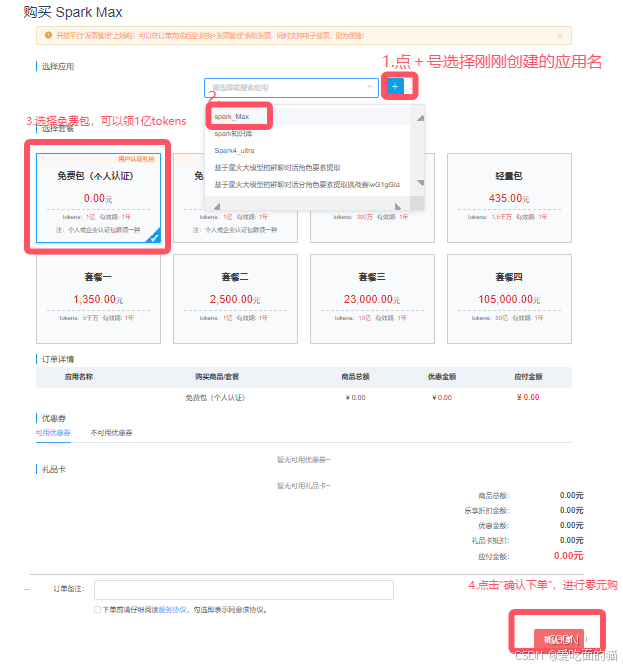
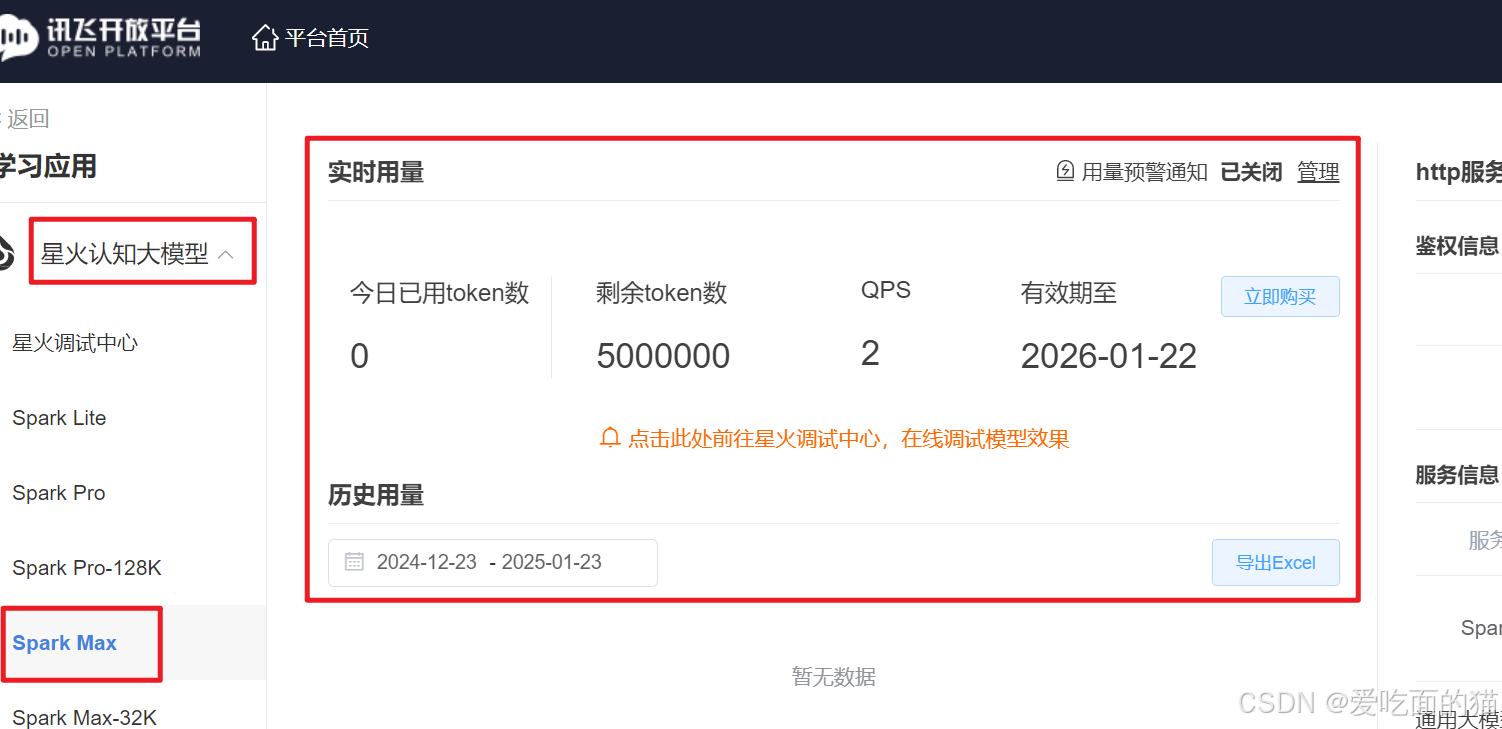
2.5查看Tokens
返回“控制台”,打开自己的应用,并选择刚购买的模型,就可以看到tokens已下发
3、调用模型api
调用模型api,使用tokens
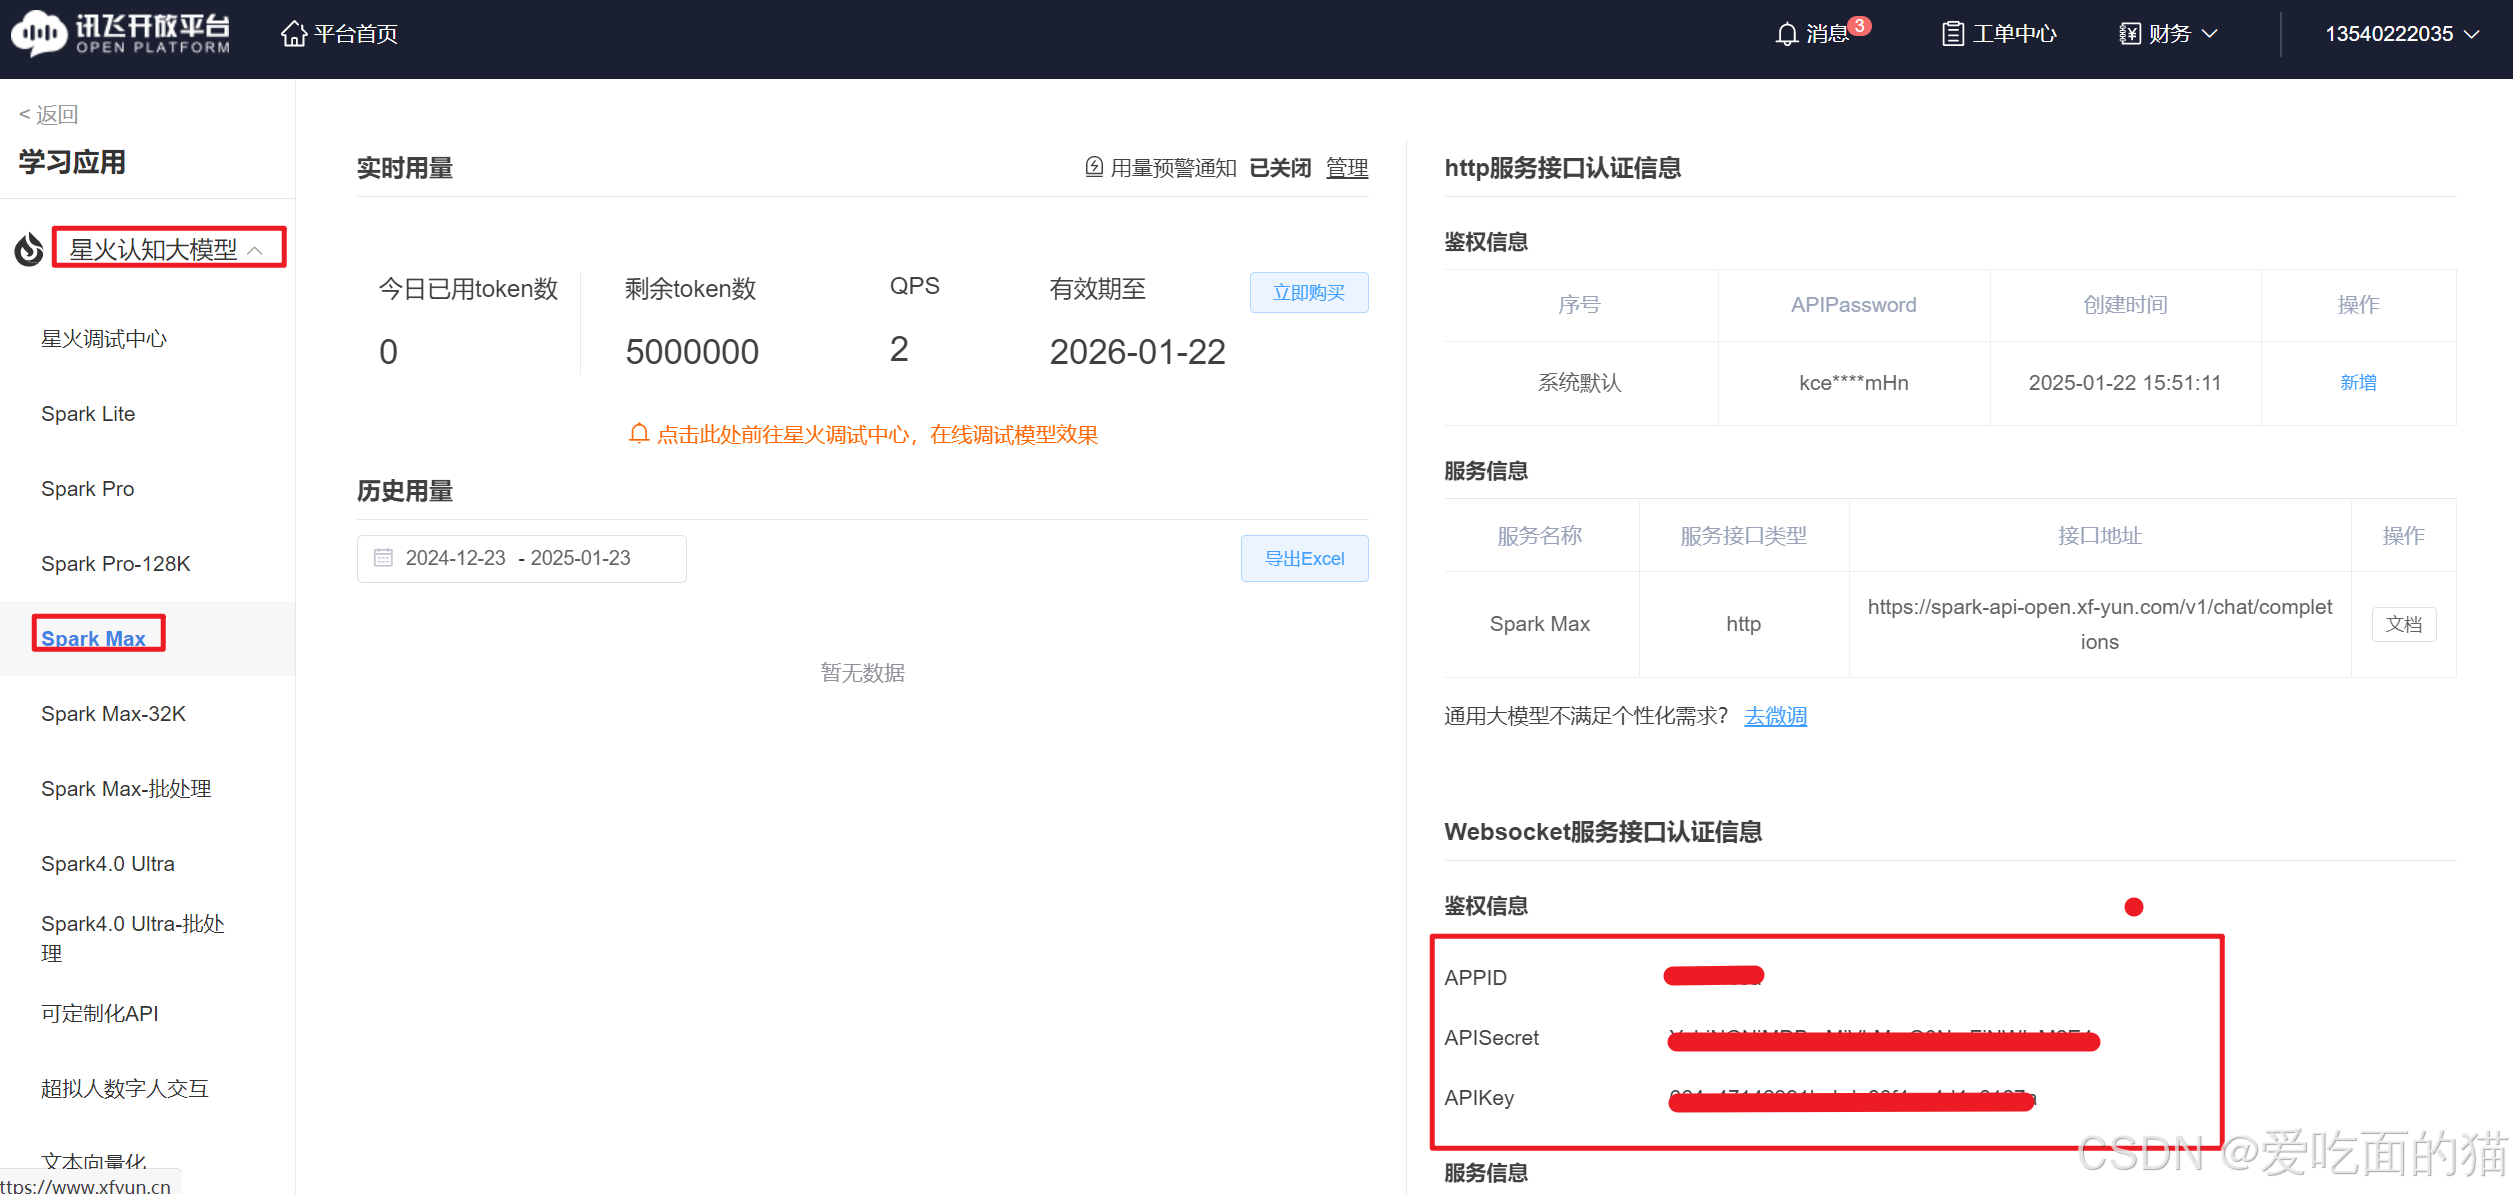
3.1 查看API密钥
在“我的应用”中查看申请的应用,找到"APPID","APISecret","APIKey"
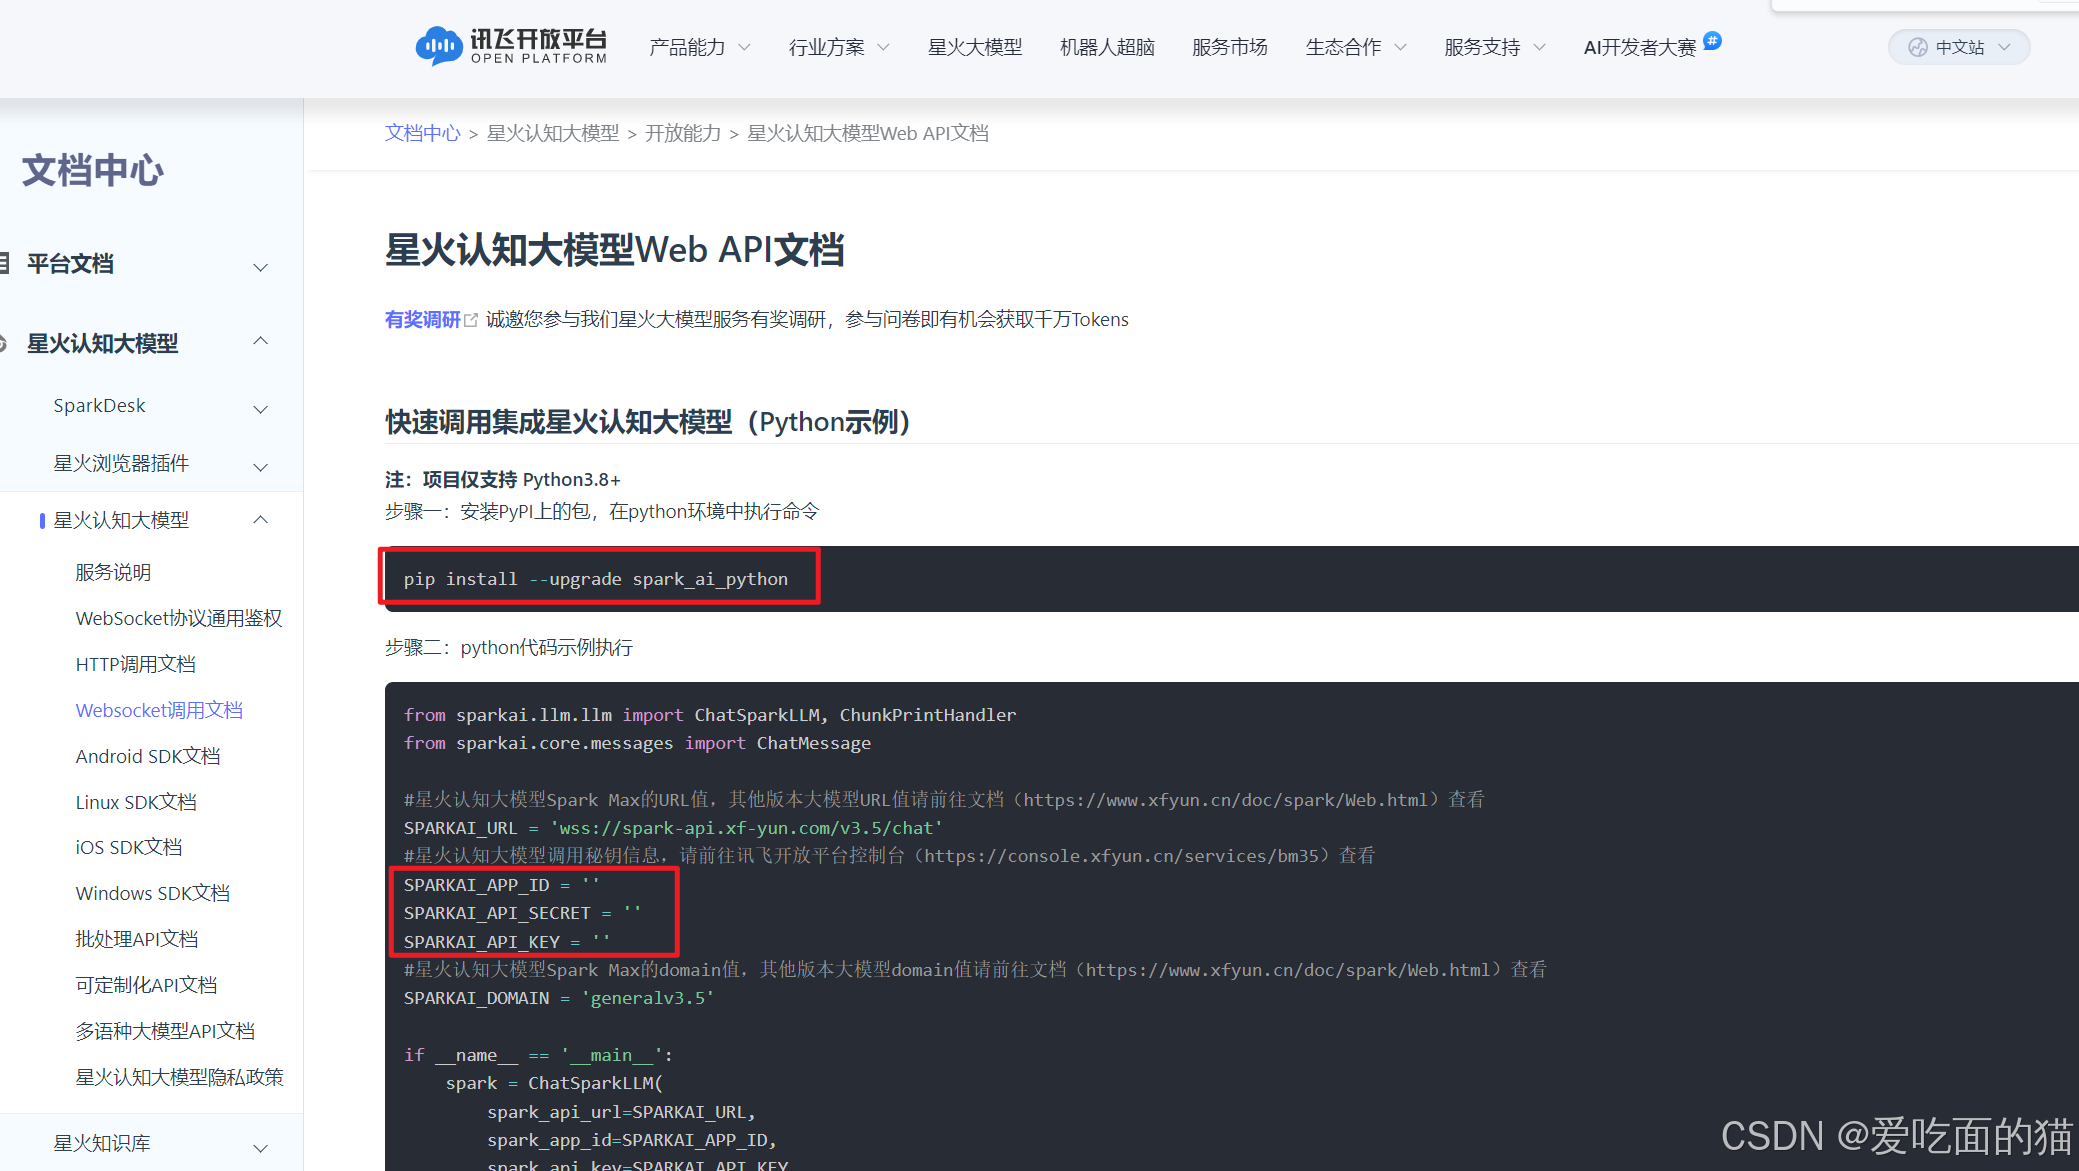
3.2 调用实例
查看调用实例:星火认知大模型Web API文档 | 讯飞开放平台文档中心
 4、编码实现
4.1 使用langchain
import os
from dotenv import find_dotenv, load_dotenv
from langchain_community.llms import SparkLLM
load_dotenv(find_dotenv())

os.environ["IFLYTEK_SPARK_APP_ID"] = "ba04ca"
os.environ["IFLYTEK_SPARK_API_KEY"] = "YzhGNjMDBmMjVhMmQmFjNWIxM4"
os.environ["IFLYTEK_SPARK_API_SECRET"] = "6647142991bebde80fa4d4127a"


llm_spark = SparkLLM()
res = llm_spark.invoke("中国国庆日是哪一天?")
print(res)
4.2、使用sparkAi
pip install --upgrade spark_ai_pythonfrom sparkai.llm.llm import ChatSparkLLM, ChunkPrintHandler
from sparkai.core.messages import ChatMessage
#星火认知大模型Spark Max的URL值,其他版本大模型URL值请前往文档(https://www.xfyun.cn/doc/spark/Web.html)查看
SPARKAI_URL = 'wss://spark-api.xf-yun.com/v3.5/chat'
#星火认知大模型调用秘钥信息,请前往讯飞开放平台控制台(https://console.xfyun.cn/services/bm35)查看
SPARKAI_APP_ID = 'ba04ca'
SPARKAI_API_SECRET = '6647142991bebde80fa4d4127a'
SPARKAI_API_KEY = 'YzhGNjMDBmMjVhMmQmFjNWIxM4'
#星火认知大模型Spark Max的domain值,其他版本大模型domain值请前往文档(https://www.xfyun.cn/doc/spark/Web.html)查看
SPARKAI_DOMAIN = 'generalv3.5'
if __name__ == '__main__':
spark = ChatSparkLLM(
spark_api_url=SPARKAI_URL,
spark_app_id=SPARKAI_APP_ID,
spark_api_key=SPARKAI_API_KEY,
spark_api_secret=SPARKAI_API_SECRET,
spark_llm_domain=SPARKAI_DOMAIN,
streaming=False,
)
messages = [ChatMessage(
role="user",
content='你好呀'
)]
handler = ChunkPrintHandler()
a = spark.generate([messages], callbacks=[handler])
print(a)
5、常见错误
5.1、报错信息:
APPID错误:
Error Code: 10005, Error: InvalidParamError:(...) app_id is not same to kong app_id
APISecret错误:
Handshake status 401 Unauthorized ... b'{"message":"HMAC signature does not match"}'
APIKey错误:
Handshake status 401 Unauthorized ... b'{"message":"HMAC signature cannot be verified: fail to retrieve credential"}'

解决方案:检测是否填写正确,是否填反信息,例如APISecret和APIKey填反了。
5.2、报错信息:
Error Code: 11200, Error: AppIdNoAuthError:(...) tokens.total
排查:检查token(Spark Max)控制台-讯飞开放平台
原因2:调用的模型版本错误(微调中出现)
排查与解决:检查你的domain和Spark_url值,是不是和模型版本对应,修改即可
#调用微调大模型时,设置为“patch”
# domain = "patch" # 微调v1.1环境的地址(lite)
domain = "patchv3" # 微调v3.1环境的地址(pro)
#云端环境的服务地址
# Spark_url = "wss://spark-api-n.xf-yun.com/v1.1/chat" # 微调v1.1环境的地址
Spark_url = "wss://spark-api-n.xf-yun.com/v3.1/chat" # 微调v3.1环境的地址
6、补充
WebSocket协议通用鉴权URL生成说明
WebSocket协议通用鉴权URL生成说明 | 讯飞开放平台文档中心
import hashlib
import base64
from urllib.parse import urlencode
from sparkai.llm.llm import ChatSparkLLM, ChunkPrintHandler
from sparkai.core.messages import ChatMessage


def get_authentication():
    APIKey = 'MWQ2Og2IxNTJjOWI5MDMyNjMx'
    APISecret = '776261842a1e6413b53f31bf0'
    date = format_date_time(mktime(datetime.now().timetuple()))
    tmp_info = f"wss://spark-api.xf-yun.com/\ndate :{date}\nGET /v3.5/chat HTTP/1.1"
    tmp_sha = hmac.new(APISecret.encode('utf-8'), tmp_info.encode('utf-8'), digestmod=hashlib.sha256).digest()
    signature = base64.b64encode(tmp_sha).decode(encoding='utf-8')
    authorization_origin = f"api_key='{APIKey}', algorithm='hmac-sha256', headers='host date request-line', signature='{signature}'"
    v = {
        "authorization": authorization_origin,  # 上方鉴权生成的authorization
        "date": date,  # 步骤1生成的date
        "host": "spark-api.xf-yun.com"  # 请求的主机名,根据具体接口替换
    }
    url = "wss://spark-api.xf-yun.com/v3.5/chat?" + urlencode(v)
    return url


