目录
动态视图
动态视图用法
⽅向(Orientation)
键盘导航和⾼亮
页眉与页脚
网格视图
动态视图
动态视图用法
Repeater 元素适合有限的静态数据, QtQuick 提供了 ListView 和 GridView, 这两个都是基于 Flickable(可滑动) 区域的元素 , ListView 与 Repeater 相比, ListView 使用了一个 model, 使用delegate 来 实例化,并且在两个 delegate之间能够设置间隔 sapcing

代码:


Component :Component 用于定义一个可以被延迟实例化的QML 对象。可以被用来创建对象模板,这些模板可以在 运行时 根据需要被实例化多次。 通常用于动态创建或销毁对象。比如: 在列表视图中动态加载项目,或者根据用户操作创建新的窗口或对话框:
- Component 必须有一个子类对象(有且只能有一个),而且在子类对象外不能有任何数据,除了Id。
- Component 是在QQmlComponent继承而来的,他是由自己的顶层子类(Item、Rectangle)为其他的 动态视图 View提供可视化组件,但它本身是不可见元素。
注意:
由于 QtQuick 默认行为会导致一些问题;列表视图 不会限制 被显示的代理项(delegates) 只在 限制区域内 显示。ListView 通过设置 clip 属性为 true ,来激活裁剪功能。
如果不不设置 滚动时 会显示在区域外

⽅向(Orientation)
使用orientation 来控制 方向


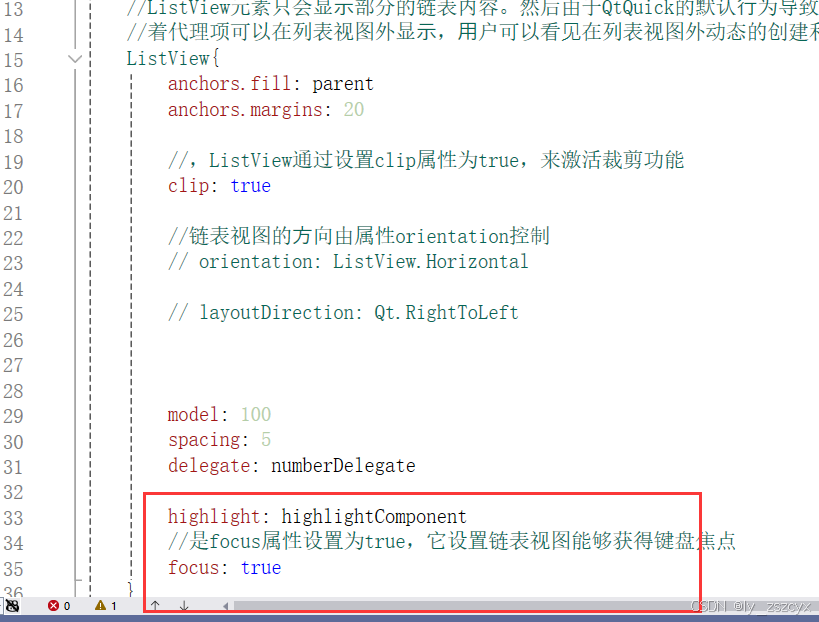

键盘导航和⾼亮
键盘高亮导航效果

完整代码:
import QtQuick 2.15
//模型-视图-代理 --->动态视图(Dynamic Views)
Rectangle {

    // width: 80
    // width: 480
    width: 240
    height: 300


    color: "white"

    //ListView元素只会显⽰部分的链表内容。然后由于QtQuick的默认⾏为导致的问题,列表视图不会限制被显⽰的代理项(delegates)只在限制区域内显⽰
    //着代理项可以在列表视图外显⽰,⽤户可以看⻅在列表视图外动态的创建和销毁这些代理项动态视图(Dynamic Views)(delegates)
    ListView{
        anchors.fill: parent
        anchors.margins: 20

        //,ListView通过设置clip属性为true,来激活裁剪功能
        clip: true

        //链表视图的⽅向由属性orientation控制
        // orientation: ListView.Horizontal

        // layoutDirection: Qt.RightToLeft


        model: 100
        spacing: 5
        delegate: numberDelegate

        highlight: highlightComponent
        //是focus属性设置为true,它设置链表视图能够获得键盘焦点
        focus: true
    }

    Component{
        id: numberDelegate
        // Rectangle{
        //     width: 40
        //     height: 40
        //     color: "lightGreen"

        //     Text {
        //         id: txt
        //         anchors.centerIn: parent
        //         font.pixelSize: 10

        //         text: index
        //     }

        // }

        Item{
            width: 40
            height: 40
            // color: "lightGreen"

            Text {
                id: txt
                anchors.centerIn: parent
                font.pixelSize: 10

                text: index
            }

        }

    }


    // Component{
    //     id: highlightComponent

    //     Rectangle{
    //         width: ListView.view.width
    //         color: "red"
    //     }
    // }


    Component{
        id: highlightComponent

        Item{
            width: ListView.view.width
            height: ListView.view.currentItem.height
            y: ListView.view.currentItem.y

            Behavior on y{
                SequentialAnimation{
                    PropertyAnimation { target: highlightRectangle; property: "opacity"; to: 0; duration: 200 }
                    NumberAnimation { duration: 1 }
                    PropertyAnimation { target: highlightRectangle; property: "opacity"; to: 1; duration: 200 }
                }
            }

            Rectangle{
                id: highlightRectangle
                anchors.fill: parent
                color: "lightGreen"
            }

        }
    }
}
页眉与页脚
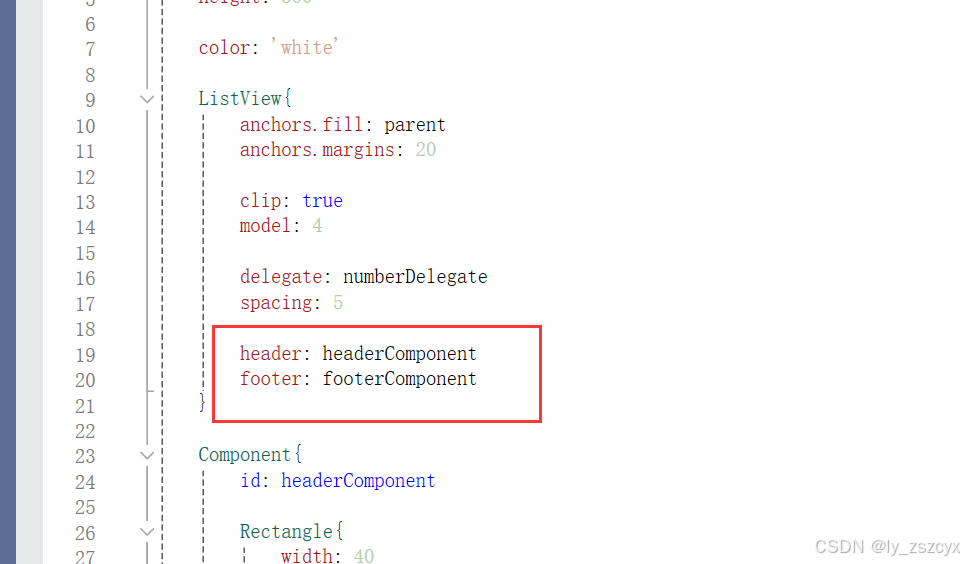
注意:页眉与页脚的 代理元素 不遵循链表视图(ListView) 的间隔属性,它们被 直接 放在在的链表 元素上下。页眉与页脚之前的间隔必须通过页眉与页脚元素自己设置。
效果图:

完整代码:
import QtQuick 2.15

Rectangle{
    width: 80
    height: 300

    color: 'white'

    ListView{
        anchors.fill: parent
        anchors.margins: 20

        clip: true
        model: 4

        delegate: numberDelegate
        spacing: 5

        header: headerComponent
        footer: footerComponent
    }

    Component{
        id: headerComponent

        Rectangle{
            width: 40
            height: 20

            color: 'yellow'
        }
    }

    Component{
        id: footerComponent
        Rectangle{
            width: 40
            height: 20
            color: 'red'
        }
    }

    Component{
        id: numberDelegate
        Rectangle{
            width: 40
            height: 40
            color: 'lightGreen'

            Text{
                anchors.centerIn: parent
                font.pixelSize: 10
                text: index
            }
        }
    }
}
网格视图
用网格视图(GridView)与 使用链表视图(ListVeiw)的方式类似,真正不同的地方是网格视图使用二维数组 存放元素,而链接视图使用的线性链表(一维数组)。
网格视图 不依赖元素间隔和大小 配置元素。它使用单元格宽度(cellWidth)与单元格高度(cellHeight)属性来控制数组内的二维数组的内容。

完整代码
import QtQuick 2.15

Rectangle{
    id:root
    width: 400
    height: 400

    color: 'white'

    GridView{
        anchors.fill: parent
        anchors.margins: 20

        clip:  true
        model: 100

        cellWidth: 45
        cellHeight: 45

        delegate: numberDelegate
        // flow: GridView.RightToLeft
        // layoutDirection: GridView.RightToLeft

        header: headerComponent
        footer: footerComponent

    }
    Component{
        id: headerComponent

        Rectangle{
            width: root.width
            height: 20

            color: 'yellow'
        }
    }

    Component{
        id: footerComponent
        Rectangle{

            width: root.width
            height: 20
            color: 'red'
        }
    }

    Component {
        id: numberDelegate
        Rectangle {
            width: 40
            height: 40
            color: "lightGreen"
            Text {
                anchors.centerIn: parent
                font.pixelSize: 10
                text: index

            }


        }

    }
}





![[原创]手把手教学之前端0基础到就业——day11( Javascript )](https://i-blog.csdnimg.cn/direct/78fc1a23d8ae4d698b713a9f4772a1a1.png)


