前言
在一些小型用户体量的socket服务内,仅部署单台机器就可以满足业务需求。但当遇到一些中大型用户体量的服务时,就需要考虑讲Netty按照集群方式部署,以更好的满足业务诉求。但Netty部署集群后都会遇到跨服务端怎么通信,也就是有集群服务X和Y,用户A链接服务X,用户B链接服务Y,那么他们都不在一个服务内怎么通信?本章节将介绍一种实现方式案例,以满足跨服务之间的用户通信。
涉及到的技术点
1:跨服务之间案例采用redis的发布和订阅进行传递消息,如果你是大型服务可以使用zookeeper
2:用户A在发送消息给用户B时候,需要传递B的channeId,以用于服务端进行查找channeId所属是否自己的服务内
3:单台机器也可以启动多个Netty服务,程序内会自动寻找可用端口
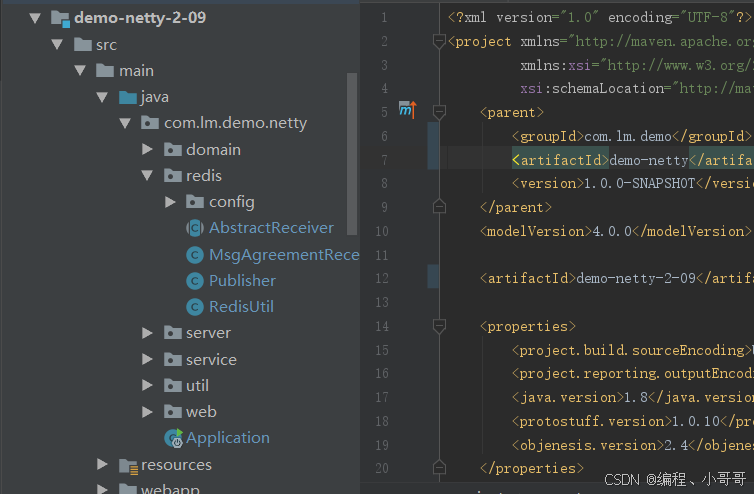
代码目录结构
domain/MsgAgreement.java | 定义信息传输协议,这个看似简单但非常重要,每一个通信的根本就是定义传输协议信息。
package com.lm.demo.netty.domain;


public class MsgAgreement {

    private String toChannelId; //发送给某人,某人channelId
    private String content;     //消息内容

    public MsgAgreement() {
    }

    public MsgAgreement(String toChannelId, String content) {
        this.toChannelId = toChannelId;
        this.content = content;
    }

    public String getToChannelId() {
        return toChannelId;
    }

    public void setToChannelId(String toChannelId) {
        this.toChannelId = toChannelId;
    }

    public String getContent() {
        return content;
    }

    public void setContent(String content) {
        this.content = content;
    }

}
PublisherConfig.java | redis消息发布者,集成与SpringBoot的配置方式
package com.lm.demo.netty.redis.config;

import com.alibaba.fastjson.support.spring.FastJsonRedisSerializer;
import org.springframework.context.annotation.Bean;
import org.springframework.context.annotation.Configuration;
import org.springframework.data.redis.connection.RedisConnectionFactory;
import org.springframework.data.redis.core.RedisTemplate;


@Configuration
public class PublisherConfig {

    @Bean
    public RedisTemplate<String, Object> redisMessageTemplate(RedisConnectionFactory connectionFactory) {
        RedisTemplate<String, Object> template = new RedisTemplate<>();
        template.setConnectionFactory(connectionFactory);
        template.setDefaultSerializer(new FastJsonRedisSerializer<>(Object.class));
        return template;
    }

}
redis/config/ReceiverConfig.java | redis消息的订阅者,集成与SpringBoot的配置方式。可以订阅多个主题
package com.lm.demo.netty.redis.config;

import com.lm.demo.netty.redis.MsgAgreementReceiver;
import org.springframework.context.annotation.Bean;
import org.springframework.context.annotation.Configuration;
import org.springframework.data.redis.connection.RedisConnectionFactory;
import org.springframework.data.redis.listener.PatternTopic;
import org.springframework.data.redis.listener.RedisMessageListenerContainer;
import org.springframework.data.redis.listener.adapter.MessageListenerAdapter;


@Configuration
public class ReceiverConfig {

    @Bean
    public RedisMessageListenerContainer container(RedisConnectionFactory connectionFactory, MessageListenerAdapter msgAgreementListenerAdapter) {
        RedisMessageListenerContainer container = new RedisMessageListenerContainer();
        container.setConnectionFactory(connectionFactory);
        container.addMessageListener(msgAgreementListenerAdapter, new PatternTopic("itstack-demo-netty-push-msgAgreement"));
        return container;
    }

    @Bean
    public MessageListenerAdapter msgAgreementListenerAdapter(MsgAgreementReceiver receiver) {
        return new MessageListenerAdapter(receiver, "receiveMessage");
    }

}
MsgAgreementReceiver.java | 实现抽象类用于接收订阅到的消息,接收消息后进行业务处理
package com.lm.demo.netty.redis;

import com.alibaba.fastjson.JSON;
import com.lm.demo.netty.domain.MsgAgreement;
import com.lm.demo.netty.util.CacheUtil;
import io.netty.channel.Channel;
import com.lm.demo.netty.util.MsgUtil;
import org.slf4j.Logger;
import org.slf4j.LoggerFactory;
import org.springframework.stereotype.Service;

@Service
public class MsgAgreementReceiver extends AbstractReceiver {

    private Logger logger = LoggerFactory.getLogger(MsgAgreementReceiver.class);

    @Override
    public void receiveMessage(Object message) {
        logger.info("接收到PUSH消息:{}", message);
        MsgAgreement msgAgreement = JSON.parseObject(message.toString(), MsgAgreement.class);
        String toChannelId = msgAgreement.getToChannelId();
        Channel channel = CacheUtil.cacheChannel.get(toChannelId);
        if (null == channel) return;
        channel.writeAndFlush(MsgUtil.obj2Json(msgAgreement));
    }

}
/RedisUtil.java | redis操作工具类,帮助存储数据。以下是将链接到服务的用户信息存放到redis方便可以在每个服务端都能看到这份用户链接数据
package com.lm.demo.netty.redis;

import com.alibaba.fastjson.JSON;
import com.lm.demo.netty.domain.UserChannelInfo;
import org.springframework.beans.factory.annotation.Autowired;
import org.springframework.data.redis.core.StringRedisTemplate;
import org.springframework.stereotype.Service;

import java.util.ArrayList;
import java.util.List;


@Service("redisUtil")
public class RedisUtil {

    @Autowired
    private StringRedisTemplate redisTemplate;

    public void pushObj(UserChannelInfo userChannelInfo) {
        redisTemplate.opsForHash().put("demo-netty-2-09-user", userChannelInfo.getChannelId(), JSON.toJSONString(userChannelInfo));
    }

    public List<UserChannelInfo> popList() {
        List<Object> values = redisTemplate.opsForHash().values("demo-netty-2-09-user");
        if (null == values) return new ArrayList<>();
        List<UserChannelInfo> userChannelInfoList = new ArrayList<>();
        for (Object strJson : values) {
            userChannelInfoList.add(JSON.parseObject(strJson.toString(), UserChannelInfo.class));
        }
        return userChannelInfoList;
    }

    public void remove(String channelId) {
        redisTemplate.opsForHash().delete("demo-netty-2-09-user",channelId);
    }

    public void clear(){
        redisTemplate.delete("demo-netty-2-09-user");
    }

}
MyServerHandler.java | 处理接收到的信息,尤其在channelRead中,将接受者不是本服务端的用户,进行全局push
package com.lm.demo.netty.server;

import com.lm.demo.netty.domain.MsgAgreement;
import com.lm.demo.netty.domain.UserChannelInfo;
import com.lm.demo.netty.service.ExtServerService;
import io.netty.channel.Channel;
import io.netty.channel.ChannelHandlerContext;
import io.netty.channel.ChannelInboundHandlerAdapter;
import io.netty.channel.socket.SocketChannel;
import com.lm.demo.netty.util.CacheUtil;
import com.lm.demo.netty.util.MsgUtil;
import org.slf4j.Logger;
import org.slf4j.LoggerFactory;

import java.text.SimpleDateFormat;
import java.util.Date;


public class MyServerHandler extends ChannelInboundHandlerAdapter {

    private Logger logger = LoggerFactory.getLogger(MyServerHandler.class);

    private ExtServerService extServerService;

    public MyServerHandler(ExtServerService extServerService) {
        this.extServerService = extServerService;
    }

    /**
     * 当客户端主动链接服务端的链接后,这个通道就是活跃的了。也就是客户端与服务端建立了通信通道并且可以传输数据
     */
    @Override
    public void channelActive(ChannelHandlerContext ctx) throws Exception {
        SocketChannel channel = (SocketChannel) ctx.channel();
        System.out.println("链接报告开始");
        System.out.println("链接报告信息:有一客户端链接到本服务端。channelId:" + channel.id());
        System.out.println("链接报告IP:" + channel.localAddress().getHostString());
        System.out.println("链接报告Port:" + channel.localAddress().getPort());
        System.out.println("链接报告完毕");

        //保存用户信息
        UserChannelInfo userChannelInfo = new UserChannelInfo(channel.localAddress().getHostString(), channel.localAddress().getPort(), channel.id().toString(), new Date());
        extServerService.getRedisUtil().pushObj(userChannelInfo);
        CacheUtil.cacheChannel.put(channel.id().toString(), channel);
        //通知客户端链接建立成功
        String str = "通知客户端链接建立成功" + " " + new Date() + " " + channel.localAddress().getHostString() + "\r\n";
        ctx.writeAndFlush(MsgUtil.buildMsg(channel.id().toString(), str));

    }

    /**
     * 当客户端主动断开服务端的链接后,这个通道就是不活跃的。也就是说客户端与服务端的关闭了通信通道并且不可以传输数据
     */
    @Override
    public void channelInactive(ChannelHandlerContext ctx) throws Exception {
        System.out.println("客户端断开链接" + ctx.channel().localAddress().toString());
        extServerService.getRedisUtil().remove(ctx.channel().id().toString());
        CacheUtil.cacheChannel.remove(ctx.channel().id().toString(), ctx.channel());
    }

    @Override
    public void channelRead(ChannelHandlerContext ctx, Object objMsgJsonStr) throws Exception {
        //接收msg消息{与上一章节相比,此处已经不需要自己进行解码}
        System.out.println(new SimpleDateFormat("yyyy-MM-dd HH:mm:ss").format(new Date()) + " 接收到消息内容:" + objMsgJsonStr);

        MsgAgreement msgAgreement = MsgUtil.json2Obj(objMsgJsonStr.toString());

        String toChannelId = msgAgreement.getToChannelId();
        //判断接收消息用户是否在本服务端
        Channel channel = CacheUtil.cacheChannel.get(toChannelId);
        if (null != channel) {
            channel.writeAndFlush(MsgUtil.obj2Json(msgAgreement));
            return;
        }
        //如果为NULL则接收消息的用户不在本服务端,需要push消息给全局
        logger.info("接收消息的用户不在本服务端,PUSH!");
        extServerService.push(msgAgreement);
    }

    /**
     * 抓住异常,当发生异常的时候,可以做一些相应的处理,比如打印日志、关闭链接
     */
    @Override
    public void exceptionCaught(ChannelHandlerContext ctx, Throwable cause) throws Exception {
        ctx.close();
        extServerService.getRedisUtil().remove(ctx.channel().id().toString());
        CacheUtil.cacheChannel.remove(ctx.channel().id().toString(), ctx.channel());
        System.out.println("异常信息:\r\n" + cause.getMessage());
    }

}
CacheUtil.java | 缓存必要信息,用于业务流程处理
package com.lm.demo.netty.util;

import com.lm.demo.netty.domain.ServerInfo;
import com.lm.demo.netty.server.NettyServer;
import io.netty.channel.Channel;

import java.util.Collections;
import java.util.HashMap;
import java.util.Map;


public class CacheUtil {

    // 缓存channel
    public static Map<String, Channel> cacheChannel = Collections.synchronizedMap(new HashMap<String, Channel>());

    // 缓存服务信息
    public static Map<Integer, ServerInfo> serverInfoMap = Collections.synchronizedMap(new HashMap<Integer, ServerInfo>());

    // 缓存服务端
    public static Map<Integer, NettyServer> serverMap = Collections.synchronizedMap(new HashMap<Integer, NettyServer>());

}
package com.lm.demo.netty.web;

import com.alibaba.fastjson.JSON;
import com.lm.demo.netty.domain.EasyResult;
import com.lm.demo.netty.domain.ServerInfo;
import com.lm.demo.netty.domain.UserChannelInfo;
import com.lm.demo.netty.redis.RedisUtil;
import com.lm.demo.netty.server.NettyServer;
import com.lm.demo.netty.service.ExtServerService;
import com.lm.demo.netty.util.CacheUtil;
import com.lm.demo.netty.util.NetUtil;
import io.netty.channel.Channel;
import org.slf4j.Logger;
import org.slf4j.LoggerFactory;
import org.springframework.beans.factory.annotation.Autowired;
import org.springframework.beans.factory.annotation.Value;
import org.springframework.stereotype.Controller;
import org.springframework.ui.Model;
import org.springframework.web.bind.annotation.RequestMapping;
import org.springframework.web.bind.annotation.ResponseBody;

import javax.annotation.Resource;
import java.net.InetSocketAddress;
import java.util.Collection;
import java.util.Date;
import java.util.List;
import java.util.concurrent.ExecutorService;
import java.util.concurrent.Executors;
import java.util.concurrent.Future;


@Controller
public class NettyController {

    private Logger logger = LoggerFactory.getLogger(NettyController.class);
    //默认线程池
    private static ExecutorService executorService = Executors.newFixedThreadPool(2);

    @Value("${server.port}")
    private int serverPort;
    @Autowired
    private ExtServerService extServerService;
    @Resource
    private RedisUtil redisUtil;
    //Netty服务端
    private NettyServer nettyServer;

    @RequestMapping("/index")
    public String index(Model model) {
        model.addAttribute("serverPort", serverPort);
        return "index";
    }

    @RequestMapping("/openNettyServer")
    @ResponseBody
    public EasyResult openNettyServer() {
        try {
            int port = NetUtil.getPort();
            logger.info("启动Netty服务,获取可用端口:{}", port);
            nettyServer = new NettyServer(new InetSocketAddress(port), extServerService);
            Future<Channel> future = executorService.submit(nettyServer);
            Channel channel = future.get();
            if (null == channel) {
                throw new RuntimeException("netty server open error channel is null");
            }
            while (!channel.isActive()) {
                logger.info("启动Netty服务,循环等待启动...");
                Thread.sleep(500);
            }
            CacheUtil.serverInfoMap.put(port, new ServerInfo(NetUtil.getHost(), port, new Date()));
            CacheUtil.serverMap.put(port, nettyServer);
            logger.info("启动Netty服务,完成:{}", channel.localAddress());
            return EasyResult.buildSuccessResult();
        } catch (Exception e) {
            logger.error("启动Netty服务失败", e);
            return EasyResult.buildErrResult(e);
        }
    }

    @RequestMapping("/closeNettyServer")
    @ResponseBody
    public EasyResult closeNettyServer(int port) {
        try {
            logger.info("关闭Netty服务开始,端口:{}", port);
            NettyServer nettyServer = CacheUtil.serverMap.get(port);
            if (null == nettyServer) {
                CacheUtil.serverMap.remove(port);
                return EasyResult.buildSuccessResult();
            }
            nettyServer.destroy();
            CacheUtil.serverMap.remove(port);
            CacheUtil.serverInfoMap.remove(port);
            logger.info("关闭Netty服务完成,端口:{}", port);
            return EasyResult.buildSuccessResult();
        } catch (Exception e) {
            logger.error("关闭Netty服务失败,端口:{}", port, e);
            return EasyResult.buildErrResult(e);
        }
    }

    @RequestMapping("/queryNettyServerList")
    @ResponseBody
    public Collection<ServerInfo> queryNettyServerList() {
        try {
            Collection<ServerInfo> serverInfos = CacheUtil.serverInfoMap.values();
            logger.info("查询服务端列表。{}", JSON.toJSONString(serverInfos));
            return serverInfos;
        } catch (Exception e) {
            logger.info("查询服务端列表失败。", e);
            return null;
        }
    }

    @RequestMapping("/queryUserChannelInfoList")
    @ResponseBody
    public List<UserChannelInfo> queryUserChannelInfoList() {
        try {
            logger.info("查询用户列表信息开始");
            List<UserChannelInfo> userChannelInfoList = redisUtil.popList();
            logger.info("查询用户列表信息完成。list:{}", JSON.toJSONString(userChannelInfoList));
            return userChannelInfoList;
        } catch (Exception e) {
            logger.error("查询用户列表信息失败", e);
            return null;
        }
    }

}
resources/application.yml | 基础配置,在我们启动服务端的时候,如果只有一台机器模拟,那么需要改变server.port端口{8080、8081}
server:
  port: 8081

spring:
  mvc:
    view:
      prefix: /WEB-INF/
      suffix: .jsp
  redis:
    host: 127.0.0.1
    port: 6379
index.jsp | 页面操作,控制和展示的一些内容
<%@ page contentType="text/html;charset=UTF-8" language="java" %>
<title>关注明哥 | 专题案例开发,关注取源码 </title>
<meta charset="UTF-8">
<link rel="stylesheet" type="text/css" href="res/js/themes/default/easyui.css">
<link rel="stylesheet" type="text/css" href="res/js/themes/icon.css">
<script type="text/javascript" src="res/js/jquery.min.js"></script>
<script type="text/javascript" src="res/js/jquery.easyui.min.js"></script>

<style>

</style>

<script>
util = {
  formatDate: function (value, row, index) {
      if (null == value) return "";
      var date = new Date();
      date.setTime(value);
      return date.format('yyyy-MM-dd HH:mm:ss');
  }
};
</script>

</head>

<body>
	<div style="margin:20px 0;"></div>
	<table class="easyui-datagrid" title="localhost:${serverPort} | Netty服务端" style="width:700px;height:250px"
			data-options="rownumbers:true,singleSelect:true,url:'/queryNettyServerList',method:'get',toolbar:toolbar">
		<thead>
			<tr>
				<th data-options="field:'ip'">IP</th>
				<th data-options="field:'port'">端口</th>
				<th data-options="field:'openDate'">启动时间</th>
			</tr>
		</thead>
	</table>
	<script type="text/javascript">
		var toolbar = [{
			text:'启动',
			iconCls:'icon-open',
			handler:function(){
			    $.post('/openNettyServer',{}, function (res) {
                               if (res.success) {
                                  $.messager.show({
                                        title: '消息提示',
                                        msg: '启动成功,请稍后刷新页面!'
                                  });
                                   $('#easyui-datagrid').datagrid('reload');
                               } else {
                                   $.messager.show({
                                       title: 'Error',
                                       msg: res.msg
                                   });
                               }
                            }, 'json');
			}
		},'-',{
			text:'关闭',
			iconCls:'icon-close',
			handler:function(){
			     //可以自己添加实现
			}
		}];
	</script>
    <hr/>
	<!-- server-user -->
    <table class="easyui-datagrid" title="localhost:${serverPort} | 用户链接信息" style="width:700px;height:250px"
    			data-options="rownumbers:true,singleSelect:true,url:'/queryUserChannelInfoList',method:'get'">
    		<thead>
    			<tr>
    				<th data-options="field:'ip'">IP</th>
    				<th data-options="field:'port'">端口</th>
    				<th data-options="field:'channelId'">用户ID</th>
    				<th data-options="field:'linkDate'">链接时间</th>
    			</tr>
    		</thead>
    </table>
</body>
</html>
测试结果
启动Redis服务

1:启动2次SpringBoot,模拟Netty集群[不同端口8080、8081] | Plugins/spring-boot/run 双击启动
2:启动2个以上的NetAssist分别链接到不同的服务端,以模拟测试跨服务通信,最后在客户端发送消息传递给另外一个不在本服务端的客户端。
最终运行效果

好了到这里就结束了netty之Netty集群部署实现跨服务端通信的落地方案的学习,大家一定要跟着动手操作起来。需要的源码的 可si我获取;