文章目录
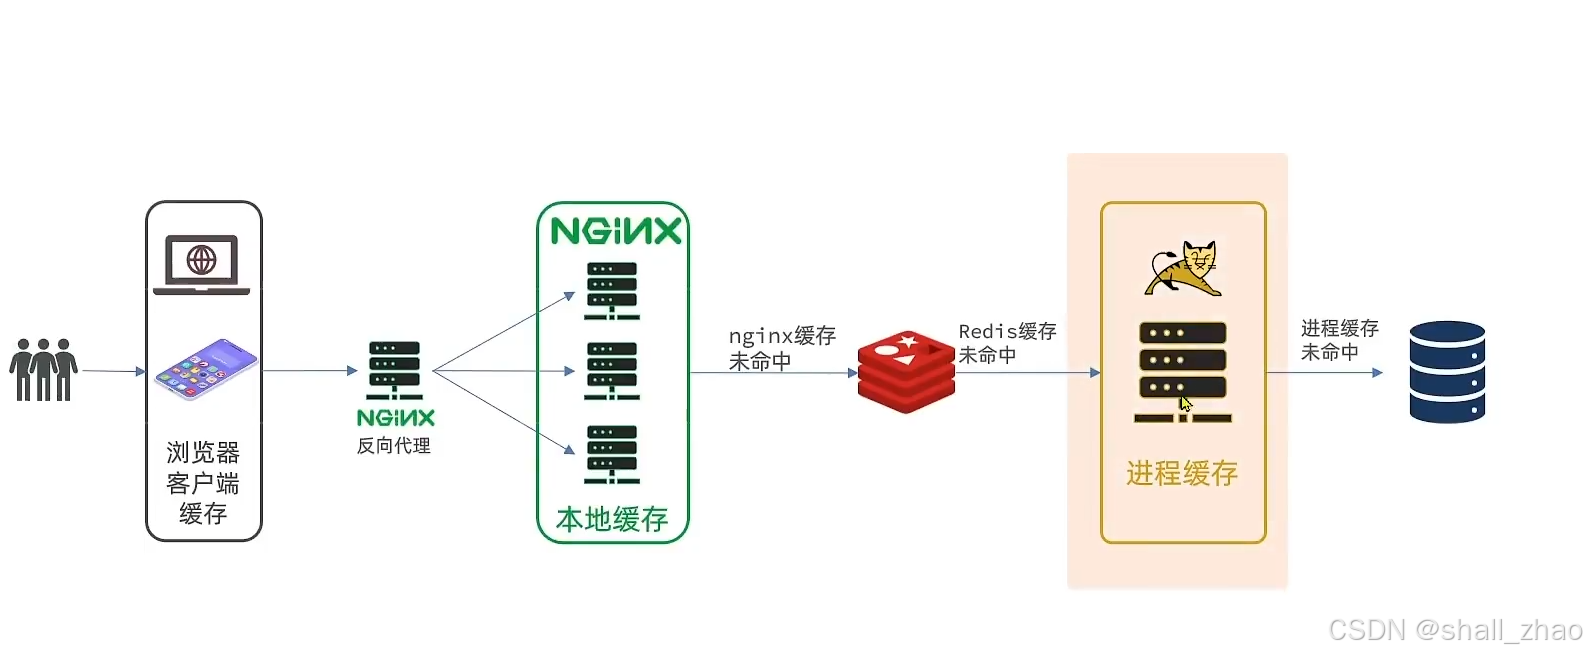
- 什么是多级缓存
- 导入商品案例
- 初识Caffeine
- 实现进程缓存
什么是多级缓存


但是现在的nginx的压力太大了,所以nginx也要部署成集群

当然我们的redis、tomcat都可以部署成集群
导入商品案例
我们在docker中开启了一个mysql的数据库,里面配置了一个关于商品的数据库,

只有两张表
在本机运行一个关于商品增上改查的springboot项目

其中的业务包括:
- 分页查询商品
- 新增商品
- 修改商品
- 修改库存
- 删除商品
- 根据id查询商品
- 根据id查询库存
业务全部使用mybatis-plus来实现,如有需要可以自行修改业务逻辑。
商品查询是购物页面,与商品管理的页面是分离的。
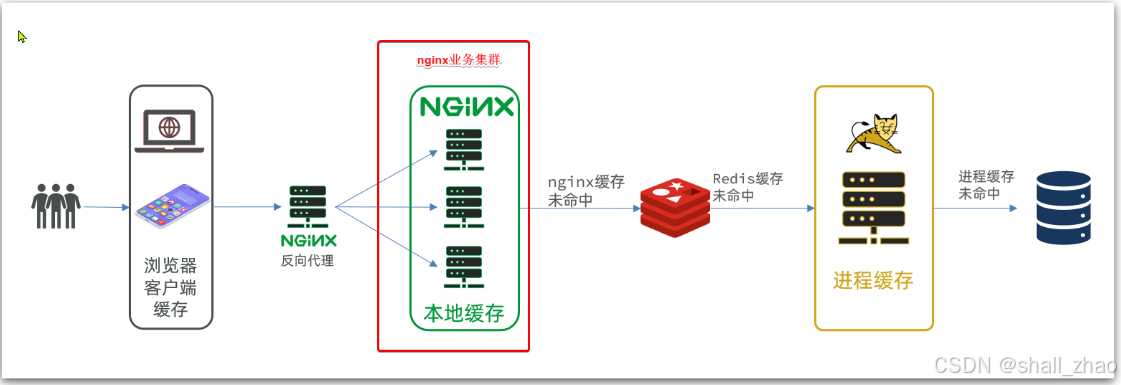
部署方式如图:

我们需要准备一个反向代理的nginx服务器,如上图红框所示,将静态的商品页面放到nginx目录中。
页面需要的数据通过ajax向服务端(nginx业务集群)查询。
运行这个nginx服务

现在,页面是假数据展示的。我们需要向服务器发送ajax请求,查询商品数据。
打开控制台,可以看到页面有发起ajax查询数据:

而这个请求地址同样是80端口,所以被当前的nginx反向代理了。
查看nginx的conf目录下的nginx.conf文件:
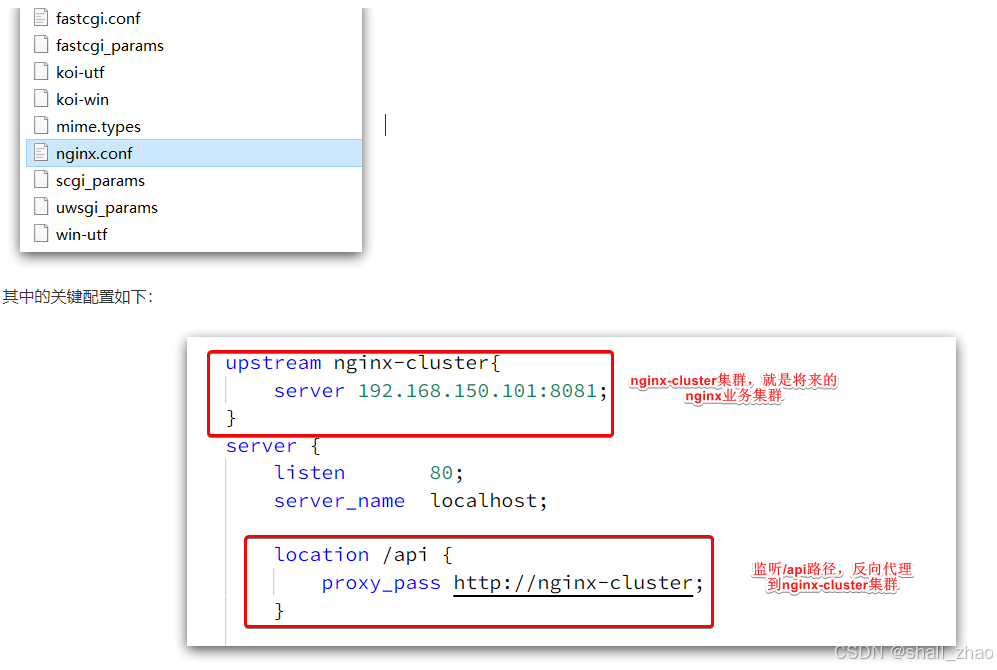
其中的192.168.150.101是我的虚拟机IP(根据自己的修改),也就是我的Nginx业务集群要部署的地方:
完整内容如下:
#user  nobody;
worker_processes  1;

events {
    worker_connections  1024;
}

http {
    include       mime.types;
    default_type  application/octet-stream;

    sendfile        on;
    #tcp_nopush     on;
    keepalive_timeout  65;

    upstream nginx-cluster{
        server 192.168.150.101:8081;
    }
    server {
        listen       80;
        server_name  localhost;

	location /api {
            proxy_pass http://nginx-cluster;
        }

        location / {
            root   html;
            index  index.html index.htm;
        }

        error_page   500 502 503 504  /50x.html;
        location = /50x.html {
            root   html;
        }
    }
}
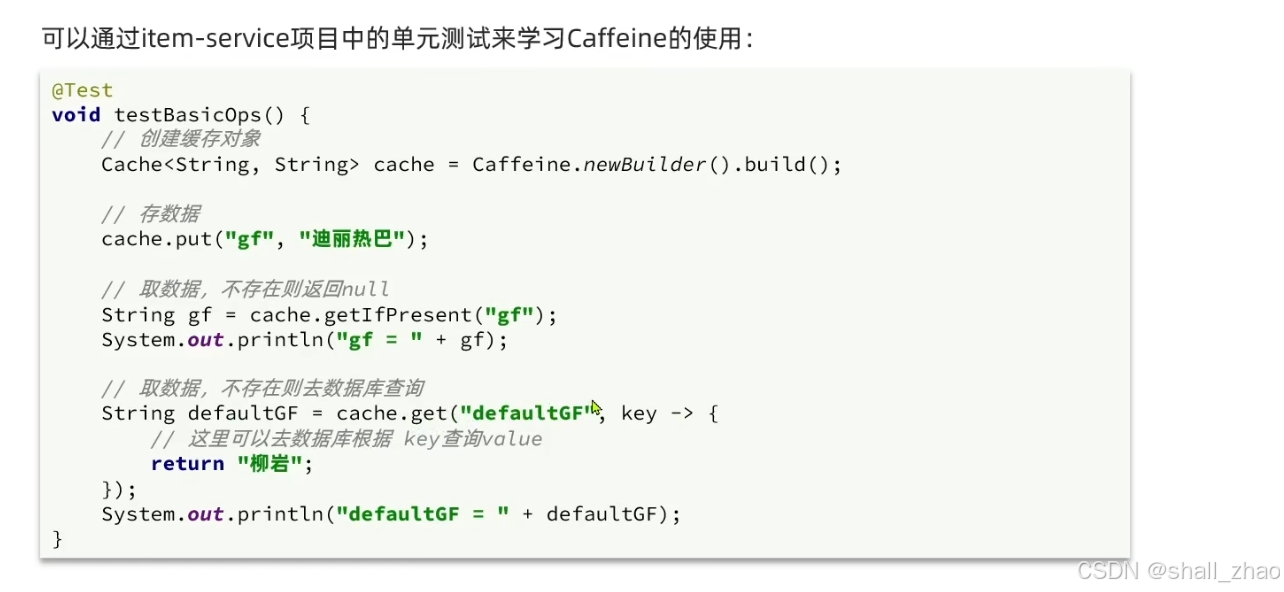
初识Caffeine


https://github.com/ben-manes/caffeine
    /*
      基本用法测试
     */
    @Test
    void testBasicOps() {
        // 创建缓存对象
        Cache<String, String> cache = Caffeine.newBuilder().build();

        // 存数据
        cache.put("gf", "迪丽热巴");

        // 取数据,不存在则返回null
        String gf = cache.getIfPresent("gf");
        System.out.println("gf = " + gf);

        // 取数据,不存在则去数据库查询
        String defaultGF = cache.get("defaultGF", key -> {
            // 这里可以去数据库根据 key查询value
            return "柳岩";
        });
        System.out.println("defaultGF = " + defaultGF);
    }
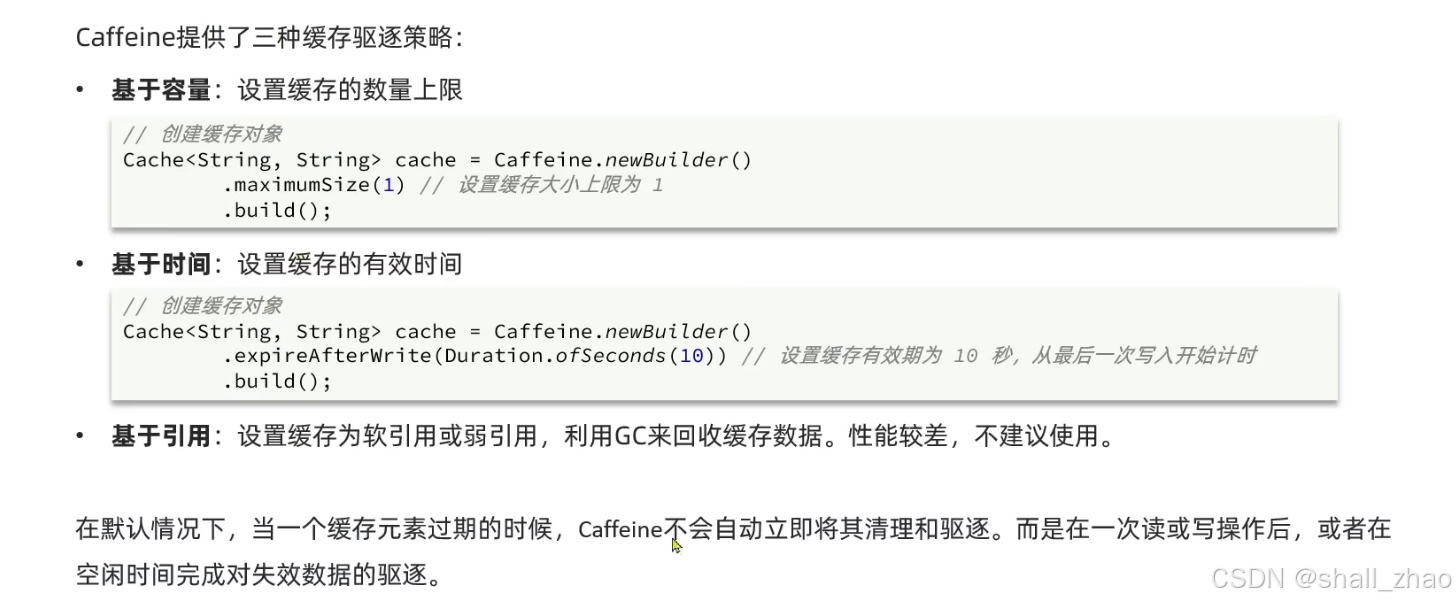
 /*
     基于大小设置驱逐策略:
     */
    @Test
    void testEvictByNum() throws InterruptedException {
        // 创建缓存对象
        Cache<String, String> cache = Caffeine.newBuilder()
                // 设置缓存大小上限为 1
                .maximumSize(1)
                .build();
        // 存数据
        cache.put("gf1", "柳岩");
        cache.put("gf2", "范冰冰");
        cache.put("gf3", "迪丽热巴");
        // 延迟10ms,给清理线程一点时间
        Thread.sleep(10L);
        // 获取数据
        System.out.println("gf1: " + cache.getIfPresent("gf1"));
        System.out.println("gf2: " + cache.getIfPresent("gf2"));
        System.out.println("gf3: " + cache.getIfPresent("gf3"));
    }

    /*
     基于时间设置驱逐策略:
     */
    @Test
    void testEvictByTime() throws InterruptedException {
        // 创建缓存对象
        Cache<String, String> cache = Caffeine.newBuilder()
                .expireAfterWrite(Duration.ofSeconds(1)) // 设置缓存有效期为 10 秒
                .build();
        // 存数据
        cache.put("gf", "柳岩");
        // 获取数据
        System.out.println("gf: " + cache.getIfPresent("gf"));
        // 休眠一会儿
        Thread.sleep(1200L);
        System.out.println("gf: " + cache.getIfPresent("gf"));
    }
实现进程缓存

首先我们要清楚,有一个商品的缓存库,还有一个库存的缓存库,这是两个缓存,不要混在一起,而且这个缓存库最好一开始就初始化了,然后所有的业务想要使用的时候,都可以去读和写,所以需要把缓存的bean提前初始化好,声明成一个bean,放在spring的容器里。
我们先定义bean
package com.heima.item.config;

import com.github.benmanes.caffeine.cache.Cache;
import com.github.benmanes.caffeine.cache.Caffeine;
import com.heima.item.pojo.Item;
import com.heima.item.pojo.ItemStock;
import org.springframework.context.annotation.Bean;
import org.springframework.context.annotation.Configuration;

@Configuration
public class CaffeineConfig {

    @Bean
    public Cache<Long, Item> itemCache(){
        return Caffeine.newBuilder()
                .initialCapacity(100)
                .maximumSize(10_000)
                .build();
    }

    @Bean
    public Cache<Long, ItemStock> stockCache(){
        return Caffeine.newBuilder()
                .initialCapacity(100)
                .maximumSize(10_000)
                .build();
    }
}
然后去改造业务
    @Autowired
    private Cache<Long, Item> itemCache;
    @Autowired
    private Cache<Long, ItemStock> stockCache;

    @GetMapping("/{id}")
    public Item findById(@PathVariable("id") Long id){
        return itemCache.get(id, key -> itemService.query()
                .ne("status", 3).eq("id", key)
                .one());
//        return itemService.query()
//                .ne("status", 3).eq("id", id)
//                .one();
    }

    @GetMapping("/stock/{id}")
    public ItemStock findStockById(@PathVariable("id") Long id){
        return stockCache.get(id, key -> stockService.getById(key));
//        return stockService.getById(id);
    }

![[C#学习笔记]接口的特性与用法](https://i-blog.csdnimg.cn/direct/adca07bb3c3e497a960e7f14e92931b4.png)
![[数据集][目标检测]打电话检测数据集VOC+YOLO格式8985张1类别](https://i-blog.csdnimg.cn/direct/0aed1bf0357c4b2fb2eff6e53bad284b.png)


