CSS定位是一个非常重要的布局工具,它允许我们精确地控制元素的位置,从而创建复杂的布局效果。定位允许你从正常的文档流布局中取出元素,并使它们具有不同的行为,例如放在另一个元素的上面,或者始终保持在浏览器视窗内的同一位置。

一、文档流
在讨论CSS定位之前,我们首先需要理解“文档流”这一概念。文档流是网页上所有元素的默认布局方式。元素按照它们在HTML中出现的顺序,从上到下、从左到右进行排列。理解文档流对于掌握CSS定位至关重要,因为定位属性可以改变元素在文档流中的行为。
文档流的基本概念
默认情况下,块级元素(如 <div>、<p>、<h1> 等)会垂直排列,每个元素占据一整行。行内元素(如 <span>、<a>、<img> 等)则会水平排列,它们只占据内容所需的宽度。
<!DOCTYPE html>
<html lang="en">
<head>
    <meta charset="UTF-8">
    <meta name="viewport" content="width=device-width, initial-scale=1.0">
    <title>文档流示例</title>
    <style>
        .block {
            background-color: lightblue;
            padding: 10px;
            margin: 10px 0;
        }
        .inline {
            background-color: lightgreen;
            padding: 5px;
        }
    </style>
</head>
<body>
    <div class="block">这是一个块级元素</div>
    <span class="inline">这是一个行内元素</span>
    <span class="inline">另一个行内元素</span>
    <div class="block">这是另一个块级元素</div>
</body>
</html>
在这个示例中,我们使用了一个块级元素和两个行内元素。块级元素会垂直排列,每个元素占据一整行,而行内元素则在同一行内水平排列。
二、定位基础
CSS定位属性允许我们改变元素在文档流中的位置,从而实现更复杂的布局效果。CSS提供了几种不同的定位方式:静态定位、相对定位、绝对定位、固定定位和粘性定位。我们将逐一介绍这些定位方式及其属性。
静态定位
静态定位是CSS的默认定位方式。在静态定位中,元素按照文档流的默认顺序排列。它不会响应 top、bottom、left 和 right 属性的设置。可以通过CSS属性 position: static; 显式设置元素为静态定位,但这通常是不必要的,因为元素默认为静态定位。
<!DOCTYPE html>
<html lang="en">
<head>
    <meta charset="UTF-8">
    <meta name="viewport" content="width=device-width, initial-scale=1.0">
    <title>静态定位示例</title>
    <style>
        .static {
            position: static;
            background-color: lightcoral;
            padding: 20px;
        }
    </style>
</head>
<body>
    <div class="static">这是一个静态定位的元素</div>
</body>
</html>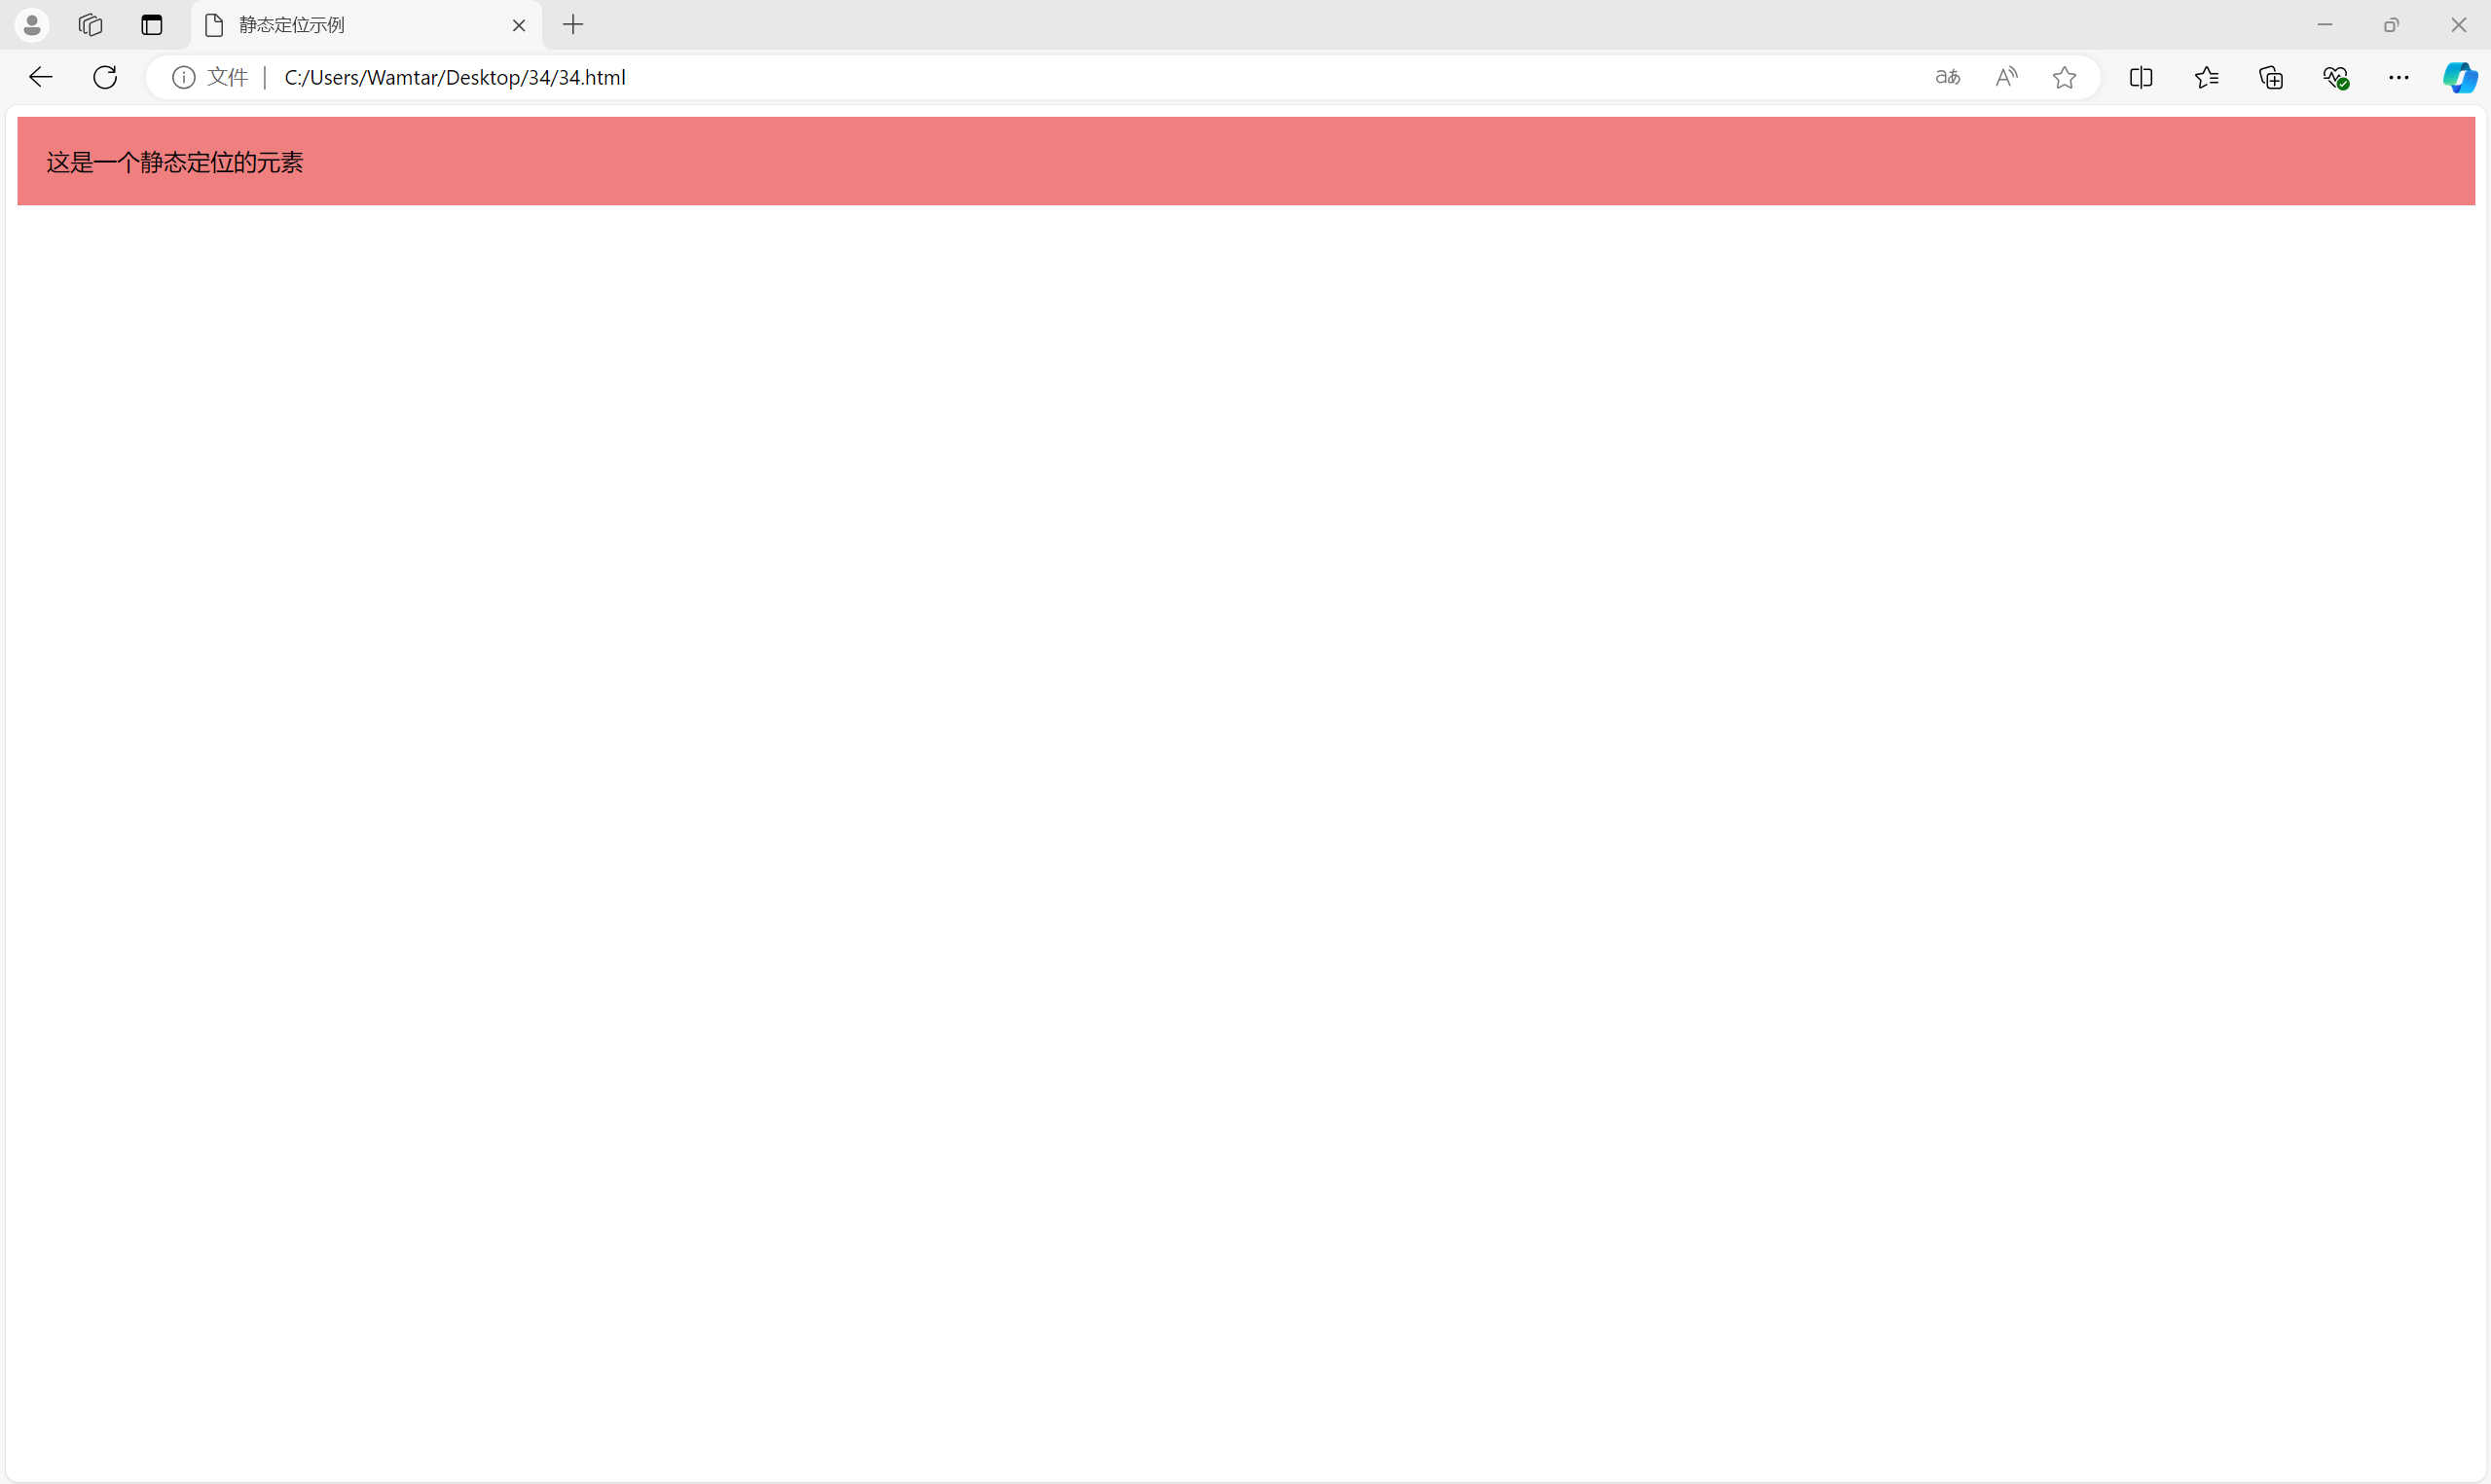
相对定位
相对定位允许我们相对于元素的默认位置进行调整。通过设置 position: relative;,我们可以使用 top、bottom、left 和 right 属性来移动元素,但元素仍然保留在文档流中,只是视觉上被移动了。
<!DOCTYPE html>
<html lang="en">
<head>
    <meta charset="UTF-8">
    <meta name="viewport" content="width=device-width, initial-scale=1.0">
    <title>相对定位示例</title>
    <style>
        .relative {
            position: relative;
            background-color: lightgoldenrodyellow;
            padding: 20px;
            left: 50px; /* 向右移动50px */
            top: 20px;  /* 向下移动20px */
        }
    </style>
</head>
<body>
    <div class="relative">这是一个相对定位的元素</div>
</body>
</html>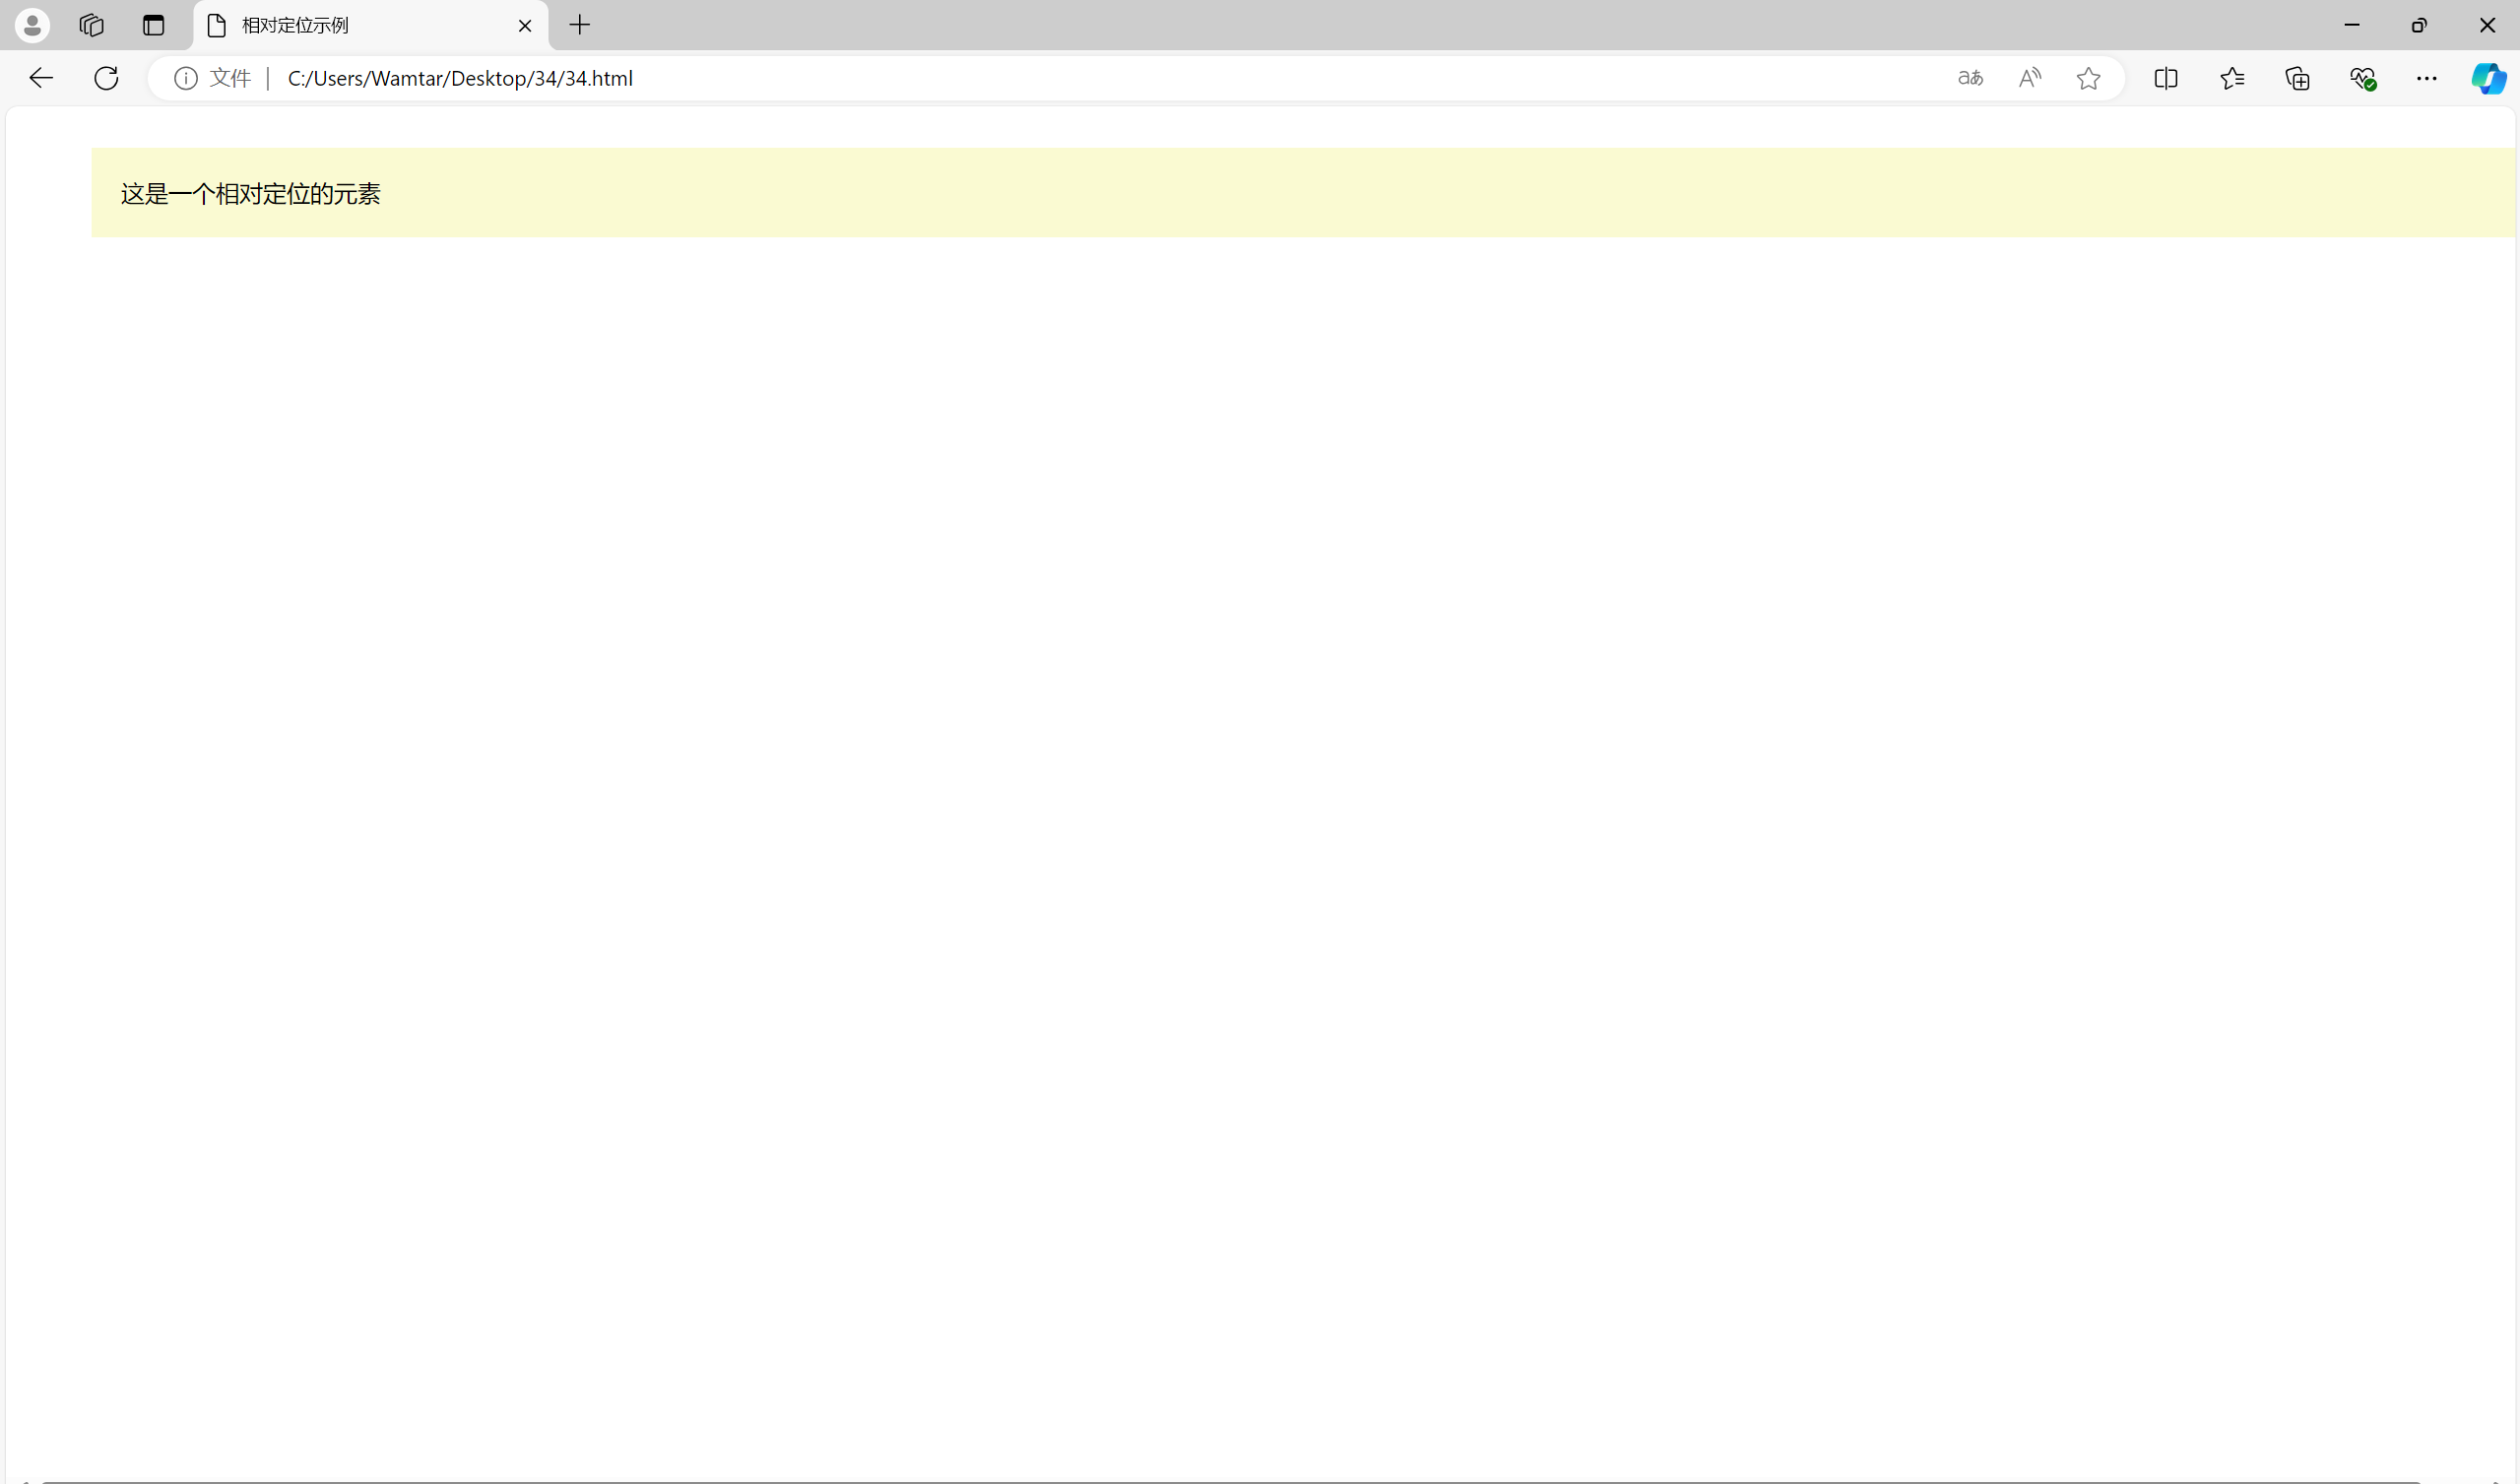
元素相对于它的默认位置被移动了50px到右边和20px到底部。即使元素视觉上移动了,文档流中的位置不变。
绝对定位
绝对定位使元素脱离文档流,完全按照我们指定的位置进行排列。通过设置 position: absolute;,我们可以使用 top、bottom、left 和 right 属性来精确控制元素的位置。绝对定位的元素相对于其最近的定位祖先元素进行定位(即最近的 position 不是 static 的祖先元素),如果没有这样的祖先元素,则相对于视口进行定位。
<!DOCTYPE html>
<html lang="en">
<head>
    <meta charset="UTF-8">
    <meta name="viewport" content="width=device-width, initial-scale=1.0">
    <title>绝对定位示例</title>
    <style>
        .container {
            position: relative;
            width: 300px;
            height: 200px;
            background-color: lightblue;
            border: 1px solid #000;
        }
        .absolute {
            position: absolute;
            background-color: lightcoral;
            padding: 20px;
            top: 30px;
            left: 40px;
        }
    </style>
</head>
<body>
    <div class="container">
        <div class="absolute">这是一个绝对定位的元素</div>
    </div>
</body>
</html>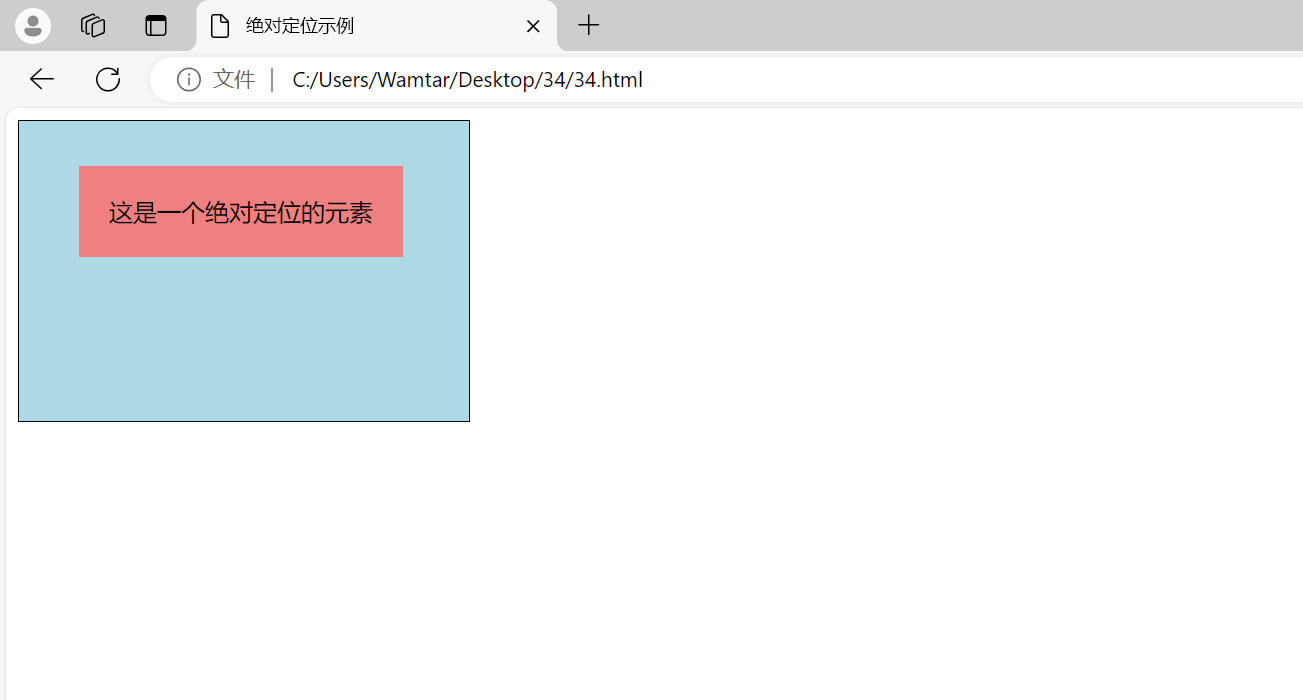
绝对定位的元素相对于其最近的定位祖先元素(.container)进行定位,位置被设置为距离顶部30px和距离左边40px。
定位上下文
绝对定位的元素的定位是相对于最近的定位上下文进行的。定位上下文是指具有定位属性的祖先元素(position 不是 static)。如果一个元素没有定位上下文,那么它将相对于视口进行定位。
<!DOCTYPE html>
<html lang="en">
<head>
    <meta charset="UTF-8">
    <meta name="viewport" content="width=device-width, initial-scale=1.0">
    <title>定位上下文示例</title>
    <style>
        .context {
            position: relative;
            width: 300px;
            height: 200px;
            background-color: lightgoldenrodyellow;
            border: 1px solid #000;
        }
        .absolute {
            position: absolute;
            background-color: lightcoral;
            padding: 20px;
            top: 20px;
            right: 20px;
        }
    </style>
</head>
<body>
    <div class="context">
        <div class="absolute">相对于上下文定位</div>
    </div>
    <div class="absolute" style="position: absolute; top: 100px; right: 100px;">
        相对于视口定位
    </div>
</body>
</html>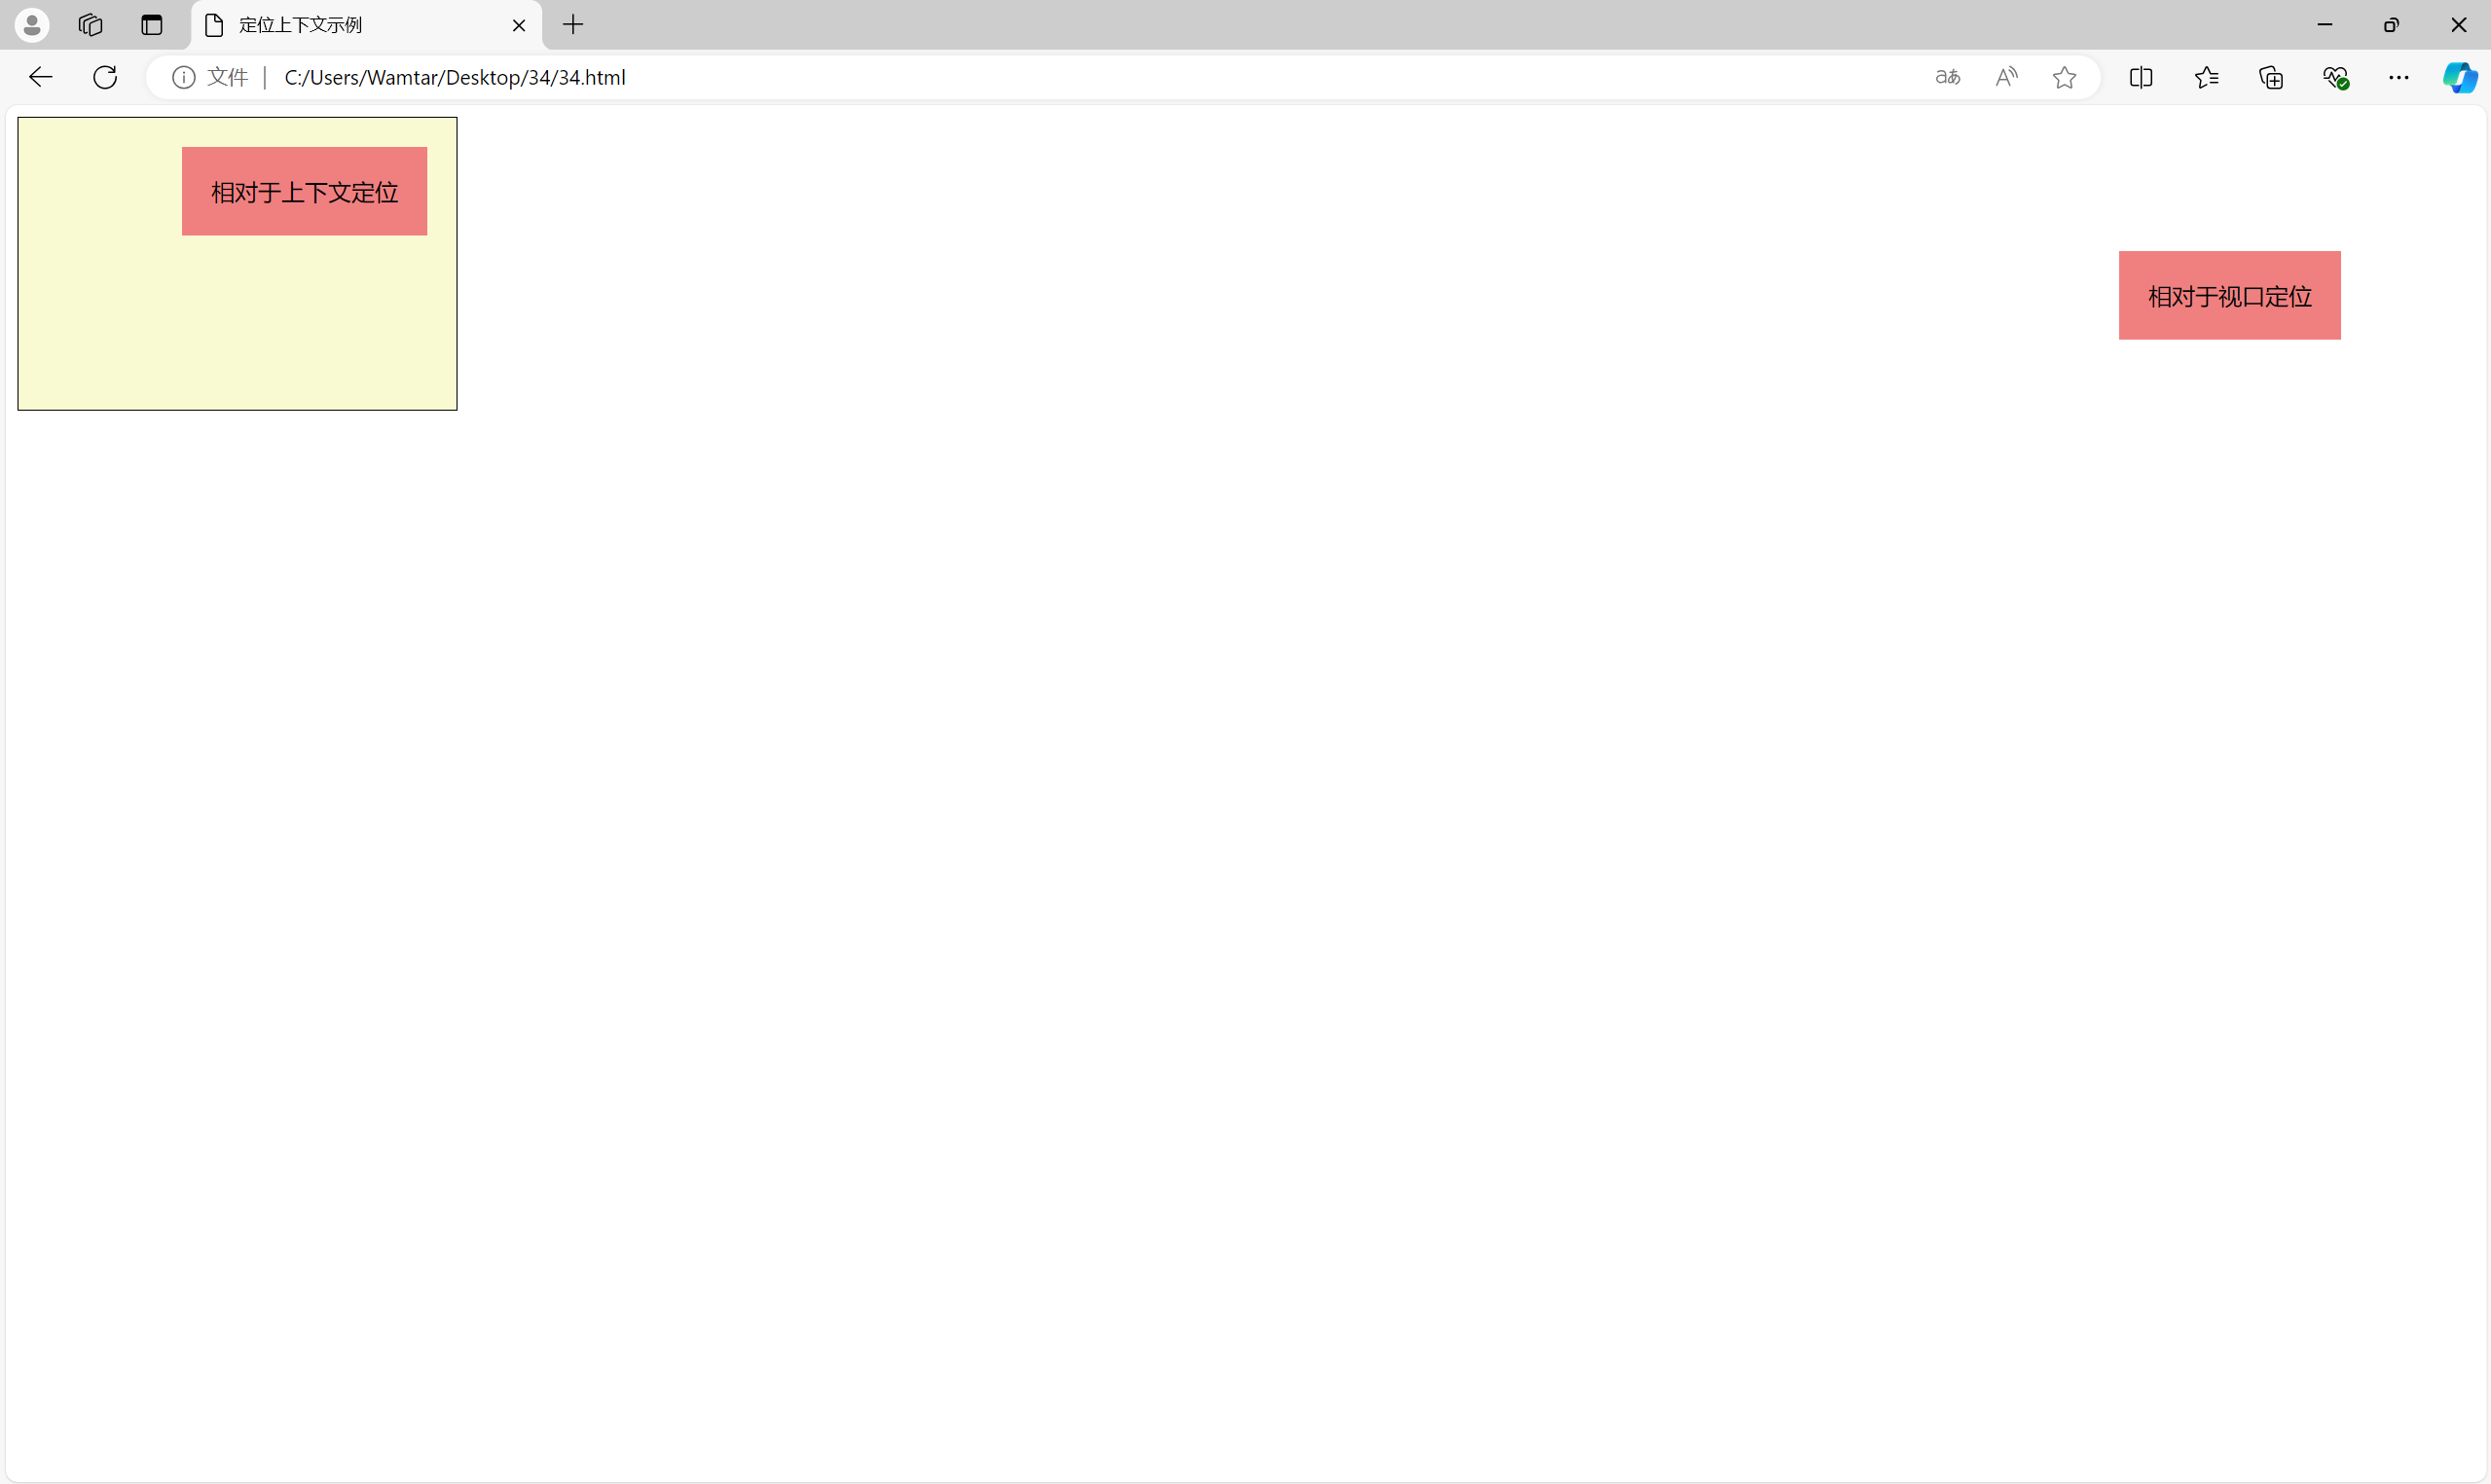
两个绝对定位的元素分别相对于其定位上下文(.context)和视口进行定位。
固定定位
固定定位使元素相对于视口进行定位,不管页面滚动与否。设置 position: fixed; 可以实现固定定位,元素会固定在视口中的特定位置。
<!DOCTYPE html>
<html lang="en">
<head>
    <meta charset="UTF-8">
    <meta name="viewport" content="width=device-width, initial-scale=1.0">
    <title>固定定位示例</title>
    <style>
        .fixed {
            position: fixed;
            background-color: lightcoral;
            padding: 20px;
            bottom: 20px;
            right: 20px;
        }
    </style>
</head>
<body>
    <div class="fixed">这是一个固定定位的元素</div>
    <div style="height: 2000px;">滚动页面查看效果</div>
</body>
</html>
示例中固定定位的元素始终固定在视口的右下角,即使页面滚动也不受影响。
粘性定位
粘性定位是一种相对定位和固定定位的结合。通过设置 position: sticky;,元素在滚动时会在某个阈值内相对位置固定,一旦滚动超过阈值,元素会跟随滚动继续移动。top、bottom、left 和 right 属性用来设置粘性位置的阈值。
<!DOCTYPE html>
<html lang="en">
<head>
    <meta charset="UTF-8">
    <meta name="viewport" content="width=device-width, initial-scale=1.0">
    <title>粘性定位示例</title>
    <style>
        .sticky {
            position: sticky;
            top: 0;
            background-color: lightcoral;
            padding: 10px;
            z-index: 10; /* 确保粘性元素在其他元素之上 */
        }
        .content {
            height: 2000px;
            background-color: lightyellow;
            padding: 20px;
        }
    </style>
</head>
<body>
    <div class="sticky">这是一个粘性定位的元素</div>
    <div class="content">滚动页面查看效果</div>
</body>
</html>
示例中粘性定位的元素会在视口顶部粘住,直到滚动超过它的容器。
三、定位属性
top、bottom、left 和 right
这些属性用于设置定位元素的相对位置。当元素的 position 属性设置为 relative、absolute、fixed 或 sticky 时,top、bottom、left 和 right 属性才会生效。
-
top:设置元素距离其定位上下文顶部的距离。 -
bottom:设置元素距离其定位上下文底部的距离。 -
left:设置元素距离其定位上下文左边的距离。 -
right:设置元素距离其定位上下文右边的距离。
<!DOCTYPE html>
<html lang="en">
<head>
    <meta charset="UTF-8">
    <meta name="viewport" content="width=device-width, initial-scale=1.0">
    <title>定位属性示例</title>
    <style>
        .relative {
            position: relative;
            background-color: lightgoldenrodyellow;
            width: 200px;
            height: 200px;
        }
        .absolute {
            position: absolute;
            background-color: lightcoral;
            width: 100px;
            height: 100px;
            top: 20px;
            left: 30px;
        }
    </style>
</head>
<body>
    <div class="relative">
        <div class="absolute">绝对定位</div>
    </div>
</body>
</html>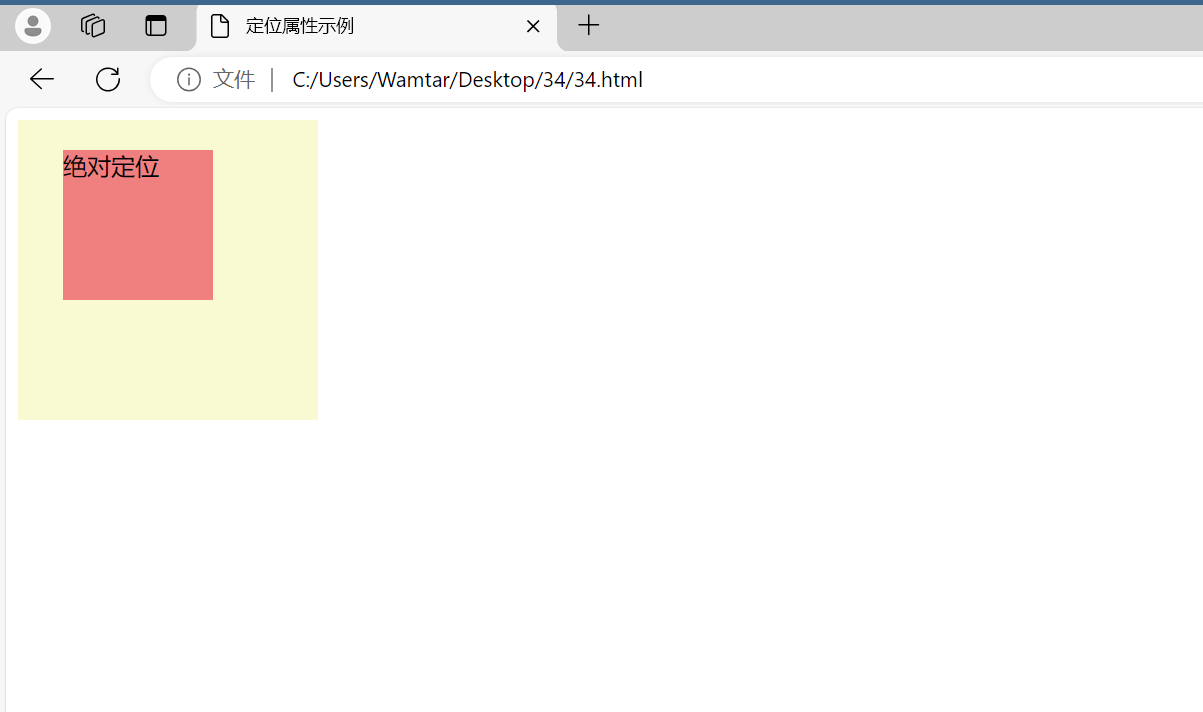
绝对定位的元素相对于其最近的定位上下文(.relative)进行定位,距离顶部20px和左边30px。
z-index
z-index 属性控制元素的堆叠顺序。值较大的元素会覆盖值较小的元素。z-index 只在定位元素(relative、absolute、fixed、sticky)上有效。
<!DOCTYPE html>
<html lang="en">
<head>
    <meta charset="UTF-8">
    <meta name="viewport" content="width=device-width, initial-scale=1.0">
    <title>z-index 示例</title>
    <style>
        .container {
            position: relative;
            width: 300px;
            height: 200px;
            background-color: lightblue;
        }
        .box {
            position: absolute;
            width: 100px;
            height: 100px;
        }
        .box1 {
            background-color: lightcoral;
            z-index: 1;
        }
        .box2 {
            background-color: lightgreen;
            z-index: 2;
        }
    </style>
</head>
<body>
    <div class="container">
        <div class="box box1">底层</div>
        <div class="box box2">顶层</div>
    </div>
</body>
</html>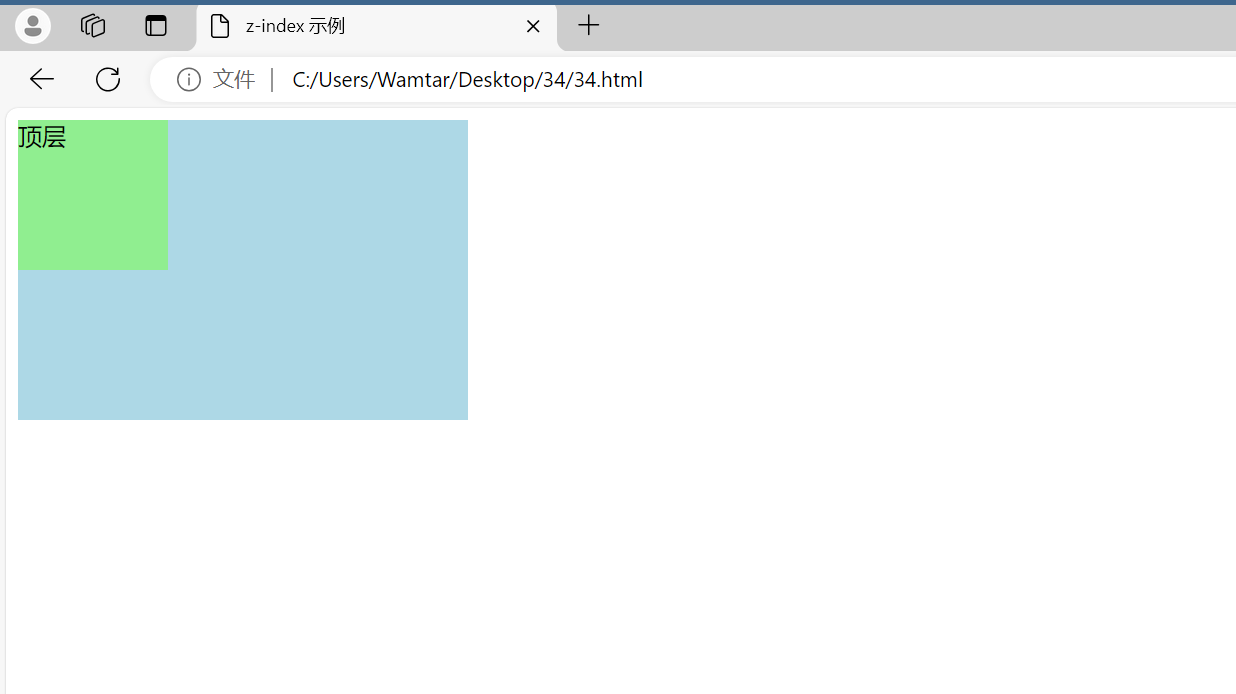
两个绝对定位的元素在 .container 内重叠,box2 的 z-index 值大于 box1,因此 box2 显示在 box1 之上。
四、实战应用示例
一个固定导航栏
固定导航栏是一种常见的网页布局需求,它使导航栏在滚动页面时始终保持在视口的顶部。
<!DOCTYPE html>
<html lang="en">
<head>
    <meta charset="UTF-8">
    <meta name="viewport" content="width=device-width, initial-scale=1.0">
    <title>固定导航栏示例</title>
    <style>
        .navbar {
            position: fixed;
            top: 0;
            left: 0;
            width: 100%;
            background-color: lightcoral;
            padding: 10px;
            box-shadow: 0 2px 5px rgba(0,0,0,0.1);
            z-index: 1000;
        }
        .content {
            padding-top: 50px; /* 预留空间给固定导航栏 */
        }
    </style>
</head>
<body>
    <div class="navbar">
        <h1>固定导航栏</h1>
    </div>
    <div class="content">
        <p>滚动页面查看固定导航栏效果。</p>
        <p>更多内容...</p>
        <p>更多内容...</p>
        <p>更多内容...</p>
        <p>更多内容...</p>
    </div>
</body>
</html>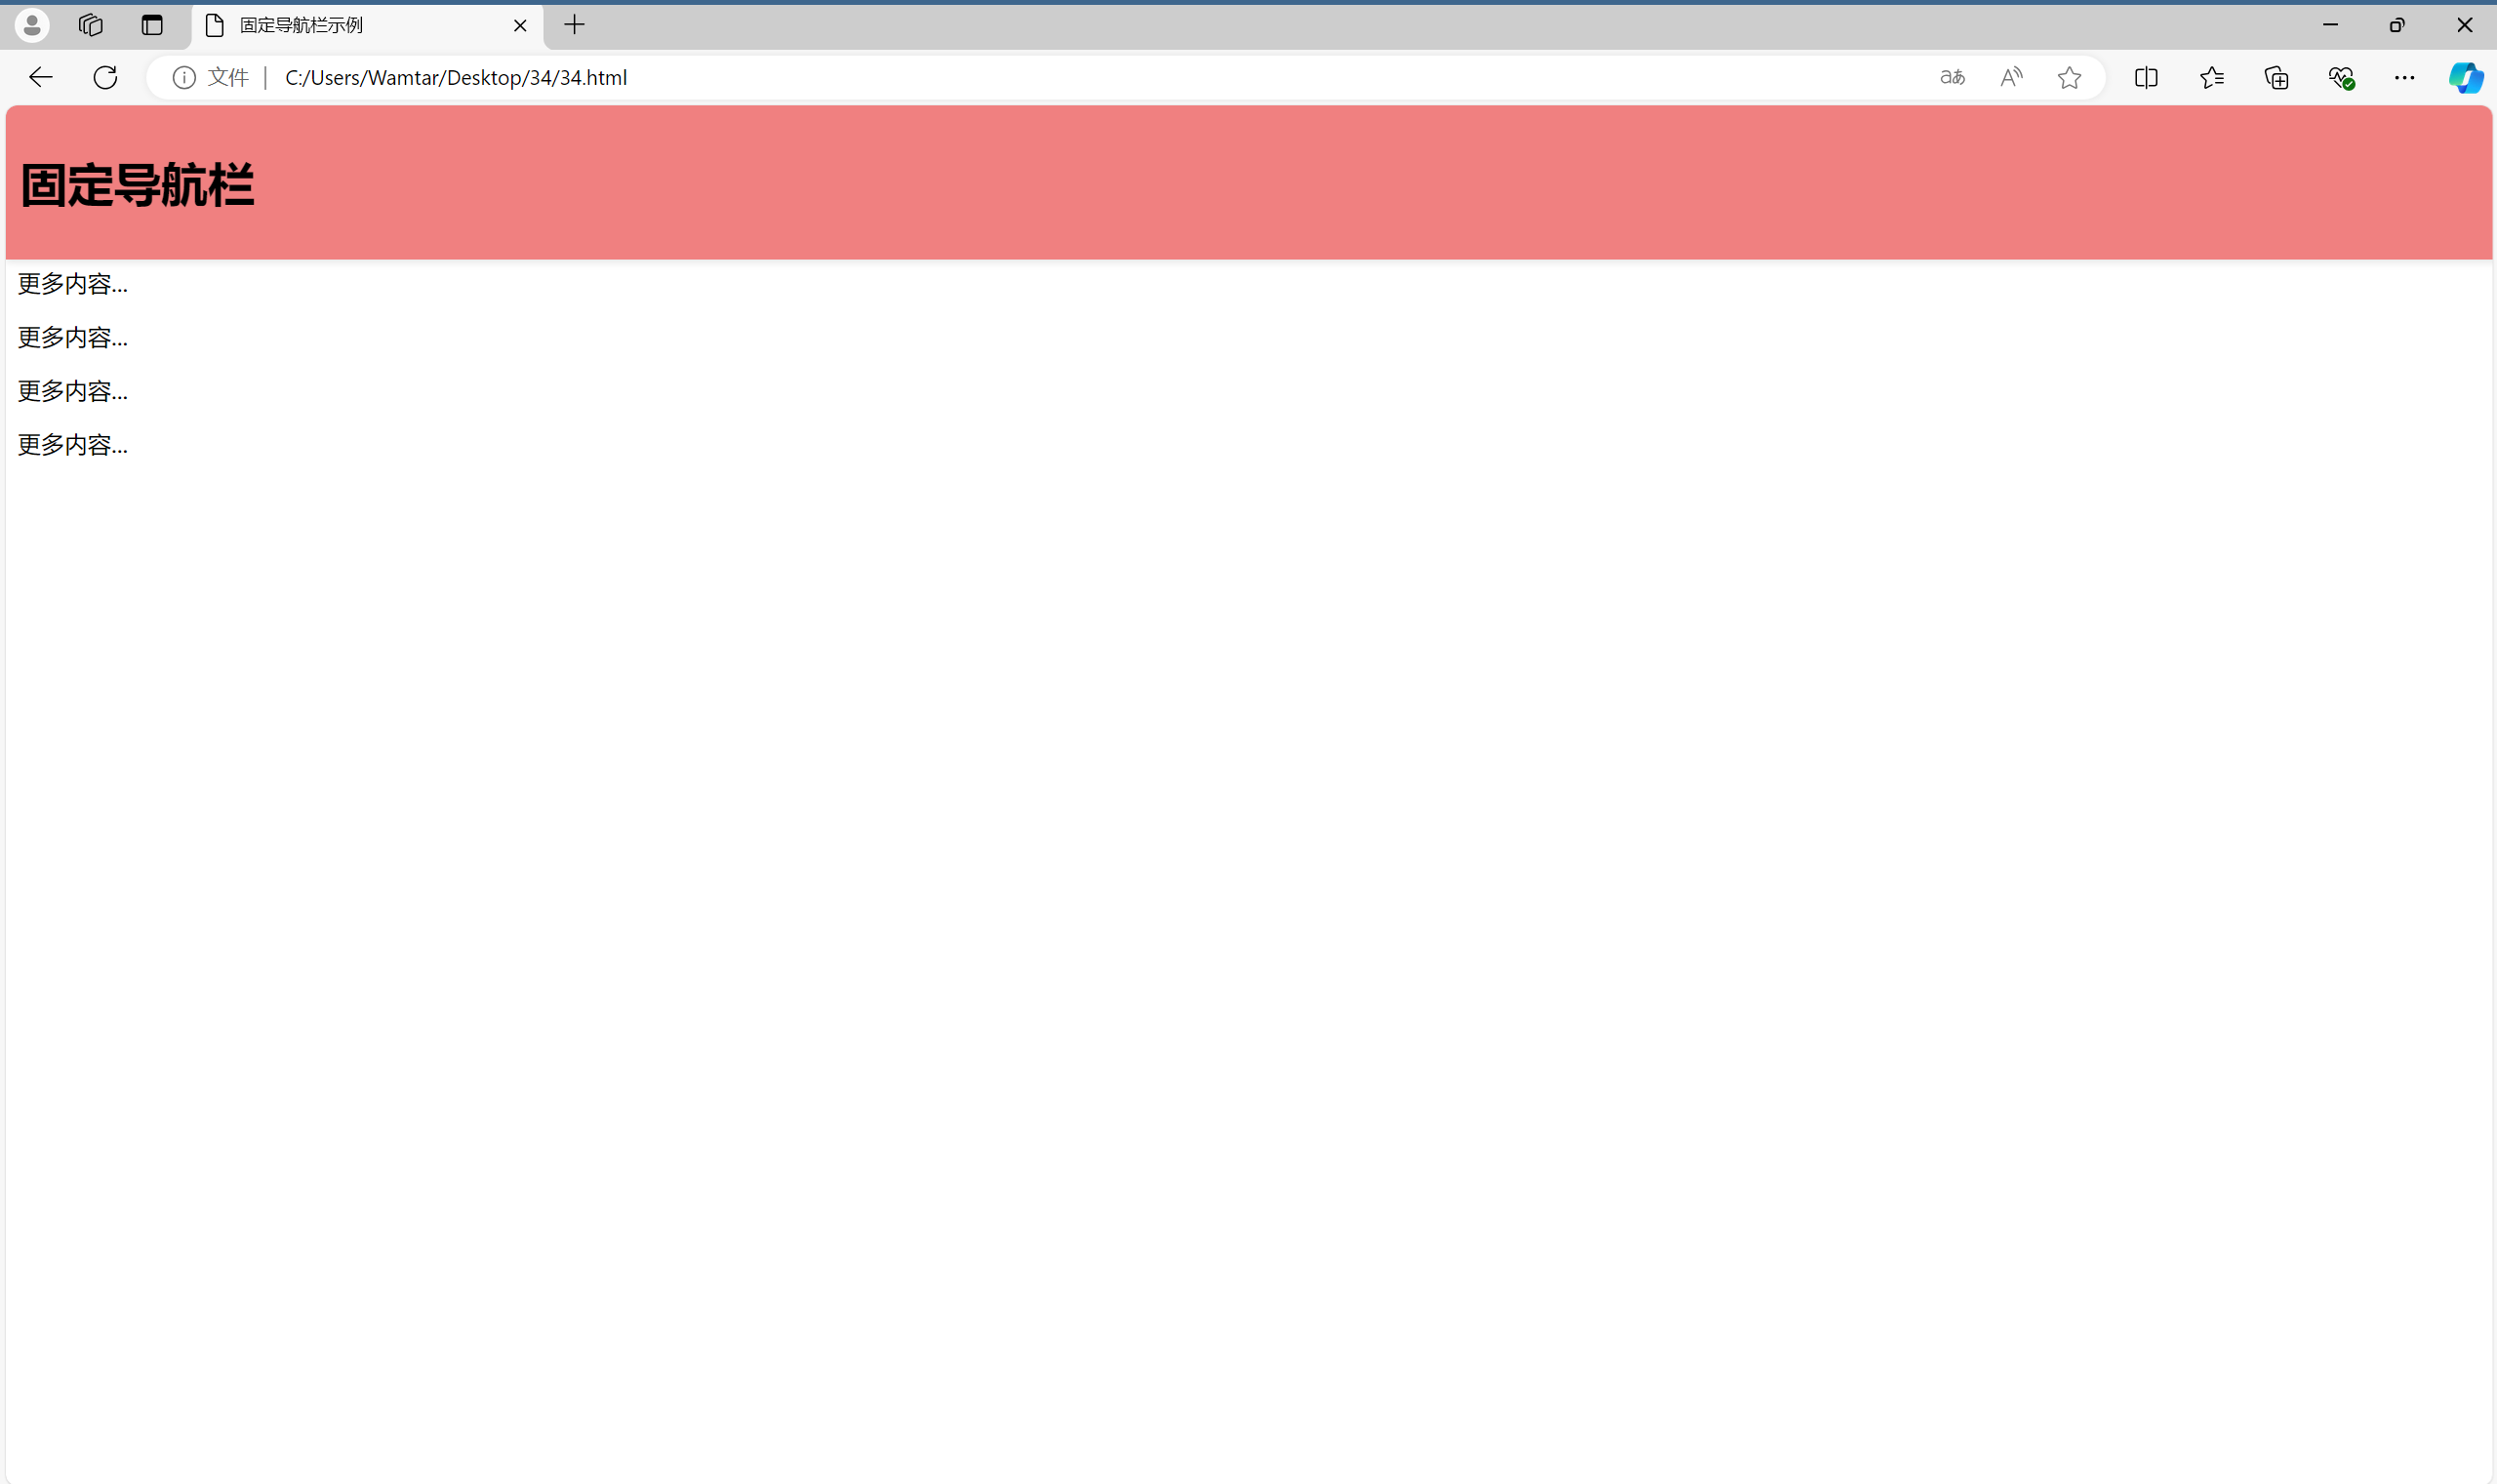
导航栏使用了固定定位,始终保持在视口的顶部,内容区域向下移动以避免被导航栏遮挡。
制作一个响应式的浮动布局
使用相对定位和绝对定位,可以创建一个响应式的浮动布局,实现多列布局效果。
<!DOCTYPE html>
<html lang="en">
<head>
    <meta charset="UTF-8">
    <meta name="viewport" content="width=device-width, initial-scale=1.0">
    <title>浮动布局示例</title>
    <style>
        .container {
            position: relative;
            width: 100%;
        }
        .column {
            position: absolute;
            width: 30%;
            background-color: lightblue;
            padding: 20px;
            box-sizing: border-box;
        }
        .column1 {
            left: 0;
        }
        .column2 {
            left: 35%;
        }
        .column3 {
            left: 70%;
        }
    </style>
</head>
<body>
    <div class="container">
        <div class="column column1">列 1</div>
        <div class="column column2">列 2</div>
        <div class="column column3">列 3</div>
    </div>
</body>
</html>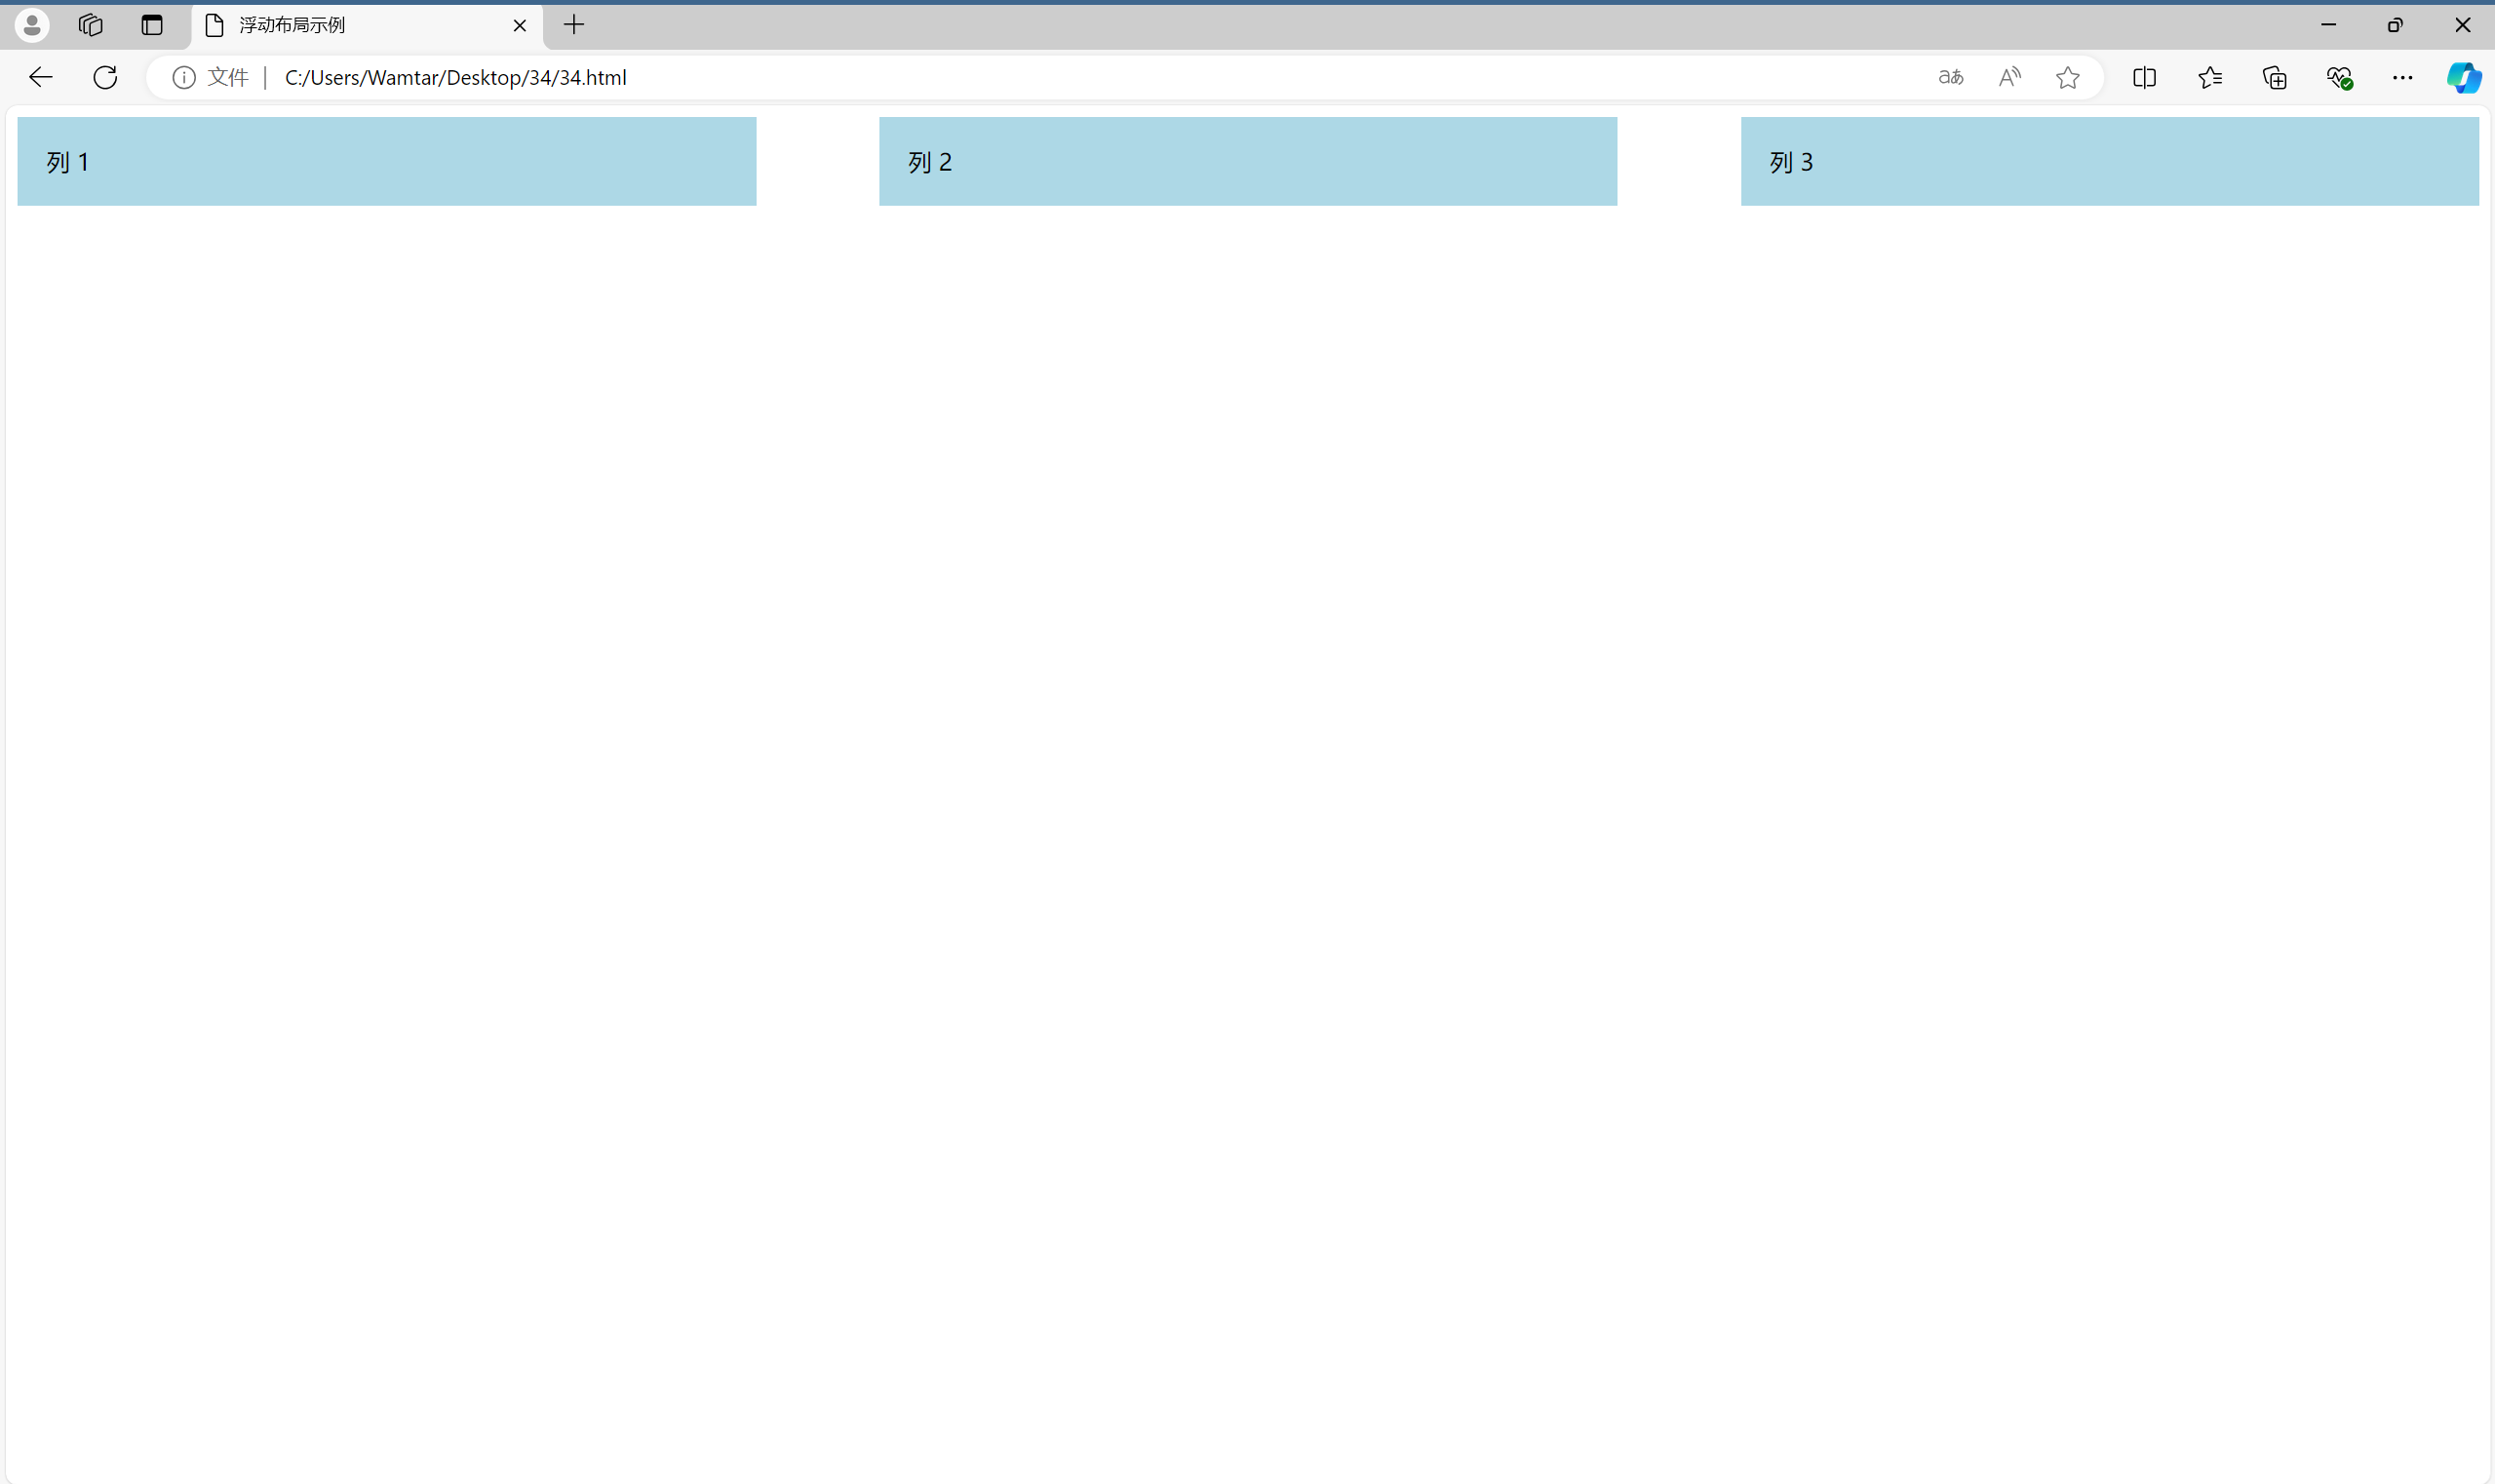
示例中我们使用绝对定位来创建三列布局,确保它们在 .container 内部并排显示。
如有表述错误及欠缺之处敬请指正补充。


