1 说明
数据库是现代信息化系统的基石,而国产数据库的发展则关乎国家的信息安全和国民经济的命脉。达梦数据库作为中国数据库领域的领军企业,其DM8数据库管理系统凭借其高性能、高可靠性、易用性等特点,逐渐赢得了用户的青睐。本文将详细介绍基于Linux平台的中标麒麟V7操作系统安装单机版DM8数据库的完整过程,涵盖了安装前的准备工作、软件安装、数据库创建和安装后验证等方面,旨在帮助读者更好地了解和使用DM8数据库。
过程概述:
- 安装前准备
- 安装数据库软件
- dbca建库
- 安装后验证
2 环境说明
DM8对软硬件的配置要求如下。
软件配置要求:

硬件配置要求:
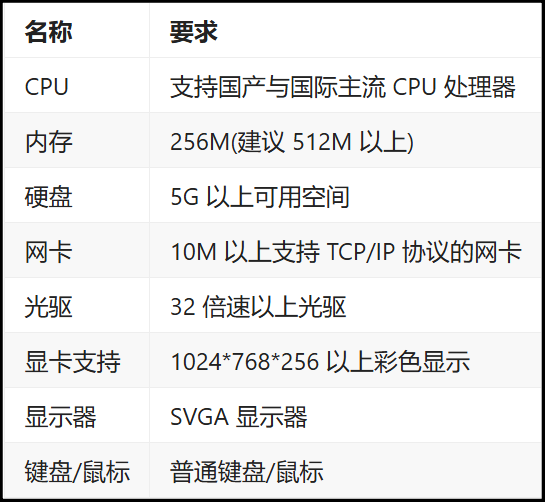
我的配置如下,基本符合要求:
| 参数项 | 参数值 |
|---|---|
| os版本 | NeoKylin Linux Advanced Server release V7/(Stahl)-x86_64 |
| 内核 | 3.10.0-1160.45.1.el7.03.x86_64 |
| CPU | 12th Gen Intel® Core™ i5-12500H |
| 内存 | 4G |
| 硬盘 | 20G |
| db版本 | DM8 |
| 部署架构 | 单机 |
| 所属用户 | dmdba |
| 所属组 | dinstall |
| 安装路径 | /dm |
3 安装前准备
3.1 安装操作系统
参考文档:VMware安装中标麒麟操作系统V7.0
3.2 查看Linux发行版本
[root@DM8-001 ~]# cat /etc/.productinfo
NeoKylin Linux Advanced Server
release V7/(Stahl)-x86_64
Build09.06.01/20220311
3.3 查看Linux内核版本
[root@DM8-001 ~]# uname -r
3.10.0-1160.45.1.el7.03.x86_64
3.4 查看磁盘分区情况
[root@DM8-001 ~]# df -h
Filesystem      Size  Used Avail Use% Mounted on
devtmpfs        1.9G     0  1.9G   0% /dev
tmpfs           1.9G     0  1.9G   0% /dev/shm
tmpfs           1.9G   13M  1.9G   1% /run
tmpfs           1.9G     0  1.9G   0% /sys/fs/cgroup
/dev/sda3       7.8G  4.4G  3.5G  56% /
/dev/sda1       197M  138M   60M  70% /boot
tmpfs           378M   36K  378M   1% /run/user/0
/dev/sr0        3.5G  3.5G     0 100% /mnt
3.5 内存
[root@DM8-001 ~]# free -h
              total        used        free      shared  buff/cache   available
Mem:           3.7G        853M        2.0G         47M        893M        2.6G
Swap:          2.0G          0B        2.0G
3.6 glic版本
要求2.3以上。
[root@DM8-001 ~]# rpm -qa|grep glibc
glibc-headers-2.17-326.el7_9.3.ns7.01.x86_64
glibc-common-2.17-326.el7_9.3.ns7.01.x86_64
glibc-2.17-326.el7_9.3.ns7.01.x86_64
glibc-devel-2.17-326.el7_9.3.ns7.01.x86_64
3.7 OS时间
操作系统时间不正确会导致试用授权产品,会导致试用授权过期,无法使用。还会导致数据库运行日志、数据库服务日志、归档日志、备份集等时间记录错误,会导致相关分析和排查工作难度增大。
[root@DM8-001 ~]# date
Sat Aug 31 21:54:11 CST 2024
3.8 关闭防火墙
一般生产中有专门的防火墙工具,系统自带的防火墙关掉即可。
[root@DM8-001 ~]# systemctl stop firewalld
[root@DM8-001 ~]# systemctl disable firewalld
Removed symlink /etc/systemd/system/multi-user.target.wants/firewalld.service.
Removed symlink /etc/systemd/system/dbus-org.fedoraproject.FirewallD1.service.
[root@DM8-001 ~]# systemctl status firewalld
● firewalld.service - firewalld - dynamic firewall daemon
   Loaded: loaded (/usr/lib/systemd/system/firewalld.service; disabled; vendor preset: enabled)
   Active: inactive (dead)
     Docs: man:firewalld(1)

Aug 31 20:58:01 DM8-001 systemd[1]: Starting firewalld - dynamic firewall daemon...
Aug 31 20:58:02 DM8-001 systemd[1]: Started firewalld - dynamic firewall daemon.
Aug 31 20:58:02 DM8-001 firewalld[706]: WARNING: AllowZoneDrifting is enabled. This is considered an insecure configuration option. It will ...g it now.
Aug 31 21:56:05 DM8-001 systemd[1]: Stopping firewalld - dynamic firewall daemon...
Aug 31 21:56:06 DM8-001 systemd[1]: Stopped firewalld - dynamic firewall daemon.
Hint: Some lines were ellipsized, use -l to show in full.
3.9 关闭selinux
修改配置文件:/etc/selinux/config,修改 SELINUX=disabled
[root@DM8-001 ~]# setenforce 0
setenforce: SELinux is disabled
[root@DM8-001 ~]# getenforce
Disabled

[root@DM8-001 ~]# cat /etc/selinux/config

# This file controls the state of SELinux on the system.
# SELINUX= can take one of these three values:
#     enforcing - SELinux security policy is enforced.
#     permissive - SELinux prints warnings instead of enforcing.
#     disabled - No SELinux policy is loaded.
SELINUX=disabled
# SELINUXTYPE= can take one of three values:
#     targeted - Targeted processes are protected,
#     minimum - Modification of targeted policy. Only selected processes are protected.
#     mls - Multi Level Security protection.
SELINUXTYPE=targeted
3.10 关闭swap
关闭Swap应根据具体情况进行判断,建议在内存资源充足的情况下将其关闭,而在内存容量较小的情况下则不宜关闭。
在Linux操作系统中,SWAP的功能相当于Windows系统中的“虚拟内存”。当系统物理内存资源紧张时,可以通过划分一部分硬盘空间作为SWAP交换区(模拟为内存使用),以此来缓解内存不足的问题。然而,数据库系统通常对响应时间有较高要求,若采用swap来替代实际内存,数据库服务的性能将会大幅下降,这是无法容忍的。
临时关闭 swap 分区,重启后失效:
[root@~]# swapoff -a
永久修改,将/etc/fstab文件中包含swap的行注释:
[root@~]# sed -ri 's/.*swap.*/#&/' /etc/fstab

##重启操作系统生效
[root@~]# reboot
3.11 关闭 numa
编辑/etc/default/grub文件,在GRUB_CMDLINE_LINUX行加上numa=off
[root@DM8-001 ~]# cat /etc/default/grub
GRUB_TIMEOUT=5
GRUB_DISTRIBUTOR="$(sed 's, release .*$,,g' /etc/system-release)"
GRUB_DEFAULT=saved
GRUB_DISABLE_SUBMENU=true
GRUB_TERMINAL_OUTPUT="console"
GRUB_CMDLINE_LINUX="crashkernel=auto rhgb quiet numa=off"
GRUB_DISABLE_RECOVERY="true"
重新生成 /etc/grub2.cfg 配置文件
[root@DM8-001 ~]# grub2-mkconfig -o /etc/grub2.cfg
Generating grub configuration file ...
Found linux image: /boot/vmlinuz-3.10.0-1160.45.1.el7.03.x86_64
Found initrd image: /boot/initramfs-3.10.0-1160.45.1.el7.03.x86_64.img
Found linux image: /boot/vmlinuz-0-rescue-4c6fddd17eb940ae80c6f23023735804
Found initrd image: /boot/initramfs-0-rescue-4c6fddd17eb940ae80c6f23023735804.img
done
重启操作系统生效
reboot
重启后确认
[root@DM8-001 ~]# dmesg | grep -i numa
[root@DM8-001 ~]# cat /proc/cmdline
3.12 禁用透明大页
编辑/etc/default/grub文件,在GRUB_CMDLINE_LINUX行加上transparent_hugepage=never
[root@DM8-001 ~]# cat /etc/default/grub
GRUB_TIMEOUT=5
GRUB_DISTRIBUTOR="$(sed 's, release .*$,,g' /etc/system-release)"
GRUB_DEFAULT=saved
GRUB_DISABLE_SUBMENU=true
GRUB_TERMINAL_OUTPUT="console"
GRUB_CMDLINE_LINUX="crashkernel=auto rhgb quiet numa=off transparent_hugepage=never"
GRUB_DISABLE_RECOVERY="true"
重新生成 /etc/grub2.cfg 配置文件
[root@DM8-001 ~]# grub2-mkconfig -o /etc/grub2.cfg
Generating grub configuration file ...
Found linux image: /boot/vmlinuz-3.10.0-1160.45.1.el7.03.x86_64
Found initrd image: /boot/initramfs-3.10.0-1160.45.1.el7.03.x86_64.img
Found linux image: /boot/vmlinuz-0-rescue-4c6fddd17eb940ae80c6f23023735804
Found initrd image: /boot/initramfs-0-rescue-4c6fddd17eb940ae80c6f23023735804.img
done
重启操作系统生效
reboot
重启后确认
[root@DM8-001 ~]# dmesg | grep -i numa
[root@DM8-001 ~]# cat /proc/cmdline
3.13 sysctl.conf参数调整
#在/etc/sysctl.conf文件添加vm.overcommit_memory = 0
[root@DM8-001 ~]# vim /etc/sysctl.conf

#配置生效
[root@DM8-001 ~]# sysctl -p
vm.overcommit_memory = 0
3.14 limits.conf 参数调整
编辑 limits.conf 文件
[root@DM8-001 ~]# vi /etc/security/limits.conf
##在最后面添加以下内容
* soft nproc 65536
* hard nproc 65536
* soft nofile 65536
* hard nofile 65536


dmdba soft nice 65536
dmdba hard nice 65536
dmdba soft as unlimited
dmdba hard as unlimited
dmdba soft fsize unlimited
dmdba hard fsize unlimited
dmdba soft nproc 65536
dmdba hard nproc 65536
dmdba soft nofile 65536
dmdba hard nofile 65536
dmdba soft core unlimited
dmdba hard core unlimited
dmdba soft data unlimited
dmdba hard data unlimited
查看是否生效
[root@DM8-001 ~]# ulimit -a
core file size          (blocks, -c) 0
data seg size           (kbytes, -d) unlimited
scheduling priority             (-e) 0
file size               (blocks, -f) unlimited
pending signals                 (-i) 14998
max locked memory       (kbytes, -l) 64
max memory size         (kbytes, -m) unlimited
open files                      (-n) 1024
pipe size            (512 bytes, -p) 8
POSIX message queues     (bytes, -q) 819200
real-time priority              (-r) 0
stack size              (kbytes, -s) 8192
cpu time               (seconds, -t) unlimited
max user processes              (-u) 14998
virtual memory          (kbytes, -v) unlimited
file locks                      (-x) unlimited
3.15 调整 system.conf 参数
[root@DM8-001 ~]# vim /etc/systemd/system.conf
#添加以下配置
DefaultLimitNOFILE=65536
DefaultLimitNPROC=10240
3.16 调整 nproc.conf 参数
[root@DM8-001 ~]# vi /etc/security/limits.d/nproc.conf
#添加以下配置:
dmdba soft nproc 65536
dmdba hard nproc 65536
3.17 创建数据库用户
创建dmdba用户
[root@DM8-001 ~]# groupadd dinstall -g 2001
[root@DM8-001 ~]# useradd -g dinstall dmdba -u 1001
[root@DM8-001 ~]# passwd dmdba
Changing password for user dmdba.
New password:
BAD PASSWORD: The password is shorter than 8 characters
Retype new password:
passwd: all authentication tokens updated successfully.
3.18 创建相关路径
创建安装目录/dm
[root@DM8-001 ~]# mkdir -p /dm/dmdbms
[root@DM8-001 ~]# chown -R dmdba:dinstall /dm/dmdbms
[root@DM8-001 ~]# chmod -R 755 /dm/dmdbms
创建数据路径:
[root@DM8-001 ~]# mkdir /dm_inst
[root@DM8-001 ~]# chown dmdba:dinstall /dm_inst
[root@DM8-001 ~]# chmod 775 /dm_inst
创建备份路径:
[root@DM8-001 ~]# mkdir /dm_bak
[root@DM8-001 ~]# chown dmdba:dinstall /dm_bak
[root@DM8-001 ~]# chmod 775 /dm_bak
创建归档路径:
[root@DM8-001 ~]# mkdir /dm_arch
[root@DM8-001 ~]# chown dmdba:dinstall /dm_arch
[root@DM8-001 ~]# chmod 775 /dm_arch
3.19 环境变量配置
切换到dmdba用户配置:
[root@DM8-001 ~]# su - dmdba
[dmdba@DM8-001 ~]$ vi .bash_profile
#添加
export DM_HOME="/dm/dmdbms"
export LD_LIBRARY_PATH="$LD_LIBRARY_PATH:/dm8/dmdbms/bin"
export PATH=$PATH:$DM_HOME/bin:$DM_HOME/tool
当前会话生效:
[dmdba@DM8-001 ~]$ source .bash_profile
3.20 磁盘分配
原则建议分 3 块盘符,分别是 dmdata 实例盘、dmbak 备份盘和 dmarch 归档盘。分开存储的优势:
- 磁盘写入数据时会产生较少的资源占用和冲突,有利于提高数据库的性能。
- 可以很容易的监测各类的使用和剩余空间。
- 减少磁盘误删或毁坏造成的损失。
- 不会抢占数据库的磁盘使用空间。
我的环境中只有单块盘20G,通过创建不同的LV,设置多个挂载点:

- 实例盘分配10G
- 备份盘分配8G
- 归档盘分配2G
一、磁盘分区
创建逻辑卷之前,还需要进行fdisk命令分区。
[root@DM8-001 ~]# fdisk /dev/sdb
Welcome to fdisk (util-linux 2.23.2).

Changes will remain in memory only, until you decide to write them.
Be careful before using the write command.

Device does not contain a recognized partition table
Building a new DOS disklabel with disk identifier 0xd790268a.

Command (m for help): n
Partition type:
   p   primary (0 primary, 0 extended, 4 free)
   e   extended
Select (default p): p
Partition number (1-4, default 1): 1
First sector (2048-41943039, default 2048): 2048
Last sector, +sectors or +size{K,M,G} (2048-41943039, default 41943039): 41943039
Partition 1 of type Linux and of size 20 GiB is set

Command (m for help): w
The partition table has been altered!

Calling ioctl() to re-read partition table.
Syncing disks.


[root@DM8-001 ~]# lsblk
NAME   MAJ:MIN RM  SIZE RO TYPE MOUNTPOINT
sda      8:0    0   10G  0 disk
├─sda1   8:1    0  200M  0 part /boot
├─sda2   8:2    0    2G  0 part [SWAP]
└─sda3   8:3    0  7.8G  0 part /
sdb      8:16   0   20G  0 disk
└─sdb1   8:17   0   20G  0 part
sr0     11:0    1  3.4G  0 rom  /mnt
二、创建LV
先创建卷组VG_DM8:
[root@DM8-001 ~]# vgcreate VG_DM8 /dev/sdb1
  Physical volume "/dev/sdb1" successfully created.
  Volume group "VG_DM8" successfully created

[root@DM8-001 ~]# vgs
  VG     #PV #LV #SN Attr   VSize   VFree
  VG_DM8   1   0   0 wz--n- <20.00g <20.00g
分别创建三个LV,对应实例盘、备份盘和归档盘:
#实例盘
[root@DM8-001 ~]# lvcreate --size 10G -n LV_DM8_INST VG_DM8
  Logical volume "LV_DM8_INST" created.

#备份盘
[root@DM8-001 ~]# lvcreate --size 8G -n LV_DM8_BAK VG_DM8
  Logical volume "LV_DM8_BAK" created.

#归档盘
[root@DM8-001 ~]# lvcreate -l 100%VG -n LV_DM8_ARCH VG_DM8
  Reducing 100%VG to remaining free space <2.00 GiB in VG.
  Logical volume "LV_DM8_ARCH" created.
查看lv:
[root@DM8-001 ~]# lvs
  LV          VG     Attr       LSize  Pool Origin Data%  Meta%  Move Log Cpy%Sync Convert
  LV_DM8_ARCH VG_DM8 -wi-a----- <2.00g
  LV_DM8_BAK  VG_DM8 -wi-a-----  8.00g
  LV_DM8_INST VG_DM8 -wi-a----- 10.00g
三、磁盘挂载
lv格式化:
[root@DM8-001 ~]# mkfs.xfs /dev/VG_DM8/LV_DM8_INST
[root@DM8-001 ~]# mkfs.xfs /dev/VG_DM8/LV_DM8_BAK
[root@DM8-001 ~]# mkfs.xfs /dev/VG_DM8/LV_DM8_ARCH

挂载:
[root@DM8-001 ~]# mount /dev/VG_DM8/LV_DM8_INST /dm_inst/
[root@DM8-001 ~]# mount /dev/VG_DM8/LV_DM8_BAK /dm_bak/
[root@DM8-001 ~]# mount /dev/VG_DM8/LV_DM8_ARCH /dm_arch/
永久挂载:
[root@DM8-001 ~]# echo -e "UUID=49807d72-8cda-4b24-810d-336dc6c0a34a /dm_inst                xfs     defaults        0 0" >> /etc/fstab
[root@DM8-001 ~]# echo -e "UUID=58296d89-24a1-42cf-b29d-c92b7728307c /dm_bak                 xfs     defaults        0 0" >> /etc/fstab
[root@DM8-001 ~]# echo -e "UUID=2d46a969-1abb-4a47-b7bf-ae8fda96ed49 /dm_arch                xfs     defaults        0 0" >> /etc/fstab
3.21 重启系统
init 6
4 安装数据库软件
4.1 软件包下载并上传
一、下载
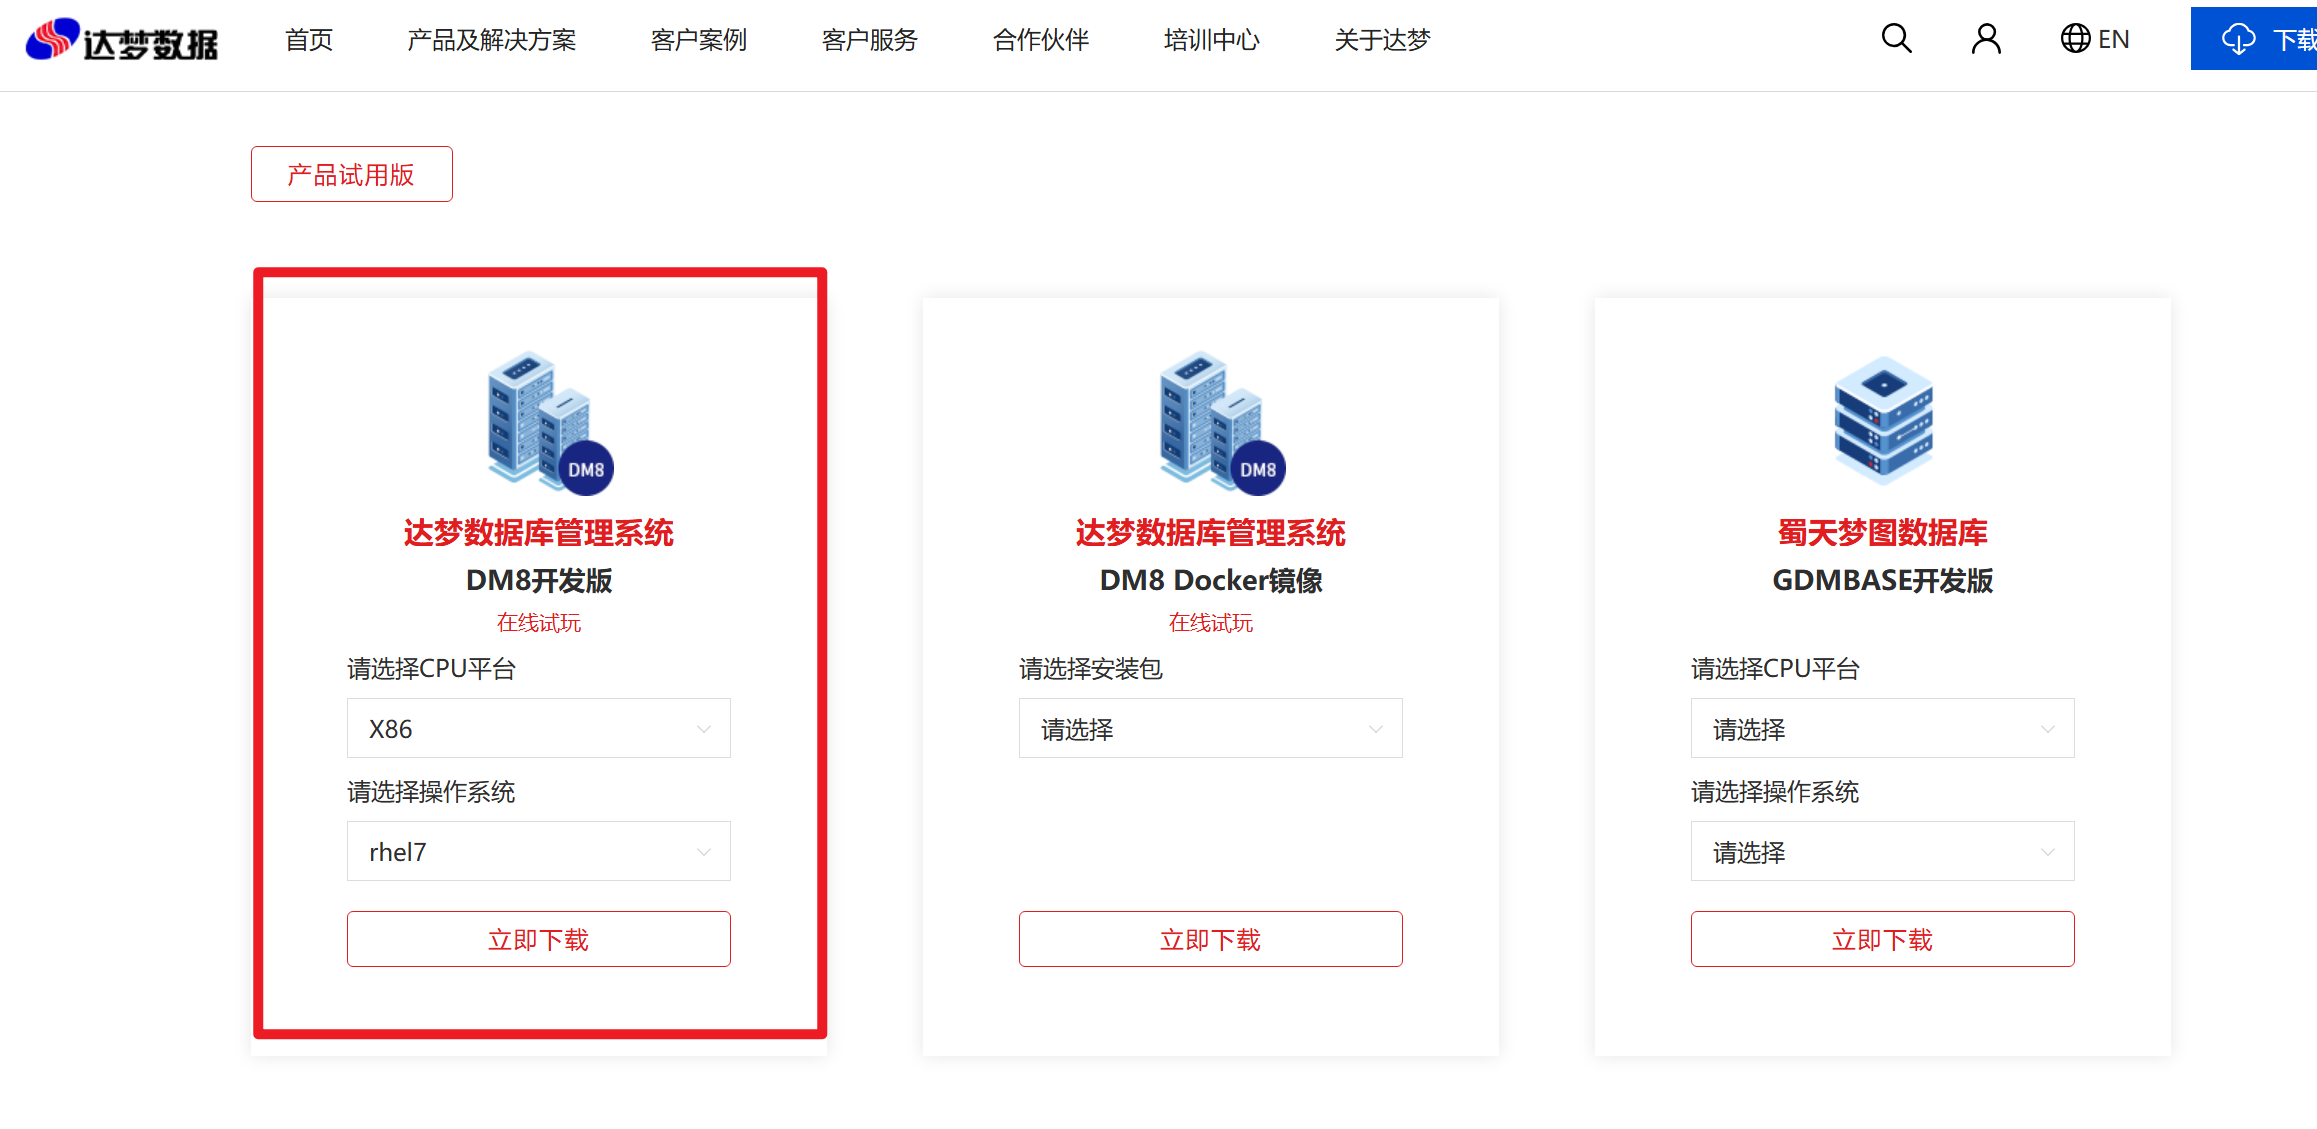
进入官网(产品下载-达梦数据库),根据CPU类型和操作系统类型下载对应的DM8数据库软件包。
我这里是中标麒麟,下拉栏里没有,因此选择X86 CPU,OS选择rhel7。
二、将下载好的iso文件上传操作系统
我上传到/tmp目录下:

将iso文件挂载到/media/目录:
[root@DM8-001 ~]# mount /tmp/dm8_20240712_x86_rh7_64.iso /media/
mount: /dev/loop0 is write-protected, mounting read-only

4.2 开始安装数据库软件
使用dmdba用户操作。
一、安装程序赋权
[root@DM8-001 ~]# cp /media/DMInstall.bin /opt/
[root@DM8-001 ~]# chown dmdba:dinstall /opt/DMInstall.bin
[root@DM8-001 ~]# ls -lth /opt/DMInstall.bin
-r-xr-xr-x 1 dmdba dinstall 1.1G Sep  1 03:11 /opt/DMInstall.bin
二、执行安装程序
切换到dmdba用户,执行DMInstall.bin程序开始安装。
[root@DM8-001 ~]# su - dmdba
Last login: Sun Sep  1 02:58:39 CST 2024 on pts/0

[dmdba@DM8-001 ~]$ /opt/DMInstall.bin
Extract install files.........
遇到报错:
Hardware architecture verification passed!
Exception in thread "main" org.eclipse.swt.SWTError: No more handles [gtk_init_check() failed]
        at org.eclipse.swt.SWT.error(SWT.java:4109)
        at org.eclipse.swt.widgets.Display.createDisplay(Display.java:902)
        at org.eclipse.swt.widgets.Display.create(Display.java:890)
        at org.eclipse.swt.graphics.Device.<init>(Device.java:154)
        at org.eclipse.swt.widgets.Display.<init>(Display.java:499)
        at org.eclipse.swt.widgets.Display.<init>(Display.java:490)
        at org.eclipse.swt.widgets.Display.getDefault(Display.java:1693)
        at com.dameng.common.gui.util.SWTUtility.<clinit>(SWTUtility.java:75)
        at com.dameng.install.ui.MainApplication.run(MainApplication.java
报错信息前几行看不懂,但是后几行有很多Display,猜测应该是图形界面类问题。
[dmdba@DM8-001 ~]$ xhost +
xhost:  unable to open display ""
[dmdba@DM8-001 ~]$ echo $DISPLAAY
果然是图新界面调不出来,声明一下DISPLAY变量,后面接的IP是本机的IP:
[dmdba@DM8-001 ~]$ export DISPLAY=192.168.1.4:0.0
[dmdba@DM8-001 ~]$ xhost +
access control disabled, clients can connect from any host
xhost:  must be on local machine to enable or disable access control.
小吐槽:有点小坑,报错前几行没有提示有价值的信息,完全靠经验去判断,如果没有处理过类似的问题,只能依靠百度了。
重新执行安装程序:
[dmdba@DM8-001 ~]$ /opt/DMInstall.bin
Extract install files.........
Hardware architecture verification passed!
三、语言与时区选择
国产数据库肯定选中文了!!!

四、安装向导
都默认下一步。
五、许可
点击“接受”,然后点击下一步。

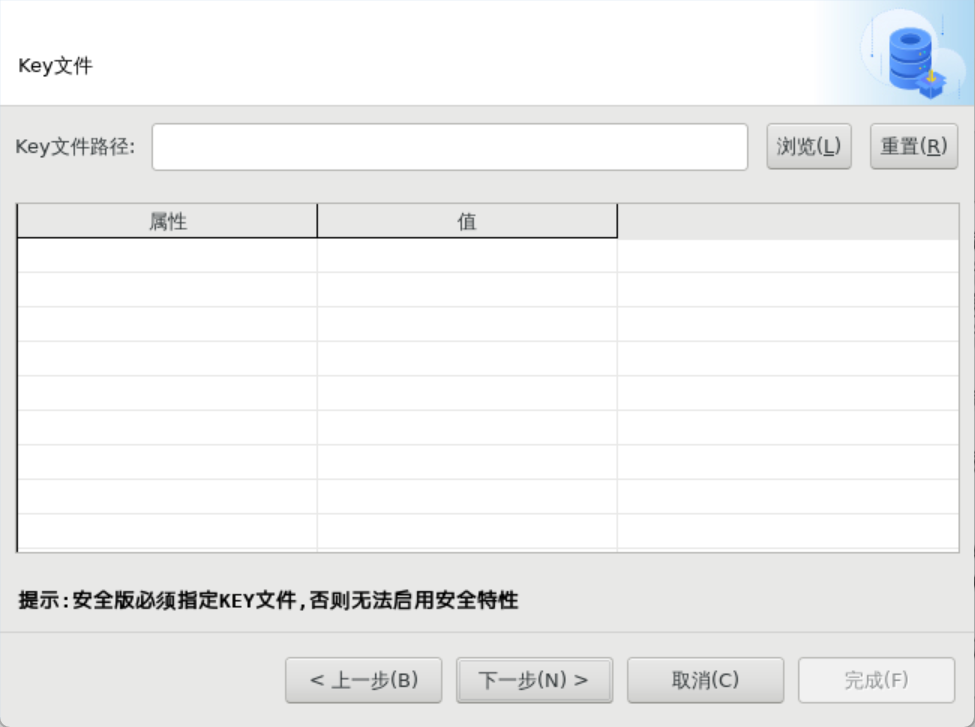
六、Key文件
只有购买了正版厂商才会提供Key文件。如果没有,忽略,点击下一步。
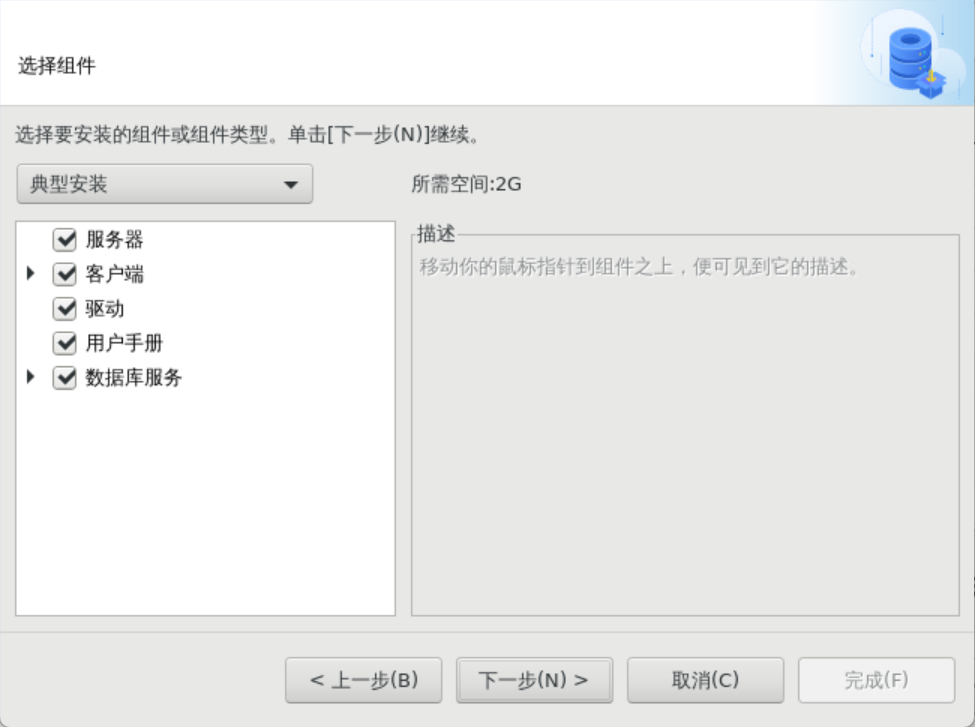
七、安装组件
选择典型安装即可。
八、安装位置
选择上面创建的DM_HOME目录。

九、安装前小节
检查一下安装的有关信息,主要看安装目录是否选对了。
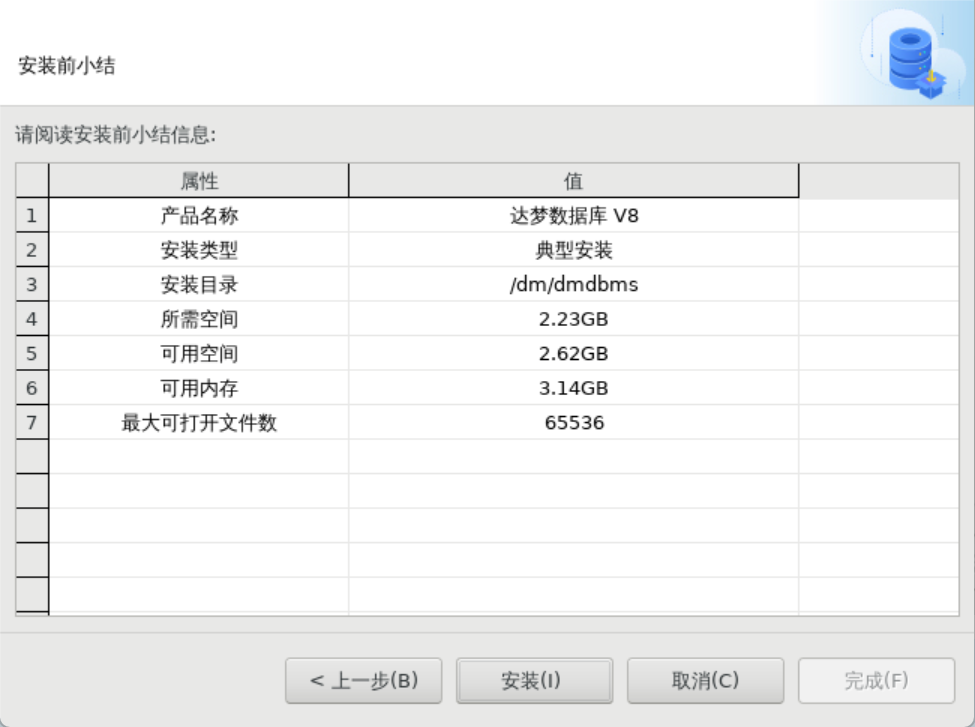
安装信息没问题,点击“安装”。
十、执行配置脚本
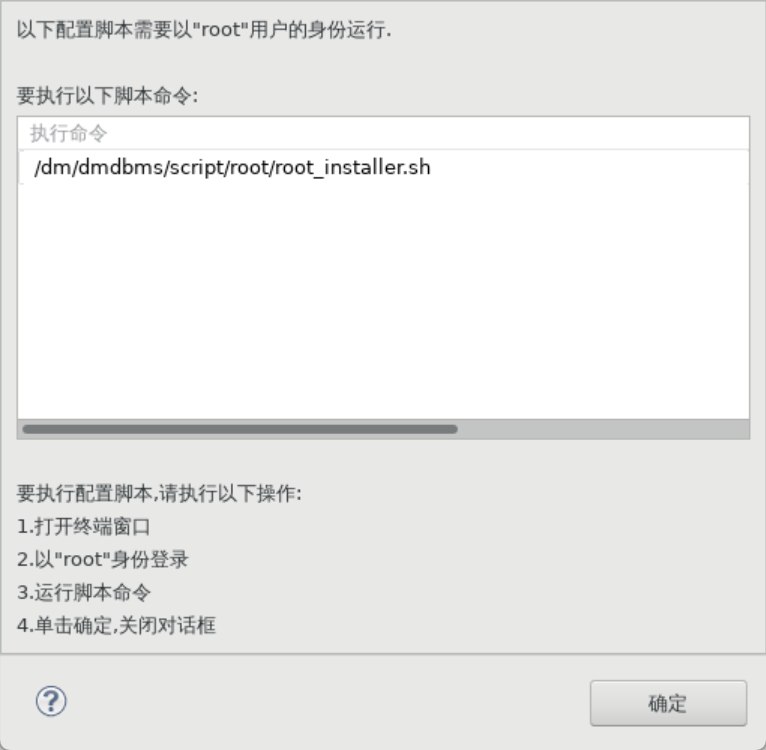
根据提示,使用root用户执行root_installer.sh脚本,作用是创建达梦服务文件、创建DMAP服务并启动。
[root@DM8-001 ~]# /dm/dmdbms/script/root/root_installer.sh
移动 /dm/dmdbms/bin/dm_svc.conf 到/etc目录
创建DmAPService服务
Created symlink from /etc/systemd/system/multi-user.target.wants/DmAPService.service to /usr/lib/systemd/system/DmAPService.service.
创建服务(DmAPService)完成
启动DmAPService服务
执行好后点击“确定”关闭对话框。
**十一、初始化数据库
不初始化,待会再建库。

5 dbca建库
5.1 运行脚本
执行dbca命令,运行安装脚本:
[dmdba@DM8-001 ~]$ dbca.sh
2024-09-01 20:14:23 [com.dameng.dbca.Startup]
[INFO] 启动DBCA
5.2 开始安装
一、操作类型
选择“创建数据库实例”,点击“开始”。

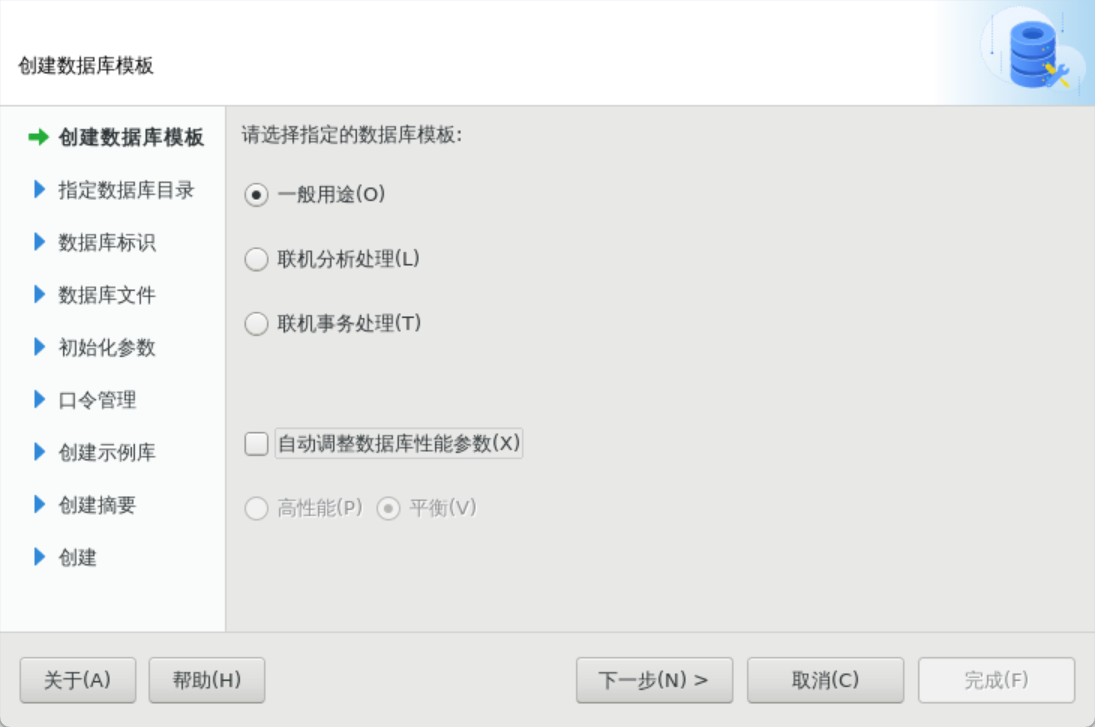
二、数据库模板
选择“一般用途”,取消勾选“自动调整性能参数”选项。
三、 数据库目录
可以选择默认的,也可以选择自定义的目录。我这里选择了自己创建的数据路径。

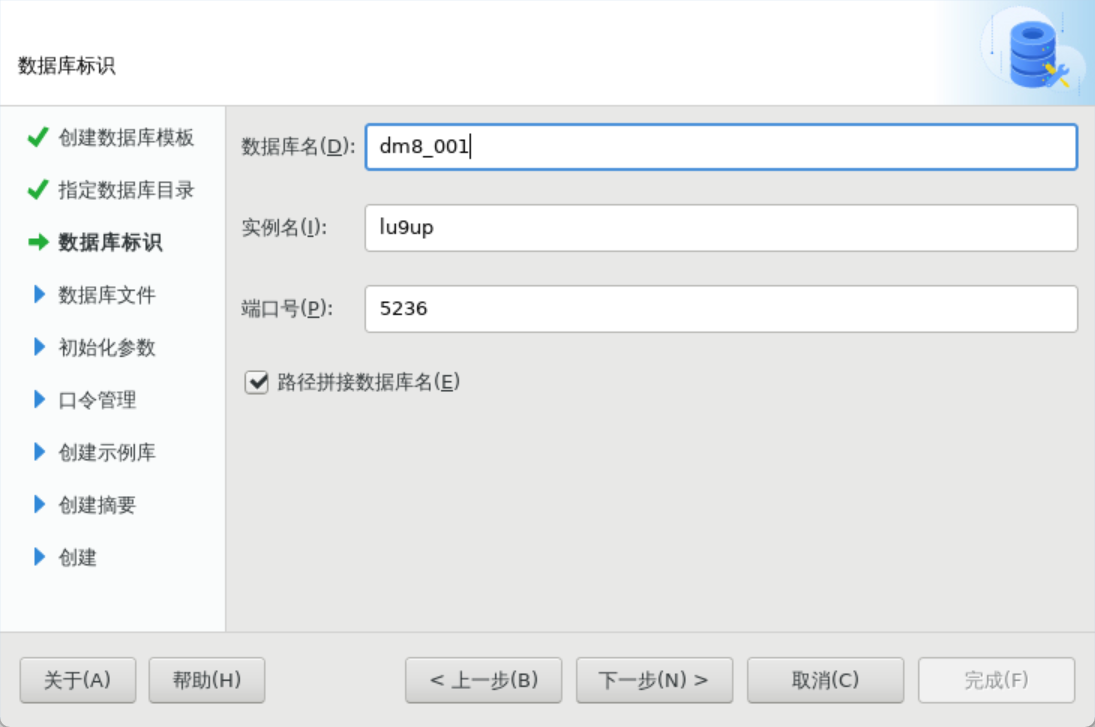
四、输入数据库标识
输入数据库名称、实例名、端口号,勾选路径拼接。
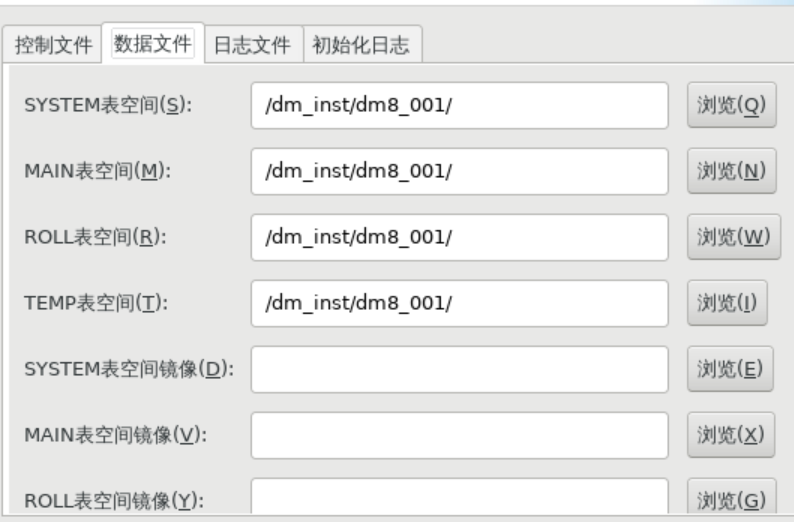
五、数据库文件路径
正确指定了数据库目录之后,其实这些路径都可以按默认选。
控制文件:

数据文件:
日志文件:

初始化日志:

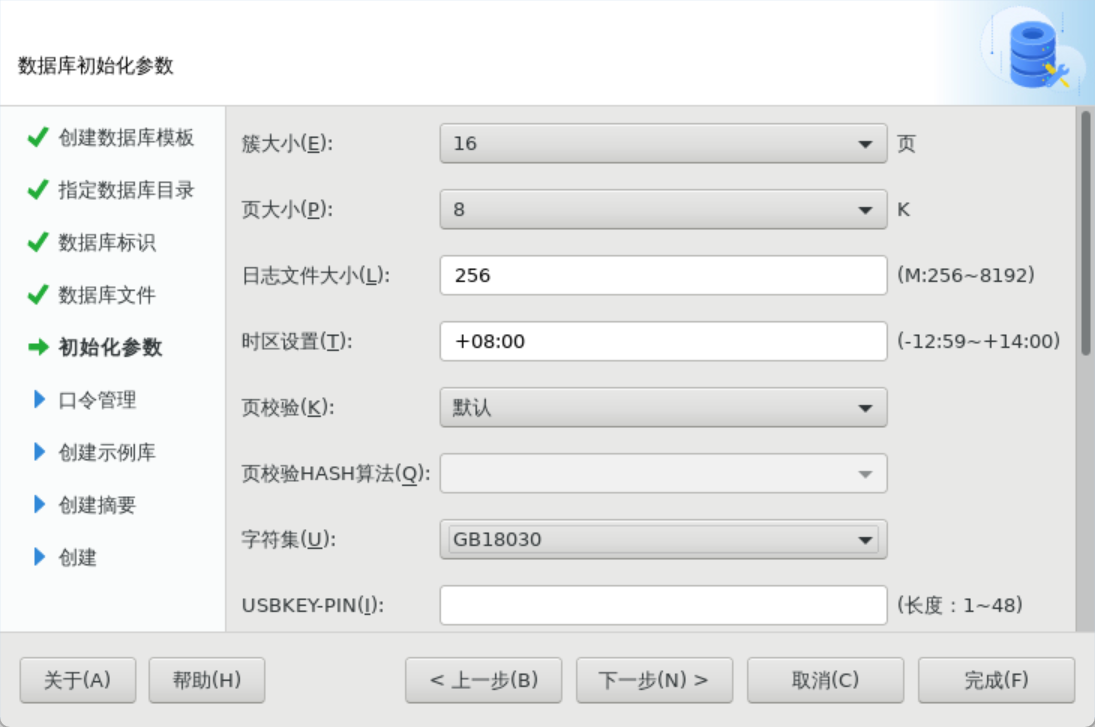
五、数据库初始化参数
就默认吧。。。
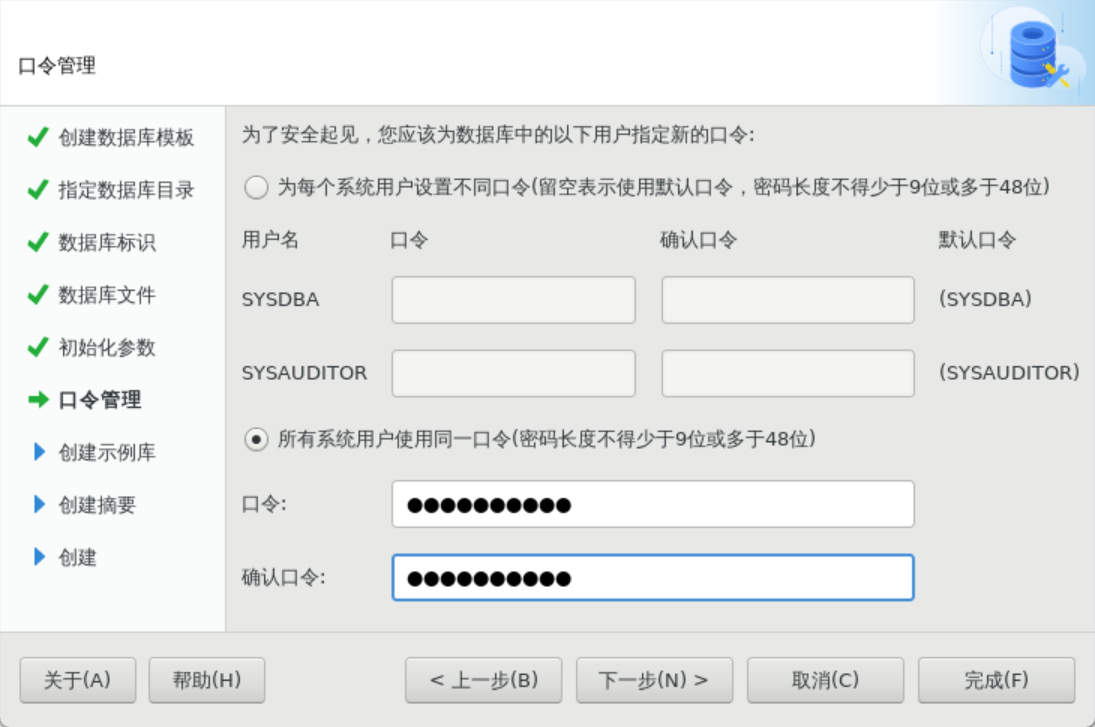
六、口令设置
选择使用统一口令。
七、创建示例数据库
勾选,方便用于做实验。

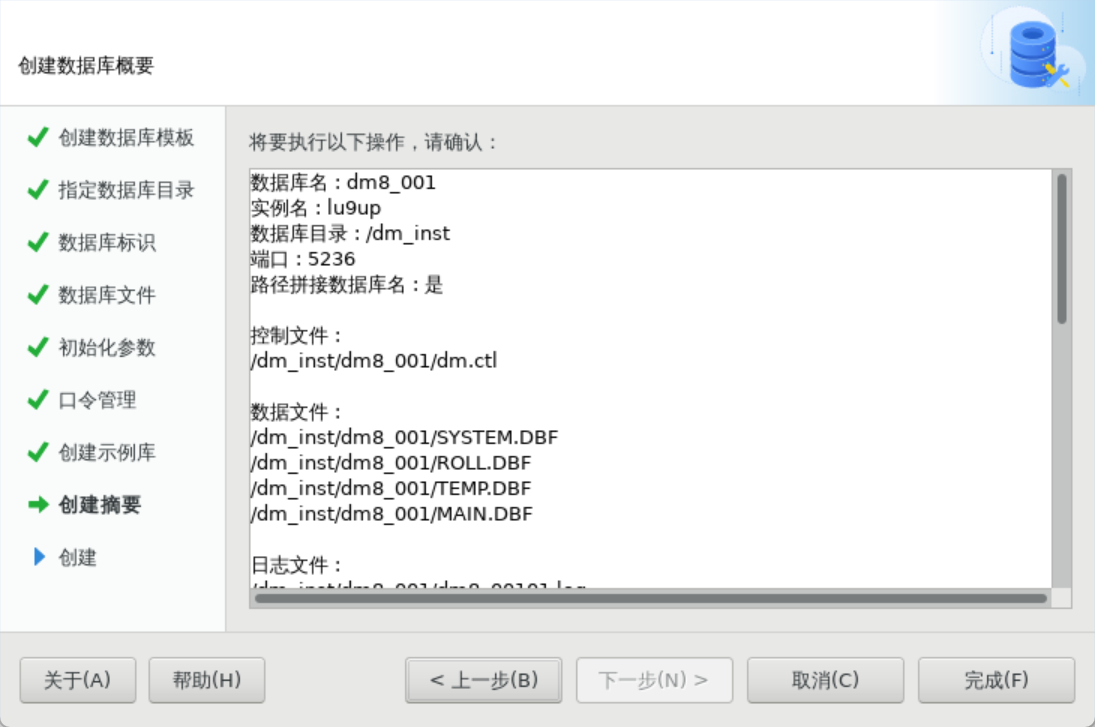
八、概要
检查一下,没问题点击“完成”创建数据库。
九、执行配置脚本
另起窗口,用root用户依次执行给出的脚本命令。作用是将一个数据库服务文件移动到正确的目录,配置该服务随系统启动而自动运行,并立即启动这个服务。

3个命令都执行完之后,可关闭此对话框,点击“完成”按钮结束安装。
[root@DM8-001 ~]# mv /dm/dmdbms/bin/DmServicelu9up.service /usr/lib/systemd/system/DmServicelu9up.service
[root@DM8-001 ~]# systemctl enable DmServicelu9up.service
Created symlink from /etc/systemd/system/multi-user.target.wants/DmServicelu9up.service to /usr/lib/systemd/system/DmServicelu9up.service.
[root@DM8-001 ~]# systemctl start DmServicelu9up.service
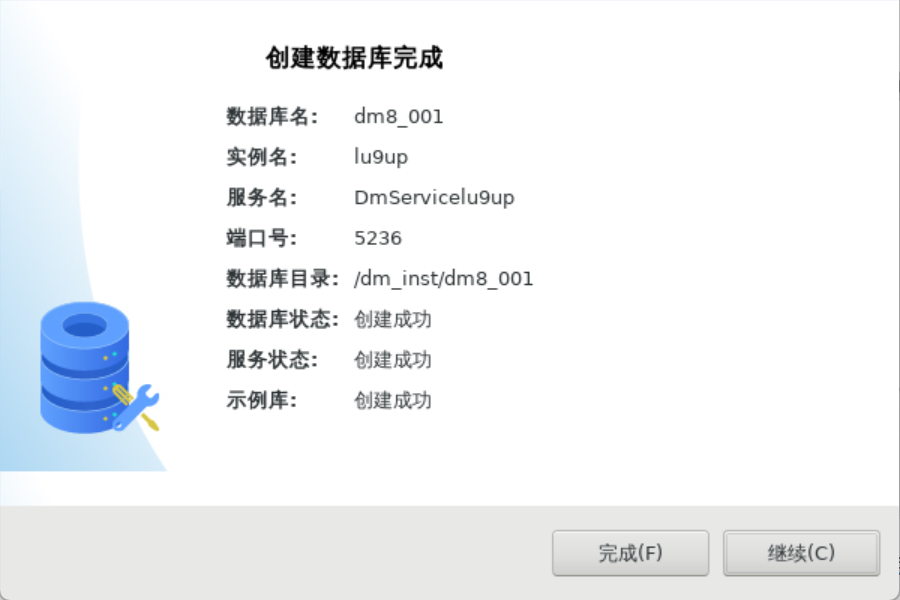
十、完成创建
点击“完成”结束数据库实例的创建。
6 安装后验证
6.1 检查服务状态
[dmdba@DM8-001 ~]$ systemctl status DmServicelu9up
● DmServicelu9up.service - DM Instance Service
   Loaded: loaded (/usr/lib/systemd/system/DmServicelu9up.service; enabled; vendor preset: disabled)
   Active: active (running) since Sun 2024-09-01 20:35:23 CST; 3min 57s ago
  Process: 17450 ExecStart=/dm/dmdbms/bin/DmServicelu9up start (code=exited, status=0/SUCCESS)
 Main PID: 17475 (dmserver)
    Tasks: 115
   CGroup: /system.slice/DmServicelu9up.service
           └─17475 /dm/dmdbms/bin/dmserver path=/dm_inst/dm8_001/dm.ini -noconsole
6.2 登录验证
用管理员用户sysdba登录数据库实例,密码为刚刚安装数据库实例时设置的统一密码。
[dmdba@DM8-001 ~]$ disql sysdba
密码:

服务器[LOCALHOST:5236]:处于普通打开状态
登录使用时间 : 10.880(ms)
disql V8

#查看版本
SQL> select * from v$version;

行号     BANNER
---------- ---------------------------------
1          DM Database Server 64 V8
2          DB Version: 0x7000c
3          03134284194-20240703-234060-20108
4          Msg Version: 12
5          Gsu level(5) cnt: 0

已用时间: 0.891(毫秒). 执行号:66401.
SQL>
7 结语
至此,DM8数据库已经安装完成。做一下小总结。
数据库老鸟不难发现,DM8的安装过程与O记很相似,不能说一模一样,只能说毫无区别,对熟悉O记的同学很友好,库装起来没什么难度。而且安装步骤全程显示中文,比较直观易懂。
总之,要想顺利安装DM8数据库,需要做好以下几点:
- 做好安装前准备
- 确认硬件环境:确保服务器满足DM8的硬件要求,包括CPU、内存、硬盘空间等。
- 确认软件环境:检查操作系统版本以及内核参数,确保与DM8兼容。
- 环境配置:关闭防火墙、SELinux、配置内核参数以及创建用户等,确保安装过程中网络畅通。
- 安装步骤
- 切换至安装用户:使用安装用户登录系统。
- 环境变量:不要忘记或者配错配置环境变量。
- 确认安装选项:仔细检查每一个安装步骤,不要随便跳过。
- 执行配置脚本;安装过程中根据提示使用root用户执行配置脚本,不要漏执行或者错序执行。
- 安装后检查
- 查看数据库服务状态:使用systemctl命令查看DM8服务是否正常运行。例如:systemctl status DmService.service
- 登录数据库:使用DM8提供的工具(如DM控制台)登录数据库,验证安装是否成功。例如:disql sysdba。
- 检查数据库版本:执行SELECT VERSION() FROM DUAL;查看数据库版本信息。

