点击下方卡片,关注“小白玩转Python”公众号
介绍
目标检测:目标检测是指在图像或视频帧中识别和定位特定目标,并使用边界框来确定它们的位置。YOLO(You Only Look Once)是一种高效的单阶段目标检测算法,以其快速的处理速度和较高的准确性而闻名。与传统的两阶段检测算法相比,YOLO的优势在于它能够一次性处理整个图像,从而实现实时目标检测,这在自动驾驶、视频监控和机器人导航等应用中尤为重要。
目标跟踪:目标跟踪则关注于在视频序列中连续跟踪已识别的目标。SORT(Simple Online and Realtime Tracking)算法因其简单性和实时性而被广泛应用于目标跟踪任务。其通过预测目标的运动轨迹并实时更新其位置,有效实现了目标的连续跟踪。结合YOLO进行检测和SORT进行跟踪,可以实现目标的连续监控和分析,确保在整个视频序列中的准确和一致的跟踪。项目 我们将使用YOLOv8m(中等版本)、OpenCV和SORT进行目标检测,以确保准确性和效率,来计算通过我们视频中特定区域的车辆数量。
项目简介
本项目旨在通过结合使用YOLOv8m(一种中等复杂度的YOLO变体)、OpenCV(一个开源的计算机视觉库)和SORT算法,实现对视频中特定区域内通过的车辆数量的准确计算。这一过程不仅确保了目标检测的准确性,也提高了整个系统的效率。
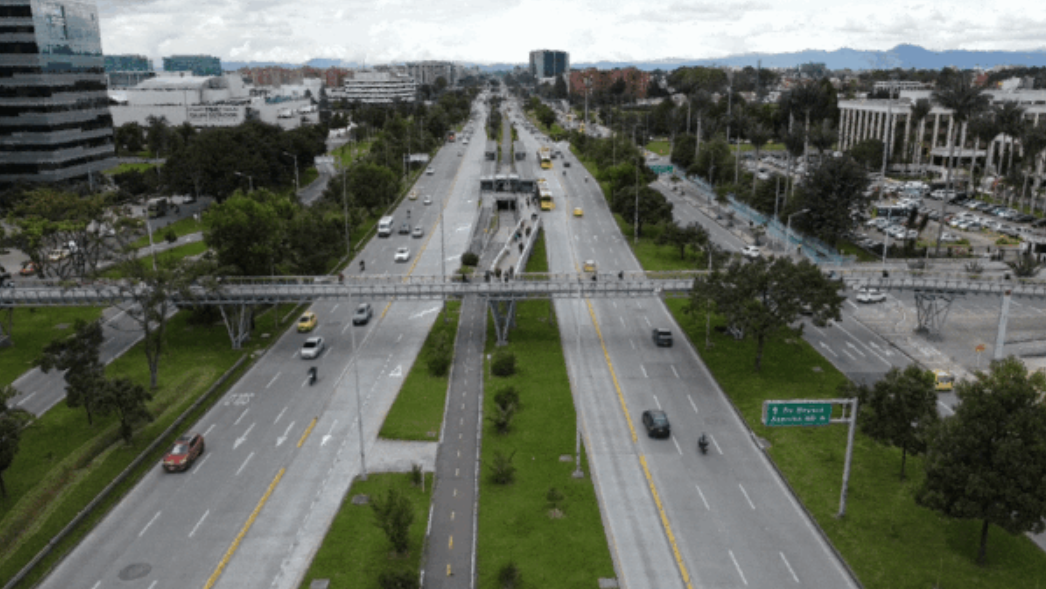
1. 选择一个视频
2. 创建掩膜
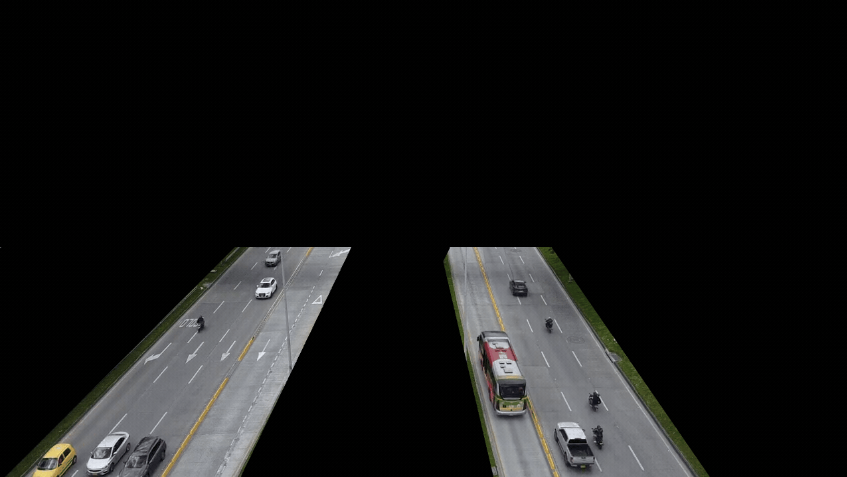
为了专注于桥下的车辆,我们将利用画布创建一个掩膜。掩膜是一个二值图像,仅包含黑色(0)和白色(255)两种像素值。在RGB色彩空间中,这对应于:
白色(255, 255, 255)表示感兴趣的区域,算法将在这些区域进行处理。
黑色(0, 0, 0)表示要忽略或排除在处理之外的区域。
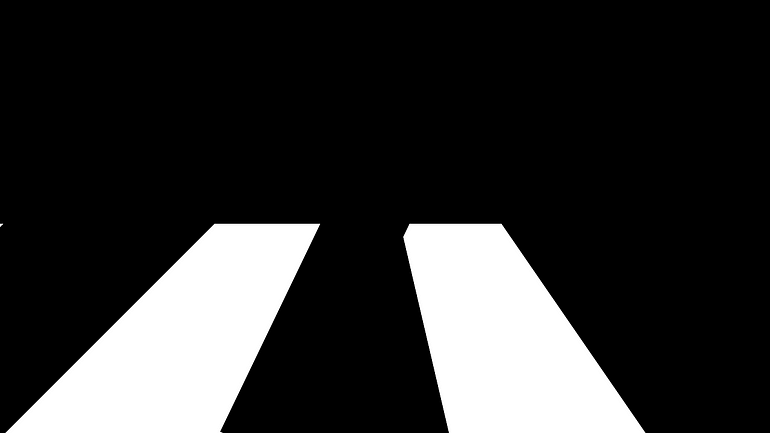
通过按位操作将掩膜与视频结合,我们实现以下结果:
3. 定义一个区域
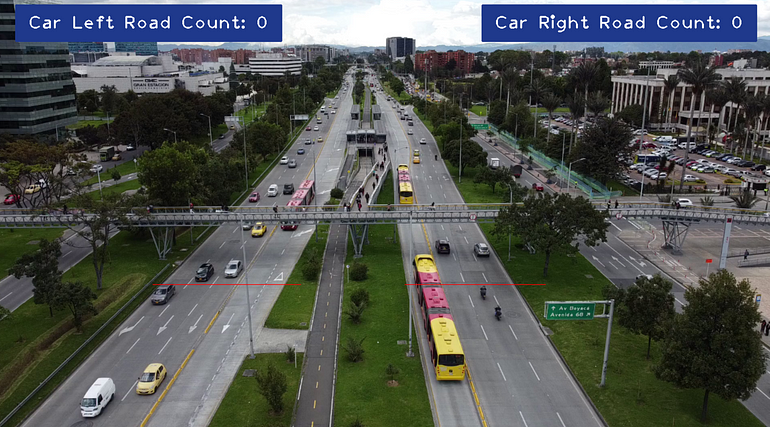
我们将在视频中定义两个区域:一个用于计算向下行驶的车辆数量,另一个用于计算向上行驶的车辆数量。

当在指定区域内识别到车辆时,我们将改变该区域的颜色为绿色,表示检测到车辆。

4. 构建布局
让我们使用cvzone构建计数器的布局。
5. 代码
cv2:执行图像和视频处理
cvzone:与OpenCV协同工作
numpy:处理数值运算
YOLO:应用目标检测
sort:用于跟踪检测到的目标的SORT库
import cv2
import numpy as np
from ultralytics import YOLO
import cvzone
from sort import sort


class_names = [
  'person', 'bicycle', 'car', 'motorcycle', 'airplane', 'bus', 'train', 'truck', 'boat', 'traffic light', 'fire hydrant', 'stop sign', 'parking meter', 'bench',
  'bird', 'cat', 'dog', 'horse', 'sheep', 'cow', 'elephant', 'bear', 'zebra', 'giraffe', 'backpack', 'umbrella', 'handbag', 'tie', 'suitcase', 'frisbee', 'skis',
  'snowboard', 'sports ball', 'kite', 'baseball bat', 'baseball glove', 'skateboard', 'surfboard', 'tennis racket', 'bottle', 'wine glass', 'cup', 'fork', 'knife',
  'spoon', 'bowl', 'banana', 'apple', 'sandwich', 'orange', 'broccoli', 'carrot', 'hot dog', 'pizza', 'donut', 'cake', 'chair', 'couch', 'potted plant', 'bed',
  'dining table', 'toilet', 'tv', 'laptop', 'mouse', 'remote', 'keyboard', 'cell phone', 'microwave', 'oven', 'toaster', 'sink', 'refrigerator', 'book', 'clock',
  'vase', 'scissors', 'teddy bear', 'hair drier', 'toothbrush'
]


class_names_goal = ['car']


model = YOLO('yolov8m.pt')
tracker = sort.Sort(max_age=20)


mask = cv2.imread('mask.png')


video = cv2.VideoCapture('traffic.mp4')


width = 1280
height = 720


line_left_road_x1 = 256
line_left_road_x2 = 500
line_left_road_y = 472


line_right_road_x1 = 672
line_right_road_x2 = 904
line_right_road_y = 472


vehicle_left_road_id_count = []
vehicle_right_road_id_count = []


while True:
  success, frame = video.read()


  if not success:
    break


  frame = cv2.resize(frame, (width, height))


  image_region = cv2.bitwise_and(frame, mask)


  results = model(image_region, stream=True)


  detections = []

  cv2.line(frame, (line_left_road_x1, line_left_road_y) ,(line_left_road_x2, line_left_road_y), (0, 0, 255))
  cv2.line(frame, (line_right_road_x1, line_right_road_y) ,(line_right_road_x2, line_right_road_y), (0, 0, 255))


  for result in results:
    for box in result.boxes:
      class_name = class_names[int(box.cls[0])]


      if not class_name in class_names_goal:
        continue


      confidence = round(float(box.conf[0]) * 100, 2)


      if confidence < 30:
        continue


      x1, y1, x2, y2 = box.xyxy[0]
      x1, y1, x2, y2 = int(x1), int(y1), int(x2), int(y2)


      detections.append([x1, y1, x2, y2, float(box.conf[0])])


    tracked_objects = tracker.update(np.array(detections))


    for obj in tracked_objects:
      x1, y1, x2, y2, obj_id = [int(i) for i in obj]


      confidence_pos_x1 = max(0, x1)
      confidence_pos_y1 = max(36, y1)


      cv2.rectangle(frame, (x1, y1), (x2, y2), (255, 0, 255), 2)
      cvzone.putTextRect(frame, f'ID: {obj_id}', (confidence_pos_x1, confidence_pos_y1), 1, 1)


      center_x = (x1 + x2) // 2
      center_y = (y1 + y2) // 2


      if  line_left_road_y - 10 < center_y < line_left_road_y + 10 and line_left_road_x1 < center_x < line_left_road_x2:
        if not obj_id in vehicle_left_road_id_count:
          vehicle_left_road_id_count.append(obj_id)


          cv2.line(frame, (line_left_road_x1, line_left_road_y) ,(line_left_road_x2, line_left_road_y), (0, 255, 0), 2)


      if  line_right_road_y - 10 < center_y < line_right_road_y + 10 and line_right_road_x1 < center_x < line_right_road_x2:
        if not obj_id in vehicle_right_road_id_count:
          vehicle_right_road_id_count.append(obj_id)


          cv2.line(frame, (line_right_road_x1, line_right_road_y) ,(line_right_road_x2, line_right_road_y), (0, 255, 0), 2)


  cvzone.putTextRect(frame, f'Car Left Road Count: {len(vehicle_left_road_id_count)}', (50, 50), 2, 2, offset=20, border=2, colorR=(140, 57, 31), colorB=(140, 57, 31))
  cvzone.putTextRect(frame, f'Car Right Road Count: {len(vehicle_right_road_id_count)}', (width - 460, 50), 2, 2, offset=20, border=2, colorR=(140, 57, 31), colorB=(140, 57, 31))


  cv2.imshow('Image', frame)


  if cv2.waitKey(1) & 0xFF == ord('q'):
    break


video.release()
cv2.destroyAllWindows()
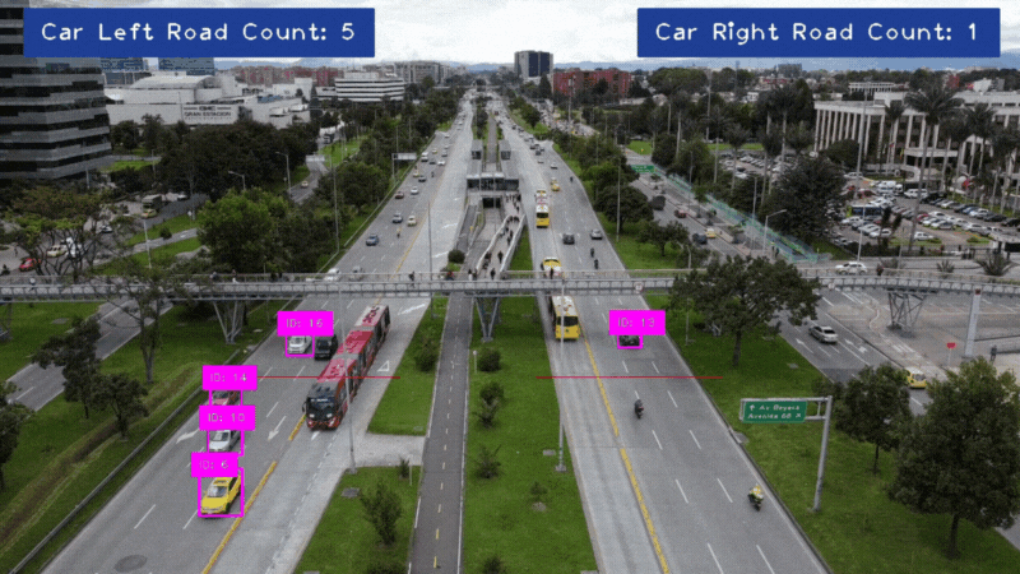
6. 结果
源码:https://github.com/VladeMelo/collaborative-filtering
· END ·
🌟 想要变身计算机视觉小能手?快来「小白玩转Python」公众号!
回复“Python视觉实战项目”,解锁31个超有趣的视觉项目大礼包!🎁
本文仅供学习交流使用,如有侵权请联系作者删除
