Flutter导航控件小结
- 路由与导航
- Navigator
- 核心方法
- 属性
- 示例
- 基本导航示例
- 替换当前页面并推入新页面
- 使用命名路由
- 动态生成路由
- 额外的导航功能
- 完整示例代码
- MaterialPageRoute
- 属性
- 示例
- CupertinoPageRoute
- 属性
- 示例
- 应用栏与底部导航
- AppBar
- 属性解析
- 示例
- BottomNavigationBar
- 属性解析
- 示例
- Drawer
- 属性解析
- 示例
- 示例
路由与导航
Navigator
Navigator 用于管理应用程序的路由,通过堆栈结构来实现页面的进出。它支持页面的推入(push)和弹出(pop)操作,允许在应用中进行复杂的导航模式。
核心方法
- Navigator.push: 将新页面推入导航堆栈。
- Navigator.pop: 从导航堆栈中弹出当前页面。
- Navigator.pushReplacement: 替换当前页面,并将新页面推入导航堆栈。
- Navigator.pushNamed: 使用命名路由推入新页面。
- Navigator.popUntil: 弹出导航堆栈中的页面直到满足特定条件。
- Navigator.pushAndRemoveUntil: 推入新页面并移除所有先前的页面,直到满足特定条件。
- Navigator.maybePop: 尝试从导航堆栈中弹出当前页面,如果没有更多页面可以弹出,则返回false。
属性
- initialRoute: 应用启动时的初始路由。
- onGenerateRoute: 动态生成路由的回调函数。
- onUnknownRoute: 当无法找到匹配路由时调用的回调函数。
示例
基本导航示例
Navigator.push(
  context,
  MaterialPageRoute(builder: (context) => SecondPage()),
);

Navigator.pop(context);
替换当前页面并推入新页面
Navigator.pushReplacement(
  context,
  MaterialPageRoute(builder: (context) => SecondPage()),
);
使用命名路由
定义命名路由:
void main() {
  runApp(MaterialApp(
    initialRoute: '/',
    routes: {
      '/': (context) => FirstPage(),
      '/second': (context) => SecondPage(),
    },
  ));
}
使用命名路由导航:
Navigator.pushNamed(context, '/second');
动态生成路由
void main() {
  runApp(MaterialApp(
    onGenerateRoute: (settings) {
      if (settings.name == '/second') {
        return MaterialPageRoute(
          builder: (context) => SecondPage(),
        );
      }
      // Define other routes here
      assert(false, 'Need to implement ${settings.name}');
      return null;
    },
  ));
}
额外的导航功能
推入新页面并移除所有先前的页面,直到满足特定条件
Navigator.pushAndRemoveUntil(
  context,
  MaterialPageRoute(builder: (context) => SecondPage()),
  ModalRoute.withName('/'),
);
尝试从导航堆栈中弹出当前页面
bool popped = await Navigator.maybePop(context);
if (!popped) {
  // Handle the case where there are no more pages to pop
}
完整示例代码
import 'package:flutter/material.dart';

void main() {
  runApp(MyApp());
}

class MyApp extends StatelessWidget {
  @override
  Widget build(BuildContext context) {
    return MaterialApp(
      initialRoute: '/',
      routes: {
        '/': (context) => FirstPage(),
        '/second': (context) => SecondPage(),
        '/third': (context) => ThirdPage(),
      },
    );
  }
}

class FirstPage extends StatelessWidget {
  @override
  Widget build(BuildContext context) {
    return Scaffold(
      appBar: AppBar(title: Text("First Page")),
      body: Center(
        child: Column(
          mainAxisAlignment: MainAxisAlignment.center,
          children: [
            ElevatedButton(
              onPressed: () {
                Navigator.push(
                  context,
                  MaterialPageRoute(builder: (context) => SecondPage()),
                );
              },
              child: Text('Push to Second Page'),
            ),
            ElevatedButton(
              onPressed: () {
                Navigator.pushReplacement(
                  context,
                  MaterialPageRoute(builder: (context) => SecondPage()),
                );
              },
              child: Text('PushReplace to Second Page'),
            ),
            ElevatedButton(
              onPressed: () {
                Navigator.pushNamed(context, '/third');
              },
              child: Text('Go to Third Page with Named Route'),
            ),
          ],
        ),
      ),
    );
  }
}

class SecondPage extends StatelessWidget {
  @override
  Widget build(BuildContext context) {
    return Scaffold(
      appBar: AppBar(title: Text("Second Page")),
      body: Center(
        child: Column(
          mainAxisAlignment: MainAxisAlignment.center,
          children: [
            ElevatedButton(
              onPressed: () {
                Navigator.pop(context, 'Data from Second Page');
              },
              child: Text('Pop and Return Data'),
            ),
            ElevatedButton(
              onPressed: () {
                Navigator.popUntil(context, ModalRoute.withName('/'));
              },
              child: Text('Pop Until First Page'),
            ),
            ElevatedButton(
              onPressed: () {
                Navigator.pushAndRemoveUntil(
                  context,
                  MaterialPageRoute(builder: (context) => ThirdPage()),
                  ModalRoute.withName('/'),
                );
              },
              child: Text('Push and Remove Until First Page'),
            ),
          ],
        ),
      ),
    );
  }
}

class ThirdPage extends StatelessWidget {
  @override
  Widget build(BuildContext context) {
    return Scaffold(
      appBar: AppBar(title: Text("Third Page")),
      body: Center(
        child: Column(
          mainAxisAlignment: MainAxisAlignment.center,
          children: [
            ElevatedButton(
              onPressed: () {
                Navigator.pop(context);
              },
              child: Text('Back to Previous Page'),
            ),
            ElevatedButton(
              onPressed: () async {
                bool popped = await Navigator.maybePop(context);
                if (!popped) {
                  ScaffoldMessenger.of(context).showSnackBar(
                    SnackBar(content: Text('No more pages to pop')),
                  );
                }
              },
              child: Text('Maybe Pop'),
            ),
          ],
        ),
      ),
    );
  }
}
MaterialPageRoute
MaterialPageRoute 是一个材料设计风格的页面路由,用于在安卓平台上提供一致的导航体验。它继承自PageRoute,并且实现了TransitionRoute用于处理页面切换时的过渡动画。
属性
- builder: 构建路由页面的回调函数。
- settings: 路由的配置信息,如名称、参数等。
- maintainState: 是否在页面离开视图但未完全移除时保持状态。
- fullscreenDialog: 是否将页面展示为全屏对话框。
示例
Navigator.push(
  context,
  MaterialPageRoute(
    builder: (context) => SecondPage(),
    settings: RouteSettings(name: '/second'),
  ),
);
在SecondPage中接收传递的参数:
class SecondPage extends StatelessWidget {
  @override
  Widget build(BuildContext context) {
    final RouteSettings settings = ModalRoute.of(context)!.settings;
    final String? data = settings.arguments as String?;

    return Scaffold(
      appBar: AppBar(title: Text("Second Page")),
      body: Center(child: Text(data ?? 'No data')),
    );
  }
}
CupertinoPageRoute
CupertinoPageRoute 是一个iOS风格的页面路由,用于在iOS平台上提供一致的导航体验。它同样继承自PageRoute,并实现了TransitionRoute用于处理页面切换时的过渡动画。
属性
- builder: 构建路由页面的回调函数。
- settings: 路由的配置信息,如名称、参数等。
- maintainState: 是否在页面离开视图但未完全移除时保持状态。
- fullscreenDialog: 是否将页面展示为全屏对话框。
示例
Navigator.push(
  context,
  CupertinoPageRoute(
    builder: (context) => SecondPage(),
    settings: RouteSettings(name: '/second'),
  ),
);
在SecondPage中接收传递的参数:
class SecondPage extends StatelessWidget {
  @override
  Widget build(BuildContext context) {
    final RouteSettings settings = ModalRoute.of(context)!.settings;
    final String? data = settings.arguments as String?;

    return CupertinoPageScaffold(
      navigationBar: CupertinoNavigationBar(
        middle: Text("Second Page"),
      ),
      child: Center(child: Text(data ?? 'No data')),
    );
  }
}
应用栏与底部导航
AppBar
AppBar 是顶部应用栏,通常用于显示标题、导航按钮等。
属性解析
AppBar({
    super.key,
    this.leading,
    this.automaticallyImplyLeading = true,
    this.title,
    this.actions,
    this.flexibleSpace,
    this.bottom,
    this.elevation,
    this.scrolledUnderElevation,
    this.notificationPredicate = defaultScrollNotificationPredicate,
    this.shadowColor,
    this.surfaceTintColor,
    this.shape,
    this.backgroundColor,
    this.foregroundColor,
    this.iconTheme,
    this.actionsIconTheme,
    this.primary = true,
    this.centerTitle,
    this.excludeHeaderSemantics = false,
    this.titleSpacing,
    this.toolbarOpacity = 1.0,
    this.bottomOpacity = 1.0,
    this.toolbarHeight,
    this.leadingWidth,
    this.toolbarTextStyle,
    this.titleTextStyle,
    this.systemOverlayStyle,
    this.forceMaterialTransparency = false,
    this.clipBehavior,
  })
- key:用于标识控件的唯一值。
- leading:可选参数,类型为 Widget,表示前导控件,通常是导航图标。
- automaticallyImplyLeading:可选参数,类型为 bool,默认为 true,是否自动根据路由生成前导控件。
- title:可选参数,类型为 Widget,表示标题控件。
- actions:可选参数,类型为 List,表示操作控件列表,通常是一些图标按钮。
- flexibleSpace:可选参数,类型为 Widget,表示灵活空间控件。
- bottom:可选参数,类型为 PreferredSizeWidget,表示底部控件,通常是 TabBar。
- elevation:可选参数,类型为 double,表示阴影高度。
- scrolledUnderElevation:可选参数,类型为 double,表示滑动时的阴影高度。
- notificationPredicate:可选参数,类型为 ScrollNotificationPredicate,表示通知谓词。
- shadowColor:可选参数,类型为 Color,表示阴影颜色。
- surfaceTintColor:可选参数,类型为 Color,表示表面颜色。
- shape:可选参数,类型为 ShapeBorder,表示形状。
- backgroundColor:可选参数,类型为 Color,表示背景颜色。
- foregroundColor:可选参数,类型为 Color,表示前景颜色。
- iconTheme:可选参数,类型为 IconThemeData,表示图标主题。
- actionsIconTheme:可选参数,类型为 IconThemeData,表示操作图标主题。
- primary:可选参数,类型为 bool,默认为 true,表示是否为主 AppBar。
- centerTitle:可选参数,类型为 bool,表示标题是否居中。
- excludeHeaderSemantics:可选参数,类型为 bool,表示是否排除头部语义。
- titleSpacing:可选参数,类型为 double,表示标题间距。
- toolbarOpacity:可选参数,类型为 double,表示工具栏不透明度,默认为 1.0。
- bottomOpacity:可选参数,类型为 double,表示底部控件不透明度,默认为 1.0。
- toolbarHeight:可选参数,类型为 double,表示工具栏高度。
- leadingWidth:可选参数,类型为 double,表示前导控件宽度。
- toolbarTextStyle:可选参数,类型为 TextStyle,表示工具栏文字样式。
- titleTextStyle:可选参数,类型为 TextStyle,表示标题文字样式。
- systemOverlayStyle:可选参数,类型为 SystemUiOverlayStyle,表示系统覆盖层样式。
- forceMaterialTransparency:可选参数,类型为 bool,表示是否强制材料透明度。
- clipBehavior:可选参数,类型为 Clip,表示剪切行为。
示例
class ExamplePage extends StatelessWidget {
  @override
  Widget build(BuildContext context) {
    return MaterialApp(
      debugShowCheckedModeBanner: false,
      home: Scaffold(
        appBar: AppBar(
          leading: IconButton(
            icon: Icon(Icons.menu),
            onPressed: () {
              // handle menu button press
            },
          ),
          title: Text('AppBar Example'),
          actions: <Widget>[
            IconButton(
              icon: Icon(Icons.search),
              onPressed: () {
                // handle search button press
              },
            ),
            IconButton(
              icon: Icon(Icons.more_vert),
              onPressed: () {
                // handle more button press
              },
            ),
          ],
          flexibleSpace: Container(
            decoration: BoxDecoration(
              gradient: LinearGradient(
                colors: [Colors.blue, Colors.purple],
                begin: Alignment.topLeft,
                end: Alignment.bottomRight,
              ),
            ),
          ),
          bottom: PreferredSize(
            preferredSize: Size.fromHeight(50.0),
            child: Container(
              color: Colors.orange,
              height: 50.0,
              child: Center(child: Text('Bottom Widget')),
            ),
          ),
          elevation: 4.0,
          backgroundColor: Colors.red,
          foregroundColor: Colors.white,
          centerTitle: true,
        ),
        body: Center(child: Text('Hello, world!')),
      ),
    );
  }
}

BottomNavigationBar
BottomNavigationBar 是底部导航栏,用于在底部展示多个导航项。
属性解析
BottomNavigationBar({
  super.key,
  required this.items,                   // 必需参数,导航栏项列表
  this.onTap,                            // 点击事件回调
  this.currentIndex = 0,                 // 当前选中的索引
  this.elevation,                        // 阴影高度
  this.type,                             // 导航栏类型
  Color? fixedColor,                     // 固定颜色(已废弃,请使用 selectedItemColor)
  this.backgroundColor,                  // 背景颜色
  this.iconSize = 24.0,                  // 图标大小
  Color? selectedItemColor,              // 选中项颜色
  this.unselectedItemColor,              // 未选中项颜色
  this.selectedIconTheme,                // 选中图标主题
  this.unselectedIconTheme,              // 未选中图标主题
  this.selectedFontSize = 14.0,          // 选中标签字体大小
  this.unselectedFontSize = 12.0,        // 未选中标签字体大小
  this.selectedLabelStyle,               // 选中标签样式
  this.unselectedLabelStyle,             // 未选中标签样式
  this.showSelectedLabels,               // 是否显示选中标签
  this.showUnselectedLabels,             // 是否显示未选中标签
  this.mouseCursor,                      // 鼠标指针样式
  this.enableFeedback,                   // 是否启用反馈
  this.landscapeLayout,                  // 横向布局
  this.useLegacyColorScheme = true,      // 是否使用旧颜色方案
});
- key:用于标识控件的唯一值。
- items:必需参数,类型为 List,表示导航栏项列表。
- onTap:可选参数,类型为 ValueChanged?,点击事件回调,当导航栏项被点击时调用。
- currentIndex:可选参数,类型为 int,默认为 0,表示当前选中的索引。
- elevation:可选参数,类型为 double?,表示阴影高度。
- type:可选参数,类型为 BottomNavigationBarType?,表示导航栏类型,可以是 fixed 或 shifting。
- backgroundColor:可选参数,类型为 Color?,表示背景颜色。
- iconSize:可选参数,类型为 double,表示图标大小,默认为 24.0。
- selectedItemColor:可选参数,类型为 Color?,表示选中项颜色。
- unselectedItemColor:可选参数,类型为 Color?,表示未选中项颜色。
- selectedIconTheme:可选参数,类型为 IconThemeData?,表示选中图标主题。
- unselectedIconTheme:可选参数,类型为 IconThemeData?,表示未选中图标主题。
- selectedFontSize:可选参数,类型为 double,表示选中标签字体大小,默认为 14.0。
- unselectedFontSize:可选参数,类型为 double,表示未选中标签字体大小,默认为 12.0。
- selectedLabelStyle:可选参数,类型为 TextStyle?,表示选中标签样式。
- unselectedLabelStyle:可选参数,类型为 TextStyle?,表示未选中标签样式。
- showSelectedLabels:可选参数,类型为 bool?,表示是否显示选中标签。
- showUnselectedLabels:可选参数,类型为 bool?,表示是否显示未选中标签。
- mouseCursor:可选参数,类型为 MouseCursor?,表示鼠标指针样式。
- enableFeedback:可选参数,类型为 bool?,表示是否启用反馈。
- landscapeLayout:可选参数,类型为 BottomNavigationBarLandscapeLayout?,表示横向布局方式。
- useLegacyColorScheme:可选参数,类型为 bool,表示是否使用旧颜色方案,默认为 true。
示例
class BottomPage extends StatefulWidget {
  @override
  _BottomPageState createState() => _BottomPageState();
}

class _BottomPageState extends State<BottomPage> {
  int _selectedIndex = 0;

  static const List<Widget> _widgetOptions = <Widget>[
    Text('Home Page',
        style: TextStyle(fontSize: 35, fontWeight: FontWeight.bold)),
    Text('Search Page',
        style: TextStyle(fontSize: 35, fontWeight: FontWeight.bold)),
    Text('Profile Page',
        style: TextStyle(fontSize: 35, fontWeight: FontWeight.bold)),
  ];

  void _onItemTapped(int index) {
    setState(() {
      _selectedIndex = index;
    });
  }

  @override
  Widget build(BuildContext context) {
    return MaterialApp(
      home: Scaffold(
        appBar: AppBar(title: Text('BottomNavigationBar Example')),
        body: Center(
          child: _widgetOptions.elementAt(_selectedIndex),
        ),
        bottomNavigationBar: BottomNavigationBar(
          items: const <BottomNavigationBarItem>[
            BottomNavigationBarItem(
              icon: Icon(Icons.home),
              label: 'Home',
            ),
            BottomNavigationBarItem(
              icon: Icon(Icons.search),
              label: 'Search',
            ),
            BottomNavigationBarItem(
              icon: Icon(Icons.person),
              label: 'Profile',
            ),
          ],
          currentIndex: _selectedIndex,
          selectedItemColor: Colors.amber[800],
          onTap: _onItemTapped,
        ),
      ),
    );
  }
}

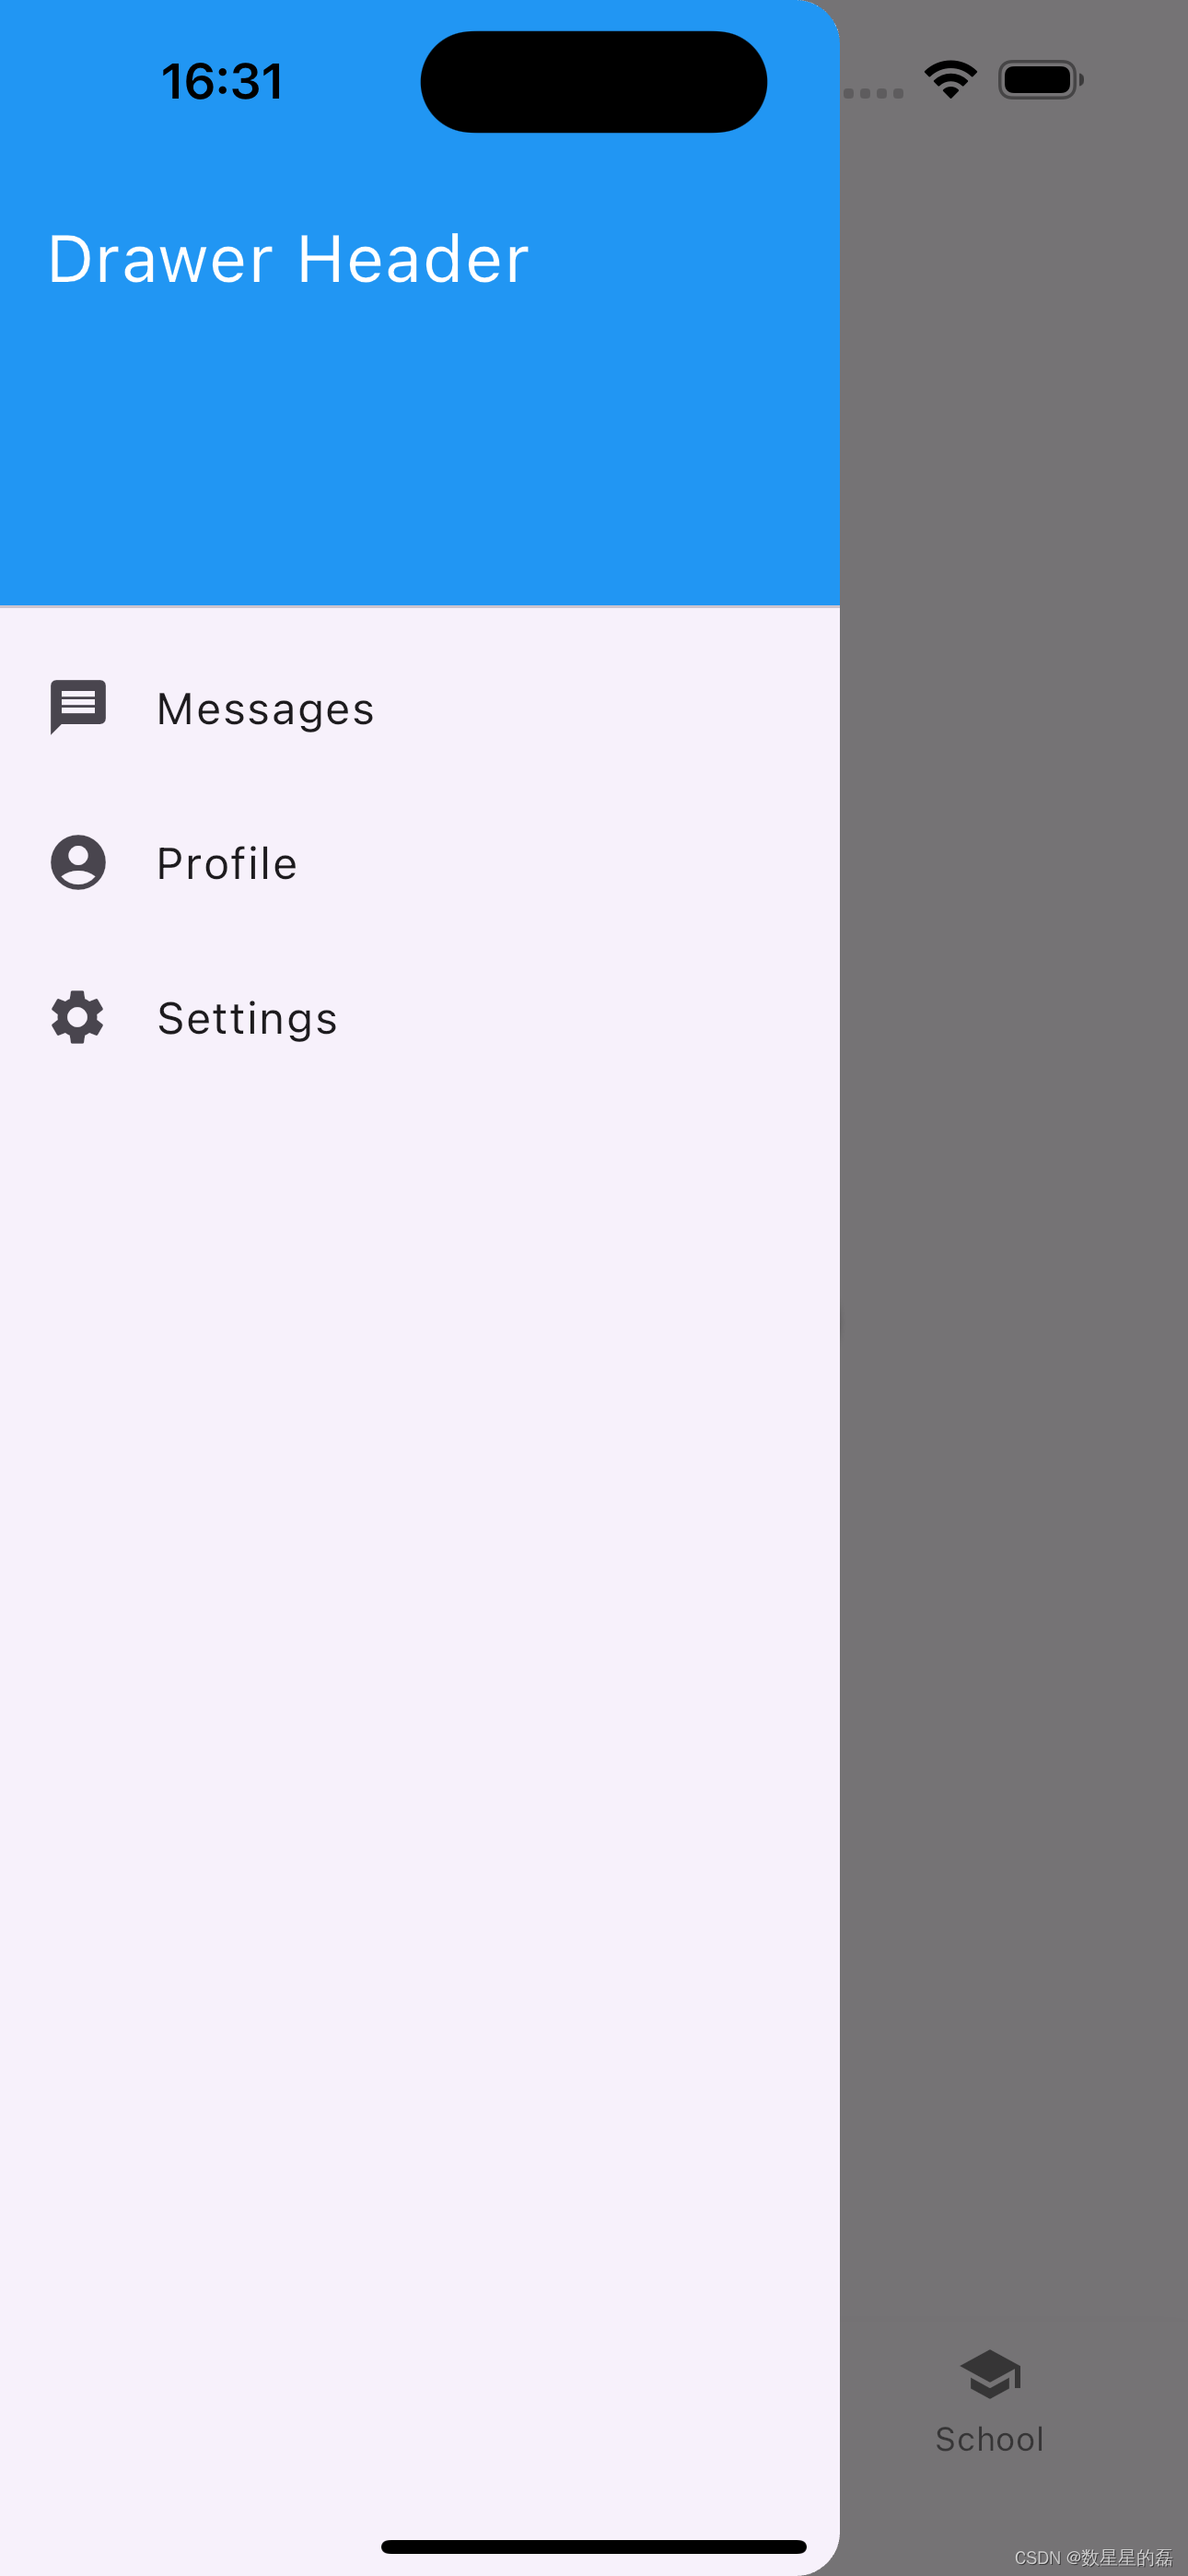
Drawer
Drawer 是抽屉导航,一般从屏幕左侧滑入,包含导航菜单项。
属性解析
const Drawer({
  super.key,
  this.backgroundColor,      // 抽屉的背景颜色
  this.elevation,            // 阴影高度
  this.shadowColor,          // 阴影颜色
  this.surfaceTintColor,     // 表面颜色
  this.shape,                // 形状
  this.width,                // 宽度
  this.child,                // 子控件
  this.semanticLabel,        // 语义标签
  this.clipBehavior,         // 剪切行为
});
- key:用于标识控件的唯一值。
- backgroundColor:可选参数,类型为 Color?,表示抽屉的背景颜色。
- elevation:可选参数,类型为 double?,表示阴影高度。
- shadowColor:可选参数,类型为 Color?,表示阴影颜色。
- surfaceTintColor:可选参数,类型为 Color?,表示表面颜色。
- shape:可选参数,类型为 ShapeBorder?,表示形状。
- width:可选参数,类型为 double?,表示宽度。
- child:可选参数,类型为 Widget?,表示子控件。
- semanticLabel:可选参数,类型为 String?,表示语义标签。
- clipBehavior:可选参数,类型为 Clip?,表示剪切行为。
示例
class ExamplePage extends StatelessWidget {
  @override
  Widget build(BuildContext context) {
    return MaterialApp(
      debugShowCheckedModeBanner: false,
      home: Scaffold(
        appBar: AppBar(
          title: Text('Drawer Example'),
        ),
        body: Center(
          child: Text(
              'Swipe from the left or click on the menu icon to open the drawer.'),
        ),
        drawer: Drawer(
          backgroundColor: Colors.white,
          elevation: 16.0,
          child: ListView(
            padding: EdgeInsets.zero,
            children: <Widget>[
              DrawerHeader(
                decoration: BoxDecoration(
                  color: Colors.blue,
                ),
                child: Text(
                  'Drawer Header',
                  style: TextStyle(
                    color: Colors.white,
                    fontSize: 24,
                  ),
                ),
              ),
              ListTile(
                leading: Icon(Icons.home),
                title: Text('Home'),
                onTap: () {
                  // Handle the tap event here
                  Navigator.pop(context);
                },
              ),
              ListTile(
                leading: Icon(Icons.settings),
                title: Text('Settings'),
                onTap: () {
                  // Handle the tap event here
                  Navigator.pop(context);
                },
              ),
              ListTile(
                leading: Icon(Icons.contacts),
                title: Text('Contacts'),
                onTap: () {
                  // Handle the tap event here
                  Navigator.pop(context);
                },
              ),
            ],
          ),
        ),
      ),
    );
  }
}

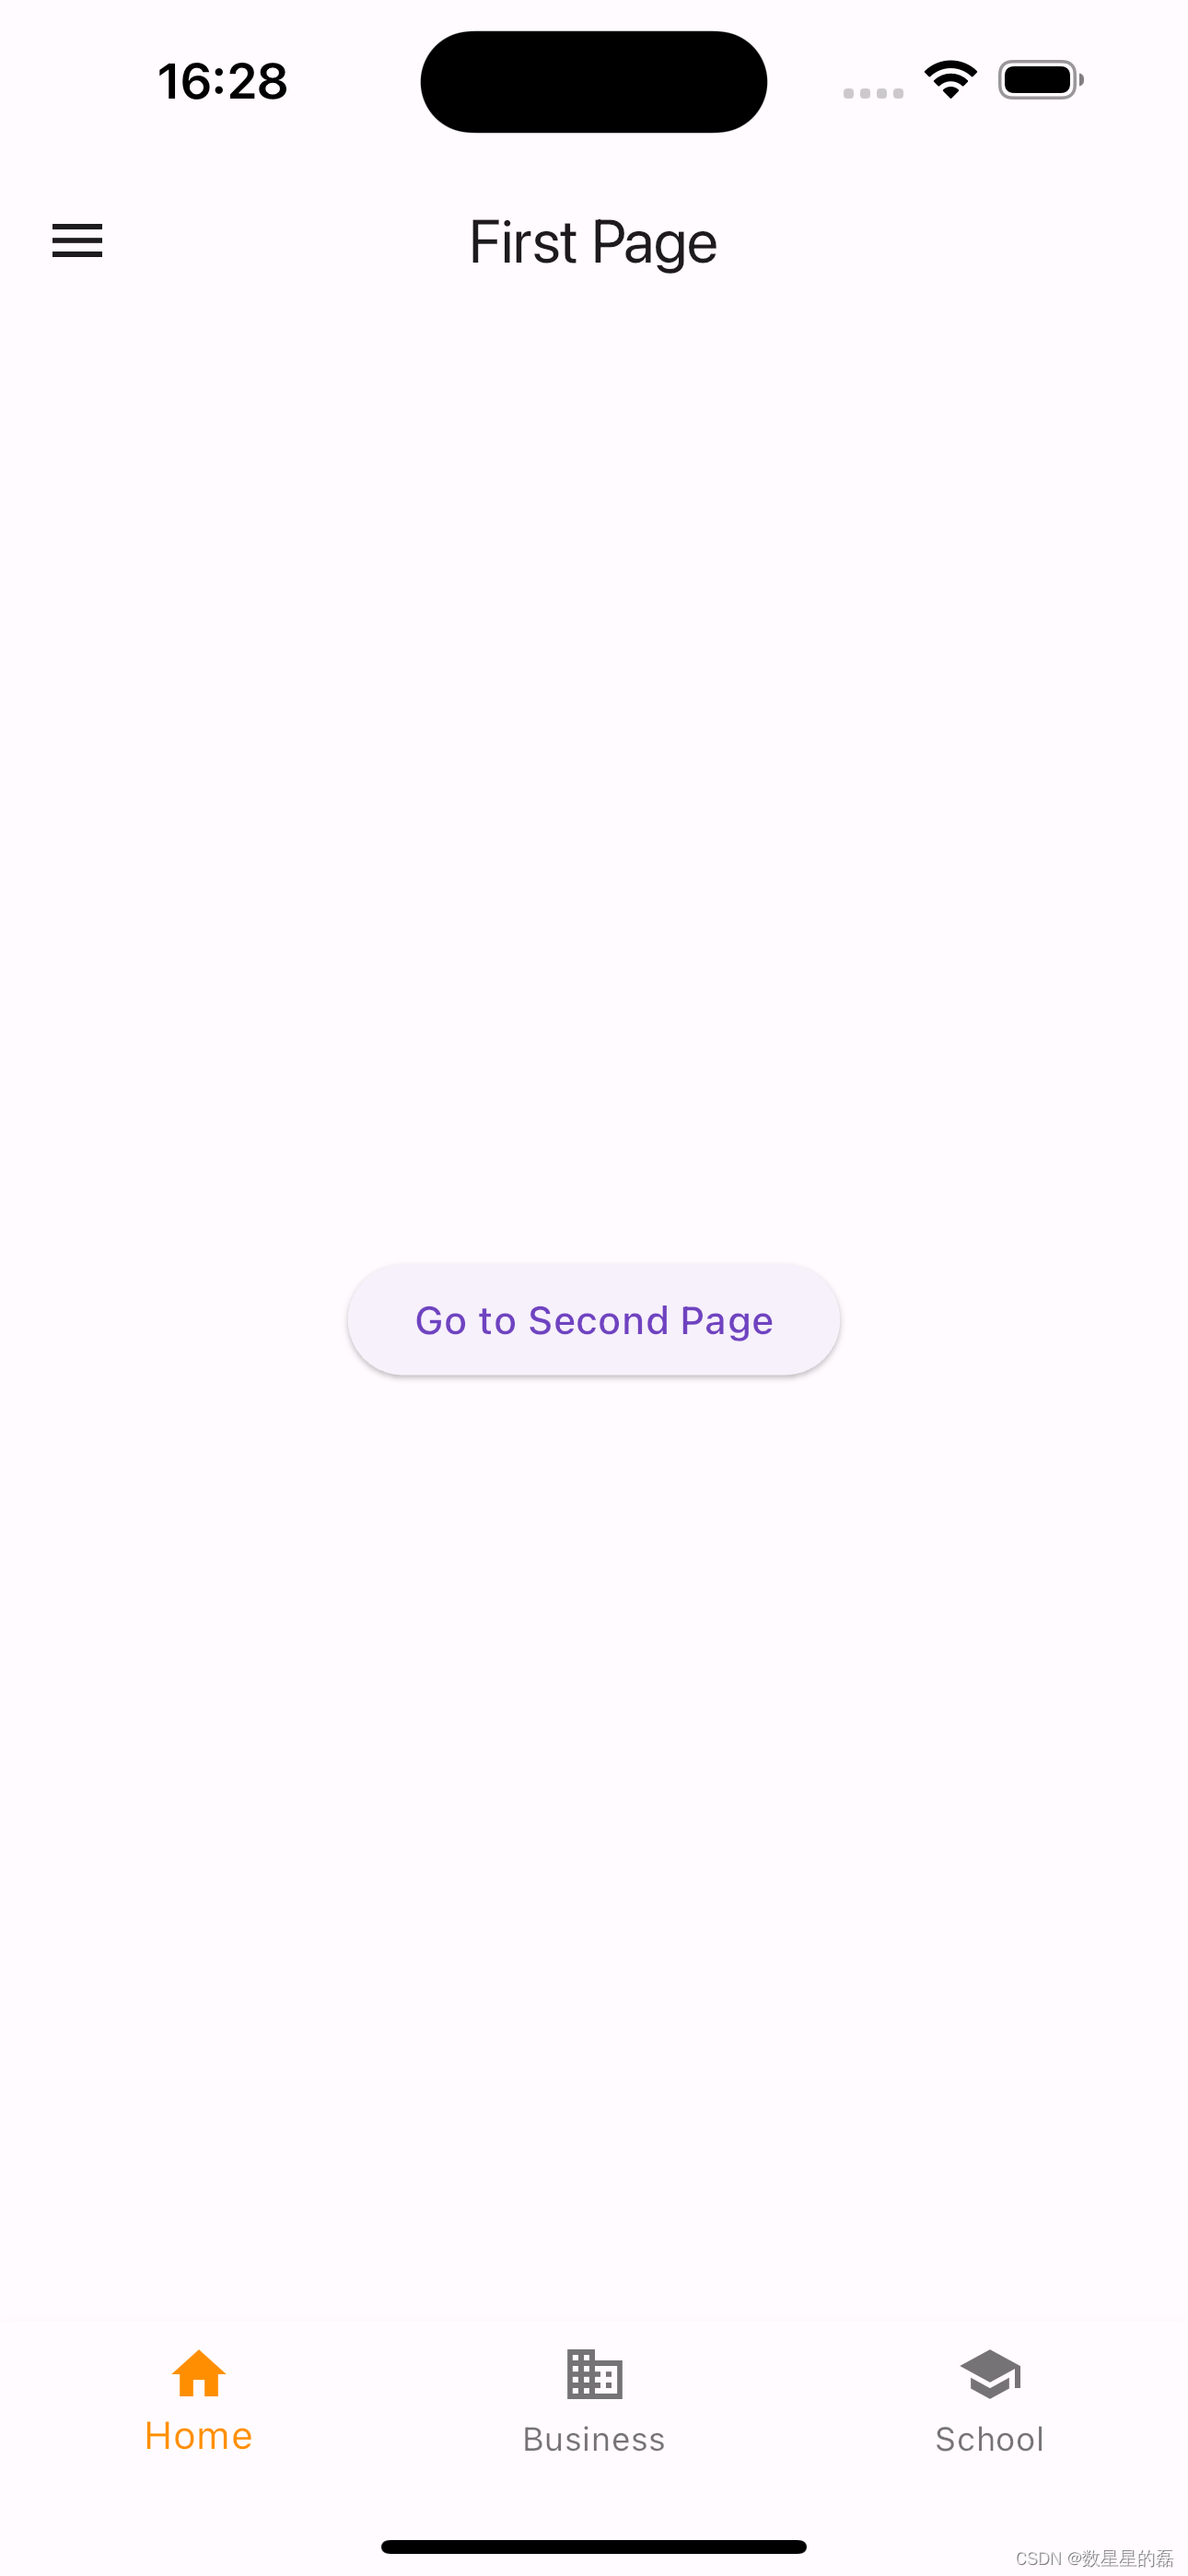
示例
class FirstPage extends StatefulWidget {
  @override
  _FirstPageState createState() => _FirstPageState();
}

class _FirstPageState extends State<FirstPage> {
  int _selectedIndex = 0;

  void _onItemTapped(int index) {
    setState(() {
      _selectedIndex = index;
    });
  }

  @override
  Widget build(BuildContext context) {
    return Scaffold(
      appBar: AppBar(
        title: Text("First Page"),
      ),
      drawer: Drawer(
        child: ListView(
          padding: EdgeInsets.zero,
          children: <Widget>[
            DrawerHeader(
              decoration: BoxDecoration(
                color: Colors.blue,
              ),
              child: Text(
                'Drawer Header',
                style: TextStyle(
                  color: Colors.white,
                  fontSize: 24,
                ),
              ),
            ),
            ListTile(
              leading: Icon(Icons.message),
              title: Text('Messages'),
              onTap: () {
                // Handle navigation
              },
            ),
            ListTile(
              leading: Icon(Icons.account_circle),
              title: Text('Profile'),
              onTap: () {
                // Handle navigation
              },
            ),
            ListTile(
              leading: Icon(Icons.settings),
              title: Text('Settings'),
              onTap: () {
                // Handle navigation
              },
            ),
          ],
        ),
      ),
      body: Center(
        child: ElevatedButton(
          onPressed: () {
            Navigator.push(
              context,
              MaterialPageRoute(
                  builder: (context) =>
                      SecondPage(data: 'Hello from First Page')),
            );
          },
          child: Text('Go to Second Page'),
        ),
      ),
      bottomNavigationBar: BottomNavigationBar(
        items: const <BottomNavigationBarItem>[
          BottomNavigationBarItem(
            icon: Icon(Icons.home),
            label: 'Home',
          ),
          BottomNavigationBarItem(
            icon: Icon(Icons.business),
            label: 'Business',
          ),
          BottomNavigationBarItem(
            icon: Icon(Icons.school),
            label: 'School',
          ),
        ],
        currentIndex: _selectedIndex,
        selectedItemColor: Colors.amber[800],
        onTap: _onItemTapped,
      ),
    );
  }
}

class SecondPage extends StatelessWidget {
  final String data;

  SecondPage({required this.data});

  @override
  Widget build(BuildContext context) {
    return Scaffold(
      appBar: AppBar(title: Text("Second Page")),
      body: Center(child: Text(data)),
    );
  }
}


![[stm32f407]定时器使用](https://i-blog.csdnimg.cn/direct/d7d07b477ed34fe8a302e92e425b42c8.png)