表格的分页实例展示
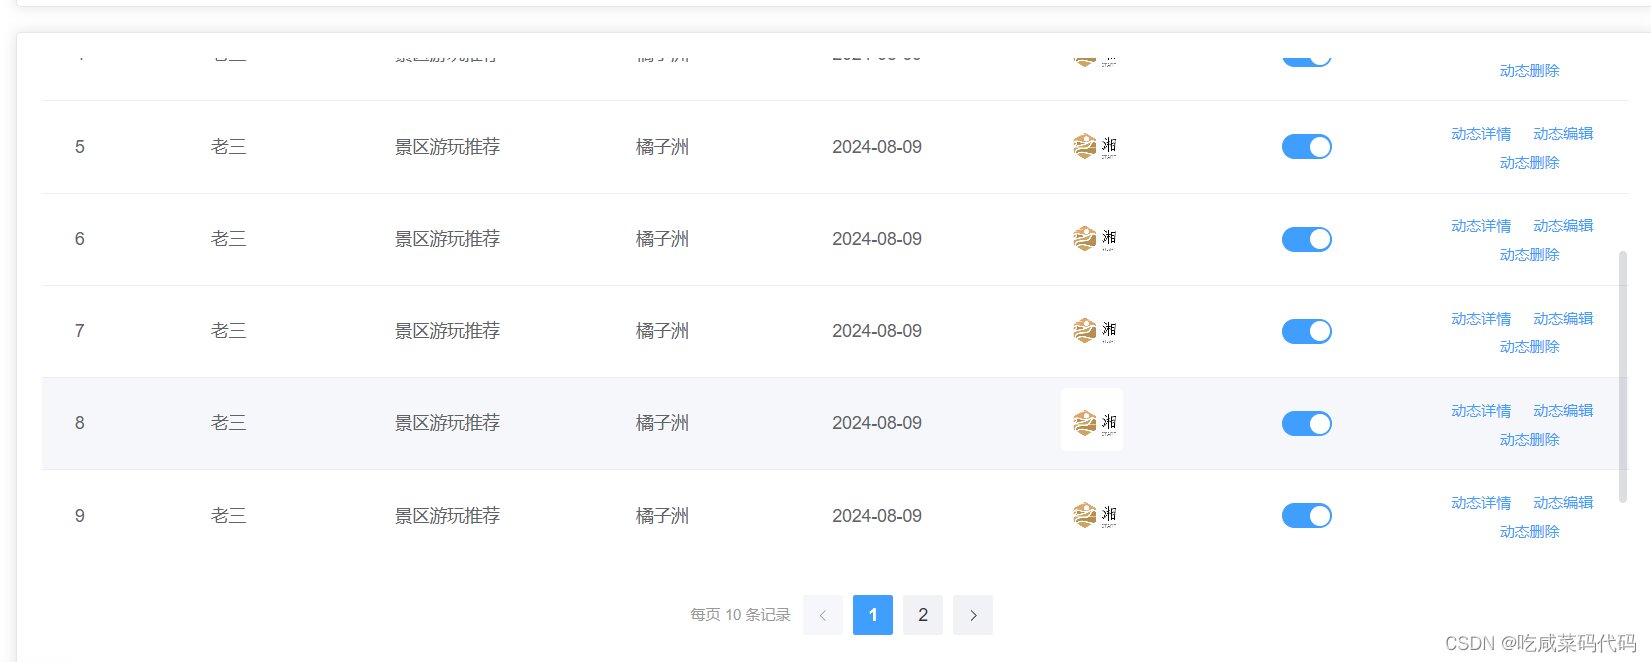
效果1:表格按照每行10条数据分页,且编号也会随之分页自增
实现按照页码分页效果

第二页 展示编号根据分页自动增长

固定表格高度
这边设置了滚动条,同时表格高度实现自适应滚动条高度
template部分
表格代码
编号是按照页码条数进行循环并根据索引自增
{{ (currentPage - 1) * pageSize + scope.$index + 1 }}
- pageSize 是每页的条数 scope.$index + 1 是自增的索引从1开始需要加1
这边有个小细节 设置了 el-scrollbar height="400px"的高度之后
style="width: 100%" height="auto" max-height="100%"
自身适应滚轮的高度 ,需要将表格高度设置为自动 最高高度设置为父级高度的100%
这样如果数据未达到滚轮最高的高度滚轮是不会显示的,达到最高高度下滑会显示滚轮
这边本想固定表头的,可是这个命令基本没用,后续看怎么搞吧
:header-cell-style="{ 'position': 'sticky', 'top': '0' }"
    <el-scrollbar height="400px">
      <el-table :data="getCurrentPageData" style="width: 100%" height="auto" max-height="100%" :header-cell-style="{ 'position': 'sticky', 'top': '0' }">
        <el-table-column type="index" label="编号" width="60px" align="center">
          <template #default="scope">
            {{ (currentPage - 1) * pageSize + scope.$index + 1 }}
          </template>
        </el-table-column>
        <el-table-column prop="nickname" label="昵称" align="center"></el-table-column>
        <el-table-column prop="communityContent" label="社区动态" align="center"></el-table-column>
        <el-table-column prop="attractionName" label="景点" align="center"></el-table-column>
        <el-table-column prop="communityContentTime" label="发布时间" align="center"></el-table-column>
        <el-table-column prop="communityImgUrl" label="封面" align="center">
          <template #default="scope">
            <el-avatar shape="square" :size="50" :src="scope.row.communityImgUrl" />
          </template>
        </el-table-column>
        <el-table-column prop="status" label="状态" align="center">
          <template #default="scope">
            <el-switch active-value="1" inactive-value="0" v-model="scope.row.status"></el-switch>
          </template>
        </el-table-column>
        <el-table-column label="操作" align="center">
          <template #default="scope">
            <el-button link type="primary" size="small" @click="detailCommunity(scope.row.id)">动态详情</el-button>
            <el-button link type="primary" size="small" @click="editCommunity(scope.row.id)">动态编辑</el-button>
            <el-button link type="primary" size="small" @click="delCommunity(scope.row.id)">动态删除</el-button>
          </template>
        </el-table-column>
      </el-table>
    </el-scrollbar>
分页代码
这边布局采用了弹性布局 第一层让其居中 第二层让两个元素固定在中间左右
<el-pagination> 中
@size-change="handleSizeChange" 切换页码时候调整每页的条数 即点击分页按钮页码时候会跳转到当前页码并显示对应的条数
layout="prev, pager, next" 是获取当前 布局
当我按pre 即左箭头 跳到之前一页
按next 即右箭头 跳到之后一页
: total 是绑定总数 这边是绑定一个数组长度 动态根据条适应变化

@current-change="handleCurrentChange" 显示当前的页面
<div style="display: flex; justify-content: center; margin-top: 20px;">
      <div style=" text-align: center; display: flex ; justify-content: center;">

        <div style="margin: 10px; color: #999; font-size: 12px; line-height: 32px">
          每页 {{ pageSize }} 条记录
        </div>
        <el-pagination
            background
            :current-page="currentPage"
            :page-size="pageSize"
            :total="commentArr.length"
            @current-change="handleCurrentChange"
            layout="prev, pager, next"
            style="flex-grow: 1"
            @size-change="handleSizeChange"
        >

        </el-pagination>
      </div>
    </div>
js部分
初始化
定义响应式变量 来初始化 pagesize页面和当前页码
// 分页相关
const currentPage = ref(1);
const pageSize = ref(10);
定义方法
动态获取 当前页面和页码尺寸
const handleCurrentChange = (val) => {
  currentPage.value = val;
};

const handleSizeChange = (val) => {
  pageSize.value = val;
  currentPage.value = 1; // 切换每页行数时,返回第一页
};
动态获取响应式数据 利用数组的slice方法 根据索引的开头和结尾截取数组元素
// 获取当前页应显示的数据
const getCurrentPageData = computed(() => {
  const startIndex = (currentPage.value - 1) * pageSize.value;
  const endIndex = currentPage.value * pageSize.value;
  return commentArr.value.slice(startIndex, endIndex);
});
确定弹窗的的实例展示
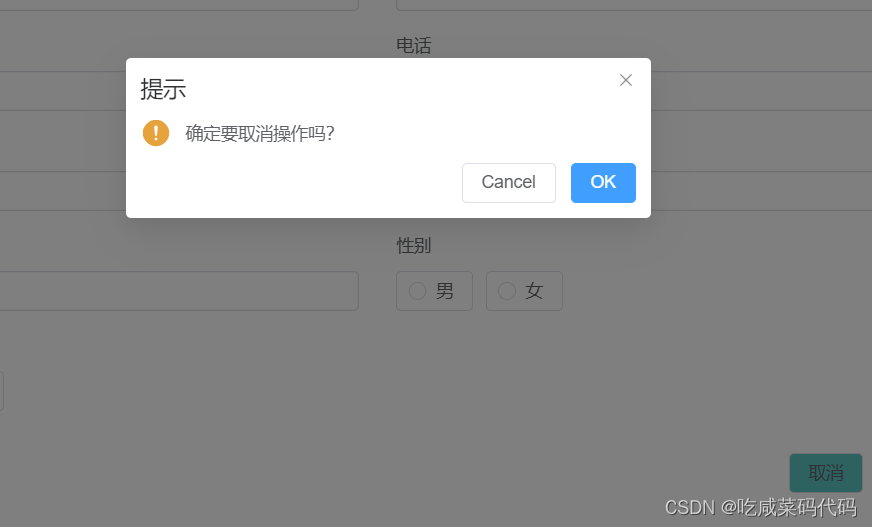
效果: 当点击取消按钮的时候或者窗口出的❌,弹出确认弹窗
template代码
弹窗dialog部分
:before-close是绑定调用方法handleBeforeClose
取消按钮@click绑定方法handleCancel()
<el-dialog :title="dialogTitle" style="width:1000px;padding:40px;"
             v-model="dialogVisible" :before-close="handleBeforeClose">
<template #footer>
      <el-button @click="handleCancel()" style="background-color: #5CC4C3">取消</el-button>
   </el-button>
    </template>
</el-dialog>
js部分
组件样式使用的是 ElMessageBox 要导包
import {ElMessageBox} from "element-plus";我这边 调用确认弹窗主要是让弹窗消失,当然可以包括清除弹窗中的数据(常用)
const handleBeforeClose = (done) => {
  // 仅处理右上角关闭按钮的逻辑
  ElMessageBox.confirm('是否关闭本窗口?', '提示', {
    type: 'warning'
  }).then(() => {
    done();
  }).catch(() => {});
};
const handleCancel = () => {
  // 点击取消按钮时弹出确认框
  ElMessageBox.confirm('确定要取消操作吗?', '提示', {
    type: 'warning'
  }).then(() => {
    dialogVisible.value = false; // 用户确认后关闭弹窗
  }).catch(() => {});
};
