文章目录
- 一、内存身份认证
- 二、jdbc身份认证
- 三、自定义登录页
一、内存身份认证
添加pom依赖
<!-- Spring Security提供的安全管理依赖启动器 -->
<dependency>
  <groupId>org.springframework.boot</groupId>
  <artifactId>spring-boot-starter-security</artifactId>
</dependency>
身份认证核心代码
@EnableWebSecurity
public class SecurityConfigMemory {

    @Bean
    public static PasswordEncoder passwordEncoder(){
        // 或者Pbkdf2PasswordEncoder、ScryptPasswordEncoder
        return new BCryptPasswordEncoder();
    }

    @Bean
    SecurityFilterChain securityFilterChain(HttpSecurity httpSecurity) throws Exception{
        httpSecurity.csrf().disable()
        .authorizeHttpRequests((authorize) ->{
            authorize.anyRequest().authenticated();
        })
        .httpBasic(Customizer.withDefaults());
        return httpSecurity.build();
    }

    /**
     * 内存身份认证
     * @return
     */
    @Bean
    public UserDetailsService userDetailsService(){
        UserDetails tom = User.builder()
            .username("tom")
            .password(passwordEncoder().encode("111222"))
            // 角色
            .roles("common","vip")
            .build();

        UserDetails jerry = User.builder()
            .username("jerry")
            .password(passwordEncoder().encode("111222"))
            // 权限
            .authorities("ROLE_vip")
            .build();
        return new InMemoryUserDetailsManager(tom,jerry);
    }

}
实际效果
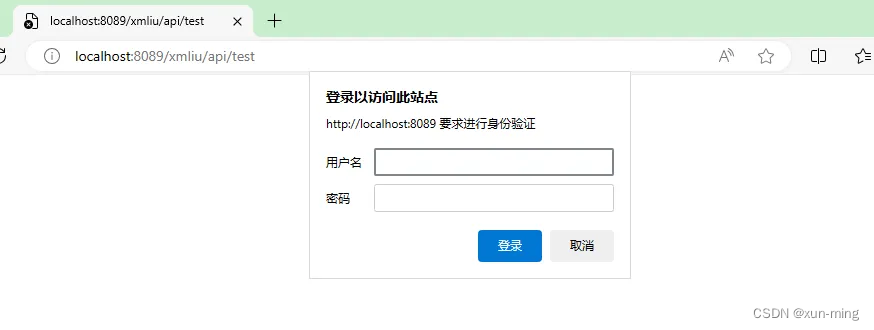
二、jdbc身份认证
就是把用户密码数据存到数据库里,不用直接放代码里,每次修改都是重新部署
需要到org.springframework.security.core.userdetails.jdbc.users.ddl中复制出创建sql脚本,创建两张表,首次运行服务后自动插入数据。

具体sql如下:users.ddl
create table users(username varchar_ignorecase(50) not null primary key,password varchar_ignorecase(500) not null,enabled boolean not null);
create table authorities (username varchar_ignorecase(50) not null,authority varchar_ignorecase(50) not null,constraint fk_authorities_users foreign key(username) references users(username));
create unique index ix_auth_username on authorities (username,authority);
核心代码
<!-- JDBC数据库连接启动器 -->
<dependency>
  <groupId>org.springframework.boot</groupId>
  <artifactId>spring-boot-starter-jdbc</artifactId>
</dependency>
@EnableWebSecurity
public class SecurityConfigDb {

    @Autowired
    private DataSource dataSource;

    @Bean
    public static PasswordEncoder passwordEncoder() {
        // 或者Pbkdf2PasswordEncoder、ScryptPasswordEncoder
        return new BCryptPasswordEncoder();
    }

    // 用户授权管理自定义配置,用户名密码弹框登录,放行静态资源
    @Bean
    SecurityFilterChain securityFilterChain(HttpSecurity httpSecurity) throws Exception {
        httpSecurity
        .authorizeHttpRequests((authorize) -> {
            authorize
            .anyRequest().authenticated();
        })
        .httpBasic(Customizer.withDefaults())
        .csrf().disable();
        return httpSecurity.build();
    }

    /**
     * jdbc身份认证
     * 首次登录成功后,第二次重启服务后可以无须登录直接访问,应该是把登录结果存到浏览器缓存或token里了,重新打开浏览器即需要重新登录
     * @return
     */
    @Bean
    public UserDetailsService userDetailsService() {
        return new JdbcUserDetailsManager(dataSource);
    }

}
实际效果同第一个
在上面代码的userDetailService方法中,也可以通过代码添加用户密码
@Bean
public UserDetailsService userDetailsService() {
    JdbcUserDetailsManager manager = new JdbcUserDetailsManager(dataSource);
    if (!manager.userExists("ddd")) {
        manager.createUser(User.withUsername("ddd").password(passwordEncoder().encode("123123")).roles("common", "vip").build());
    }
    if (!manager.userExists("jerry")) {
        manager.createUser(User.withUsername("jerry").password(passwordEncoder().encode("111222")).authorities("ROLE_vip").build());
    }
    return manager;
}
三、自定义登录页
1,pom依赖
<dependency>
  <groupId>org.springframework.boot</groupId>
  <artifactId>spring-boot-starter-thymeleaf</artifactId>
</dependency>
2,修改properties配置
#prefix中后边的斜杠不能少
spring.thymeleaf.prefix=classpath:/templates/
spring.thymeleaf.suffix=.html
spring.thymeleaf.mode=HTML
spring.thymeleaf.encoding=UTF-8
spring.thymeleaf.servlet.content-type=text/html
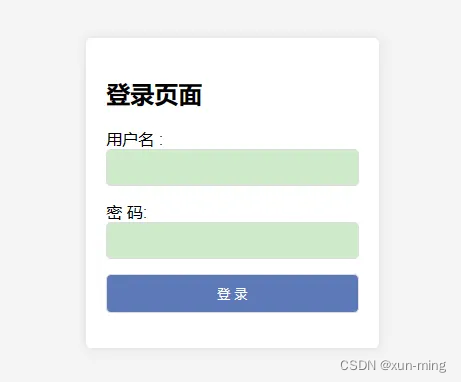
3,新建login.html
<!DOCTYPE html>
<html lang="zh-cn" xmlns:th="http://www.thymeleaf.org">
  <head>
    <title>Login Page</title>
    <link th:href="@{/css/login.css}" href="/css/login.css"  th:rel="stylesheet"/>
  </head>
  <body>
    <div class="login-container">
      <h2>登录页面</h2>
      <form th:action="@{/doLogin}" method="post">
        <div th:class="form-group"><label> 用户名 : <input type="text" name="username" required/> </label></div>
        <div th:class="form-group"><label> 密 码: <input type="password" name="password" required/> </label></div>
        <div th:class="form-group"><input type="submit" value="登 录"/></div>
      </form>
    </div>
  </body>
</html>
关联的样式login.css
body {
  font-family: Arial, sans-serif;
  background-color: #f4f4f4;
  margin: 0;
  padding: 0;
  display: flex;
  justify-content: center;
  align-items: center;
  height: 100vh;
}
.login-container {
  background-color: #fff;
  padding: 20px;
  border-radius: 5px;
  box-shadow: 0 0 10px rgba(0, 0, 0, 0.1);
}
.form-group {
  margin-bottom: 15px;
}
.form-group label {
  display: block;
  margin-bottom: 5px;
}
.form-group input {
  width: 100%;
  padding: 10px;
  border: 1px solid #ddd;
  border-radius: 5px;
  box-sizing: border-box; /* ensures padding doesn't affect width */
}
.form-group input[type="submit"] {
  background-color: #5c79b8;
  color: white;
  cursor: pointer;
}
.form-group input[type="submit"]:hover {
  background-color: #4cae97;
}
.h2{
  width: 100%;
}
4,新建Controller
@Controller
public class IndexController {

    @RequestMapping("/entry")
    public String index(){
        System.out.println("访问登录页面");
        return "login";
    }

    @RequestMapping("/entry-success")
    public String success(){
        System.out.println("访问登录success页面");
        // return "登录成功";
        return "success";
    }

    @RequestMapping("/entry-failure")
    public String failure(){
        System.out.println("访问登录failure页面");
        // return "登录失败";
        return "failure";
    }
}
@Slf4j
@RestController
@RequestMapping("/api")
public class ApiController {

    @GetMapping("/test")
    public String test() {
        return "this is ngrok info test for xmliu";
    }
}
5,Security配置优化:添加放行css文件,登录页接口,登录成功和登录失败以及登录提交表单方法
在第二个配置的基础上修改securityFilterChain方法
// 用户授权管理自定义配置,用户名密码弹框登录,放行静态资源
@Bean
SecurityFilterChain securityFilterChain(HttpSecurity httpSecurity) throws Exception {
    httpSecurity
    .authorizeHttpRequests((authorize) -> {
        authorize
        .antMatchers("/css/**","/img/**").permitAll()
        .anyRequest().authenticated();
    })
    .httpBasic(Customizer.withDefaults())
    // .authorizeRequests().antMatchers("/css/**").permitAll().anyRequest().authenticated().and()
    // 开启基于表单的用户登录
    .formLogin()
    // 自定义登录页面接口
    .loginPage("/entry")
    // 用户名参数,默认username,如果表单中用户名参数是username可以忽略此项
    .usernameParameter("username")
    // 用户名参数,默认password,如果表单中密码参数是password可以忽略此项
    .passwordParameter("password")
    // 登录表单提交按钮处理方法
    .loginProcessingUrl("/doLogin")
    // 登录成功后跳转到首页index.html
    .defaultSuccessUrl("/")
    // 登录失败跳转到失败页的接口
    .failureUrl("/entry-failure")
    // 允许放行,spring security不会对这个端点做授权检查
    .permitAll()
    .and().csrf().disable();
    return httpSecurity.build();
}
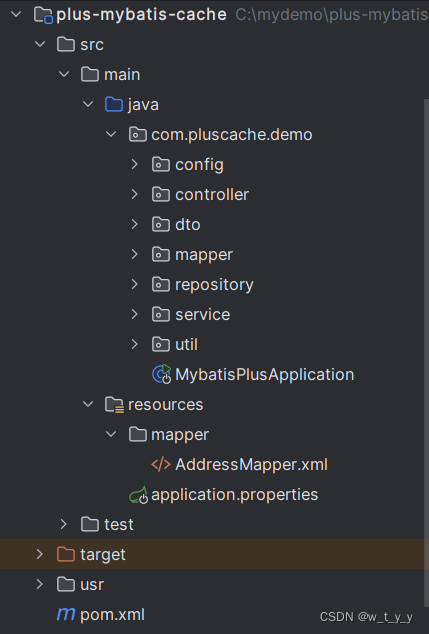
6,resources目录结构如下图

除了login.html,其他几个html文件都差不多,就是文字不一样而已,这里以index.html为例
<!DOCTYPE html>
<html lang="zh-cn" xmlns:th="http://www.thymeleaf.org">
  <head>
    <title>Login Page</title>
    <style>
      body {
        font-family: Arial, sans-serif;
        background-color: #f4f4f4;
        margin: 0;
        padding: 0;
        display: flex;
        justify-content: center;
        align-items: center;
        height: 100vh;
      }
    </style>
  </head>
  <body>
    <div>
      <h2>首页</h2>
    </div>
  </body>
</html>
7,由于项目中我添加了拦截器,所以关于资源放行这块,还需要在拦截器中做处理
@Configuration
@Component
public class MyInterceptor implements HandlerInterceptor {

    @Resource
    MyComp myComp;

    @Override
    public boolean preHandle(HttpServletRequest request, HttpServletResponse response, Object handler) throws Exception {

        // 获取接口地址
        String url = request.getRequestURL().toString();
        ...
        // 添加判断,防止css文件访问不了报错
        if(url.endsWith("/xmliu/") || url.endsWith("css")){
            return true;
        }
            ...
        return false
    }
拦截器配置
@Configuration
public class MyWebConfig implements WebMvcConfigurer {

    @Override
    public void addInterceptors(InterceptorRegistry registry) {
        registry
        .addInterceptor(interceptor())
        // 不拦截哪些请求
        .excludePathPatterns("/city/**")
        // 不拦截自定义的spring security登录页面
        .excludePathPatterns("/error")
        .excludePathPatterns("/entry")
        .excludePathPatterns("/entry-failure")
        .excludePathPatterns("/entry-success")
        .excludePathPatterns("/api/**");
    }

    /**
     * @return myInterceptor
     */
    @Bean
    public MyInterceptor interceptor() {
        return  new MyInterceptor();
    }
}
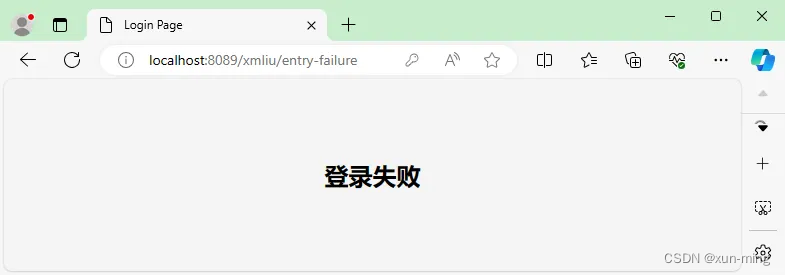
8,实际效果
用户名和密码输入错误
输入正确登录成功,进入首页
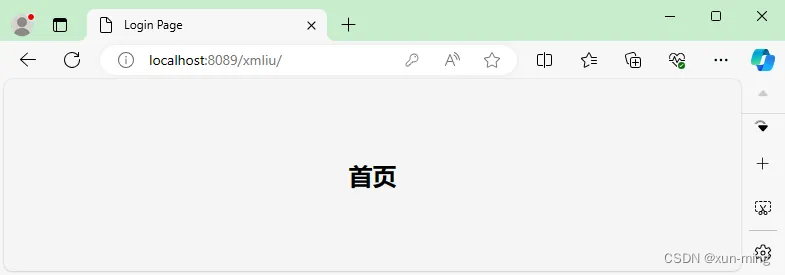
如果刚开始就是访问的接口页,那么登录成功后页会直接访问接口,而不是进入首页