记录ChatGLM3-6B部署及官方Lora微调示例详细步骤及如何使用微调后的模型进行推理
一、下载代码
使用git clone 命令下载源码
git clone https://github.com/THUDM/ChatGLM3.git如图所示

二、下载模型
模型权重文件从魔塔进行下载,不需要翻墙。权重文件比较大,所以花费时间也比较长,请耐心等待。
git lfs install
git clone https://www.modelscope.cn/ZhipuAI/chatglm3-6b.git
使用pwd命令获取模型路径,这个路径后面需要用到:
pwd
/mnt/workspace/chatglm3-6b
三、 启动验证
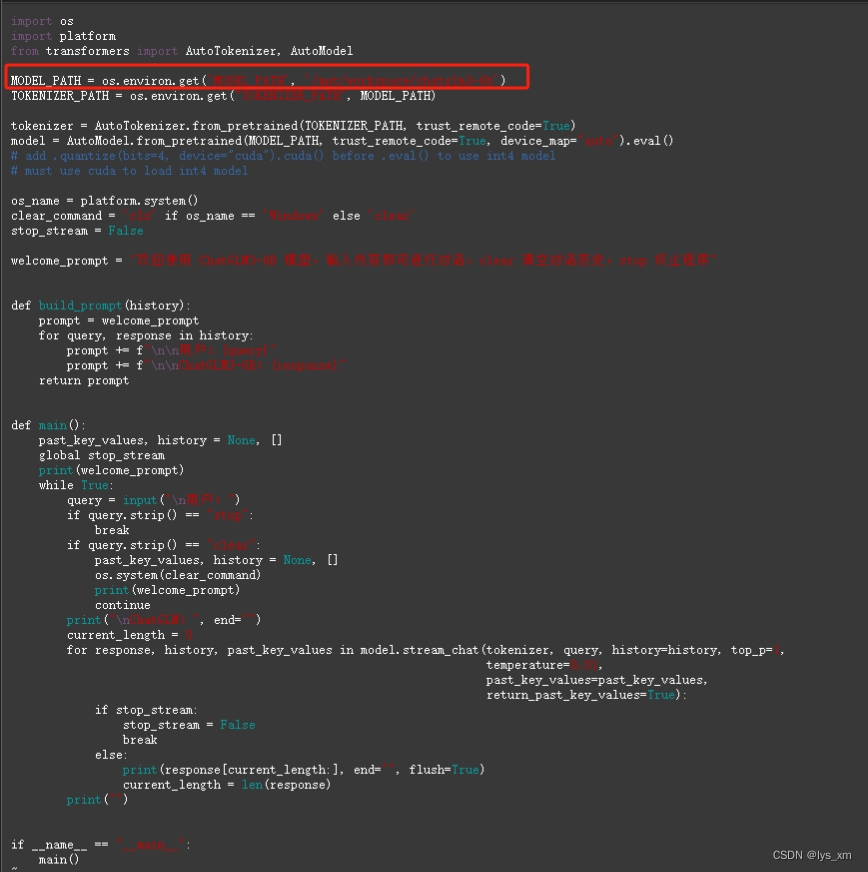
使用命令方式启动,启动之前需要修改模型地址配置。在路径 ChatGLM3/basic_demo 下找到文件 cli_demo.py 文件,修改MODEL_PATH,修改后的路径就是第二步【下载模型】后使用 pwd 命令查询出来的路径。
启动之前安装依赖
cd 到 ChatGLM3 路径下

pip install -r requirements.txt
使用一下命令启动并验证,第一次启动会略慢
cd 到 basic_demo 路径下

python cli_demo.py
四、 微调
经过多次尝试,微调的GPU显存应不小于24G,不然容易报OOM等错误。微调参数意义参考: ChatGLM3/finetune_demo at main · THUDM/ChatGLM3 (github.com)
首先先安装微调的依赖
cd 到目录 ChatGLM3/finetune_demo

pip install -r requirements.txt
上传数据
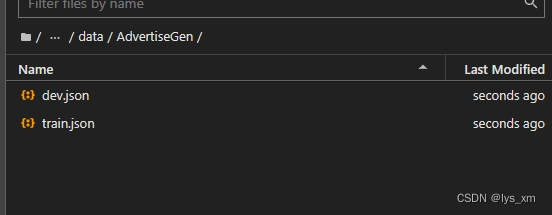
转换数据,调整为标准的对话格式
import json
from typing import Union
from pathlib import Path


def _resolve_path(path: Union[str, Path]) -> Path:
    return Path(path).expanduser().resolve()


def _mkdir(dir_name: Union[str, Path]):
    dir_name = _resolve_path(dir_name)
    if not dir_name.is_dir():
        dir_name.mkdir(parents=True, exist_ok=False)


def convert_adgen(data_dir: Union[str, Path], save_dir: Union[str, Path]):
    def _convert(in_file: Path, out_file: Path):
        _mkdir(out_file.parent)
        with open(in_file, encoding='utf-8') as fin:
            with open(out_file, 'wt', encoding='utf-8') as fout:
                for line in fin:
                    dct = json.loads(line)
                    sample = {'conversations': [{'role': 'user', 'content': dct['content']},
                                                {'role': 'assistant', 'content': dct['summary']}]}
                    fout.write(json.dumps(sample, ensure_ascii=False) + '\n')

    data_dir = _resolve_path(data_dir)
    save_dir = _resolve_path(save_dir)

    train_file = data_dir / 'train.json'
    if train_file.is_file():
        out_file = save_dir / train_file.relative_to(data_dir)
        _convert(train_file, out_file)

    dev_file = data_dir / 'dev.json'
    if dev_file.is_file():
        out_file = save_dir / dev_file.relative_to(data_dir)
        _convert(dev_file, out_file)


convert_adgen('data/AdvertiseGen', 'data/AdvertiseGen_fix')
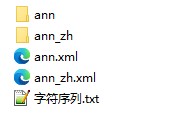
得到转换后的训练和验证数据:
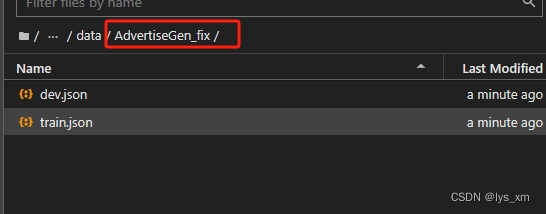
使用以下命令开始训练, data/AdvertiseGen_fix - 微调数据路径; /mnt/workspace/chatglm3-6b - 模型权重路径
cd 到 finetune_demo 目录下

CUDA_VISIBLE_DEVICES=0 NCCL_P2P_DISABLE="1" NCCL_IB_DISABLE="1" python finetune_hf.py  data/AdvertiseGen_fix  /mnt/workspace/chatglm3-6b  configs/lora.yaml
训练中,根据数据量和参数设置的不同而花费的时间不同,我大概花了1个小时
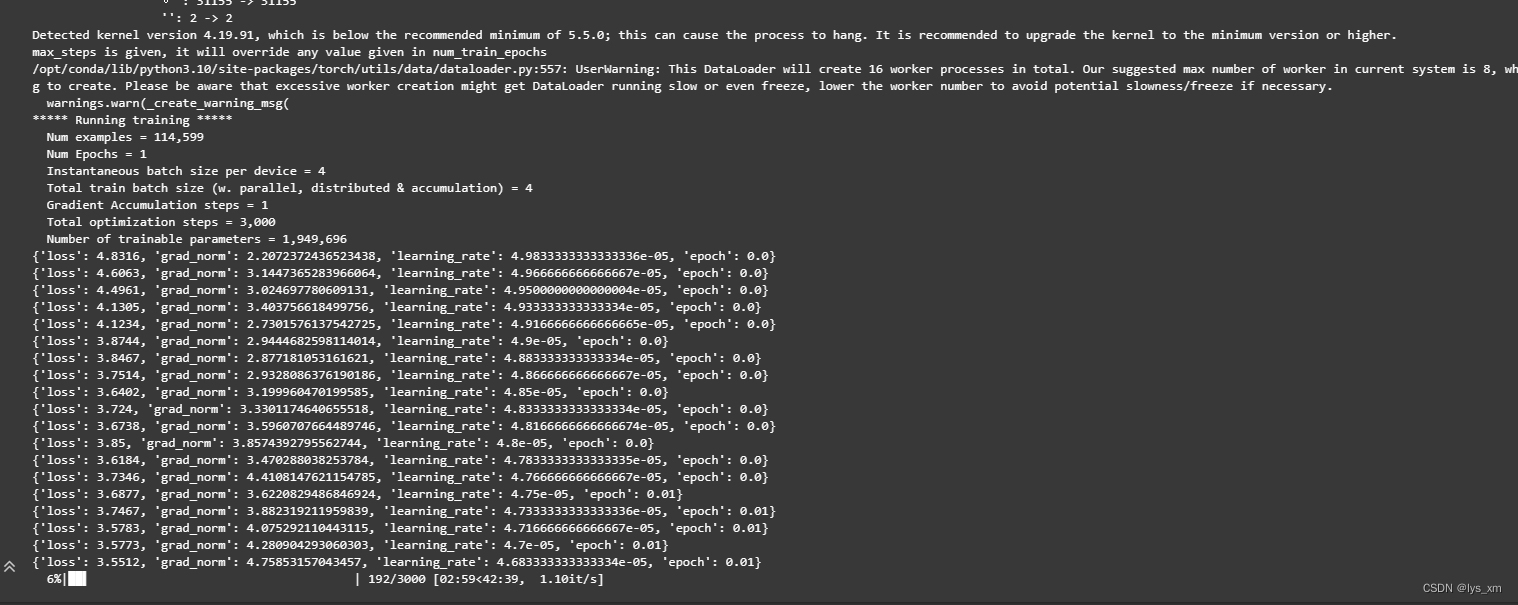
验证微调后的效果
CUDA_VISIBLE_DEVICES=0 NCCL_P2P_DISABLE="1" NCCL_IB_DISABLE="1" python inference_hf.py output/checkpoint-3000/ --prompt "类型#裙*版型#显瘦*材质#网纱*风格#性感*裙型#百褶*裙下摆#压褶*裙长#连衣裙*裙衣门襟#拉链*裙衣门襟#套头*裙款式#拼接*裙款式#拉链*裙款式#木耳边*裙款式#抽褶*裙款式#不规则" 
五、 微调后的模型
如果想要在 basic_demo 路径下的各demo中结合使用微调后的模型,需要修改 basic_demo/ 下的*_demo.py代码,即使用 finetune_demo/inference_hf 中的 方法 load_model_and_tokenizer 替换各demo里面获取 model 和 tokenizer的方法
def load_model_and_tokenizer(
        model_dir: Union[str, Path], trust_remote_code: bool = True
) -> tuple[ModelType, TokenizerType]:
    model_dir = _resolve_path(model_dir)
    if (model_dir / 'adapter_config.json').exists():
        model = AutoPeftModelForCausalLM.from_pretrained(
            model_dir, trust_remote_code=trust_remote_code, device_map='auto'
        )
        tokenizer_dir = model.peft_config['default'].base_model_name_or_path
    else:
        model = AutoModelForCausalLM.from_pretrained(
            model_dir, trust_remote_code=trust_remote_code, device_map='auto'
        )
        tokenizer_dir = model_dir
    tokenizer = AutoTokenizer.from_pretrained(
        tokenizer_dir, trust_remote_code=trust_remote_code
    )
    return model, tokenizer
以 basic_demo/cli_demo.py 为例,暴力粘合后的代码如下:
import os
import platform
from pathlib import Path
from typing import Annotated, Union
from peft import AutoPeftModelForCausalLM, PeftModelForCausalLM
from transformers import (
    AutoModelForCausalLM,
    AutoTokenizer,
    PreTrainedModel,
    PreTrainedTokenizer,
    PreTrainedTokenizerFast,
)

ModelType = Union[PreTrainedModel, PeftModelForCausalLM]
TokenizerType = Union[PreTrainedTokenizer, PreTrainedTokenizerFast]
def _resolve_path(path: Union[str, Path]) -> Path:
    return Path(path).expanduser().resolve()

MODEL_PATH = os.environ.get('MODEL_PATH', 'THUDM/chatglm3-6b')
TOKENIZER_PATH = os.environ.get("TOKENIZER_PATH", MODEL_PATH)

def load_model_and_tokenizer(model_dir: Union[str, Path]) -> tuple[ModelType, TokenizerType]:
    model_dir = _resolve_path(model_dir)
    if (model_dir / 'adapter_config.json').exists():
        model = AutoPeftModelForCausalLM.from_pretrained(
            model_dir, trust_remote_code=True, device_map='auto'
        )
        tokenizer_dir = model.peft_config['default'].base_model_name_or_path
    else:
        model = AutoModelForCausalLM.from_pretrained(
            model_dir, trust_remote_code=True, device_map='auto'
        )
        tokenizer_dir = model_dir
    tokenizer = AutoTokenizer.from_pretrained(
        tokenizer_dir, trust_remote_code=True
    )
    return model, tokenizer

# tokenizer = AutoTokenizer.from_pretrained(TOKENIZER_PATH, trust_remote_code=True)
# model = AutoModel.from_pretrained(MODEL_PATH, trust_remote_code=True, device_map="auto").eval()

finetune_path = '/mnt/workspace/ChatGLM3/finetune_demo/output/checkpoint-3000'
model, tokenizer = load_model_and_tokenizer(finetune_path)

# add .quantize(bits=4, device="cuda").cuda() before .eval() to use int4 model
# must use cuda to load int4 model

os_name = platform.system()
clear_command = 'cls' if os_name == 'Windows' else 'clear'
stop_stream = False

welcome_prompt = "欢迎使用 ChatGLM3-6B 模型,输入内容即可进行对话,clear 清空对话历史,stop 终止程序"


def build_prompt(history):
    prompt = welcome_prompt
    for query, response in history:
        prompt += f"\n\n用户:{query}"
        prompt += f"\n\nChatGLM3-6B:{response}"
    return prompt


def main():
    past_key_values, history = None, []
    global stop_stream
    print(welcome_prompt)
    while True:
        query = input("\n用户:")
        if query.strip() == "stop":
            break
        if query.strip() == "clear":
            past_key_values, history = None, []
            os.system(clear_command)
            print(welcome_prompt)
            continue
        print("\nChatGLM:", end="")
        current_length = 0
        for response, history, past_key_values in model.stream_chat(tokenizer, query, history=history, top_p=1,
                                                                    temperature=0.01,
                                                                    past_key_values=past_key_values,
                                                                    return_past_key_values=True):
            if stop_stream:
                stop_stream = False
                break
            else:
                print(response[current_length:], end="", flush=True)
                current_length = len(response)
        print("")


if __name__ == "__main__":
    main()
最后使用 python cli_demo.py执行测试


