往期:
从项目开始学习Vue——01
目录标题
- 一、基础插件
- (一)路由Vue Router
- (二)导航守卫(路由拦截器)
- 二、Vuex
- (一)什么是Vuex
- Vuex的部分介绍内容:
- (二)何时使用Vuex
- (三)具体使用
- State
- getter
- mutation
- Action
- Module
- 三、element-ui
- 四、布局插件
- 五、js-cookie的使用方法
- 六、Axios
- 七、加密jsencrypt
- 八、加载进度nprogress
- 九、自定义vue指令,实现权限控制
- 十、vue组件
- 十一、其他
- 十二、一边学,一边做(仿制若依框架)
一、基础插件
(一)路由Vue Router
Vue Router 官方文档
Vue Router 的作用简单来说就是在同一个页面中实现不同模块页面的动态加载,不需要刷新页面和新建标签页。
比如这种系统:可以在同一个页面加载不同模块的页面,打开、切换和关闭页面都非常流畅,用户体验性大大提高。(单页面系统SPA)
若以开源框架地址

一个简单的demo。利用element-ui和Vue Router 实现
一般来说我们的页面不可能像demo一样简单丑陋,一般需要结合layout(布局)使用,需要添加侧边导航栏,顶部导航栏,内容展示栏,个人中心栏,设置栏等。
(二)导航守卫(路由拦截器)
路由前拦截器
路由后拦截器
一个例子:
/**
 * 路由拦截器
 * */
import store from '../store'
import router from './index'
import { Message } from 'element-ui'
import NProgress from 'nprogress'
import 'nprogress/nprogress.css'
import { getToken } from '@/utils/auth'

NProgress.configure({ showSpinner: false })

const whiteList = ['/login', '/register']

//添加一个导航钩子,它会在每次路由之前被执行。返回一个用来移除该钩子的函数。

//to: 即将要进入的目标 用一种标准化的方式
// from: 当前导航正要离开的路由 用一种标准化的方式
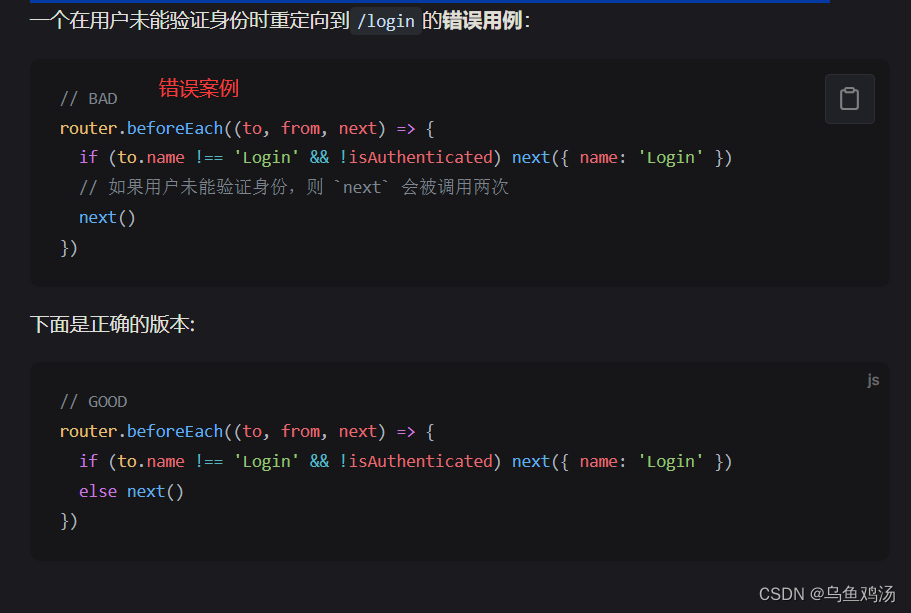
//在之前的 Vue Router 版本中,还可以使用 第三个参数 next
// 。这是一个常见的错误来源,我们经过 RFC 讨论将其移除。
// 然而,它仍然是被支持的,这意味着你可以向任何导航守卫传递第三个参数。
// 在这种情况下,确保 next 在任何给定的导航守卫中都被严格调用一次。
// 它可以出现多于一次,但是只能在所有的逻辑路径都不重叠的情况下,否则钩子永远都不会被解析或报错。
router.beforeEach((to, from, next) => {
    //开启加载进度条
    NProgress.start()
    if (getToken()) {
        /* has token*/
        if (to.path === '/login') {
            next({ path: '/' })
            NProgress.done()
        } else {
            if (store.state.user.roles.length === 0) {
                // 判断当前用户是否已拉取完user_info信息
                store.dispatch('GetInfo').then(() => {
                    next({ path: '/' })
                }).catch(err => {
                    store.dispatch('LogOut').then(() => {
                        Message.error(err)
                        next({ path: '/' })
                    })
                })
            } else {
                next()
            }
        }
    } else {
        // 没有token
        if (whiteList.indexOf(to.path) !== -1) {
            // 在免登录白名单,直接进入
            next()
        } else {
            // 否则全部重定向到登录页
            next('/login')
            NProgress.done()
        }
    }
})

//路由后
router.afterEach(() => {
  NProgress.done()
})
守卫方法()三个重要参数
- to: 即将要进入的目标
- from: 当前导航正要离开的路由
- next :在之前的 Vue Router 版本中,还可以使用 第三个参数 next 。这是一个常见的错误来源,我们经过 RFC 讨论将其移除。然而,它仍然是被支持的,这意味着你可以向任何导航守卫传递第三个参数。在这种情况下,确保 next 在任何给定的导航守卫中都被严格调用一次。它可以出现多于一次,但是只能在所有的逻辑路径都不重叠的情况下,否则钩子永远都不会被解析或报错。
二、Vuex
Vuex官网
(一)什么是Vuex

如果你有了解过vue框架提供的状态管理:
store 模式那么Vuex理解起来十分简单,他们的作用是基本一致的。
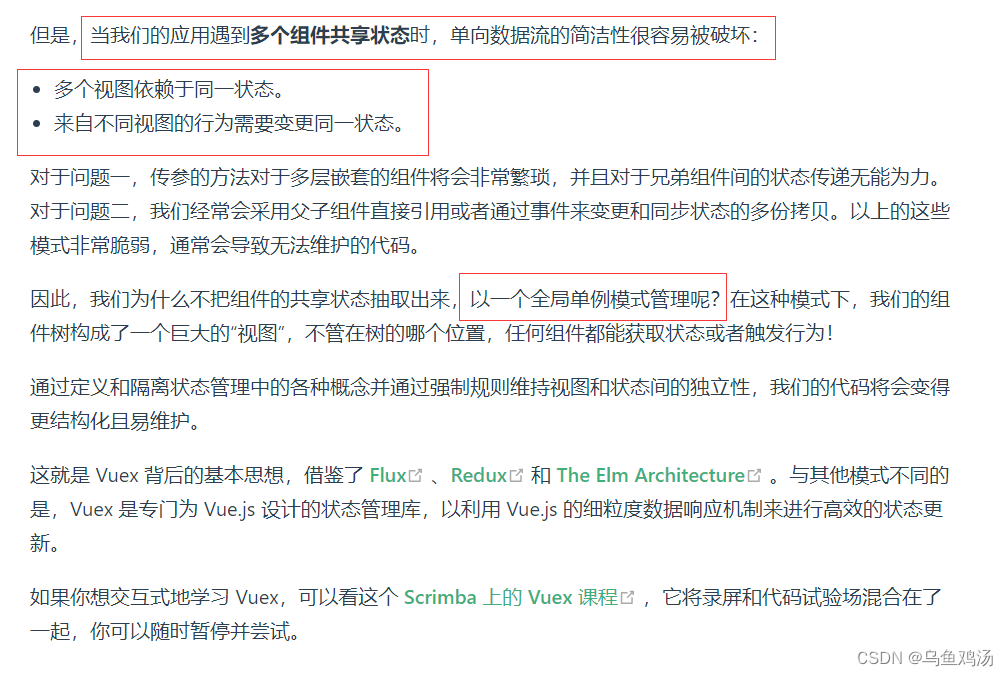
Vuex 中管理的变量(内容)是全局唯一的,也就是单例模式。不同页面获取这个变量的内容都是一致的。
Vuex的部分介绍内容:
(二)何时使用Vuex
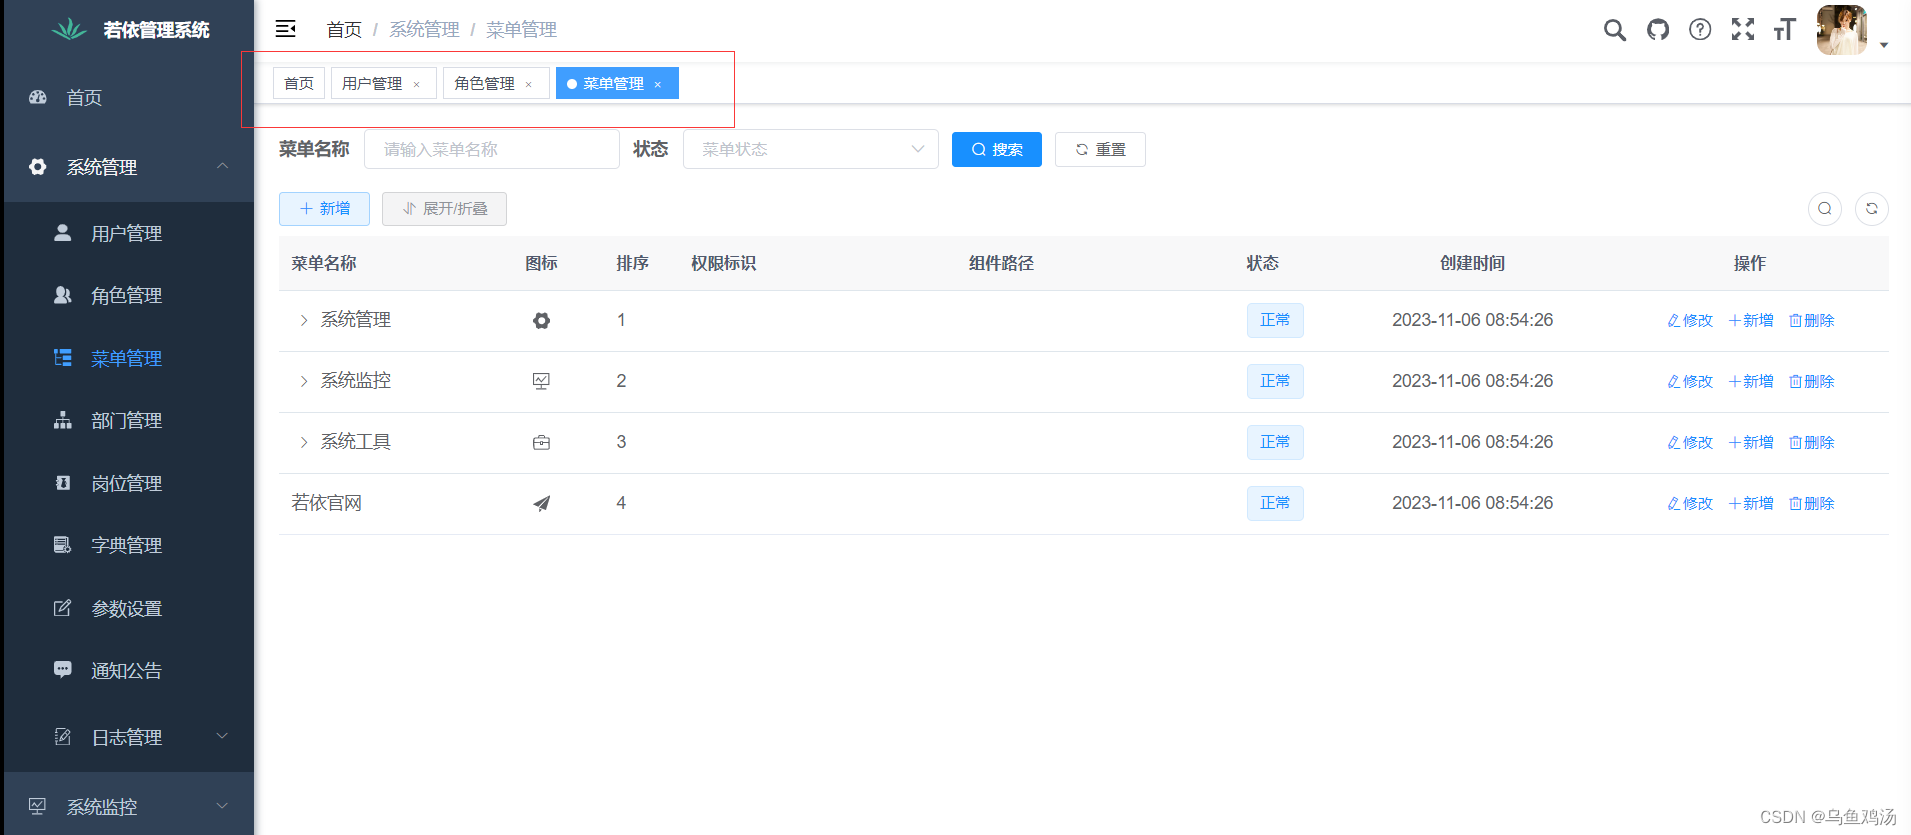
如果您需要构建一个中大型单页应用,您很可能会考虑如何更好地在组件外部管理状态,Vuex 将会成为自然而然的选择。
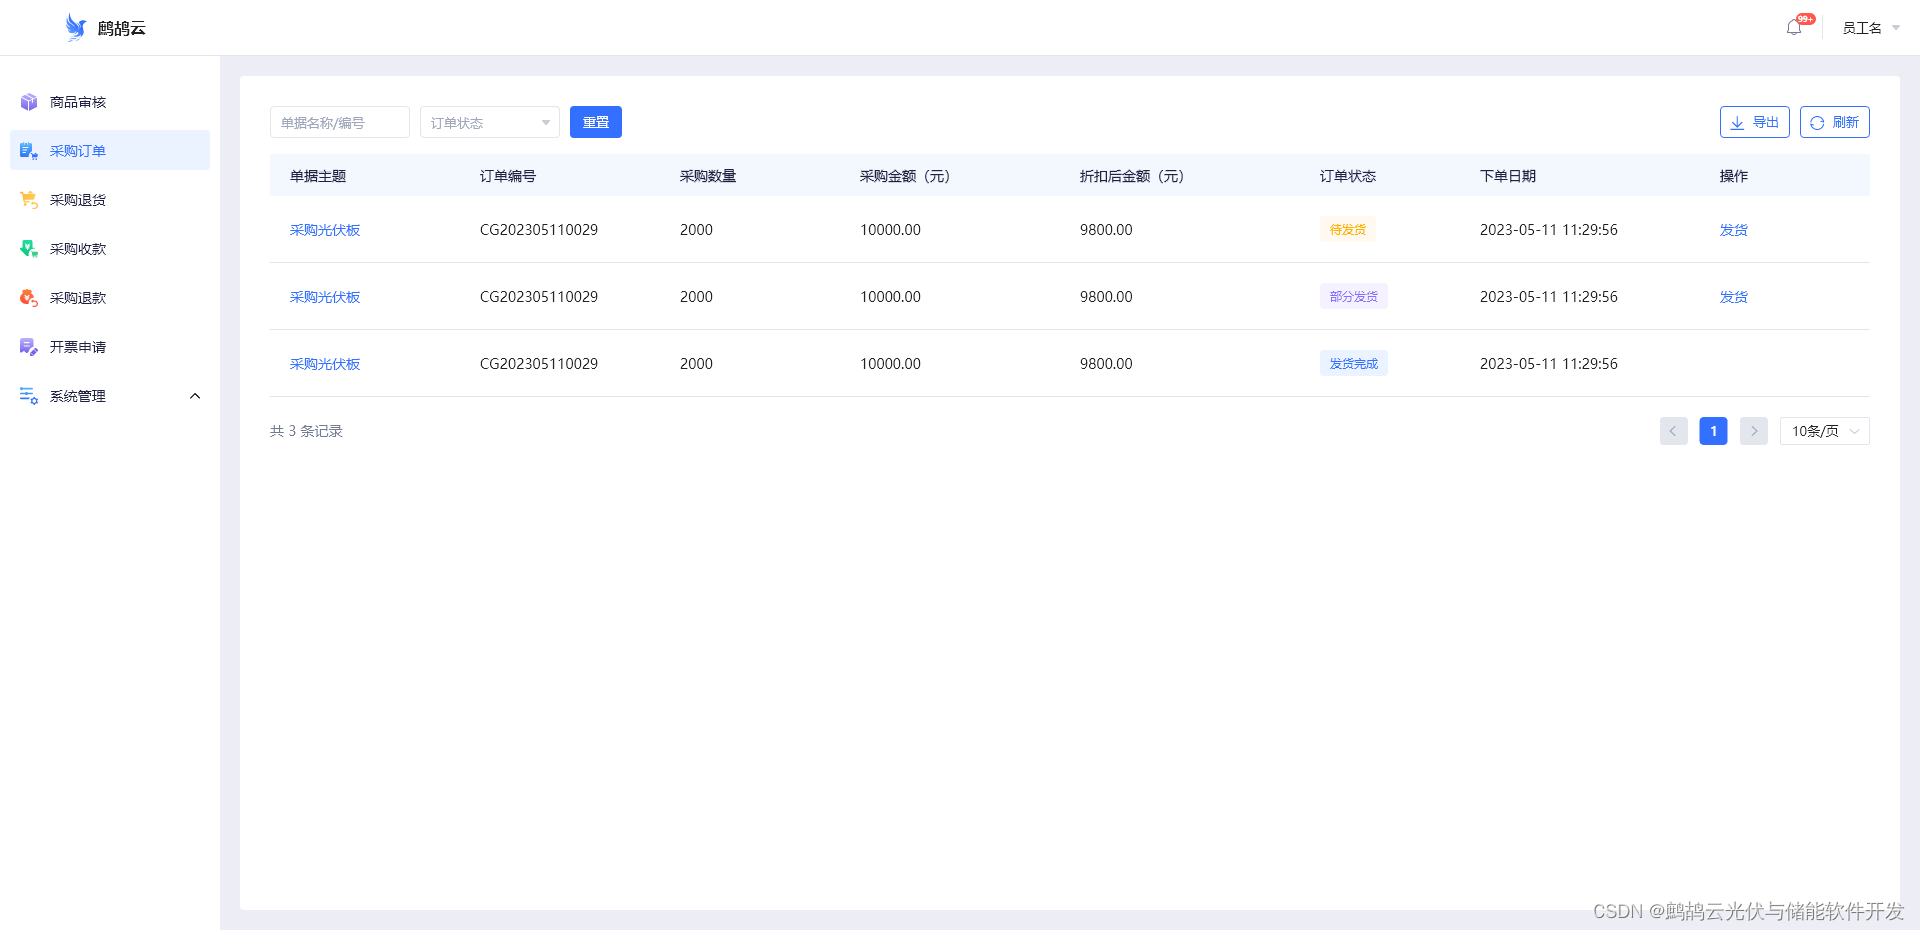
下面这种就是单页应用:
(三)具体使用
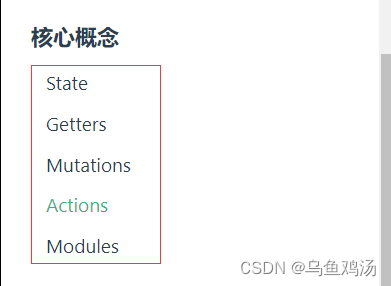
由以下部分组成:
State
存储在 Vuex 中的数据和 Vue 实例中的 data 遵循相同的规则。
创建
import Vue from 'vue'
import Vuex from 'vuex'

Vue.use(Vuex)

export default new Vuex.Store({
  state: {
    name: 'lihua',
  },
  getters: {
  },
  mutations: {
  },
  actions: {
  },
  modules: {
  }
})
在vue中调用state:
通过在根实例中注册 store 选项,该 store 实例会注入到根组件下的所有子组件中,且子组件能通过 this.$store 访问到。让我们更新下 Counter 的实现:
- 在根实例中注册 store 选项
import Vue from 'vue'
import App from './App.vue'
import router from './router'
import store from './store'

Vue.config.productionTip = false

new Vue({
  router,
  store, // 在根实例中注册 store 选项
  render: function (h) { return h(App) }
}).$mount('#app')
- 调用:
<template>
    <div>
        <div>{{name}}</div>
        <button v-on:click="onEvent">获取Vuex State变量</button>
    </div>
</template>

<script>
    export default {
        data() {
            return {
                name: '1',
            }
        },
        name: 'HelloWorld',
        props: {
            msg: String
        },
        methods: {
            onEvent: function () {

                this.name = this.$store.state.name
                // console.log(this.$store.state.name)
            },
        },
    }
</script>

<!-- Add "scoped" attribute to limit CSS to this component only -->
<style scoped>

</style>
getter
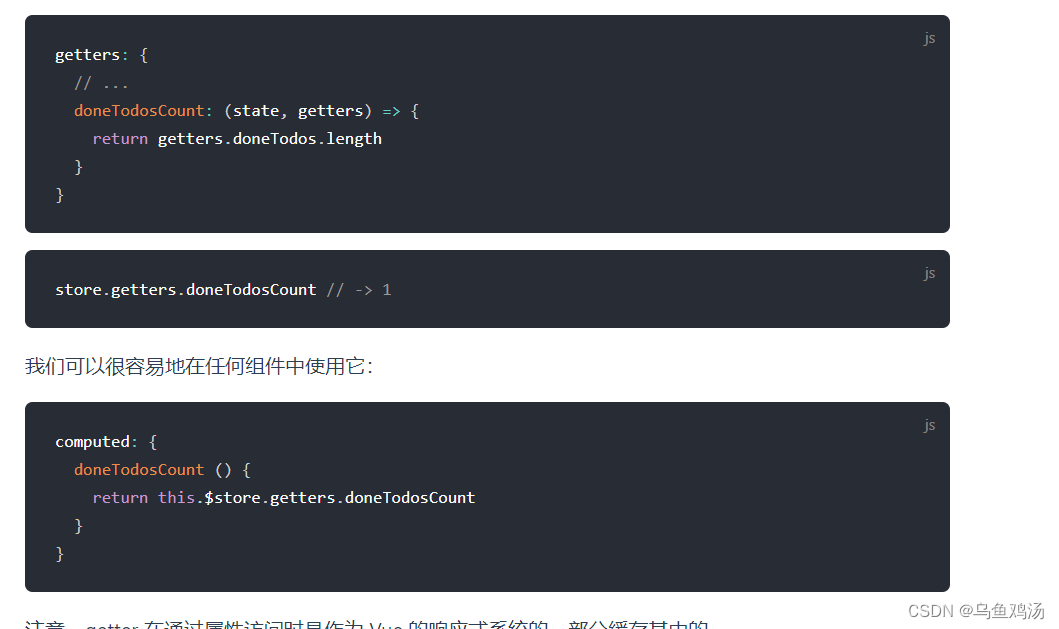
Vuex 允许我们在 store 中定义“getter”(可以认为是 store 的计算属性)。就像计算属性一样,getter 的返回值会根据它的依赖被缓存起来,且只有当它的依赖值发生了改变才会被重新计算。
具体使用
mutation
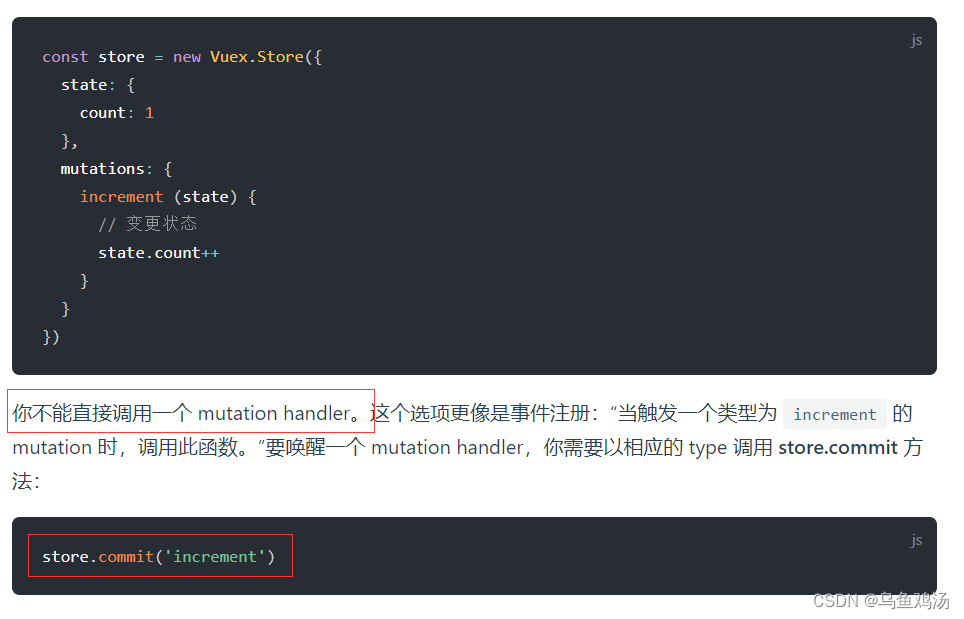
更改 Vuex 的 store 中的状态的唯一方法是提交 mutation。Vuex 中的 mutation 非常类似于事件:每个 mutation 都有一个字符串的 事件类型 (type) 和 一个 回调函数 (handler)。这个回调函数就是我们实际进行状态更改的地方,并且它会接受 state 作为第一个参数:
Action
Action 类似于 mutation,不同在于:
- Action 提交的是 mutation,而不是直接变更状态。
- Action 可以包含任意异步操作。
Module
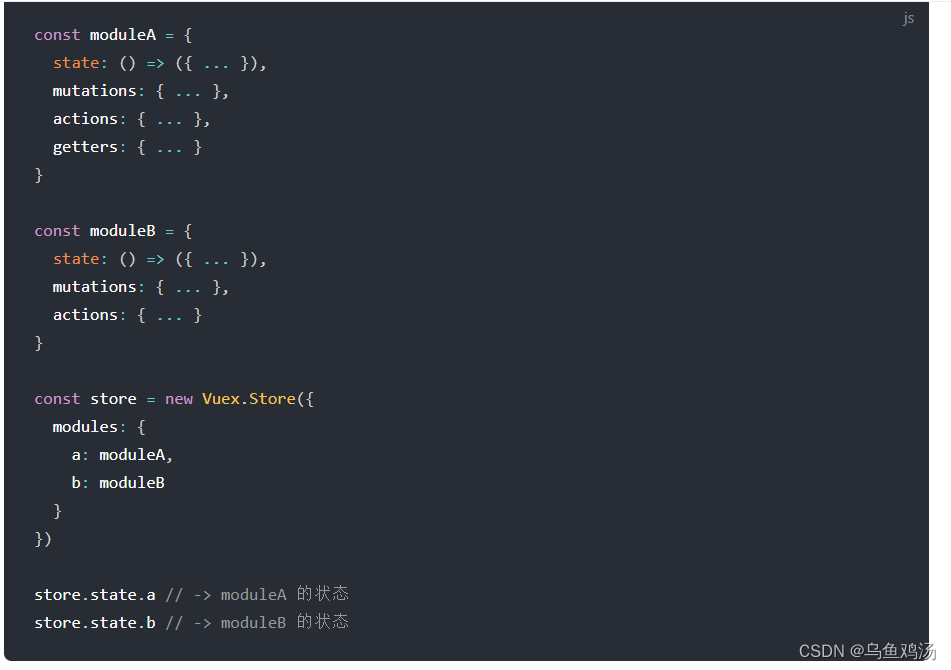
为了解决以上问题,Vuex 允许我们将 store 分割成模块(module)。每个模块拥有自己的 state、mutation、action、getter、甚至是嵌套子模块——从上至下进行同样方式的分割:
例子:
三、element-ui
官方文档
四、布局插件
Vue Grid Layout -️ 适用Vue.js的栅格布局系统
五、js-cookie的使用方法
js-cookie的使用方法
这个插件多用于保存一下token到浏览器的cookie中
例子:
import Cookies from 'js-cookie'

const TokenKey = 'Admin-Token'

export function getToken() {
  return Cookies.get(TokenKey)
}

export function setToken(token) {
  return Cookies.set(TokenKey, token)
}

export function removeToken() {
  return Cookies.remove(TokenKey)
}
六、Axios
Axios 是一个基于 promise 网络请求库
一个例子:
import axios from 'axios'
import { Notification, MessageBox, Message, Loading } from 'element-ui'
import store from '@/store'
import { getToken } from '@/utils/auth'
import errorCode from '@/utils/errorCode'
import cache from '@/utils/cache'

axios.defaults.headers['Content-Type'] = 'application/json;charset=utf-8'
// 创建axios实例
const service = axios.create({
  // axios中请求配置有baseURL选项,表示请求URL公共部分
  // 请求路径前缀,一般从.env.production .env.development 环境变量中获取
  // baseURL: process.env.VUE_APP_BASE_API,
  baseURL:'/dev-api',
  // 超时
  timeout: 10000
})
/**
 * 参数处理
 * @param {*} params  参数
 */
function tansParams(params) {
  let result = ''
  for (const propName of Object.keys(params)) {
    const value = params[propName];
    var part = encodeURIComponent(propName) + "=";
    if (value !== null && value !== "" && typeof (value) !== "undefined") {
      if (typeof value === 'object') {
        for (const key of Object.keys(value)) {
          if (value[key] !== null && value[key] !== "" && typeof (value[key]) !== 'undefined') {
            let params = propName + '[' + key + ']';
            var subPart = encodeURIComponent(params) + "=";
            result += subPart + encodeURIComponent(value[key]) + "&";
          }
        }
      } else {
        result += part + encodeURIComponent(value) + "&";
      }
    }
  }
  return result
}
// request拦截器
service.interceptors.request.use(config => {
  // 是否需要设置 token
  const isToken = (config.headers || {}).isToken === false
  // 是否需要防止数据重复提交
  const isRepeatSubmit = (config.headers || {}).repeatSubmit === false
  if (getToken() && !isToken) {
    config.headers['Authorization'] = 'Bearer ' + getToken() // 让每个请求携带自定义token 请根据实际情况自行修改
  }
  // get请求映射params参数
  if (config.method === 'get' && config.params) {
    let url = config.url + '?' + tansParams(config.params);
    url = url.slice(0, -1);
    config.params = {};
    config.url = url;
  }

  //防止重复提交
  if (!isRepeatSubmit && (config.method === 'post' || config.method === 'put')) {
    const requestObj = {
      url: config.url,
      data: typeof config.data === 'object' ? JSON.stringify(config.data) : config.data,
      time: new Date().getTime()
    }
    const sessionObj = cache.session.getJSON('sessionObj')
    if (sessionObj === undefined || sessionObj === null || sessionObj === '') {
      cache.session.setJSON('sessionObj', requestObj)
    } else {
      const s_url = sessionObj.url;                  // 请求地址
      const s_data = sessionObj.data;                // 请求数据
      const s_time = sessionObj.time;                // 请求时间
      const interval = 1000;                         // 间隔时间(ms),小于此时间视为重复提交
      if (s_data === requestObj.data && requestObj.time - s_time < interval && s_url === requestObj.url) {
        const message = '数据正在处理,请勿重复提交';
        console.warn(`[${s_url}]: ` + message)
        return Promise.reject(new Error(message))
      } else {
        cache.session.setJSON('sessionObj', requestObj)
      }
    }
  }
  return config
}, error => {
    console.log(error)
    Promise.reject(error)
})

// 响应拦截器
service.interceptors.response.use(res => {
    // 未设置状态码则默认成功状态
    const code = res.data.code || 200;
    // 获取错误信息
    const msg = errorCode[code] || res.data.msg || errorCode['default']
    // 二进制数据则直接返回
    if (res.request.responseType ===  'blob' || res.request.responseType ===  'arraybuffer') {
      return res.data
    }
    if (code === 401) {
      MessageBox.confirm('登录状态已过期,您可以继续留在该页面,或者重新登录', '系统提示', { confirmButtonText: '重新登录', cancelButtonText: '取消', type: 'warning' }).then(() => {

      }).catch(() => {

      });
      return Promise.reject('无效的会话,或者会话已过期,请重新登录。')
    } else if (code === 500) {
      Message({ message: msg, type: 'error' })
      return Promise.reject(new Error(msg))
    } else if (code === 601) {
      Message({ message: msg, type: 'warning' })
      return Promise.reject('error')
    } else if (code !== 200) {
      Notification.error({ title: msg })
      return Promise.reject('error')
    } else {
      return res.data
    }
  },
  error => {
    console.log('err' + error)
    let { message } = error;
    if (message === "Network Error") {``
      message = "后端接口连接异常";
    } else if (message.includes("timeout")) {
      message = "系统接口请求超时";
    } else if (message.includes("Request failed with status code")) {
      message = "系统接口" + message.substr(message.length - 3) + "异常";
    }
    Message({ message: message, type: 'error', duration: 5 * 1000 })
    return Promise.reject(error)
  }
)


export default service
七、加密jsencrypt
可以用于加密前端账号、密码和一些敏感信息。
import JSEncrypt from 'jsencrypt/bin/jsencrypt.min'

// 密钥对生成 http://web.chacuo.net/netrsakeypair

const publicKey = 'MFwwDQYJKoZIhvcNAQEBBQADSwAwSAJBAKoR8mX0rGKLqzcWmOzbfj64K8ZIgOdH\n' +
  'nzkXSOVOZbFu/TJhZ7rFAN+eaGkl3C4buccQd/EjEsj9ir7ijT7h96MCAwEAAQ=='

const privateKey = 'MIIBVAIBADANBgkqhkiG9w0BAQEFAASCAT4wggE6AgEAAkEAqhHyZfSsYourNxaY\n' +
  '7Nt+PrgrxkiA50efORdI5U5lsW79MmFnusUA355oaSXcLhu5xxB38SMSyP2KvuKN\n' +
  'PuH3owIDAQABAkAfoiLyL+Z4lf4Myxk6xUDgLaWGximj20CUf+5BKKnlrK+Ed8gA\n' +
  'kM0HqoTt2UZwA5E2MzS4EI2gjfQhz5X28uqxAiEA3wNFxfrCZlSZHb0gn2zDpWow\n' +
  'cSxQAgiCstxGUoOqlW8CIQDDOerGKH5OmCJ4Z21v+F25WaHYPxCFMvwxpcw99Ecv\n' +
  'DQIgIdhDTIqD2jfYjPTY8Jj3EDGPbH2HHuffvflECt3Ek60CIQCFRlCkHpi7hthh\n' +
  'YhovyloRYsM+IS9h/0BzlEAuO0ktMQIgSPT3aFAgJYwKpqRYKlLDVcflZFCKY7u3\n' +
  'UP8iWi1Qw0Y='

// 加密
export function encrypt(txt) {
  const encryptor = new JSEncrypt()
  encryptor.setPublicKey(publicKey) // 设置公钥
  return encryptor.encrypt(txt) // 对数据进行加密
}

// 解密
export function decrypt(txt) {
  const encryptor = new JSEncrypt()
  encryptor.setPrivateKey(privateKey) // 设置私钥
  return encryptor.decrypt(txt) // 对数据进行解密
}
八、加载进度nprogress

可以在请求拦截器中使用
import NProgress from 'nprogress'
import 'nprogress/nprogress.css'

NProgress.configure({ showSpinner: false })
router.beforeEach((to, from, next) => {
    //开启加载进度条
    NProgress.start()
})

//路由后
router.afterEach(() => {
  // 关闭进度条
  NProgress.done()
})
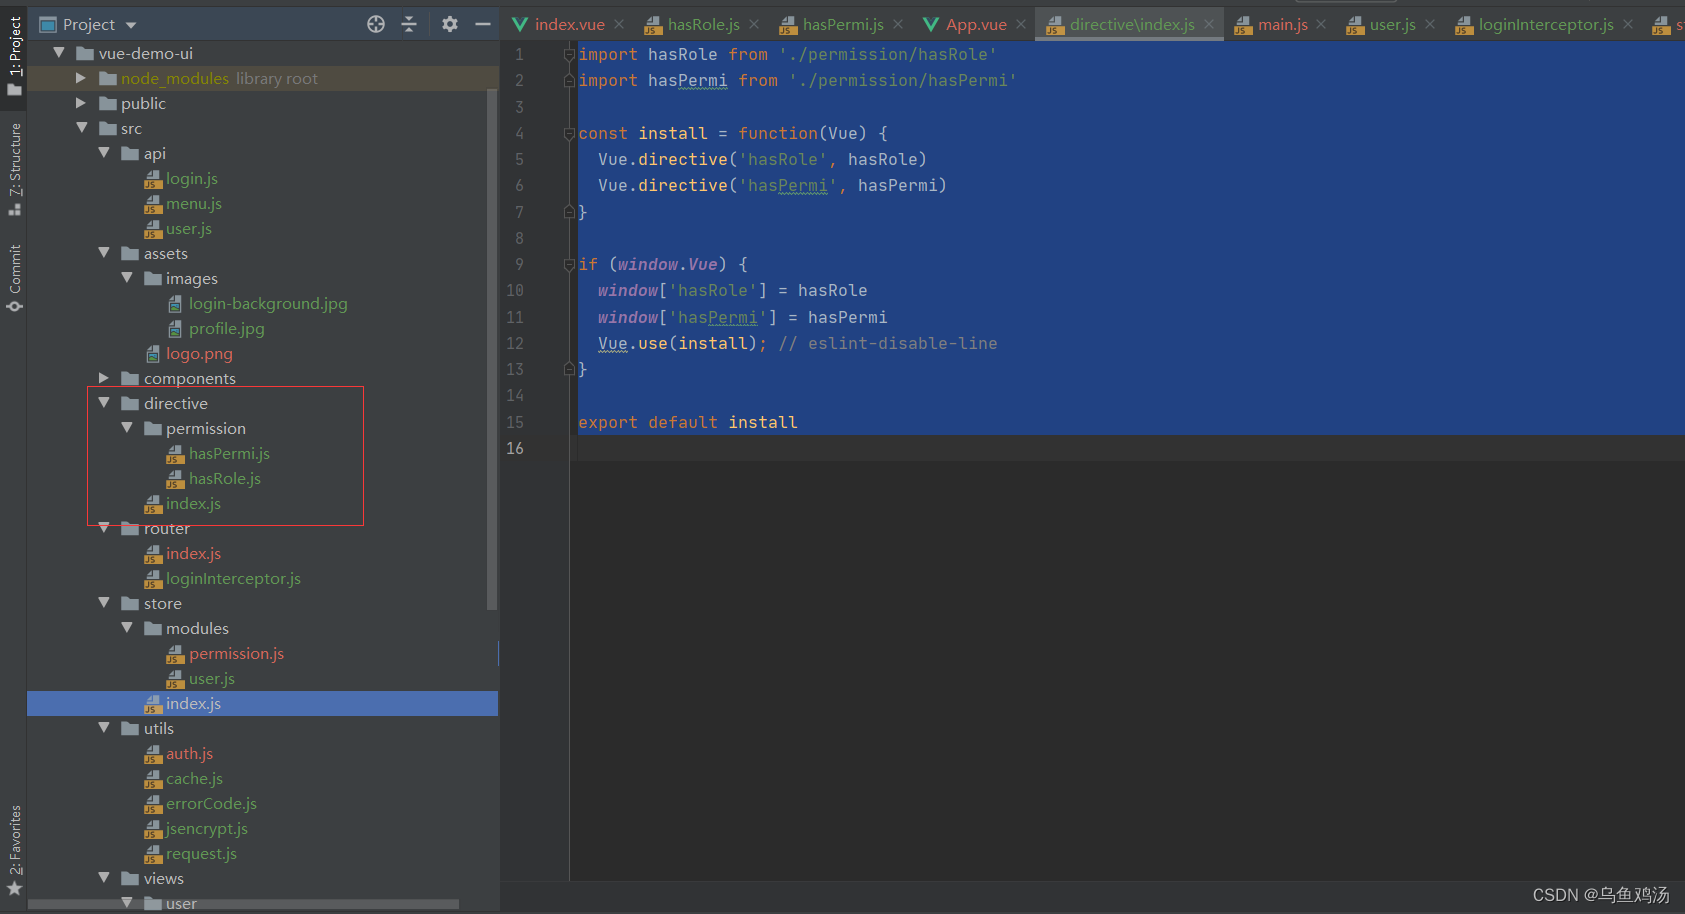
九、自定义vue指令,实现权限控制
hasPermi.js
 /**
 * v-hasPermi 操作权限处理
 * Copyright (c) 2019 ruoyi
 */

import store from '@/store'

export default {
  inserted(el, binding, vnode) {
    const { value } = binding
    const all_permission = "*:*:*";
    const permissions = store.getters && store.getters.permissions

    if (value && value instanceof Array && value.length > 0) {
      const permissionFlag = value

      const hasPermissions = permissions.some(permission => {
        return all_permission === permission || permissionFlag.includes(permission)
      })

      if (!hasPermissions) {
        el.parentNode && el.parentNode.removeChild(el)
      }
    } else {
      throw new Error(`请设置操作权限标签值`)
    }
  }
}
汇总指令
index.js
import hasRole from './permission/hasRole'
import hasPermi from './permission/hasPermi'

const install = function(Vue) {
  Vue.directive('hasRole', hasRole)
  Vue.directive('hasPermi', hasPermi)
}

if (window.Vue) {
  window['hasRole'] = hasRole
  window['hasPermi'] = hasPermi
  Vue.use(install); // eslint-disable-line
}

export default install
在main.js中导入
import directive from './directive' // directive

Vue.use(directive)
使用
<div  v-hasPermi="['system:user:edit']" >111</div>
<div  v-has-permi="['1:2:3']" >111</div>
十、vue组件
https://www.cnblogs.com/cq1715584439/p/11734041.html
十一、其他
新手可能像我一样对js文件里面的 import 、export 、export default 有些懵逼。
其实看名字就能大概猜出他们的意思,一个是导入、一个是导出。
如果有大量js文件,那么js之间的变量、函数、对象、类应该如果调用和管理呢。如果js文件很多,js之间调来调去就会很乱,可维护性很低。这个时候就凸显出import 、export 字段的用处了,如果一个js,需要引入其他js的变量、函数,那么你就用import 导入一个变量、函数、对象。export 、export default 与 import 相反,就是你需要给这个 js 导出什么给外部js调用。
其他更多可以参考这篇了解
十二、一边学,一边做(仿制若依框架)
未完结
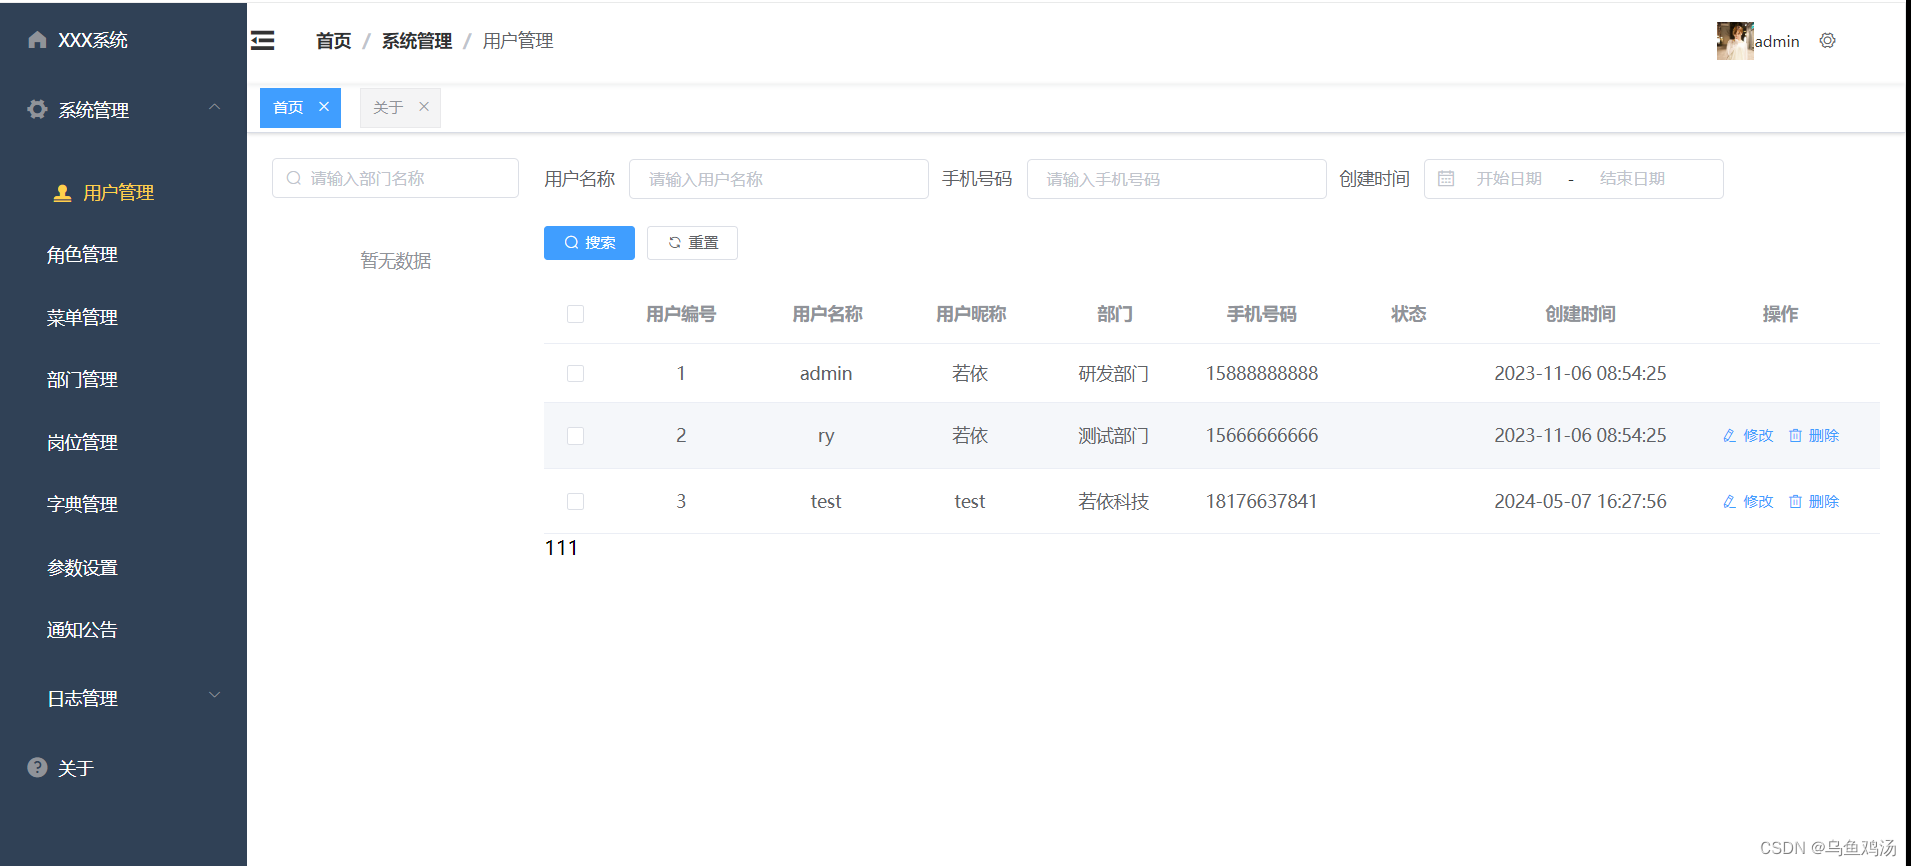
**注意:**需要启动后端接口,去拉取若依后端代码,并启动
代码位置
