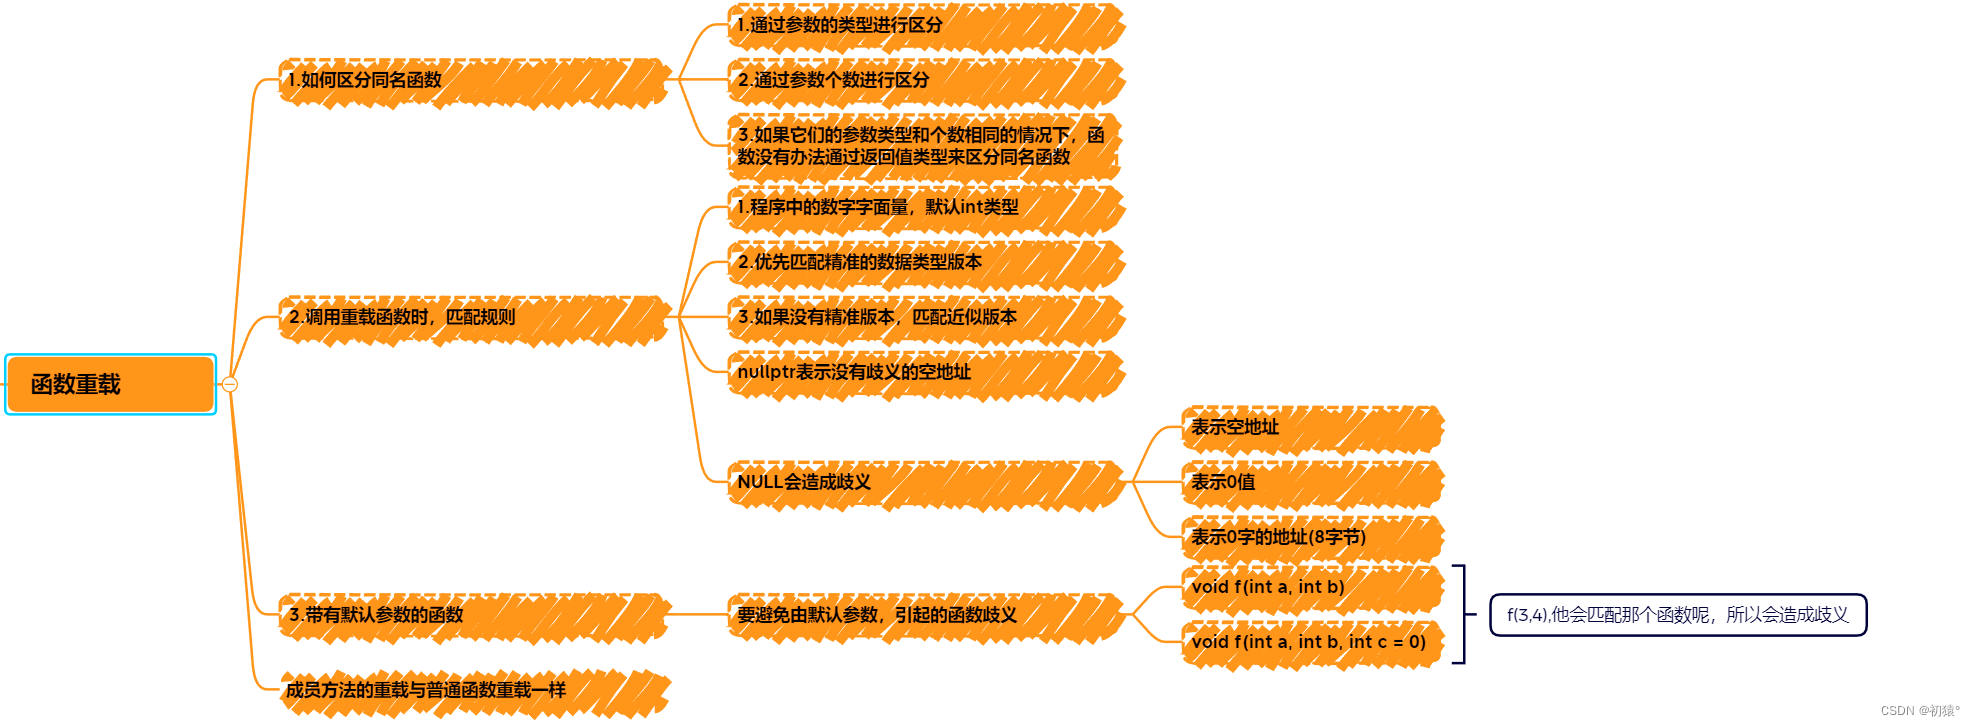
重载的概念
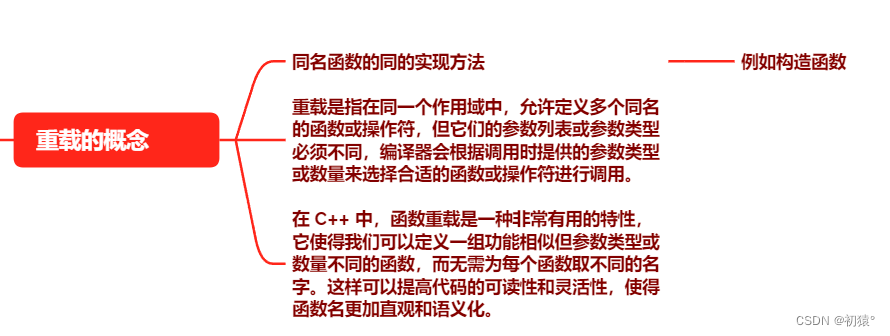
一.函数重载
代码演示例子:
#include<iostream>
using namespace std;

//函数名相同,在是每个函数的参数不相同
void output(int x) {
    printf("output int : %d\n", x);
    return ;
}

void output(long long x) {
    printf("output long long : %llX\n", x);
    return ;
}

void output(const char *s) {
    if (!s) {
        printf("output string : nullptr\n");
        return ;
    }
    printf("output string : %s\n", s);
    return ;
}

void output(int x, int y) {
    printf("output double int : %d, %d\n", x, y);
    return ;
}
//如果调用这个函数时,没有传入参数3,也就是c
//那么c的默认值就为123,并且程序不会编译不通过
void output(int a, char b, int c = 123) {
    printf("output a = %d, b = %c, c = %d\n", a, b, c);
    return ;
}

//如果这里没有第三个参数,那么就会造成编译报错
//因为没有办法通过返回值类型进行区分重载类型
//也就是没有办法区分和上面的double int进行区分
const char *output(int a, int b, char c) {
    printf("output a = %d, b = %d, c = %c\n", a, b, c);
    return "yes";
}


int main() {
    output(3);//这里匹配的是int类型的output
    //在数字后面加上LL 表示这个数字是longlong类型
    output(3LL);//这里匹配的是longlong类型的output
    output("hello world");//匹配参数为char *的output
    output(3, 4);//匹配参数为两个int类型的output
    output(3LL, 4);//近似匹配了两个int类型的output
    //下面这个output(NULL),他会匹配到int类型
    //NULL可以表示成0值
    //然后它也可以表示成一个地址,然后它又是0值的地址,地址有64位也就是8字节,那他也会匹配long long类型
    //然后还表示一个空地址,还会匹配到char *类型
    //output(NULL);
    //而在C++中 nullptr只表示空地址,这样他就会精确匹配对应的函数
    output(nullptr);
    output(12, 'p');
    cout << output(3, 4, 'c') << endl;
    return 0;
}然后如果output(NULL)那行代码没有注释掉,那么就会出现,注释说明的情况,无法匹配造成歧义:
 对于成员函数重载和普通函数的重载一样,我就不用代码进行演示了。
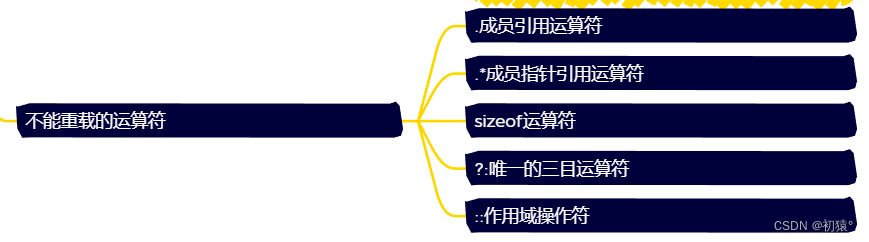
二.运算符重载
不能重载的运算符:
类外:

参考代码:
#include <iostream>
#include <cstdio>
using namespace std;

class Point {
public :
    Point() : x(0), y(0), output_width(0) {}
    Point(int x, int y) : x(x), y(y), output_width(0) {}
private :
    int x, y;
    int output_width;
    //利用友元进行解决私有成员属性的访问问题
    friend ostream &operator<<(ostream &out, const Point &p);
    friend int operator*(const Point &, const Point &);
    friend Point operator+(const Point &, int );
    friend double operator*(const Point &, double );
    friend double operator*(double , const Point &);
    friend Point &operator-(Point &, int x) ;
    friend Point &operator-(Point &, Point &) ;
    friend Point &operator-(Point &, const char *) ;
};
//ostream类型就像cout的对象的类型
//加上const为了同时支持const和非const限定的对象
ostream &operator<<(ostream &out, const Point &p) {
    out << "("  << p.x << ", " << p.y << ")";
    return out;
}

int operator*(const Point &p1, const Point &p2) {
    return p1.x * p2.x + p1.y * p2.y;
}

Point operator+(const Point &p1, int x) {
    Point p(p1.x + x, p1.y + x);
    return p;
}

double operator*(const Point &p1, double x) {
    return p1.x * x + p1.y * x;
}

double operator*(double x, const Point &p1) {
    //这里他调用的就是上面运算符重载的方法
    return p1 * x;
}

Point &operator-(Point &p, int x) {
    p.output_width = x;
    return p;
}

Point &operator-(Point &p1, Point &p2) {
    char str[100] = {0};
    snprintf(str, 99, "(%%%dd, %%%dd)", p1.output_width, p1.output_width);
    printf(str, p2.x, p2.y);
    return p1;
}

Point &operator-(Point &p, const char *s) {
    printf("%s", s);
    return p;
}

Point &operator^(Point &p1, const Point &p2) {

    return p1;
}

Point &operator^(Point &p1, int x) {

    return p1;
}

int main() {
    Point p1(5, 6), p2(3, 6), p3(6, 9), p4(10, 12);
    //cout他也不认识我们创建的Point类
    //如果要对cout进行对p1进行输出
    //那么我们就要对<<这个左移运算符进行重载
    cout << p1 << endl;
    //这里对运算符的重载可以不用实现和我一样的,可以通过自己的想象然后来实现
    //然后实现的结果和自己的想象的需要是一样的结果
    cout << p1 * p2 << endl;
    cout << p1 * 2.3 << endl;
    cout << 2.3 * p1 << endl;
    cout << p1 + 5 << endl;
    //实现效果
    //p1 - 6设置输出的位宽为6
    //- p2 输出p2的值,并且输入的位宽为p1的位宽
    //- "\n" 换行
    p1 - 6 - p2 - "\n";
    return 0;
}
练习:
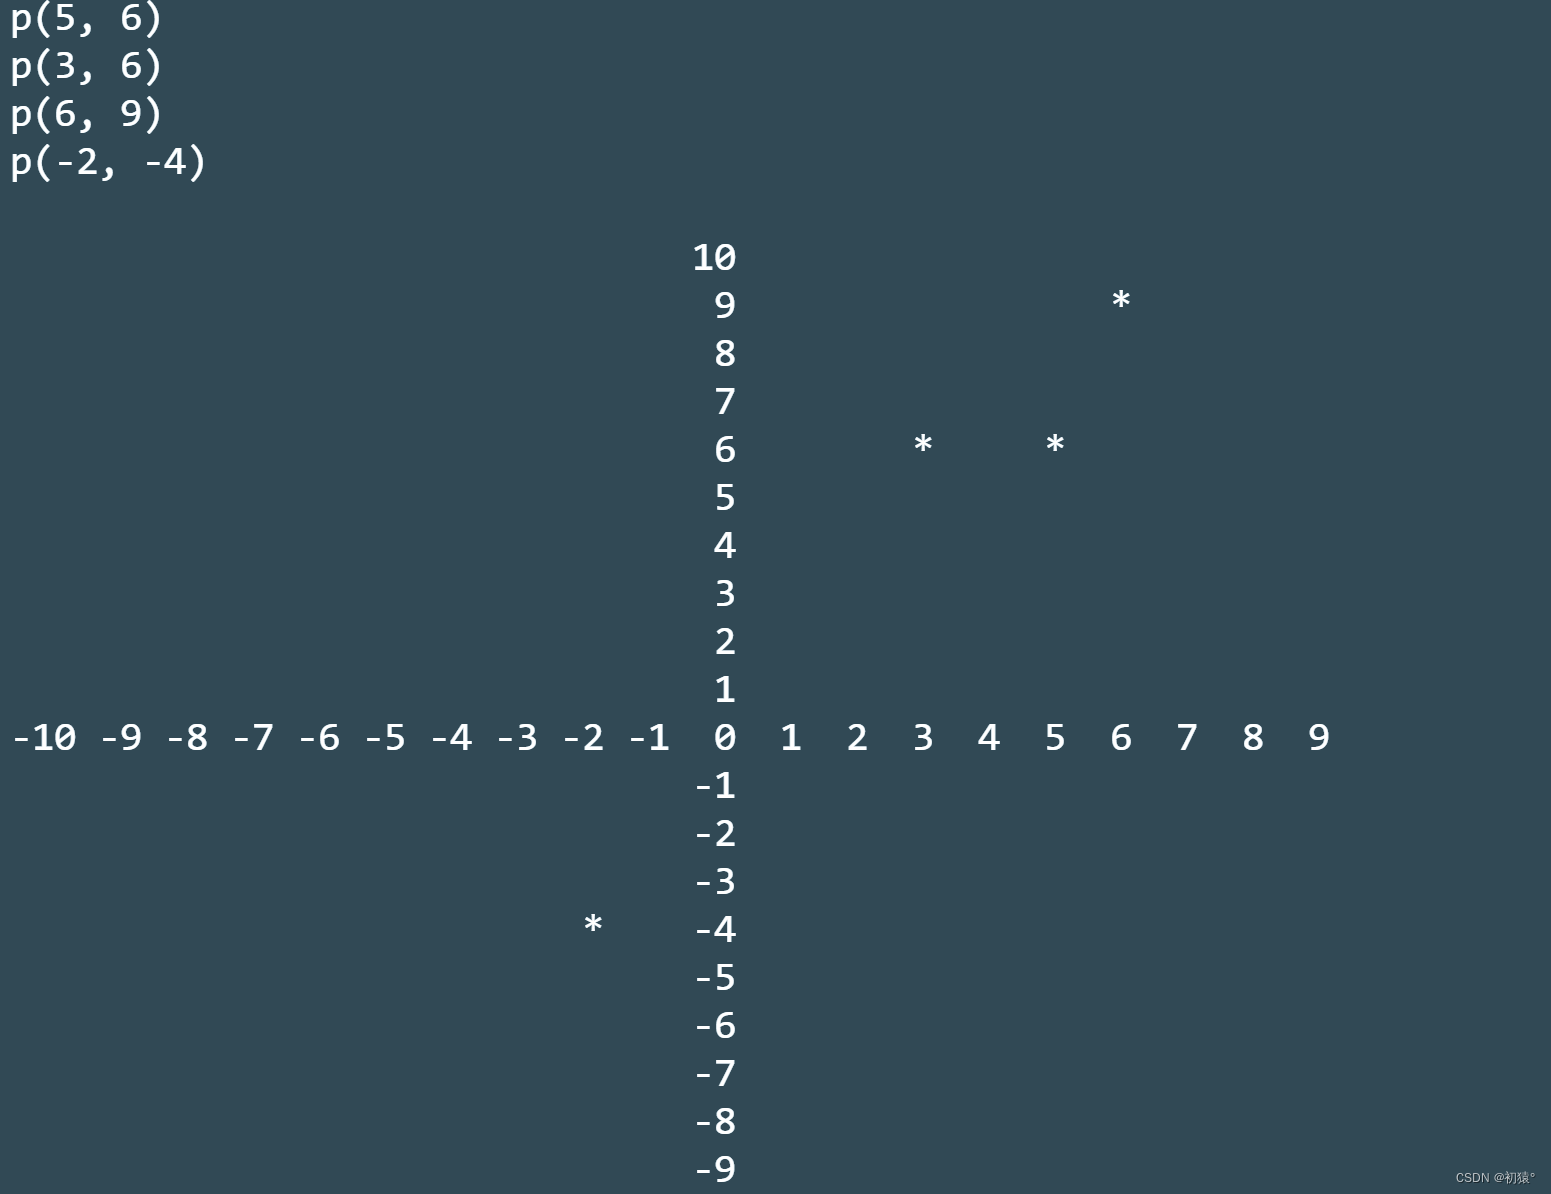
实现下面的代码:
    Point p1(5, 6), p2(3, 6), p3(6, 9), p4(-2, -4);
    cout << p1 << p2 << p3 << p4 << endl;
    //^运算符将每个类中的成员属性x,y输出到一个坐标轴中
    //^1时打印出这个坐标轴
    p1^p2^p3^p4^1;
参考代码:
#include <iostream>
#include <cstdio>
using namespace std;

#define MAX_N 20

class Point {
public :
    Point() : x(0), y(0) {}
    Point(int x, int y) : x(x), y(y) {}
    ~Point() {}
    static void init_x_y_axis() {
        for (int i = 0; i < MAX_N; i++) {
            Point::x_y_axis[i] = new int[MAX_N + 5];
        }
        return ;
    }
    static void set_x_y_axis(int x, int y) {
        if (x_y_axis[x + MAX_N / 2][y + MAX_N / 2]) return ;
        x_y_axis[x + MAX_N / 2][y + MAX_N / 2] = 1;
        return ;
    }
    void output() {
        cout << sizeof(Point::x_y_axis[0]) << endl;
        cout << sizeof(Point::x_y_axis) << endl;
    }

    friend Point &operator^(Point &, Point &);
    friend Point &operator^(Point &, int);
    friend ostream &operator<<(ostream &, const Point &);
private :
    int x, y;
    //创建一个类属性
    //用来当作坐标轴
    static int **x_y_axis;
};

int **Point::x_y_axis = new int*[MAX_N + 5];


Point &operator^(Point &p1, Point &p2) {
    //将每个对象的x,y输出到坐标轴中
    Point::set_x_y_axis(p1.x, p1.y);
    Point::set_x_y_axis(p2.x, p2.y);
    return p1;
}

Point &operator^(Point &p1, int num) {
    //我们要求的是^1才打印
    if (num != 1) return p1;
    for (int y = MAX_N / 2; y > -MAX_N / 2; y--) {
        for (int x = -MAX_N / 2; x < MAX_N / 2; x++) {
            !x && y && printf("%3d", y);
            if (!y) {
                printf("%3d", x);
            } else {
                if (Point::x_y_axis[x + (MAX_N / 2)][y + (MAX_N / 2)]) {
                    printf("%3c", '*');
                }
                else if (x) printf("%3c", ' ');
            }
        }
        putchar(10);
    }
    return p1;
}

ostream &operator<<(ostream &out, const Point &p1) {
    out << "p("  << p1.x << ", " << p1.y << ")" << endl;
    return out;
}

int main() {
    Point::init_x_y_axis();
    Point p1(5, 6), p2(3, 6), p3(6, 9), p4(-2, -4);
    cout << p1 << p2 << p3 << p4 << endl;
    //^运算符将每个类中的成员属性x,y输出到一个坐标轴中
    //^1时打印出这个坐标轴
    p1^p2^p3^p4^1;
    return 0;
}
实现效果:
实现结果可以和我不一样,但是一定要实现你自己的想法,C++的语法就是非常的灵活并且也非常容易出错,所以这才是C++的难处.
注意:学习C++是学习C++的设计模式。
类内:
对于下面的运算符,只能再类内中重载,但是不是意思是只能重载这些运算符,对于类外可以重载的运算符,类内一样也可以重载
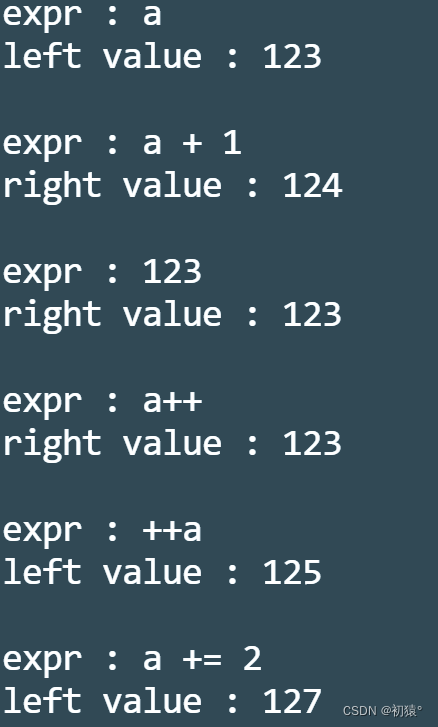
在说类内的运算符之前说一个知识点左值右值:
左值右值

带入代码理解:
#include<iostream>
using namespace std;

#define LEFT_OR_RIGHT(expr) {\
    printf("expr : %s\n", #expr);\
    left_or_right(expr);\
    printf("\n");\
}

void left_or_right(int &x) {
    printf("left value : %d\n", x);
    return ;
}

void left_or_right(int &&x) {
    printf("right value : %d\n", x);
    return ;
}


int main() {
    int a = 123;
    //a可以通过单一变量a访问
    //那么他就是左值
    LEFT_OR_RIGHT(a);
    //a + 1是中间产生临时的一个值
    //那么他无法通过单一变量进行访问到
    //那他就是一个右值
    //因为在过了下面这行代码后,我们没有办法进行通过单一变量进行访问到它
    LEFT_OR_RIGHT(a + 1);
    //任何字面量的值都是右值
    LEFT_OR_RIGHT(123);
    //这里a++你带入进去的是a的值
    //然后带入后,a进行了a += 1
    //那么在这行代码之后你无法通过单一变量去访问到之前的a值
    //那么它就是右值
    LEFT_OR_RIGHT(a++);
    //++a带入的是 a += 1的值
    //在这行代码之后,它可以通过单一变量a去访问到这个值
    //那他就是左值
    LEFT_OR_RIGHT(++a);
    //a += 2同理它可以通过变量a去访问到这个值
    LEFT_OR_RIGHT(a += 2);
    return 0;
}
执行结果,和我代码注释推断的结果是一样的:
然后下一个版本:
#include<iostream>
using namespace std;
#define LEFT_OR_RIGHT(expr) {\
printf("expr : %s\n", #expr);\
left_or_right(expr);\
printf("\n");\
}
void left_or_right(int &&, int);
void left_or_right(int &x, int flag = 1) {
printf("left value : %d\n", x);
if (flag) left_or_right(x, 0);
return ;
}
void left_or_right(int &&x, int flag = 1) {
printf("right value : %d\n", x);
if (flag) left_or_right(x, 0);
return ;
}
namespace test1 {
int main() {
int a = 123;
//a可以通过单一变量a访问
//那么他就是左值
LEFT_OR_RIGHT(a);
//a + 1是中间产生临时的一个值
//那么他无法通过单一变量进行访问到
//那他就是一个右值
//因为在过了下面这行代码后,我们没有办法进行通过单一变量进行访问到它
LEFT_OR_RIGHT(a + 1);
//任何字面量的值都是右值
LEFT_OR_RIGHT(123);
//这里a++你带入进去的是a的值
//然后带入后,a进行了a += 1
//那么在这行代码之后你无法通过单一变量去访问到之前的a值
//那么它就是右值
LEFT_OR_RIGHT(a++);
//++a带入的是 a += 1的值
//在这行代码之后,它可以通过单一变量a去访问到这个值
//那他就是左值
LEFT_OR_RIGHT(++a);
//a += 2同理它可以通过变量a去访问到这个值
LEFT_OR_RIGHT(a += 2);
return 0;
}
}
int main() {
//test1::main();
left_or_right(123);
return 0;
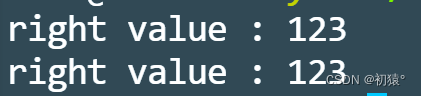
}执行结果:
为什么呢,123先调用右值引用没有问题吧,然后现在flag为1,需要再次调用left_or_right()函数,然后呢现在他的参数为x而不是123,那么在执行完成调用函数这句代码之后,我还是可以通过x进行访问到这个值,在右值引用这个函数的作用域里面这个x是持久态,我调用完成这个函数我是可以进行访问到的,所以第二次调用就会调用左值引用。

那么问题来了,我想保持当前的右值引用如何操作呢:
现在去理解move函数就是把move函数里的参数强制转换为右值,如果你想了解的更深可以自己看看move函数的原型,以及具体如何操作的。
if (flag) left_or_right(move(x), 0);改完这行代码后执行结果:
还有一种方式:
forward<>()函数,forward 函数通常用于完美转发,用于将参数原封不动地传递给另一个函数,保持参数的值类别不变。
if (flag) left_or_right(forward<int &&>(x), 0);forward在这句代码的作用就是将x作为右值引用作为传入参数,但是x他还是左值引用。
但是move是将x变为了右值引用。
移动构造
那么说完左值右值,那么对于构造函数还有一种形式,叫做移动构造:
代码演示:
#include <iostream>
#include <cassert>
#include <ctime>
using namespace std;

class Array {
public :
    Array(int n) : n(n), arr(new int[n]) {
        cout << "array default constructor " << arr << endl;
    }
    Array(const Array &a) : n(a.n), arr(new int[n]) {
        cout << "copy array constructor " << arr << endl;
        for (int i = 0; i < n; i++) arr[i] = a[i];
        return ;
    }
    //再函数调用时,如果没有返回值优化
    //那么调用func()函数时,会先默认构造a,
    //默认构造返回值的隐匿对象,这里创建了新的空间
    //然后a拷贝给匿名对象
    //然后又将匿名拷贝给b对象,有创建了新空间
    //而移动构造,直接将第一次a创建的空间直接给匿名对象
    //匿名对象又通过移动构造将创建的空间给b对象,省去了中间创建新空间的步骤和释放空间的步骤
    Array(Array &&a) : n(a.n), arr(a.arr) {
        cout << "move constructor" << arr << endl;
        a.arr = nullptr;
        a.n = 0;
        return ;
    }
    //这里为什么要返回int &
    //因为你在访问该位置时,又可以能会将该位置进行赋值
    //所以需要返回int &
    int &operator[](int ind) const{
        assert(ind >= 0 && ind < n);
        return arr[ind];
    }

    void output(const char *frm) {
        for (int i = 0; i < n; i++) {
            printf(frm, i, arr[i]);
        }
    }
    ~Array() {
        if (arr) delete[] arr;
        cout << "array disconstructor " << arr << endl;
        return ;
    }
private :
    int n;
    int *arr;
};

Array func() {
    int n = 7;
    Array a(n);
    for (int i = 0; i < n; i++) {
        a[i] = i;
    }
    return a;
}

int main() {
    srand(time(0));
    int n = 10;
    printf("a = ");
    Array a(n);
    for (int i = 0; i < n; i++) {
        a[i] = rand() % 100;
    }
    a.output("a[%d] = %d\n");
    Array b = func();
    b[0] = 999;
    b.output("b[%d] = %d\n");
    //如果对于a对象不用了,想将a对象所有的东西给c对象
    //那么就可以调用移动构造,使用move函数将a对象传入时变为右值
    Array c(move(a));
    c.output("c[%d] = %d\n");
    return 0;
}

类内的运算符重载代码演示:
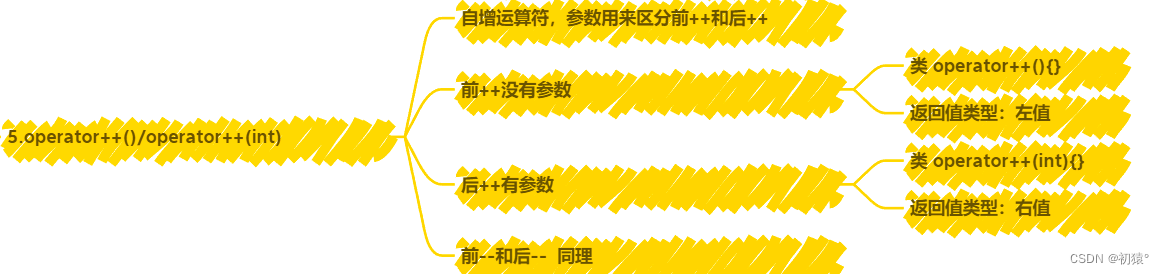
前后++代码演示:
#include<iostream>
using namespace std;

class Point {
public :
    Point(int x, int y) : x(x), y(y) {}
    Point(const Point &a) : x(a.x), y(a. y) {}
    //+重载, p1 + p2 就是 p1.x + p2.x, p1.y + p2.y
    //因为返回的是一个新的值,所以是右值,返回值类型就不是引用,也就是不是左值
    Point operator+(const Point &p) {//他这里是成员方法,比如它可以访问this指针
        Point ret(x + p.x, y + p.y);
        return ret;
    }
    //由于是前++,就不需要参数
    //前++返回的是左值,所以返回值类型也是左值
    //返回的对象也是本身
    Point &operator++() {
        cout << "++class" << endl;
        this->x += 1, this->y += 1;
        return *this;
    }
    //后++是一个右值,在演示左值和右值代码中有示例
    //那么返回的是一个新的值,所以返回值类型也是右值,而不是左值引用
    //参数列表中有参数,就是后++
    Point operator++(int) {
        cout << "class++" << endl;
        Point ret(*this);
        //代码设计逻辑和技巧
        ++(*this);
        return ret;
    }
    friend ostream &operator<<(ostream &out, const Point &p);
private :
    int x, y;
};

ostream &operator<<(ostream &out, const Point &p) {
    out << "(" << p.x << ", " << p.y << ")";
    return out;
}


int main() {
    Point a(1, 2), b(3, 4);
    cout << "a : " << a << endl;
    cout << "b : " << b << endl;
    cout << a + b << endl;
    //这样去调用运算符重载的函数和上行代码执行效果一样
    cout << a.operator+(b) << endl;
    cout << "++a : " << ++a << endl;
    cout << "b++ : "<< b++ << endl;
    cout << "b : "<< b << endl;
    return 0;
}
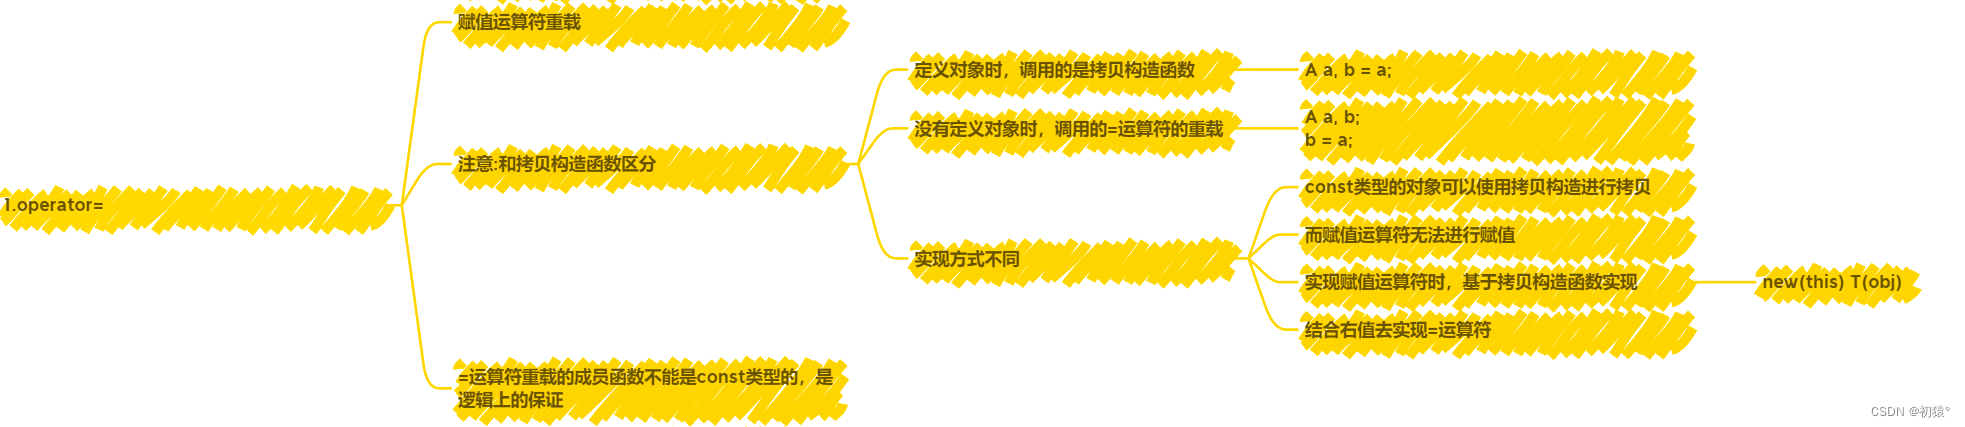
=赋值运算符重载代码演示:
#include<iostream>
using namespace std;

class A {
public :
    A() {
        cout << "default constructor " << this << endl;
    }
    A(const A &a) {
        cout << "copy constructor " << this << endl;
    }
    A(const A &&a) {
        cout << "move constructor " << this << endl;
    }
    //对于=重载
    A &operator=(const A &a) {
        //new关键字的原地构造
        //在this指针这块位置调用拷贝构造
        //this指针指向的就是下面的对象c
        new(this) A(a);
        cout << "operator= " << this << endl;
        return *this;
    }
    A &operator=(A &&a) {
        new(this) A(move(a));
        cout << "operator= " << this << endl;
        return *this;
    }
};


int main() {
    A a, c, d;
    A b = a;
    c = a;
    d = move(a);
    cout << "a = " << &a << endl;
    cout << "b = " << &b << endl;
    cout << "c = " << &c << endl;
    cout << "d = " << &d << endl;
    return 0;
}
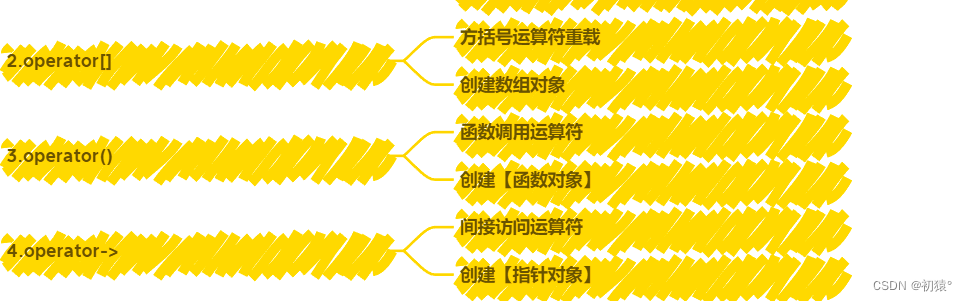
[]、->、()运算符重载代码演示:
#include <iostream>
#include <cstdlib>
#include <ctime>
using namespace std;

class Array_Object {
public :
    int operator[](int ind) {
        return 2 * ind;
    }
};

class Function_Object {
public :
    int operator()(int x) {
        return 2 * x;
    }
};

class Point {
public :
    Point(int x, int y) : x(x), y(y){
        printf("x = %d, y = %d\n", x, y);
    }
    int x, y;
};

class Point_Object {
public :
    Point_Object() : p(new Point(rand() % 100, rand() % 100)) {}
    Point *operator->() {
        return p;
    }
    ~Point_Object() {
        delete p;
    }
private :
    Point *p;
};

int main() {
    srand(time(0));
    Array_Object arr;
    Function_Object fun;
    Point_Object p;
    cout << p->x << " " << p->y << endl;
    for (int i = 0; i < 10; i++) {
        cout << "arr[" << i << "]" << arr[i] << endl;
    }
    for (int i = 0; i < 10; i++) {
        cout << "fun(" << i << ")" << fun(i) << endl;
    }
    return 0;
}