安卓提供了两种方式的事件处理:基于回调的事件处理和基于监听的事件处理。
-
基于监听的事件处理
基于监听的事件处理一般包含三个要素,分别是:
Event Source(事件源):事件发生的场所,通常是各个组件
Event(事件):事件封装了界面组件上发生的特定事件(通常就是用户的一次操作)
Event Listener(事件监听器):负责监听事件源发生的事件,并对各种事件作出相应的响应
下面使用一个简单的案例介绍按钮事件监听器
布局文件就是简单的线性布局器,上面是一个EditText,下面是一个Button按钮
<?xml version="1.0" encoding="utf-8"?>
<LinearLayout xmlns:android="http://schemas.android.com/apk/res/android"
    android:orientation="vertical"
    android:layout_width="match_parent"
    android:layout_height="match_parent"
    android:gravity="center_horizontal">

    <EditText
        android:id="@+id/txt"
        android:layout_width="match_parent"
        android:layout_height="wrap_content"
        android:editable="false"
        android:cursorVisible="false"
        android:textSize="12pt"/>

    <Button
        android:layout_width="wrap_content"
        android:layout_height="wrap_content"
        android:id="@+id/bn"
        android:text="单击我"/>

</LinearLayout>
使用Java代码给Button注册一个事件监听器
public class EventActivity extends Activity {

    @Override
    protected void onCreate(@Nullable Bundle savedInstanceState) {
        super.onCreate(savedInstanceState);
        setContentView(R.layout.event);
        Button bn = (Button) findViewById(R.id.bn);
        bn.setOnClickListener(new View.OnClickListener() {
            @Override
            public void onClick(View v) {
                EditText txt = (EditText) findViewById(R.id.txt);
                txt.setText("bn按钮被单击了!");
            }
        });
    }
}
单击按钮后,文本框就会显示"bn按钮被单击了!"

-
外部类作为事件监听器类
如果某个事件监听器确实需要被多个GUI界面所共享,而且主要是完成某种业务逻辑的实现,那么就可以考虑使用外部类形式来定义事件监听器类。
我们定义一个类实现OnClickListener接口,并且实现onClick()方法
public class SendSmsListener implements View.OnClickListener {

    private Activity activity;
    private EditText address;
    private EditText content;

    public SendSmsListener(Activity activity, EditText adress, EditText content){
        Toast.makeText(activity, "初始化完成", Toast.LENGTH_SHORT).show();
        this.activity = activity;
        this.address = adress;
        this.content = content;
    }

    @Override
    public void onClick(View v) {
        String addressStr = address.getText().toString();
        String contentStr = content.getText().toString();
        // 获取短信管理器
        SmsManager smsManager = SmsManager.getDefault();
        // 创建发送短信想PendingIntent
        PendingIntent pendingIntent = PendingIntent.getBroadcast(activity, 0, new Intent(), PendingIntent.FLAG_IMMUTABLE);
        // 发送短信文本
        smsManager.sendTextMessage(addressStr, null, contentStr, pendingIntent, null);
        Toast.makeText(activity, "短信发送完成", Toast.LENGTH_LONG).show();
    }
}
然后编辑一个简单的线性布局,有两个输入框和一个按钮
<?xml version="1.0" encoding="utf-8"?>
<LinearLayout xmlns:android="http://schemas.android.com/apk/res/android"
    android:layout_width="match_parent"
    android:layout_height="match_parent"
    android:orientation="vertical"
    android:gravity="center_horizontal">

    <EditText
        android:id="@+id/edit1"
        android:layout_width="match_parent"
        android:layout_height="wrap_content"
        android:textSize="50pt"/>

    <EditText
        android:id="@+id/edit2"
        android:layout_width="match_parent"
        android:layout_height="wrap_content"
        android:textSize="50pt"/>

    <Button
        android:id="@+id/send"
        android:layout_width="match_parent"
        android:layout_height="wrap_content"
        android:text="点击我发送信息"
        android:longClickable="true"/>

</LinearLayout>
最后编写一个Activity
public class SendMessageActivity extends Activity {

    private EditText editText1;
    private EditText editText2;

    @Override
    protected void onCreate(@Nullable Bundle savedInstanceState) {
        super.onCreate(savedInstanceState);
        setContentView(R.layout.message);
        editText1 = (EditText) findViewById(R.id.edit1);
        editText2 = (EditText) findViewById(R.id.edit2);
        Button button = (Button) findViewById(R.id.send);
        button.setTextSize(25);
        button.setOnClickListener(new SendSmsListener(this, editText1, editText2));
        // 请求权限
        ActivityCompat.requestPermissions(this,new String[]{Manifest.permission.SEND_SMS} , 1);
    }
}
为了能够顺利发送短信,需要重新开启一台模拟器,填写模拟器的ID,否则程序会报错

我的电脑配置没有办法同时运行两个虚拟机,所以这里就不展示了。
-
基于回调的事件处理
回调这个词在编程领域经常被提及,我的理解是,回调实际上是某个类中早已经定义好的方法或者接口,当我们继承或者实现接口的时候,可以相应地重写对应方法,或者实现相应接口。在程序运行的特定位置会调用特定的方法,当我们重写了某个方法之后,就可以在特定情况下实现对应的逻辑。
最最简单的一个例子就是Activity的onCreate()方法,当我们初始化一个Activity类的时候,就会调用这个方法,如果我们不重写这个方法,那么程序就会调用默认的onCreate()方法,如果我们重写了这个方法,那么程序就会调用我们重写的onCreate()方法。
我们可以用回调的方式实现一个跟随手指的小球。
首先自定义一个自定义的View
public class DrawViewPlus extends View {

    public float currentX = 50;
    public float currentY = 50;
    // 定义创建画笔
    Paint p = new Paint();
    public DrawViewPlus(Context context, AttributeSet set) {
        super(context, set);
    }

    @Override
    protected void onDraw(Canvas canvas) {
        super.onDraw(canvas);
        // 设置画笔颜色
        p.setColor(Color.RED);
        // 绘制小球
        canvas.drawCircle(currentX, currentY, 15, p);
    }

    @Override
    public boolean onTouchEvent(MotionEvent event) {
        // 获取触碰的坐标点
        currentX = event.getX();
        currentY = event.getY();
        // 重新绘制小球
        this.invalidate();
        // 返回true表明处理方法已经处理完该事件
        return true;
    }
}
然后再xml文件中加入自定义组件
<?xml version="1.0" encoding="utf-8"?>
<LinearLayout xmlns:android="http://schemas.android.com/apk/res/android"
    android:orientation="vertical"
    android:layout_width="match_parent"
    android:layout_height="match_parent">

    <!-- 使用自定义组件 -->
    <com.example.acitvitytest.ui.DrawViewPlus
        android:orientation="vertical"
        android:layout_width="match_parent"
        android:layout_height="match_parent"/>

</LinearLayout>
在Activity中只需要简单地加载界面就行,所有的逻辑都在自定义组件中编写,这样可以让程序结构更加清晰。
public class DrawActivity extends Activity {

    @Override
    protected void onCreate(@Nullable Bundle savedInstanceState) {
        super.onCreate(savedInstanceState);
        setContentView(R.layout.draw);
    }
}
-
响应系统设置的事件
Configuration类专门用于描述手机设备上的配置信息,这些配置信息既包括用户特定的配置项,也包括系统的动态设备配置。
<?xml version="1.0" encoding="utf-8"?>
<LinearLayout xmlns:android="http://schemas.android.com/apk/res/android"
    android:layout_width="match_parent"
    android:layout_height="match_parent"
    android:orientation="vertical">


    <EditText
        android:layout_width="match_parent"
        android:layout_height="wrap_content"
        android:textSize="35pt"
        android:id="@+id/ori" />

    <EditText
        android:layout_width="match_parent"
        android:layout_height="wrap_content"
        android:textSize="35pt"
        android:id="@+id/navigation" />

    <EditText
        android:layout_width="match_parent"
        android:layout_height="wrap_content"
        android:textSize="35pt"
        android:id="@+id/touch" />

    <EditText
        android:layout_width="match_parent"
        android:layout_height="wrap_content"
        android:textSize="35pt"
        android:id="@+id/mnc" />

    <Button
        android:layout_width="match_parent"
        android:layout_height="wrap_content"
        android:id="@+id/bn"
        android:textSize="35pt"
        android:text="获取手机信息"/>


</LinearLayout>
public class CfgActivity extends Activity {
@Override
protected void onCreate(@Nullable Bundle savedInstanceState) {
super.onCreate(savedInstanceState);
setContentView(R.layout.configuration);
// 获取应用界面中的界面组件
EditText ori = findViewById(R.id.ori);
EditText navigation = findViewById(R.id.navigation);
EditText touch = findViewById(R.id.touch);
EditText mnc = findViewById(R.id.mnc);
Button bn = findViewById(R.id.bn);
// 为按钮绑定事件监听器
bn.setOnClickListener(new View.OnClickListener() {
@Override
public void onClick(View v) {
// 获取系统的Configuration对象
Configuration cfg = getResources().getConfiguration();
String screen = cfg.orientation ==
Configuration.ORIENTATION_LANDSCAPE ? "横向屏幕" : "纵向屏幕";
String mncCode = cfg.mnc + "";
String naviname;
if(cfg.orientation == Configuration.NAVIGATION_NONAV){
naviname = "没有方向控制";
}
else if (cfg.orientation == Configuration.NAVIGATION_WHEEL){
naviname = "滚轮控制方向";
}
else if (cfg.orientation == Configuration.NAVIGATION_DPAD){
naviname = "方向键控制方向";
}
else {
naviname = "轨迹球控制方向";
}
String touchname = cfg.touchscreen == Configuration.TOUCHSCREEN_NOTOUCH ? "无触摸屏" : "支持触摸屏";
ori.setText(screen);
navigation.setText(naviname);
touch.setText(touchname);
mnc.setText(mncCode);
}
});
}
}点击按钮就可以获取相应的配置信息

-
Handler消息传递机制
Handler类的主要作用有两个:在新启动的线程中发送消息和在主线程中获取处理消息。
我们可以通过一个新线程来周期性地修改ImageView所显示的图片,通过这种方式来开发一个动画效果。
<?xml version="1.0" encoding="utf-8"?>
<LinearLayout xmlns:android="http://schemas.android.com/apk/res/android"
    android:layout_width="match_parent"
    android:layout_height="match_parent">


    <ImageView
        android:layout_width="match_parent"
        android:layout_height="wrap_content"
        android:id="@+id/show"/>

</LinearLayout>
public class HanlderActivity extends Activity {
// 定义周期性显示图片的id
int[] images = new int[] {
R.drawable.ic_launcher_foreground,
R.drawable.ic_launcher_background
};
int currentImageId = 0;
@Override
protected void onCreate(@Nullable Bundle savedInstanceState) {
super.onCreate(savedInstanceState);
setContentView(R.layout.handler);
ImageView image = findViewById(R.id.show);
Handler myhandler = new Handler(){
@Override
public void handleMessage(@NonNull Message msg) {
super.handleMessage(msg);
// 如果消息是本程序发送的,那么就修改ImageView显示的图片
if(msg.what == 0x1233){
image.setImageResource(images[currentImageId++ % images.length]);
}
}
};
// 定义一个计时器,让该计时器周期性地执行指定任务
new Timer().schedule(new TimerTask() {
@Override
public void run() {
// 发送空消息
myhandler.sendEmptyMessage(0x1233);
}
},0, 1200);
}
}上述代码中使用TimerTask对象启动了一个新的线程,由于启动的线程没有办法直接访问Activity中的界面组件,因此使用Handler传递消息,从而实现间接访问。程序会周期性地变换显示的图片


和Handler一起工作的组件有三个:
Message:Hanlder接收和处理的消息对象
Looper:每个线程只能拥有一个Looper,他的loop方法负责读取MessageQueue中的消息,读到信息之后就把消息交给发送该消息的Handler进行处理
MessageQueue:消息队列,他用先进先出的方式来管理Message
我们通常会将比较耗时的操作放到一个新的线程中去执行,如果使用UI线程执行耗时操作,那么线程很可能被阻塞,从而降低用户体验。
我们可以看一下Looper对象中的prepare()方法
	/** Initialize the current thread as a looper.
      * This gives you a chance to create handlers that then reference
      * this looper, before actually starting the loop. Be sure to call
      * {@link #loop()} after calling this method, and end it by calling
      * {@link #quit()}.
      */
    public static void prepare() {
        prepare(true);
    }

    private static void prepare(boolean quitAllowed) {
        if (sThreadLocal.get() != null) {
            throw new RuntimeException("Only one Looper may be created per thread");
        }
        sThreadLocal.set(new Looper(quitAllowed));
    }
这是一个静态方法,大概的逻辑就是实例化一个Looper对象放到sThreadLocal容器中,并且容器中只能有一个Looper对象,假如在实例化前就已经存在了Looper对象,那么就抛异常。
    private Looper(boolean quitAllowed) {
        mQueue = new MessageQueue(quitAllowed);
        mThread = Thread.currentThread();
    }
我们可以看到Looper对象的构造方法是用private修饰的,也就是说我们不能自己实例化Looper对象,只能通过调用静态的prepare()方法进行构造。
最后构造得到的实例对象是放到ThreadLocal容器中的
static final ThreadLocal<Looper> sThreadLocal = new ThreadLocal<Looper>();Looper对象最重要的方法就是loop(),该方法会反复检查MessageQueue中是否有消息,如果有消息就会取出来进行处理,如果没有消息就会进行阻塞,直到取出消息为止
/**
* Poll and deliver single message, return true if the outer loop should continue.
*/
@SuppressWarnings("AndroidFrameworkBinderIdentity")
private static boolean loopOnce(final Looper me,
final long ident, final int thresholdOverride) {
Message msg = me.mQueue.next(); // might block
if (msg == null) {
// No message indicates that the message queue is quitting.
return false;
}
// This must be in a local variable, in case a UI event sets the logger
final Printer logging = me.mLogging;
if (logging != null) {
logging.println(">>>>> Dispatching to " + msg.target + " "
+ msg.callback + ": " + msg.what);
}
// Make sure the observer won't change while processing a transaction.
final Observer observer = sObserver;
final long traceTag = me.mTraceTag;
long slowDispatchThresholdMs = me.mSlowDispatchThresholdMs;
long slowDeliveryThresholdMs = me.mSlowDeliveryThresholdMs;
if (thresholdOverride > 0) {
slowDispatchThresholdMs = thresholdOverride;
slowDeliveryThresholdMs = thresholdOverride;
}
final boolean logSlowDelivery = (slowDeliveryThresholdMs > 0) && (msg.when > 0);
final boolean logSlowDispatch = (slowDispatchThresholdMs > 0);
final boolean needStartTime = logSlowDelivery || logSlowDispatch;
final boolean needEndTime = logSlowDispatch;
if (traceTag != 0 && Trace.isTagEnabled(traceTag)) {
Trace.traceBegin(traceTag, msg.target.getTraceName(msg));
}
final long dispatchStart = needStartTime ? SystemClock.uptimeMillis() : 0;
final long dispatchEnd;
Object token = null;
if (observer != null) {
token = observer.messageDispatchStarting();
}
long origWorkSource = ThreadLocalWorkSource.setUid(msg.workSourceUid);
try {
msg.target.dispatchMessage(msg);
if (observer != null) {
observer.messageDispatched(token, msg);
}
dispatchEnd = needEndTime ? SystemClock.uptimeMillis() : 0;
} catch (Exception exception) {
if (observer != null) {
observer.dispatchingThrewException(token, msg, exception);
}
throw exception;
} finally {
ThreadLocalWorkSource.restore(origWorkSource);
if (traceTag != 0) {
Trace.traceEnd(traceTag);
}
}
if (logSlowDelivery) {
if (me.mSlowDeliveryDetected) {
if ((dispatchStart - msg.when) <= 10) {
Slog.w(TAG, "Drained");
me.mSlowDeliveryDetected = false;
}
} else {
if (showSlowLog(slowDeliveryThresholdMs, msg.when, dispatchStart, "delivery",
msg)) {
// Once we write a slow delivery log, suppress until the queue drains.
me.mSlowDeliveryDetected = true;
}
}
}
if (logSlowDispatch) {
showSlowLog(slowDispatchThresholdMs, dispatchStart, dispatchEnd, "dispatch", msg);
}
if (logging != null) {
logging.println("<<<<< Finished to " + msg.target + " " + msg.callback);
}
// Make sure that during the course of dispatching the
// identity of the thread wasn't corrupted.
final long newIdent = Binder.clearCallingIdentity();
if (ident != newIdent) {
Log.wtf(TAG, "Thread identity changed from 0x"
+ Long.toHexString(ident) + " to 0x"
+ Long.toHexString(newIdent) + " while dispatching to "
+ msg.target.getClass().getName() + " "
+ msg.callback + " what=" + msg.what);
}
msg.recycleUnchecked();
return true;
}
/**
* Run the message queue in this thread. Be sure to call
* {@link #quit()} to end the loop.
*/
@SuppressWarnings("AndroidFrameworkBinderIdentity")
public static void loop() {
final Looper me = myLooper();
if (me == null) {
throw new RuntimeException("No Looper; Looper.prepare() wasn't called on this thread.");
}
if (me.mInLoop) {
Slog.w(TAG, "Loop again would have the queued messages be executed"
+ " before this one completed.");
}
me.mInLoop = true;
// Make sure the identity of this thread is that of the local process,
// and keep track of what that identity token actually is.
Binder.clearCallingIdentity();
final long ident = Binder.clearCallingIdentity();
// Allow overriding a threshold with a system prop. e.g.
// adb shell 'setprop log.looper.1000.main.slow 1 && stop && start'
final int thresholdOverride =
SystemProperties.getInt("log.looper."
+ Process.myUid() + "."
+ Thread.currentThread().getName()
+ ".slow", 0);
me.mSlowDeliveryDetected = false;
for (;;) {
if (!loopOnce(me, ident, thresholdOverride)) {
return;
}
}
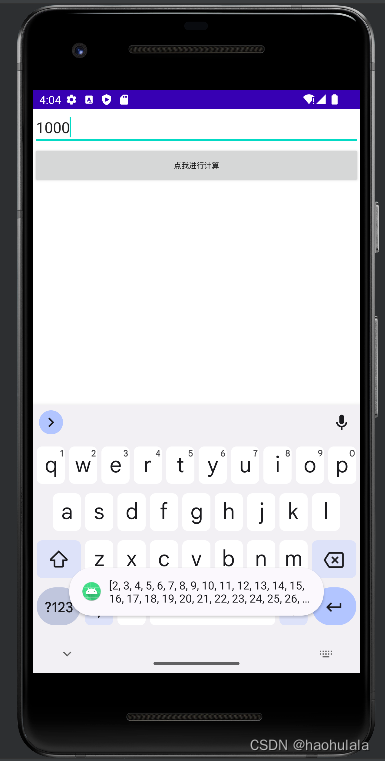
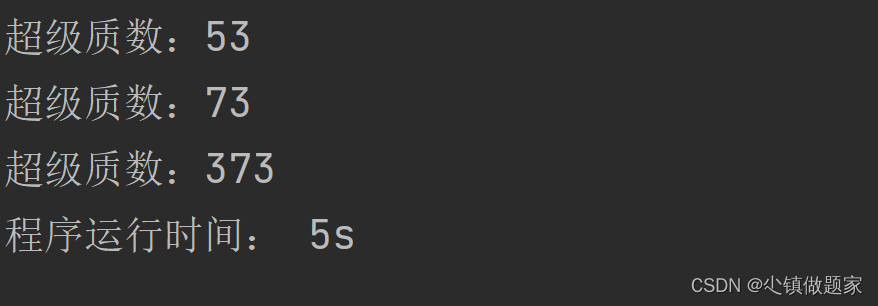
}下面我们就写一个简单的程序计算到某个指定数为止的所有质数,并且用Toast显示出来。
界面代码比较简单,就是一个文本框和一个按钮
<?xml version="1.0" encoding="utf-8"?>
<LinearLayout xmlns:android="http://schemas.android.com/apk/res/android"
    android:layout_width="match_parent"
    android:layout_height="match_parent"
    android:orientation="vertical">

    <EditText
        android:id="@+id/input"
        android:layout_width="match_parent"
        android:layout_height="wrap_content"
        android:textSize="50pt"/>

    <Button
        android:layout_width="match_parent"
        android:layout_height="wrap_content"
        android:text="点我进行计算"
        android:textSize="25pt"
        android:id="@+id/cal"
        android:onClick="cal"/>


</LinearLayout>
在Java代码中我们需要定义一个线程,里面定义一个Handler类,该Handler类的处理消息的逻辑是先从消息中取出数据,然后进行计算,最后使用Toast显示计算结果。
按钮的点击事件的处理逻辑是,首先封装一个Message对象,然后将Message对象传递给线程中的Handler对象。
public class CalNumActivity extends Activity {

    private final String UPPER = "UPPER_NUM";
    private CalThread calThread;
    private EditText editText;
    class CalThread extends Thread{
        public Handler mHandler;
        @Override
        public void run() {
            // 实例化Looper对象
            Looper.prepare();
            mHandler = new Handler(){
                @Override
                public void handleMessage(@NonNull Message msg) {
                    if(msg.what == 0x123){
                        // 获取最大的那个数,从Message中取出Data
                        // 该Data是Bundle对象,采用键值对的形式传递数据
                        int upper = msg.getData().getInt(UPPER);
                        List<Integer> numlist = new ArrayList<>();
                        outer:
                        for(int i=2; i<=upper; i++){
                            for(int j=2; j<=Math.sqrt(i); j++){
                                // 只能被1和它本身整除的才是质数
                                if(j == i){
                                    continue;
                                }
                                if(j % i == 0){
                                    continue outer;
                                }
                            }
                            numlist.add(i);
                        }
                        // 显示计算出来的质数
                        Toast.makeText(CalNumActivity.this, numlist.toString(), Toast.LENGTH_LONG).show();
                    }
                }
            };
            // 执行loop()方法,从MessageQueue中取出消息
            Looper.loop();
        }
    }


    @Override
    protected void onCreate(@Nullable Bundle savedInstanceState) {
        super.onCreate(savedInstanceState);
        setContentView(R.layout.calnum);
        editText = findViewById(R.id.input);
        Button button = findViewById(R.id.cal);
        // 启动新线程
        calThread = new CalThread();
        calThread.start();
    }

    // 为按钮的点击事件添加事件处理函数
    public void cal(View source){
        // 构建消息
        Message msg = new Message();
        msg.what = 0x123;
        Bundle bundle = new Bundle();
        bundle.putInt(UPPER, Integer.parseInt(editText.getText().toString()));
        msg.setData(bundle);
        calThread.mHandler.sendMessage(msg);
    }
}