目录
一、使用maven管理spring项目
1.1搭建开发环境
1.1.1修改settings.xml文件
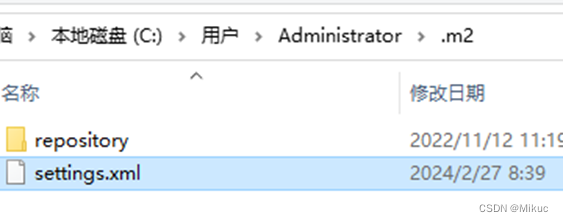
1.1.2把该文件拷入.m2目录
1.1.3打开ecplise,建立maven项目
1.1.4向pom.xml文件中添加spring的坐标:
1.4.1.1代码含义
1.4.1.2代码说明
1.2创建spring配置文件
二、注入简单值
2.1设置注入
2.2构造注入
三、各种数据类型的注入
3.1注入null
3.2注入数组array
3.3注入list
3.4注入set对象
3.5注入map对象
一、使用maven管理spring项目
1.1搭建开发环境
使用Maven+eclipse
1.1.1修改settings.xml文件

1.1.2把该文件拷入.m2目录
1.1.3打开ecplise,建立maven项目

1.1.4向pom.xml文件中添加spring的坐标:
<project xmlns="http://maven.apache.org/POM/4.0.0" xmlns:xsi="http://www.w3.org/2001/XMLSchema-instance" xsi:schemaLocation="http://maven.apache.org/POM/4.0.0 http://maven.apache.org/xsd/maven-4.0.0.xsd">
  <modelVersion>4.0.0</modelVersion>
  <groupId>cn.edu.aaa</groupId>
  <artifactId>demo1</artifactId>
  <version>0.0.1-SNAPSHOT</version>

<dependencies>
  	<dependency>
  		<groupId>org.springframework</groupId>
  		<artifactId>spring-context</artifactId>
  		<version>5.3.23</version>
  	</dependency>
  </dependencies>
</project>
1.4.1.1代码含义
这个pom.xml文件定义了一个Maven项目,其groupId为cn.edu.aaa,artifactId为demo1,版本为0.0.1-SNAPSHOT,并且该项目依赖于spring-context库,版本为5.3.23。当你使用Maven构建此项目时,Maven会自动下载并包含这个依赖库。
1.4.1.2代码说明
1)groupId是项目组的唯一标识符。它通常代表项目所属的实际项目或组织。在这个例子中,它是cn.edu.aaa`。
2)artifactId是项目的唯一标识符,通常与项目的名称相对应。在这个例子中,项目名是demo1`。
3)version定义了项目的当前版本。SNAPSHOT`是一个特殊的版本,它表示当前的开发版本,通常用于开发过程中的版本控制。
4)<dependencies>这个标签用于定义项目所依赖的其他库或框架。
5)这是一个依赖项,它指定了项目需要spring-context库,该库由org.springframework组提供,版本为5.3.23
1.2创建spring配置文件
<?xml version="1.0" encoding="UTF-8"?>
<beans xmlns="http://www.springframework.org/schema/beans"
	xmlns:p="http://www.springframework.org/schema/p"
	xmlns:aop="http://www.springframework.org/schema/aop"
    xmlns:xsi="http://www.w3.org/2001/XMLSchema-instance"
    xsi:schemaLocation="http://www.springframework.org/schema/beans
   http://www.springframework.org/schema/beans/spring-beans.xsd
   http://www.springframework.org/schema/context
   http://www.springframework.org/schema/context/spring-context.xsd
   http://www.springframework.org/schema/aop
   http://www.springframework.org/schema/aop/spring-aop.xsd">
</beans>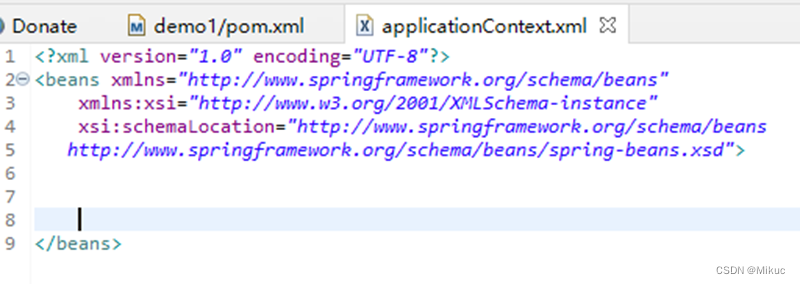
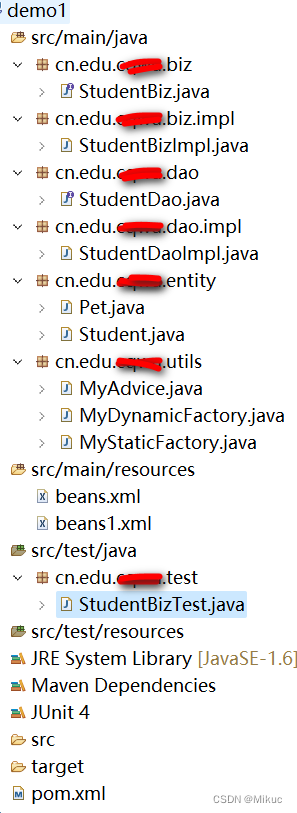
3.建立业务模型
二、注入简单值
2.1设置注入
设置注入- 通过调用settor方法进行注入
1)beans.xml配置文件

2)Student.java 学生实体类
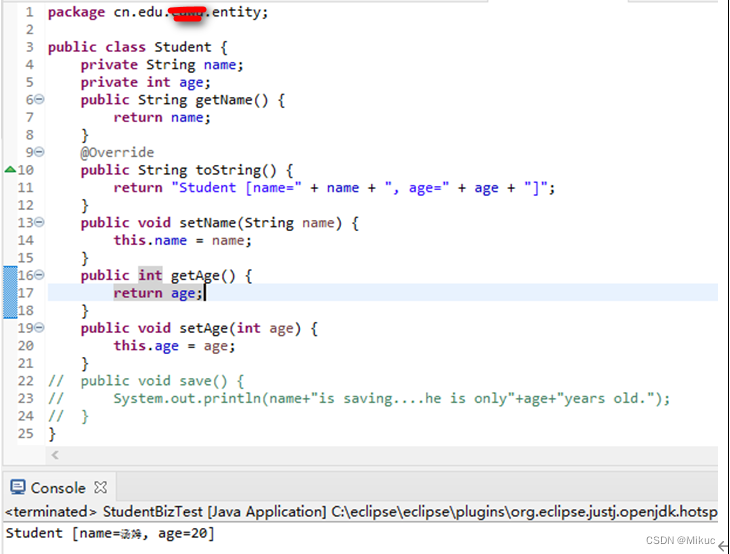
3)测试类

代码分析
ApplicationContext context=new ClassPathXmlApplicationContext("beans.xml");代码含义:
这行代码执行后,context变量就持有一个指向初始化好的ApplicationContext的引用,你可以通过这个context来获取、管理在beans.xml中定义的bean
代码说明:
1)ApplicationContext:这是Spring框架中的一个核心接口,代表Spring IoC容器,负责管理应用程序中的bean。
2)new ClassPathXmlApplicationContext("beans.xml"):这是ApplicationContext的一个实现类的构造方法。它告诉Spring从类路径(classpath)下查找名为beans.xml的Spring配置文件,并基于该文件的内容来初始化一个ApplicationContext容器。
3)beans.xml:这是Spring的一个配置文件,通常使用XML格式。该文件定义了Spring容器中的bean以及它们之间的依赖关系。
StudentBiz biz=context.getBean(StudentBiz.class);代码说明:
1)StudentBiz biz:定义一个StudentBiz类型的变量biz。StudentBiz是一个接口,它定义了某些业务逻辑或功能。
2)context.getBean(StudentBiz.class):调用ApplicationContext的getBean方法,并传入StudentBiz.class作为参数。这告诉Spring容器,我们想要获取一个类型为StudentBiz的bean实例
2.2构造注入
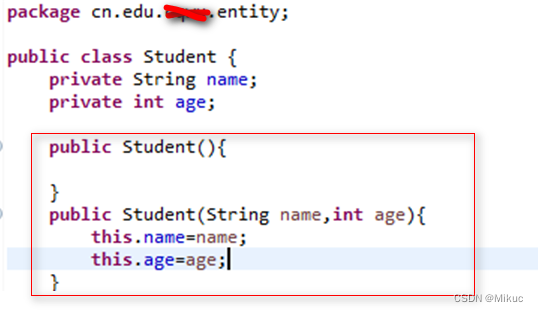
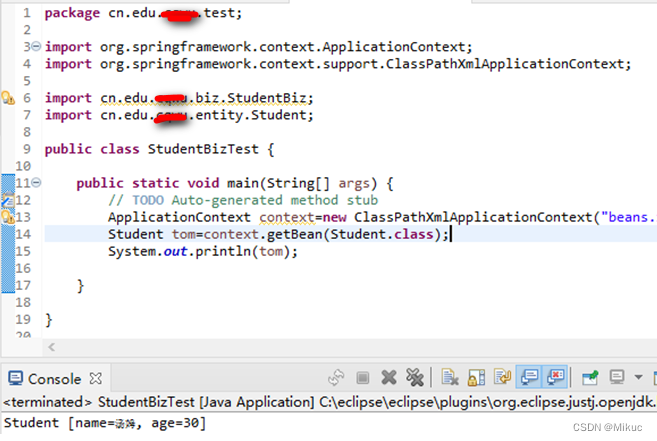
构造注入 – 调用构造方法进行注入
beans.xml配置文件

学生实体类
测试类
三、各种数据类型的注入
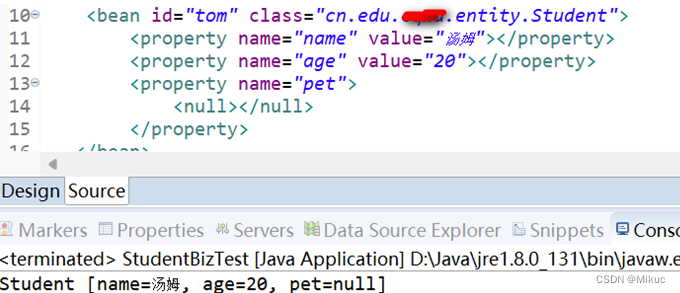
3.1注入null
涉及:Student对象、pet对象
注意:pet的类型会发生变化
Student.java

beans.xml
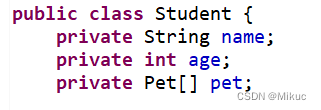
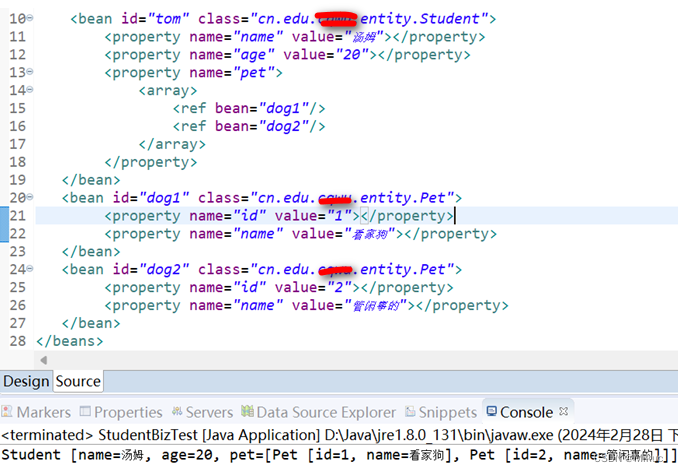
3.2注入数组array
Student.java
beans.xml
3.3注入list
Student.java

bean.xml

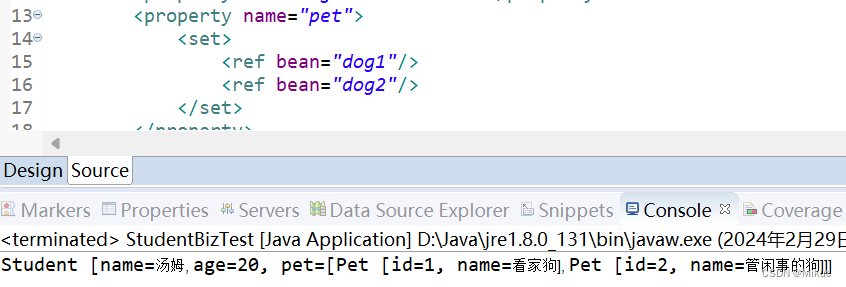
3.4注入set对象
Student.java
![]()
beans.xml
3.5注入map对象
Student.java

beans.xml

附件:
