使用open3d进行人体配准和重建学习记录
- 一、使用kinectv2捕捉人体rgb和depth图
- 二、重建部分
- 2.1 泼松重建
- 2.2 滚球重建
- 2.3 alpha重建
一、使用kinectv2捕捉人体rgb和depth图
# -*- coding: utf-8 -*-
# @Time : 2024/3/20 17:26
# @Author : sjh
# @Site :
# @File : main.py
# @Comment : 采用RGBD点云重建
import ctypes
import os
import sys
import time
import cv2
import loguru
import mapper
import matplotlib.pyplot as plt
import numpy as np
import open3d as o3d
from pykinect2 import PyKinectRuntime
from pykinect2 import PyKinectV2
from pykinect2.PyKinectV2 import *
import shutil
import os
import shutil
def make_clean_folder(path_folder):
if not os.path.exists(path_folder):
os.makedirs(path_folder)
else:
shutil.rmtree(path_folder)
os.makedirs(path_folder)
def RGBD2cloud(file_path):
file_path = file_path
make_clean_folder("./data/pcd_data")
# 获取文件列表
file_list = os.listdir(os.path.join(file_path, "RGB"))
# 定义排序键函数,提取文件名中的数字部分作为排序依据
def extract_number(filename):
return int(''.join(filter(str.isdigit, filename)))
# 使用 sorted() 函数对文件列表进行排序,以文件名中的数字部分作为排序依据
sorted_file_list = sorted(file_list, key=extract_number)
for i, name in enumerate(sorted_file_list):
color_raw = o3d.io.read_image(os.path.join(file_path, "RGB", name))
depth_raw = o3d.io.read_image(os.path.join(file_path, "DEPTH", name.replace(".jpg", ".png")))
# 将Open3D图像转换为NumPy数组
depth_raw_np = np.asarray(depth_raw)
# 应用双边滤波
depth_filtered_np = cv2.bilateralFilter(depth_raw_np.astype(np.float32), 3, 3, 3)
# 如果需要,将NumPy数组转换回Open3D图像
depth_raw = o3d.geometry.Image(depth_filtered_np)
rgbd_image = o3d.geometry.RGBDImage.create_from_color_and_depth(color_raw, depth_raw,
convert_rgb_to_intensity=False)
plt.subplot(1, 2, 1)
plt.title('Redwood grayscale image')
plt.imshow(rgbd_image.color)
plt.subplot(1, 2, 2)
plt.title('Redwood depth image')
plt.imshow(rgbd_image.depth)
# plt.show()
inter = o3d.camera.PinholeCameraIntrinsic()
inter.set_intrinsics(1920, 1080, 365.939, 365.939, 256.530, 207.09)
pcd = o3d.geometry.PointCloud().create_from_rgbd_image(
rgbd_image, inter)
# Flip it, otherwise the pointcloud will be upside down
pcd.transform([[1, 0, 0, 0], [0, -1, 0, 0], [0, 0, -1, 0], [0, 0, 0, 1]])
o3d.io.write_point_cloud(f"./data/pcd_data/test{i + 1}.pcd", pcd)
# o3d.visualization.draw_geometries([pcd])
def seg_body(pcd_path, show=False):
def display_inlier_outlier(cloud, ind, show):
inlier_cloud = cloud.select_by_index(ind)
outlier_cloud = cloud.select_by_index(ind, invert=True)
# 选中的点为灰色,未选中点为红色
outlier_cloud.paint_uniform_color([1, 0, 0])
inlier_cloud.paint_uniform_color([0.8, 0.8, 0.8])
# 可视化
if show: o3d.visualization.draw_geometries([inlier_cloud, outlier_cloud], window_name="统计滤波1")
return inlier_cloud
def plane_filter(pcd):
# 分割点云
plane_model, inliers = pcd.segment_plane(distance_threshold=0.01,
ransac_n=3,
num_iterations=1000)
[plane_a, plane_b, plane_c, plane_d] = plane_model
print(f"Plane equation: {plane_a}x + {plane_b}y + {plane_c}z + {plane_d} = 0")
inlier_cloud = pcd.select_by_index(inliers)
outlier_cloud = pcd.select_by_index(inliers, invert=True)
# 选中的点为灰色,未选中点为红色
outlier_cloud.paint_uniform_color([1, 0, 0])
inlier_cloud.paint_uniform_color([0.8, 0.8, 0.8])
# 可视化结果
o3d.visualization.draw_geometries([inlier_cloud, outlier_cloud], window_name="Inlier Cloud")
o3d.visualization.draw_geometries([outlier_cloud], window_name="Outlier Cloud")
return outlier_cloud
def statistical_filter(pcd, show):
# 统计滤波
num_neighbors = 20 # K邻域点的个数
std_ratio = 2.0 # 标准差乘数
# 执行统计滤波,返回滤波后的点云sor_pcd和对应的索引ind
sor_pcd, ind = pcd.remove_statistical_outlier(num_neighbors, std_ratio)
print("统计式离群点移除2,统计滤波后的点云:", sor_pcd)
sor_pcd.paint_uniform_color([0, 0, 1])
# 提取噪声点云
sor_noise_pcd = pcd.select_by_index(ind, invert=True)
print("噪声点云:", sor_noise_pcd)
sor_noise_pcd.paint_uniform_color([1, 0, 0])
# 可视化滤波结果
if show: o3d.visualization.draw_geometries([sor_pcd, sor_noise_pcd], window_name="统计滤波2",
width=800, # 窗口宽度
height=600) # 窗口高度
# 半径式离群点剔除
print("半径式离群点剔除")
sor_pcd, ind = sor_pcd.remove_radius_outlier(nb_points=16, radius=0.05)
sor_pcd.paint_uniform_color([0, 0, 1])
# 提取噪声点云
sor_noise_pcd = pcd.select_by_index(ind, invert=True)
print("噪声点云:", sor_noise_pcd)
sor_noise_pcd.paint_uniform_color([1, 0, 0])
# 可视化滤波结果
if show: o3d.visualization.draw_geometries([sor_pcd, sor_noise_pcd], window_name="统计滤波2",
width=800, # 窗口宽度
height=600) # 窗口高度
return sor_pcd
def filter_points_by_distance(cloud, max_distance=3.0):
# 将点云转换为NumPy数组
points = np.asarray(cloud.points)
# 找到满足距离条件的点的索引
valid_indices = np.where((np.abs(points[:, 2]) <= max_distance) & (points[:, 1] >= -0.55) & (-0.85 <= points[:, 0] ) & ( points[:, 0] <= 0.55)
& (np.abs(points[:, 2]) >= 1))[0]
# 使用select_by_index方法基于索引过滤点云
filtered_cloud = cloud.select_by_index(valid_indices)
return filtered_cloud
file_list = os.listdir(pcd_path)
# 定义一个自定义的排序函数,根据文件名中 "test" 的最后一个数字进行排序
def sort_by_last_number(file_name):
return int(file_name.split("test")[-1].split(".")[0])
# 使用 sorted() 函数对文件列表进行排序
sorted_file_list = sorted(file_list, key=sort_by_last_number, reverse=False)
# 删除文件夹及其内容
shutil.rmtree("./data/seg_pcd_data/")
# 创建空文件夹
os.makedirs("./data/seg_pcd_data/")
make_clean_folder("./data/seg_pcd_data")
for i, name in enumerate(sorted_file_list):
print("read file:", os.path.join(pcd_path, name))
# 加载点云文件
pcd = o3d.io.read_point_cloud(os.path.join(pcd_path, name))
# 使用PassThrough滤波器去除超出指定范围的点云
pcd = filter_points_by_distance(pcd, max_distance=2.5)
if show: o3d.visualization.draw_geometries([pcd], window_name="Filtered Point Cloud")
pcd = pcd.voxel_down_sample(voxel_size=0.02)
# 统计式离群点移除
print("统计式离群点移除1")
cl, ind = pcd.remove_statistical_outlier(nb_neighbors=50,
std_ratio=0.05)
# 可视化
pcd = display_inlier_outlier(pcd, ind, show)
# nb_neighbors:最近k个点 std_ratio:基于标准差的阈值,越小滤除点越多
pcd = statistical_filter(pcd, show)
# 保存人体点云
if show: o3d.visualization.draw_geometries([pcd], window_name="Outlier Cloud")
o3d.io.write_point_cloud(f"./data/seg_pcd_data/human_body{i + 1}.pcd", pcd)
def mutilway_registration(bunny_path):
def load_bunnypoint_clouds(voxel_size=0.0, bunny_path=''):
pcds = []
demo_icp_pcds = os.listdir(bunny_path)
for path in demo_icp_pcds:
pcd = o3d.io.read_point_cloud(os.path.join(bunny_path, path))
pcd_down = pcd.voxel_down_sample(voxel_size=voxel_size)
pcds.append(pcd_down)
return pcds
voxel_size = 0.005
pcds_down = load_bunnypoint_clouds(voxel_size, bunny_path)
o3d.visualization.draw_geometries(pcds_down, )
def pairwise_registration(source, target):
# 估计目标点云的法线
target.estimate_normals(
search_param=o3d.geometry.KDTreeSearchParamHybrid(radius=0.1, max_nn=30)
)
print("Apply point-to-plane ICP")
icp_coarse = o3d.pipelines.registration.registration_icp(
source, target, max_correspondence_distance_coarse, np.identity(4),
o3d.pipelines.registration.TransformationEstimationPointToPlane())
icp_fine = o3d.pipelines.registration.registration_icp(
source, target, max_correspondence_distance_fine,
icp_coarse.transformation,
o3d.pipelines.registration.TransformationEstimationPointToPlane())
transformation_icp = icp_fine.transformation
information_icp = o3d.pipelines.registration.get_information_matrix_from_point_clouds(
source, target, max_correspondence_distance_fine,
icp_fine.transformation)
return transformation_icp, information_icp
def full_registration(pcds, max_correspondence_distance_coarse,
max_correspondence_distance_fine):
pose_graph = o3d.pipelines.registration.PoseGraph()
odometry = np.identity(4)
pose_graph.nodes.append(o3d.pipelines.registration.PoseGraphNode(odometry))
n_pcds = len(pcds)
for source_id in range(n_pcds):
for target_id in range(source_id + 1, n_pcds):
transformation_icp, information_icp = pairwise_registration(
pcds[source_id], pcds[target_id])
print("Build o3d.pipelines.registration.PoseGraph")
if target_id == source_id + 1: # odometry case
odometry = np.dot(transformation_icp, odometry)
pose_graph.nodes.append(
o3d.pipelines.registration.PoseGraphNode(
np.linalg.inv(odometry)))
pose_graph.edges.append(
o3d.pipelines.registration.PoseGraphEdge(source_id,
target_id,
transformation_icp,
information_icp,
uncertain=False))
else: # loop closure case
pose_graph.edges.append(
o3d.pipelines.registration.PoseGraphEdge(source_id,
target_id,
transformation_icp,
information_icp,
uncertain=True))
return pose_graph
print("完整注册 ...")
max_correspondence_distance_coarse = voxel_size * 15
max_correspondence_distance_fine = voxel_size * 1.5
with o3d.utility.VerbosityContextManager(
o3d.utility.VerbosityLevel.Debug) as cm:
pose_graph = full_registration(pcds_down,
max_correspondence_distance_coarse,
max_correspondence_distance_fine)
print("优化姿势图...")
option = o3d.pipelines.registration.GlobalOptimizationOption(
max_correspondence_distance=max_correspondence_distance_fine,
edge_prune_threshold=0.25,
reference_node=0)
with o3d.utility.VerbosityContextManager(
o3d.utility.VerbosityLevel.Debug) as cm:
o3d.pipelines.registration.global_optimization(
pose_graph,
o3d.pipelines.registration.GlobalOptimizationLevenbergMarquardt(),
o3d.pipelines.registration.GlobalOptimizationConvergenceCriteria(),
option)
voxel_size = 0.005
print("Transform points and display")
for point_id in range(len(pcds_down)):
print(pose_graph.nodes[point_id].pose)
pcds_down[point_id].transform(pose_graph.nodes[point_id].pose)
o3d.visualization.draw_geometries(pcds_down, )
pcds = load_bunnypoint_clouds(voxel_size, bunny_path)
pcd_combined = o3d.geometry.PointCloud()
for point_id in range(len(pcds)):
pcds[point_id].transform(pose_graph.nodes[point_id].pose)
pcd_combined += pcds[point_id]
pcd_combined_down = pcd_combined.voxel_down_sample(voxel_size=voxel_size)
o3d.io.write_point_cloud("multiway_registration.pcd", pcd_combined_down)
o3d.visualization.draw_geometries([pcd_combined_down], )
class Cloud:
def __init__(self, file="", dynamic=False, color=False, depth=False, body=False, skeleton=False,
simultaneously=False, color_overlay=False):
# Initialize Kinect object
self._kinect = PyKinectRuntime.PyKinectRuntime(
PyKinectV2.FrameSourceTypes_Color | PyKinectV2.FrameSourceTypes_Depth | PyKinectV2.FrameSourceTypes_Body | PyKinectV2.FrameSourceTypes_BodyIndex)
self._body_index = None # save body index image
self._body_index_points = None # save body index points
self._cloud = False # Flag to break loop when creating a pointcloud
self._depth = None # Store last depth frame
self._color_frame = None # store the last color frame
self._red = 0 # Store red value from cv2 track bar
self._green = 0 # Store green value from cv2 track bar
self._blue = 0 # Store blue value from cv2 track bar
self._size = 0.5 # Store value of point size from cv2 track bar
self._opacity = 0 # store opacity value of colors from cv2 track bar
self._dt = .0 # Store time value since kinect started from cv2 track bar
self._skeleton_points = None # store multiple skeleton points
self._color_point_cloud = color # Flag to show dynamic point cloud using the color frame
self._depth_point_cloud = depth # Flag to show dynamic point cloud using the depth frame
self._simultaneously_point_cloud = simultaneously # Flag for simultaneously showing the point clouds
self._skeleton_point_cloud = skeleton # Flag for showing the skeleton cloud
self._dynamic = dynamic # Flag for initializing a dynamic pointcloud
self._cloud_file = file # Store the file name
self._body_index_cloud = body # save body flag
self._color_overlay = color_overlay # flag to display the rgb image color up to the pointcloud
self._dir_path = os.path.dirname(os.path.realpath(__file__)) # Store the absolute path of the file
self._body_frame = None # store body frame data
self._joints = None # save skeleton joints
self._bodies_indexes = None # save tracked skeleton indexes
self._world_points = None # Store world points
self._color_point_cloud_points = None # store color cloud points for simultaneously showing
self._depth_point_cloud_points = None # store depth cloud points for simultaneously showing
self._body_point_cloud_points = None # store body cloud points for simultaneously showing
self._skeleton_point_cloud_points = None # store skeleton cloud points for simultaneously showing
self._simultaneously_point_cloud_points = None # stack all the points
self._skeleton_colors = np.asarray([[1, 0, 0], [0, 1, 0], [0, 0, 1], [1, 1, 0], [0, 1, 1], [1, 0, 1]],
dtype=np.float32) # skeleton color pallet
self._scatter = None # Store GL Scatter handler
self._color = None # Store color for each point
self._t = None # Store starting time for pointcloud
self._dynamic_point_cloud = None # Store the calculated point cloud points
def main(self):
cv2.namedWindow("Press Space to Continue", cv2.WINDOW_NORMAL) # 创建一个窗口以便捕捉按键
vis = o3d.visualization.Visualizer() # 启动可视化工具
# vis.create_window() # 初始化窗口
frame_num = 0
while True:
# 检测空格键,继续下一次循环
key = cv2.waitKey(0) # 0表示无限等待直到有键盘输入
if key == 32: # 空格键的ASCII码是32
self._cloud_file = f'data/pcd_data/test_cloud_{frame_num}.pcd'
self.create_points() # 创建点云数据
# 根据文件类型导出点云
if self._cloud_file[-4:] == '.ply':
self.export_to_ply()
if self._cloud_file[-4:] == '.pcd':
self.export_to_pcd()
loguru.logger.info(f"已保存第{frame_num}帧pcd")
frame_num += 1
# # add file geometry
# vis.add_geometry(o3d.io.read_point_cloud(os.path.join(self._dir_path, self._cloud_file)))
# opt = vis.get_render_option() # get options
# opt.background_color = np.asarray([0, 0, 0]) # background to black
# view_control = vis.get_view_control()
# view_control.rotate(0, -360)
# vis.poll_events()
# vis.update_renderer()
elif key == 27: # 如果按下ESC键,则退出循环
break
def create_points(self):
"""
Check if the file exists and if not create the point cloud points and the file
:return None
"""
# Check if the file exists in the folder
if self._depth_point_cloud or self._color_point_cloud:
t = time.time() # starting time
while not self._cloud:
self._depth = self._kinect.get_last_depth_frame()
self._color_frame = self._kinect.get_last_color_frame()
# ----- Get Depth Frame
if not self._kinect.has_new_depth_frame():
# store depth frame
continue
# ----- Get Color Frame
if not self._kinect.has_new_color_frame():
# store color frame
continue
# wait for kinect to grab at least one depth frame
if self._kinect.has_new_depth_frame() and self._color_frame is not None:
# use mapper to get world points
if self._depth_point_cloud:
world_points = mapper.depth_2_world(self._kinect, self._kinect._depth_frame_data,
_CameraSpacePoint)
world_points = ctypes.cast(world_points, ctypes.POINTER(ctypes.c_float))
world_points = np.ctypeslib.as_array(world_points, shape=(
self._kinect.depth_frame_desc.Height * self._kinect.depth_frame_desc.Width, 3))
world_points *= 1000 # transform to mm
self._dynamic_point_cloud = np.ndarray(shape=(len(world_points), 3), dtype=np.float32)
# transform to mm
self._dynamic_point_cloud[:, 0] = world_points[:, 0]
self._dynamic_point_cloud[:, 1] = world_points[:, 2]
self._dynamic_point_cloud[:, 2] = world_points[:, 1]
if self._cloud_file[-4:] == '.ply' or self._cloud_file[-4:] == '.pcd':
# update color for .ply file only
self._color = np.zeros((len(self._dynamic_point_cloud), 3), dtype=np.float32)
# map color to depth frame
Xs, Ys = mapper.color_2_depth_space(self._kinect, _ColorSpacePoint,
self._kinect._depth_frame_data, show=False)
color_img = self._color_frame.reshape(
(self._kinect.color_frame_desc.Height, self._kinect.color_frame_desc.Width, 4)).astype(
np.uint8)
# make align rgb/d image
align_color_img = np.zeros(
(self._kinect.depth_frame_desc.Height, self._kinect.depth_frame_desc.Width, 4),
dtype=np.uint8)
align_color_img[:, :] = color_img[Ys, Xs, :]
align_color_img = align_color_img.reshape(
(self._kinect.depth_frame_desc.Height * self._kinect.depth_frame_desc.Width, 4)).astype(
np.uint8)
align_color_img = align_color_img[:, :3:] # remove the fourth opacity channel
align_color_img = align_color_img[..., ::-1] # transform from bgr to rgb
self._color[:, 0] = align_color_img[:, 0]
self._color[:, 1] = align_color_img[:, 1]
self._color[:, 2] = align_color_img[:, 2]
if self._color_point_cloud:
# use mapper to get world points from color sensor
world_points = mapper.color_2_world(self._kinect, self._kinect._depth_frame_data,
_CameraSpacePoint)
world_points = ctypes.cast(world_points, ctypes.POINTER(ctypes.c_float))
world_points = np.ctypeslib.as_array(world_points, shape=(
self._kinect.color_frame_desc.Height * self._kinect.color_frame_desc.Width, 3))
world_points *= 1000 # transform to mm
# transform the point cloud to np (424*512, 3) array
self._dynamic_point_cloud = np.ndarray(shape=(len(world_points), 3), dtype=np.float32)
self._dynamic_point_cloud[:, 0] = world_points[:, 0]
self._dynamic_point_cloud[:, 1] = world_points[:, 2]
self._dynamic_point_cloud[:, 2] = world_points[:, 1]
if self._cloud_file[-4:] == '.ply' or self._cloud_file[-4:] == '.pcd':
# update color for .ply file only
self._color = np.zeros((len(self._dynamic_point_cloud), 3), dtype=np.float32)
# get color image
color_img = self._color_frame.reshape(
(self._kinect.color_frame_desc.Height, self._kinect.color_frame_desc.Width, 4)).astype(
np.uint8)
color_img = color_img.reshape(
(self._kinect.color_frame_desc.Height * self._kinect.color_frame_desc.Width, 4))
color_img = color_img[:, :3:] # remove the fourth opacity channel
color_img = color_img[..., ::-1] # transform from bgr to rgb
# update color with rgb color
self._color[:, 0] = color_img[:, 0]
self._color[:, 1] = color_img[:, 1]
self._color[:, 2] = color_img[:, 2]
self._cloud = True # break loop
self._dt = time.time() - t # running time
else:
print('[CloudPoint] No sensor flag checked')
print('Example 1 :\n pcl = Cloud(file=filename, color=True) \n pcl.visualize()')
print('Example 2 :\n pcl = Cloud(file=filename, depth=True) \n pcl.visualize()')
sys.exit()
def export_to_ply(self):
"""
Inspired by https://github.com/bponsler/kinectToPly
Writes a kinect point cloud into a .ply file
return None
"""
# assert that the points have been created
assert self._dynamic_point_cloud is not None, "Point Cloud has not been initialized"
assert self._cloud_file != "", "Specify text filename"
# stack data
data = np.column_stack((self._dynamic_point_cloud, self._color))
data = data[np.all(data != float('-inf'), axis=1)] # remove -inf
# header format of ply file
header_lines = ["ply",
"format ascii 1.0",
"comment generated by: python",
"element vertex {}".format(int(len(data))),
"property float x",
"property float y",
"property float z",
"property uchar red",
"property uchar green",
"property uchar blue",
"end_header"]
# convert to string
data = '\n'.join(
'{} {} {} {} {} {}'.format('%.2f' % x[0], '%.2f' % x[1], '%.2f' % x[2], int(x[3]), int(x[4]), int(x[5])) for
x in data)
header = '\n'.join(line for line in header_lines) + '\n'
# write file
file = open(os.path.join(self._dir_path, self._cloud_file), 'w')
file.write(header)
file.write(data)
file.close()
def export_to_pcd(self):
# assert that the points have been created
assert self._dynamic_point_cloud is not None, "Point Cloud has not been initialized"
assert self._cloud_file != "", "Specify text filename"
# pack r/g/b to rgb
rgb = np.asarray([[int(int(r_g_b[0]) << 16 | int(r_g_b[1]) << 8 | int(r_g_b[0]))] for r_g_b in self._color])
# stack data
data = np.column_stack((self._dynamic_point_cloud, rgb))
data = data[np.all(data != float('-inf'), axis=1)] # remove -inf
# header format of pcd file
header_lines = ["# .PCD v0.7 - Point Cloud Data file format",
"VERSION 0.7",
"FIELDS x y z rgb",
"SIZE 4 4 4 4",
"TYPE F F F U",
"COUNT 1 1 1 1",
"WIDTH {}".format(int(len(data))),
"HEIGHT 1",
"VIEWPOINT 0 0 0 1 0 0 0",
"POINTS {}".format(int(len(data))),
"DATA ascii"]
# convert to string
data = '\n'.join('{} {} {} {}'.format('%.2f' % x[0], '%.2f' % x[1], '%.2f' % x[2], int(x[3])) for x in data)
header = '\n'.join(line for line in header_lines) + '\n'
# write file
file = open(os.path.join(self._dir_path, self._cloud_file), 'w')
file.write(header)
file.write(data)
file.close()
if __name__ == "__main__":
# pcl = Cloud(dynamic=True, simultaneously=True, color=True, depth=True, body=False, skeleton=False, color_overlay=True)
# pcl.main() # step1 得到点云
# RGBD2cloud(file_path=r"./data/RGBD4") # step1 得到点云
seg_body(pcd_path=r"./data/pcd_data", show=False) # #step2
# mutilway_registration(bunny_path=r"./data/seg_pcd_data/") # #step3
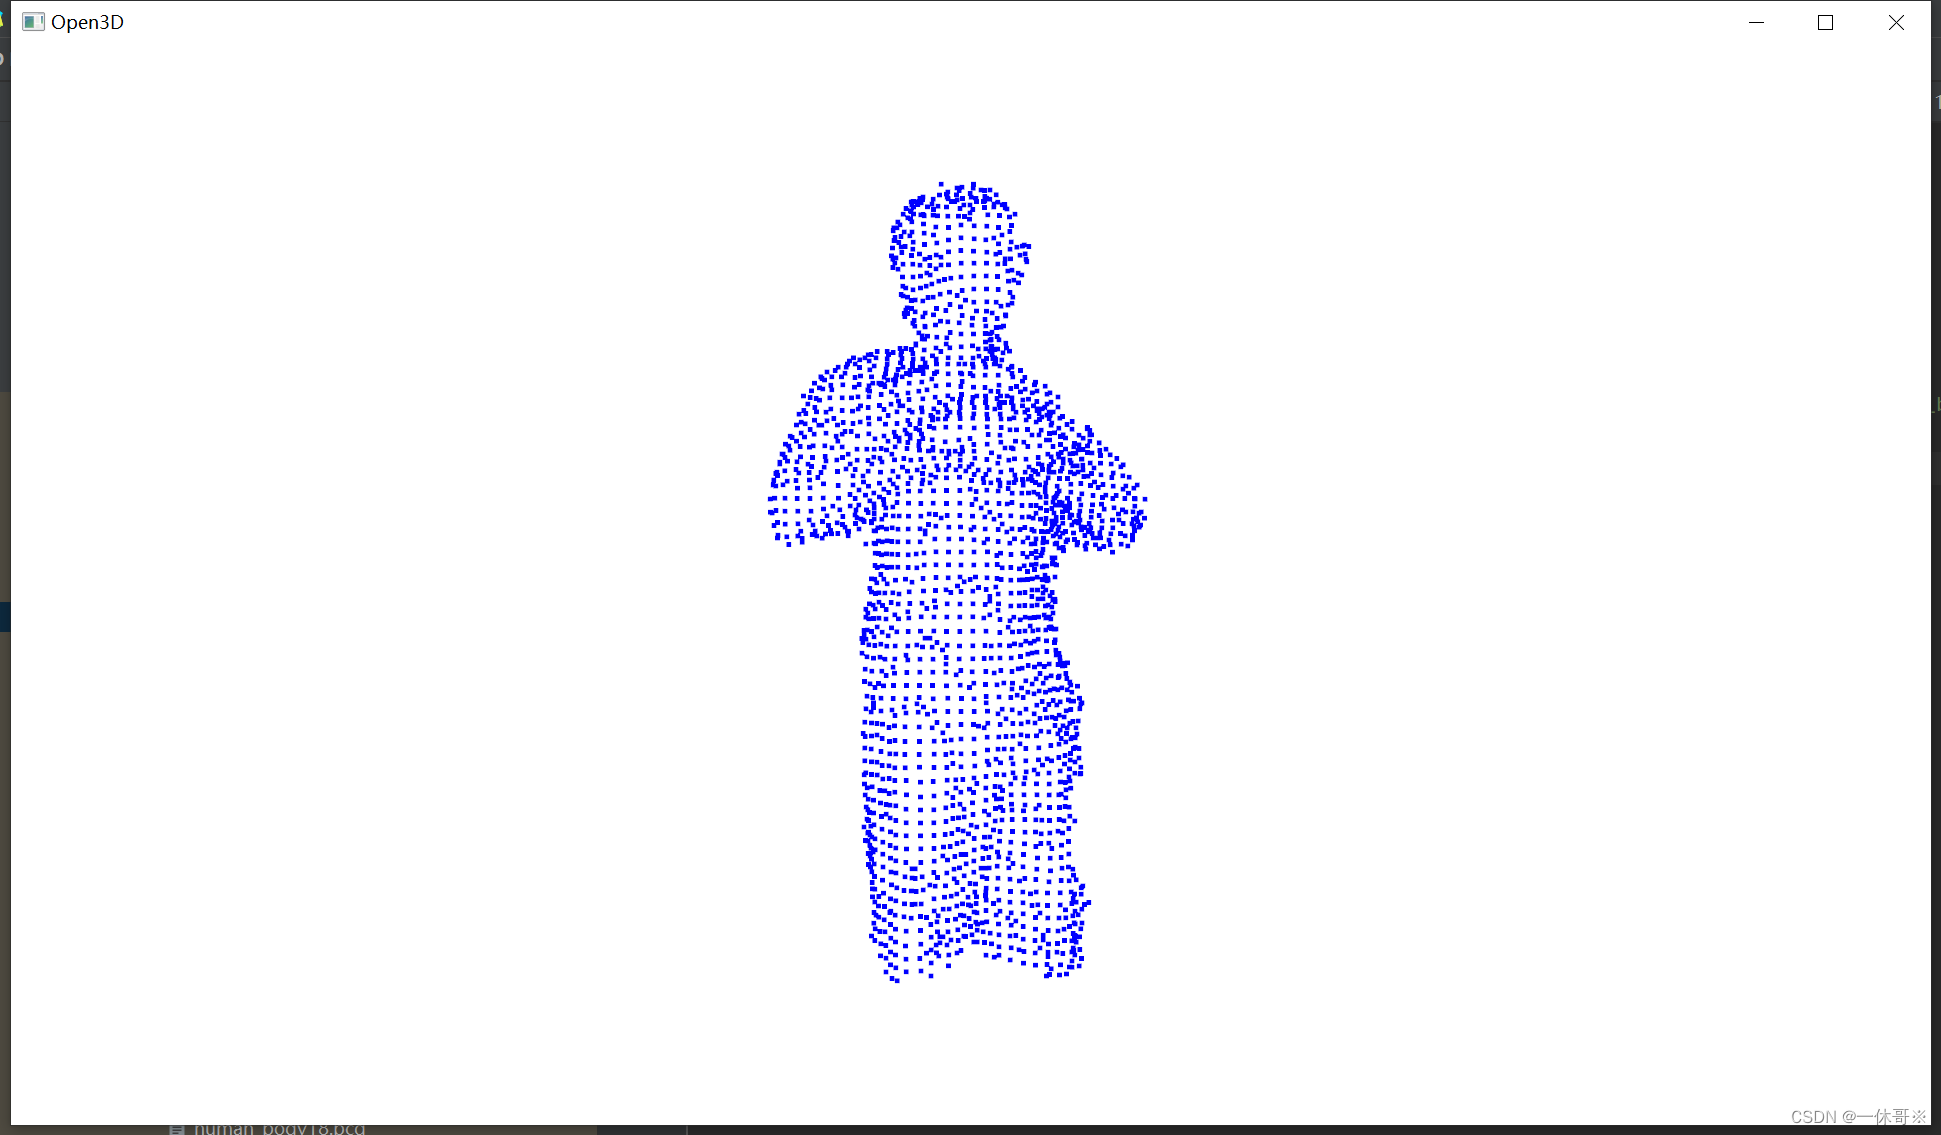
其中RGBD2cloud可以将rgb和depth转化为点云图,
seg_body可以裁剪出人体上半部分点云图,目前裁剪出的点云图失去了彩色部分
二、重建部分
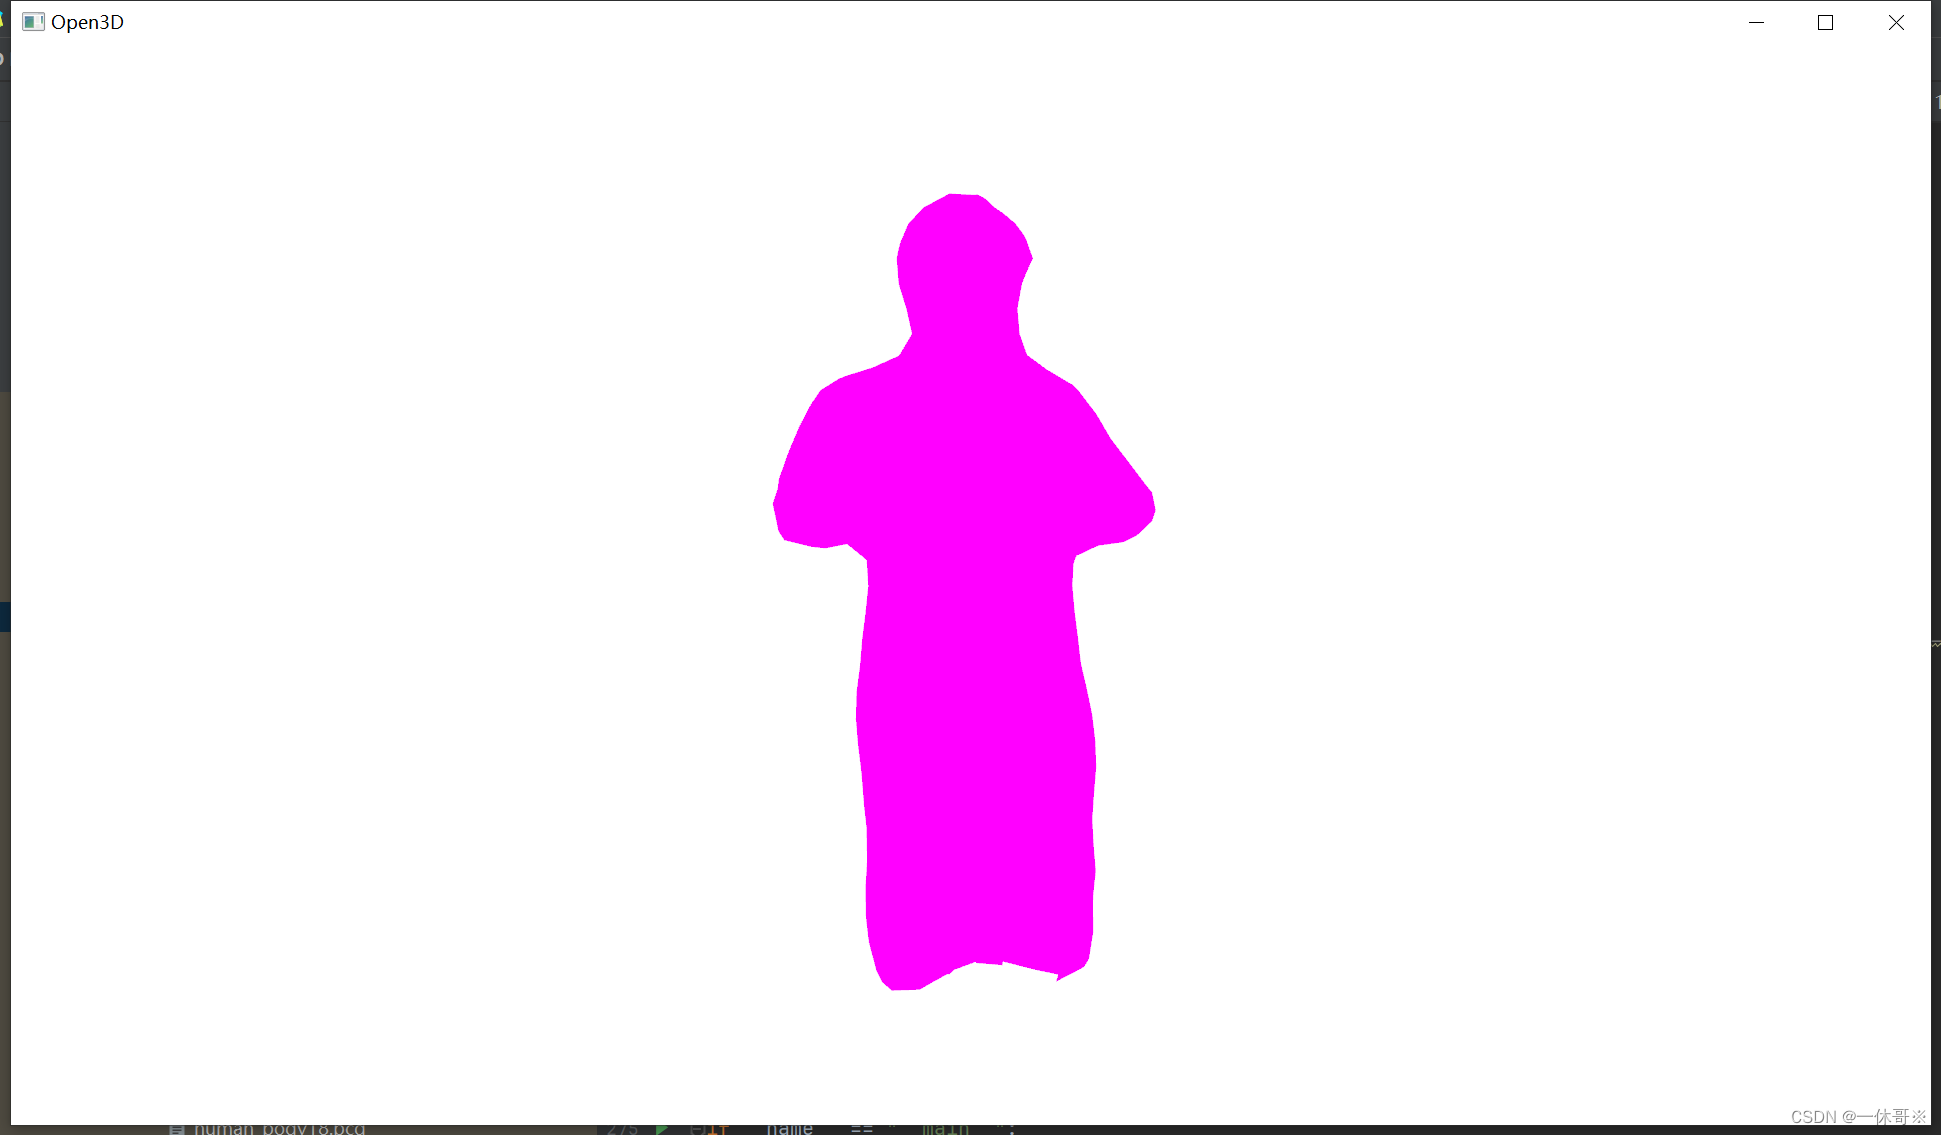
2.1 泼松重建
def Poisson_rec(pcd_path):
    import open3d as o3d
    import numpy as np

    # 加载点云
    pcd = o3d.io.read_point_cloud(pcd_path)
    pcd = pcd.voxel_down_sample(voxel_size=0.05)
    pcd.paint_uniform_color([1.0, 0.0, 1.0])
    # 法线估计
    radius = 0.5  # 调整为更适合你数据的值
    max_nn = 30 # 调整为更适合你数据的值
    pcd.estimate_normals(search_param=o3d.geometry.KDTreeSearchParamHybrid(radius, max_nn))

    # 使用不依赖于相机位置的方法调整法线方向
    pcd.orient_normals_consistent_tangent_plane(k=max_nn)

    # Poisson重建
    with o3d.utility.VerbosityContextManager(o3d.utility.VerbosityLevel.Debug) as cm:
        mesh, densities = o3d.geometry.TriangleMesh.create_from_point_cloud_poisson(pcd, depth=9)  # 调整深度参数

    # 可视化重建结果
    o3d.visualization.draw_geometries([mesh], window_name="点云重建")
    # 可视化
    print('visualize densities')
    densities = np.asarray(densities)
    density_colors = plt.get_cmap('plasma')(
        (densities - densities.min()) / (densities.max() - densities.min()))
    density_colors = density_colors[:, :3]
    density_mesh = o3d.geometry.TriangleMesh()
    density_mesh.vertices = mesh.vertices
    density_mesh.triangles = mesh.triangles
    density_mesh.triangle_normals = mesh.triangle_normals
    density_mesh.vertex_colors = o3d.utility.Vector3dVector(density_colors)
    o3d.visualization.draw_geometries([density_mesh],)

    print('remove low density vertices')
    vertices_to_remove = densities < np.quantile(densities, 0.01)
    mesh.remove_vertices_by_mask(vertices_to_remove)
    print(mesh)
    o3d.visualization.draw_geometries([mesh],)
    o3d.io.write_triangle_mesh("mesh.ply", mesh)
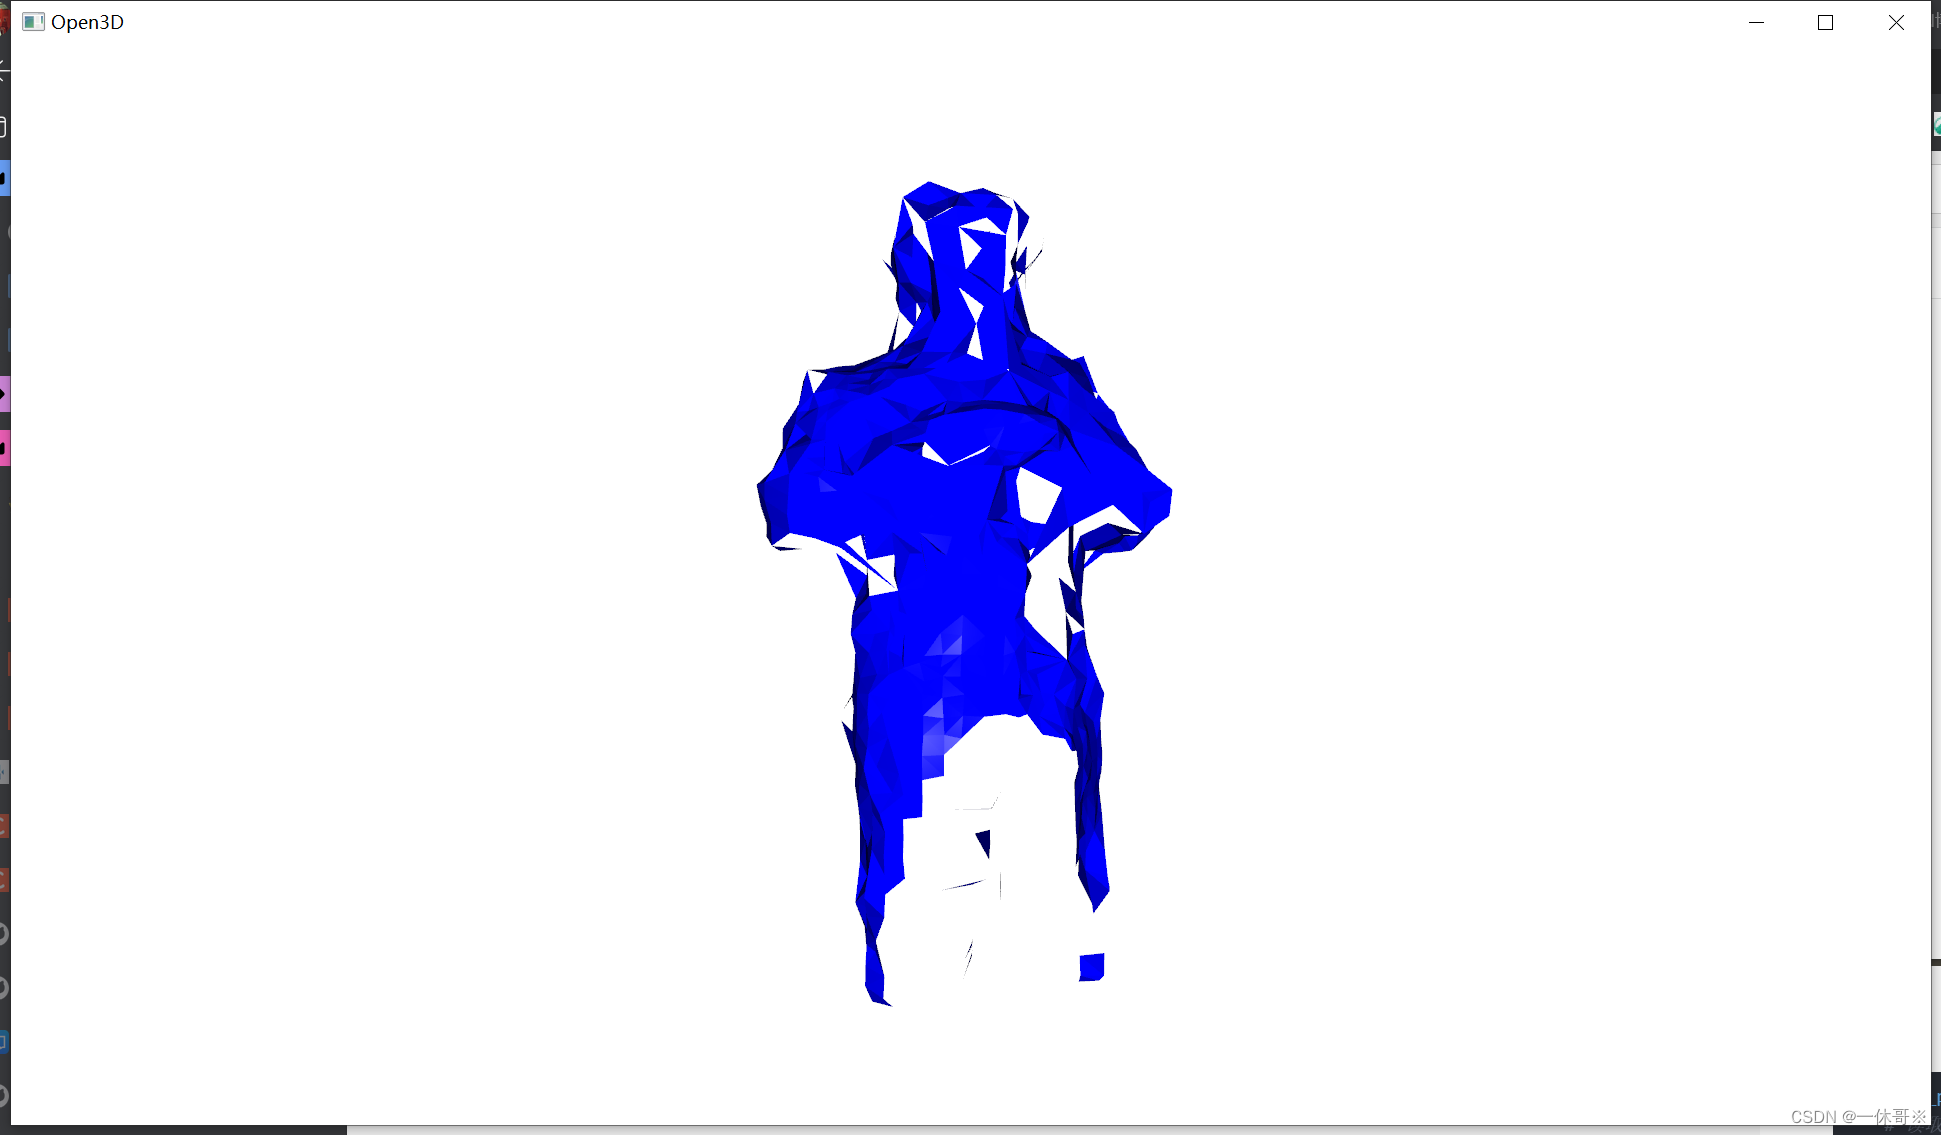
2.2 滚球重建
def Ball_pivoting(pcd_path):
    # 读取你的点云数据
    pcd_path = pcd_path  # 将这里的路径改为你的点云文件路径
    pcd = o3d.io.read_point_cloud(pcd_path)
    pcd = o3d.io.read_point_cloud(pcd_path)
    pcd.estimate_normals(search_param=o3d.geometry.KDTreeSearchParamHybrid(radius=0.05, max_nn=50))
    pcd.orient_normals_consistent_tangent_plane(100)
    # 可视化原始点云
    o3d.visualization.draw_geometries([pcd])

    # 定义球枢转算法的球半径
    radii = [0.05, 0.1, 0.2]

    # 使用球枢转算法从点云中创建三角网格
    rec_mesh = o3d.geometry.TriangleMesh.create_from_point_cloud_ball_pivoting(
        pcd, o3d.utility.DoubleVector(radii))

    # 可视化重建的网格和原始点云
    o3d.visualization.draw_geometries([rec_mesh])
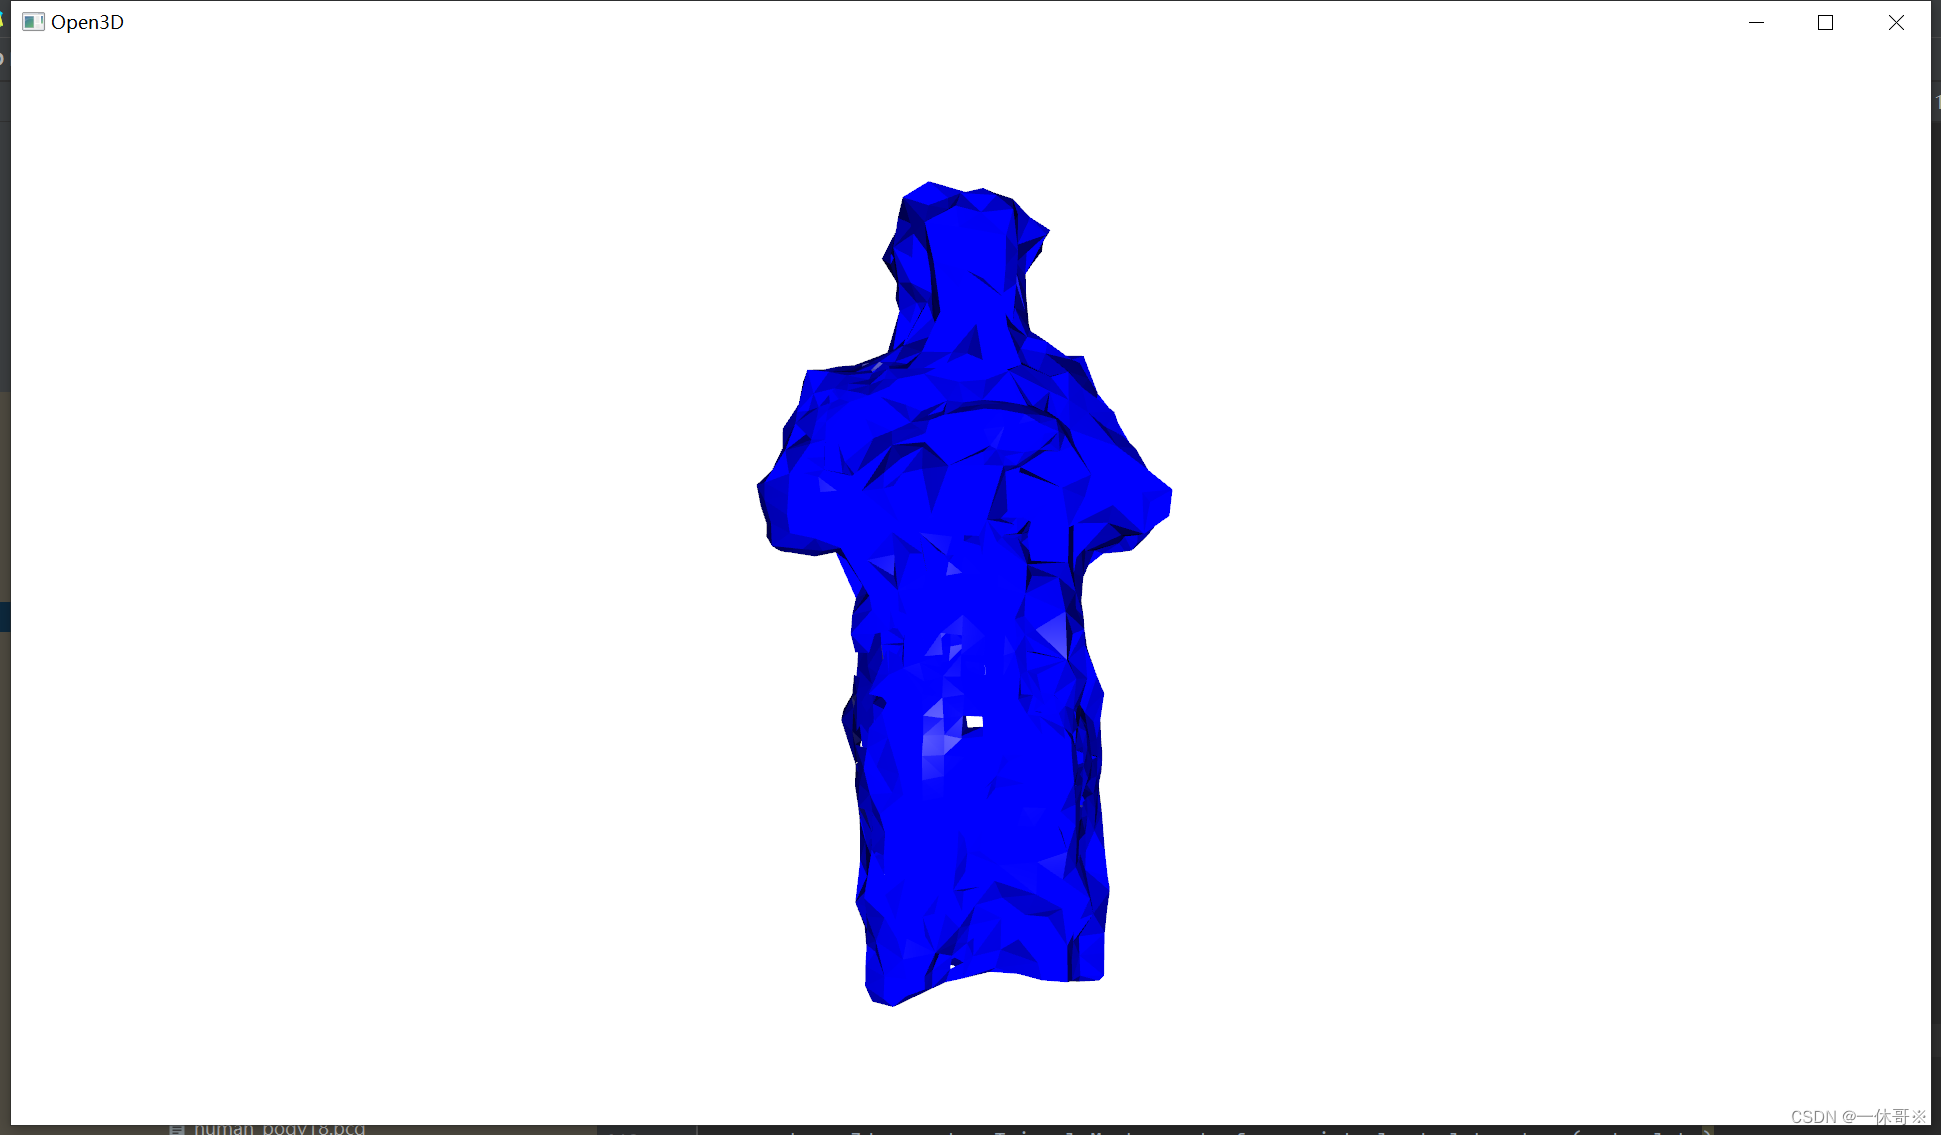
2.3 alpha重建
    import open3d as o3d
    import numpy as np

    # --------------------------- 加载点云 ---------------------------
    print("->正在加载点云... ")
    pcd = o3d.io.read_point_cloud(pcd_path)
    pcd = pcd.voxel_down_sample(voxel_size=0.005)
    print("原始点云:", pcd)
    # ==============================================================

    # ------------------------- Alpha shapes -----------------------
    alpha = 0.05
    print(f"alpha={alpha:.3f}")
    mesh = o3d.geometry.TriangleMesh.create_from_point_cloud_alpha_shape(pcd, alpha)
    mesh.compute_vertex_normals()
    o3d.visualization.draw_geometries([mesh], mesh_show_back_face=True)
    # 保存三角网格而不是点云
    o3d.io.write_triangle_mesh("./mesh.ply", mesh)
现在存在以下问题:
- 人体点云分割后缺少了彩色信息,icp配准后就无法使用彩色icp
- 配准后的点云如何有效重建
