【Maven】使用maven-jar、maven-assembly、maven-shade优雅的实现第三方依赖一同打Jar包

news2025/1/23 10:36:51

文章目录

  • 一.前言
  • 二.常规Jar 打包:maven-jar-plugin
  • 三.Shade 打包:maven-shade-plugin
    • 1.如何使用
    • 2.将部分jar包添加或排除
    • 3.将依赖jar包内部资源添加或排除
    • 4.自动将所有不使用的类排除
    • 5.将依赖的类重命名并打包进来 (隔离方案)
    • 6.修改包的后缀名
    • 7.异常:Invalid signature file digest for Manifest main attributes
  • 四.Assembly 打包方式:maven-assembly-plugin
  • 五.IDEA使用 Maven Assembly 插件的具体实现

一.前言

maven提供的打包插件有如下三种

  • maven-jar-plugin maven 默认打包插件【springboot默认使用该方式打包】,用来创建 project jar
  • maven-shade-plugin 用来打可执行包,executable(fat) jar
  • maven-assembly-plugin 支持定制化打包方式,例如 apache 项目的打包方式

二.常规Jar 打包:maven-jar-plugin

  • 使用maven-jar-plugin插件, 默认的打包方式,用来打普通的project JAR包 .
<build>
   <plugins>
       <plugin>
            <groupId>org.apache.maven.plugins</groupId>
            <artifactId>maven-jar-plugin</artifactId>
            <version>3.1.0</version>
            <configuration>
                <archive>
                    <manifest>
                        <!-- 可执行jar包需要指定入口函数 然后通过java -jar执行 -->
                        <mainClass>类的全路径名称</mainClass>
                        <!-- 是否添加依赖的jar路径配置 -->
                        <addClasspath>true</addClasspath>
                        <!-- 依赖的jar包存放位置,和生成的jar放在同一级目录下 -->
                        <classpathPrefix>lib/</classpathPrefix>
                    </manifest>
                </archive>
                <!-- 不打包com.artisan.excludes下面的所有类 -->
                <excludes>com/artisan/excludes/*</excludes>
            </configuration>
        </plugin>
    </plugins>
</build>
  • 上面配置使用这个 jar包的时候就需要在它同一级的创建一个lib目录来存放。 可以使用includes或excludes选择的打包某些内容

三.Shade 打包:maven-shade-plugin

  • 插件:使用maven-shade-plugin插件

    • maven-shade-plugin提供了两大基本功能:

      • 将依赖的jar包打包到当前jar包(常规打包是不会将所依赖jar包打进来的);
      • 对依赖的jar包进行重命名(用于类的隔离);

1.如何使用

  • maven-shade-plugin 只存在一个goal :shade: ,需要将其绑定到 package的生命周期上面 上
    <build>
        <plugins>
            <plugin>
                <groupId>org.apache.maven.plugins</groupId>
                <artifactId>maven-shade-plugin</artifactId>
                <version>3.2.4</version>
                <executions>
                    <execution>
                        <phase>package</phase><!-- 绑定到package生命周期阶段上 -->
                        <goals>
                            <goal>shade</goal>
                        </goals>
                        <configuration>
                            <!--默认情况下,通过mvn package生成的jar包中因为没有指定Main-Class属性,因此并不能使用-jar配置直接运行。需要配置Main-Class。-->
                            <!--mainClass可有可无,加上的话则直接生成可运行jar包 通过java -jar xxx.jar执行-->
                            <!--<transformers>
                                <transformer
                                        implementation="org.apache.maven.plugins.shade.resource.ManifestResourceTransformer">
                                    <mainClass>com.example.App</mainClass>
                                </transformer>
                            </transformers>-->
                        </configuration>
                    </execution>
                </executions>
            </plugin>
        </plugins>
    </build>
  • 打包后target 目录下会生成可执行 Jar包。该包里面包含项目中使用了和没使用的的所有第三方包代码

2.将部分jar包添加或排除

        <plugins>
            <plugin>
                <groupId>org.apache.maven.plugins</groupId>
                <artifactId>maven-shade-plugin</artifactId>
                <version>3.2.4</version>
                
                <executions>
                    <execution>
                        <phase>package</phase>
                        
                        <goals>
                            <goal>shade</goal>
                        </goals>
                        
                        <configuration>
                        <!--这里-->
                            <artifactSet>
                                <excludes>
                                    <exclude>jmock:*</exclude>
                                    <exclude>*:xml-apis</exclude>
                                    <exclude>org.apache.maven:lib:tests</exclude>
                                    <exclude>log4j:log4j:jar:</exclude>
                                </excludes>
                                <includes>
                                    <include>junit:junit</include>
                                </includes>
                            </artifactSet>
                        </configuration>
                    </execution>
                </executions>
            </plugin>
  • jar包以 groupId : artifactId[[:type] : classifier]的形式表示
  • 1.3版本后插件支持通配符 ‘*’ and ‘?’

3.将依赖jar包内部资源添加或排除

        <plugins>
            <plugin>
                <groupId>org.apache.maven.plugins</groupId>
                <artifactId>maven-shade-plugin</artifactId>
                <version>3.2.4</version>
                <executions>
                    <execution>
                        <phase>package</phase>
                        
                        <goals>
                            <goal>shade</goal>
                        </goals>
    
                        <configuration>
                           <!--这里-->
                            <filters>
                                <filter>
                                    <artifact>junit:junit</artifact>
                                    <includes>
                                        <include>junit/framework/**</include>
                                        <include>org/junit/**</include>
                                    </includes>
                                    <excludes>
                                        <exclude>org/junit/experimental/**</exclude>
                                        <exclude>org/junit/runners/**</exclude>
                                    </excludes>
                                </filter>
                                
                                <filter>
                                    <artifact>*:*</artifact>
                                    <excludes>
                                        <exclude>META-INF/*.SF</exclude>
                                        <exclude>META-INF/*.DSA</exclude>
                                        <exclude>META-INF/*.RSA</exclude>
                                    </excludes>
                                </filter>
                                
                            </filters>
                        </configuration>
                    </execution>
                </executions>
            </plugin>

4.自动将所有不使用的类排除

        <plugins>
            <plugin>
                <groupId>org.apache.maven.plugins</groupId>
                <artifactId>maven-shade-plugin</artifactId>
                <version>3.2.4</version>
                <executions>
                    <execution>
                        <phase>package</phase>
                        <goals>
                            <goal>shade</goal>
                        </goals>
                        
                        <configuration>
   							<minimizeJar>true</minimizeJar> <!--这里-->
                        </configuration>
                    </execution>
                </executions>
            </plugin>

5.将依赖的类重命名并打包进来 (隔离方案)

            <plugin>
                <groupId>org.apache.maven.plugins</groupId>
                <artifactId>maven-shade-plugin</artifactId>
                <version>3.2.4</version>
                <executions>
                    <execution>
                        <phase>package</phase>
                        <goals>
                            <goal>shade</goal>
                        </goals>
                        <configuration>
                            <relocations>
                                <relocation>
                                    <pattern>org.codehaus.plexus.util</pattern>
                                    <shadedPattern>org.shaded.plexus.util</shadedPattern>
                                    <excludes>
                                        <exclude>org.codehaus.plexus.util.xml.Xpp3Dom</exclude>
                                        <exclude>org.codehaus.plexus.util.xml.pull.*</exclude>
                                    </excludes>
                                </relocation>
                            </relocations>
                        </configuration>
                    </execution>
                </executions>
            </plugin>
  • org.codehaus.plexus.util重命名为org.shaded.plexus.util,原始jar包中的org.codehaus.plexus.util.xml.Xpp3Domorg.codehaus.plexus.util.xml.pull不会被重命名到目的包中

6.修改包的后缀名

  • 会生成一个以 “-oyjp”为结尾的jar包
        <plugins>
            <plugin>
                <groupId>org.apache.maven.plugins</groupId>
                <artifactId>maven-shade-plugin</artifactId>
                <version>3.2.4</version>
                <executions>
                    <execution>
                        <phase>package</phase>
                        <goals>
                            <goal>shade</goal>
                        </goals>
                        <configuration>
                            <shadedArtifactAttached>true</shadedArtifactAttached>
                            <shadedClassifierName>oyjp</shadedClassifierName> <!--这里 -->
                        </configuration>
                    </execution>
                </executions>
            </plugin>

7.异常:Invalid signature file digest for Manifest main attributes

  • 原因:有些jar包生成时,会 使用jarsigner生成文件签名(完成性校验),分为两个文件存放在META-INF目录下:
a signature file, with a .SF extension;
a signature block file, with a .DSA, .RSA, or .EC extension;

在生成jar时,将这些排除掉,不再进行完成性校验,如下所示:

<configuration>
 <filters>
    <filter>
      <artifact>*:*</artifact>
      <excludes>
        <exclude>META-INF/*.SF</exclude>
        <exclude>META-INF/*.DSA</exclude>
        <exclude>META-INF/*.RSA</exclude>
      </excludes>
    </filter>
  </filters>
</configuration>

四.Assembly 打包方式:maven-assembly-plugin

  • 使用maven-assembly-plugin插件 。

  • 日常使用比较多的是maven-assembly-plugin插件

    • 例如:大数据项目中往往有很多shell脚本、SQL脚本、.properties及.xml配置项等,采用assembly插件可以让输出的结构清晰而标准化
<build>
    <plugins>
        <plugin>
            <groupId>org.apache.maven.plugins</groupId>
            <artifactId>maven-assembly-plugin</artifactId>
            <version>${maven-assembly-plugin.version}<version>
            <executions>
                <execution>
                    <id>make-assembly</id>
                    <!-- 绑定到package生命周期 -->
                    <phase>package</phase>
                    <goals>
                        <!-- 只运行一次 -->
                        <goal>single</goal>
                    </goals>
                </execution>
            </executions>
            <configuration>
                <!-- 配置描述符文件 -->
                <descriptor>src/main/assembly/assembly.xml</descriptor>
                
                <!-- 也可以使用Maven预配置的描述符,默认打包所有
                <descriptorRefs>
                    <descriptorRef>jar-with-dependencies</descriptorRef>
                </descriptorRefs> -->
            </configuration>
        </plugin>
    </plugins>
</build>

src/main/assembly/编写描述符文件assembly.xml

<assembly>
    <id>assembly</id>
    <formats>
        <format>tar.gz</format>
    </formats>
    <includeBaseDirectory>true</includeBaseDirectory>
    <fileSets>
        <fileSet>
            <directory>src/main/bin</directory>
            <includes>
                <include>*.sh</include>
            </includes>
            <outputDirectory>bin</outputDirectory>
            <fileMode>0755</fileMode>
        </fileSet>
        <fileSet>
            <directory>src/main/conf</directory>
            <outputDirectory>conf</outputDirectory>
        </fileSet>
        <fileSet>
            <directory>src/main/sql</directory>
            <includes>
                <include>*.sql</include>
            </includes>
            <outputDirectory>sql</outputDirectory>
        </fileSet>
        <fileSet>
            <directory>target/classes/</directory>
            <includes>
                <include>*.properties</include>
                <include>*.xml</include>
                <include>*.txt</include>
            </includes>
            <outputDirectory>conf</outputDirectory>
        </fileSet>
    </fileSets>
    <files>
        <file>
            <source>target/${project.artifactId}-${project.version}.jar</source>
            <outputDirectory>.</outputDirectory>
        </file>
    </files>
    <dependencySets>
        <dependencySet>
            <unpack>false</unpack>
            <scope>runtime</scope>
            <outputDirectory>lib</outputDirectory>
        </dependencySet>
    </dependencySets>
</assembly>
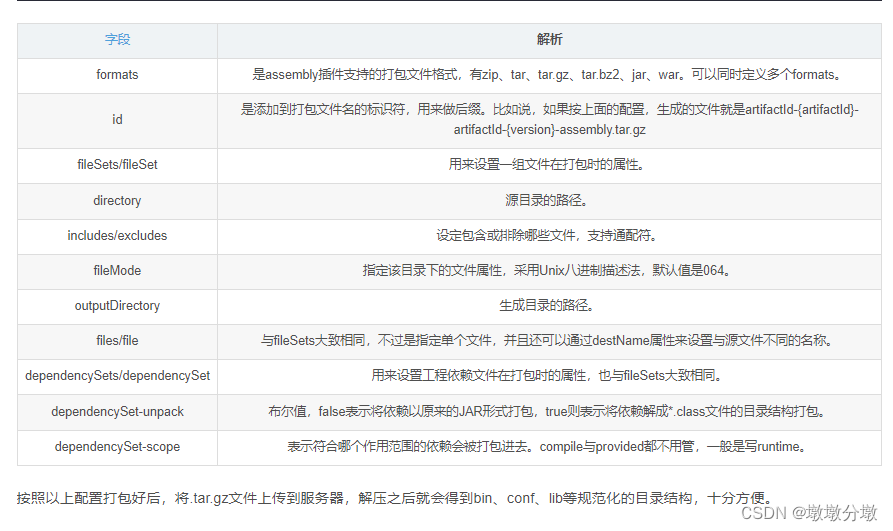
在这里插入图片描述

五.IDEA使用 Maven Assembly 插件的具体实现

1.修改pom.xml文件

    <build>
        <plugins>
            <plugin>
                <artifactId>maven-assembly-plugin</artifactId>
                <version>2.6</version>
                <configuration>
                    <descriptorRefs>
                        <descriptorRef>jar-with-dependencies</descriptorRef>
                    </descriptorRefs>
                    <archive>
                        <!--mainClass可有可无,加上的话则直接生成可运行jar包 通过java -jar xxx.jar执行-->
                        <manifest>
                            <mainClass>Main.Main</mainClass>
                        </manifest>
                    </archive>
                </configuration>
                <executions>
                    <execution>
                        <id>make-assembly</id>
                        <phase>package</phase>
                        <goals>
                            <goal>single</goal>
                        </goals>
                    </execution>
                </executions>
            </plugin>
        </plugins>
    </build>
  • 在执行 Maven 打包命令 (mvn clean package) 会在target 目录下找到一个包含所有依赖项的可执行 *-with-dependencies.jar包
    • 注: 最终的 jar包可能非常大,因为它包含了所有依赖包。如果只想打包应用程序本身而不包含其他依赖,可以考虑编写描述符文件或者使用 Maven Shade 插件来进行定制

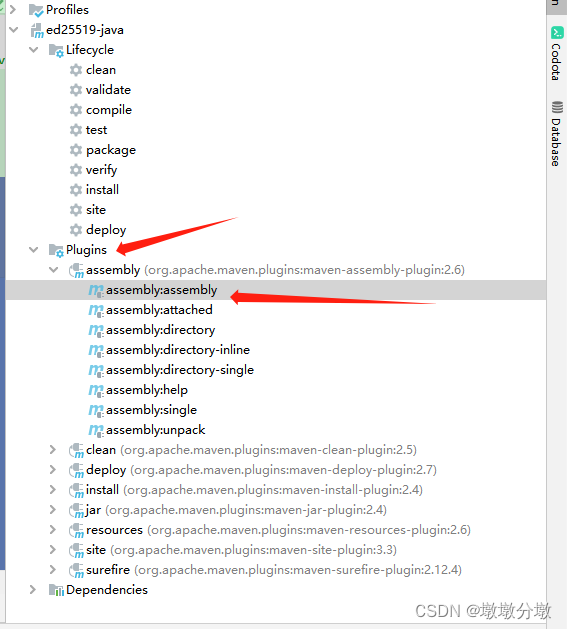
2.使用assembly打包 先使用clean清除 然后使用assembly打包
在这里插入图片描述

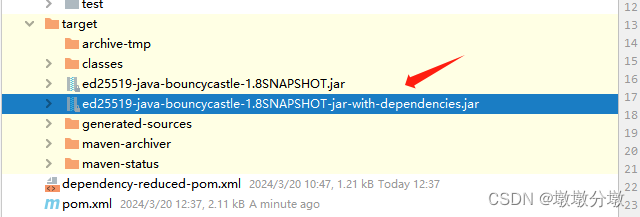
3.打完包会在target目录下生成两个jar包,如果你有用maven引用外部jar,使用*-with-dependencies.jar包即可。
在这里插入图片描述

4.如果要打包的项目依赖其他项目打包的jar,需要添加file -> project-structure... -> Libraries,点击+号添加对应的jar到项目,还需要再pom.xml再引用一下`
在这里插入图片描述
5.如果项目中使用junit,导致打包失败
在这里插入图片描述

本文来自互联网用户投稿,该文观点仅代表作者本人,不代表本站立场。本站仅提供信息存储空间服务,不拥有所有权,不承担相关法律责任。如若转载,请注明出处:http://www.coloradmin.cn/o/1532395.html

如若内容造成侵权/违法违规/事实不符,请联系多彩编程网进行投诉反馈,一经查实,立即删除!

相关文章

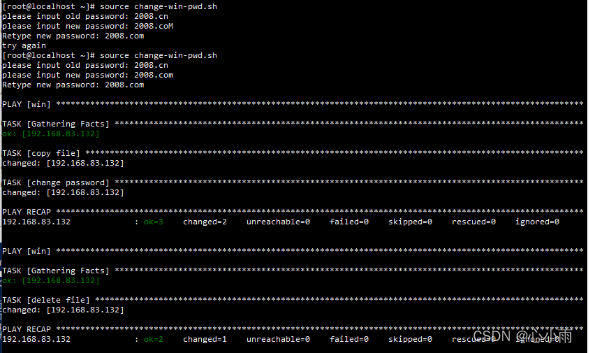
使用ansible批量修改操作系统管理员账号密码

一、ansible server端配置 1、对于Linux主机配置免密登录ssh-copy-id -i ~/.ssh/id_rsa.pub rootremote_ip 2、在/etc/ansible/hosts文件中添加相应主机IP 3、对于Windows主机需要在/etc/ansible/hosts文件中进行以下配置 192.168.83.132 ansible_ssh_useradministrator an…

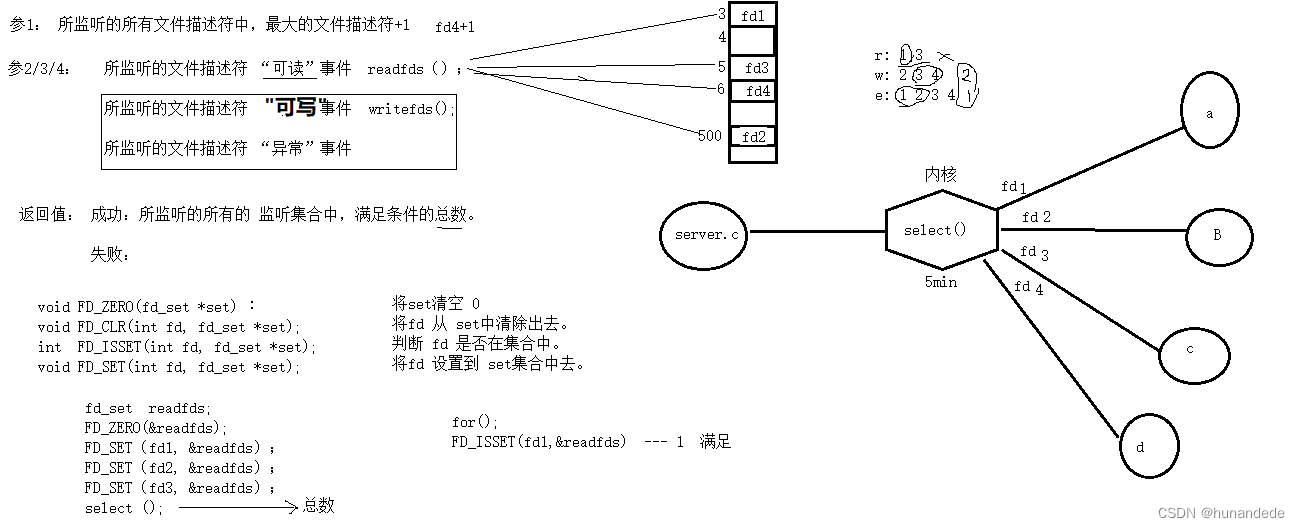
147 Linux 网络编程3 ,高并发服务器 --多路I/O转接服务器 - select

从前面的知识学习了如何通过socket &#xff0c;多进程&#xff0c;多线程创建一个高并发服务器&#xff0c;但是在实际工作中&#xff0c;我们并不会用到前面的方法 去弄一个高并发服务器&#xff0c;有更加好用的方法&#xff0c;就是多路I/O转接器 零 多路I/O转接服务器 多…

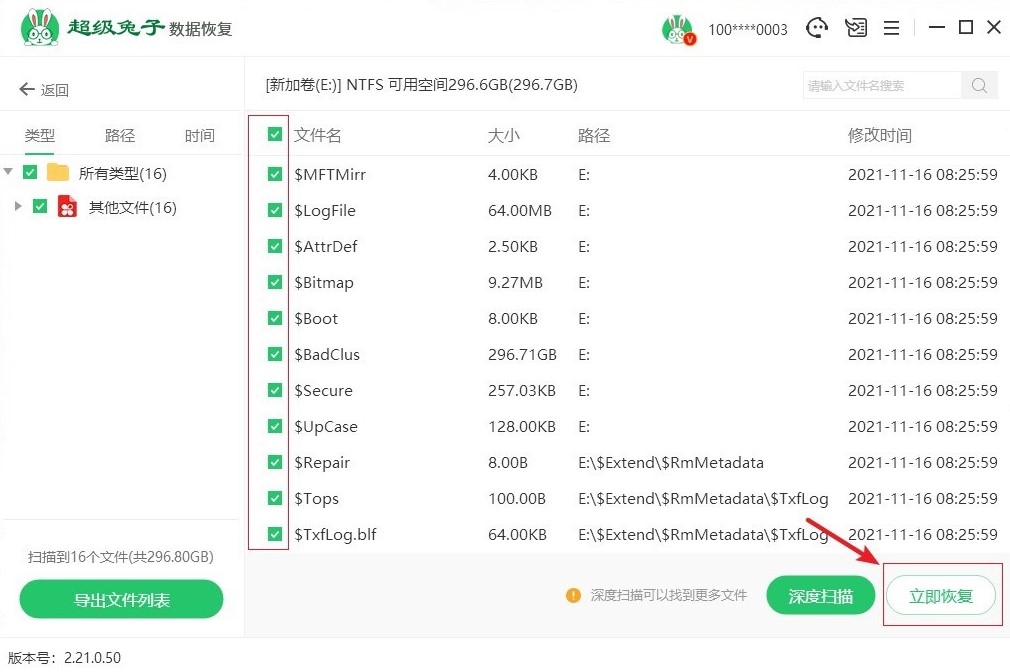
电脑硬盘误删怎么恢复,误删硬盘的文件能不能再恢复

误删硬盘的文件能不能再恢复&#xff1f;很多朋友都很关心这个问题&#xff0c;不用担心&#xff0c;误删硬盘文件是可以恢复的&#xff01;使用电脑不可避免会遇到一些糊涂的时刻&#xff0c;比如误删了重要的文件。当我们发现自己不小心将硬盘上的文件删除时&#xff0c;心里…

【STM32】读写BKP备份寄存器RTC实时时钟

目录 BKP BKP简介 BKP基本结构 BKP测试代码 RTC RTC简介 RTC框图 RTC基本结构 硬件电路 RTC操作注意事项 接线图 初始化 使用BKP解决只初始化一次时间 初始化参考代码 RTC设置时间 RTC读取时间 完整代码 MyRTC.c MyRTC.h main.c BKP BKP简介 BKP&#xff0…

Centos7部署单节点MongoDB(V4.2.25)

&#x1f388; 作者&#xff1a;互联网-小啊宇 &#x1f388; 简介&#xff1a; CSDN 运维领域创作者、阿里云专家博主。目前从事 Kubernetes运维相关工作&#xff0c;擅长Linux系统运维、开源监控软件维护、Kubernetes容器技术、CI/CD持续集成、自动化运维、开源软件部署维护…

Apipost数据模型上线,解决相似数据结构复用问题

在API设计和开发过程中&#xff0c;存在许多瓶颈&#xff0c;其中一个主要问题是在遇到相似数据结构的API时会产生重复性较多的工作&#xff1a;在每个API中都编写相同的数据&#xff0c;这不仅浪费时间和精力&#xff0c;还容易出错并降低API的可维护性。 为了解决这个问题&a…

乐优商城(九)数据同步RabbitMQ

1. 项目问题分析 现在项目中有三个独立的微服务&#xff1a; 商品微服务&#xff1a;原始数据保存在 MySQL 中&#xff0c;从 MySQL 中增删改查商品数据。搜索微服务&#xff1a;原始数据保存在 ES 的索引库中&#xff0c;从 ES 中查询商品数据。商品详情微服务&#xff1a;做…

【phoenix】flink程序执行phoenix,phoenix和flink-sql-connector-hbase包类不兼容

问题报错 Caused by: java.lang.RuntimeException: java.lang.RuntimeException: class org.apache.flink.hbase.shaded.org.apache.hadoop.hbase.client.ClusterStatusListener$MulticastListener not org.apache.hadoop.hbase.client.ClusterStatusListener$Listener如下图&…

语音识别教程:Whisper

语音识别教程&#xff1a;Whisper 一、前言 最近看国外教学视频的需求&#xff0c;有些不是很适应&#xff0c;找了找AI字幕效果也不是很好&#xff0c;遂打算基于Whisper和GPT做一个AI字幕给自己。 二、具体步骤 1、安装FFmpeg Windows: 进入 https://github.com/BtbN/FF…

使用光标精灵更换电脑鼠标光标样式,一键安装使用

想要让自己在使用电脑时更具个性化&#xff0c;让工作和娱乐更加愉快&#xff0c;改变你的电脑指针光标皮肤可能是一个简单而有效的方法。很多人或许并不清楚如何轻松地调整电脑光标样式&#xff0c;下面我就来分享一种简单的方法。 电脑光标在系统里通常只有几种默认图案&…

支付宝手机网站支付,微信扫描二维码支付

支付宝手机网站支付 支付宝文档 响应示例 <form name"punchout_form" method"post" action"https://openapi.alipay.com/gateway.do?charsetUTF-8&methodalipay.trade.wap.pay&formatjson&signERITJKEIJKJHKKKKKKKHJEREEEEEEEEEEE…

软件的安装与卸载(YUM)

YUM&#xff1a;yum 是一个方便的"应用商店"&#xff0c;你可以通过它轻松地安装、更新和删除软件包&#xff0c;就像从应用商店中下载和安装应用程序一样。&#xff08;这个得用root身份&#xff0c;普通用户权限不够&#xff09; 常用命令&#xff1a; 1.安装软件…

提供数字免疫力:采取整体方法来优化您的网络

采用数字技术已成为许多美国企业的关键竞争优势&#xff0c;导致其在与新部署的云解决方案的安全连接方面的投资不断增加。然而&#xff0c;随着越来越多的关键应用程序迁移到云端&#xff0c;公司保护其敏感数据和资源变得更具挑战性&#xff0c;因为这些资产现在超出了内部防…

计算机网络相关

OSI七层模型 各层功能&#xff1a; TCP/IP四层模型 应用层 传输层 网络层 网络接口层 访问一个URL的全过程 在浏览器中输入指定网页的 URL。 浏览器通过 DNS 协议&#xff0c;获取域名对应的 IP 地址。 浏览器根据 IP 地址和端口号&#xff0c;向目标服务器发起一个 TCP…

c++ 指针大小

C的一个指针占内存几个字节&#xff1f; 结论&#xff1a; 取决于是64位编译模式还是32位编译模式&#xff08;注意&#xff0c;和机器位数没有直接关系&#xff09; 在64位编译模式下&#xff0c;指针的占用内存大小是8字节在32位编译模式下&#xff0c;指针占用内存大小是4字…

11种创造型设计模式(下)

观察者模式 我们可以比喻观察者模式是一种类似广播的设计模式 介绍 观察者模式&#xff1a;对象之间多对一依赖的一种设计方案&#xff0c;被依赖的对象是Subject&#xff0c;依赖的对象是Observer&#xff0c;Subject通知Observer变化。 代码 说明&#xff1a; WeatherStat…

sdsl库编译安装和使用

1. 下载和编译 git clone https://github.com/simongog/sdsl-lite.git cd sdsl-lite# 建一个conda环境 激活环境&#xff0c;安装cmake。 ./install.sh /usr/local/ 2. 示例代码 #include <sdsl/suffix_arrays.hpp> #include <fstream>using namespace sdsl;int…

SpringCloud Gateway工作流程

Spring Cloud Gateway的工作流程 具体的流程&#xff1a; 用户发送请求到网关 请求断言&#xff0c;用户请求到达网关后&#xff0c;由Gateway Handler Mapping&#xff08;网关处理器映射&#xff09;进行Predicates&#xff08;断言&#xff09;&#xff0c;看一下哪一个符合…

抖音视频批量下载软件可导出视频分享链接|手机网页视频提取|视频爬虫采集工具

解锁抖音视频无水印批量下载新姿势&#xff01; 在快节奏的生活中&#xff0c;抖音作为时下最热门的短视频平台之一&#xff0c;吸引着广大用户的目光。而如何高效地获取喜欢的视频内容成为了许多人关注的焦点。Q:290615413现在&#xff0c;我们推出的抖音视频批量下载软件&…

前端知识点03(JS)

文章目录 前端知识点03&#xff08;JS&#xff09;1、JS中this指向问题2、script中的async和defer的区别3、setTimeOut和setInterval4、Es6和ES5的区别5、ES6的新特性 &#x1f389;写在最后 前端知识点03&#xff08;JS&#xff09; hello hello~ &#xff0c;这里是 code袁~&…