📢📢📢📣📣📣
哈喽!大家好,我是【IT邦德】,江湖人称jeames007,10余年DBA及大数据工作经验
一位上进心十足的【大数据领域博主】!😜😜😜
中国DBA联盟(ACDU)成员,目前服务于工业互联网
擅长主流Oracle、MySQL、PG、高斯及Greenplum运维开发,备份恢复,安装迁移,性能优化、故障应急处理等。
✨ 如果有对【数据库】感兴趣的【小可爱】,欢迎关注【IT邦德】💞💞💞
❤️❤️❤️感谢各位大可爱小可爱!❤️❤️❤️
文章目录
- 📣 1.社区版介绍
- 📣 2.部署环境
- 📣 3.服务器参数
- ✨ 3.1 配置 sysctl.conf
- ✨ 3.2 会话变量设置
- ✨ 3.3 同步服务
- 📣 4.软件下载
- 📣 5.用户及目录
- 📣 6.安装软件
- 📣 7.配置文件
- 📣 7.部署 OceanBase
- 📣 8.使用OB
- ✨ 8.1 连接 OceanBase
- ✨ 8.2 租户创建
- ✨ 8.3 建库建表
- 📣 9.报错处理
- 📣 10.总结
本文详细讲述基于Centos7系统OceanBase4.2版本单副本集群部署的详细过程
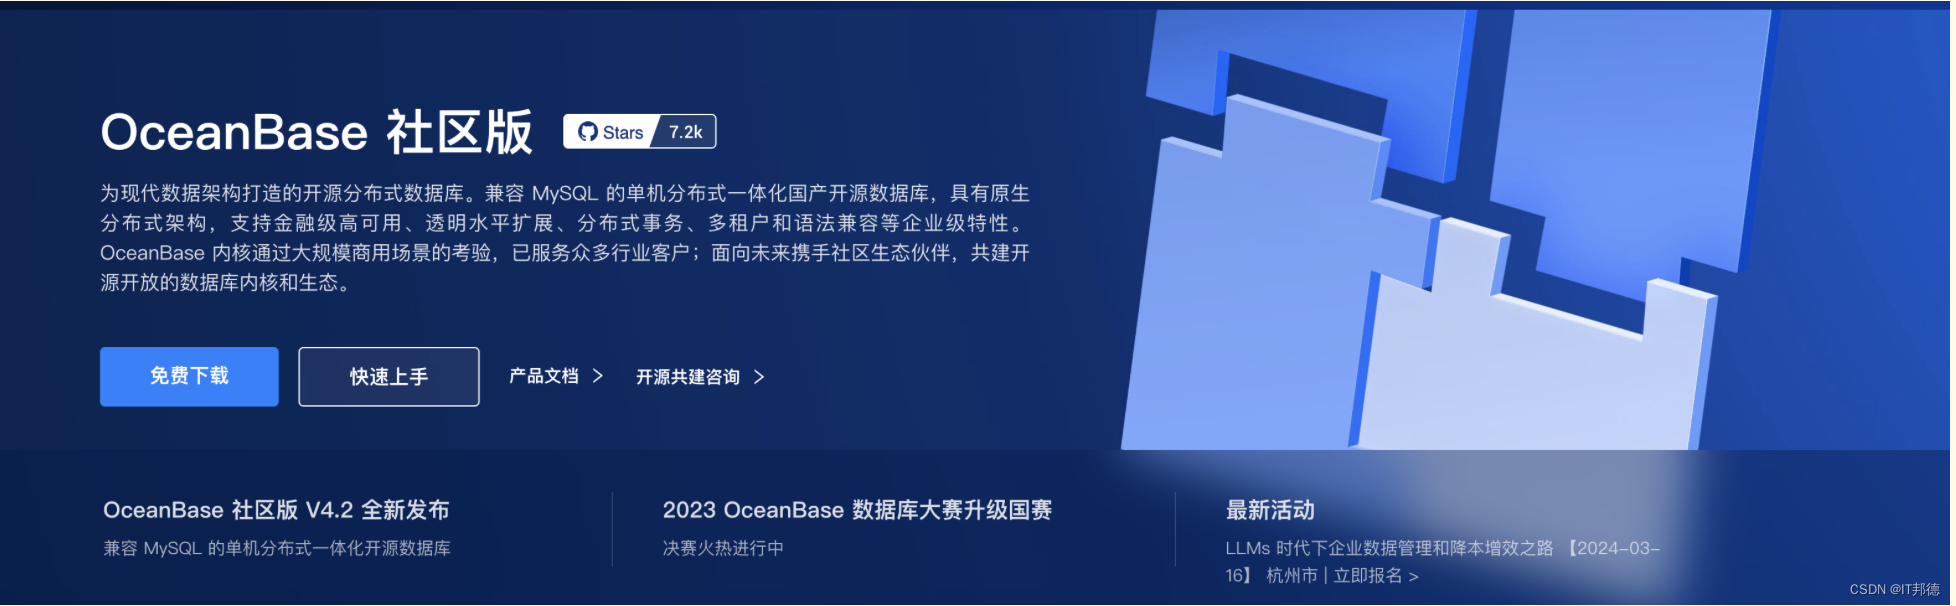
📣 1.社区版介绍
OceanBase 数据库社区版:兼容 MySQL 的单机分布式一体化数据库,具有原生分布式架构,支持金融级高可用、透明水平扩展、分布式事务、多租户和语法兼容等企业级特性。OceanBase 社区版数据库内核开源,与 MySQL 兼容,对接虚拟化和大数据技术及产品,支持多种图形化的开发工具、运维监控工具和数据迁移工具;同时社区版提供开放的接口和丰富的生态能力,支持企业或个人更好的实现定制化业务需求。
📣 2.部署环境
1.操作系统:
[root@centos79 ~]# cat /etc/redhat-release
CentOS Linux release 7.9.2009 (Core)
2.内存
测试环境最低要求 8 GB
[root@centos79 ~]# free -m
total used free shared buff/cache available
Mem: 11834 1017 10142 17 674 10547
Swap: 4995 0 4995
[root@centos79 ~]# vi /etc/fstab
[root@centos79 ~]# tmpfs /dev/shm tmpfs defaults,size=10G 0 0
[root@centos79 ~]# cat /etc/fstab | grep shm
tmpfs /dev/shm tmpfs defaults,size=10G 0 0
[root@centos79 ~]# mount -o remount /dev/shm
[root@centos79 ~]# df -TH /dev/shm
Filesystem Type Size Used Avail Use% Mounted on
tmpfs tmpfs 11G 0 11G 0% /dev/shm
3.OB运行目录
//home/admin//{data,redo}
4.关闭防火墙和 SELinux
##查看防火墙状态:
systemctl status firewalld
systemctl disable firewalld
systemctl stop firewalld
systemctl status firewalld
##关闭 SELinux
vi /etc/selinux/config
确保:SELINUX=disabled
[root@centos79 ~]# setenforce 0
setenforce: SELinux is disabled
📣 3.服务器参数
✨ 3.1 配置 sysctl.conf
在 /etc/sysctl.conf 配置文件中添加以下内容:

#for oceanbase
#修改内核异步 I/O 限制
fs.aio-max-nr=1048576
#网络优化
net.core.somaxconn = 2048
net.core.netdev_max_backlog = 10000
net.core.rmem_default = 16777216
net.core.wmem_default = 16777216
net.core.rmem_max = 16777216
net.core.wmem_max = 16777216

net.ipv4.ip_local_port_range = 3500 65535
net.ipv4.ip_forward = 0
net.ipv4.conf.default.rp_filter = 1
net.ipv4.conf.default.accept_source_route = 0
net.ipv4.tcp_syncookies = 1
net.ipv4.tcp_rmem = 4096 87380 16777216
net.ipv4.tcp_wmem = 4096 65536 16777216
net.ipv4.tcp_max_syn_backlog = 16384
net.ipv4.tcp_fin_timeout = 15
net.ipv4.tcp_max_syn_backlog = 16384
net.ipv4.tcp_tw_reuse = 1
net.ipv4.tcp_tw_recycle = 1
net.ipv4.tcp_slow_start_after_idle=0

vm.swappiness = 0
vm.min_free_kbytes = 2097152
fs.file-max = 6573688

sysctl -p 生效
✨ 3.2 会话变量设置
将会话级别的最大栈空间大小设置为 unlimited,最大文件句柄数设置为 655350,Core 文件大小设置为 unlimited。

在 /etc/security/limits.conf 配置文件中添加以下内容:

root soft nofile 655350
root hard nofile 655350
* soft nofile 655350
* hard nofile 655350
* soft stack 20480
* hard stack 20480
* soft nproc 655360
* hard nproc 655360
* soft core unlimited
* hard core unlimited

您需查看 /etc/security/limits.d/20-nproc.conf 文件中是否存在 nproc 的配置,若存在需同步修改该文件中 nproc 的值。
退出当前会话,重新登录。执行以下命令,查看配置是否生效。
[root@centos79 ~]# ulimit -a
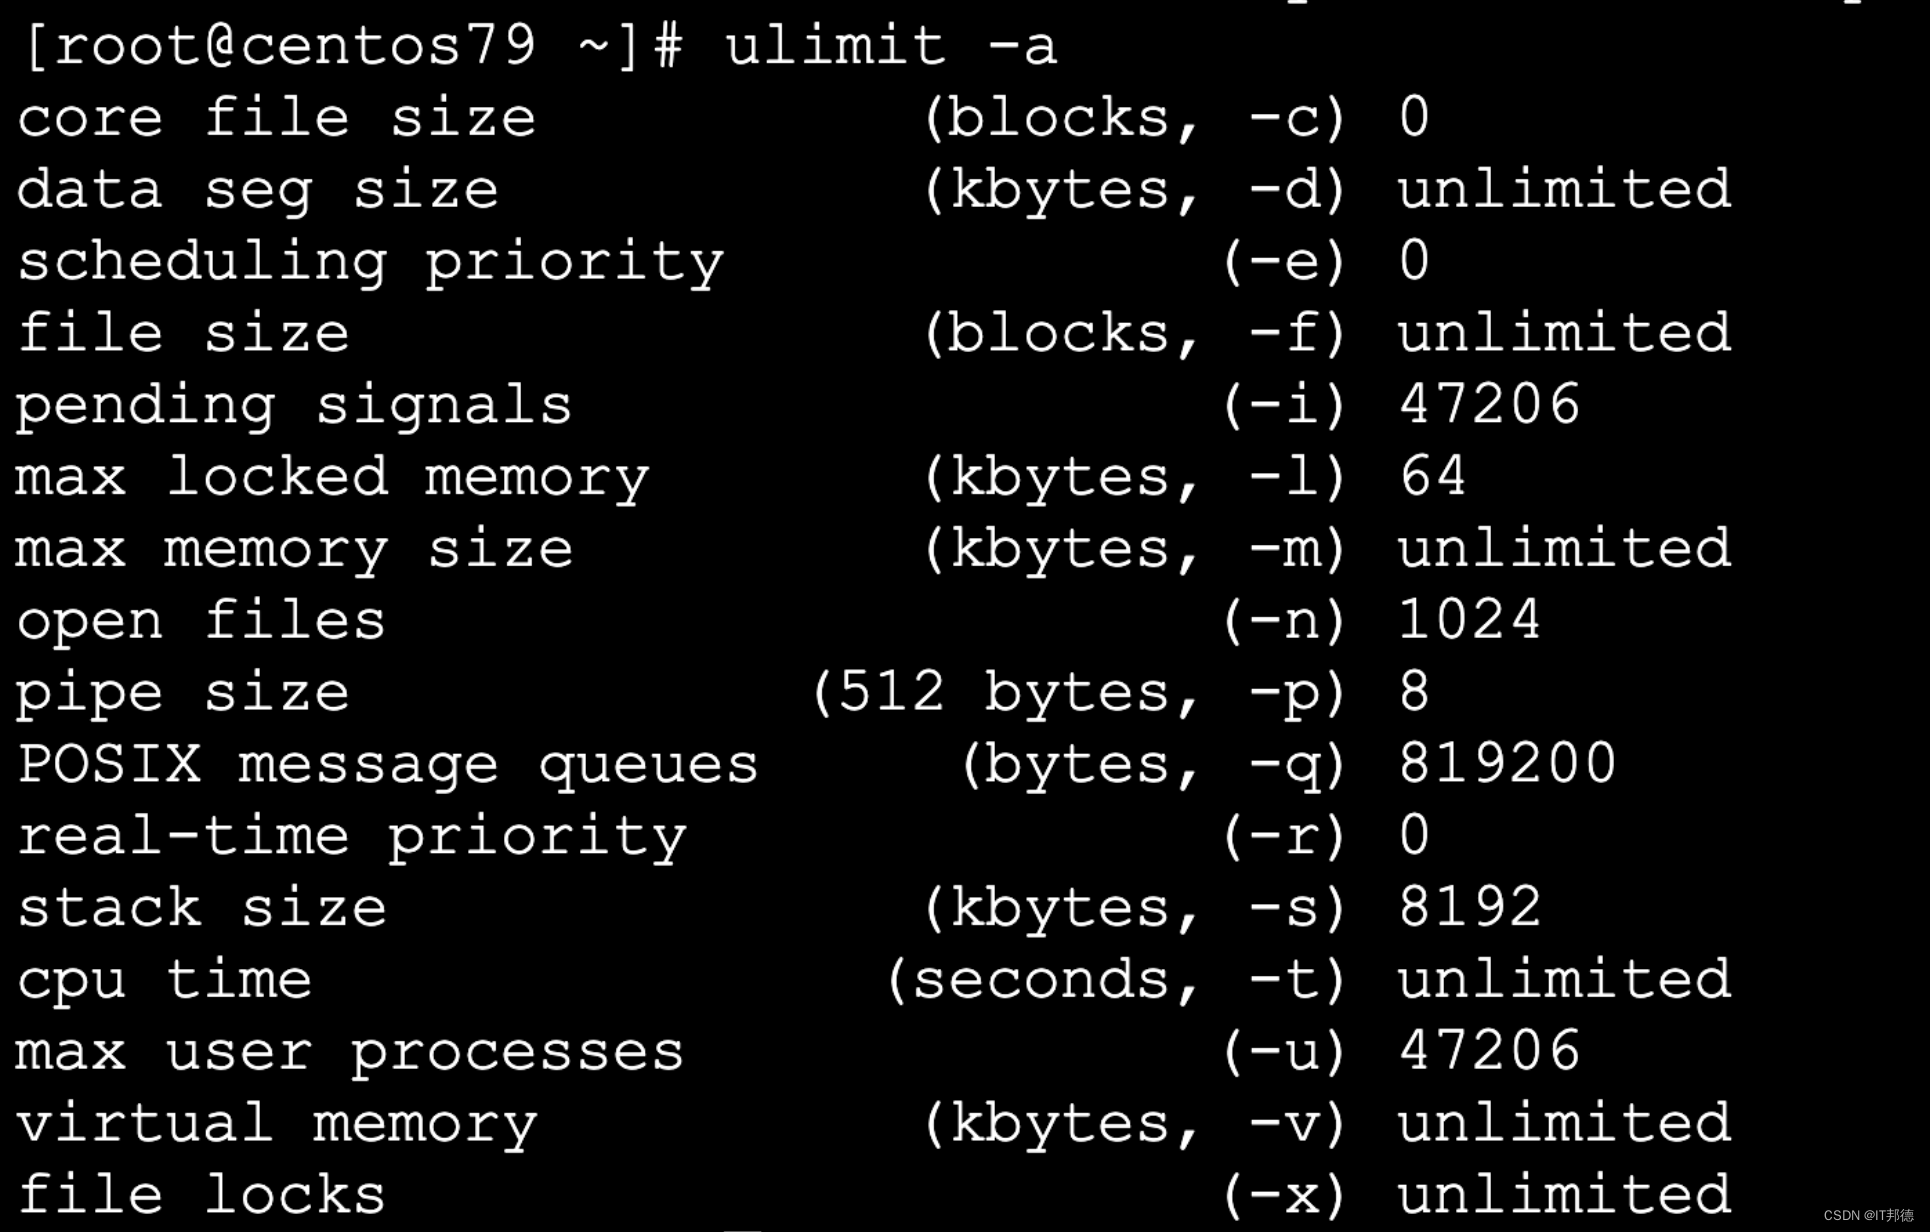
✨ 3.3 同步服务
OceanBase 是分布式数据库产品,是一个集群软件,对各个节点之间的时间同步性有要求。
技术上要求所有节点之间的时间误差控制在 50ms 以内。实际生产环境为了稳定性和性能考虑,建议时间误差控制在 10ms 以内。
通常只要节点配置时间同步服务器跟公网时间保持同步即可。
CentOS 或 RedHat 7.x 版本推荐使用 chrony 服务做时间源。
Chrony 是 NTP(Network Time Protocol,网络时间协议,服务器时间同步的一种协议)的另一种实现,
与 ntpd 不同,它可以更快且更准确地同步系统时钟,最大程度的减少时间和频率误差。
判断是否使用 ntpd同步时间
[root@centos79 ~]# systemctl status ntpd
Unit ntpd.service could not be found.
如果提示上面这个信息,表示没有使用 ntpd,那就继续。 如果提示有 ntpd 服务,就卸载 ntpd 软件。
安装 chrony服务
这里采用 YUM 安装方法。您也可以下载相应的 RPM 包安装。
[root@centos79 ~]# yum -y install chrony
[root@centos79 ~]# rpm -qa | grep chrony
chrony-3.4-1.el7.x86_64
chrony 服务守护进程名是 chronyd,chronyc 是用来监控 chronyd 性能和配置参数的命令行工具。
chrony 的主配置文件: /etc/chrony.conf ,配置方法如下:
# 如果是测试环境,没有时间同步服务器,那就选取一台配置为时间同步服务器。
# 如果选中的是本机,则配置如下 server
server 127.127.1.0
cat >> /etc/chrony.conf << "EOF"
server 192.168.3.14
# 指定一台主机、子网,或者网络以允许或拒绝NTP连接到扮演时钟服务器的机器
allow 192.168.0.0/16
# 即使没有同步到时间源,也要服务时间
local stratum 10
EOF
systemctl start chronyd
systemctl status chronyd
systemctl enable chronyd
查看时间同步活动
chronyc activity
查看时间服务器
chronyc sources
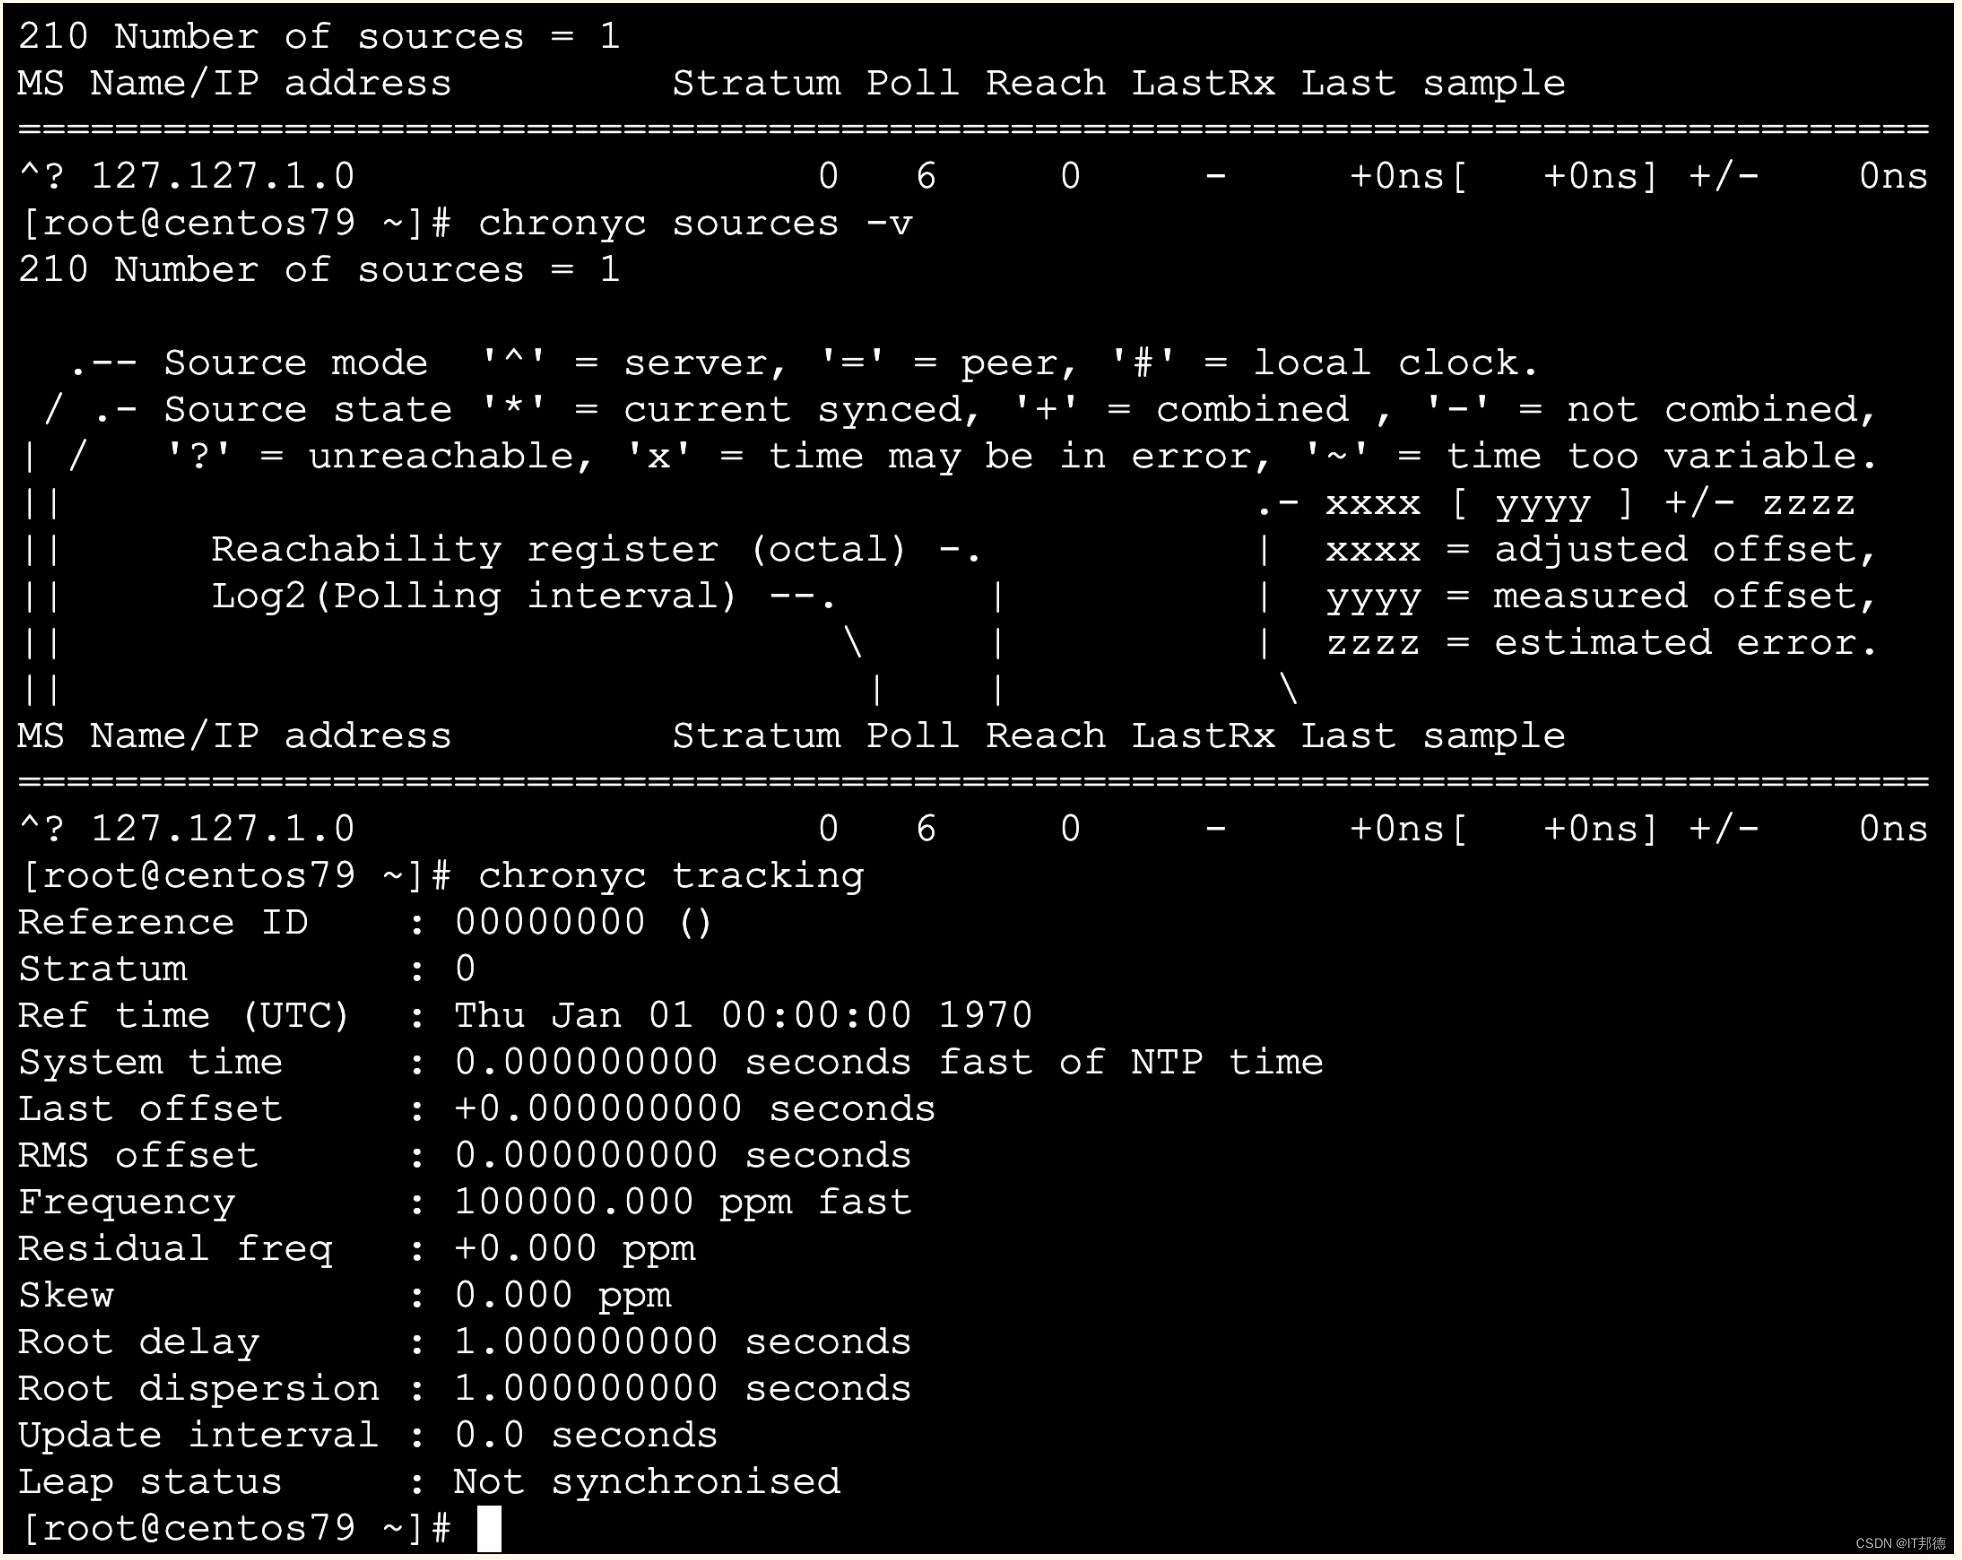
查看同步状态
chronyc sources -v
校准时间服务器:
chronyc tracking
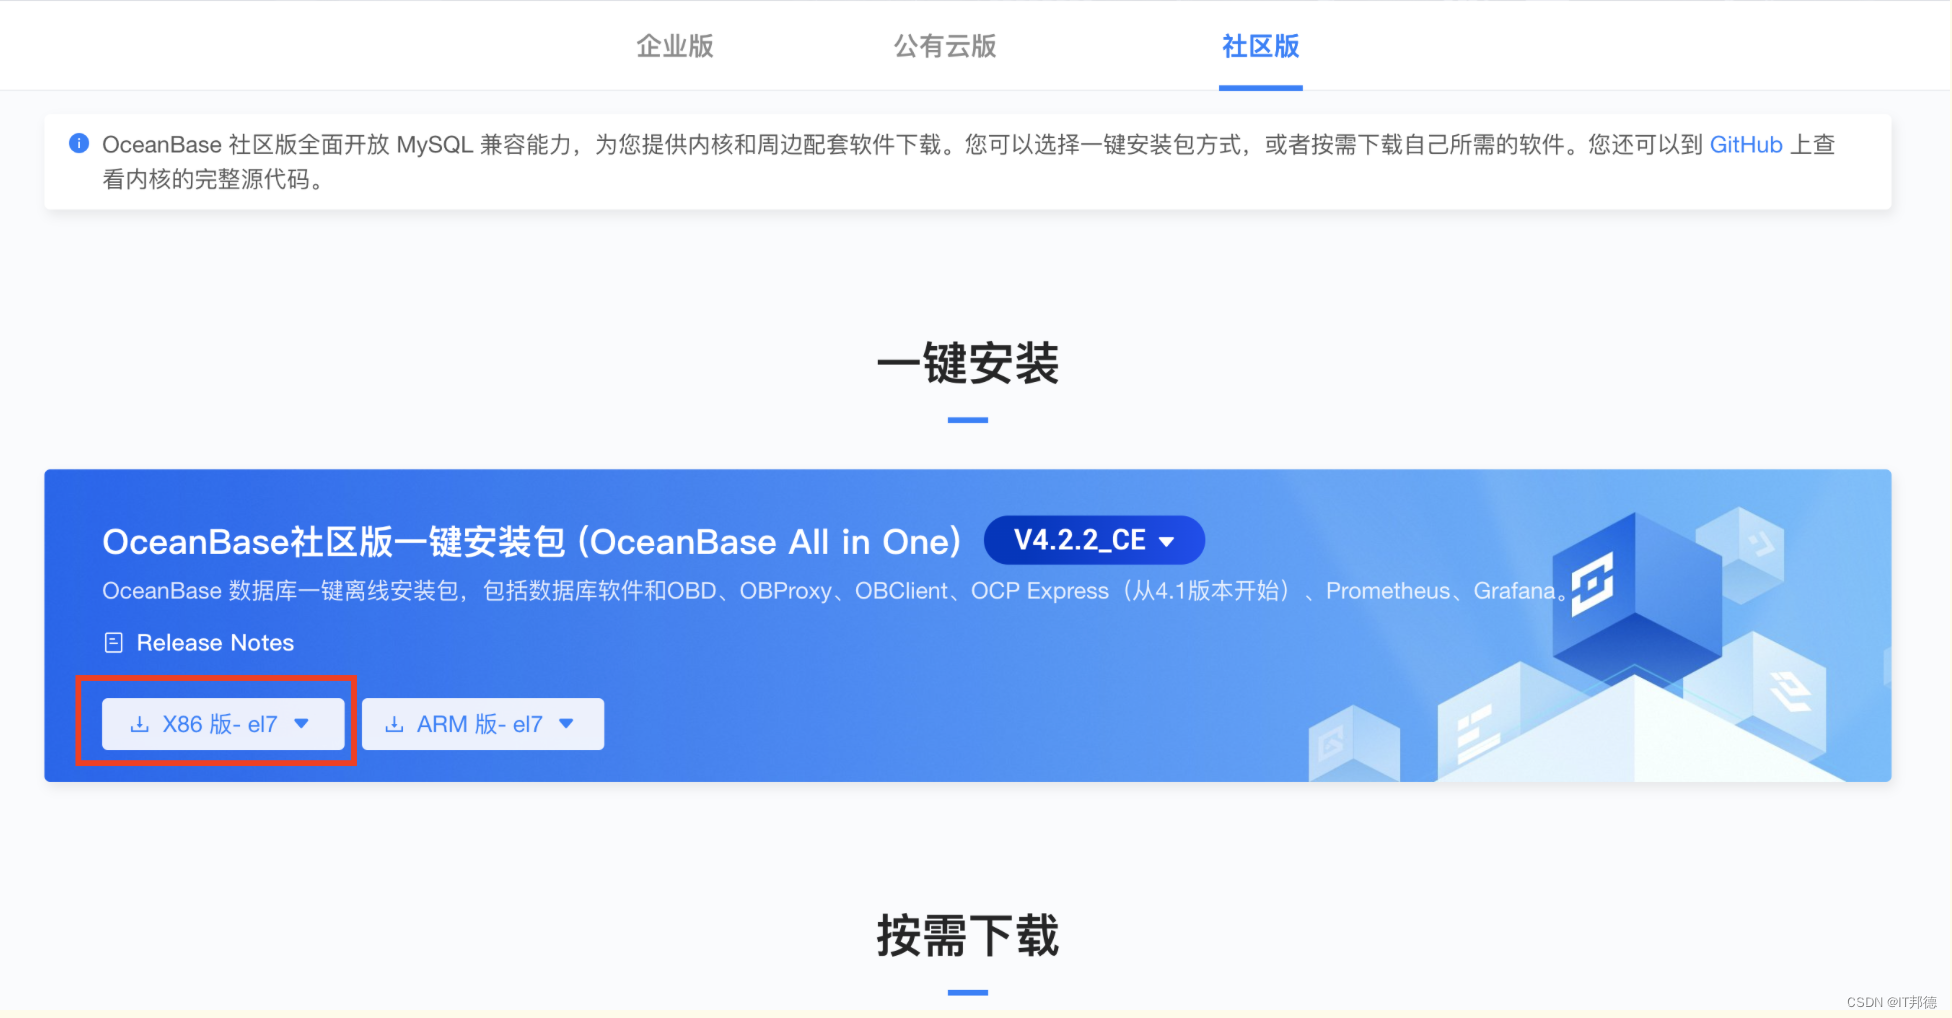
📣 4.软件下载
https://www.oceanbase.com/softwarecenter
–安装包
oceanbase-all-in-one-4.2.2.0-100000192024011915.el7.x86_64.tar.gz
📣 5.用户及目录
1.执行以下命令,创建账户 admin。
useradd -U admin -d /home/admin -s /bin/bash
mkdir -p /home/admin
sudo chown -R admin:admin /home/admin
2.执行以下命令,为账户 admin 设置密码
echo ‘admin:admin’ | chpasswd
3.为账户 admin 设置 sudo 权限
在 /etc/sudoers 文件添加以下内容:
## Same thing without a password
# %wheel        ALL=(ALL)       NOPASSWD: ALL
admin       ALL=(ALL)       NOPASSWD: ALL
[admin@centos79 ~]$ id admin
uid=1001(admin) gid=1001(admin) groups=1001(admin)
2.创建目录
[admin@jeames ~]$ mkdir -p /home/admin/data
[admin@jeames ~]$ mkdir -p /home/admin/redo
📣 6.安装软件
在 all-in-one 安装包所在目录下执行如下命令解压安装包并安装。
[root@centos79 ~]# mkdir /opt/soft
[root@centos79 ~]# chown -R admin:admin /opt/soft
[root@centos79 ~]# su - admin
[admin@centos79 ~]$ cd /opt/soft
[admin@centos79 opt]$ tar -xzf oceanbase-all-in-one-*.tar.gz
[admin@centos79 soft]$ cd oceanbase-all-in-one/bin/
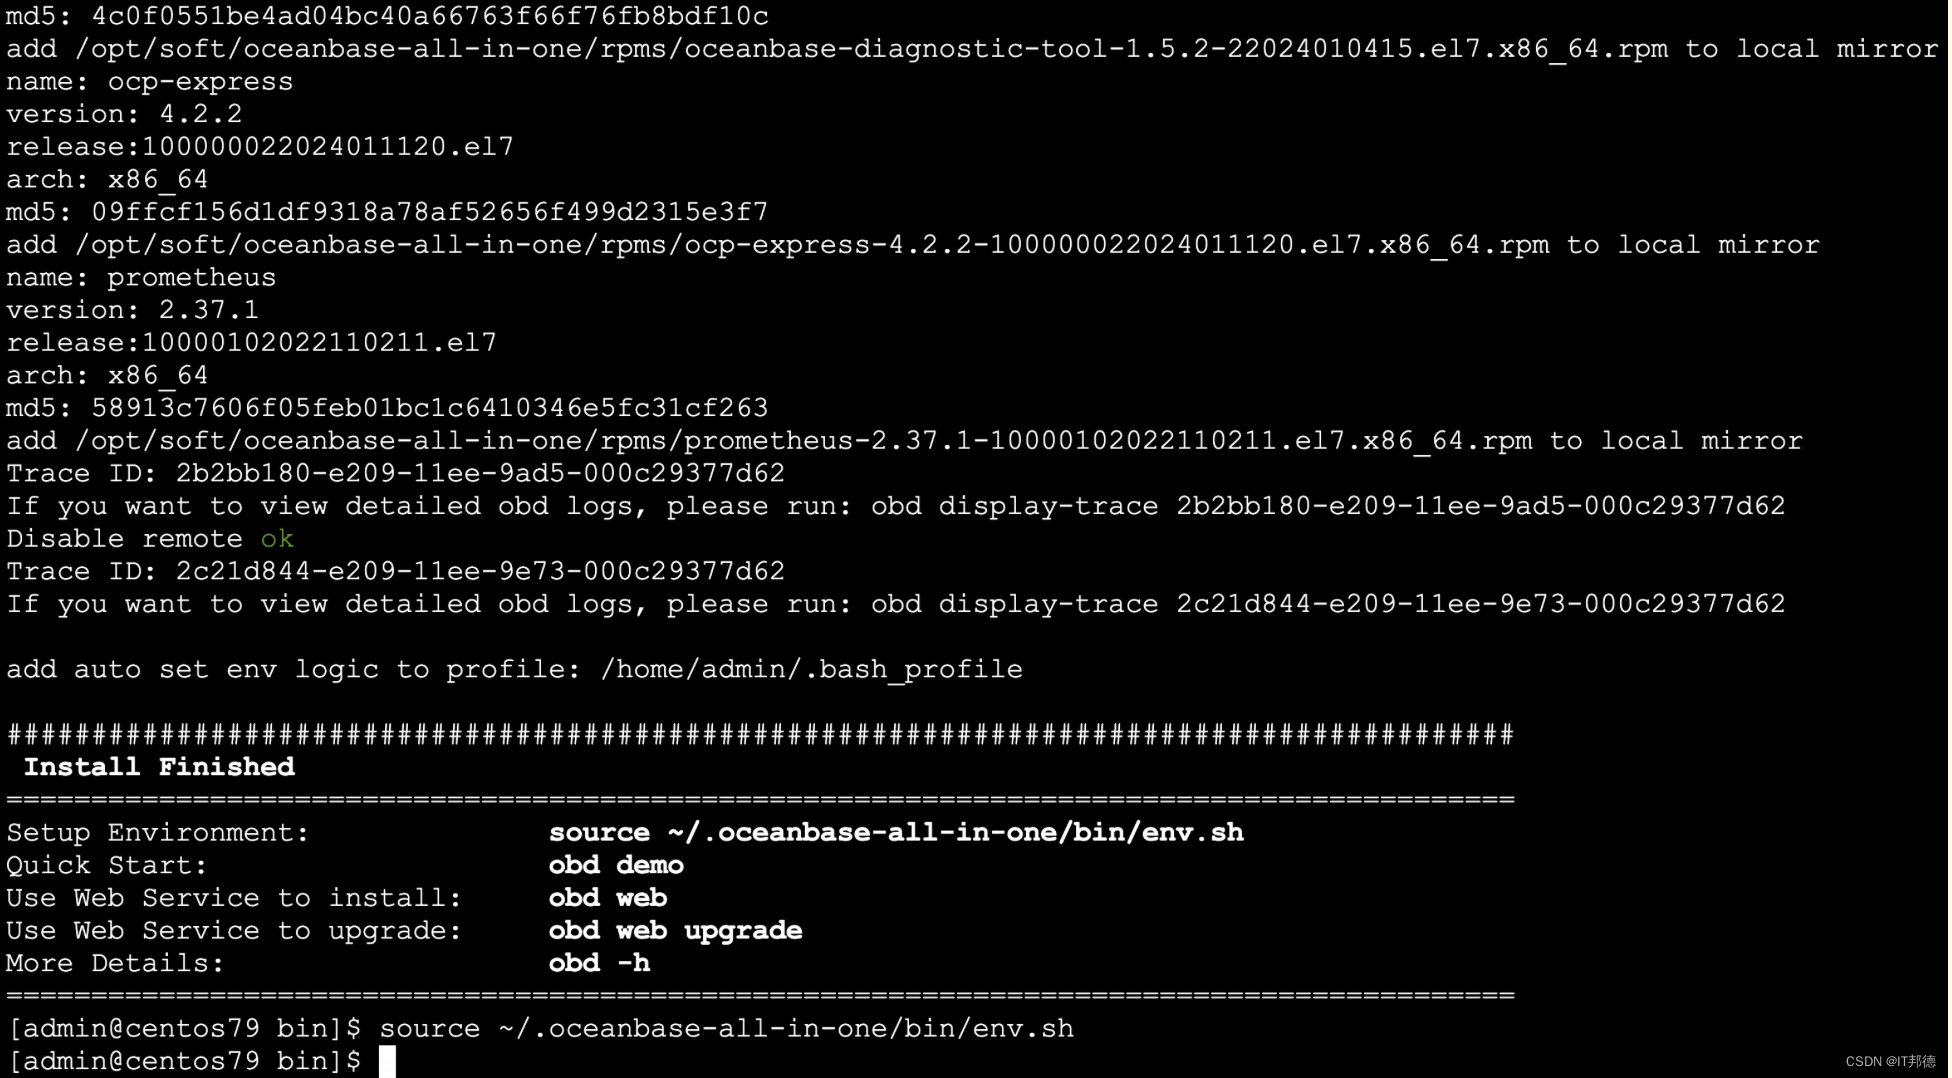
[admin@centos79 bin]$ ./install.sh
add auto set env logic to profile: /home/admin/.bash_profile

#########################################################################################
 Install Finished
=========================================================================================
Setup Environment:              source ~/.oceanbase-all-in-one/bin/env.sh
Quick Start:                    obd demo
Use Web Service to install:     obd web
Use Web Service to upgrade:     obd web upgrade
More Details:                   obd -h
=========================================================================================

[admin@centos79 bin]$ source ~/.oceanbase-all-in-one/bin/env.sh
📣 7.配置文件
可在 ~/.oceanbase-all-in-one/obd/usr/obd/example 目录下查看 OBD 提供的配置文件示例。
请根据您的资源条件选择相应的配置文件。
此处以单机部署 + ODP 配置(mini-single-with-obproxy-example.yaml)为例,介绍如何修改配置文件。
1.修改用户信息
Only need to configure when remote login is required
user:
  username: admin
  password: admin
# key_file: /home/admin/.ssh/id_rsa
  port: your ssh port, default 22
  timeout: ssh connection timeout (second), default 30

注意:
a.username 为登录到目标机器的用户名,确保您的用户名有 home_path 的写权限。password 和 key_file 均用于验证用户,通常情况下只需要填写一个。
b.在配置秘钥路径后,如果您的秘钥不需要口令,请注释或者删除 password,以免 password 被视为秘钥口令用于登录,导致校验失败。


2.修改机器的 IP、端口和相关目录,并配置内存相关参数及密码,此处注意user前不能有空格

user:
    username: admin
    password: admin
#   key_file: your ssh-key file path if need
#   port: your ssh port, default 22
#   timeout: ssh connection timeout (second), default 30
oceanbase-ce:
  servers:
    # Please don't use hostname, only IP can be supported
    - 192.168.3.20
  global:
    #  The working directory for OceanBase Database. OceanBase Database is started under this directory. This is a required field
.
    home_path: /home/admin/observer
    # The directory for data storage. The default value is $home_path/store.
    data_dir: /home/admin/data
    # The directory for clog, ilog, and slog. The default value is the same as the data_dir value.
    redo_dir: /home/admin/redo
    # Starting from observer version 4.2, the network selection for the observer is based on the 'local_ip' parameter, and the 'd
evname' parameter is no longer mandatory.
    # If the 'local_ip' parameter is set, the observer will first use this parameter for the configuration, regardless of the 'de
vname' parameter.
    # If only the 'devname' parameter is set, the observer will use the 'devname' parameter for the configuration.
    # If neither the 'devname' nor the 'local_ip' parameters are set, the 'local_ip' parameter will be automatically assigned the
 IP address configured above.
    # devname: eth0
    mysql_port: 2881 # External port for OceanBase Database. The default value is 2881. DO NOT change this value after the cluste
r is started.
    rpc_port: 2882 # Internal port for OceanBase Database. The default value is 2882. DO NOT change this value after the cluster
is started.
    zone: zone1
    cluster_id: 1
    # please set memory limit to a suitable value which is matching resource.
    memory_limit: 6G # The maximum running memory for an observer
    system_memory: 1G # The reserved system memory. system_memory is reserved for general tenants. The default value is 30G.
    datafile_size: 2G # Size of the data file.
    datafile_next: 2G # the auto extend step. Please enter an capacity, such as 2G
    datafile_maxsize: 20G # the auto extend max size. Please enter an capacity, such as 20G
    log_disk_size: 13G # The size of disk space used by the clog files.
    cpu_count: 16
    production_mode: false
    enable_syslog_wf: false # Print system logs whose levels are higher than WARNING to a separate log file. The default value is
 true.
    enable_syslog_recycle: true # Enable auto system log recycling or not. The default value is false.
    max_syslog_file_count: 4 # The maximum number of reserved log files before enabling auto recycling. The default value is 0.
    # observer cluster name, consistent with obproxy's cluster_name
    appname: obcluster
    # root_password: # root user password, can be empty
    # proxyro_password: # proxyro user pasword, consistent with obproxy's observer_sys_password, can be empty
obproxy-ce:
  # Set dependent components for the component.
  # When the associated configurations are not done, OBD will automatically get the these configurations from the dependent compo
nents.
  depends:
    - oceanbase-ce
  servers:
    - 192.168.3.20
  global:
    listen_port: 2883 # External port. The default value is 2883.
    prometheus_listen_port: 2884 # The Prometheus port. The default value is 2884.
    home_path: /home/admin/obproxy
    # oceanbase root server list
    # format: ip:mysql_port;ip:mysql_port. When a depends exists, OBD gets this value from the oceanbase-ce of the depends.
    # rs_list: 192.168.1.2:2881
    enable_cluster_checkout: false
    # observer cluster name, consistent with oceanbase-ce's appname. When a depends exists, OBD gets this value from the oceanbas
e-ce of the depends.
    # cluster_name: obcluster
    skip_proxy_sys_private_check: true
    enable_strict_kernel_release: false
    # obproxy_sys_password: # obproxy sys user password, can be empty. When a depends exists, OBD gets this value from the oceanb
ase-ce of the depends.
    # observer_sys_password: # proxyro user pasword, consistent with oceanbase-ce's proxyro_password, can be empty. When a depend
s exists, OBD gets this value from the oceanbase-ce of the depends.
[admin@centos79 example]$
📣 7.部署 OceanBase
1.安装集群
[admin@centos79 ~]$ cd ~/.oceanbase-all-in-one/obd/usr/obd/example
[admin@centos79 example]$ obd cluster deploy obtest -c mini-single-with-obproxy-example.yaml
2.启动 OceanBase 数据库
[admin@centos79 ~]$ obd cluster start obtest
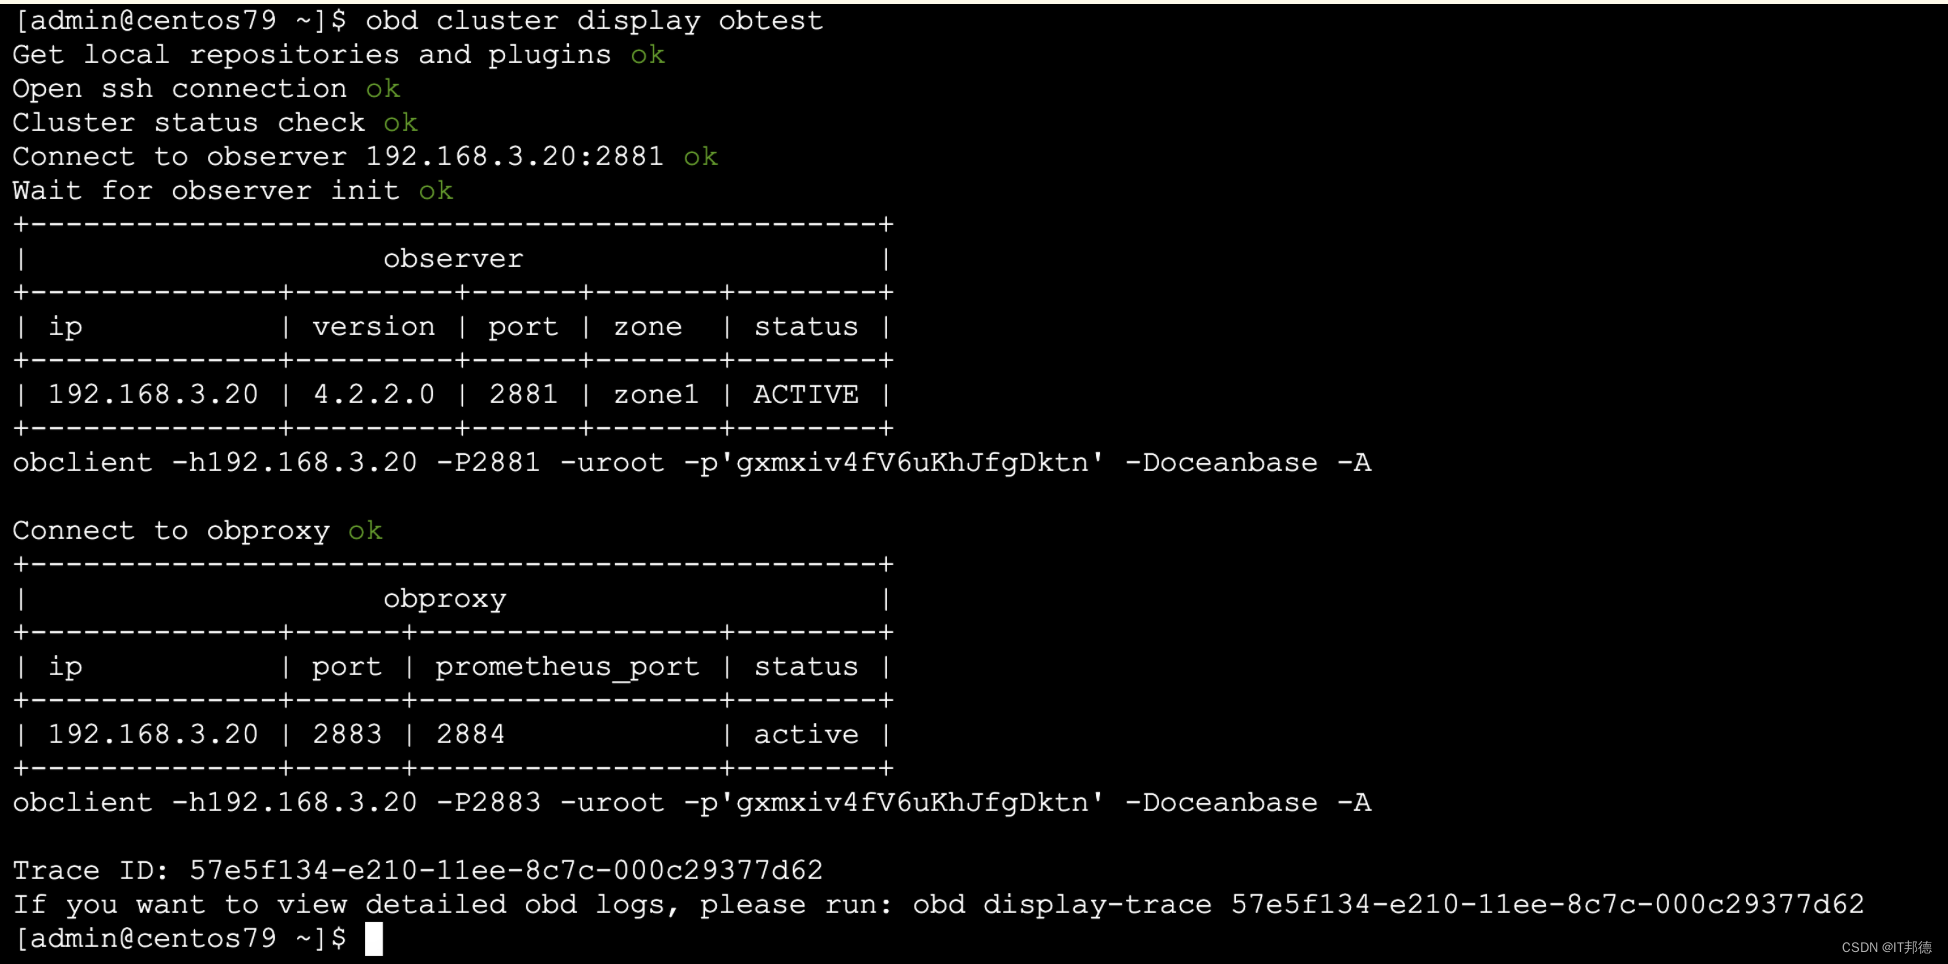
3. 查看 obtest 集群状态
[admin@centos79 ~]$ obd cluster display obtest
📣 8.使用OB
✨ 8.1 连接 OceanBase
[admin@centos79 ~]$ netstat -tulnp | grep 88
(Not all processes could be identified, non-owned process info
 will not be shown, you would have to be root to see it all.)
tcp        0      0 0.0.0.0:2881            0.0.0.0:*               LISTEN      6011/observer
tcp        0      0 0.0.0.0:2882            0.0.0.0:*               LISTEN      6011/observer
tcp        0      0 0.0.0.0:2883            0.0.0.0:*               LISTEN      6930/obproxy
tcp        0      0 0.0.0.0:2884            0.0.0.0:*               LISTEN      6930/obproxy
tcp        0      0 192.168.3.20:2886       0.0.0.0:*               LISTEN      6631/obshell


运行以下命令,使用 OBClient 客户端连接 OceanBase 数据库:
obclient -h<IP> -P<PORT> -uroot@sys -p

obclient -h192.168.3.20 -P2883 -uroot -p'gxmxiv4fV6uKhJfgDktn' -Doceanbase -A
obclient -h192.168.3.20 -uroot@sys -P2883 -p'gxmxiv4fV6uKhJfgDktn'

说明:
IP 为 OBServer 节点的 IP 地址;
PORT 为连接 OceanBase 数据库的的端口,直连时为 mysql_port 配置项的值,默认端口为 2881,如果您对端口做了修改,此处使用您实际配置的端口号。

[admin@centos79 ~]$ obclient -h192.168.3.20 -uroot@sys -P2883 -p'gxmxiv4fV6uKhJfgDktn'
Welcome to the OceanBase.  Commands end with ; or \g.
Your OceanBase connection id is 6
Server version: OceanBase_CE 4.2.2.0 (r100000192024011915-fac02c6690de9ff9f9f96c0bdf86ffe39ae0d7e7) (Built Jan 19 2024 15:14:05)

Copyright (c) 2000, 2018, OceanBase and/or its affiliates. All rights reserved.

Type 'help;' or '\h' for help. Type '\c' to clear the current input statement.

obclient [(none)]> show databases;
+--------------------+
| Database           |
+--------------------+
| information_schema |
| LBACSYS            |
| mysql              |
| oceanbase          |
| ocs                |
| ORAAUDITOR         |
| SYS                |
| test               |
+--------------------+
8 rows in set (0.003 sec)


obclient [(none)]> SELECT * FROM oceanbase.DBA_OB_TENANTS\G
*************************** 1. row ***************************
                 TENANT_ID: 1
               TENANT_NAME: sys
               TENANT_TYPE: SYS
               CREATE_TIME: 2024-03-14 22:35:45.355238
               MODIFY_TIME: 2024-03-14 22:35:45.355238
              PRIMARY_ZONE: RANDOM
                  LOCALITY: FULL{1}@zone1
         PREVIOUS_LOCALITY: NULL
        COMPATIBILITY_MODE: MYSQL
                    STATUS: NORMAL
             IN_RECYCLEBIN: NO
                    LOCKED: NO
               TENANT_ROLE: PRIMARY
         SWITCHOVER_STATUS: NORMAL
          SWITCHOVER_EPOCH: 0
                  SYNC_SCN: NULL
            REPLAYABLE_SCN: NULL
              READABLE_SCN: NULL
        RECOVERY_UNTIL_SCN: NULL
                  LOG_MODE: NOARCHIVELOG
ARBITRATION_SERVICE_STATUS: DISABLED
                  UNIT_NUM: 1
                COMPATIBLE: 4.2.2.0
                 MAX_LS_ID: 1
1 row in set (0.003 sec)
✨ 8.2 租户创建
1.创建资源规格
资源规格是对 CPU、内存、磁盘空间、IOPS 等资源项进行的定义。
通过 DBA_OB_UNIT_CONFIGS 视图,获取已有的资源规格信息。
obclient [(none)]> use oceanbase
obclient [oceanbase]> SELECT * FROM oceanbase.DBA_OB_UNIT_CONFIGS\G
obclient [oceanbase]> SELECT * FROM oceanbase.DBA_OB_UNIT_CONFIGS\G
*************************** 1. row ***************************
UNIT_CONFIG_ID: 1
          NAME: sys_unit_config
   CREATE_TIME: 2024-03-14 22:35:45.334024
   MODIFY_TIME: 2024-03-14 22:35:45.334024
       MAX_CPU: 3
       MIN_CPU: 3
   MEMORY_SIZE: 2147483648
 LOG_DISK_SIZE: 2147483648
      MAX_IOPS: 9223372036854775807
      MIN_IOPS: 9223372036854775807
   IOPS_WEIGHT: 3
1 row in set (0.004 sec)
创建一个名称为 S1_unit_config 的资源规格,其资源配置为 CPU 为 1 核,内存 4G,日志盘空间 6G。
obclient [oceanbase]> CREATE RESOURCE UNIT S1_unit_config
MEMORY_SIZE = ‘4G’,
MAX_CPU = 1, MIN_CPU = 1,
LOG_DISK_SIZE = ‘6G’,
MAX_IOPS = 10000, MIN_IOPS = 10000, IOPS_WEIGHT=1;
查询 DBA_OB_UNIT_CONFIGS 视图,确认资源规格创建成功。
obclient [oceanbase]> SELECT * FROM oceanbase.DBA_OB_UNIT_CONFIGS WHERE NAME = 'S1_unit_config'\G
*************************** 1. row ***************************
UNIT_CONFIG_ID: 1001
          NAME: S1_unit_config
   CREATE_TIME: 2024-03-14 22:50:57.100456
   MODIFY_TIME: 2024-03-14 22:50:57.100456
       MAX_CPU: 1
       MIN_CPU: 1
   MEMORY_SIZE: 4294967296
 LOG_DISK_SIZE: 6442450944
      MAX_IOPS: 10000
      MIN_IOPS: 10000
   IOPS_WEIGHT: 1
1 row in set (0.002 sec)
2.创建资源池
创建资源规格后,可以在创建资源池时指定资源规格,从而使用相应大小的资源单元,并最终分配给相应的租户。
–使用 root 用户登录到集群的 sys 租户。
[admin@centos79 ~]$ obclient -h192.168.3.20 -uroot@sys -P2883 -p’gxmxiv4fV6uKhJfgDktn’ -A
obclient [(none)]> use oceanbase
--通过 DBA_OB_RESOURCE_POOLS 视图,获取资源池的配置信息。
obclient [oceanbase]> SELECT * FROM oceanbase.DBA_OB_RESOURCE_POOLS\G
*************************** 1. row ***************************
RESOURCE_POOL_ID: 1
            NAME: sys_pool
       TENANT_ID: 1
     CREATE_TIME: 2024-03-14 22:35:45.338336
     MODIFY_TIME: 2024-03-14 22:35:45.343026
      UNIT_COUNT: 1
  UNIT_CONFIG_ID: 1
       ZONE_LIST: zone1
    REPLICA_TYPE: FULL
1 row in set (0.002 sec)
–创建一个名为 mq_pool_01 的资源池,在 zone1 里各创建 1 个 Unit,每个 Unit 的资源规格为 S1_unit_config。
obclient [oceanbase]> select * from GV$OB_SERVERS\G
*************************** 1. row ***************************
                 SVR_IP: 192.168.3.20
               SVR_PORT: 2882
                   ZONE: zone1
               SQL_PORT: 2881
           CPU_CAPACITY: 16
       CPU_CAPACITY_MAX: 16
           CPU_ASSIGNED: 3
       CPU_ASSIGNED_MAX: 3
           MEM_CAPACITY: 5368709120
           MEM_ASSIGNED: 2147483648
      LOG_DISK_CAPACITY: 13958643712
      LOG_DISK_ASSIGNED: 2147483648
        LOG_DISK_IN_USE: 134217728
     DATA_DISK_CAPACITY: 21474836480
       DATA_DISK_IN_USE: 12582912
DATA_DISK_HEALTH_STATUS: NORMAL
           MEMORY_LIMIT: 6442450944
    DATA_DISK_ALLOCATED: 2147483648
DATA_DISK_ABNORMAL_TIME: NULL
  SSL_CERT_EXPIRED_TIME: NULL
1 row in set (0.001 sec)

obclient [oceanbase]> CREATE RESOURCE POOL mq_pool_01
                UNIT='S1_unit_config',
                UNIT_NUM=1,
                ZONE_LIST=('zone1');
3.创建租户
资源池创建后,您可以根据业务需要,将资源池分配给租户。
OceanBase 数据库支持两种类型的租户,MySQL 兼容模式和 Oracle 兼容模式。创建租户时,您需要指定租户的类型。租户创建后,租户类型无法修改,因此创建租户前请规划好您的租户类型。
–使用 root 用户登录到集群的 sys 租户。
[admin@centos79 ~]$ obclient -h192.168.3.20 -uroot@sys -P2883 -p’gxmxiv4fV6uKhJfgDktn’ -A
–进入 oceanbase 数据库。
obclient [(none)]> USE oceanbase;
--通过 DBA_OB_TENANTS 视图,查看所有的租户信息
obclient [oceanbase]> SELECT * FROM oceanbase.DBA_OB_TENANTS\G
*************************** 1. row ***************************
                 TENANT_ID: 1
               TENANT_NAME: sys
               TENANT_TYPE: SYS
               CREATE_TIME: 2024-03-14 22:35:45.355238
               MODIFY_TIME: 2024-03-14 22:35:45.355238
              PRIMARY_ZONE: RANDOM
                  LOCALITY: FULL{1}@zone1
         PREVIOUS_LOCALITY: NULL
        COMPATIBILITY_MODE: MYSQL
                    STATUS: NORMAL
             IN_RECYCLEBIN: NO
                    LOCKED: NO
               TENANT_ROLE: PRIMARY
         SWITCHOVER_STATUS: NORMAL
          SWITCHOVER_EPOCH: 0
                  SYNC_SCN: NULL
            REPLAYABLE_SCN: NULL
              READABLE_SCN: NULL
        RECOVERY_UNTIL_SCN: NULL
                  LOG_MODE: NOARCHIVELOG
ARBITRATION_SERVICE_STATUS: DISABLED
                  UNIT_NUM: 1
                COMPATIBLE: 4.2.2.0
                 MAX_LS_ID: 1
1 row in set (0.004 sec)


obclient [oceanbase]>
CREATE TENANT IF NOT EXISTS mq_t1
PRIMARY_ZONE='zone1',
RESOURCE_POOL_LIST=('mq_pool_01')
set OB_TCP_INVITED_NODES='%';

obclient [oceanbase]> SELECT * FROM oceanbase.DBA_OB_TENANTS\G
*************************** 1. row ***************************
                 TENANT_ID: 1
               TENANT_NAME: sys
               TENANT_TYPE: SYS
               CREATE_TIME: 2024-03-14 22:35:45.355238
               MODIFY_TIME: 2024-03-14 22:35:45.355238
              PRIMARY_ZONE: RANDOM
                  LOCALITY: FULL{1}@zone1
         PREVIOUS_LOCALITY: NULL
        COMPATIBILITY_MODE: MYSQL
                    STATUS: NORMAL
             IN_RECYCLEBIN: NO
                    LOCKED: NO
               TENANT_ROLE: PRIMARY
         SWITCHOVER_STATUS: NORMAL
          SWITCHOVER_EPOCH: 0
                  SYNC_SCN: NULL
            REPLAYABLE_SCN: NULL
              READABLE_SCN: NULL
        RECOVERY_UNTIL_SCN: NULL
                  LOG_MODE: NOARCHIVELOG
ARBITRATION_SERVICE_STATUS: DISABLED
                  UNIT_NUM: 1
                COMPATIBLE: 4.2.2.0
                 MAX_LS_ID: 1
*************************** 2. row ***************************
                 TENANT_ID: 1001
               TENANT_NAME: META$1002
               TENANT_TYPE: META
               CREATE_TIME: 2024-03-14 23:11:28.571252
               MODIFY_TIME: 2024-03-14 23:11:43.342405
              PRIMARY_ZONE: zone1
                  LOCALITY: FULL{1}@zone1
         PREVIOUS_LOCALITY: NULL
        COMPATIBILITY_MODE: MYSQL
                    STATUS: NORMAL
             IN_RECYCLEBIN: NO
                    LOCKED: NO
               TENANT_ROLE: PRIMARY
         SWITCHOVER_STATUS: NORMAL
          SWITCHOVER_EPOCH: 0
                  SYNC_SCN: NULL
            REPLAYABLE_SCN: NULL
              READABLE_SCN: NULL
        RECOVERY_UNTIL_SCN: NULL
                  LOG_MODE: NOARCHIVELOG
ARBITRATION_SERVICE_STATUS: DISABLED
                  UNIT_NUM: 1
                COMPATIBLE: 4.2.2.0
                 MAX_LS_ID: 1
*************************** 3. row ***************************
                 TENANT_ID: 1002
               TENANT_NAME: mq_t1
               TENANT_TYPE: USER
               CREATE_TIME: 2024-03-14 23:11:28.574059
               MODIFY_TIME: 2024-03-14 23:11:43.388110
              PRIMARY_ZONE: zone1
                  LOCALITY: FULL{1}@zone1
         PREVIOUS_LOCALITY: NULL
        COMPATIBILITY_MODE: MYSQL
                    STATUS: NORMAL
             IN_RECYCLEBIN: NO
                    LOCKED: NO
               TENANT_ROLE: PRIMARY
         SWITCHOVER_STATUS: NORMAL
          SWITCHOVER_EPOCH: 0
                  SYNC_SCN: 1710429122710005000
            REPLAYABLE_SCN: 1710429122710005000
              READABLE_SCN: 1710429122209956004
        RECOVERY_UNTIL_SCN: 4611686018427387903
                  LOG_MODE: NOARCHIVELOG
ARBITRATION_SERVICE_STATUS: DISABLED
                  UNIT_NUM: 1
                COMPATIBLE: 4.2.2.0
                 MAX_LS_ID: 1001
3 rows in set (0.007 sec)
✨ 8.3 建库建表
默认管理员用户(MySQL 模式为 root,Oracle 模式为 sys)的密码为空,您需要及时修改管理员用户的密码。
MySQL 兼容模式

--登录 mq_t1 租户的 root 用户。
obclient -h192.168.3.20 -uroot@mq_t1 -P2883 -A


--执行以下语句修改 root 用户的密码
obclient [(none)]> ALTER USER root IDENTIFIED BY '123456';

--退出后重新登陆
obclient -uroot@mq_t1 -h127.1 -P2883 -p123456 -A

--创建数据库并指定字符集
CREATE DATABASE testdb DEFAULT CHARACTER SET UTF8;
obclient [(none)]> use testdb

--建表
CREATE TABLE course_tb(
course_id int(10) NOT NULL,
course_name char(10) NOT NULL,
course_datetime char(30) NOT NULL);

INSERT INTO course_tb VALUES(1, 'Python', '2021-12-1 19:00-21:00');
INSERT INTO course_tb VALUES(2, 'SQL', '2021-12-2 19:00-21:00');
INSERT INTO course_tb VALUES(3, 'R', '2021-12-3 19:00-21:00');

obclient [testdb]> desc course_tb
    -> ;
+-----------------+----------+------+-----+---------+-------+
| Field           | Type     | Null | Key | Default | Extra |
+-----------------+----------+------+-----+---------+-------+
| course_id       | int(10)  | NO   |     | NULL    |       |
| course_name     | char(10) | NO   |     | NULL    |       |
| course_datetime | char(30) | NO   |     | NULL    |       |
+-----------------+----------+------+-----+---------+-------+

obclient [testdb]> select * from course_tb;
+-----------+-------------+-----------------------+
| course_id | course_name | course_datetime       |
+-----------+-------------+-----------------------+
|         1 | Python      | 2021-12-1 19:00-21:00 |
|         2 | SQL         | 2021-12-2 19:00-21:00 |
|         3 | R           | 2021-12-3 19:00-21:00 |
+-----------+-------------+-----------------------+
📣 9.报错处理
1.资源池创建内存不足报错
obclient [oceanbase]> CREATE RESOURCE POOL mq_pool_01
    ->                 UNIT='S1_unit_config',
    ->                 UNIT_NUM=1,
    ->                 ZONE_LIST=('zone1');
ERROR 4733 (HY000): zone 'zone1' resource not enough to hold 1 unit. You can check resource info by views: DBA_OB_UNITS, GV$OB_UNITS, GV$OB_SERVERS.
server '"192.168.3.20:2882"' MEMORY resource not enough

此处报错记得跳到配置文件内存即可,调大即可,给到10G

# 使用 edit-config 命令进入编辑模式,修改集群配置
# 修改配置并保存退出后,OBD 会告知如何使得此次修改生效,复制 OBD 输出的命令即可
[admin@centos79 ~]$  obd cluster edit-config obtest
# 保存修改后输输入以下命令加载
[admin@test001 ~]$ obd cluster reload obtest


2.启动报系统参数
[admin@centos79 ~]$ obd cluster start obtest
Get local repositories ok
Search plugins ok
Load cluster param plugin ok
Open ssh connection ok
Check before start observer x
[ERROR] OBD-1007: (192.168.3.20) The value of the ulimit parameter "open files" must not be less than 20000 (Current value: 1024), Please execute `echo -e "* soft nofile 20000\n* hard nofile 20000" >> /etc/security/limits.d/nofile.conf` as root in 192.168.3.20. if it dosen't work, please check whether UsePAM is yes in /etc/ssh/sshd_config.
[ERROR] OBD-1007: (192.168.3.20) The value of the ulimit parameter "max user processes" must not be less than 120000 (Current value: 4096), Please execute `echo -e "* soft nproc 120000\n* hard nproc 120000" >> /etc/security/limits.d/nproc.conf` as root in 192.168.3.20. if it dosen't work, please check whether UsePAM is yes in /etc/ssh/sshd_config.
[WARN] OBD-1007: (192.168.3.20) The recommended number of core file size is unlimited (Current value: 0)
[WARN] OBD-1007: (192.168.3.20) The recommended number of stack size is unlimited (Current value: 8192)
[WARN] OBD-1017: (192.168.3.20) The value of the "vm.max_map_count" must be within [327600, 1310720] (Current value: 65530, Recommended value: 655360)
[WARN] OBD-1017: (192.168.3.20) The value of the "fs.file-max" must be greater than 6573688 (Current value: 1155354, Recommended value: 6573688)
[WARN] OBD-2000: (192.168.3.20) not enough memory. (Free: 5.4G, Need: 6.0G)
[WARN] OBD-1012: (192.168.3.20) clog and data use the same disk (/)


修改系统参数即可

root soft nofile 655350
root hard nofile 655350
* soft nofile 655350
* hard nofile 655350
* soft stack 20480
* hard stack 20480
* soft nproc 655360
* hard nproc 655360
* soft core unlimited
* hard core unlimited

您需查看 /etc/security/limits.d/20-nproc.conf 文件中是否存在 nproc 的配置,若存在需同步修改该文件中 nproc 的值。
退出当前会话,重新登录。执行以下命令,查看配置是否生效。
[root@centos79 ~]# ulimit -a
📣 10.总结
通过本文让大家快速掌握OceanBase 集群的手动部署技能,理解进程的相关目录、集群初始化、OBProxy和 OB 集群关系等