文章目录
- Fastapi ORM操作
- 1、创建模型
- 2、创建数据库连接配置文件
- 3、启动项目
- 4、根据模型类创建数据库表
- 1. 初始化配置,只需要使用一次
- 2. 初始化数据库,一般情况下只用一次
- 3. 更新模型并进行迁移
- 4. 重新执行迁移,写入数据库
- 5. 回到上一个版本
- 6. 查看历史迁移记录
- 5、选课系统接口开发
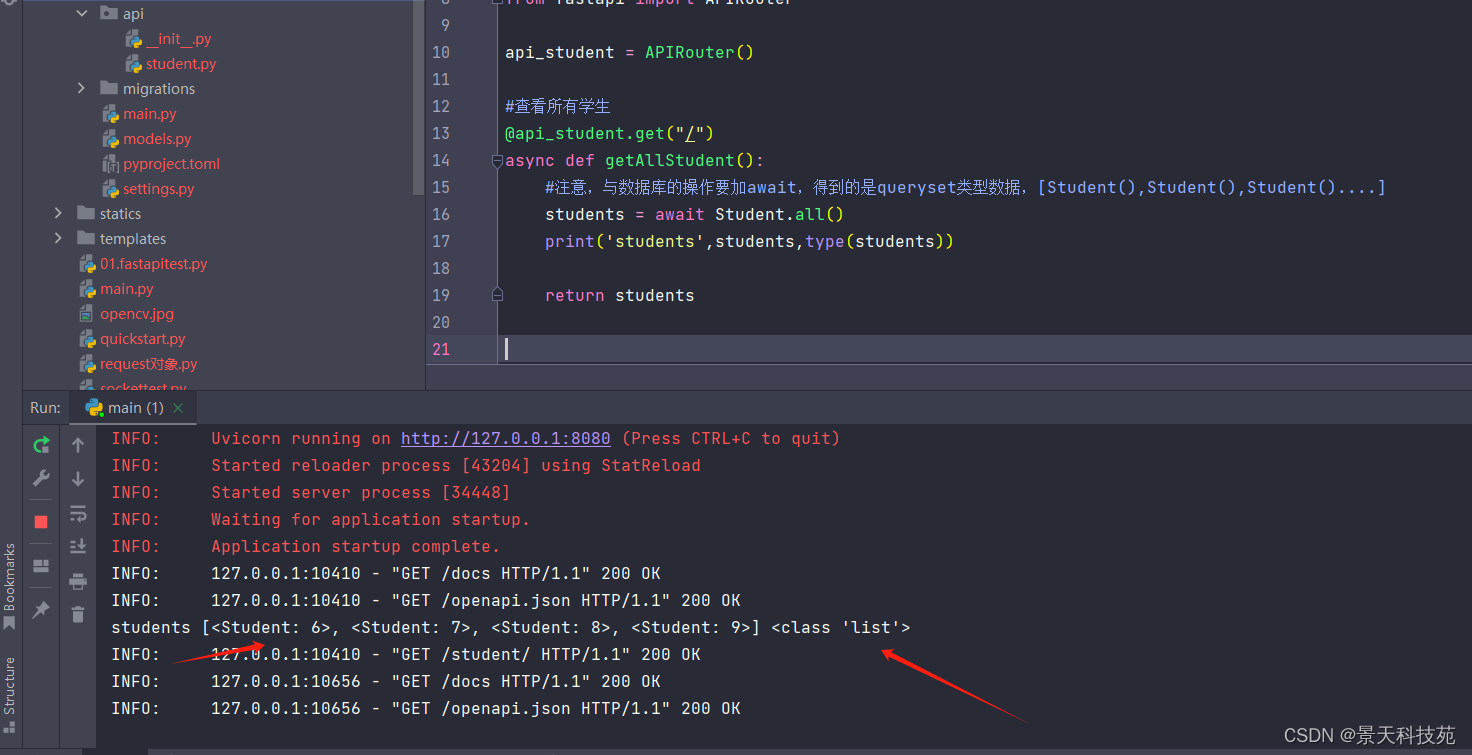
- (1)all查询,查询出来的是个list类型数据
- (2)过滤查询,查询指定内容filter,得到的依然是list类型数据
- (3)get方法,直接查询
- (4)模糊查询,查询学号大于2001的学生
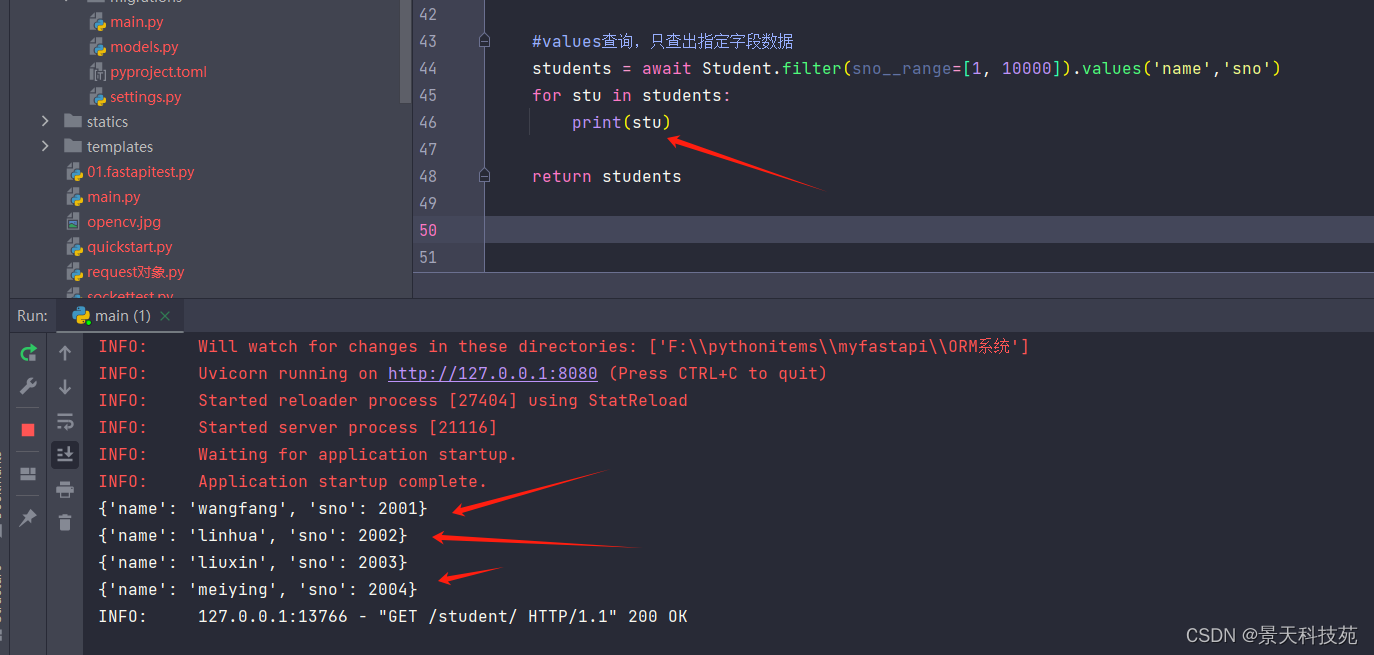
- (5)values查询
- (6)将数据库数据显示到web页面
Fastapi ORM操作
在大型的web开发中,我们肯定会用到数据库操作,那么FastAPI也支持数据库的开发,你可以用 PostgreSQL、MySQL、 SQLite Oracle 等。本文用SQLite为例。我们看下在fastapi是如何操作设计数据库的。
ORM是“对象-关系-映射”的简称。(Object Relational Mapping,简称ORM)
fastapi是一个很优秀的框架,但是缺少一个合适的orm,官方代码里面使用的是sqlalchemy,Tortoise ORM 是受 Django 启发的易于使用的异步 ORM (对象关系映射器)。

Tortoise ORM 目前支持以下[数据库]
- PostgreSQL >= 9.4(使用asyncpg)
- SQLite(使用aiosqlite)
- MySQL/MariaDB
安装tortoise
pip install tortoise
安装数据模型迁移工具
pip install aerich
我用的mysql,因此还需要安装aiomysql包:
pip install aiomysql
aerich的功能类似于django的migrate。
1、创建模型
以选课系统为例:
创建个模型类文件 models.py
#导入tortoise

from tortoise.models import Model
from tortoise import fields


#创建班级类
class Clas(Model):
    name = fields.CharField(max_length=255, description='班级名称')


#创建老师类
class Teacher(Model):
    id = fields.IntField(pk=True)
    name = fields.CharField(max_length=255, description='姓名')
    tno = fields.IntField(description='账号')
    pwd = fields.CharField(max_length=255, description='密码')


#课程表
class Course(Model):
    id = fields.IntField(pk=True)
    name = fields.CharField(max_length=255, description='课程名')
    teacher = fields.ForeignKeyField('models.Teacher', related_name='courses', description='课程讲师')


#创建学生类
class Student(Model):
    id = fields.IntField(pk=True)
    sno = fields.IntField(description='学号')
    #description 在接口文档有个显示
    pwd = fields.CharField(max_length=255, description='密码')
    name = fields.CharField(max_length=255, description='姓名')
    # 一对多,反向查询时使用related_name
    clas = fields.ForeignKeyField('models.Clas', related_name='students')
    # 多对多
    courses = fields.ManyToManyField('models.Course', related_name='students',description='学生选课表')

2、创建数据库连接配置文件
创建settings.py 配置文件
TORTOISE_ORM = {
    'connections': {
        'default': {
            # 'engine': 'tortoise.backends.asyncpg',  PostgreSQL
            'engine': 'tortoise.backends.mysql',  # MySQL or Mariadb
            'credentials': {
                'host': '10.10.0.52',
                'port': '3306',
                'user': 'root',
                'password': 'Jingxxxxxxxx',
                'database': 'fastapi',
                'minsize': 1,
                'maxsize': 5,
                'charset': 'utf8mb4',
                "echo": True
            }
        },
    },
    'apps': {
        'models': {
            #这个models就是自己配置的models.py位置

            'models': ['models'],
            'default_connection': 'default',

        }
    },
    'use_tz': False,
    'timezone': 'Asia/Shanghai'
}
3、启动项目
main.py 启动项目
from fastapi import FastAPI  # FastAPI 是一个为你的 API 提供了所有功能的 Python 类。
import uvicorn
from tortoise.contrib.fastapi import register_tortoise

from settings import TORTOISE_ORM


#创建应用程序,app是应用程序名
app = FastAPI()  # 这个实例将是创建你所有 API 的主要交互对象。这个 app 同样在如下命令中被 uvicorn 所引用


# 该方法会在fastapi启动时触发,内部通过传递进去的app对象,监听服务启动和终止事件
# 当检测到启动事件时,会初始化Tortoise对象,如果generate_schemas为True则还会进行数据库迁移
# 当检测到终止事件时,会关闭连接
register_tortoise(
    app,
    #数据库配置信息
    config=TORTOISE_ORM,
    # generate_schemas=True,  # 如果数据库为空,则自动生成对应表单,生产环境不要开
    # add_exception_handlers=True,  # 生产环境不要开,会泄露调试信息
)


if __name__ == '__main__':
    #注意,run的第一个参数 必须是文件名:应用程序名
    uvicorn.run("quickstart:app", port=8080,  reload=True, workers=1)

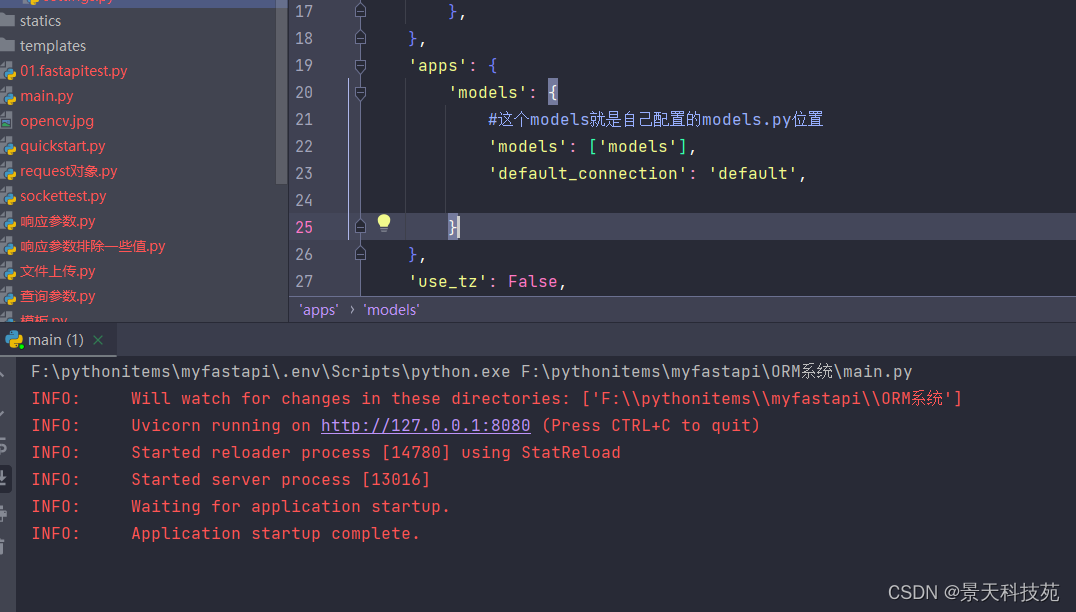
启动没报错表示正常连接到了数据库
4、根据模型类创建数据库表
aerich是一种ORM迁移工具,需要结合tortoise异步orm框架使用。安装aerich
1. 初始化配置,只需要使用一次
初始化之前,需要在settings.py中将aerich自带的models也配置上

在中高端执行命令
aerich init -t settings.TORTOISE_ORM # TORTOISE_ORM配置的位置)

初始化完会在当前目录生成一个文件:pyproject.toml和一个文件夹:migrations
- pyproject.toml:保存配置文件路径,低版本可能是aerich.ini
- migrations:存放迁移文件
2. 初始化数据库,一般情况下只用一次
将我们在models.py里面配置的表创建到数据库中
aerich init-db

- 此时数据库中就有相应的表格
- 如果
TORTOISE_ORM配置文件中的models改了名,则执行这条命令时需要增加--app参数,来指定你修改的名字
查看数据库,数据库中就有了我们在模型类里面配置的表

看下migrations里面的py文件,就是创建表语句

3. 更新模型并进行迁移
我们在创建模型类之后,通常也会修改
修改model类,重新生成迁移文件,比如添加一个字段
我们给course类添加个地址字段
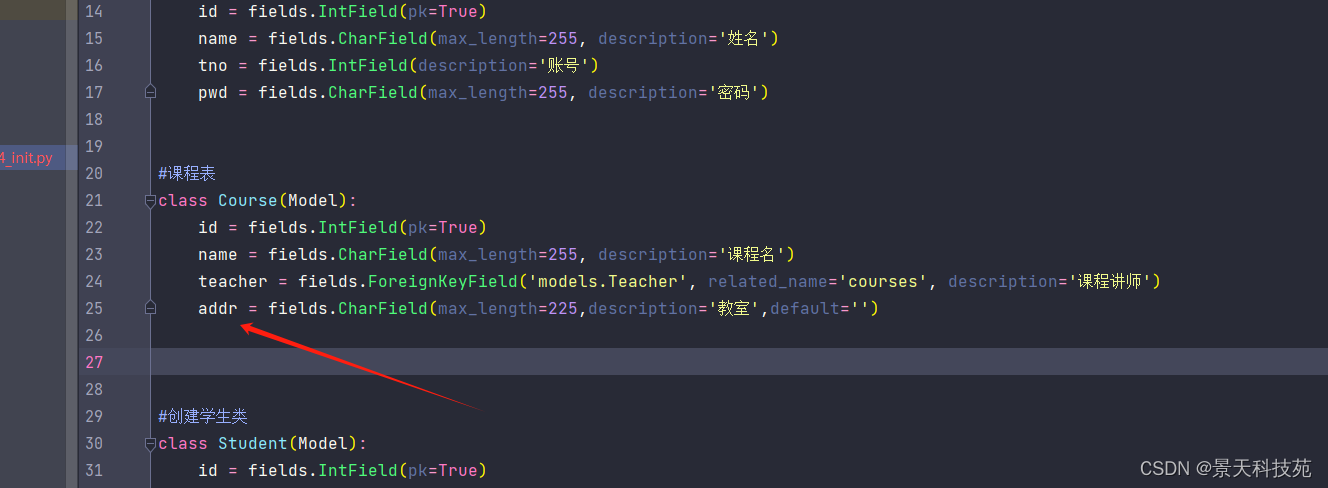
aerich migrate [–name] (标记修改操作) # aerich migrate --name add_column --name是给这次迁移起个名字
不加–name,有个默认的名字
迁移文件名的格式为 {version_num}{datetime}{name|update}.py。


注意,此时sql并没有执行,数据库中course表中没有xxx字段

4. 重新执行迁移,写入数据库
aerich upgrade

此时,就把模型类中新添加爱的字段更新到数据库中了

5. 回到上一个版本
aerich downgrade

再看下数据库,新加的字段又没了,回退了

6. 查看历史迁移记录
aerich history

5、选课系统接口开发
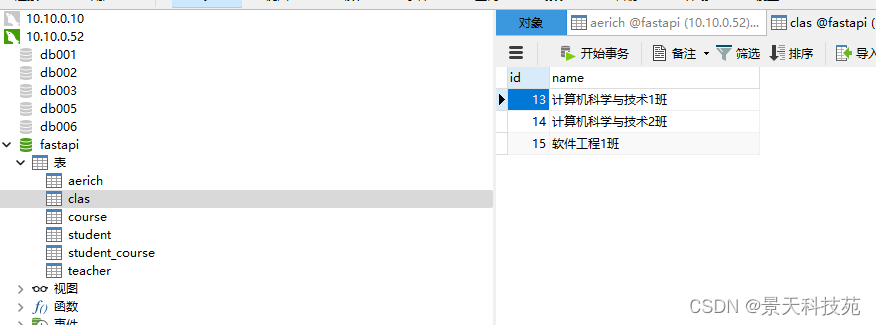
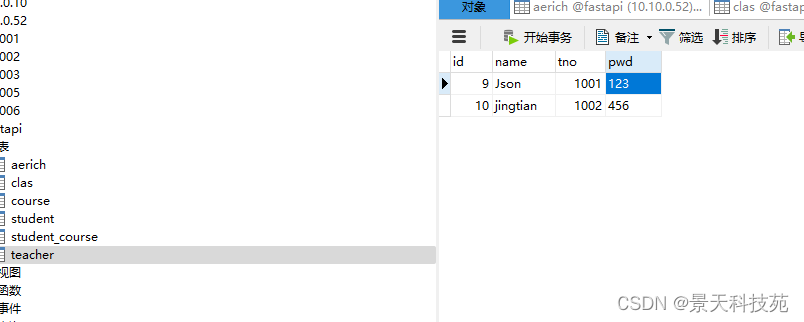
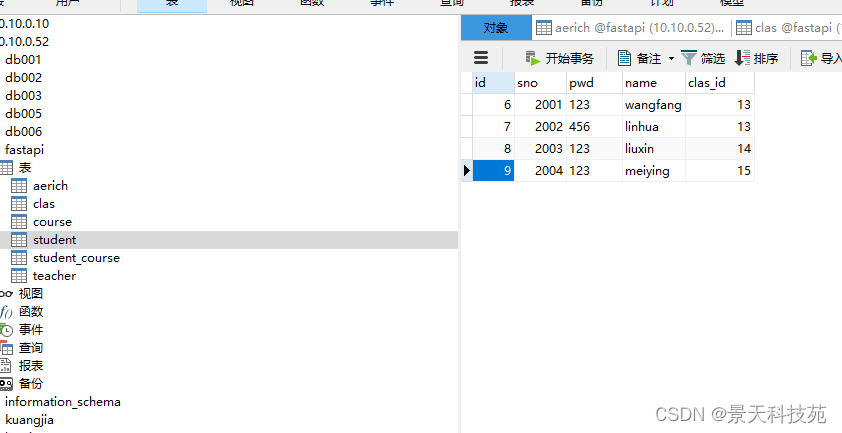
先看看各个表数据
班级表
教师表
课程表

学生表
学生课程表

我们在项目下建个包api,在这个包里面写接口
api/student.py
from fastapi.exceptions import HTTPException

#导入models
from models import *

from pydantic import BaseModel
from typing import List, Union
from fastapi import APIRouter

api_student = APIRouter()

#查看所有学生,注意,tortoise处理数据库要用异步,路径函数前面加async
@api_student.get("/")
async def getAllStudent():
    #注意,与数据库的操作要加await,得到的是列表类型数据,[Student(),Student(),Student()....]
    students = await Student.all()
    print('students',students,type(students))

    return students


#查看某个学生,基于路径参数
@api_student.get("/{student_id}")
async def getOneStudent(student_id:int):
    #注意,与数据库的操作要加await
    student = await Student.all().values("name", "clas__name")


    return student
在main.py导入api,并做路由分发
from fastapi import FastAPI  # FastAPI 是一个为你的 API 提供了所有功能的 Python 类。
import uvicorn
from tortoise.contrib.fastapi import register_tortoise

from settings import TORTOISE_ORM


#导入api
from api.student import api_student


#创建应用程序,app是应用程序名
app = FastAPI()  # 这个实例将是创建你所有 API 的主要交互对象。这个 app 同样在如下命令中被 uvicorn 所引用


#路由分发
app.include_router(api_student, prefix="/student", tags=["学生信息接口", ])

# 该方法会在fastapi启动时触发,内部通过传递进去的app对象,监听服务启动和终止事件
# 当检测到启动事件时,会初始化Tortoise对象,如果generate_schemas为True则还会进行数据库迁移
# 当检测到终止事件时,会关闭连接
register_tortoise(
    app,
    #数据库配置信息
    config=TORTOISE_ORM,
    # generate_schemas=True,  # 如果数据库为空,则自动生成对应表单,生产环境不要开
    # add_exception_handlers=True,  # 生产环境不要开,会泄露调试信息
)


if __name__ == '__main__':
    #注意,run的第一个参数 必须是文件名:应用程序名
    uvicorn.run("main:app", port=8080,  reload=True, workers=1)
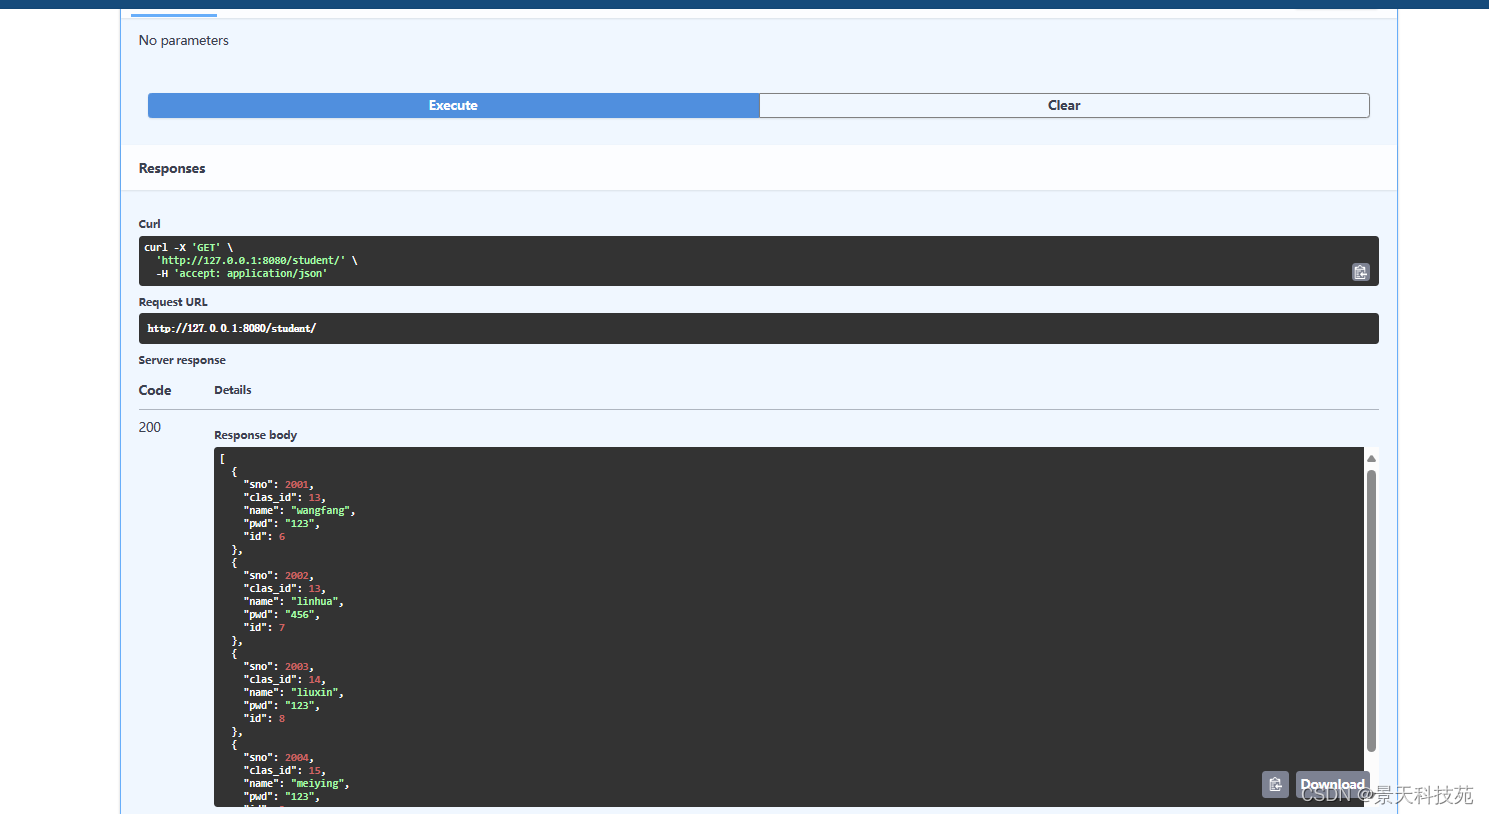
运行程序

执行查询所有学生
(1)all查询,查询出来的是个list类型数据
循环遍历
#循环打印
for stu in students:
print(stu.name, stu.sno)

(2)过滤查询,查询指定内容filter,得到的依然是list类型数据
student = await Student.filter(name='liuxin')
print(student,type(student))
#得到具体数据
print(student[0].name)

(3)get方法,直接查询
#get方法
student = await Student.get(name="wangfang")
print(student,type(student))
print(student.name,student.sno)
此时得到的就是模型类对象,可以直接获取属性值

(4)模糊查询,查询学号大于2001的学生
students = await Student.filter(sno__gt=2001)
print(students)
得到的也是列表

#查询学号是2001和2002的学生,在某个范围内,用__in
students = await Student.filter(sno__in=[2001,2002])

(5)values查询
只查出指定字段数据,得到的是列表套字典数据,有几个字典,取决于查询出几条记录
students = await Student.filter(sno__range=[1, 10000]).values(‘name’,‘sno’)
for stu in students:
print(stu)
(6)将数据库数据显示到web页面
在student.py 这个api文件里面
返回页面模板
#导入模板的包
from fastapi.templating import Jinja2Templates

# 实例化Jinja2对象,并将文件夹路径设置为以templates命名的文件夹
templates = Jinja2Templates(directory="templates")


接口:
@api_student.get("/index")
async def show_student(request:Request):
    students = await Student.all()
    return templates.TemplateResponse(
        'index.html', #第一个参数放模板文件
        {
            'request': request,  # 注意,返回模板响应时,必须有request键值对,且值为Request请求对象
            'students':students

        }, #context上下文对象,是个字典
    )
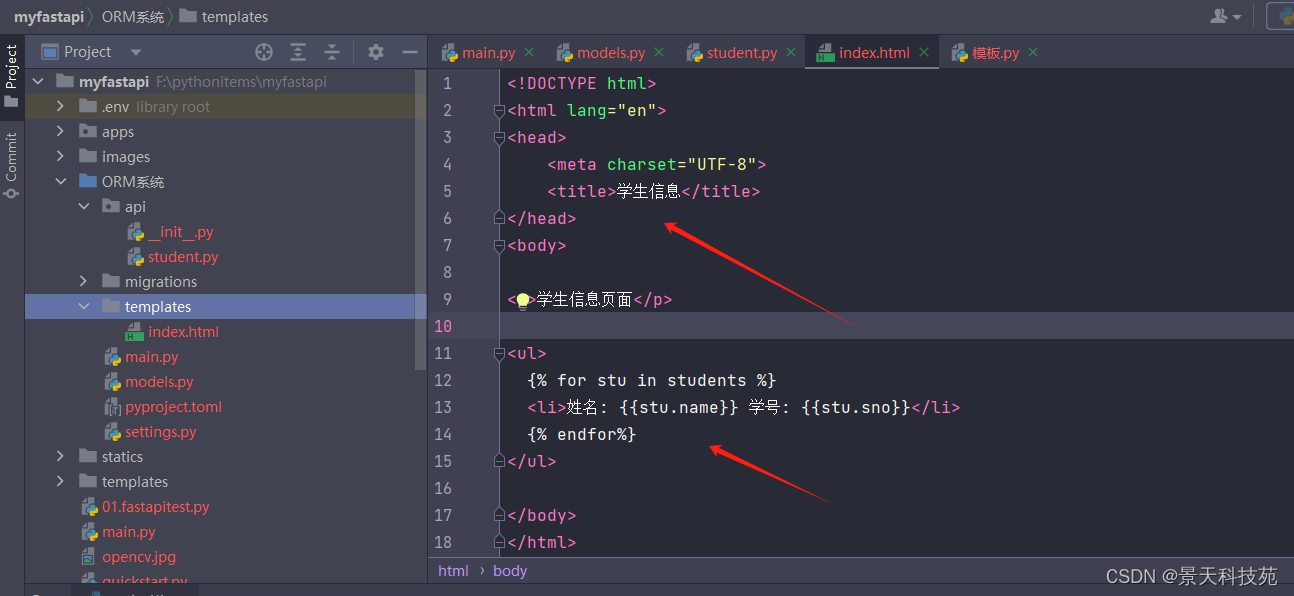
创建templates文件夹下的index.html
<!DOCTYPE html>
<html lang="en">
<head>
    <meta charset="UTF-8">
    <title>学生信息</title>
</head>
<body>

<p>学生信息页面</p>

<ul>
  {% for stu in students %}
  <li>姓名: {{stu.name}} 学号: {{stu.sno}}</li>
  {% endfor%}
</ul>

</body>
</html>
启动程序,访问

浏览器访问

当然,也可以借助bootstrap让页面更好看
<!DOCTYPE html>
<html lang="en">
<head>
    <meta charset="UTF-8">
    <title>学生信息</title>
    <link href="https://cdn.jsdelivr.net/npm/bootstrap@5.3.0-alpha1/dist/css/bootstrap.min.css" rel="stylesheet"
          integrity="sha384-GLhlTQ8iRABdZLl6O3oVMWSktQOp6b7In1Zl3/Jr59b6EGGoI1aFkw7cmDA6j6gD" crossorigin="anonymous">
</head>
<body>


<div class="col-md-8 offset-md-2">
    <h2>学生信息</h2>
    <table class="table table-hover table-striped">
    <thead>
    <tr>
        <td>姓名</td>
        <td>学号</td>
        <td>班级</td>
    </tr>
    </thead>
    <tbody>

    {% for student in students%}
    <tr>
        <td>{{student.name}}</td>
        <td>{{student.sno}}</td>
        <td>{{student.clas_id}}</td>
    </tr>
    {%endfor%}

    </tbody>
</table>
</div>


</body>
</html>


