一、css设置样式的方式总结:
对象.style.css属性
对象.className = ‘’
- 会覆盖原来的类
对象.setAttribut(‘style’,‘css样式’)
对象.setAttribute(‘class’,‘类名’)
对象.style.setProperty(css属性名,css属性值)
对象.style.cssText = “css样式表”
<style>
      .headerObj {
        height: 100px;
        background-color: red;
      }
      .select {
        background-color: blue;
      }
    </style>
<body>
    <header class="headerObj" id="headerObj" style="" name-1="">
      我是头部元素
    </header>
</body><script>
    var headerObj = document.querySelector('#headerObj')
    headerObj.addEventListener('mouseover', function () {
      this.style.height = '200px'
      this.className = 'select'//会覆盖原来的类
      this.setAttribute('style', 'background-color:green')
      this.setAttribute('class', 'select headerObj')
      this.style.setProperty('background-color', 'green')
      this.style.cssText =
        'height: 200px;background-color: pink; font-size:30px'
    })
</script>
二、节点
DOM节点:网页中所有的内容都是节点
- 标签、属性、文本、注释、document
节点的特征:
-
节点类型:nodeType
-
节点名称:nodeName
-
节点值: nodeValue
节点 标签节点 属性节点 文本节点 document 节点类型 1 2 3 9 节点属性 大写的标签名 属性名 #text #document 节点值 null 属性值 文本内容 null 先获取属性节点: 元 素.getAttributeNode(“属性名”) 1.先获取文本节点: 元 素.firstChild 2.标签的第一个子节点必是文本节点
标签节点
<body>
    <header class="headClass" id="headerId" name-1="h1">
      我是头部区域标签
    </header>
    <span class="spanClass" id="spanId" name-1="s1">我是行内元素范围标签</span>
</body>
<script>
    console.log(headerObj.nodeType) //1   块元素
    console.log(spanObj.nodeType) //1     行内元素
    console.log(headerObj.nodeName) //HEADER
    console.log(spanObj.nodeName) //SPAN
    console.log(headerObj.nodeValue) //null
    console.log(spanObj.nodeValue) //null
</script>
属性节点
<script>
    console.log(headerObj.getAttributeNode('class').nodeType) //2
    console.log(headerObj.getAttributeNode('name-1').nodeType) //2
    console.log(spanObj.getAttributeNode('name-1').nodeType) //2
    console.log(spanObj.getAttributeNode('id').nodeType) //2
    console.log(headerObj.getAttributeNode('class').nodeName) //class
    console.log(headerObj.getAttributeNode('name-1').nodeName) //name-1
    console.log(spanObj.getAttributeNode('name-1').nodeName) //name-1
    console.log(spanObj.getAttributeNode('id').nodeName) //id
    console.log(headerObj.getAttributeNode('class').nodeValue) //class
    console.log(headerObj.getAttributeNode('name-1').nodeValue) //name-1
    console.log(spanObj.getAttributeNode('name-1').nodeValue) //name-1
    console.log(spanObj.getAttributeNode('id').nodeValue) //id
</script>
文本节点
<script>
    console.log(headerObj.firstChild.nodeType) //3
    console.log(spanObj.firstChild.nodeType) //3
    console.log(headerObj.firstChild.nodeName) //#text
    console.log(spanObj.firstChild.nodeName) //#text
    console.log(headerObj.firstChild.nodeValue) //文本内容
    console.log(spanObj.firstChild.nodeValue) //
</script>
document节点
<script>
    console.log(document.nodeType) //9
    console.log(document.nodeName) //#document
    console.log(document.nodeValue) //null
</script>
三、节点之间的关系
  <body>
    <ul id="list">
      <!-- 我是ul的第一行文本 -->
      <li id="li1">第一行</li>
      <!-- 我是ul的第二行文本 -->
      <li id="li2">第二行</li>
      111
      <li class="li3">第三行</li>
      <li>第四行</li>
      <!-- 我是ul的注释 -->
      <li>第五行</li>
      <!-- 我是ul的最后一行文本 -->
    </ul>
  </body>
  <script>
    var ulList = document.getElementById('list')
    var li2 = document.getElementById('li2')
  </script>
嵌套关系
1、父节点 parentNode

2、父元素节点 parentElement

parentNode与parentElement的区别:
-
html标签的父节点是document的节点名称
-
html标签的父元素节点是document的节点值

3、子节点 childNodes (标签节点、文本节点、注释节点)
每个li前后都有text


4、子元素节点 children 标签节点
所有的li元素

5、第一个子节点 firstChild 文本节点

6、第一个子元素节点 firstElementChild 标签节点

7、最后一个子节点 lastChild 文本节点

8、最后一个子节点 lastElementChild 标签节点

并列关系
1、上一个节点 previousSibling 文本节点

2、上一个元素节点 previousElementSibling 标签节点

3、下一个节点 nextSibling 文本节点

4、下一个元素节点 nextElementSibling 标签节点

总结
-
1、firstChild/lastChild/previousSibling/nextSibling获取到的都是文本节点,
如果有文本返回节点值-文本内容,如果没有文本返回节点名称-#text -
2、firstElementChild/lastElementChild/previousElementSibling/nextElementSibling获取到的都是标签节点
四、创建元素的三种方式
1、document.write() 弊端:只能往body中添加元素
document.write("<header class='hObj'>头部区域</header>")
2、innerHTML 弊端:覆盖原有的元素
3、document.createElement(“标签名”)
1、添加元素:
- 父元素.appendChild(子元素)
2、删除元素:
- 父元素.removeChild(子元素)
综合案例:
    <style>
      #btn {
        width: 300px;
        height: 100px;
        font-size: 30px;
      }
      #box {
        margin-top: 30px;
        width: 300px;
        height: 300px;
        border: 3px solid red;
      }
      .li1 {
        color: green;
        font-size: 30px;
      }
    </style>
  <body>
  //1、先搭建静态页面
    <button id="btn">动态的创建列表</button>
    <div id="box"></div>
  </body>
  <script>
    // 2、获取元素
    var btn = document.getElementById('btn')
    var box = document.getElementById('box')
    // 3、创建一个武功秘籍数组
    var arr = ['易经经','葵花宝典','辟邪剑谱','吸星大法','太极拳',]
    // 4、给按钮绑定单击事件
    btn.onclick = function () {
      // 5、创建ul元素,并将该元素当做box的子元素
      var ulObj = document.createElement('ul')
      box.appendChild(ulObj)
      // 6、遍历武功秘籍数组
      arr.forEach(function (value, index) {
        // 7、创建li元素,并将该元素当做ul的子元素
        var liObj = document.createElement('li')
        ulObj.appendChild(liObj)
        // 8、将数组的6个元素分别当做li的文本内容
        liObj.innerText = value
        // 9、设置每个li的class属性
        liObj.setAttribute('class', 'li' + (index + 1))
        // 10、给li绑定鼠标移入移出事件
        liObj.onmouseover = function () {
          this.style.setProperty('background-color', 'red')
        }
        liObj.onmouseout = function () {
          this.style.setProperty('background-color', '')
        }
        // 11、给li绑定单击事件
        liObj.onclick = function () {
          ulObj.removeChild(this)
        }
      })
      // 12、按钮禁用提示用户不能点了
      this.disabled = true
      this.innerText = '别点了!!!'
    }
  </script>


五、BOM
- BOM:浏览器对象模型,顶级对象是window
属性:console、全局变量、location( 操作地址栏)、history
location
console.log(window.location)
-
1、hash 地址栏中#后面的内容 window.location.hash
-
2、host 域名(主机民)和端口号 window.location.host
-
3、hostname 主机名 window.location.hostname
-
4、port 主机名 window.location.port
-
5、href 整个地址 l ocation.href
-
6、protocol 协议 window.location.protocol
-
7、origin 协议+主机名+端口号 window.location.origin
-
8、reload() 重新加载页面
-
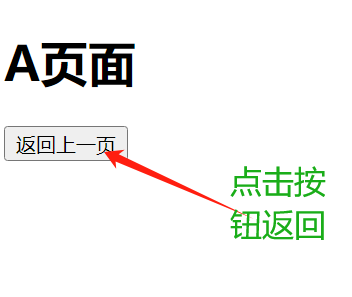
9、back() 返回上一页
history
- 9、back() 返回上一页
<body>
    <button id="btn">点我重新加载页面</button>
    <button onclick="goToA()">点我跳转到A页面</button>
    <button onclick="forwardToA()">前进一页</button>
</body>
<script>
// 8、reload() 重新加载页面
    document.getElementById('btn').onclick = function () {
      window.location.reload()
    }
    // 9、location   back()返回上一页
    console.log(window.history)
    function goToA() {
      window.location.href = './A.html'  //另一个网页
    }
    // 9、history    返回上一页
    function forwardToA() {
      window.history.forward()
    }
</script>

