Elasticsearch 是一个强大的 RESTful 搜索和分析引擎,能够处理越来越多的用例。 它将集中存储你的数据,以实现闪电般的快速搜索、微调相关性以及可轻松扩展的强大分析。 关于如何使用 Elastic Stack(又名 ELK 堆栈)将数据摄取到 Elasticsearch 的资源有很多。在今天的文章中,我将详细介绍如何使用 Node.js 从零开始来把地震的实时数据采集到 Elasticsearch 中。
如果你选择的编程语言是 JavaScript,并且你需要使用 RESTful API 方法从第三方应用程序获取数据,那么使用 Node.js 获取数据是一个不错的选择。 你还可以托管服务器,让它持续实时摄取数据。 该演示将向您展示如何设置一个 Node.js + Express.js 服务器,该服务器实时将数据提取到 Elasticsearch 中,然后可以对这些数据进行分析并以有意义的方式采取行动。
对于此演示,我们将使用 USGS 实时发布的公开可用的全球地震数据。
准备工作
Elasticsearch 及 Kibana
如果你还没有安装好自己的 Elasticsearch 及 Kibana 的话,那么请参考我之前的文章:
- 如何在 Linux,MacOS 及 Windows 上进行安装 Elasticsearch
- Kibana:如何在 Linux,MacOS 及 Windows上安装 Elastic 栈中的 Kibana
在今天的展示中,我将使用 Elastic Stack 8.x 来进行展示。在安装的时候,请参考相应的 Elastic Stack 8.x 的文章来进行安装。
Node.js
你需要安装好自己的 Node.js 来完成下面的练习。你可以参考 Node.js 链接来进行相应的安装。
实时数据
根据 USGS 网上所提供的信息,我们可以在地址 https://earthquake.usgs.gov/earthquakes/feed/v1.0/summary/all_hour.geojson 找到相应的地震信息数据。我们可以通过如下的命令来进行查看:
curl https://earthquake.usgs.gov/earthquakes/feed/v1.0/summary/all_hour.geojson | jq .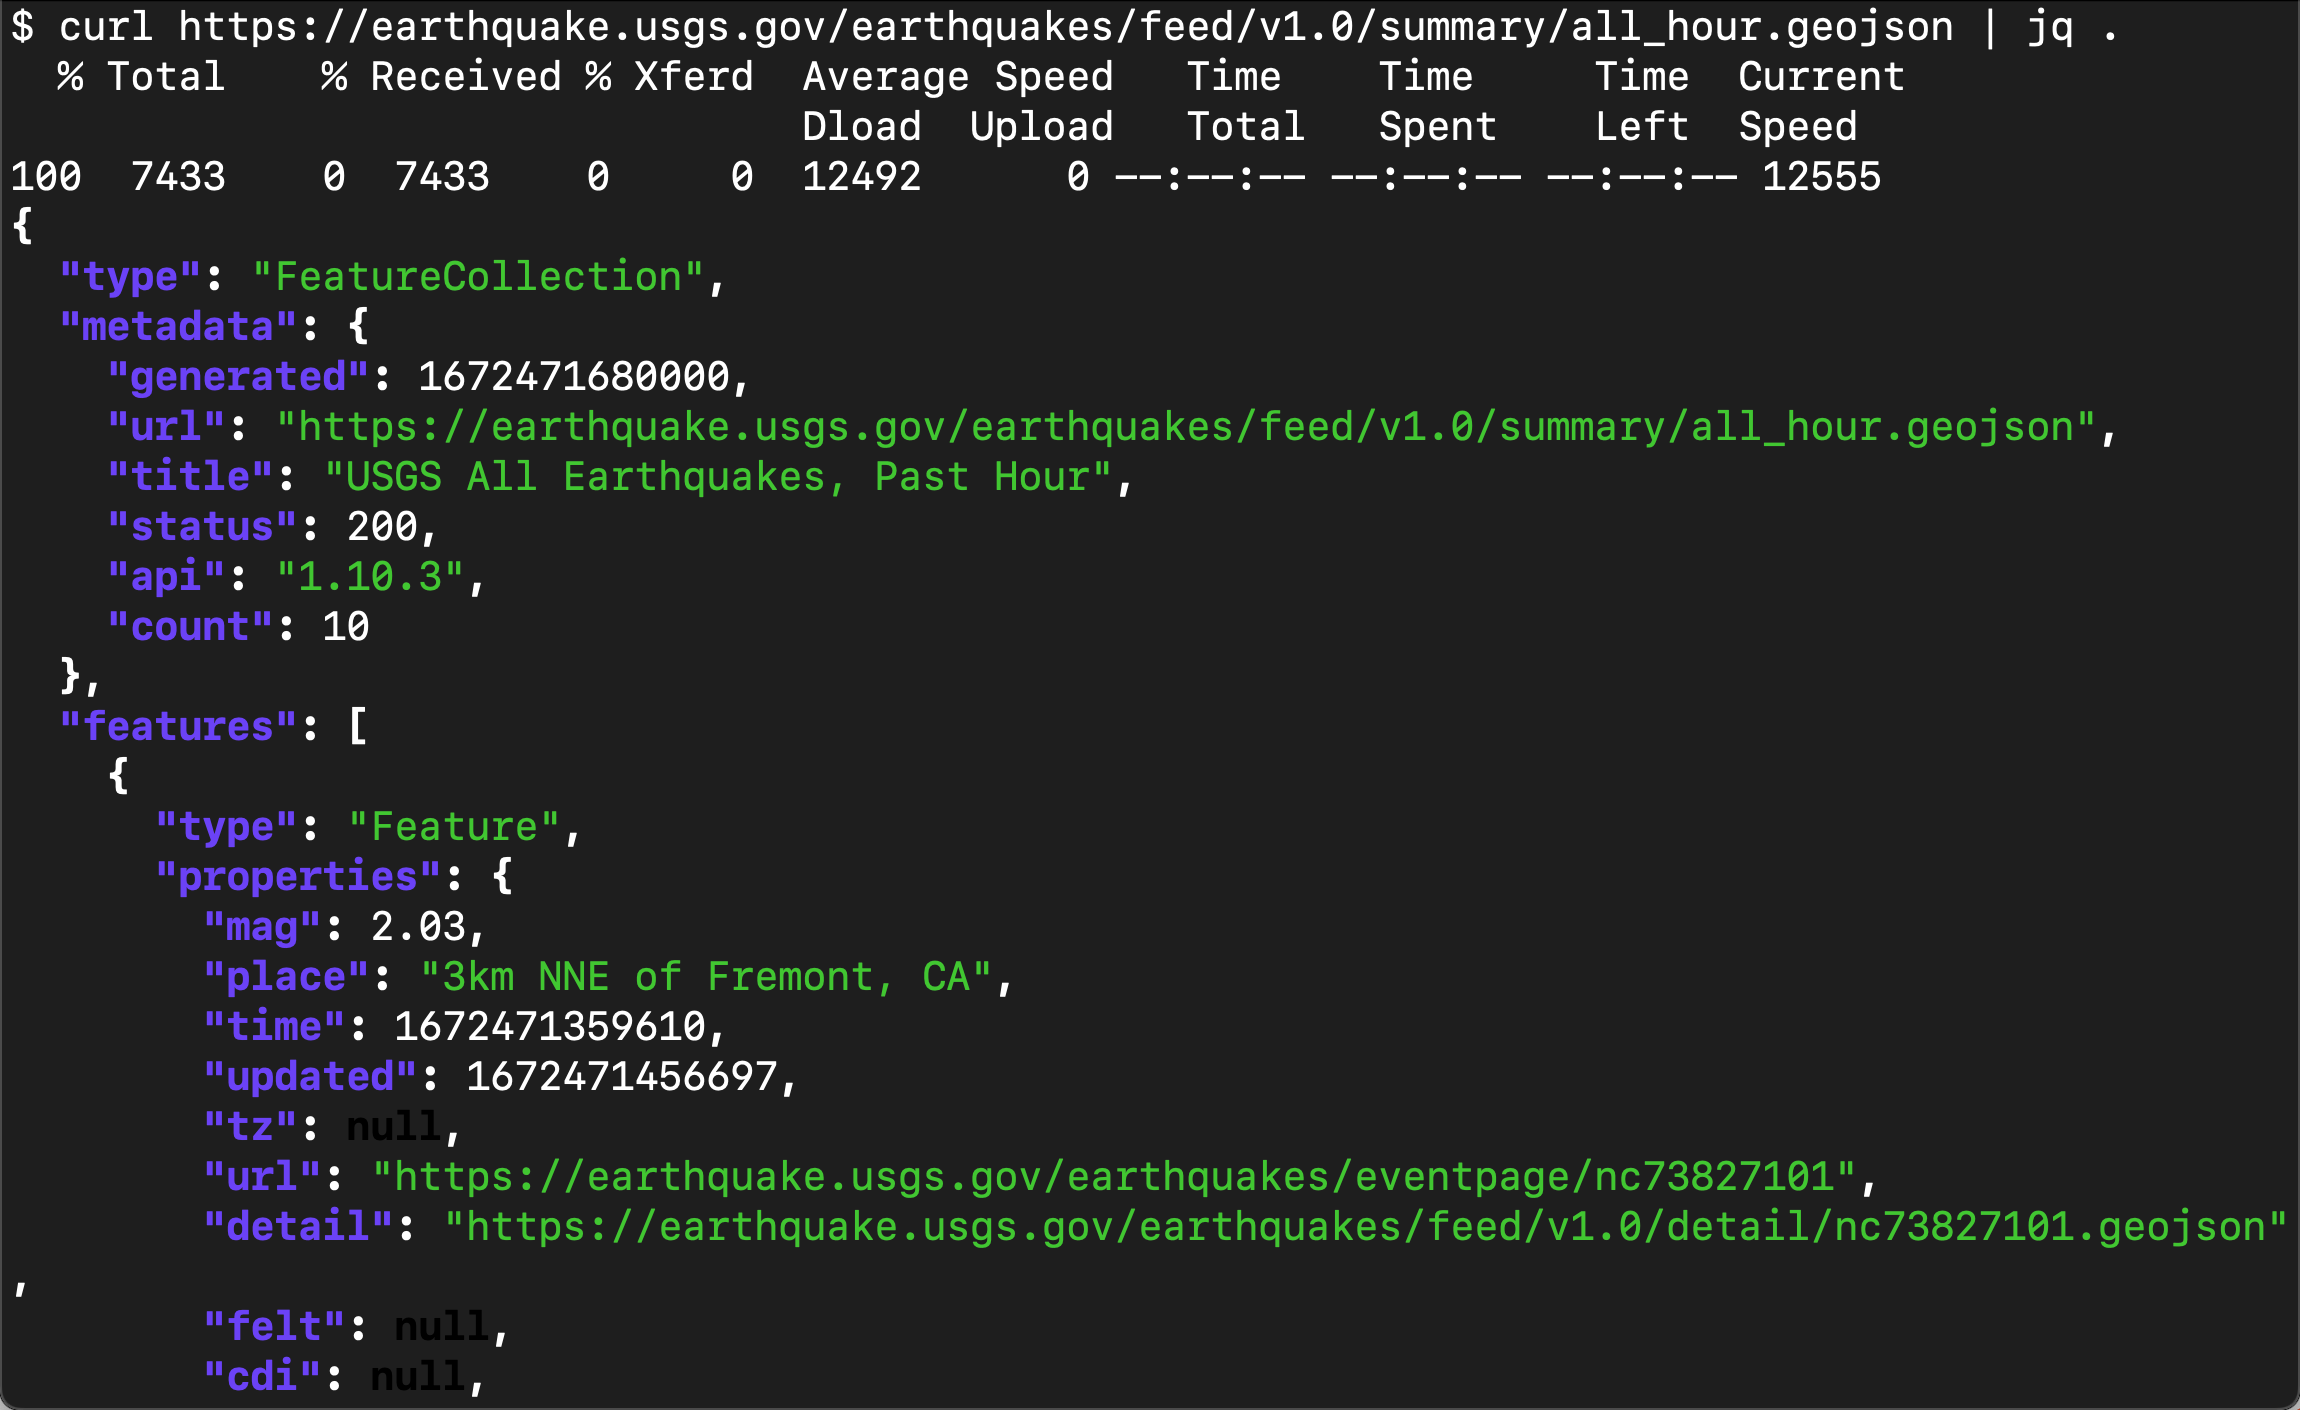
如上所示,它是一个以 JSON 格式给出来的数据信息。这个数据会实时发生变化,我们可以通过反复访问这个接口来得到所需要的地震信息。在这里,我们需要注意的是:
- "time": 1672471359610,这是一个时间信息,可以作为我们的 timestamp 来对它进行分析。我们将最终把它存入到 @timestamp 里。
-
"id": "nc73827101",这是一个地震特有的 id,我们将以这个 id 成为数据的 id。
-
"geometry",这个是地震发生的地理位置。我们可以需要在 Elasticsearch 中为它定一下为 geo_point 数据类型。我们将把它变为:
虽然数据有很多,但是我们最终需要的数据格式是这样的:
{
  "mag": 1.13,
  "place": "11km ENE of Coachella, CA",
  "@timestamp": 2022-05-02T20:07:53.266Z,
  "url": "https://earthquake.usgs.gov/earthquakes/eventpage/ci40240408",
  "sig": 20,
  "type": "earthquake",
  "depth": 2.09,
  "coordinates": {
    "lat": 33.7276667,
    "lon": -116.0736667
  }
}
在接下来的步骤里,我来详细介绍如何达到我们最终的目的。
创建 Node.js 应用
创建最基本的 express 应用
我们将从 0 开始一步一步地创建 Node.js 应用。首先我们在自己的电脑中创建一个目录:
mkdir earthquake_app$ pwd
/Users/liuxg/demos
$ mkdir earthquake_app
$ cd earthquake_app/
我们进入到该目录中,并打入如下的命令:
npm init -y$ npm init -y
Wrote to /Users/liuxg/demos/earthquake_app/package.json:
{
"name": "earthquake_app",
"version": "1.0.0",
"description": "",
"main": "index.js",
"scripts": {
"test": "echo \"Error: no test specified\" && exit 1"
},
"keywords": [],
"author": "",
"license": "ISC"
}
$ ls
package.json上述命令生成一个叫做 package.json 的文件。在以后安装的 packages,它也会自动添加到这个文件中。默认的设置显然不是我们想要的。我们需要对它做一些修改。
在接下来的代码中,我们将会使用如下的一些 packages:
- @elastic/elasticsearch
- axios
- config
- cors
- express
- log-timestamp
- nodemon
我们可以通过如下的命令来进行安装:
npm i @elastic/elasticsearch axios config cors express log-timestamp nodemon$ npm i @elastic/elasticsearch axios config cors express log-timestamp nodemon
npm notice Beginning October 4, 2021, all connections to the npm registry - including for package installation - must use TLS 1.2 or higher. You are currently using plaintext http to connect. Please visit the GitHub blog for more information: https://github.blog/2021-08-23-npm-registry-deprecating-tls-1-0-tls-1-1/
npm notice Beginning October 4, 2021, all connections to the npm registry - including for package installation - must use TLS 1.2 or higher. You are currently using plaintext http to connect. Please visit the GitHub blog for more information: https://github.blog/2021-08-23-npm-registry-deprecating-tls-1-0-tls-1-1/
added 118 packages in 17s
11 packages are looking for funding
run `npm fund` for details由于我之前已经安装过,所以我上面显示的信息和你的可能会有所不同。我们再次来查看 package.json 文件:
$ pwd
/Users/liuxg/demos/earthquake_app
$ ls
node_modules      package-lock.json package.json
$ cat package.json
{
  "name": "earthquake_app",
  "version": "1.0.0",
  "description": "",
  "main": "index.js",
  "scripts": {
    "test": "echo \"Error: no test specified\" && exit 1"
  },
  "keywords": [],
  "author": "",
  "license": "ISC",
  "dependencies": {
    "@elastic/elasticsearch": "^8.5.0",
    "axios": "^1.2.2",
    "config": "^3.3.8",
    "cors": "^2.8.5",
    "express": "^4.18.2",
    "log-timestamp": "^0.3.0",
    "nodemon": "^2.0.20"
  }
}
很显然,我们最新安装的 packages 已经自动添加到 package.json 文件中了。
我们接下来创建一个叫做 server 的子目录,并在它里面创建一个叫做 server.js 的文件:
$ pwd
/Users/liuxg/demos/earthquake_app
$ mkdir server
$ touch server/server.js
在上面,我们创建了一个叫做 server.js 的文件。这个将来就是我们需要运行的 server 脚本。为了能够让我们的 package.json 文件的配置能让 npm 进行运行,我们需要对它进行修改。
$ pwd
/Users/liuxg/demos/earthquake_app
$ cat package.json
{
  "name": "earthquake_app",
  "version": "1.0.0",
  "description": "",
  "main": "sever.js",
  "scripts": {
    "start": "nodemon server/server.js",
    "test": "echo \"Error: no test specified\" && exit 1"
  },
  "keywords": [],
  "author": "",
  "license": "ISC",
  "dependencies": {
    "@elastic/elasticsearch": "^8.5.0",
    "axios": "^1.2.2",
    "config": "^3.3.8",
    "cors": "^2.8.5",
    "express": "^4.18.2",
    "log-timestamp": "^0.3.0",
    "nodemon": "^2.0.20"
  }
}
很多人可能会奇怪,为啥使用 nodemon 来启动脚本。它的好处是当我们修改好 server.js 里的脚本,那么它会自动重新启动服务器的运行,而不需要我们每次都需要打入如下的命令:
npm start接下为了验证我们的 express 应用是否能成功地运行,我们修改 server.js 为如下的代码:
server/server.js
onst express = require('express');

const app = express();

const port = 5001;

app.get('/', (req, res) => {
    res.send('Hello World!')
  })

app.listen(port, () => console.log(`Server listening at http://localhost:${port}`));
我们接下来使用如下的命令来进行启动:
npm start$ pwd
/Users/liuxg/demos/earthquake_app
$ npm start
> earthquake_app@1.0.0 start
> nodemon server/server.js
[nodemon] 2.0.20
[nodemon] to restart at any time, enter `rs`
[nodemon] watching path(s): *.*
[nodemon] watching extensions: js,mjs,json
[nodemon] starting `node server/server.js`
Server listening at http://localhost:5001我们可以看到服务器已经成功地运行起来了,并且它运行于 5001 端口上。我们可以通过浏览器来进行访问它的网址:
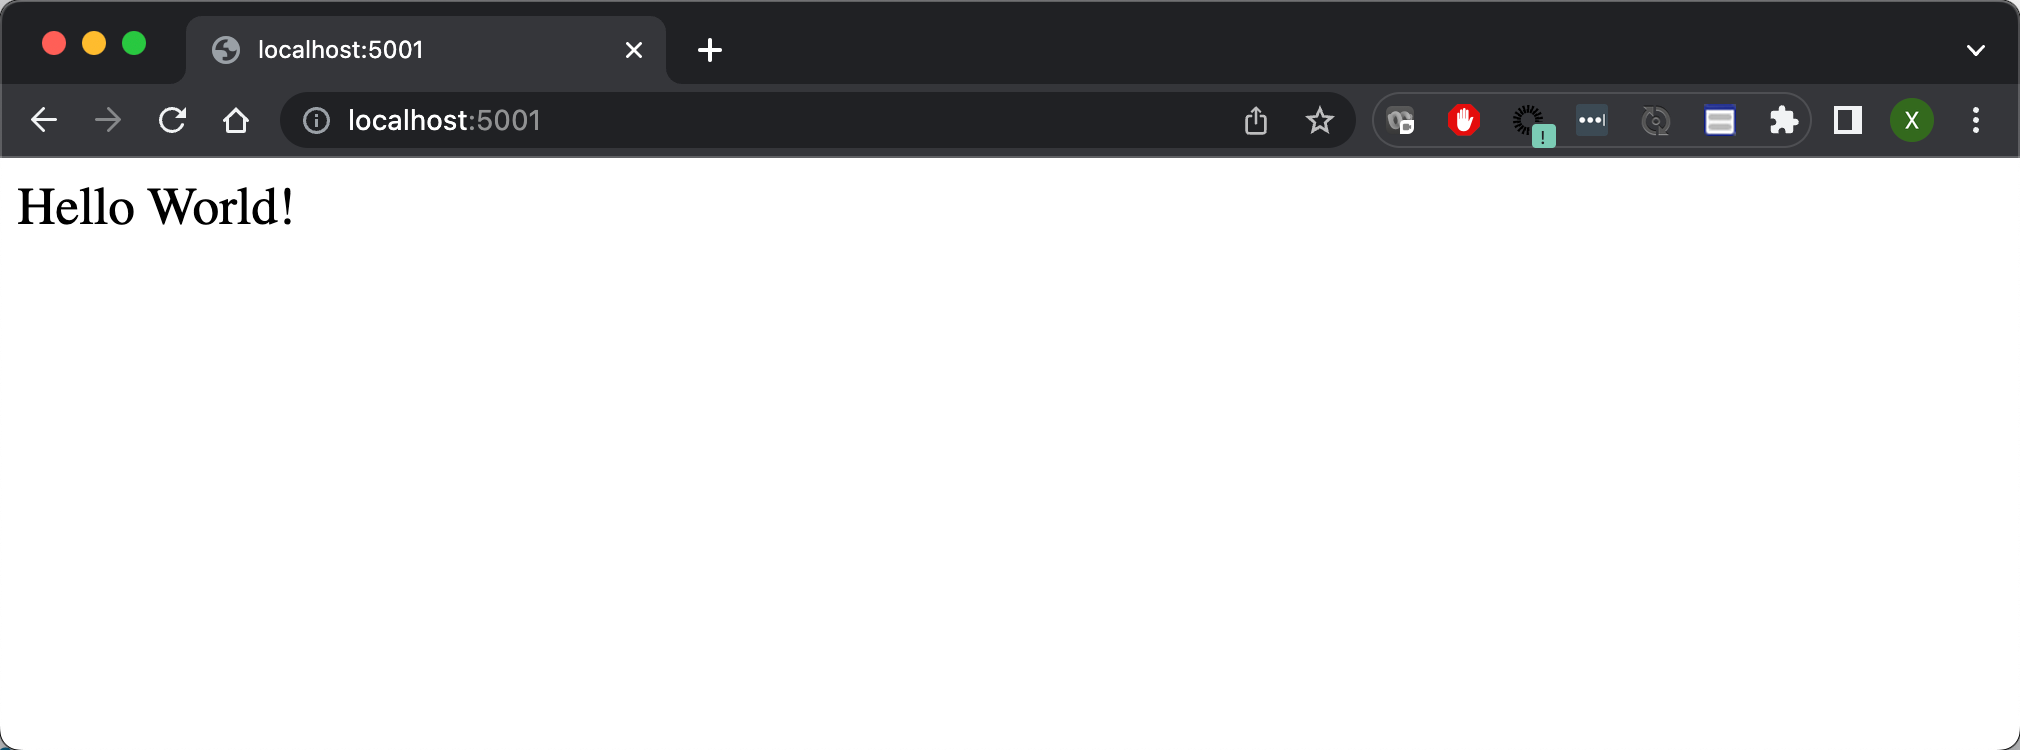
上面显示我们的服务器运行正常。
安全地连接 Node.js 服务器到 Elasticsearch
接下来,我们需要创建代码来安全地连接 Node.js 服务到我们本地部署的 Elasticsearch 中。我们可以参考之前的文章 “Elasticsearch:使用最新的 Nodejs client 8.x 来创建索引并搜索”。我们可以在项目的更目录下创建如下的两个子目录:
mkdir config
mkdir -p server/elasticsearch$ pwd
/Users/liuxg/demos/earthquake_app
$ mkdir config
$ mkdir -p server/elasticsearch
$ ls -d */
config/ node_modules/ server/在 config 子目录下,我们创建如下的一个叫做 default.json 的文件。这个是用来配置如何连接到 Elasticsearch 的:
config/default.json
{
"elastic": {
"elasticsearch_endpoint": "https://localhost:9200",
"username": "elastic",
"password": "-pK6Yth+mU8O-f+Q*F3i",
"apiKey": "eVBKOFhJVUJUN1gwSDQyLU5halY6R1BVRjNOUmpRYUtkTmpXTUZHdWZVUQ==",
"certificate": "/Users/liuxg/elastic/elasticsearch-8.5.3/config/certs/http_ca.crt",
"caFingerprint": "E3D36275D9FA80CF96F74E6537FC74E7952511A75E01605EBCFB8FC9F08F598C"
}
}我们先不要着急来了解这些配置参数。有些我们可能并不一定要用到。这些设置针对我们每个人的 Elasticsearch 的安装的不同而不同。在上面的参数解释如下:
- elasticsearch_endpoint:这个是 Elasticsearch 的访问地址
- username:这个是访问 Elasticsearch 的用户名,你可以不选用超级用户 elastic,而且在生产环境中,也不是推荐的方法
- password:这个是上面 username 账号的密码
- apiKey:这个是访问 Elasticsearch 所需要的 apiKey。你可以参考 “Elasticsearch:使用最新的 Nodejs client 8.x 来创建索引并搜索” 来了解如何进行生产。在下面的代码中,我们也可以使用 code 来进行生成
- certificate:这个是证书的位置。每个 Elasticsearch 集群都会有一个生成的证书位置。我们需要填入这个位置信息
- caFingerprint:这个是证书的 fingerprint 信息。我们可以采用 fingerprint 来进行连接。在本演示中,我将不使用这种方式。更多信息,请参考 Connecting | Elasticsearch JavaScript Client [master] | Elastic
我们在 elasticsearch 目录下创建一个叫做 client.js 的文件:
server/elasticsearch/client.js
const { Client } = require('@elastic/elasticsearch');
const config = require('config');
const fs = require('fs')
const elasticConfig = config.get('elastic');
// const client = new Client ( {
// node: elasticConfig.elasticsearch_endpoint,
// auth: {
// apiKey: elasticConfig.apiKey
// },
// tls: {
// ca: fs.readFileSync(elasticConfig.certificate),
// rejectUnauthorized: true
// }
// });
const client = new Client ( {
node: elasticConfig.elasticsearch_endpoint,
auth: {
username: elasticConfig.username,
password: elasticConfig.password
},
tls: {
ca: fs.readFileSync(elasticConfig.certificate),
rejectUnauthorized: true
}
});
client.ping()
.then(response => console.log("You are connected to Elasticsearch!"))
.catch(error => console.error("Elasticsearch is not connected."))
module.exports = client; 在上面,我使用了两种方法来连接到 Elasticsearch。一种是通过 username/password 的方式来进行连接:
const client = new Client ( {
node: elasticConfig.elasticsearch_endpoint,
auth: {
username: elasticConfig.username,
password: elasticConfig.password
},
tls: {
ca: fs.readFileSync(elasticConfig.certificate),
rejectUnauthorized: true
}
});而另外一种就是被注释掉的那个方法:
const client = new Client ( {
node: elasticConfig.elasticsearch_endpoint,
auth: {
apiKey: elasticConfig.apiKey
},
tls: {
ca: fs.readFileSync(elasticConfig.certificate),
rejectUnauthorized: true
}
});这个也是被推荐的方法。在实际的使用中,我们更推荐使用 API key 来进行连接。
我们首先来使用 username/password 的方式来进行连接。我们需要修改我们的 server.js 来进行验证:
server/server.js
const express = require('express');
const client = require('./elasticsearch/client');
const app = express();
const port = 5001;
app.get('/', (req, res) => {
res.send('Hello World!')
})
app.listen(port, () => console.log(`Server listening at http://localhost:${port}`));我们重新运行服务器。我们可以看到如下的输出:
$ pwd
/Users/liuxg/demos/earthquake_app
$ npm start

> earthquake_app@1.0.0 start
> nodemon server/server.js

[nodemon] 2.0.20
[nodemon] to restart at any time, enter `rs`
[nodemon] watching path(s): *.*
[nodemon] watching extensions: js,mjs,json
[nodemon] starting `node server/server.js`
Server listening at http://localhost:5001
You are connected to Elasticsearch!上面的输出表明我们已经能够成功地连接到 Elasticsearch 了。
使用代码获取 API key
我们接下来可以通过代码来获得 API key,尽管我们可以通过其它的方法来获得。请详细阅读 “Elasticsearch:创建 API key 接口访问 Elasticsearch”。在这里,我们可以使用 Node.js 代码来动态地生成一个 API key。我们在 server 目录下创建如下的一个文件:
sever/create-api-key.js
const client = require('./elasticsearch/client');
async function generateApiKeys(opts) {
const body = await client.security.createApiKey({
body: {
name: 'earthquake_app',
role_descriptors: {
earthquakes_example_writer: {
cluster: ['monitor'],
index: [
{
names: ['earthquakes'],
privileges: ['create_index', 'write', 'read', 'manage'],
},
],
},
},
},
});
return Buffer.from(`${body.id}:${body.api_key}`).toString('base64');
}
generateApiKeys()
.then(console.log)
.catch((err) => {
console.error(err);
process.exit(1);
});我们使用如下的命令来运行这个 Node.js 的代码:
$ pwd
/Users/liuxg/demos/earthquake_app
$ ls server/create-api-key.js
server/create-api-key.js
$ node server/create-api-key.js
You are connected to Elasticsearch!
emZJSGFZVUJUN1gwSDQyLWRLaS06LVpHaXR1bm5RQnEybE4zOWoyd0g5Zw==我们可以把上面命令生成的 API key 写入到之前的 default.json 文件中。这样我们也可以通过 API key 的方式来访问 Elasticsearch 了,如果我们需要的话。这样 client.js 实际上可以写成:
server/elasticsearch/client.js
const { Client } = require('@elastic/elasticsearch');
const config = require('config');
const fs = require('fs')
const elasticConfig = config.get('elastic');
const client = new Client ( {
  node: elasticConfig.elasticsearch_endpoint,
   auth: {
     apiKey: elasticConfig.apiKey
   },
   tls: {
    ca: fs.readFileSync(elasticConfig.certificate),
    rejectUnauthorized: true
   }
});
// const client = new Client ( {
// node: elasticConfig.elasticsearch_endpoint,
// auth: {
// username: elasticConfig.username,
// password: elasticConfig.password
// },
// tls: {
// ca: fs.readFileSync(elasticConfig.certificate),
// rejectUnauthorized: true
// }
// });
client.ping()
.then(response => console.log("You are connected to Elasticsearch!"))
.catch(error => console.error("Elasticsearch is not connected."))
module.exports = client; 我们重新运行 server.js,我们可以看到如下的输出:
$ pwd
/Users/liuxg/demos/earthquake_app
$ npm start

> earthquake_app@1.0.0 start
> nodemon server/server.js

[nodemon] 2.0.20
[nodemon] to restart at any time, enter `rs`
[nodemon] watching path(s): *.*
[nodemon] watching extensions: js,mjs,json
[nodemon] starting `node server/server.js`
Server listening at http://localhost:5001
You are connected to Elasticsearch!很显然,我们的 API key 方式是成功的。使用 API key 的好处是我们不必要暴露用户的密码在代码中,而且,我们甚至可以为这个 API key 来设置有效时间及权限。可以授予最小所需要的权限,以确保安全。
设置 RESTful API 调用以从源检索数据

现在我们的服务器正在运行并且 Elasticsearch 已连接,我们需要测试对 USGS 的 API 调用以接收初始数据。 在项目的根目录下,创建一个名为 routes 的文件夹和一个名为 api 的子文件夹。 在 api 文件夹中,创建一个名为 data.js 的文件并添加以下代码:
$ pwd
/Users/liuxg/demos/earthquake_app
$ mkdir -p server/routes/api
我在 routes/api 目录下创建一个如下的 data.js 文件:
server/routes/api/data.js
require('log-timestamp');
const express = require('express');
const router = express.Router();
const axios = require('axios')
const client = require('../../elasticsearch/client');
const URL = `https://earthquake.usgs.gov/earthquakes/feed/v1.0/summary/all_hour.geojson`;

router.get('/earthquakes', async function (req, res) {
    console.log('Loading Application...');

    //======= Check that Elasticsearch is up and running =======\\
    pingElasticsearch = async () => {
        await client.ping(
            function(error,res) {
                if (error) {
                    console.error('elasticsearch cluster is down!');
                } else {
                    console.log('Elasticsearch Ready');
                }
            }
        );
    }

    // ====== Get Data From USGS and then index into Elasticsearch
    indexAllDocs = async () => {
        try {
            console.log('Getting Data From Host')

            const EARTHQUAKES = await axios.get(`${URL}`,{
                headers: {
                    'Content-Type': [
                        'application/json',
                        'charset=utf-8'
                    ]
                }
            });

            console.log('Data Received!')

            results = EARTHQUAKES.data.features

            console.log('Indexing Data...')

            console.log(results)
            res.json(results)

            if (EARTHQUAKES.data.length) {
                indexAllDocs();
            } else {
                console.log('All Data Has Been Indexed!');
            };
        } catch (err) {
            console.log(err)
        };

        console.log('Preparing For The Next Data Check...');
    }

    console.log("Ping the Elasticsearch server");
    pingElasticsearch()

    console.log("Get data from USGS");
    indexAllDocs()
});

module.exports = router;
上面的代码使用 npm 包 Axios 对 USGS 地震 API 进行异步 API 调用。 收到数据后,它将显示为 JSON。 你还可以看到我们在页面顶部导入了一个名为 log-timestamp 的依赖项。 这将允许我们将时间戳添加到每个 console.log。
我们接下来修改 server.js 如下:
server/server.js
const express = require('express');
const client = require('./elasticsearch/client');

const app = express();

const port = 5001;

//Define Routes
const data = require('./routes/api/data')
app.use('/api/data', data);

app.get('/', (req, res) => {
    res.send('Hello World!')
  })

app.listen(port, () => console.log(`Server listening at http://localhost:${port}`));
重新运行我们的 server.js。我们通过 Postman 或者其它的工具来对我们的 REST 接口进行访问:
localhost:5000/api/data/earthquakes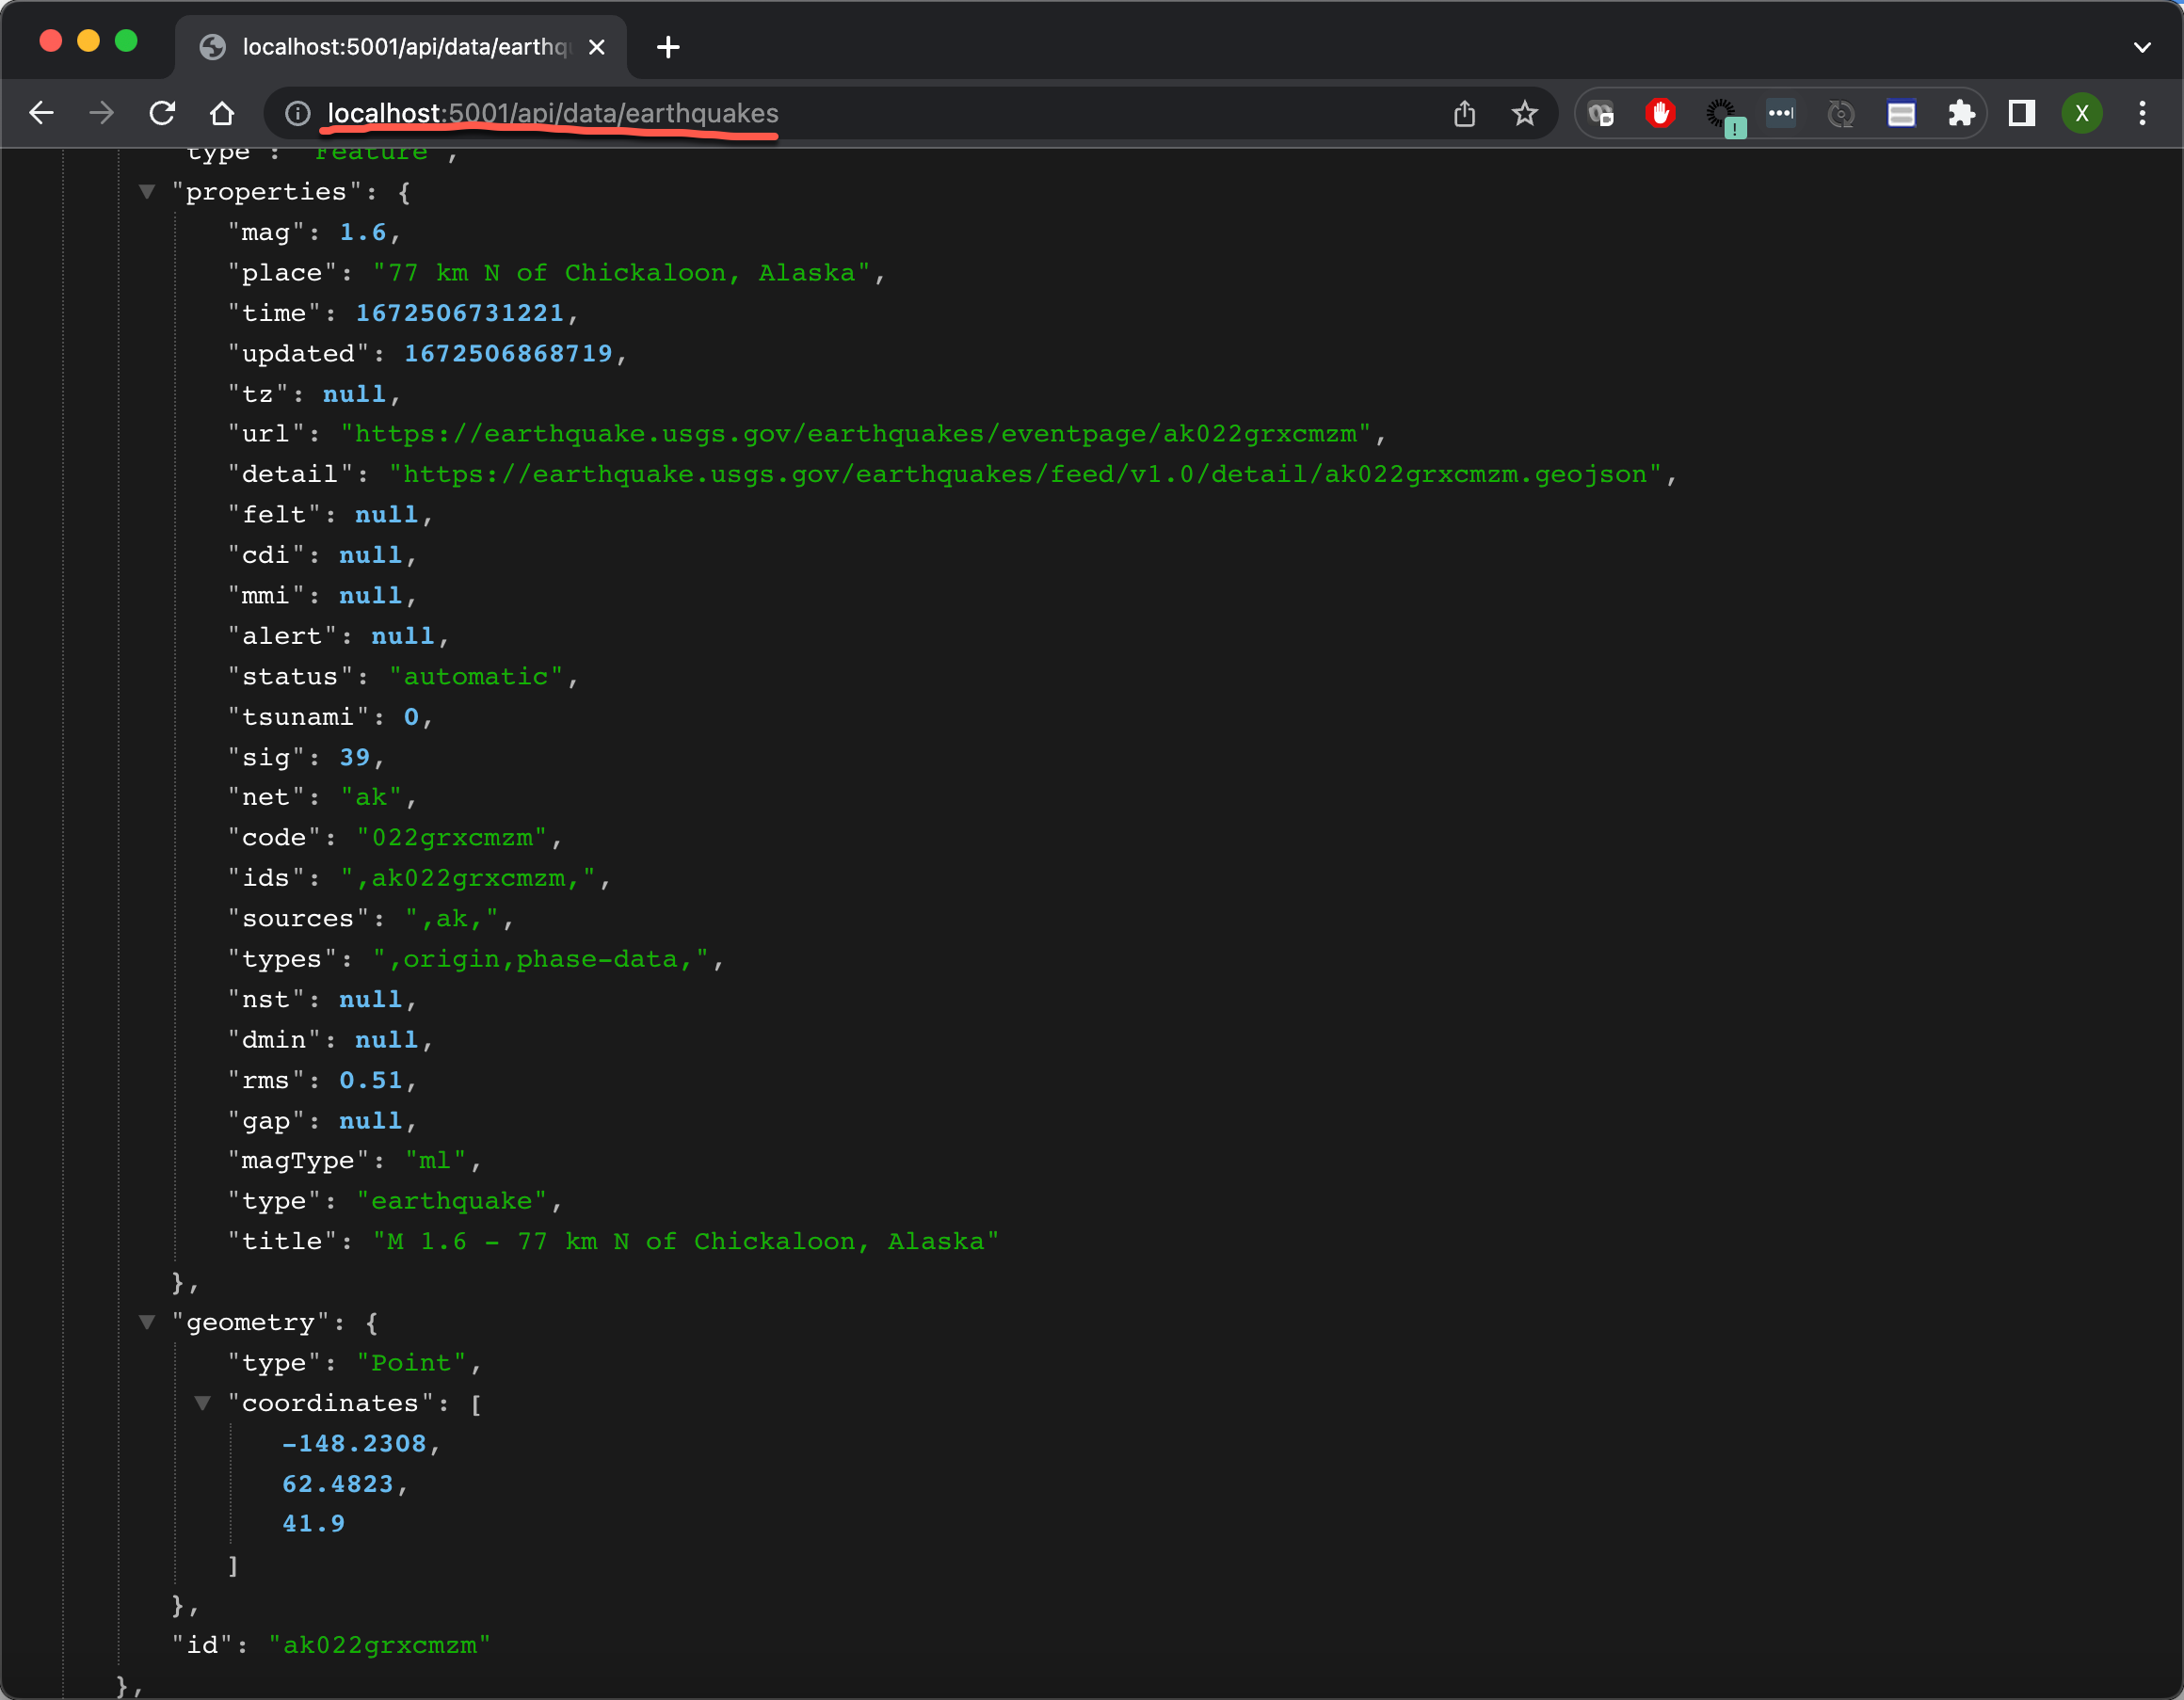
从上面的输出中,我们可以看出来设计的 REST 接口工作是正常的。它含有一些收集来的数据。在所收集来的数据中,有一些数据是我们并不需要的。我们最终需要的数据是这样的:
{
  "mag": 1.13,
  "place": "11km ENE of Coachella, CA",
  "time": 2022-05-02T20:07:53.266Z,
  "url": "https://earthquake.usgs.gov/earthquakes/eventpage/ci40240408",
  "sig": 20,
  "type": "earthquake",
  "depth": 2.09,
  "coordinates": {
    "lat": 33.7276667,
    "lon": -116.0736667
  }
}
也就是说我们可以删除一下不需要的字段,并且我们需要转换一些字段,比如把 time 字段转换为我们想要的 @timestamp 字段。另外在写入 Elasticsearch 时,我们需要预先针对 coodinates 字段进行定义。它是一个 geo_point 类型的字段。
定义 mapping 及 pipeline
如上所示,我们需要的字段如上。我们可以如下的一个 earthquakes 索引。我们在 Kibana 的 console 中打入如下的命令:
PUT earthquakes
{
  "mappings": {
    "properties": {
      "@timestamp": {
        "type": "date"
      },
      "coordinates": {
        "type": "geo_point"
      },
      "depth": {
        "type": "float"
      },
      "mag": {
        "type": "float"
      },
      "place": {
        "type": "text",
        "fields": {
          "keyword": {
            "type": "keyword"
          }
        }
      },
      "sig": {
        "type": "short"
      },
      "type": {
        "type": "keyword"
      },
      "url": {
        "enabled": false
      }
    }
  }
}
在上面,我们针对索引的字段类型做如下的说明:
- @timestamp:这是一个 date 字段类型的字段。我们希望的格式是 2022-05-02T20:07:53.266Z 而不是以 EPOC 形式显示的值,比如 1672471359610。这个字段有 time 转换而来
- coordinates:这个是一个 geo_point 的字段。是地震发生的地理位置
- place:这是一个 multi-field 字段。我们希望对这个字段进行统计,也可以针对它进行搜索
- sig:这字段我们使用 short 类型,而不是 long。这样可以省去存储空间
- type:这是一个 keyword 类型的字段。它只可以做数据分析统计之用
- url:这个字段,我们既不想对它进行搜索,也不想对它进行统计,所有设置 enabled 为 false。这样可以省去分词的时间,从而提高摄入数据的速度
为此,我们可以针对上面的 data.js 做更进一步的修改:
server/routes/api/data.js
const express = require('express');
const router = express.Router();
const axios = require('axios')
const client = require('../../elasticsearch/client');
const URL = `https://earthquake.usgs.gov/earthquakes/feed/v1.0/summary/all_hour.geojson`;

 //======= Check that Elasticsearch is up and running =======\\
function pingElasticsearch() {
    console.log("ping .....")
    client.ping({
        requestTimeout: 30000,
      }, function(error,res) {
        if (error) {
            console.error('elasticsearch cluster is down!');
        } else {
            console.log('Elasticsearch Ready');
        }
    });
};

// ====== Get Data From USGS and then index into Elasticsearch
indexAllDocs = async () => {
    try {
        const EARTHQUAKES = await axios.get(`${URL}`,{
            headers: {
                'Content-Type': [
                    'application/json',
                    'charset=utf-8'
                ]
            }
        });

        console.log('Getting Data From Host')

        results = EARTHQUAKES.data.features

        results.map(
            async (results) => (
              (earthquakeObject = {
                place: results.properties.place, //
                time: results.properties.time,   //
                url: results.properties.url,     //
                sig: results.properties.sig,     //
                mag: results.properties.mag,     //
                type: results.properties.type,   //
                longitude: results.geometry.coordinates[0], //
                latitude: results.geometry.coordinates[1],  //
                depth: results.geometry.coordinates[2],  //
              }),
              await client.index({
                index: 'earthquakes',
                id: results.id,
                body: earthquakeObject
              })
            )
        );

        if (EARTHQUAKES.data.length) {
            indexAllDocs();
        } else {
            console.log('All Data Has Been Indexed!');
        };
    } catch (err) {
        console.log(err)
    };

    console.log('Preparing For The Next Data Check...');
}


//================== Official API Call ==================\\
router.get('/earthquakes', function (req, res) {
    res.send('Running Application...');
    console.log('Loading Application...')

    indexAllDocs(res);

});

module.exports = router;
在上面,我们添加了把文档写入 Elasticsearch 的代码部分。我们使用地震数据的 id 作为 Elasticsearch 文档的 id。等服务器运行起来后,我们需要在 terminal 中打入如下的命令:
curl -XGET http://localhost:5001/api/data/earthquakes我们可以在 Kibana 中通过如下的命令来查看文档:
GET earthquakes/_search?filter_path=**.hits我们可以看到如下的结果:
{
  "hits": {
    "hits": [
      {
        "_index": "earthquakes",
        "_id": "nc73827281",
        "_score": 1,
        "_source": {
          "place": "10km S of Laytonville, CA",
          "time": 1672505649740,
          "url": "https://earthquake.usgs.gov/earthquakes/eventpage/nc73827281",
          "sig": 63,
          "mag": 2.02,
          "type": "earthquake",
          "longitude": -123.4981689,
          "latitude": 39.5991669,
          "depth": 4.59
        }
      },
   ...
很显然,这个文档的 source 和我们之前的想要的格式还是不太一样。为了能够使的 time 转换为 @timestamp,我们可以在 Node.js 的代码中进行相应的转换。我们也可以采用 ingest pipeline 来实现相应的操作。我们定义如下的 ingest pipeine。
POST _ingest/pipeline/_simulate
{
  "pipeline": {
    "description": "This is for data transform for earthquake data",
    "processors": [
      {
        "date": {
          "field": "time",
          "formats": [
            "UNIX_MS"
            ]
        }
      }
      ]
  },
  "docs": [
    {
      "_source": {
        "place": "16km N of Borrego Springs, CA",
        "time": 1672507053210,
        "url": "https://earthquake.usgs.gov/earthquakes/eventpage/ci40152271",
        "sig": 10,
        "mag": 0.81,
        "type": "earthquake",
        "longitude": -116.368,
        "latitude": 33.4013333,
        "depth": 2.91
      }
    }
  ]
}
在上面的命令中,我们使用 date processor 来把 time 转换为所需要的格式,并在默认的情况下把 target 设置为 @timestamp。上面命令运行的结果为:
{
"docs": [
{
"doc": {
"_index": "_index",
"_id": "_id",
"_version": "-3",
"_source": {
"sig": 10,
"mag": 0.81,
"depth": 2.91,
"@timestamp": "2022-12-31T17:17:33.210Z",
"latitude": 33.4013333,
"place": "16km N of Borrego Springs, CA",
"time": 1672507053210,
"type": "earthquake",
"url": "https://earthquake.usgs.gov/earthquakes/eventpage/ci40152271",
"longitude": -116.368
},
"_ingest": {
"timestamp": "2023-01-01T00:31:03.544821Z"
}
}
}
]
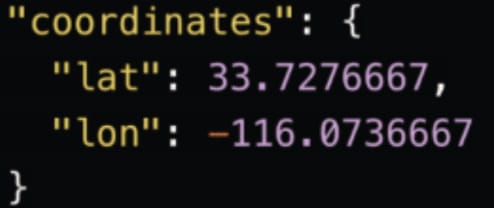
}从上面的输出中,我们可以看出来 @timestamp 字段已经生成。它的值由 time 字段转换而来。我们还发现 latitude 及 longitude 并不是按照我们需要的格式来显示的。我们需要把它转化为另外一个像如下的对象:
我们可以通过 rename processor 来操作:
POST _ingest/pipeline/_simulate
{
  "pipeline": {
    "description": "This is for data transform for earthquake data",
    "processors": [
      {
        "date": {
          "field": "time",
          "formats": [
            "UNIX_MS"
            ]
        }
      },
      {
        "rename": {
          "field": "latitude",
          "target_field": "coordinates.lat"
        }
      },
      {
        "rename": {
          "field": "longitude",
          "target_field": "coordinates.lon"
        }
      }
    ]
  },
  "docs": [
    {
      "_source": {
        "place": "16km N of Borrego Springs, CA",
        "time": 1672507053210,
        "url": "https://earthquake.usgs.gov/earthquakes/eventpage/ci40152271",
        "sig": 10,
        "mag": 0.81,
        "type": "earthquake",
        "longitude": -116.368,
        "latitude": 33.4013333,
        "depth": 2.91
      }
    }
  ]
}
在上面的命令中,我们通过 rename processor 来重新命名 longitude 及 latitude 两个字段。运行上面的代码,我们可以看到如下的结果:
{
  "docs": [
    {
      "doc": {
        "_index": "_index",
        "_id": "_id",
        "_version": "-3",
        "_source": {
          "sig": 10,
          "mag": 0.81,
          "depth": 2.91,
          "@timestamp": "2022-12-31T17:17:33.210Z",
          "coordinates": {
            "lon": -116.368,
            "lat": 33.4013333
          },
          "place": "16km N of Borrego Springs, CA",
          "time": 1672507053210,
          "type": "earthquake",
          "url": "https://earthquake.usgs.gov/earthquakes/eventpage/ci40152271"
        },
        "_ingest": {
          "timestamp": "2023-01-01T00:38:42.729604Z"
        }
      }
    }
  ]
}
很显然,我们看到了一个新的 coordinates 的字段。它是一个 object。我们发现有一个多余的字段叫做 time。这个并不是我们所需要的。我们可以通过 remove processor 来删除这个字段。
POST _ingest/pipeline/_simulate
{
  "pipeline": {
    "description": "This is for data transform for earthquake data",
    "processors": [
      {
        "date": {
          "field": "time",
          "formats": [
            "UNIX_MS"
            ]
        }
      },
      {
        "rename": {
          "field": "latitude",
          "target_field": "coordinates.lat"
        }
      },
      {
        "rename": {
          "field": "longitude",
          "target_field": "coordinates.lon"
        }
      },
      {
        "remove": {
          "field": "time"
        }
      }
    ]
  },
  "docs": [
    {
      "_source": {
        "place": "16km N of Borrego Springs, CA",
        "time": 1672507053210,
        "url": "https://earthquake.usgs.gov/earthquakes/eventpage/ci40152271",
        "sig": 10,
        "mag": 0.81,
        "type": "earthquake",
        "longitude": -116.368,
        "latitude": 33.4013333,
        "depth": 2.91
      }
    }
  ]
}
我们运行上面的命令。我们再次查看输出的结果:
{
  "docs": [
    {
      "doc": {
        "_index": "_index",
        "_id": "_id",
        "_version": "-3",
        "_source": {
          "sig": 10,
          "mag": 0.81,
          "depth": 2.91,
          "@timestamp": "2022-12-31T17:17:33.210Z",
          "coordinates": {
            "lon": -116.368,
            "lat": 33.4013333
          },
          "place": "16km N of Borrego Springs, CA",
          "type": "earthquake",
          "url": "https://earthquake.usgs.gov/earthquakes/eventpage/ci40152271"
        },
        "_ingest": {
          "timestamp": "2023-01-01T00:44:46.919265Z"
        }
      }
    }
  ]
}
很显然这个时候,我们的 time 字段不见了。
在上面,我们通过 _simulate 的端点测试好了我们的 ingest pipeline。接下来,是我们使用命令来创建这个 pipeline 的时候了。我们使用如下的命令来创建这个 pipeline:
PUT _ingest/pipeline/earthquake_data_pipeline
{
  "description": "This is for data transform for earthquake data",
  "processors": [
    {
      "date": {
        "field": "time",
        "formats": [
          "UNIX_MS"
        ]
      }
    },
    {
      "rename": {
        "field": "latitude",
        "target_field": "coordinates.lat"
      }
    },
    {
      "rename": {
        "field": "longitude",
        "target_field": "coordinates.lon"
      }
    },
    {
      "remove": {
        "field": "time"
      }
    }
  ]
}
运行上面的命令。这样我们就创建了一个叫做 earthquake_data_pipeline 的 ingest pipeline。
接下来,我们需要删除之前所创建的索引,因为它包含我们不需要的一些字段:
DELETE earthquakes我们再次运行之前创建索引 earthquakes 的命令:
PUT earthquakes
    {
      "mappings": {
        "properties": {
          "@timestamp": {
            "type": "date"
          },
          "coordinates": {
            "type": "geo_point"
          },
          "depth": {
            "type": "float"
          },
          "mag": {
            "type": "float"
          },
          "place": {
            "type": "text",
            "fields": {
              "keyword": {
                "type": "keyword"
              }
            }
          },
          "sig": {
            "type": "short"
          },
          "type": {
            "type": "keyword"
          },
          "url": {
            "enabled": false
          }
        }
      }
    }
我们接下来需要修改 data.js 文件来使用这个 ingest pipeline:
server/routes/api/data.js
const express = require('express');
const router = express.Router();
const axios = require('axios')
const client = require('../../elasticsearch/client');
const URL = `https://earthquake.usgs.gov/earthquakes/feed/v1.0/summary/all_hour.geojson`;

 //======= Check that Elasticsearch is up and running =======\\
function pingElasticsearch() {
    console.log("ping .....")
    client.ping({
        requestTimeout: 30000,
      }, function(error,res) {
        if (error) {
            console.error('elasticsearch cluster is down!');
        } else {
            console.log('Elasticsearch Ready');
        }
    });
};

// ====== Get Data From USGS and then index into Elasticsearch
indexAllDocs = async () => {
    try {
        const EARTHQUAKES = await axios.get(`${URL}`,{
            headers: {
                'Content-Type': [
                    'application/json',
                    'charset=utf-8'
                ]
            }
        });

        console.log('Getting Data From Host')

        results = EARTHQUAKES.data.features

        results.map(
            async (results) => (
              (earthquakeObject = {
                place: results.properties.place,
                time: results.properties.time,
                url: results.properties.url,
                sig: results.properties.sig,
                mag: results.properties.mag,
                type: results.properties.type,
                longitude: results.geometry.coordinates[0],
                latitude: results.geometry.coordinates[1],
                depth: results.geometry.coordinates[2],
              }),
              await client.index({
                index: 'earthquakes',
                id: results.id,
                body: earthquakeObject,
                pipeline: 'earthquake_data_pipeline'
              })
            )
        );

        if (EARTHQUAKES.data.length) {
            indexAllDocs();
        } else {
            console.log('All Data Has Been Indexed!');
        };
    } catch (err) {
        console.log(err)
    };

    console.log('Preparing For The Next Data Check...');
}


//================== Official API Call ==================\\
router.get('/earthquakes', function (req, res) {
    res.send('Running Application...');
    console.log('Loading Application...')

    setInterval(() => {
        pingElasticsearch()
        indexAllDocs(res);
    }, 120000);

});

module.exports = router;
在上面的代码中,我对一下的两处做了修改:
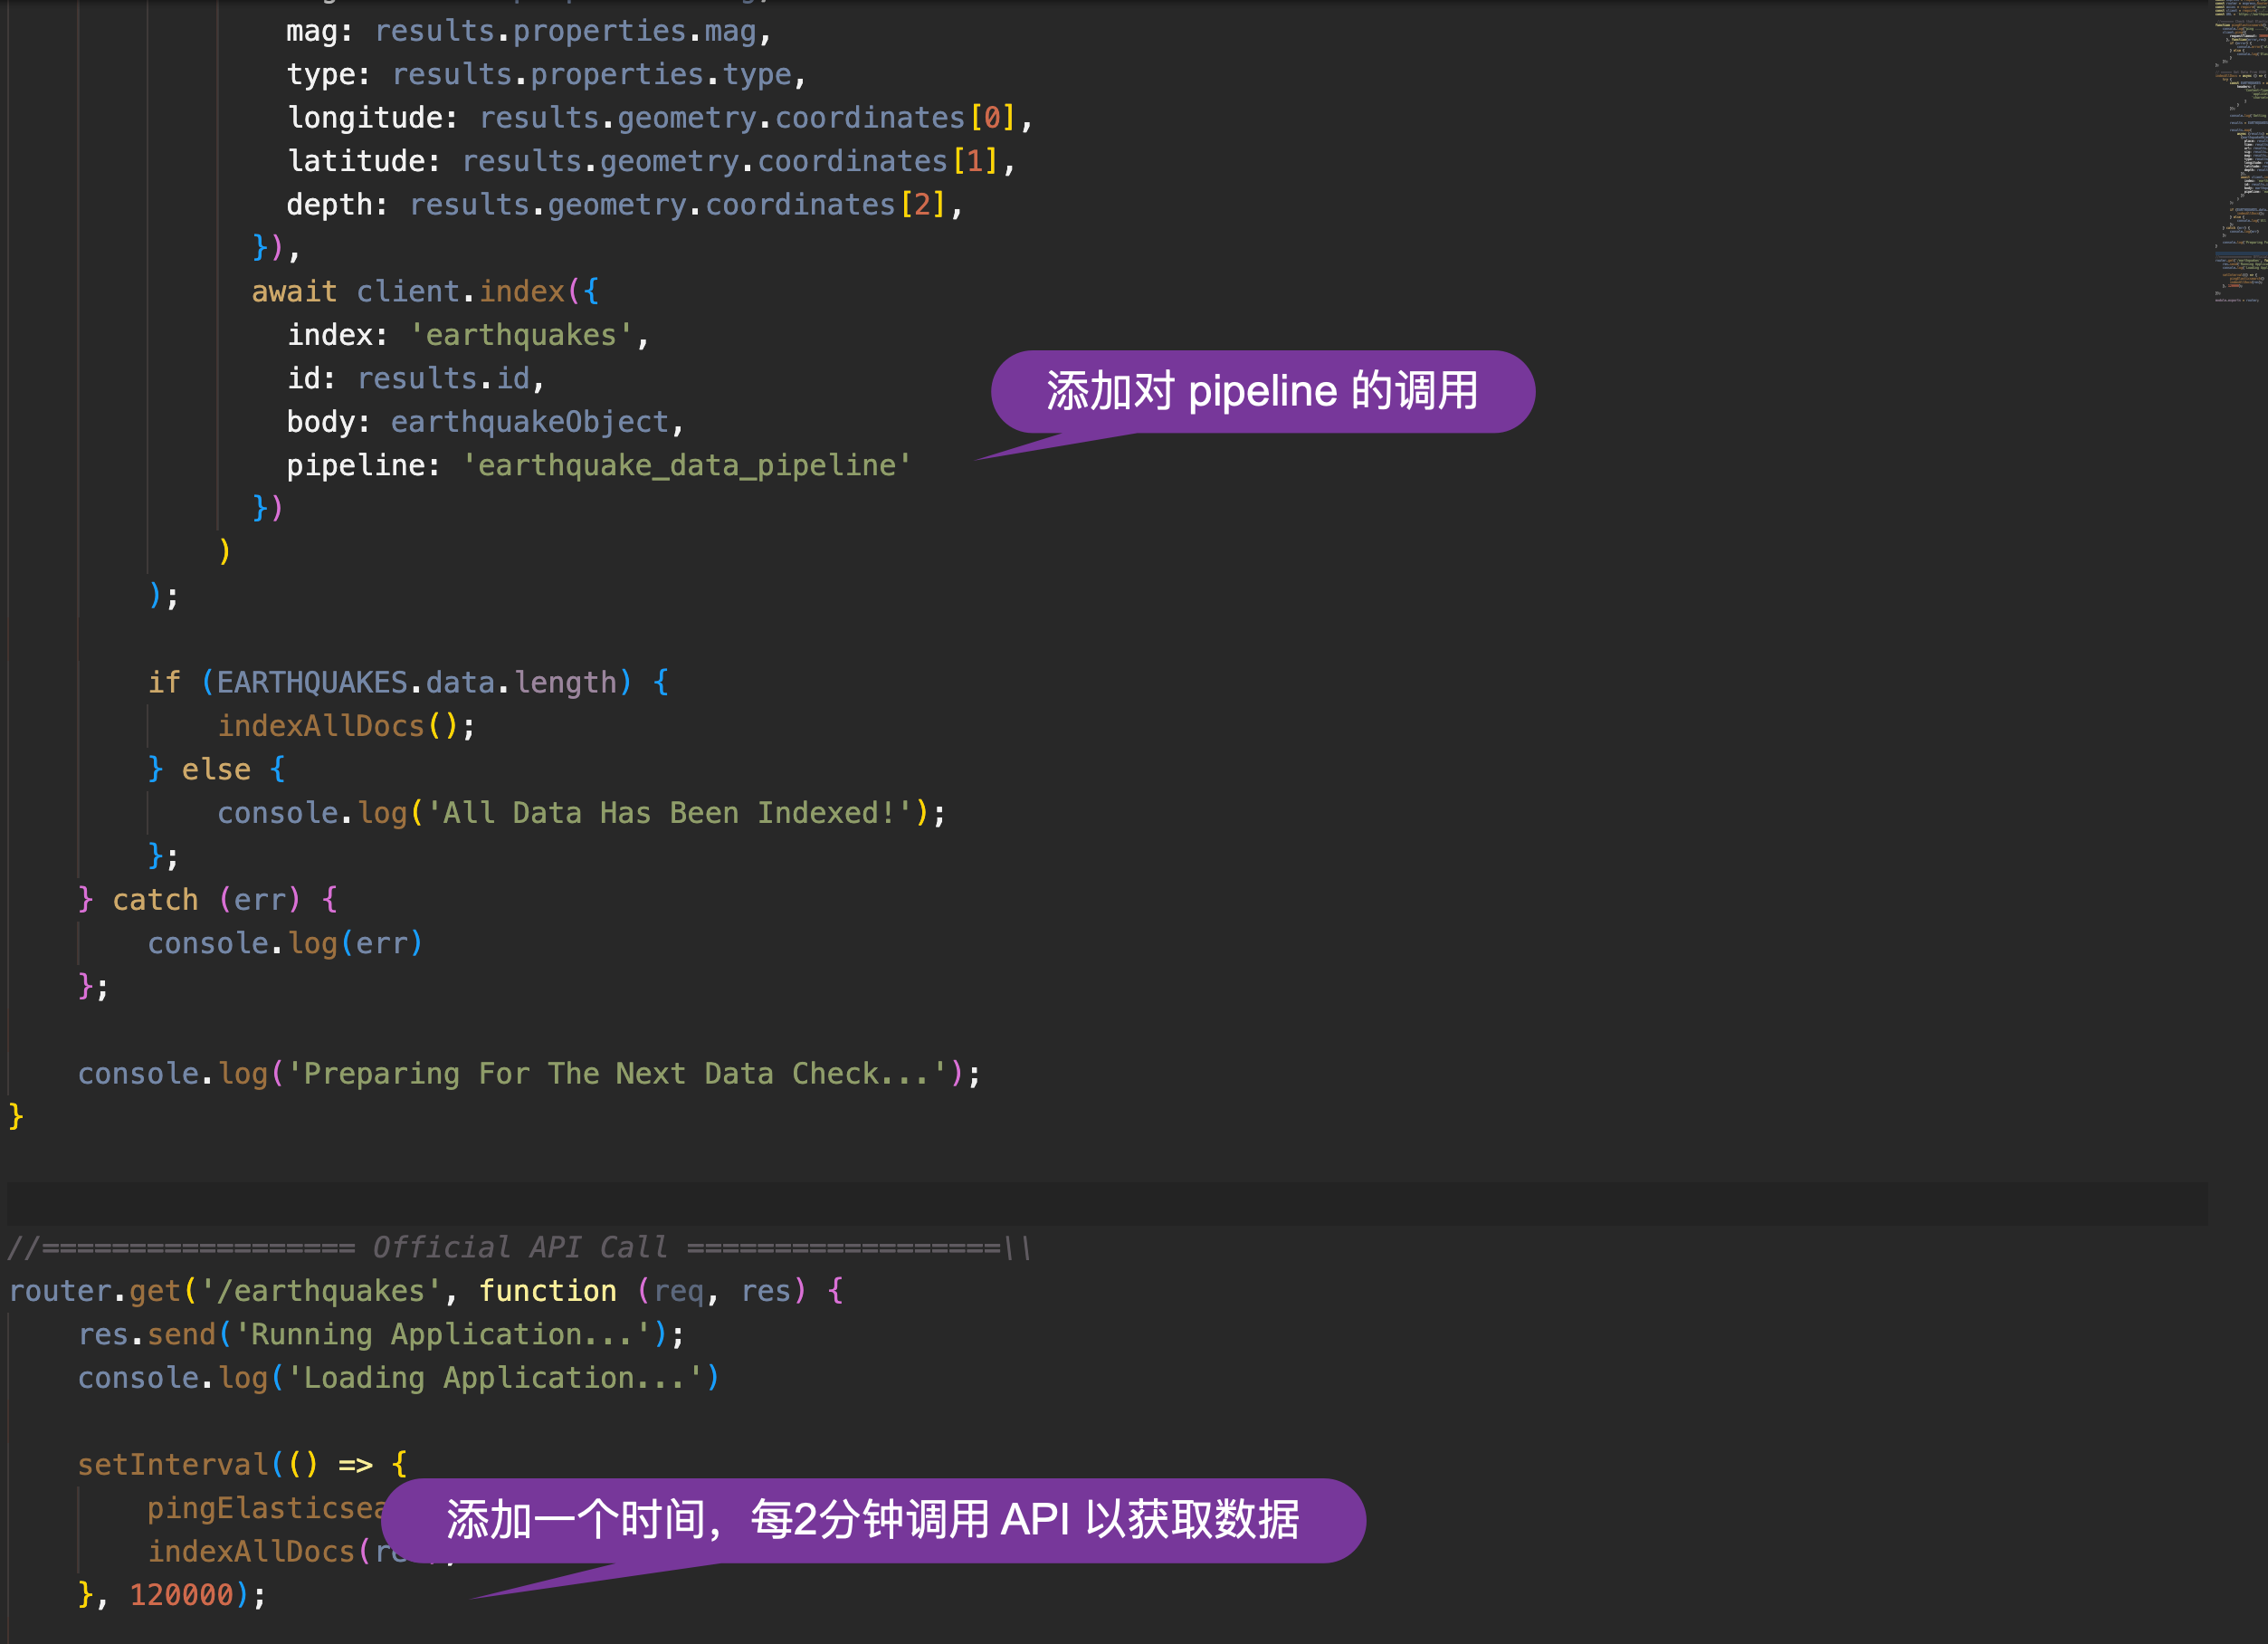
我们再次使用如下的命令来启动对数据的采集:
curl -XGET http://localhost:5001/api/data/earthquakes稍等一点时间(超过2分钟),我们到 Kibana 中来查看数据:
GET earthquakes/_search我们可以看到如下的数据:
{
  "took": 0,
  "timed_out": false,
  "_shards": {
    "total": 1,
    "successful": 1,
    "skipped": 0,
    "failed": 0
  },
  "hits": {
    "total": {
      "value": 9,
      "relation": "eq"
    },
    "max_score": 1,
    "hits": [
      {
        "_index": "earthquakes",
        "_id": "us7000j1cr",
        "_score": 1,
        "_source": {
          "sig": 340,
          "mag": 4.7,
          "depth": 181.449,
          "@timestamp": "2023-01-01T06:39:45.239Z",
          "coordinates": {
            "lon": 70.8869,
            "lat": 36.5351
          },
          "place": "36 km S of Jurm, Afghanistan",
          "type": "earthquake",
          "url": "https://earthquake.usgs.gov/earthquakes/eventpage/us7000j1cr"
        }
      },
  ...
从上面,我们可以看出来有9个地震数据已经被写入。我们可以让应用运行一段时间,它可能会有更多的数据进来。比如:
{
  "took": 0,
  "timed_out": false,
  "_shards": {
    "total": 1,
    "successful": 1,
    "skipped": 0,
    "failed": 0
  },
  "hits": {
    "total": {
      "value": 10,
      "relation": "eq"
    },
    "max_score": 1,
    "hits": [
      {
        "_index": "earthquakes",
        "_id": "nc73827436",
        "_score": 1,
        "_source": {
          "sig": 252,
          "mag": 4.04,
          "depth": 4.51,
          "@timestamp": "2023-01-01T06:49:08.930Z",
          "coordinates": {
            "lon": -121.220665,
            "lat": 36.5789986
          },
          "place": "9km NW of Pinnacles, CA",
          "type": "earthquake",
          "url": "https://earthquake.usgs.gov/earthquakes/eventpage/nc73827436"
        }
      },
我们可以看到10个数据。
从上面的数据中,我们可以看到最终的数据结构就是我们想要的数据结构。
在接下来的文章中,我将详细描述如何对这个数据进行可视化。我将使用 Kibana 来进行展示,也会使用 Web 来进行搜索。请参阅文章 “Elasticsearch:使用 Node.js 将实时数据提取到 Elasticsearch 中(二)”
为了方便大家的学习,我把源代码放在这里:https://github.com/liu-xiao-guo/earthquakes-app
参考:
【1】https://medium.com/@webdevmark16/ingesting-real-time-data-into-elasticsearch-with-node-js-a7aa9b5acf8c