大创项目推荐 深度学习人脸表情识别算法 - opencv python 机器视觉

news2024/9/21 18:38:35

文章目录

  • 0 前言
  • 1 技术介绍
    • 1.1 技术概括
    • 1.2 目前表情识别实现技术
  • 2 实现效果
  • 3 深度学习表情识别实现过程
    • 3.1 网络架构
    • 3.2 数据
    • 3.3 实现流程
    • 3.4 部分实现代码
  • 4 最后

0 前言

🔥 优质竞赛项目系列,今天要分享的是

🚩 深度学习人脸表情识别系统

该项目较为新颖,适合作为竞赛课题方向,学长非常推荐!

🥇学长这里给一个题目综合评分(每项满分5分)

  • 难度系数:3分
  • 工作量:3分
  • 创新点:4分

🧿 更多资料, 项目分享:

https://gitee.com/dancheng-senior/postgraduate

1 技术介绍

1.1 技术概括

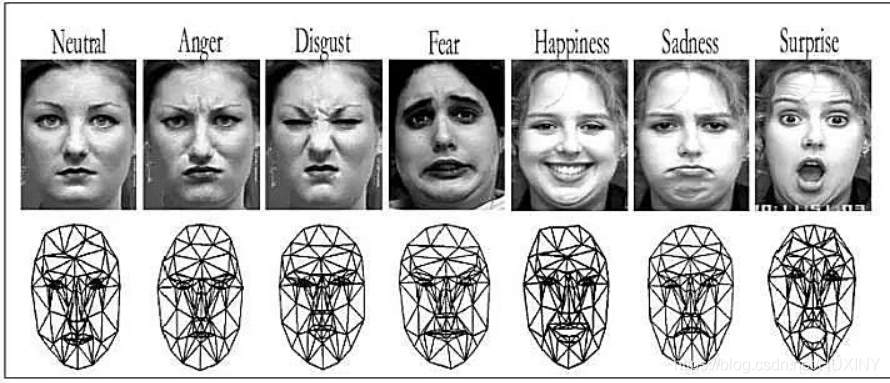
面部表情识别技术源于1971年心理学家Ekman和Friesen的一项研究,他们提出人类主要有六种基本情感,每种情感以唯一的表情来反映当时的心理活动,这六种情感分别是愤怒(anger)、高兴(happiness)、悲伤
(sadness)、惊讶(surprise)、厌恶(disgust)和恐惧(fear)。

尽管人类的情感维度和表情复杂度远不是数字6可以量化的,但总体而言,这6种也差不多够描述了。
在这里插入图片描述

1.2 目前表情识别实现技术

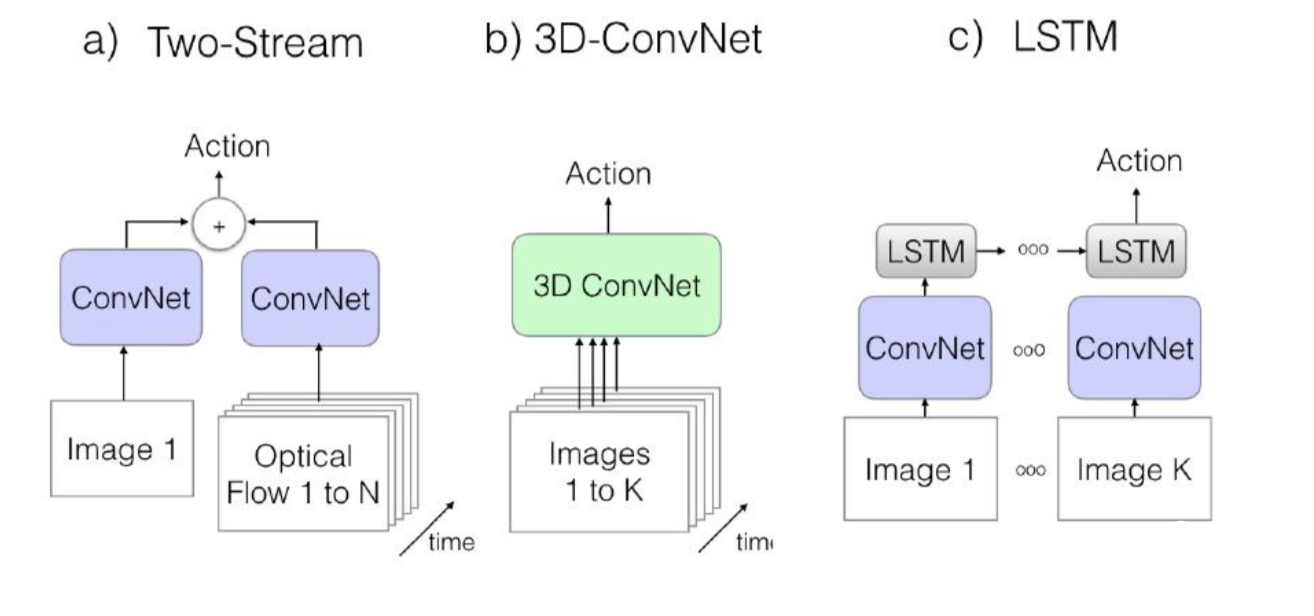
在这里插入图片描述
在这里插入图片描述

2 实现效果

废话不多说,先上实现效果

在这里插入图片描述
在这里插入图片描述

在这里插入图片描述

3 深度学习表情识别实现过程

3.1 网络架构

在这里插入图片描述
面部表情识别CNN架构(改编自 埃因霍芬理工大学PARsE结构图)

其中,通过卷积操作来创建特征映射,将卷积核挨个与图像进行卷积,从而创建一组要素图,并在其后通过池化(pooling)操作来降维。

在这里插入图片描述

3.2 数据

主要来源于kaggle比赛,下载地址。
有七种表情类别: (0=Angry, 1=Disgust, 2=Fear, 3=Happy, 4=Sad, 5=Surprise, 6=Neutral).
数据是48x48 灰度图,格式比较奇葩。
第一列是情绪分类,第二列是图像的numpy,第三列是train or test。

在这里插入图片描述

3.3 实现流程

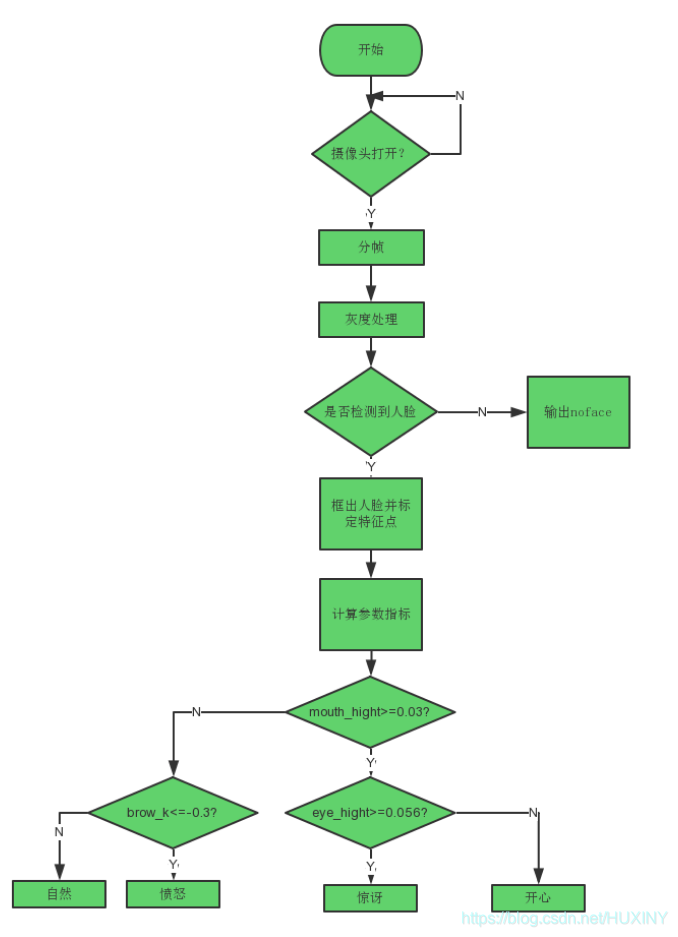
在这里插入图片描述

3.4 部分实现代码


    import cv2
    import sys
    import json
    import numpy as np
    from keras.models import model_from_json

    emotions = ['angry', 'fear', 'happy', 'sad', 'surprise', 'neutral']
    cascPath = sys.argv[1]
    
    faceCascade = cv2.CascadeClassifier(cascPath)
    noseCascade = cv2.CascadeClassifier(cascPath)

    # load json and create model arch
    json_file = open('model.json','r')
    loaded_model_json = json_file.read()
    json_file.close()
    model = model_from_json(loaded_model_json)
    
    # load weights into new model
    model.load_weights('model.h5')
    
    # overlay meme face
    def overlay_memeface(probs):
        if max(probs) > 0.8:
            emotion = emotions[np.argmax(probs)]
            return 'meme_faces/{}-{}.png'.format(emotion, emotion)
        else:
            index1, index2 = np.argsort(probs)[::-1][:2]
            emotion1 = emotions[index1]
            emotion2 = emotions[index2]
            return 'meme_faces/{}-{}.png'.format(emotion1, emotion2)
    
    def predict_emotion(face_image_gray): # a single cropped face
        resized_img = cv2.resize(face_image_gray, (48,48), interpolation = cv2.INTER_AREA)
        # cv2.imwrite(str(index)+'.png', resized_img)
        image = resized_img.reshape(1, 1, 48, 48)
        list_of_list = model.predict(image, batch_size=1, verbose=1)
        angry, fear, happy, sad, surprise, neutral = [prob for lst in list_of_list for prob in lst]
        return [angry, fear, happy, sad, surprise, neutral]
    
    video_capture = cv2.VideoCapture(0)
    while True:
        # Capture frame-by-frame
        ret, frame = video_capture.read()
    
        img_gray = cv2.cvtColor(frame, cv2.COLOR_BGR2GRAY,1)

        faces = faceCascade.detectMultiScale(
            img_gray,
            scaleFactor=1.1,
            minNeighbors=5,
            minSize=(30, 30),
            flags=cv2.cv.CV_HAAR_SCALE_IMAGE
        )
    
        # Draw a rectangle around the faces
        for (x, y, w, h) in faces:
    
            face_image_gray = img_gray[y:y+h, x:x+w]
            filename = overlay_memeface(predict_emotion(face_image_gray))
    
            print filename
            meme = cv2.imread(filename,-1)
            # meme = (meme/256).astype('uint8')
            try:
                meme.shape[2]
            except:
                meme = meme.reshape(meme.shape[0], meme.shape[1], 1)
            # print meme.dtype
            # print meme.shape
            orig_mask = meme[:,:,3]
            # print orig_mask.shape
            # memegray = cv2.cvtColor(orig_mask, cv2.COLOR_BGR2GRAY)
            ret1, orig_mask = cv2.threshold(orig_mask, 10, 255, cv2.THRESH_BINARY)
            orig_mask_inv = cv2.bitwise_not(orig_mask)
            meme = meme[:,:,0:3]
            origMustacheHeight, origMustacheWidth = meme.shape[:2]
    
            roi_gray = img_gray[y:y+h, x:x+w]
            roi_color = frame[y:y+h, x:x+w]
    
            # Detect a nose within the region bounded by each face (the ROI)
            nose = noseCascade.detectMultiScale(roi_gray)
    
            for (nx,ny,nw,nh) in nose:
                # Un-comment the next line for debug (draw box around the nose)
                #cv2.rectangle(roi_color,(nx,ny),(nx+nw,ny+nh),(255,0,0),2)
    
                # The mustache should be three times the width of the nose
                mustacheWidth =  20 * nw
                mustacheHeight = mustacheWidth * origMustacheHeight / origMustacheWidth
    
                # Center the mustache on the bottom of the nose
                x1 = nx - (mustacheWidth/4)
                x2 = nx + nw + (mustacheWidth/4)
                y1 = ny + nh - (mustacheHeight/2)
                y2 = ny + nh + (mustacheHeight/2)
    
                # Check for clipping
                if x1 < 0:
                    x1 = 0
                if y1 < 0:
                    y1 = 0
                if x2 > w:
                    x2 = w
                if y2 > h:
                    y2 = h

                # Re-calculate the width and height of the mustache image
                mustacheWidth = (x2 - x1)
                mustacheHeight = (y2 - y1)
    
                # Re-size the original image and the masks to the mustache sizes
                # calcualted above
                mustache = cv2.resize(meme, (mustacheWidth,mustacheHeight), interpolation = cv2.INTER_AREA)
                mask = cv2.resize(orig_mask, (mustacheWidth,mustacheHeight), interpolation = cv2.INTER_AREA)
                mask_inv = cv2.resize(orig_mask_inv, (mustacheWidth,mustacheHeight), interpolation = cv2.INTER_AREA)
    
                # take ROI for mustache from background equal to size of mustache image
                roi = roi_color[y1:y2, x1:x2]
    
                # roi_bg contains the original image only where the mustache is not
                # in the region that is the size of the mustache.
                roi_bg = cv2.bitwise_and(roi,roi,mask = mask_inv)
    
                # roi_fg contains the image of the mustache only where the mustache is
                roi_fg = cv2.bitwise_and(mustache,mustache,mask = mask)
    
                # join the roi_bg and roi_fg
                dst = cv2.add(roi_bg,roi_fg)
    
                # place the joined image, saved to dst back over the original image
                roi_color[y1:y2, x1:x2] = dst
    
                break
    
        #     cv2.rectangle(frame, (x, y), (x+w, y+h), (0, 255, 0), 2)
        #     angry, fear, happy, sad, surprise, neutral = predict_emotion(face_image_gray)
        #     text1 = 'Angry: {}     Fear: {}   Happy: {}'.format(angry, fear, happy)
        #     text2 = '  Sad: {} Surprise: {} Neutral: {}'.format(sad, surprise, neutral)
        #
        # cv2.putText(frame, text1, (50, 50), cv2.FONT_HERSHEY_SIMPLEX, 2, (255, 0, 0), 3)
        # cv2.putText(frame, text2, (50, 150), cv2.FONT_HERSHEY_SIMPLEX, 2, (255, 0, 0), 3)
    
        # Display the resulting frame
        cv2.imshow('Video', frame)
    
        if cv2.waitKey(1) & 0xFF == ord('q'):
            break
    
    # When everything is done, release the capture
    video_capture.release()
    cv2.destroyAllWindows()

需要完整代码以及学长训练好的模型,联系学长获取

4 最后

🧿 更多资料, 项目分享:

https://gitee.com/dancheng-senior/postgraduate

本文来自互联网用户投稿,该文观点仅代表作者本人,不代表本站立场。本站仅提供信息存储空间服务,不拥有所有权,不承担相关法律责任。如若转载,请注明出处:http://www.coloradmin.cn/o/1354187.html

如若内容造成侵权/违法违规/事实不符,请联系多彩编程网进行投诉反馈,一经查实,立即删除!

相关文章

【JavaFX】JavaFX11开发踩坑记录

文章目录 技术栈踩坑记录 技术栈 JavaFX 11MavenJDK 11 踩坑记录 这些坑对于初学者很容易踩&#xff0c;JavaFX经常会报错空指针异常遇到其中一个问题可能就会消耗好几天的时间。 JavaFX 采用的是MVC架构设计&#xff0c;页面设计使用 fxml文件&#xff1b;业务逻辑采用Con…

k8s的网络

k8s的网络 k8s中的通信模式&#xff1a; 1、pod内部之间容器与容器之间的通信 在同一个pod中的容器共享资源和网络&#xff0c;使用同一个网络命名空间&#xff0c;可以直接通信的 2、同一个node节点之内&#xff0c;不同pod之间的通信 每个pod都有一个全局的真实的ip地址…

qt 异常汇总

1. C2338 No Q_OBJECT in the class with the signal (编译源文件 ..\..\qt\labelme-master\src\mainwindow.cpp mainwindow头文件中的类没有Q_OBJECT宏定义&#xff0c;或者其子类或者其他依赖没有Q_OBJECT宏定义。 全部qt类都要写上Q_OBJECT. 2. C2385 对connect的访…

AI:116-基于深度学习的视频行为识别与分析

🚀点击这里跳转到本专栏,可查阅专栏顶置最新的指南宝典~ 🎉🎊🎉 你的技术旅程将在这里启航! 从基础到实践,深入学习。无论你是初学者还是经验丰富的老手,对于本专栏案例和项目实践都有参考学习意义。 ✨✨✨ 每一个案例都附带有在本地跑过的关键代码,详细讲解供…

ctfshow——PHP特性

文章目录 web 89web 90web 91web 92web 93web 94web 95web 96web 97web 98web 99 web 89 使用人工分配 ID 键的数值型数组绕过preg_match. 两个函数&#xff1a; preg_match()&#xff1a;执行正则表达式&#xff0c;进行字符串过滤。preg_match函数用法&#xff0c;正则表达式…

uni-app 前后端调用实例 基于Springboot 详情页实现

锋哥原创的uni-app视频教程&#xff1a; 2023版uniapp从入门到上天视频教程(Java后端无废话版)&#xff0c;火爆更新中..._哔哩哔哩_bilibili2023版uniapp从入门到上天视频教程(Java后端无废话版)&#xff0c;火爆更新中...共计23条视频&#xff0c;包括&#xff1a;第1讲 uni…

【Java EE初阶七】多线程案例(生产者消费者模型)

1. 阻塞队列 队列是先进先出的一种数据结构&#xff1b; 阻塞队列&#xff0c;是基于队列&#xff0c;做了一些扩展&#xff0c;适用于多线程编程中&#xff1b; 阻塞队列特点如下&#xff1a; 1、是线程安全的 2、具有阻塞的特性 2.1、当队列满了时&#xff0c;就不能往队列里…

Yapi安装配置(CentOs)

环境要求 nodejs&#xff08;7.6) mongodb&#xff08;2.6&#xff09; git 准备工作 清除yum命令缓存 sudo yum clean all卸载低版本nodejs yum remove nodejs npm -y安装nodejs,获取资源,安装高版本nodejs curl -sL https://rpm.nodesource.com/setup_8.x | bash - #安装 s…

图片中src属性绑定不同的路径

vue3 需求是按钮disable的时候&#xff0c;显示灰色的icon&#xff1b;非disable状态&#xff0c;显示白色的icon 一开始src写成三元表达式&#xff0c;发现不行&#xff0c;网上说src不能写成三元表达式&#xff0c;vue会识别成字符串 最后的解决方案 同时&#xff0c;发现…

win下持续观察nvidia-smi

简介&#xff1a;在Windows操作系统中&#xff0c;没有与Linux中watch命令直接对应的内置工具&#xff0c;但有1种方法快速简单的方法可以实现类似的效果&#xff0c;尤其是用于监控类似于nvidia-smi的命令输出。 历史攻略&#xff1a; Python&#xff1a;查看windows下GPU的…

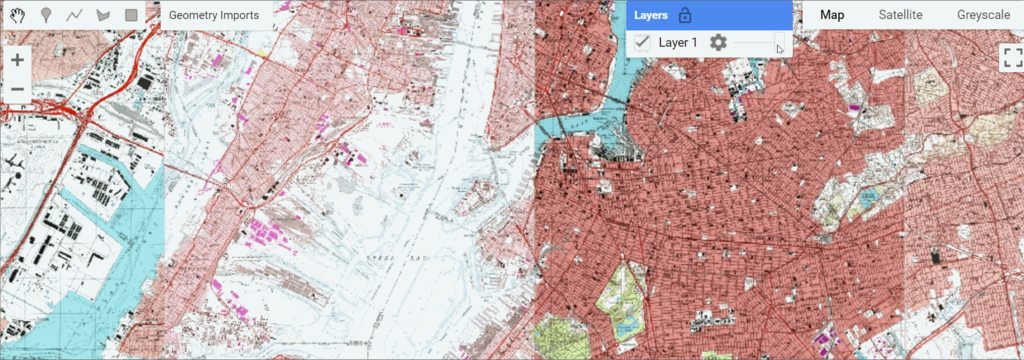
美国地质调查局历史地形图

简介 美国地质调查局地形图的历史可以追溯到 19 世纪末&#xff0c;当时美国地质调查局开始着手绘制整个美国的详细地图。1:24,000 比例尺&#xff0c;也称为 7.5 分四边形地图&#xff0c;成为最广泛使用的比例尺之一。每张地图覆盖 7.5 分经纬度的区域&#xff0c;从而详细呈…

在Docker中安装Tomact

目录 前言&#xff1a; 一.安装Tomact 查找指定的tomact版本 下载tomact9.0 查看该镜像是否安装成功 安装成功之后就开始运行镜像了 ps&#xff08;用于列出正在运行的Docker容器&#xff09; ​编辑 测试(虚拟机ip:8080) ​编辑 解决措施 ​编辑 完成以上步骤&…

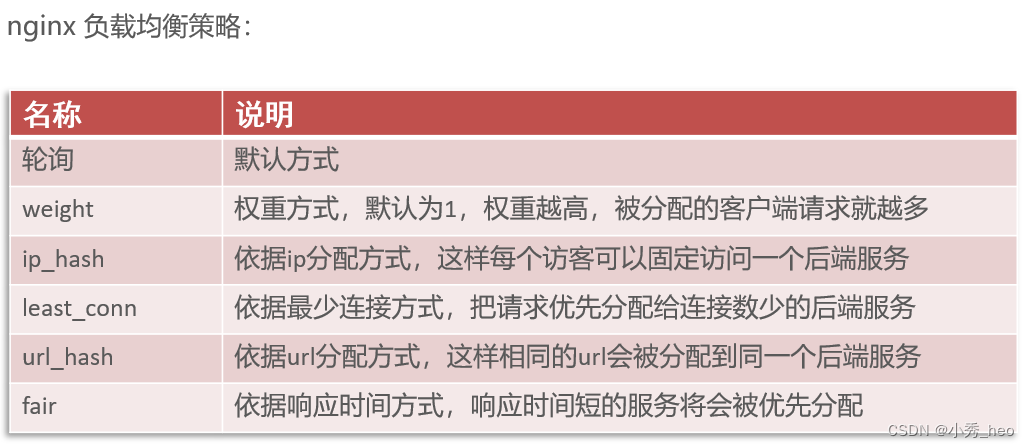
【Nginx】反向代理和负载均衡

反向代理 nginx 反向代理&#xff0c;就是将前端发送的动态请求由 nginx 转发到后端服务器。 server {listen 80;server_name localhost;# 反向代理,处理管理端发送的请求location /api/ {proxy_pass http://localhost:8080/admin/;#proxy_pass http://webservers/…

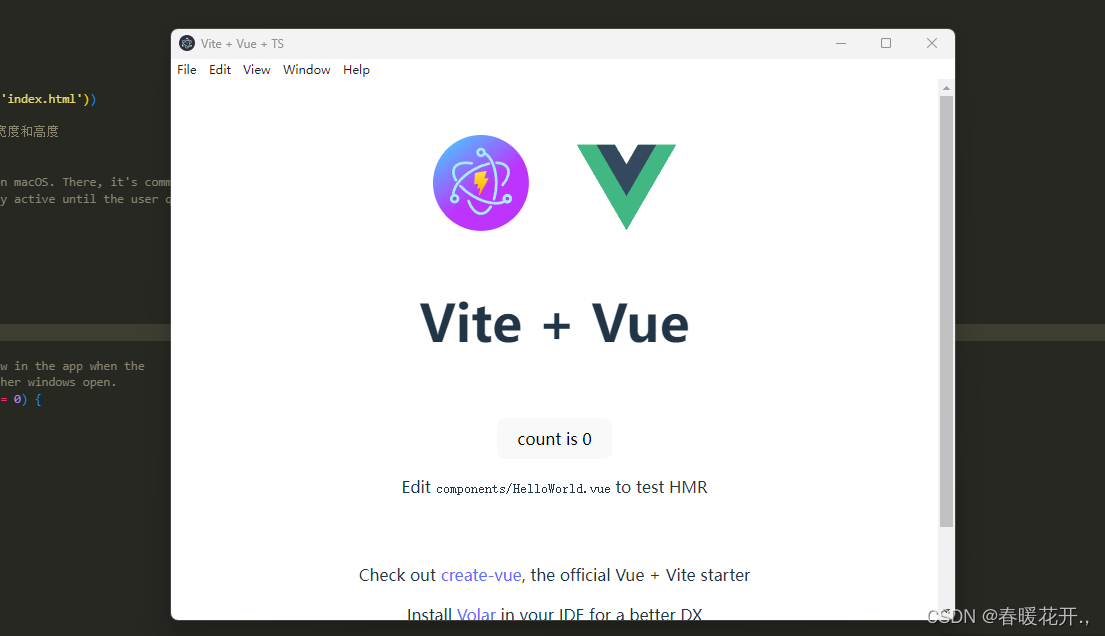
【Electron】快速建立Vue3+Vite+Electron Ts项目

git https://github.com/electron-vite/electron-vite-vue 创建项目 npm create electron-vite or pnpm create electron-vite 初始化 pnpm install or pnpm i 启动项目 pnpm dev 打包项目 pnpm build 项目创建成功后默认情况下 窗口是H800 W600 在createWindow 函数…

计算机视觉中的神经网络可视化工具与项目

前言 本文介绍了一些关于神经网络可视化的项目&#xff0c;主要有CNN解释器&#xff0c;特征图、卷积核、类可视化的一些代码和项目&#xff0c;结构可视化工具&#xff0c;网络结构手动画图工具。 CNN解释器 这是一个中国博士发布的名叫CNN解释器的在线交互可视化工具。 主要…

macOS跨进程通信: FIFO(有名管道) 创建实例

一&#xff1a; 简介 在类linux系统中管道分为有名管道和匿名管道。两者都能单方向的跨进程通信。 匿名管道&#xff08;pipe&#xff09;: 必须是父子进程之间&#xff0c;而且子进程只能由父进程fork() 出来的&#xff0c;才能继承父进程的管道句柄&#xff0c;一般mac 开发…

基于多反应堆的高并发服务器【C/C++/Reactor】(中)子线程 WorkerThread的实现 和 线程池ThreadPool的初始化

一、子线程 WorkerThread的实现 &#xff08;1&#xff09;工作线程 线程ID&#xff1a;每个线程都有一个唯一的ID,用于标识线程的名字&#xff1a;非必需&#xff0c;主要用于识别线程互斥锁&#xff1a;线程同步条件变量&#xff1a;线程阻塞EventLoop&#xff1a;在每个子…

WEB:探索开源PDF.js技术应用

1、简述 PDF.js 是一个由 Mozilla 开发的开源 JavaScript 库&#xff0c;用于在浏览器中渲染 PDF 文档。它的目标是提供一个纯粹的前端解决方案&#xff0c;摆脱了依赖插件或外部程序的束缚&#xff0c;使得在任何支持 JavaScript 的浏览器中都可以轻松地显示 PDF 文档。 2、…

解析大语言模型LLM的幻觉问题:消除错觉、提高认知

文章目录 前言一、幻觉介绍二、幻觉产生的原因三、幻觉的现象四、幻觉的分类五、幻觉解决方案六、幻觉待解决问题后记 前言 在人类的感知和认知过程中&#xff0c;幻觉一直是一个被广泛讨论和研究的问题。幻觉指的是一种虚假的感知或认知经验&#xff0c;使我们看到、听到或感…

YOLOv5算法进阶改进(12)— 引入YOLOv8中的C2f模块 | 提升小目标检测精度

前言:Hello大家好,我是小哥谈。YOLOv8是由Ultralytics开发的一个前沿的SOTA模型。它在以前成功的YOLO版本基础上,引入了新的功能和改进,进一步提升了其性能和灵活性。C2f模块和C3模块分别是YOLOv8和YOLOv5中的两种不同的模块设计,它们在结构和功能上有一些区别。本文将YOL…