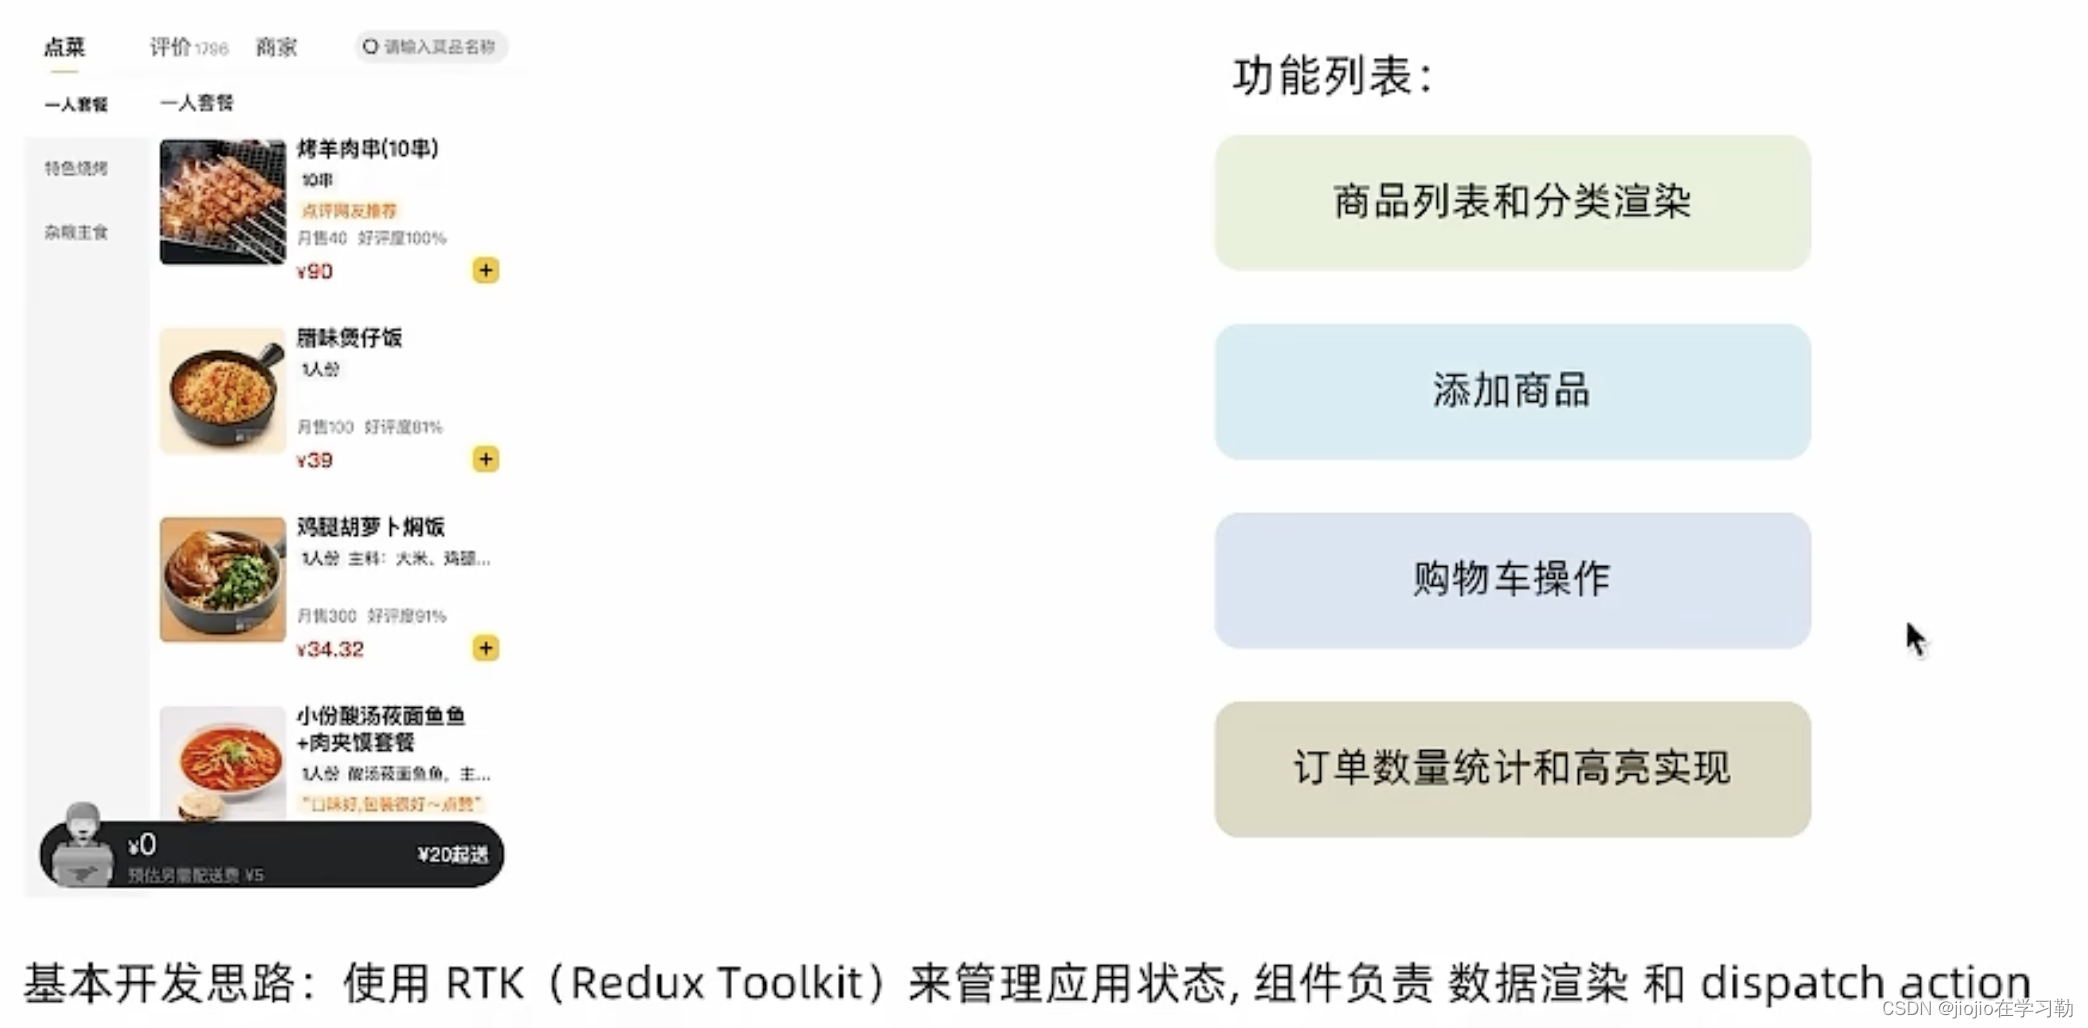
1.案例展示

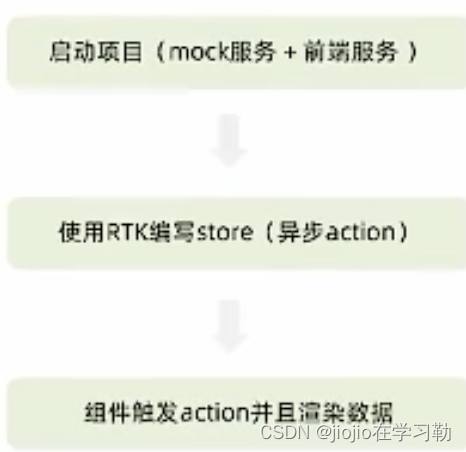
2.环境搭建
- 克隆项目到本地(内置了基础静态组件和模版)
git clone http://git.itcast.cn/heimaqianduan/redux-meituan.git
- 安装所有依赖
npm i
- 启动mock服务(内置了json-server)
npm run serve
- 启动前端服务
npm run start
3.分类和商品列表渲染
1.store modules 下 takeaway.js文件
// 编写store
import { createSlice } from "@reduxjs/toolkit"
import axios from "axios"

const foodsStore = createSlice({
  name: 'foods',
  initialState: {
    // 商品列表
    foodsList: [],a
  },
  reducers: {
    // 更改商品列表
    setFoodsList (state, action) {
      state.foodsList = action.payload
    }
  }
})

// 异步获取部分
const { setFoodsList} = foodsStore.actions
const fetchFoodsList = () => {
  return async (dispatch) => {
    // 编写异步逻辑
    const res = await axios.get('http://localhost:3004/takeaway')
    // 调用dispatch函数提交action
    dispatch(setFoodsList(res.data))
  }
}

export { fetchFoodsList }

const reducer = foodsStore.reducer
export default reducer
2.store下index.js文件
import foodsReducer from './modules/takeaway'
import { configureStore } from '@reduxjs/toolkit'
const store = configureStore({
  reducer: {
    foods: foodsReducer
  }
})
export default store
3.app.js
import { useDispatch, useSelector } from 'react-redux'
import { fetchFoodsList } from './store/modules/takeaway'
import { useEffect } from 'react'
// 触发action执行
  // 1. useDispatch -> dispatch 2. actionCreater导入进来 3.useEffect
  const dispatch = useDispatch()
  useEffect(() => {
    dispatch(fetchFoodsList())
  }, [dispatch])
  // 获取foodsList渲染数据列表
  // 1. useSelector
  const { foodsList } = useSelector(state => state.foods)
   {/* 外卖商品列表 */}
              {foodsList.map((item, index) => {
                return (
                 <FoodsCategory
                    key={item.tag}
                    // 列表标题
                    name={item.name}
                    // 列表商品
                    foods={item.foods}
                  />
                )
              })}
4.menu.js
import { useDispatch,useSelector } from 'react-redux'
const dispatch = useDispatch()
const {foodsList} = useSelector(state=>state.foods)
5.index.js
// 注入store
import { Provider } from 'react-redux'
import store from './store'
const root = createRoot(document.getElementById('root'))
root.render(
  <Provider store={store}>
    <App />
  </Provider>
)
4.点击分类激活实现

1.store modules下 takeaway.js文件
// 编写store
import { createSlice } from "@reduxjs/toolkit"
import axios from "axios"
const foodsStore = createSlice({
  name: 'foods',
  initialState: {
    // 商品列表
    foodsList: [],
    //激活index
    activeIndex:0,
  },
  reducers: {
    // 更改商品列表
    setFoodsList (state, action) {
      state.foodsList = action.payload
    },
    //更改activeIndex
    changeActiveIndex(state,action){
        state.activeIndex = action.payload
    }
  }
})

// 异步获取部分
const { setFoodsList,changeActiveIndex} = foodsStore.actions
2.menu.js
import classNames from 'classnames'
import './index.scss'

import { useDispatch,useSelector } from 'react-redux'
import { changeActiveIndex} from '../../store/modules/takeaway'
const Menu = () => {
  const dispatch = useDispatch()
  const {foodsList,activeIndex} = useSelector(state=>state.foods)
  const menus = foodsList.map(item => ({ tag: item.tag, name: item.name }))
  return (
    <nav className="list-menu">
      {/* 添加active类名会变成激活状态 */}
      {menus.map((item, index) => {
        return (
          <div
          onClick={() => dispatch(changeActiveIndex(index))}
            key={item.tag}
            className={classNames(
              'list-menu-item',
              activeIndex === index && 'active'
            )}
          >
            {item.name}
          </div>
        )
      })}
    </nav>
  )
}

export default Menu
3.app.js
const { foodsList , activeIndex} = useSelector(state => state.foods)
<div className="goods-list">
              {/* 外卖商品列表 */}
              {foodsList.map((item, index) => {
                return (
                  activeIndex==index && <FoodsCategory
                    key={item.tag}
                    // 列表标题
                    name={item.name}
                    // 列表商品
                    foods={item.foods}
                  />
                )
              })}
            </div>
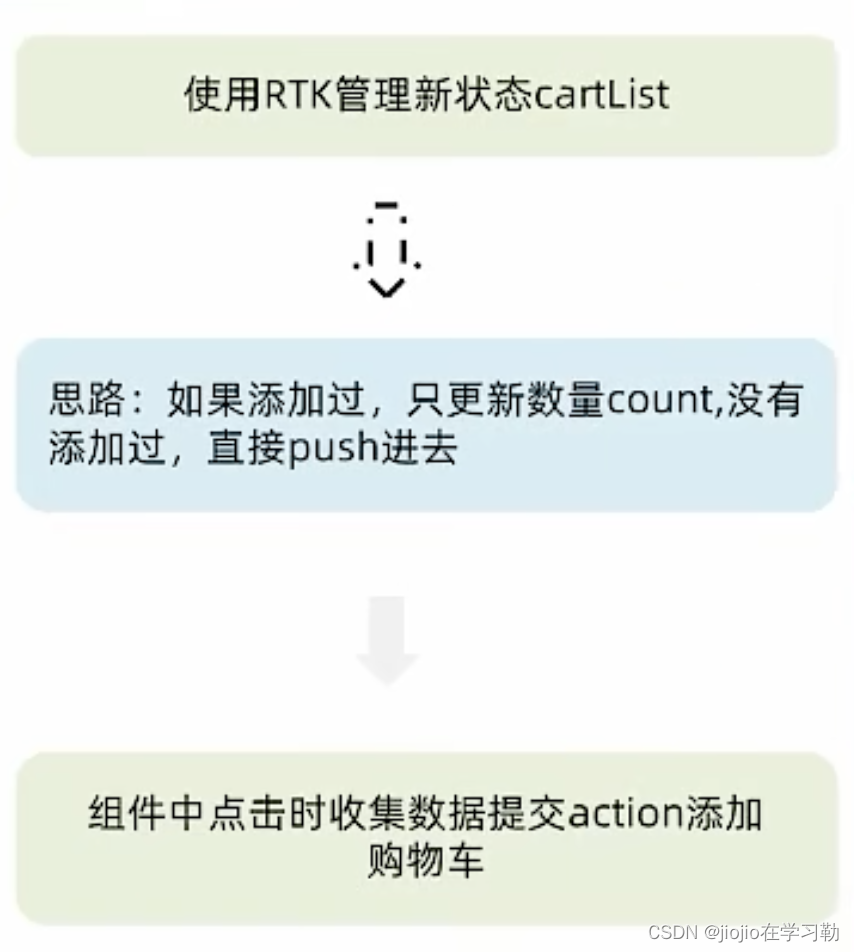
5.添加购物车
1.takeaway.js
// 编写store

import { createSlice } from "@reduxjs/toolkit"
import axios from "axios"

const foodsStore = createSlice({
  name: 'foods',
  initialState: {
    // 商品列表
    foodsList: [],
    // 菜单激活下标值
    activeIndex: 0,
    // 购物车列表
    cartList: []
  },
  reducers: {
    // 更改商品列表
    setFoodsList (state, action) {
      state.foodsList = action.payload
    },
    // 更改activeIndex
    changeActiveIndex (state, action) {
      state.activeIndex = action.payload
    },
    // 添加购物车
    addCart (state, action) {
      // 是否添加过?以action.payload.id去cartList中匹配 匹配到了 添加过
      const item = state.cartList.find(item => item.id === action.payload.id)
      if (item) {
        item.count++
      } else {
        state.cartList.push(action.payload)
      }
    },
  }
})

const { setFoodsList, changeActiveIndex, addCart} = foodsStore.actions
export { fetchFoodsList, changeActiveIndex, addCart}
2.foodItem下index.js文件
import { useDispatch } from 'react-redux'
import { setCarlist } from '../../../store/modules/takeaway'
const dispatch = useDispatch()
 <div className="goods-count">
            <span className="plus" onClick={() => dispatch(setCarlist({
              id,
              picture,
              name,
              unit,
              description,
              food_tag_list,
              month_saled,
              like_ratio_desc,
              price,
              tag,
              count
            }))}></span>
          </div>
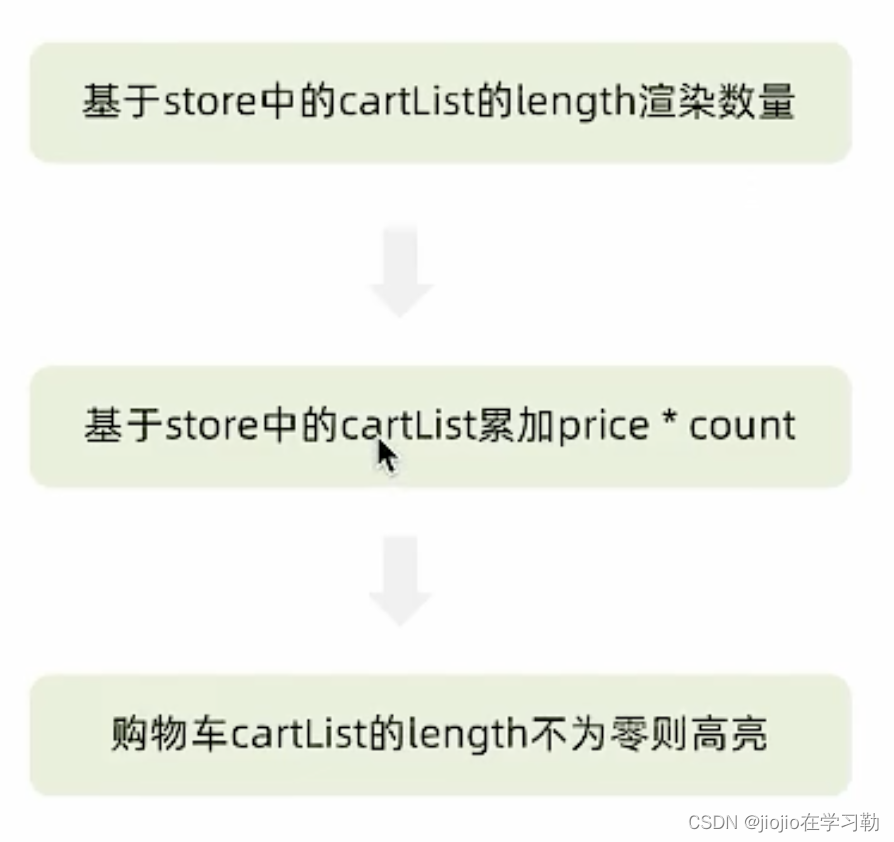
6.统计区域功能实现

1.cart下面index.js
import classNames from 'classnames'
import { useState } from 'react'
import { useDispatch, useSelector } from 'react-redux'
import Count from '../Count'
import './index.scss'


const Cart = () => {
  const { carList } = useSelector(state => state.foods)
  // 计算总价
  const totalPrice = carList.reduce((a, c) => a + c.price * c.count, 0)
  return (
    <div className="cartContainer">
      <div className="cart">
        {/* fill 添加fill类名购物车高亮*/}
        {/* 购物车数量 */}
        <div  className={classNames('icon', carList.length > 0 && 'fill')}>
          {carList.length > 0 && <div className="cartCornerMark">{carList.length}</div>}
        </div>
        {/* 购物车价格 */}
        <div className="main">
          <div className="price">
            <span className="payableAmount">
              <span className="payableAmountUnit">¥</span>
              {totalPrice.toFixed(2)}
            </span>
          </div>
          <span className="text">预估另需配送费 ¥5</span>
        </div>
        {/* 结算 or 起送 */}
        {carList.length > 0 ? (
          <div className="goToPreview">去结算</div>
        ) : (
          <div className="minFee">1元起送</div>
        )}
      </div>
      {/* 添加visible类名 div会显示出来 */}
      <div className={classNames('cartPanel')}>
        <div className="header">
          <span className="text">购物车</span>
          <span className="clearCart">
            清空购物车
          </span>
        </div>

        {/* 购物车列表 */}
        <div className="scrollArea">
          {carList.map(item => {
            return (
              <div className="cartItem" key={item.id}>
                <img className="shopPic" src={item.picture} alt="" />
                <div className="main">
                  <div className="skuInfo">
                    <div className="name">{item.name}</div>
                  </div>
                  <div className="payableAmount">
                    <span className="yuan">¥</span>
                    <span className="price">{item.price}</span>
                  </div>
                </div>
                <div className="skuBtnWrapper btnGroup">
                  {/* 数量组件 */}
                  <Count
                    count={item.count}

                  />
                </div>
              </div>
            )
          })}
        </div>
      </div>
    </div>
  )
}

export default Cart
7.购物车列表功能实现


1.takeaway.js
// 编写store

import { createSlice } from "@reduxjs/toolkit"
import axios from "axios"

const foodsStore = createSlice({
  name: 'foods',
  initialState: {
    // 商品列表
    foodsList: [],
    //激活index
    activeIndex:0,
    //汽车
    carList:[]
  },
  reducers: {
    // 更改商品列表
    setFoodsList (state, action) {
      state.foodsList = action.payload
    },
    //更改activeIndex
    changeActiveIndex(state,action){
        state.activeIndex = action.payload
    },
    setCarlist(state,action){
      // 是否添加过?以action.payload.id去cartList中匹配 匹配到了 添加过
      const item = state.carList.find(item => item.id === action.payload.id)
      if (item) {
        item.count++
      } else {
        state.carList.push(action.payload)
      }
    },
    increCount(state,action){
      const item = state.carList.find(item => item.id === action.payload.id)
      item.count++
    },
    decreCount(state,action){
        const item = state.carList.find(item => item.id === action.payload.id)
        if(item.count===0){
         return
        }
      item.count--
    },
     // 清除购物车
     clearCart (state) {
        state.carList = []
      }

}
})

// 异步获取部分
const { setFoodsList,changeActiveIndex,setCarlist,increCount,decreCount,clearCart} = foodsStore.actions
const fetchFoodsList = () => {
  return async (dispatch) => {
    // 编写异步逻辑
    const res = await axios.get('http://localhost:3004/takeaway')
    // 调用dispatch函数提交action
    dispatch(setFoodsList(res.data))
  }
}

export { fetchFoodsList ,changeActiveIndex,setCarlist,increCount,decreCount,clearCart}

const reducer = foodsStore.reducer

export default reducer
2.cart下index文件
import classNames from 'classnames'
import { useDispatch, useSelector } from 'react-redux'
import Count from '../Count'
import './index.scss'
import {increCount,decreCount,clearCart} from '../../store/modules/takeaway'


const Cart = () => {
  const { carList } = useSelector(state => state.foods)
  // 计算总价
  const totalPrice = carList.reduce((a, c) => a + c.price * c.count, 0)

  const dispatch = useDispatch()

  return (
    <div className="cartContainer">
      <div className="cart">
        {/* fill 添加fill类名购物车高亮*/}
        {/* 购物车数量 */}
        <div  className={classNames('icon', carList.length > 0 && 'fill')}>
          {carList.length > 0 && <div className="cartCornerMark">{carList.length}</div>}
        </div>
        {/* 购物车价格 */}
        <div className="main">
          <div className="price">
            <span className="payableAmount">
              <span className="payableAmountUnit">¥</span>
              {totalPrice.toFixed(2)}
            </span>
          </div>
          <span className="text">预估另需配送费 ¥5</span>
        </div>
        {/* 结算 or 起送 */}
        {carList.length > 0 ? (
          <div className="goToPreview">去结算</div>
        ) : (
          <div className="minFee">1元起送</div>
        )}
      </div>
      {/* 添加visible类名 div会显示出来 */}
      <div className={classNames('cartPanel',carList.length>0&&'visible')} >
        <div className="header">
          <span className="text">购物车</span>
          <span className="clearCart" onClick={()=>dispatch(clearCart())}>
            清空购物车
          </span>
        </div>

        {/* 购物车列表 */}
        <div className="scrollArea">
          {carList.map(item => {
            return (
              <div className="cartItem" key={item.id}>
                <img className="shopPic" src={item.picture} alt="" />
                <div className="main">
                  <div className="skuInfo">
                    <div className="name">{item.name}</div>
                  </div>
                  <div className="payableAmount">
                    <span className="yuan">¥</span>
                    <span className="price">{item.price}</span>
                  </div>
                </div>
                <div className="skuBtnWrapper btnGroup">
                  {/* 数量组件 */}
                  <Count
                    count={item.count}
                    onPlus={()=>dispatch(increCount({id:item.id}))}
                    onMinus={()=>dispatch(decreCount({id:item.id}))}
                  />
                </div>
              </div>
            )
          })}
        </div>
      </div>
    </div>
  )
}

export default Cart
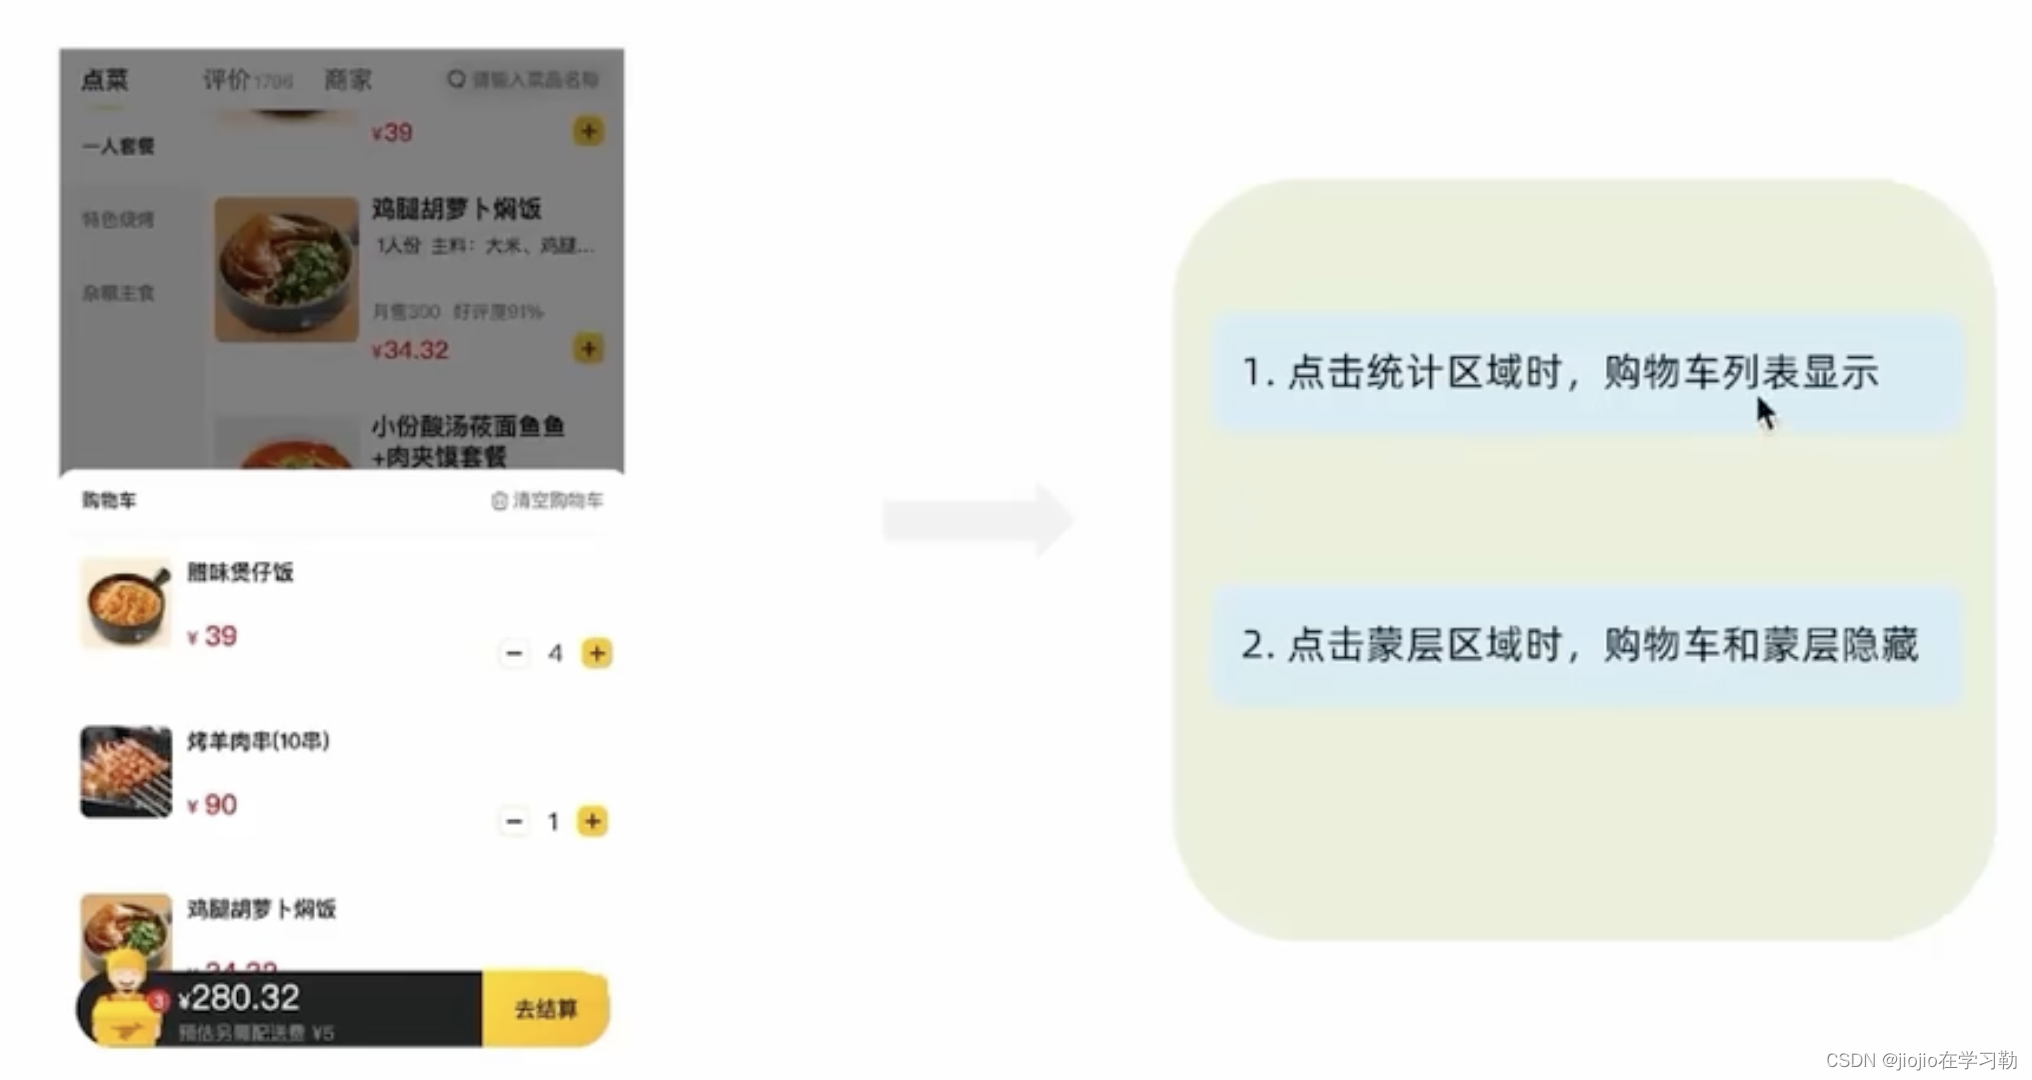
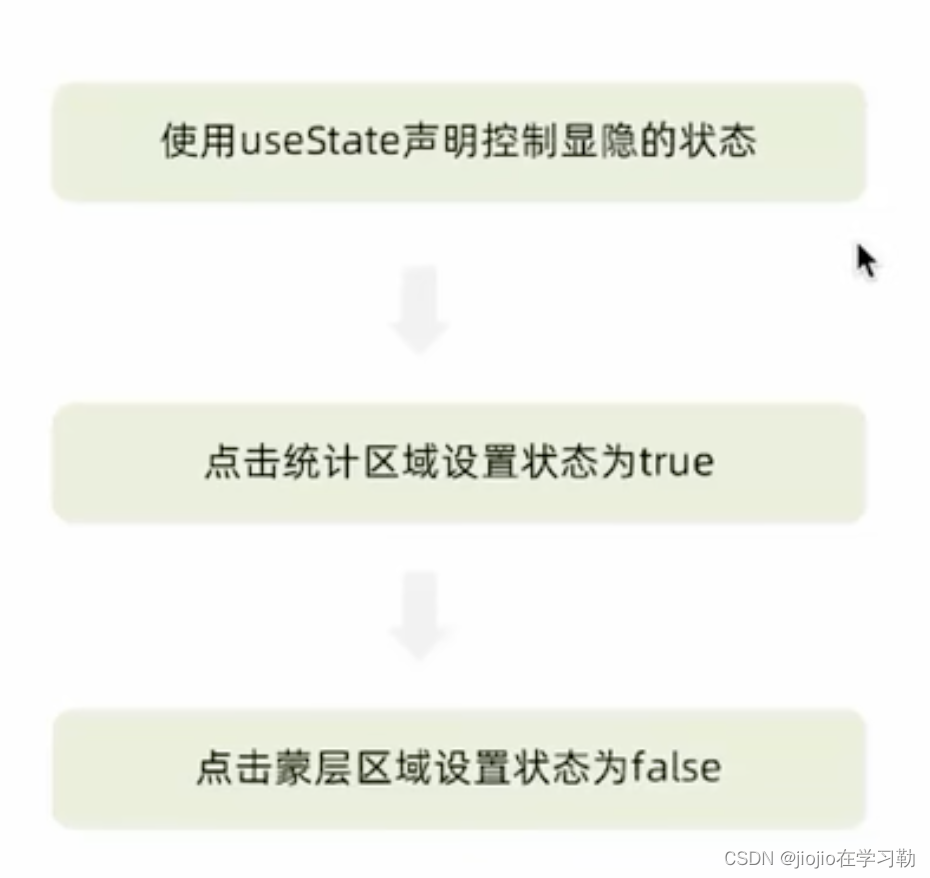
8.控制购物车显示和隐藏
1.cart文件下index.js文件
import classNames from 'classnames'
import { useDispatch, useSelector} from 'react-redux'
import { useState } from 'react'
import Count from '../Count'
import './index.scss'
import {increCount,decreCount,clearCart} from '../../store/modules/takeaway'


const Cart = () => {
  const { carList } = useSelector(state => state.foods)
  // 计算总价
  const totalPrice = carList.reduce((a, c) => a + c.price * c.count, 0)
  const [visible,setVisible]= useState(false)
  const dispatch = useDispatch()

  const onShow = () => {
    if (carList.length > 0) {
      setVisible(true)
    }
  }
  return (
    <div className="cartContainer">
       {/* 遮罩层 添加visible类名可以显示出来 */}
       <div
        className={classNames('cartOverlay', visible && 'visible')}
        onClick={() => setVisible(false)}
      />
      <div className="cart">
        {/* fill 添加fill类名购物车高亮*/}
        {/* 购物车数量 */}
        <div onClick={onShow}  className={classNames('icon', carList.length > 0 && 'fill')}>
          {carList.length > 0 && <div className="cartCornerMark">{carList.length}</div>}
        </div>
        {/* 购物车价格 */}
        <div className="main">
          <div className="price">
            <span className="payableAmount">
              <span className="payableAmountUnit">¥</span>
              {totalPrice.toFixed(2)}
            </span>
          </div>
          <span className="text">预估另需配送费 ¥5</span>
        </div>
        {/* 结算 or 起送 */}
        {carList.length > 0 ? (
          <div className="goToPreview">去结算</div>
        ) : (
          <div className="minFee">1元起送</div>
        )}
      </div>
      {/* 添加visible类名 div会显示出来 */}
      <div className={classNames('cartPanel',visible &&'visible')} >
        <div className="header">
          <span className="text">购物车</span>
          <span className="clearCart" onClick={()=>dispatch(clearCart())}>
            清空购物车
          </span>
        </div>

        {/* 购物车列表 */}
        <div className="scrollArea">
          {carList.map(item => {
            return (
              <div className="cartItem" key={item.id}>
                <img className="shopPic" src={item.picture} alt="" />
                <div className="main">
                  <div className="skuInfo">
                    <div className="name">{item.name}</div>
                  </div>
                  <div className="payableAmount">
                    <span className="yuan">¥</span>
                    <span className="price">{item.price}</span>
                  </div>
                </div>
                <div className="skuBtnWrapper btnGroup">
                  {/* 数量组件 */}
                  <Count
                    count={item.count}
                    onPlus={()=>dispatch(increCount({id:item.id}))}
                    onMinus={()=>dispatch(decreCount({id:item.id}))}
                  />
                </div>
              </div>
            )
          })}
        </div>
      </div>
    </div>
  )
}

export default Cart