文章目录
- 一、前言
- 二、封装沉浸式状态栏管理类
- 1、创建Demo工程
- 2、封装状态栏管理类
- 三、编写页面实现沉浸式状态栏效果
- 1、存储windowStage实例
- 2、Page页面中实现沉浸式开启关闭功能
- 2.1、开启沉浸式状态栏
- 2.2、设置标题栏偏移量
一、前言
在应用开发中,页面跟状态栏的默认显示效果一般是如下:
但是产品UI设计的时候,一般是会设计一个沉浸式状态的页面效果,如下:

那在鸿蒙应用开发中,应该怎么实现这个沉浸式状态栏的效果呢?下面我们来创建一个Demo工程进行讲解。
二、封装沉浸式状态栏管理类
1、创建Demo工程
首先我们创建一个Demo工程,在ets目录下创建common文件夹。

2、封装状态栏管理类
我们在common目录中创建StatusBarManager.ts文件,完整的代码如下:
import window from '@ohos.window';
import HashMap from '@ohos.util.HashMap';
import { Log } from './Log';

/**
 * 状态栏管理器
 */
export class StatusBarManager {
  private readonly TAG = 'StatusBarManager';
  private readonly CONFIG_SYSTEM_BAR_HEIGHT = 'systemBarHeight';
  private static mInstance: StatusBarManager;
  private mWindowStage: window.WindowStage;

  private mConfig = new HashMap<string, any>();

  private constructor() {
  }

  public static get(): StatusBarManager {
    if (!this.mInstance) {
      this.mInstance = new StatusBarManager();
    }
    return this.mInstance;
  }

  /**
   * 存储windowStage实例
   * @param windowStage
   */
  public storeWindowStage(windowStage: window.WindowStage) {
    this.mWindowStage = windowStage;
  }

  /**
   * 获取windowStage实例
   * @returns
   */
  public getWindowStage(): window.WindowStage {
    return this.mWindowStage;
  }

  /**
   * 设置沉浸式状态栏
   * @param windowStage
   * @returns
   */
  public setImmersiveStatusBar(windowStage: window.WindowStage): Promise<void> {

    let resolveFn, rejectFn;
    let promise = new Promise<void>((resolve, reject) => {
      resolveFn = resolve;
      rejectFn = reject;
    });

    // 1.获取应用主窗口。
    try {
      let windowClass = windowStage.getMainWindowSync();
      Log.info(this.TAG, 'Succeeded in obtaining the main window. Data: ' + JSON.stringify(windowClass));

      // 2.实现沉浸式效果:设置窗口可以全屏绘制。
      // 将UI内容顶入状态栏下方
      windowClass.setWindowLayoutFullScreen(true)
        .then(() => {
          //3、设置状态栏 可见
          windowClass.setWindowSystemBarEnable(['status']).then(() => {
            //4、设置状态栏透明背景
            const systemBarProperties: window.SystemBarProperties = {
              statusBarColor: '#00000000'
            };
            //设置窗口内导航栏、状态栏的属性
            windowClass.setWindowSystemBarProperties(systemBarProperties)
              .then(() => {
                Log.info(this.TAG, 'Succeeded in setting the system bar properties.');
              }).catch((err) => {
              Log.error(this.TAG, 'Failed to set the system bar properties. Cause: ' + JSON.stringify(err));
            });
          })

          //5、存储状态栏高度
          this.storeStatusBarHeight(windowClass);

          resolveFn();
        });

    } catch (err) {
      Log.error(this.TAG, 'Failed to obtain the main window. Cause: ' + JSON.stringify(err));
      rejectFn();
    }

    return promise;

  }

  /**
   * 关闭沉浸式状态栏
   * @param windowStage
   * @returns
   */
  public hideImmersiveStatusBar(windowStage: window.WindowStage): Promise<void> {

    let resolveFn, rejectFn;
    let promise = new Promise<void>((resolve, reject) => {
      resolveFn = resolve;
      rejectFn = reject;
    });
    // 1.获取应用主窗口。
    try {
      let windowClass = windowStage.getMainWindowSync();
      Log.info(this.TAG, 'Succeeded in obtaining the main window. Data: ' + JSON.stringify(windowClass));

      windowClass.setWindowLayoutFullScreen(false)
        .then(() => {
          //存储状态栏高度
          this.mConfig.set(this.CONFIG_SYSTEM_BAR_HEIGHT, 0);
          resolveFn();
        });

    } catch (err) {
      Log.error(this.TAG, 'Failed to obtain the main window. Cause: ' + JSON.stringify(err));
      rejectFn(err);
    }
    return promise;

  }


  /**
   * 获取状态栏高度进行保存
   * @param windowClass
   * @returns
   */
  private storeStatusBarHeight(windowClass: window.Window) {

    try {
      const avoidArea = windowClass.getWindowAvoidArea(window.AvoidAreaType.TYPE_SYSTEM);
      // 保存高度信息
      this.mConfig.set(this.CONFIG_SYSTEM_BAR_HEIGHT, avoidArea.topRect.height);
      Log.info(this.TAG, 'Succeeded in obtaining the area. Data:' + JSON.stringify(avoidArea));

    } catch (err) {
      Log.error(this.TAG, 'Failed to obtain the area. Cause:' + JSON.stringify(err));
    }
  }

  /**
   * 未开启沉浸式状态栏,偏移量为0,开启, 偏移量为状态栏高度
   * @returns
   */
  public getSystemBarOffset(): number {
    let height = 0;
    if (this.mConfig.hasKey(this.CONFIG_SYSTEM_BAR_HEIGHT)) {
      height = this.mConfig.get(this.CONFIG_SYSTEM_BAR_HEIGHT) as number;
    }
    return height;
  }

  /**
   * 是否开启沉浸式状态栏
   * @returns
   */
  public isOpenImmersiveStatusBar(): boolean {
    return this.getSystemBarOffset() > 0;
  }
}
StatusBarManager 管理类主要提供以下常用的方法:
- get- 获取管理类单例实例
- storeWindowStage- 存储windowStage实例
该方法在UIAbility中进行调用。 - getWindowStage- 获取windowStage实例
- setImmersiveStatusBar- 设置沉浸式状态栏
- hideImmersiveStatusBar- 关闭沉浸式状态栏
- storeStatusBarHeight- (内部私有方法)获取状态栏高度进行保存
- getSystemBarOffset- 获取状态栏高度(沉浸式状态栏下需要调整的标题偏移量)
- isOpenImmersiveStatusBar- 是否开启沉浸式状态栏
下面我们主要讲解下setImmersiveStatusBar方法,设置沉浸式状态栏,这个过程主要分为五个步骤:
1、获取应用主窗口
let windowClass = windowStage.getMainWindowSync();
我们通过传入的windowStage,同步获取一个主窗口实例。
2、设置窗口可以全屏绘制
windowClass.setWindowLayoutFullScreen(true)
我们将窗口设置为全屏模式。
3、设置状态栏可见
windowClass.setWindowSystemBarEnable(['status'])
在设置全屏后,状态栏不可见,我们需要的不是全屏效果,而是状态栏沉浸式效果,因此需要将状态栏设置为可见。
这里入参是一个数组,可以设置状态栏、也可以设置底部导航栏。
4、设置窗口内状态栏背景为透明
const systemBarProperties: window.SystemBarProperties = {
              statusBarColor: '#00000000'
};
windowClass.setWindowSystemBarProperties(systemBarProperties)
              .then(() => {
                Log.info(this.TAG, 'Succeeded in setting the system bar properties.');
              }).catch((err) => {
              Log.error(this.TAG, 'Failed to set the system bar properties. Cause: ' + JSON.stringify(err));
            });
状态栏设置为显示状态后,我们给状态栏的背景色设置为透明,这里才能达到沉浸式的效果。
5、存储状态栏高度
const avoidArea = windowClass.getWindowAvoidArea(window.AvoidAreaType.TYPE_SYSTEM);
// 保存高度信息
this.mConfig.set(this.CONFIG_SYSTEM_BAR_HEIGHT, avoidArea.topRect.height);
我们通过上述代码可以获取系统状态栏的高度,并将其保存起来,后续页面通过该高度来判断是否是开启了沉浸式状态栏。
这样我们的状态栏管理类就封装完毕,下面我们来写下页面UI实现沉浸式页面状态栏效果。
三、编写页面实现沉浸式状态栏效果
1、存储windowStage实例
具体如下:
  onWindowStageCreate(windowStage: window.WindowStage): void {
    // Main window is created, set main page for this ability
    hilog.info(0x0000, 'testTag', '%{public}s', 'Ability onWindowStageCreate');

    StatusBarManager.get().storeWindowStage(windowStage);

    windowStage.loadContent('pages/Index', (err, data) => {
      if (err.code) {
        hilog.error(0x0000, 'testTag', 'Failed to load the content. Cause: %{public}s', JSON.stringify(err) ?? '');
        return;
      }
      hilog.info(0x0000, 'testTag', 'Succeeded in loading the content. Data: %{public}s', JSON.stringify(data) ?? '');
    });
  }
在EntryAbility.ts 文件 onWindowStageCreate方法中添加如下代码:
StatusBarManager.get().storeWindowStage(windowStage);
我们这个Demo效果,是在单个Page中开启关闭沉浸式效果,因此我们需要在UIAbility中存储windowStage实例。
实际应用使用中,如果需要所有Page都开启沉浸式状态效果,则可以将上述代码调整为
StatusBarManager.get().setImmersiveStatusBar(windowStage);
2、Page页面中实现沉浸式开启关闭功能
2.1、开启沉浸式状态栏
我们拷贝如下代码到Index.ets 文件中:
import { StatusBarManager } from '../common/StatusBarManager';

@Entry
@Component
struct Index {
  @State showImmersiveStatusBar: boolean = false;

  build() {
    Column() {

      Column() {
        Column() {
          Text('这是标题')
            .fontSize(20)
            .fontColor(Color.White)
        }
        .height(50)
        .justifyContent(FlexAlign.Center)
      }
      .width('100%')
      .backgroundColor('#ff007dfe')

      Column() {
        Text('点击开启沉浸式状态栏')
          .fontSize(16)

        Button(this.showImmersiveStatusBar ? '关闭' : '开启')
          .fontSize(16)
          .margin({ top: 20 })
          .padding({ left: 50, right: 50 })
          .onClick(() => {

            if (this.showImmersiveStatusBar) {
              this.close();
            } else {
              this.open();
            }
            this.showImmersiveStatusBar = !this.showImmersiveStatusBar;
          })
      }
      .width('100%')
      .height('100%')
      .justifyContent(FlexAlign.Center)
    }
    .height('100%')
  }

  private open() {
    let windowStage = StatusBarManager.get().getWindowStage();
    if (windowStage) {
      StatusBarManager.get().setImmersiveStatusBar(windowStage);
    }
  }

  private close() {
    let windowStage = StatusBarManager.get().getWindowStage();
    if (windowStage) {
      StatusBarManager.get().hideImmersiveStatusBar(windowStage);
    }
  }
}
我们运行下代码将应用装到手机上看看效果**
(真机配置签名方式前面文章有示例讲解,不懂的同学可以翻下我之前的文章看下)**
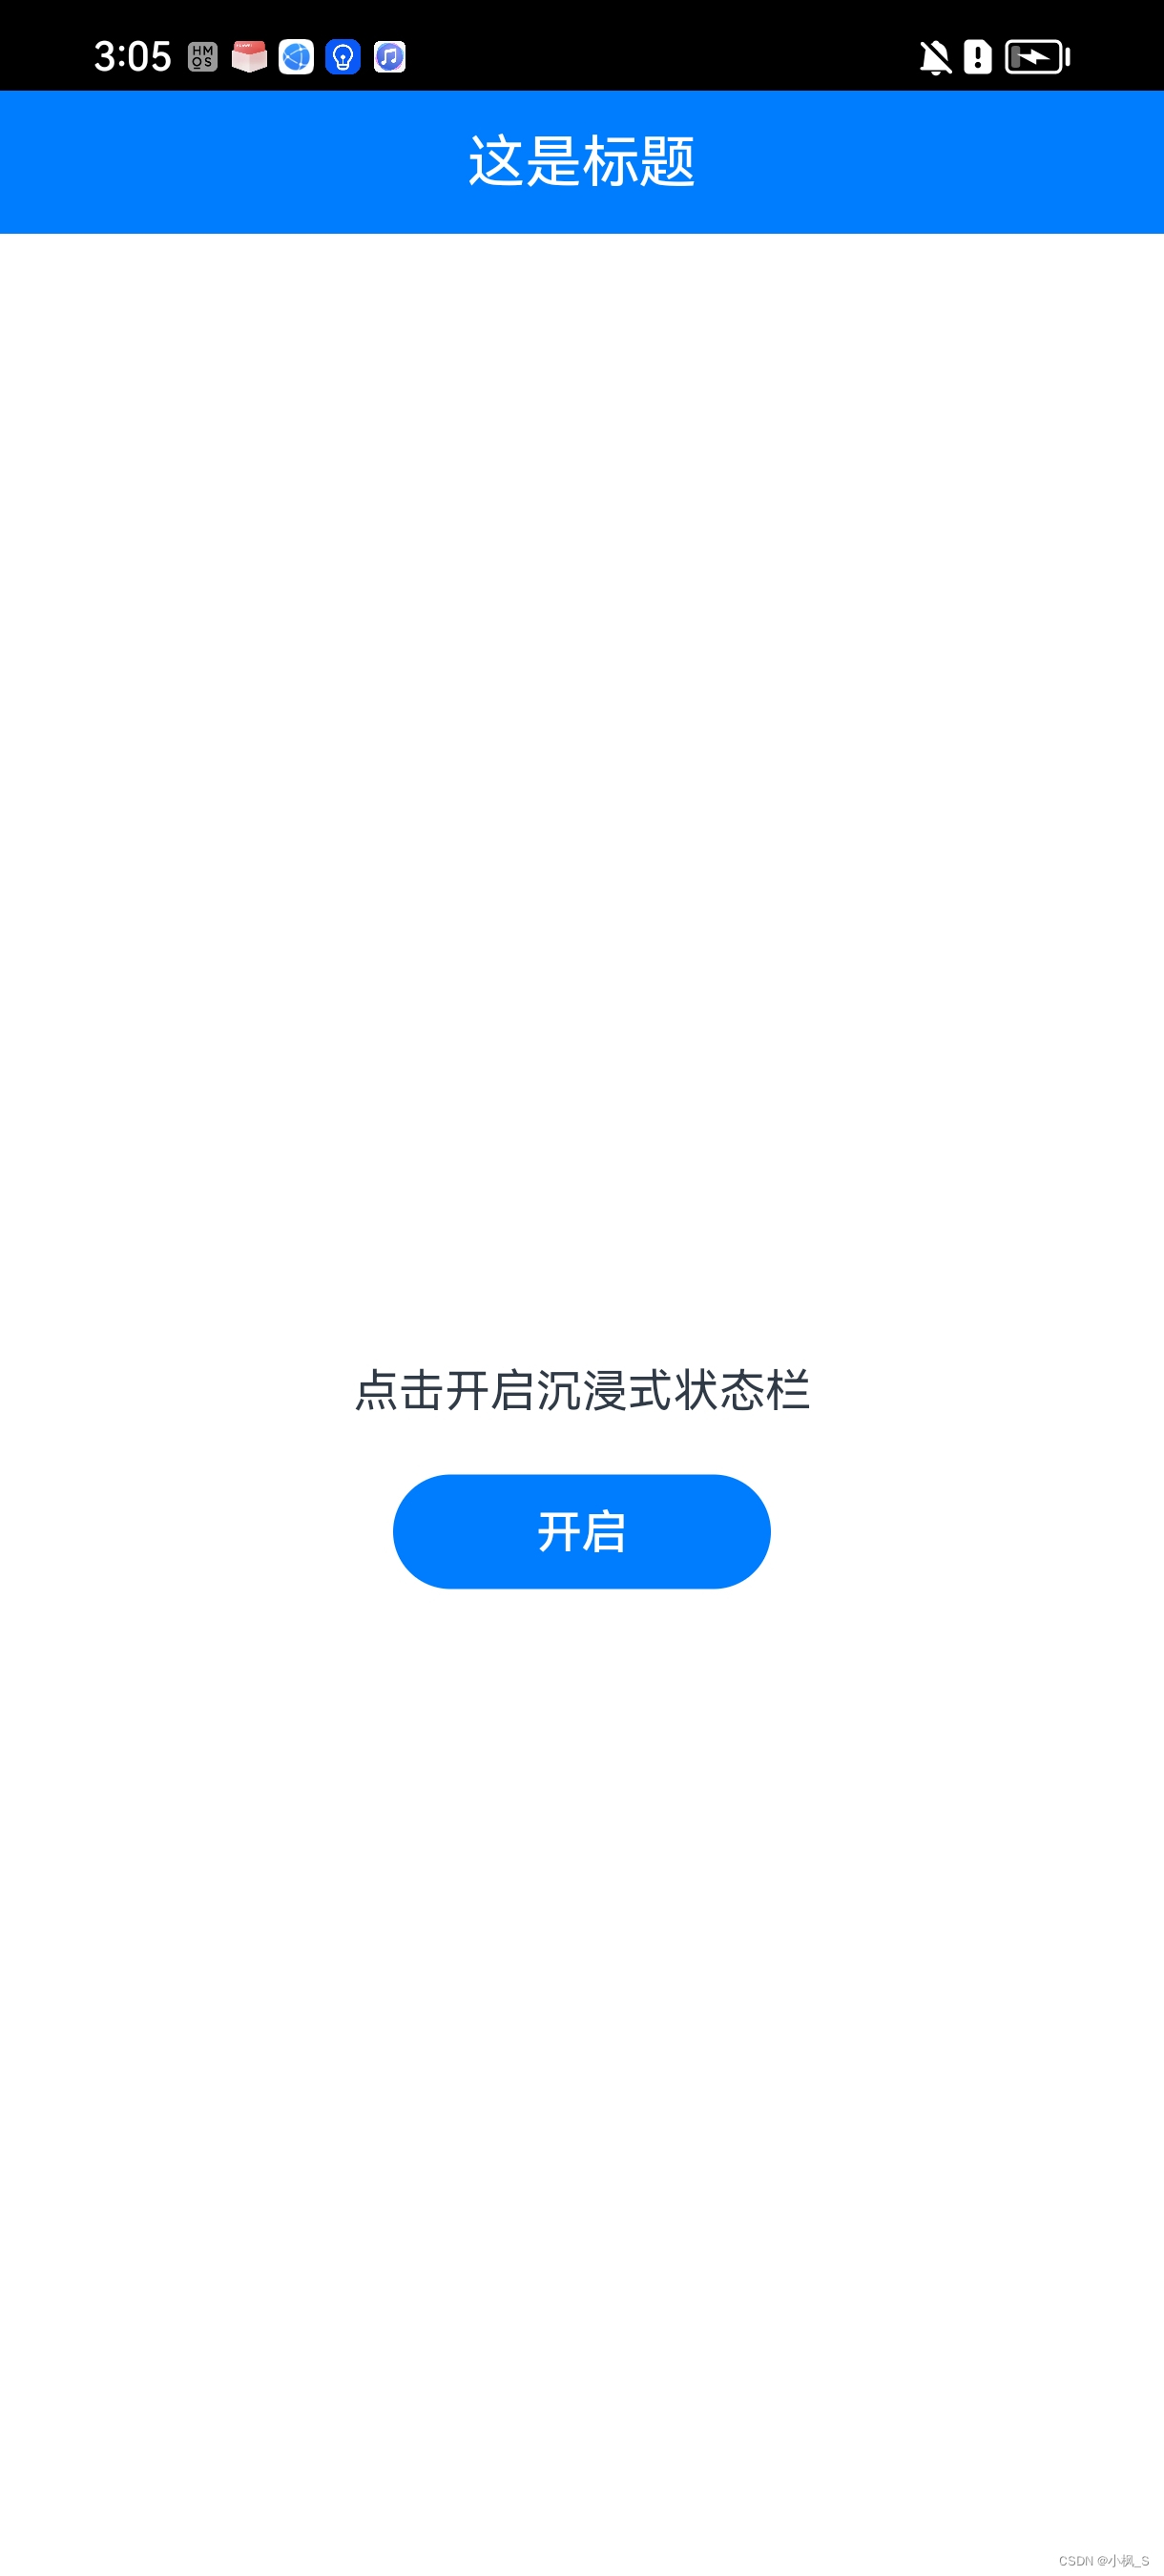
具体效果如下:

我们点击下开启看下效果,

咋看以下好像没什么问题,但是如果手机是居中挖孔屏,那我们的标题就会显示在摄像头位置上,影响页面布局的正常显示,那这个问题应该怎么处理呢。
大家还记得我们上面封装状态栏管理器的时候,对外提供了一个获取状态栏高度偏移量的方法吗,这个时候我们就需要用到它了。
2.2、设置标题栏偏移量
我们在布局中,对标题栏设置一个上方的Padding,数值为状态栏高度即可,那这个偏移量怎么获取呢,在什么时候获取呢?我们接着往下看。
 private open() {
    let windowStage = StatusBarManager.get().getWindowStage();
    if (windowStage) {
      StatusBarManager.get().setImmersiveStatusBar(windowStage)
        .then(() => {
          this.titleBarPadding= StatusBarManager.get().getSystemBarOffset();
        });
    }
  }
我们封装setImmersiveStatusBar的时候,是在执行沉浸式状态栏完成后,使用Promise方式返回了结果,表明沉浸式状态栏开启完成,我们只需要使用then关键字,在代码块中调用 getSystemBarOffset获取高度后设置给titleBarPadding即可。
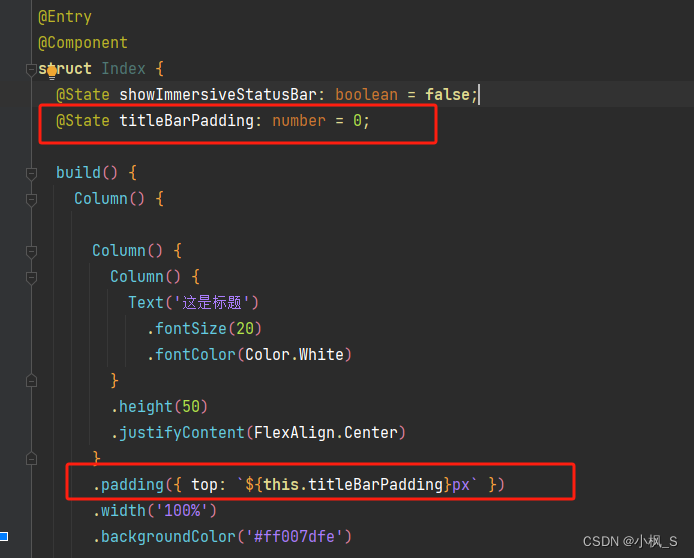
下面贴下修改后的完整代码:
import { StatusBarManager } from '../common/StatusBarManager';

@Entry
@Component
struct Index {
  @State showImmersiveStatusBar: boolean = false;
  @State titleBarPadding: number = 0;

  build() {
    Column() {

      Column() {
        Column() {
          Text('这是标题')
            .fontSize(20)
            .fontColor(Color.White)
        }
        .height(50)
        .justifyContent(FlexAlign.Center)
      }
      .padding({ top: `${this.titleBarPadding}px` })
      .width('100%')
      .backgroundColor('#ff007dfe')

      Column() {
        Text('点击开启沉浸式状态栏')
          .fontSize(16)

        Button(this.showImmersiveStatusBar ? '关闭' : '开启')
          .fontSize(16)
          .margin({ top: 20 })
          .padding({ left: 50, right: 50 })
          .onClick(() => {

            if (this.showImmersiveStatusBar) {
              this.close();
            } else {
              this.open();
            }
            this.showImmersiveStatusBar = !this.showImmersiveStatusBar;
          })
      }
      .width('100%')
      .height('100%')
      .justifyContent(FlexAlign.Center)
    }
    .height('100%')
  }

  private open() {
    let windowStage = StatusBarManager.get().getWindowStage();
    if (windowStage) {
      StatusBarManager.get().setImmersiveStatusBar(windowStage)
        .then(() => {
          this.titleBarPadding = StatusBarManager.get().getSystemBarOffset();
        });
    }
  }

  private close() {
    let windowStage = StatusBarManager.get().getWindowStage();
    if (windowStage) {
      StatusBarManager.get().hideImmersiveStatusBar(windowStage).then(() => {
        this.titleBarPadding = 0;
      })
    }
  }
}
下面我们重新运行看下效果:
看起来效果还可以,开启沉浸式状态栏后,页面的UI展示效果明显提到了一个档次哈哈。
本文到此完毕,如果有什么疑问,欢迎评论区沟通探讨。谢谢大家的阅读!