首先我们了解一下什么是文件:
文件其实就是让我们用来保存数据的地方,它可以用来保存信息,图片,以及音频等各类数据。
文件流:
那我们是如何通过我们的程序来进行对文件的操作呢?这里我们就要提出一个概念,就是我们的文件流,文件流是如何操作的,我们来看一下示意图:这里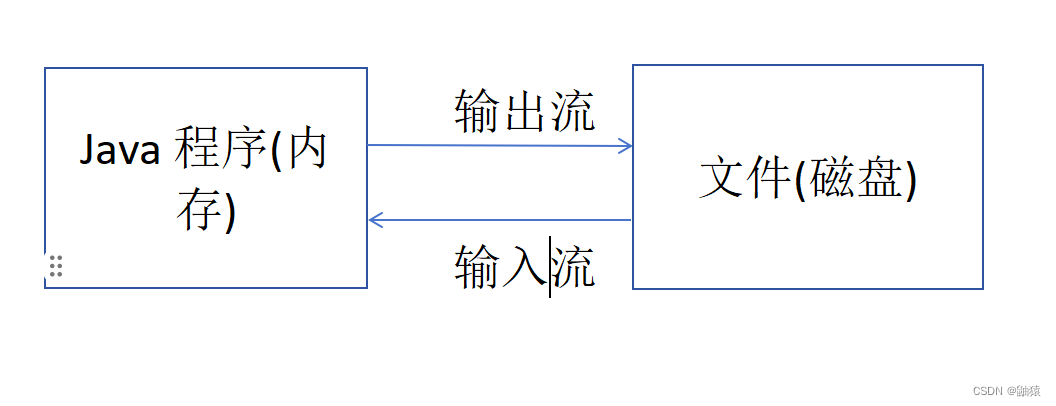
这里我们来介绍一下流的概念:
流:数据在数据源(文件)和程序(内存)之间经历的路径。
输入流:数据从数据源(文件)到程序(内存)的路径。
输出流: 数据从程序(内存)到数据源(文件)的路径。
常见创建文件的方式:
new File(String pathname)//根据路径构建一个File对象。
new File(File parsent, String child)//根据父目录文件 + 子路径构建。
new File(String parsent, String child)//根据父目录 + 子路径构建。
createNewFile,是真正创建文件的方法。我们先来看一下File的构造器有几种,上述只是常用的构造器,我们现在来看一下File的体系图长什么样:
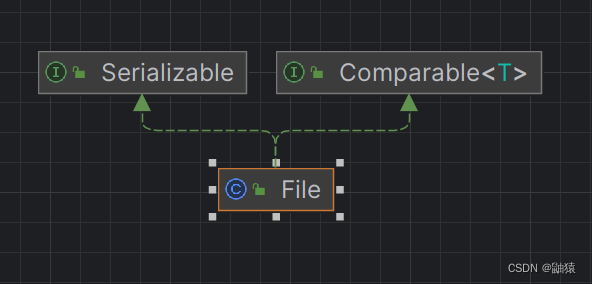
实现的两个接口我们之前也解释过但是没有深入了解,这里最最重要的是实现了可序列化接口
Serializable,这是关键,详情稍后解释,我们先来看一下File的全部构造器有哪些: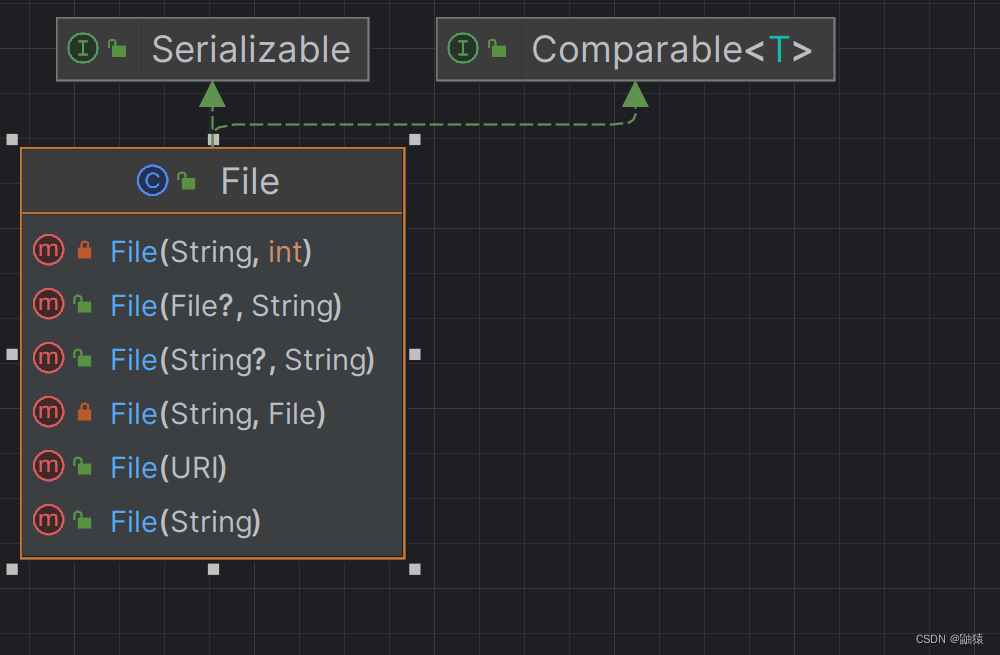
接下来我们通过我们熟悉的三个构造器分别在D盘内创建不同的文件:
new File(String pathname)//根据路径构建一个File对象。
@Test
    public void create01(){
        String pathname = "D://newt1";
        File file = new File(pathname);
        try {
            file.createNewFile();
        } catch (IOException e) {
            throw new RuntimeException(e);
        }
} ![]()
我们发现文件已经被创建完成;
接下来我们输入语句当我们创建成功后输出文件创建成功这个语句。
new File(File parsent, String child)//根据父目录文件 + 子路径构建。
@Test
    public void create02(){
        String pathname = "D://";
        File parsentfile = new File(pathname);
        String Child = "newt2";
        File file = new File(parsentfile, Child);
        try {
            file.createNewFile();
            System.out.println("文件创建成功~");
        } catch (IOException e) {
            throw new RuntimeException(e);
        }
} 
 new File(String parsent, String child)//根据父目录 + 子路径构建。
@Test
    public void create03(){
        String pathname = "D://";
        String Child = "newt3";
        File file = new File(pathname, Child);
        try {
            file.createNewFile();
            System.out.println("文件创建成功~");
        } catch (IOException e) {
            throw new RuntimeException(e);
        }
    }
 我们这边创建文件的方式我们已经掌握了,创建文件之后我们就可以对文件进行相关的操作:
getname(), getAbsoulePath(), getParsent(), length, exits, isFile, isDirectory.
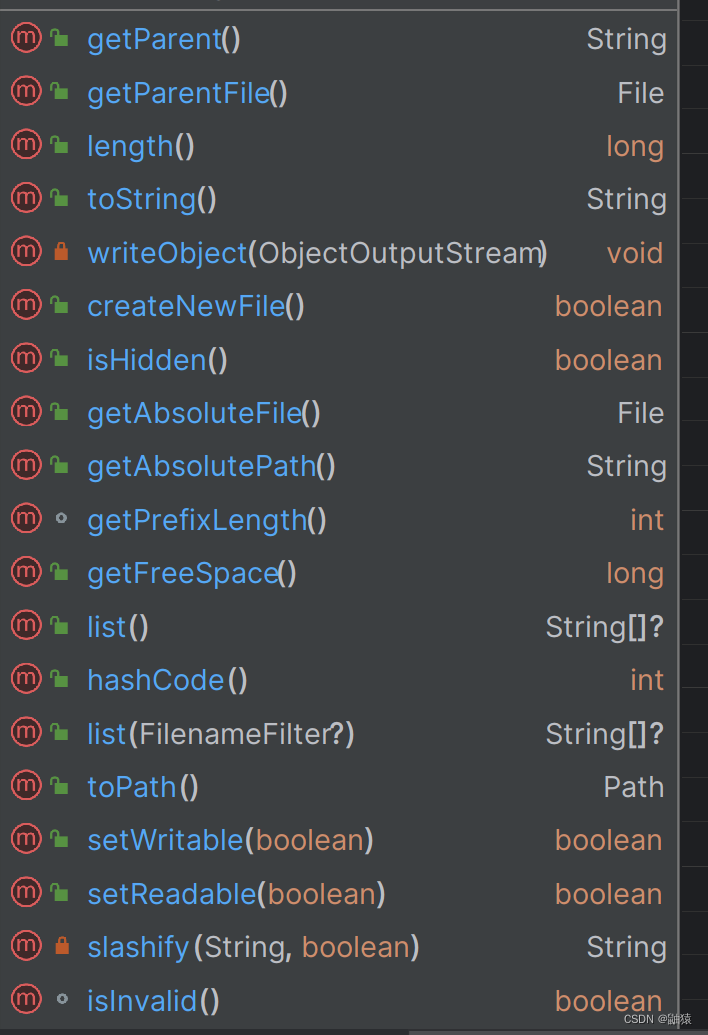
这里全是Compareable接口下的方法,特别的多这里图片中的方法只是一部分,实例我们就不列举了,有兴趣的可以去练几个。
当我们希望创建一个目录文件的时候可以使用以下方法:

 这里我们有两个方法,我们来解释一下两者的区别,第一个方法mkdir()创建的是一级目录,而mkdir()创建的是多级目录。delect可以删除空目录或文件。
接下来我们就来进入主题:
I/O流的原理和流的分类:
I/O流:其实是Input/Ouput的缩写形式,I/O流是非常实用的技术,用来处理数据的传输,如读写/写入文件的操作,网络通讯等。
在java中对于数据的读取和写入,都是通过”流(stream)“的方式来进行的。
java.io.该包下面提供了大量的”流“类和接口,已经很多的相关方法。
流的分类:
按操作数据单位的不同课分为:字节流(8 bit)二进制文件, 字符流(按字符)文本文件。
按照数据流的流向分为:输入流, 输出流。
按照流的角色可分为:节点流, 处理流/包装类。

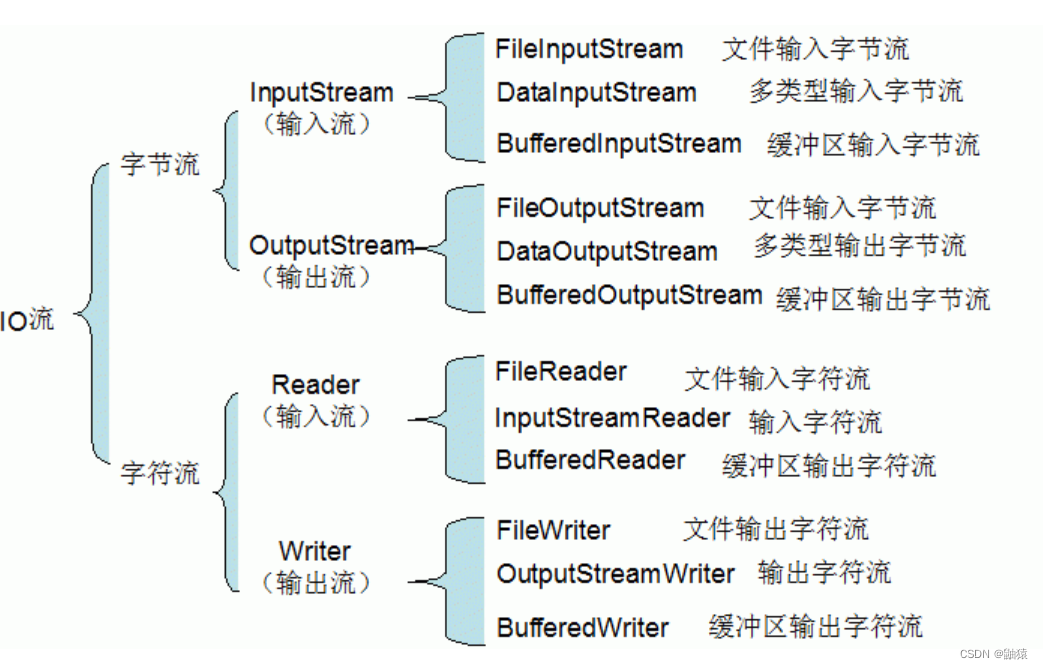
I/O体系图 -- 常用类
 FileInputStream
使用FileInputstream来读取文件Hello.txt文件内的数据:
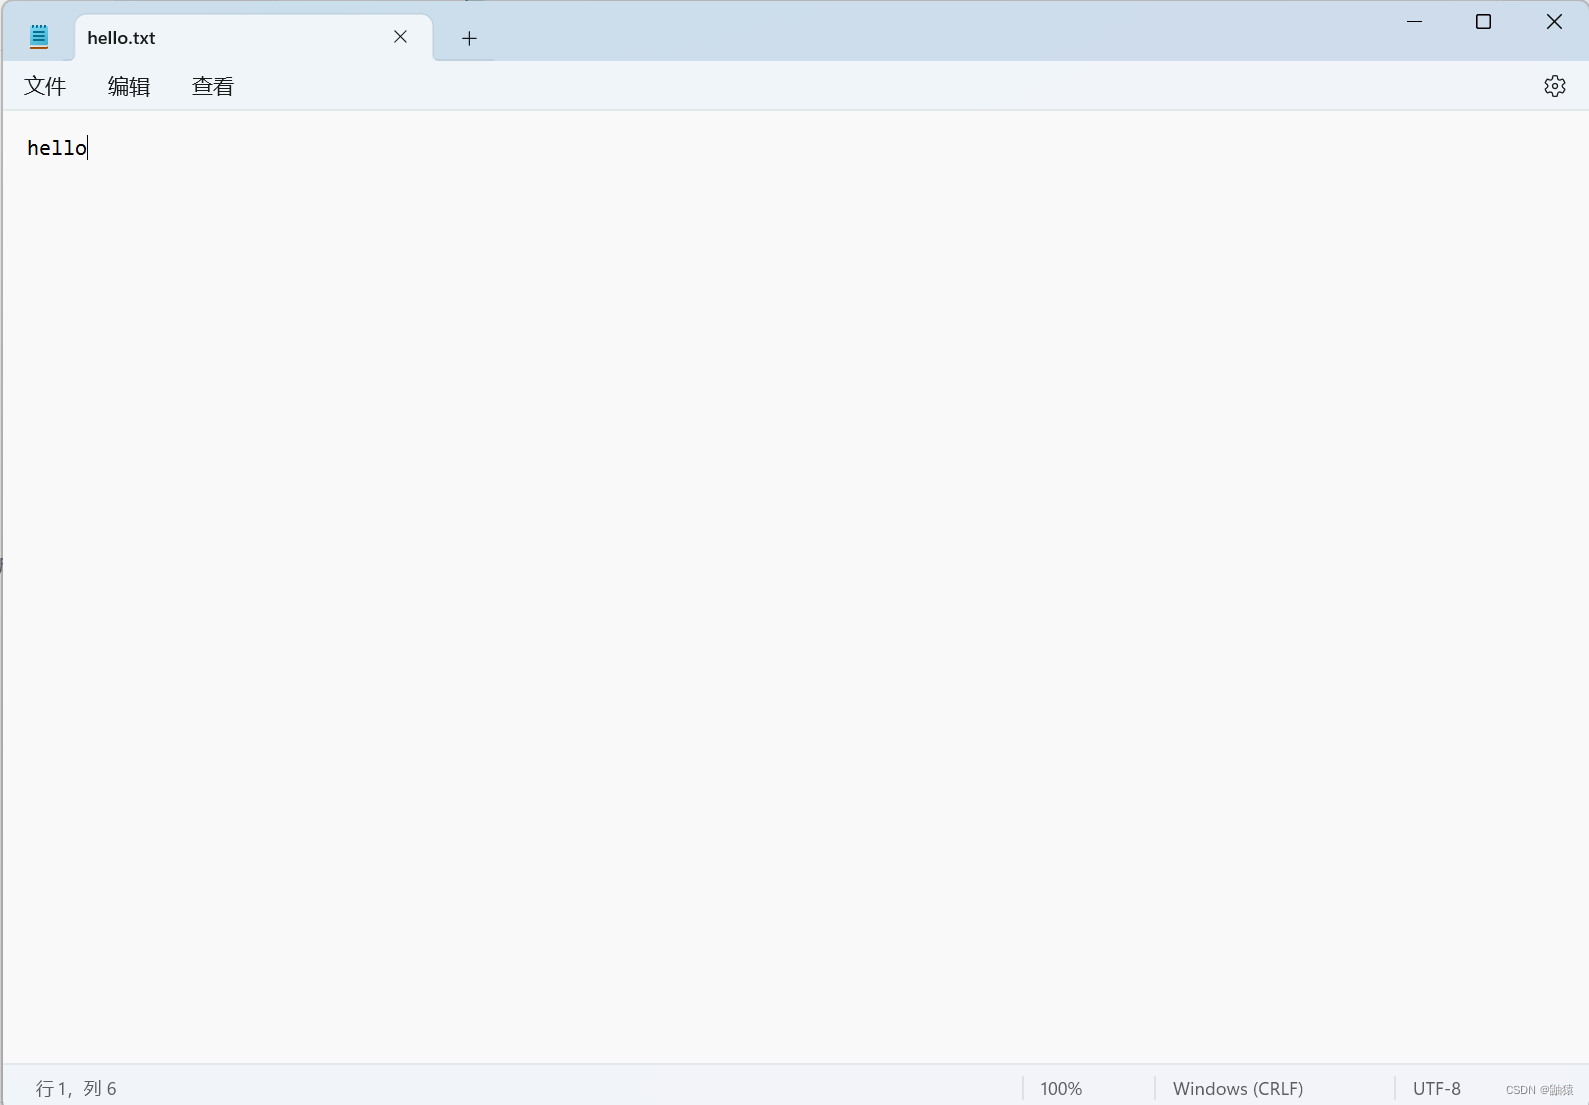 这里我们准备好了hello.txt文件里面也有数据,接下来我们就要用程序来读取数据:
@Test
public void readFile01() {
        String filePath = "D:\\hello.txt";
        int readData = 0;
        FileInputStream fileInputStream = null;
        try {
        //创建 FileInputStream 对象,用于读取 文件
            fileInputStream = new FileInputStream(filePath);
        //从该输入流读取一个字节的数据。 如果没有输入可用,此方法将阻止。
        //如果返回-1 , 表示读取完毕
            while ((readData = fileInputStream.read()) != -1) {
                System.out.print((char) readData);//转成 char 显示
            }
        } catch (IOException e) {
            e.printStackTrace();
        } finally {
        //关闭文件流,释放资源.
            try {
                fileInputStream.close();
            } catch (IOException e) {
                e.printStackTrace();
            }
        }
} 
这里我们发现的单个字节读取效率比较第低这里我们也有相关的优化方法。
优化代码:
import org.junit.jupiter.api.Test;

import java.io.FileInputStream;
import java.io.IOException;
@SuppressWarnings({"all"})
public class Filestream {
    @Test
    public void readFile02() {
        String filePath = "e:\\hello.txt";
        //字节数组
        byte[] buf = new byte[8]; //一次读取 8 个字节.
        int readLen = 0;
        FileInputStream fileInputStream = null;
        try {
        //创建 FileInputStream 对象,用于读取 文件
            fileInputStream = new FileInputStream(filePath);
        //从该输入流读取最多 b.length 字节的数据到字节数组。 此方法将阻塞,直到某些输入可用。
        //如果返回-1 , 表示读取完毕
        //如果读取正常, 返回实际读取的字节数
            while ((readLen = fileInputStream.read(buf)) != -1) {
                System.out.print(new String(buf, 0, readLen));//显示
            }
        } catch (IOException e) {
            e.printStackTrace();
        } finally {
        //关闭文件流,释放资源.
            try {
            fileInputStream.close();
        } catch (IOException e) {
            e.printStackTrace();
            }
        }
    }
}
优化后的代码它可以直接一次性读取8个字节,这肯定会比单个字节读取的效率更高。
FileOutputStream

使用FileOutputStream来对数据进行写入操作:
import org.junit.jupiter.api.Test;

import java.io.FileOutputStream;
import java.io.IOException;
@SuppressWarnings({"all"})
public class Filestream {
    @Test
    public void writeFile() {
        //创建 FileOutputStream 对象
        String filePath = "D:\\hello.txt";
        FileOutputStream fileOutputStream = null;
        try {
            //得到 FileOutputStream 对象 对象
            // 1. new FileOutputStream(filePath) 创建方式,当写入内容是,会覆盖原来的内容
            //2. new FileOutputStream(filePath, true) 创建方式,当写入内容是,是追加到文件后面
            fileOutputStream = new FileOutputStream(filePath, true);
            //写入一个字节
            fileOutputStream.write('H');
            //写入字符串
            String str = "hsp,world!";
            str.getBytes(); //可以把 字符串-> 字节数组
            fileOutputStream.write(str.getBytes());
            /*
            write(byte[] b, int off, int len) 将 len 字节从位于偏移量 off 的指定字节数组写入此文件输出流
            */
            fileOutputStream.write(str.getBytes(), 0, 3);
        } catch (IOException e) {
            e.printStackTrace();
        } finally {
            try {fileOutputStream.close();
            } catch (IOException e) {
                e.printStackTrace();
            }
        }
    }
} 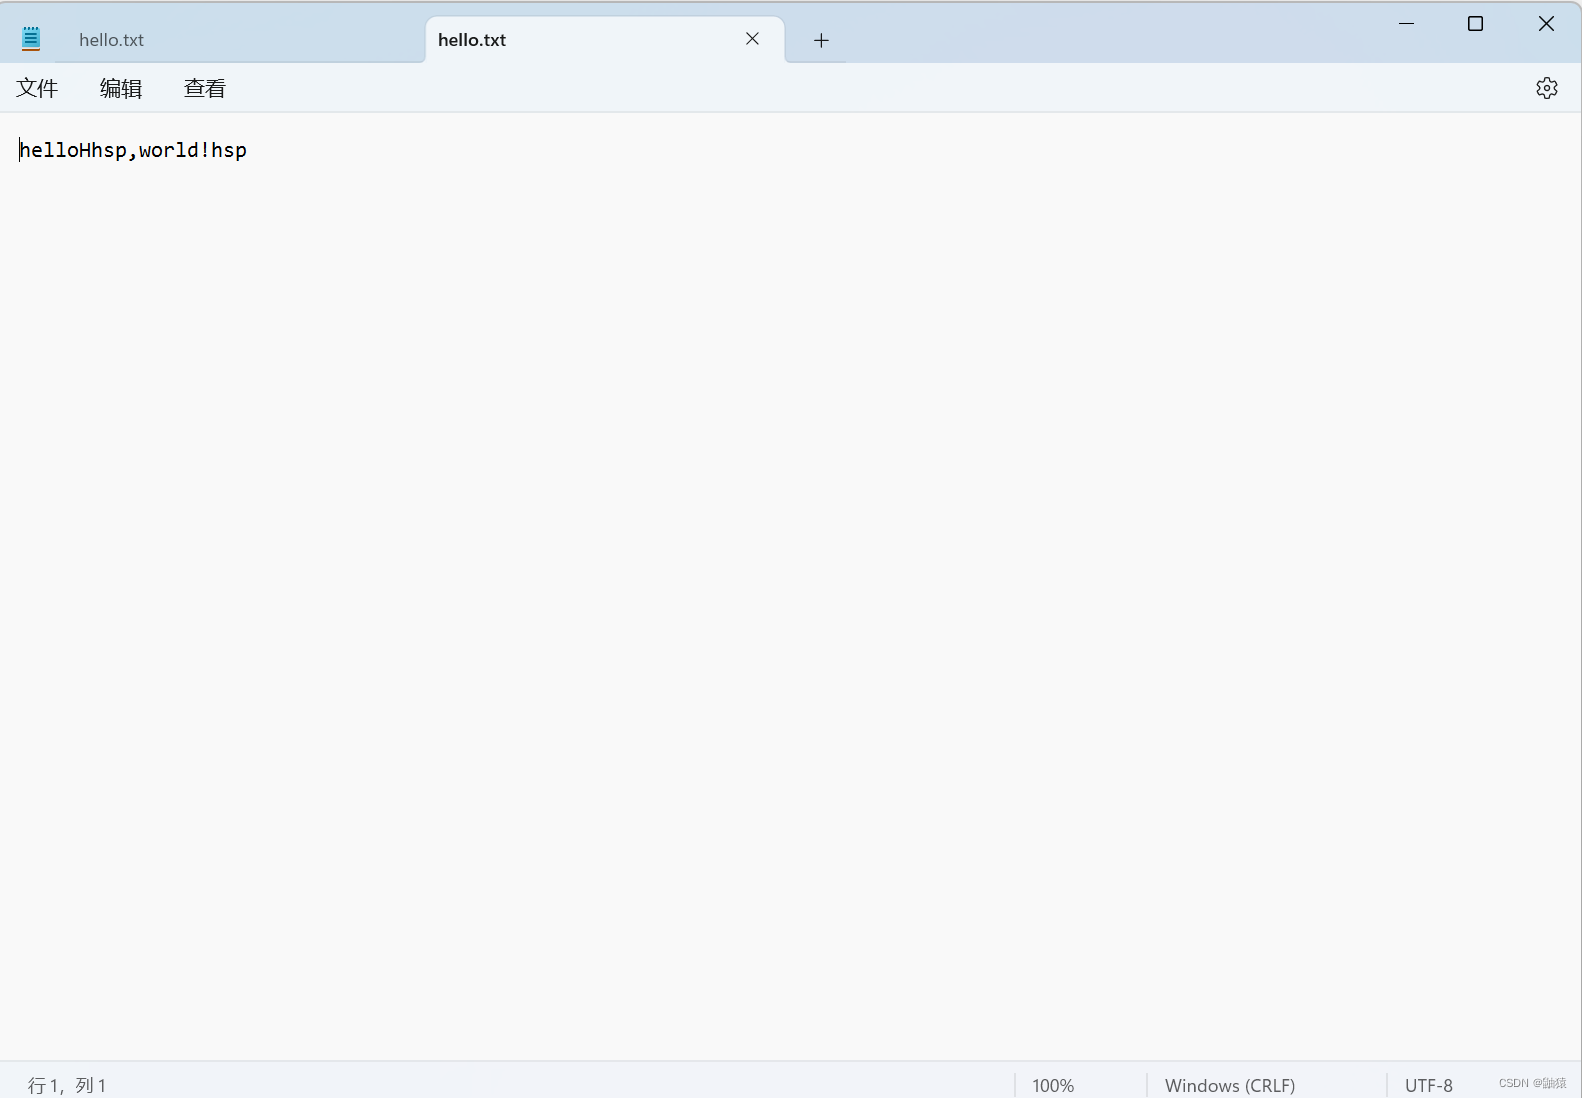
这里我们发现文件的内容追加成功。文件追加的细节点,代码中都有详细的备注,大家可以看一下。
接下来我们来了解一下字符流的相关内容:
字符流:

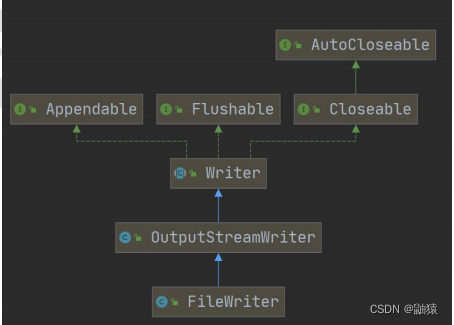
上述则是字符流类型的体系图,接下来我们就来讲解一下相关的细节。


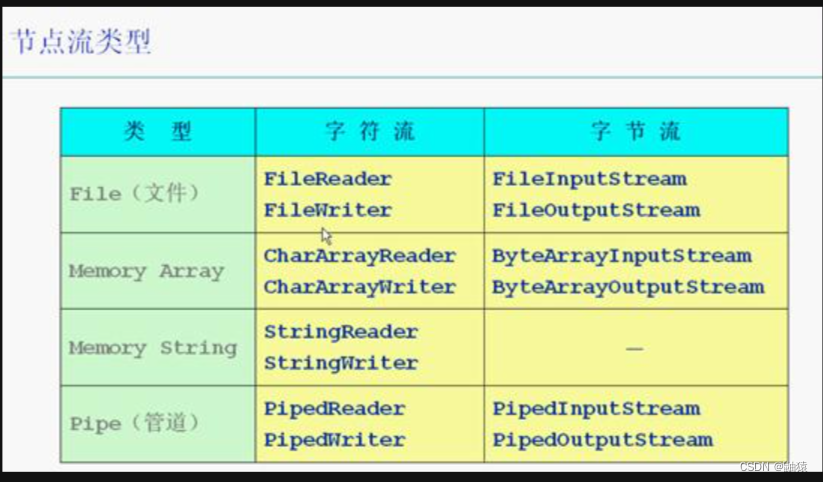


import java.io.BufferedReader;
import java.io.FileReader;
/**
 * @author 韩顺平
 * @version 1.0
 * 演示 bufferedReader 使用
 */
public class Filestream{
    public static void main(String[] args) throws Exception {
        String filePath = "D:\\hello.txt";
//创建 bufferedReader
        BufferedReader bufferedReader = new BufferedReader(new FileReader(filePath));
//读取
        String line; //按行读取, 效率高
//说明
//1. bufferedReader.readLine() 是按行读取文件
//2. 当返回 null 时,表示文件读取完毕
        while ((line = bufferedReader.readLine()) != null) {
            System.out.println(line);
        }
//关闭流, 这里注意,只需要关闭 BufferedReader ,因为底层会自动的去关闭 节点流
        bufferedReader.close();
    }
}
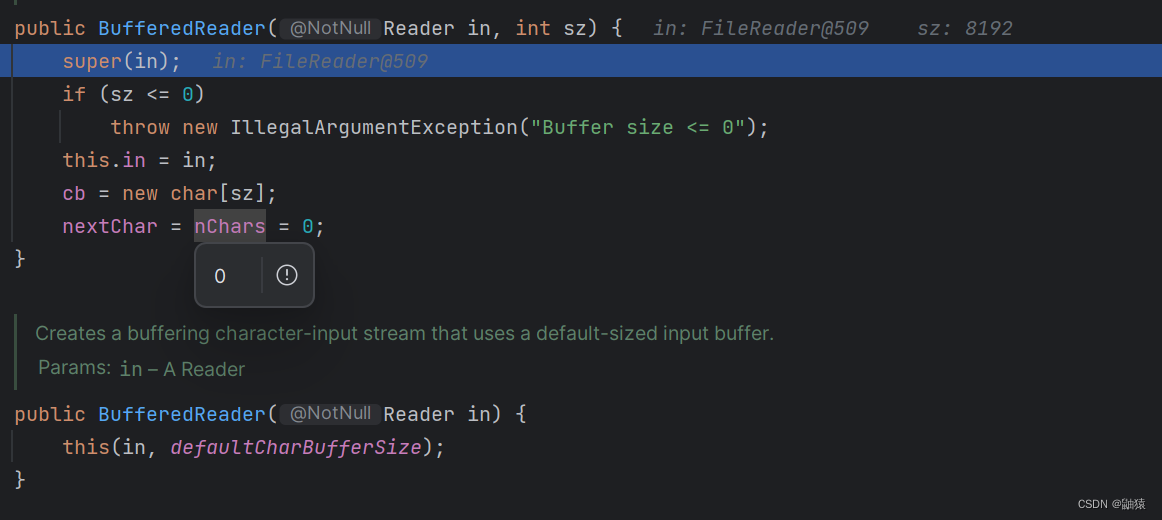
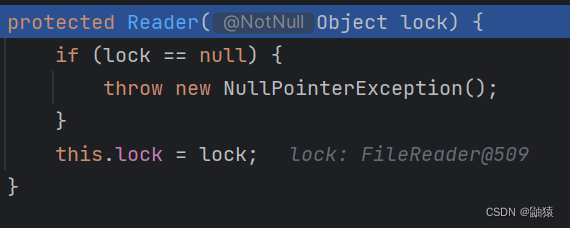
这里我们追一下相关的源码:
