其实,在wpf中,最核心的就是xaml,因为只有xaml,才能体现出用的是wpf,而不是普通的cs文件,cs文件在winform中等等程序都可以使用的,唯独xaml才是wpf中最重要的,最精华的东西,但是xaml说深也深,说浅也浅,很多人都是用winform的做法去开发wpf,从效果上看,没有任何区别的。
今天说一下wpf中的资源,其实也属于xaml中的内容,万物皆资源。在资源中,我们可以插入UC控件以及ViewModel。
1.首先创建一个wpf程序

2. 把UC控件当做资源来使用
2.1首先创建一个UC界面

2.2在App.xaml中把它当做资源
<Application x:Class="WpfApp2.App"
             xmlns="http://schemas.microsoft.com/winfx/2006/xaml/presentation"
             xmlns:x="http://schemas.microsoft.com/winfx/2006/xaml"
             xmlns:local="clr-namespace:WpfApp2"
             StartupUri="MainWindow.xaml">
    <Application.Resources>
        <ResourceDictionary>
            <local:UserControl1 x:Key="ucTest"/>
            <ResourceDictionary.MergedDictionaries>
            </ResourceDictionary.MergedDictionaries>
        </ResourceDictionary>
    </Application.Resources>
</Application>
2.3在主界面直接调用
<Window x:Class="WpfApp2.MainWindow"
        xmlns="http://schemas.microsoft.com/winfx/2006/xaml/presentation"
        xmlns:x="http://schemas.microsoft.com/winfx/2006/xaml"
        xmlns:d="http://schemas.microsoft.com/expression/blend/2008"
        xmlns:mc="http://schemas.openxmlformats.org/markup-compatibility/2006"
        xmlns:local="clr-namespace:WpfApp2"
        mc:Ignorable="d"
        Title="MainWindow" Height="450" Width="800">
    <Grid>
        <ContentControl Content="{StaticResource ucTest}" />
    </Grid>
</Window>
2.4 效果

此时其实就是把UC控件充当了引用界面的方式,效果一毛一样。
3.把ViewModel当做资源来使用
3.1接着上面的代码继续,我们采用简单的MVVM模式
建立MainViewModel
using System;
using System.Collections.Generic;
using System.ComponentModel;
using System.Linq;
using System.Runtime.CompilerServices;
using System.Text;
using System.Threading.Tasks;
using System.Windows.Data;

namespace WpfApp2
{
    public class MainViewModel : BindingBase
    {
        public MainViewModel()
        {

        }

        private string name = "故里2130";

        public string Name
        {
            get { return name; }
            set
            {
                name = value; OnPropertyChanged();//OnPropertyChanged(nameof(name),使用特性,去掉括号的值
            }
        }
    }

    public class BindingBase : INotifyPropertyChanged
    {
        public event PropertyChangedEventHandler PropertyChanged;
        //protected virtual void OnPropertyChanged(string propertyName)
        protected virtual void OnPropertyChanged([CallerMemberName] string propertyName = "")//此处使用特性
        {
            PropertyChanged?.Invoke(this, new PropertyChangedEventArgs(propertyName));
        }
    }
}
3.2在App.xaml中把它当做资源
<Application x:Class="WpfApp2.App"
             xmlns="http://schemas.microsoft.com/winfx/2006/xaml/presentation"
             xmlns:x="http://schemas.microsoft.com/winfx/2006/xaml"
             xmlns:local="clr-namespace:WpfApp2"
             StartupUri="MainWindow.xaml">
    <Application.Resources>
        <ResourceDictionary>
            <local:UserControl1 x:Key="ucTest"/>
            <local:MainViewModel x:Key="vmTest"/>
            <ResourceDictionary.MergedDictionaries>
            </ResourceDictionary.MergedDictionaries>
        </ResourceDictionary>
    </Application.Resources>
</Application>
3.3然后在界面中调用
<Window x:Class="WpfApp2.MainWindow"
        xmlns="http://schemas.microsoft.com/winfx/2006/xaml/presentation"
        xmlns:x="http://schemas.microsoft.com/winfx/2006/xaml"
        xmlns:d="http://schemas.microsoft.com/expression/blend/2008"
        xmlns:mc="http://schemas.openxmlformats.org/markup-compatibility/2006"
        xmlns:local="clr-namespace:WpfApp2"
        mc:Ignorable="d"
        DataContext="{StaticResource vmTest}"
        Title="MainWindow" Height="450" Width="800">
    <StackPanel>
        <TextBlock Text="{Binding Name}"/>
        <ContentControl Content="{StaticResource ucTest}" />
    </StackPanel>
</Window>
3.4效果
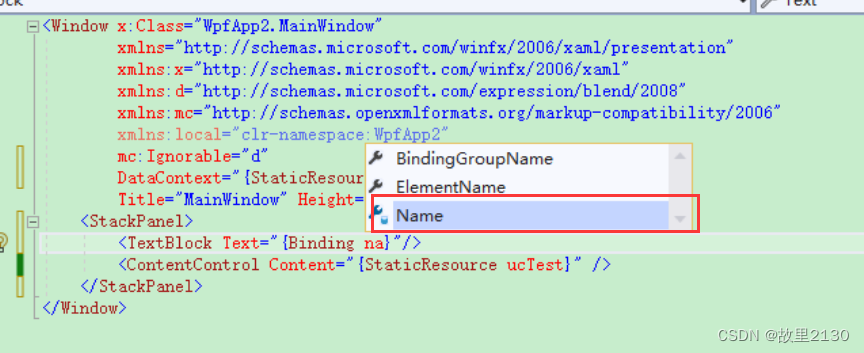
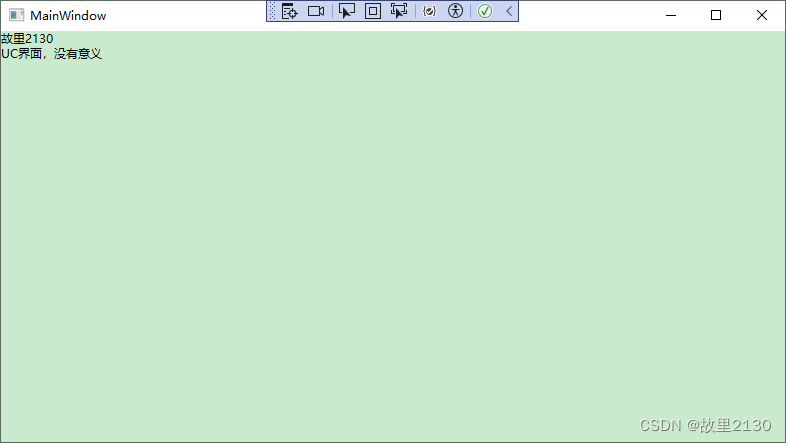
然后可以直接绑定属性的值,非常的方便,不得不说,这个功能很nice。
源码:
https://download.csdn.net/download/u012563853/88623422
来源:
巧妙的使用WPF中的资源-CSDN博客


![[C++进阶]---AVL树模拟实现](https://img-blog.csdnimg.cn/direct/bb32e18c80c14a08846d32179f1927f5.png)
