文章目录
- 🌴序言
- 🍀前置⼯作:配置扫描路径
- 🎄添加注解存储 Bean 对象
- 🌳类注解
- 🚩为什么要这么多类注解
- 🚩注解之间的联系
- 🎋⽅法注解 @Bean
- 🚩⽅法注解需要配合类注解使⽤
- ⭕总结
🌴序言
在博主前面所写的《【JavaEE进阶】 Spring 的创建和使⽤》中我们已经可以实现基本的 Spring 读取和存储对象的操作了,但在操作的过程中我们发现读取和存储对象并没有想象中的那么“简单”,所以接下来我们要学习更加简单的操作 Bean 对象的⽅法。
在 Spring 中想要更简单的存储和读取对象的核⼼是使⽤注解
之前我们存储 Bean 时,需要在 spring-config 中添加⼀⾏ bean 注册内容才⾏,如下图所示:
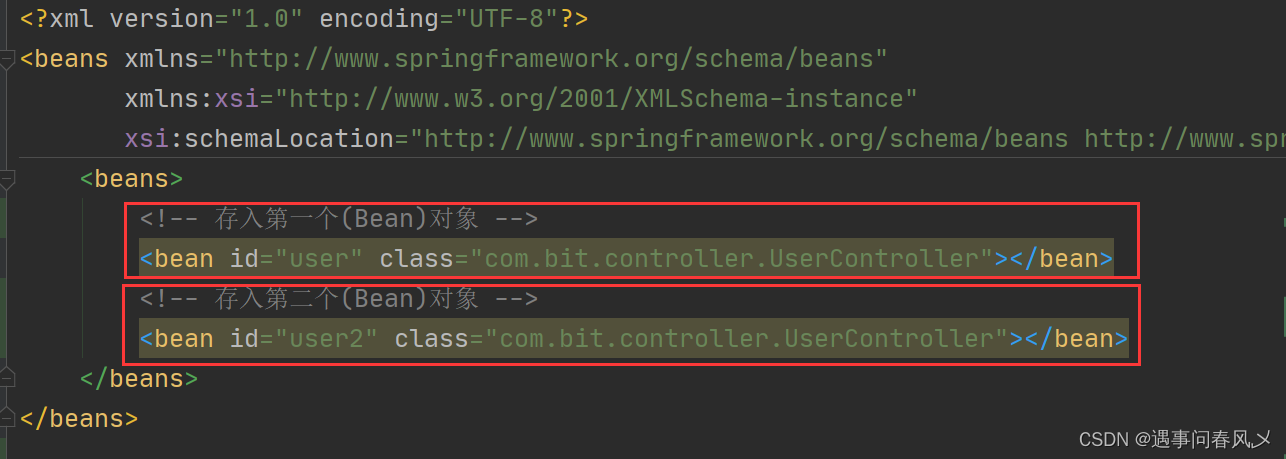
⽽现在我们只需要⼀个注解就可以替代之前要写⼀⾏配置的尴尬了,不过在开始存储对象之前,我们先要来点准备⼯作
🍀前置⼯作:配置扫描路径
注意:
- 想要将对象成功的存储到 Spring 中,我们需要配置⼀下存储对象的扫描包路径,只有被配置的包下的所有类,添加了注解才能被正确的识别并保存到Spring 中
在 spring-config.xml 添加如下配置
<?xml version="1.0" encoding="UTF-8"?>
<beans xmlns="http://www.springframework.org/schema/beans"
       xmlns:xsi="http://www.w3.org/2001/XMLSchema-instance"
       xmlns:content="http://www.springframework.org/schema/context"
       xsi:schemaLocation="http://www.springframework.org/schema/beans http://www.springframework.org/schema/beans/spring-beans.xsd http://www.springframework.org/schema/context https://www.springframework.org/schema/context/spring-context.xsd">
    <content:component-scan base-package="org.example"></content:component-scan>
</beans>
其中标红的⼀⾏为注册扫描的包,如下图所示

注意
- 如果不是在配置的扫描包下的类对象,即使添加了注解,也是不能被存储到 Spring 中的
🎄添加注解存储 Bean 对象
想要将对象存储在 Spring 中,有两种注解类型可以实现:
-
类注解:@Controller、@Service、@Repository、@Component、@Configuration。
-
⽅法注解:@Bean。
🌳类注解
由于这五种类注解的使用方式基本相同,所以博主在这里只演示一种即可
@Controller // 将对象存储到 Spring 中
public class UserController {
	public void sayHi(String name) {
		System.out.println("Hi," + name);
	}
}
我们只需要在存储的对象上面添加相应的注解就好,不同的注解有着不同的含义,不过基本使用相同,后面会进行详细介绍
使用注意事项:
- 由于这是类存储,并不能存储一个类的多个对象
那么如何进行获取呢?
后面会讲更加简单的获取,这里我们还是使用《【JavaEE进阶】 Spring 的创建和使⽤》中所讲的获取方式
public class Application {
	public static void main(String[] args) {
		// 1.得到 spring 上下⽂
		ApplicationContext context =new ClassPathXmlApplicationContext("spring-config.xml");
		// 2.得到 bean
		UserController userController = context.getBean("userController",UserController.class);
		// 3.调⽤ bean ⽅法
		userController.sayHi("遇事问春风乄");
	}
}
读取时的注意事项:
- 由于时类注解,所以我们在获取对象时,我们所填的 id 处的参数有如下约定
- 当首字母和第二字母没有全部大写时采用:类名首字母小写作为id
- 当首字母和第二字母全部大写时采用:类名首字母和第二个字母全部小写
🚩为什么要这么多类注解
既然功能是⼀样的,为什么需要这么多的类注解呢?
这和为什么每个省/市都有⾃⼰的⻋牌号是⼀样的?⽐如陕⻄的⻋牌号就是:陕X:XXXXXX,北京的⻋牌号:京X:XXXXXX,⼀样。甚⾄⼀个省不同的县区也是不同的,⽐如⻄安就是,陕A:XXXXX,咸阳:陕B:XXXXXX,宝鸡,陕C:XXXXXX,⼀样。这样做的好处除了可以节约号码之外,更重要的作⽤是可以直观的标识⼀辆⻋的归属地。
那么为什么需要怎么多的类注解也是相同的原因,就是让程序员看到类注解之后,就能直接了解当前类的⽤途,⽐如:
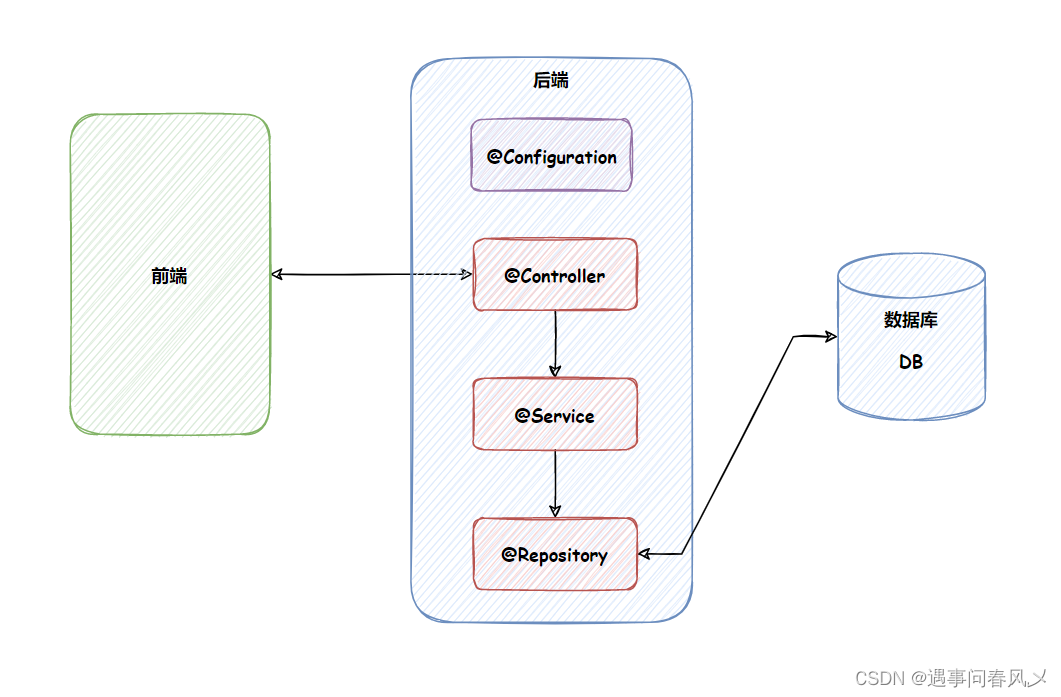
五大类注解用途(重点) :
-
@Controller (控制器) :归属于业务逻辑层,用来控制用户的行为,它用来检查用户参数的有效性(比如检查用户输入的用户名是否有效)。
-
@Service (服务) :归属于服务层,调用持久化类实现相应的功能。[不直接和数据库交互的,它类似于控制中心]
-
@Repository (仓库) :归属于持久层,是直接和数据库进行交互的。通常每一个表都会对应一个@Repos i tory。
-
@Configuration (配置) :归属于配置层,是用来配置当前项目的一些信息。
-
@Component (组件) :归属于公共工具类,提供某些公共方法。
🚩注解之间的联系
查看 @Controller / @Service / @Repository / @Configuration 等注解的源码发现:
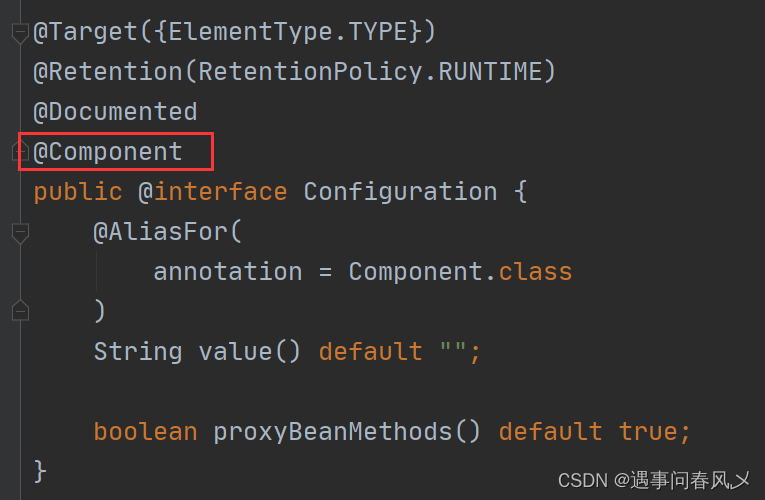
其实这些注解⾥⾯都有⼀个注解 @Component,说明它们本身就是属于 @Component 的“⼦类”
🎋⽅法注解 @Bean
类注解是添加到某个类上的,⽽⽅法注解是放到某个⽅法上的,如以下代码的实现:
首先我们准备Student类如下:
public class Student {
    private String name;
    private int old;

    @Override
    public String toString() {
        return "Student{" +
                "name='" + name + '\'' +
                ", old=" + old +
                '}';
    }

    public String getName() {
        return name;
    }

    public void setName(String name) {
        this.name = name;
    }

    public int getOld() {
        return old;
    }

    public void setOld(int old) {
        this.old = old;
    }
}
然后再创建Students类进行获取每一个Student的对象
package org.example;

import org.springframework.context.annotation.Bean;

public class Students {
    @Bean
    public Student student() {
        Student stu = new Student();
        stu.setName("遇事问春风乄");
        stu.setOld(21);
        return stu;
    }
}
然⽽,当我们写完以上代码,尝试获取 bean 对象中的 user1 时却发现,根本获取不到
package org.example;

import org.springframework.context.ApplicationContext;
import org.springframework.context.support.ClassPathXmlApplicationContext;

public class Main {
    public static void main(String[] args) {
        ApplicationContext context = new ClassPathXmlApplicationContext("spring-config.xml");
        Student student = context.getBean("student",Student.class);
        student.toString();
    }
}
以上程序的执⾏结果如下:

🚩⽅法注解需要配合类注解使⽤
在 Spring 框架的设计中,⽅法注解 @Bean 要配合类注解才能将对象正常的存储到 Spring 容器中(在哪一类中使用了注解方法,该类就得加上类注解),如下代码所示:
package org.example;

import org.springframework.context.annotation.Bean;
import org.springframework.stereotype.Controller;

@Controller
public class Students {
    @Bean
    public Student student() {
        Student stu = new Student();
        stu.setName("遇事问春风乄");
        stu.setOld(21);
        return stu;
    }
}
注意事项:
- 添加类注解的类与添加注解方法的返回类一定要不一样
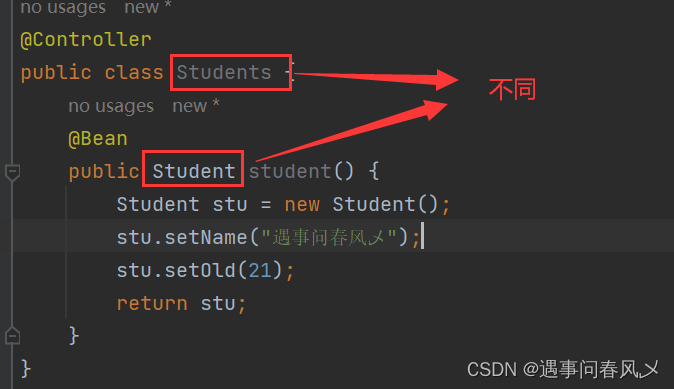
否则就会出现以下问题:
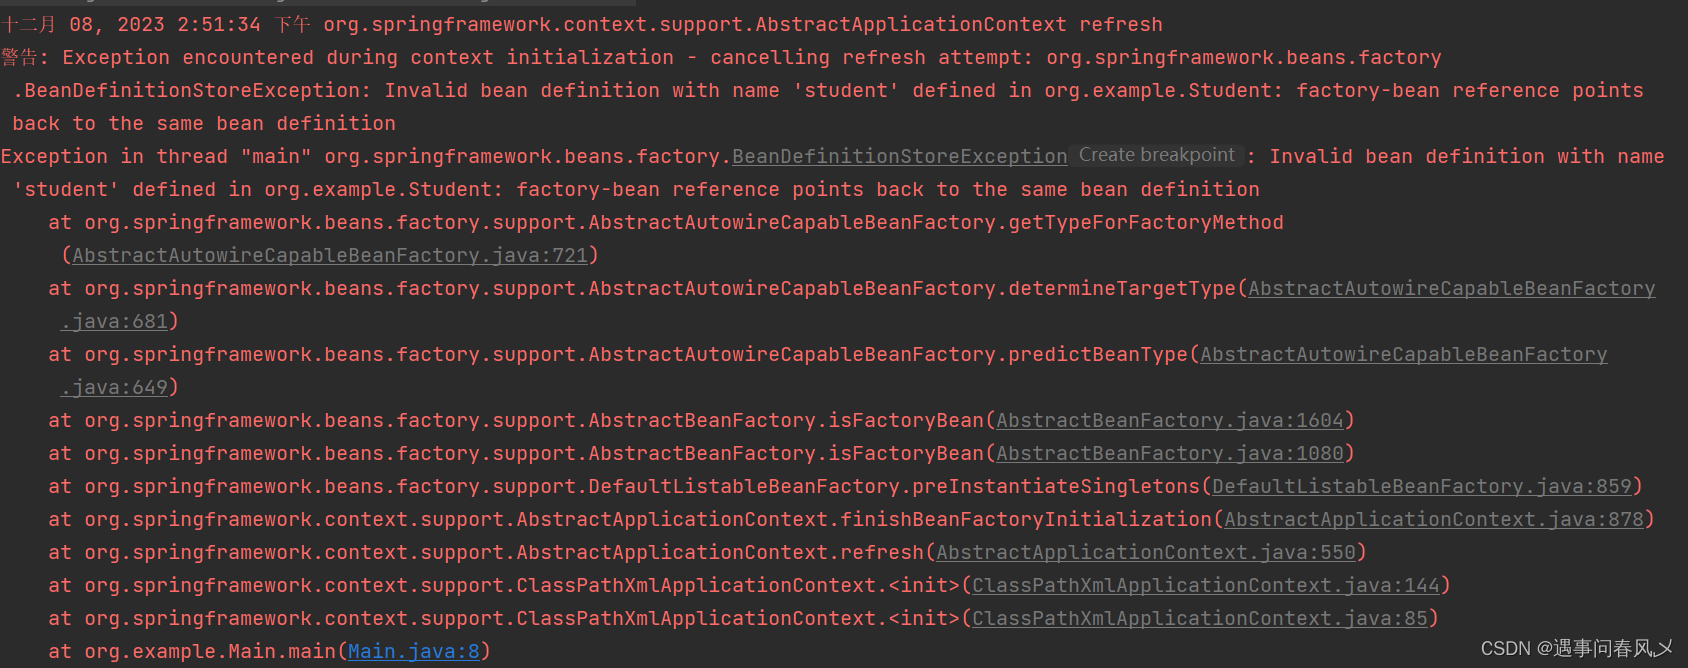
除此之外,在使用时我们还得知道
我们再进行获取的时候的 id 属性默认为你的方法名
我们也可以对通过设置 name 属性给 Bean 对象进⾏重命名操作。而且可以设置多个,且都能获取到
- 注意:一但进行重命名操作后,就不能使用默认方法名了
使用代码如下:
@Controller
public class Students {
    @Bean(name = {"st1","st2","st3"})
    public Student student() {
        Student stu = new Student();
        stu.setName("遇事问春风乄");
        stu.setOld(21);
        return stu;
    }
}
public class Main {
    public static void main(String[] args) {
        ApplicationContext context = new ClassPathXmlApplicationContext("spring-config.xml");
        Student student1 = context.getBean("st1",Student.class);
        System.out.println(student1.toString());
        Student student2 = context.getBean("st2",Student.class);
        System.out.println(student2.toString());
        Student student3 = context.getBean("st3",Student.class);
        System.out.println(student3.toString());
    }
}
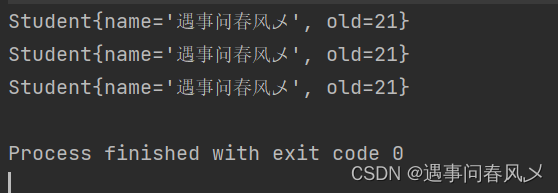
但我们再次使用默认方法名时就会报错:

另外我们在书写时 name={} 可以省略,如下代码所示
@Controller
public class Students {
    @Bean({"st1","st2","st3"})
    public Student student() {
        Student stu = new Student();
        stu.setName("遇事问春风乄");
        stu.setOld(21);
        return stu;
    }
}
⭕总结
关于《【JavaEE进阶】 Spring使用注解存储对象》就讲解到这儿,对于取对象,Spring也有更简单的写法,后续博主会给大家一一介绍!感谢大家的支持,欢迎各位留言交流以及批评指正,如果文章对您有帮助或者觉得作者写的还不错可以点一下关注,点赞,收藏支持一下!

