@State 装饰的变量,或称为状态变量,一旦变量拥有了状态属性,就和自定义组件的渲染绑定起来。当状态改变时,UI 会发生对应的渲染改变(类似 Compose 的 mutablestateof )。
@Prop 装饰的变量可以和父组件建立单向的同步关系。@Prop 装饰的变量是可变的,但是变化不会同步回其父组件。
@Lin k装饰的变量可以与其父组件中对应的数据源建立双向数据绑定。
@State 装饰器使用规则
| @State变量装饰器 | 说明 |
|---|---|
| 装饰器参数 | 无 |
| 同步类型 | 不与父组件中任何类型的变量同步 |
| 允许装饰的变量类型 | Object、class、string、number、boolean、enum 类型,以及这些类型的数组。 类型必须被指定。 不支持 any,不支持简单类型和复杂类型的联合类型,不允许使用 undefined 和 null。 |
| 被装饰变量的初始值 | 必须本地初始化 |
@State 装饰器使用场景
装饰简单类型的变量
@Entry
@Component
struct Index {
  @State count: number = 0;

  build() {
    Column() {
      Button() {
        Text(`click times: ${this.count}`).margin(20)
      }
      .onClick(() => {
        this.count += 1;
      })
      .width('100%')
    }
    .margin(20)
    .height('100%')
  }
}
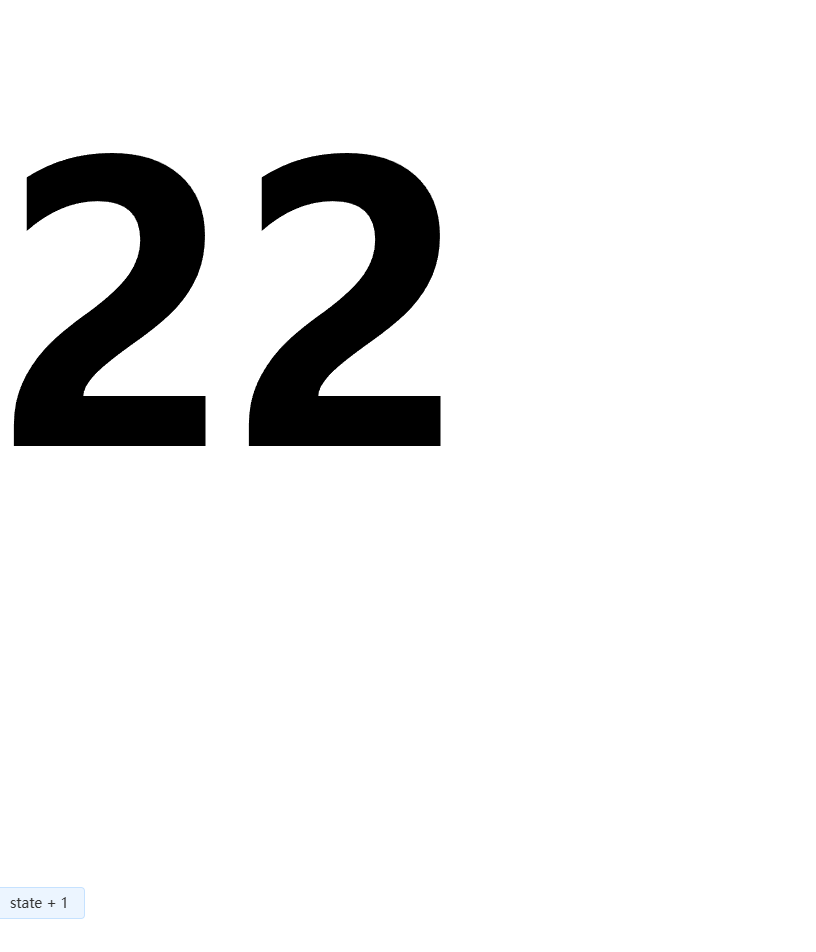
当状态变量 count 改变时,查询到只有 Button 组件关联了它;执行 Button 组件的更新方法,实现按需刷新。
运行效果:

装饰 class 对象类型的变量
@State 除了可以装饰简单类型的变量以外,好可以装修 class 对象,比如,我们在代码里面定义一个 class 类:
class Model {
  public value: string;

  constructor(value: string) {
    this.value = value;
  }
}

@Entry
@Component
struct Index {
  @State count: number = 0;

  build() {
    Column() {
      MyComponent({ count: 1, increaseBy: 2 }).margin(20)
      MyComponent({ title: new Model('Hello, World 2'), count: 7 }).margin(40)
    }
    .width('100%')
  }
}

@Component
struct MyComponent {
  @State title: Model = new Model('Hello World');
  @State count: number = 0;
  private increaseBy: number = 1;

  build() {
    Column() {
      Text(`${this.title.value}`)
      Button(`Click to change title`).onClick(() => {
        // @State 变量的更新将触发上面的 Text 组件内容更新
        this.title.value = this.title.value === 'Hello ArkUI' ? 'Hello World' : 'Hello ArkUI';
      }).margin(20)

      Button(`Click to increase count=${this.count}`).onClick(() => {
        // @State 变量的更新将触发该 Button 组件的内容更新
        this.count += this.increaseBy;
      })
    }
  }
}
运行效果:

可以发现:第一个 MyComponent 内部状态的更改是不会影响第二个 MyComponent。
@Prop 装饰器使用规则
| @Prop变量装饰器 | 说明 |
|---|---|
| 装饰器参数 | 无 |
| 同步类型 | 单向同步:对父组件状态变量值的修改,将同步给子组件@Prop装饰的变量, 子组件@Prop变量的修改不会同步到父组件的状态变量上 |
| 允许装饰的变量类型 | string、number、boolean、enum 类型。 不支持 any,不允许使用 undefined 和 null。 必须指定类型。 在父组件中,传递给 @Prop 装饰的值不能为 undefined 或者 null |
| 被装饰变量的初始值 | 允许本地初始化 |
要理解 @Prop 变量值初始化和更新机制,有必要了解父组件和拥有 @Prop 变量的子组件初始渲染和更新流程。
1. 初始渲染:
⇒ 执行父组件的 build() 函数将创建子组件的新实例,将数据源传递给子组件;
⇒ 初始化子组件 @Prop 装饰的变量。
2. 更新:
⇒ 子组件 @Prop 更新时,更新仅停留在当前子组件,不会同步回父组件;
⇒ 当父组件的数据源更新时,子组件的 @Prop 装饰的变量将被来自父组件的数据源重置,所有 @Prop 装饰的本地的修改将被父组件的更新覆盖。
@Prop 装饰器使用场景
父组件 @State 到子组件 @Prop 简单数据类型同步
@Entry
@Component
struct Index {
  @State parentValue: number = 10;

  build() {
    Column() {
      Text(`父组件传递数据 ${this.parentValue}`).margin(20)
      // 父组件的数据源的修改会同步给子组件
      Button(`加一个 + 1`).onClick(() => {
        this.parentValue += 1;
      })
      // 父组件的修改会同步给子组件
      Button(`减一个 -1`).onClick(() => {
        this.parentValue -= 1;
      }).margin(20)

      CountDownComponent({ subValue: this.parentValue, costOfOneAttempt: 2 })
    }
    .width('100%')
  }
}

@Component
struct CountDownComponent {
  @Prop subValue: number;
  costOfOneAttempt: number = 1;

  build() {
    Column() {
      if (this.subValue > 0) {
        Text(`子组件获取到的数据: ${this.subValue}`).margin({ top: 50 })
      } else {
        Text('Over!').margin({ top: 50 })
      }
      // @Prop 装饰的变量不会同步给父组件
      Button(`子组件内部操作`).onClick(() => {
        this.subValue -= this.costOfOneAttempt;
      }).margin(20)
    }
  }
}
运行效果:

解读下代码:
- CountDownComponent 子组件首次创建时其 @Prop 装饰的 subValue 变量将从父组件 @State 装饰的 parentValue 变量初始化;
- 按“+1”或“-1”按钮时,父组件的 @State 装饰的 parentValue 值会变化,这将触发父组件重新渲染,在父组件重新渲染过程中会刷新使用 parentValue 状态变量的 UI 组件并单向同步更新 CountDownComponent 子组件中的 subValue 值;
- 更新 subValue 状态变量值也会触发 CountDownComponent 的重新渲染,在重新渲染过程中,评估使用 subValue 状态变量的 if 语句条件(this.subValue > 0),并执行 true 分支中的使用 subValue 状态变量的 UI 组件相关描述来更新 Text 组件的 UI 显示;
- 当按下子组件 CountDownComponent 的“子组件内部操作”按钮时,其 @Prop 变量 subValue 将被更改,但是 subValue 值的更改不会影响父组件的 parentValue 值;
- 父组件的 parentValue 值会变化时,父组件的修改将覆盖掉子组件 CountDownComponent 中 subValue 本地的修改。
父组件 @State 数组项到子组件 @Prop 简单数据类型同步
@Entry
@Component
struct Index {
  @State arr: number[] = [1,2,3];

  build() {
    Column() {
      Child({value: this.arr[0]})
      Child({value: this.arr[1]})
      Child({value: this.arr[2]})

      Divider().height(5)

      ForEach(this.arr,
        item => {
          Child({value: item})
        },
        item => item.toString()
      )

      Divider().height(5)

      Text('replace entire arr')
        .fontSize(40)
        .onClick(()=>{
          // 两个数组都包含项“3”。
          this.arr = this.arr[0] == 1 ? [3,4,5] : [1,2,3];
        })
    }
    .width('100%')
  }
}

@Component
struct Child {
  @Prop value: number;

  build() {
    Text(`${this.value}`)
      .fontSize(50)
      .onClick(()=>{this.value++})
  }
}
看下效果:

页面显示正常,接下来有意思的事情就发生了,我们看下实操效果:

方便你看到前后效果,我们对比下前后的结果图:

让我们来分析下这个数值变化:
- 在子组件 Child 中做的所有的修改都不会同步回父组件 Index 组件,所以即使 6 个组件显示都为 6,但在父组件 Index 中,this.arr 保存的值依旧是 [1,2,3]。
- 点击 replace entire arr,this.arr[0] == 1 成立,将 this.arr 赋值为 [3, 4, 5];
- 因为 this.arr[0] 已更改,Child({value: this.arr[0]}) 组件将 this.arr[0] 更新同步到实例 @Prop 装饰的变量。Child({value: this.arr[1]}) 和 Child({value: this.arr[2]}) 同理。
- this.arr 的更改触发 ForEach 更新,this.arr 更新的前后都有数值为 3 的数组项:[3, 4, 5] 和[1, 2, 3]。根据 diff 算法,数组项“3”将被保留,删除“1”和“2”的数组项,添加为“4”和“5”的数组项(关于 ForEach 的这个特性,不懂的可以查看 【 写给初学者的 HarmonyOS 教程 – 循环渲染(ForEach)】)。这就意味着,数组项“3”的组件不会重新生成,而是将其移动到第一位。所以“3”对应的组件不会更新,此时“3”对应的组件数值为“6”,ForEach最终的渲染结果是“6”,“4”,“5”。
从父组件中的 @State 类对象属性到 @Prop 简单类型的同步
class Book {
  public title: string;
  public pages: number;
  public readIt: boolean = false;

  constructor(title: string, pages: number) {
    this.title = title;
    this.pages = pages;
  }
}

@Component
struct ReaderComp {
  @Prop title: string;
  @Prop readIt: boolean;

  build() {
    Row() {
      Text(this.title)
      Text(`... ${this.readIt ? '已阅读' : '还没读'}`)
        .onClick(() => this.readIt = true)
    }
  }
}

@Entry
@Component
struct Index {
  @State book: Book = new Book('《 肖生克的救赎 》', 765);

  build() {
    Column() {
      ReaderComp({ title: this.book.title, readIt: this.book.readIt }).margin(20)
      ReaderComp({ title: this.book.title, readIt: this.book.readIt }).margin(20)
      ReaderComp({ title: this.book.title, readIt: this.book.readIt }).margin(20)
      ReaderComp({ title: this.book.title, readIt: this.book.readIt }).margin(20)
    }
    .width('100%')
  }
}
代码很简单,不用过多解释,直接看效果:

@Prop 本地初始化不和父组件同步
为了支持 @Component 装饰的组件复用场景,@Prop 支持本地初始化,这样可以让 @Prop 是否与父组件建立同步关系变得可选。当且仅当 @Prop 有本地初始化时,从父组件向子组件传递 @Prop 的数据源才是可选的。
下面的示例中,子组件包含两个 @Prop 变量:
- @Prop customCounter 没有本地初始化,所以需要父组件提供数据源去初始化 @Prop,并当父组件的数据源变化时,@Prop 也将被更新;
- @Prop customCounter2 有本地初始化,在这种情况下,@Prop 依旧允许但非强制父组件同步数据源给 @Prop。
@Component
struct MyComponent {
  @Prop customCounter: number;
  @Prop customCounter2: number = 5;

  build() {
    Column() {
      Row() {
        Text(`From Main: ${this.customCounter}`).width(90).height(40).fontColor('#FF0010')
      }

      Row() {
        Button('子组件本地修改 !').width(180).height(60).margin({ top: 10 })
          .onClick(() => {
            this.customCounter2++
          })
      }.height(100).width(180)

      Row() {
        Text(`Custom Local: ${this.customCounter2}`).width(90).height(40).fontColor('#FF0010')
      }
    }
  }
}

@Entry
@Component
struct Index {
  @State mainCounter: number = 10;

  build() {
    Column() {
      Row() {
        Column() {
          Button('修改数值').width(480).height(60).margin({ top: 10, bottom: 10 })
            .onClick(() => {
              this.mainCounter++
            })
        }
      }

      Row() {
        // customCounter 必须从父组件初始化,因为 MyComponent 的 customCounter 成员变量缺少本地初始化;此处,customCounter2 可以不做初始化。
        MyComponent({ customCounter: this.mainCounter })
        // customCounter2 也可以从父组件初始化,父组件初始化的值会覆盖子组件 customCounter2 的本地初始化的值
        MyComponent({ customCounter: this.mainCounter, customCounter2: this.mainCounter })
      }
    }
  }
}
效果:

@Link 装饰器使用规则
| @Link变量装饰器 | 说明 |
|---|---|
| 装饰器参数 | 无 |
| 同步类型 | 双向同步。 父组件中 @State/@StorageLink/@Link 和子组件 @Link 可以建立双向数据同步,反之亦然。 |
| 允许装饰的变量类型 | Object、class、string、number、boolean、enum 类型,以及这些类型的数组。 类型必须被指定,且和双向绑定状态变量的类型相同。 不支持 any,不支持简单类型和复杂类型的联合类型,不允许使用 undefined 和 null。 |
| 被装饰变量的初始值 | 无,禁止本地初始化。 |
为了了解 @Link 变量初始化和更新机制,有必要先了解父组件和拥有 @Link 变量的子组件的关系,初始渲染和双向更新的流程(以父组件为 @State 为例)。
1. 初始渲染:
执行父组件的 build() 函数后将创建子组件的新实例。初始化过程如下:
⇒ 必须指定父组件中的 @State 变量,用于初始化子组件的 @Link 变量。子组件的 @Link 变量值与其父组件的数据源变量保持同步(双向数据同步)。
⇒ 父组件的 @State 状态变量包装类通过构造函数传给子组件,子组件的 @Link 包装类拿到父组件的 @State 的状态变量后,将当前 @Link 包装类 this 指针注册给父组件的 @State 变量。
2. @Link 的数据源更新:
即父组件中状态变量更新,引起相关子组件的 @Link 的更新,处理步骤:
⇒ 通过初始渲染的步骤可知,子组件 @Link 包装类把当前 this 指针注册给父组件。父组件 @State 变量变更后,会遍历更新所有依赖它的系统组件(elementid)和状态变量(比如 @Link 包装类)。
⇒ 通知 @Link 包装类更新后,子组件中所有依赖 @Link 状态变量的系统组件(elementId)都会被通知更新。以此实现父组件对子组件的状态数据同步。
3. @Link的更新:
当子组件中 @Link 更新后,处理步骤如下(以父组件为 @State 为例):
⇒ @Link 更新后,调用父组件的 @State 包装类的 set 方法,将更新后的数值同步回父组件。
⇒ 子组件 @Link 和父组件 @State 分别遍历依赖的系统组件,进行对应的 UI 的更新。以此实现子组件 @Link 同步回父组件 @State。
@Link 装饰器使用场景
简单类型和类对象类型的 @Link
以下示例中,点击父组件 ShufflingContainer 中的 “父组件: 设置红色 Button” 和 “父组件: 设置蓝色 Button”,可以从父组件将变化同步给子组件,子组件 GreenButton 和 RedButton 中 @Link 装饰变量的变化也会同步给其父组件。
class BlueButtonState {
  width: number = 0;
  constructor(width: number) {
    this.width = width;
  }
}

@Component
struct BlueButton {
  @Link blueButtonState: BlueButtonState;
  build() {
    Button('Blue Button')
      .width(this.blueButtonState.width)
      .height(120.0)
      .backgroundColor('#085DFF')
      .onClick(() => {
        if (this.blueButtonState.width < 400) {
          // 更新 class 的属性,变化可以被观察到同步回父组件
          this.blueButtonState.width += 50;
        } else {
          // 更新 class 的属性,变化可以被观察到同步回父组件
          this.blueButtonState = new BlueButtonState(200);
        }
      })
  }
}
@Component
struct RedButton {
  @Link redButtonState: number;
  build() {
    Button('Red Button')
      .width(this.redButtonState)
      .height(150.0)
      .backgroundColor('#ff0000')
      .onClick(() => {
        // 子组件的简单类型可以同步回父组件
        this.redButtonState += 20.0;
      })
  }
}
@Entry
@Component
struct ShufflingContainer {
  @State blueButtonState: BlueButtonState = new BlueButtonState(200);
  @State redButtonProp: number = 100;
  build() {
    Column() {
      // class 类型从父组件 @State 向子组件 @Link 数据同步
      Button('父组件: 设置绿色 Button')
        .onClick(() => {
          this.blueButtonState.width = (this.blueButtonState.width < 400) ? this.blueButtonState.width + 100 : 100;
        }).margin(20)
      // class 类型初始化 @Link
      BlueButton({ blueButtonState: $blueButtonState })
      Divider().height(20)
      // 简单类型从父组件 @State 向子组件 @Link 数据同步
      Button('父组件: 设置红色 Button')
        .onClick(() => {
          this.redButtonProp = (this.redButtonProp < 400) ? this.redButtonProp + 100 : 100;
        }).margin(20)
      // 简单类型初始化 @Link
      RedButton({ redButtonState: $redButtonProp })
    }.width('100%').justifyContent(FlexAlign.Center)
  }
}
运行效果:

数组类型的@Link
@Component
struct Child {
  @Link items: number[];

  build() {
    Column() {
      Button(`Button1: push`).onClick(() => {
        this.items.push(this.items.length + 1);
      }).margin(20)
      Button(`Button2: replace whole item`).onClick(() => {
        this.items = [100, 200, 300];
      })
    }
  }
}

@Entry
@Component
struct Parent {
  @State arr: number[] = [1, 2, 3];

  build() {
    Column() {
      Child({ items: $arr })
      Divider().height(20)
      ForEach(this.arr,
        item => {
          Text(`${item}`)
        },
        item => item.toString()
      )
    }.width('100%')
  }
}
运行效果:

ArkUI 框架可以观察到数组元素的添加,删除和替换。在该示例中 @State 和 @Link 的类型是相同的 number[],不允许将@Link 定义成 number 类型(@Link item : number),并在父组件中用 @State 数组中每个数据项创建子组件。