说在前面
在日常的图片处理中,我们经常会遇到需要抠图的情况,无论是为了美化照片、制作海报,还是进行图片合成。抠图对于我们来说也是一种很常用的功能了,今天就让我们一起来看下怎么使用canvas来实现一个锚点抠图功能。
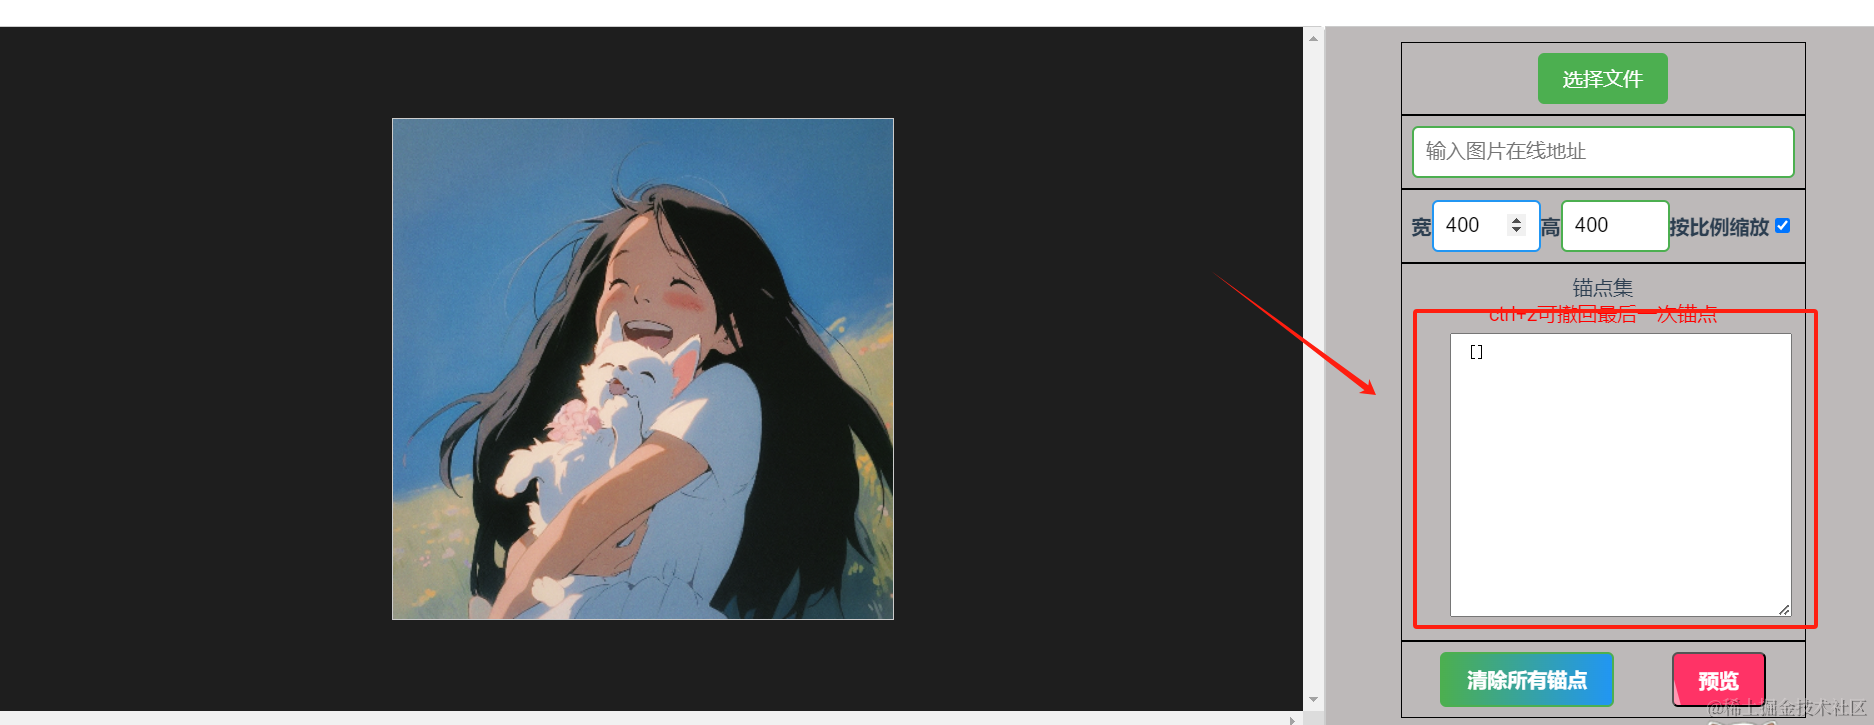
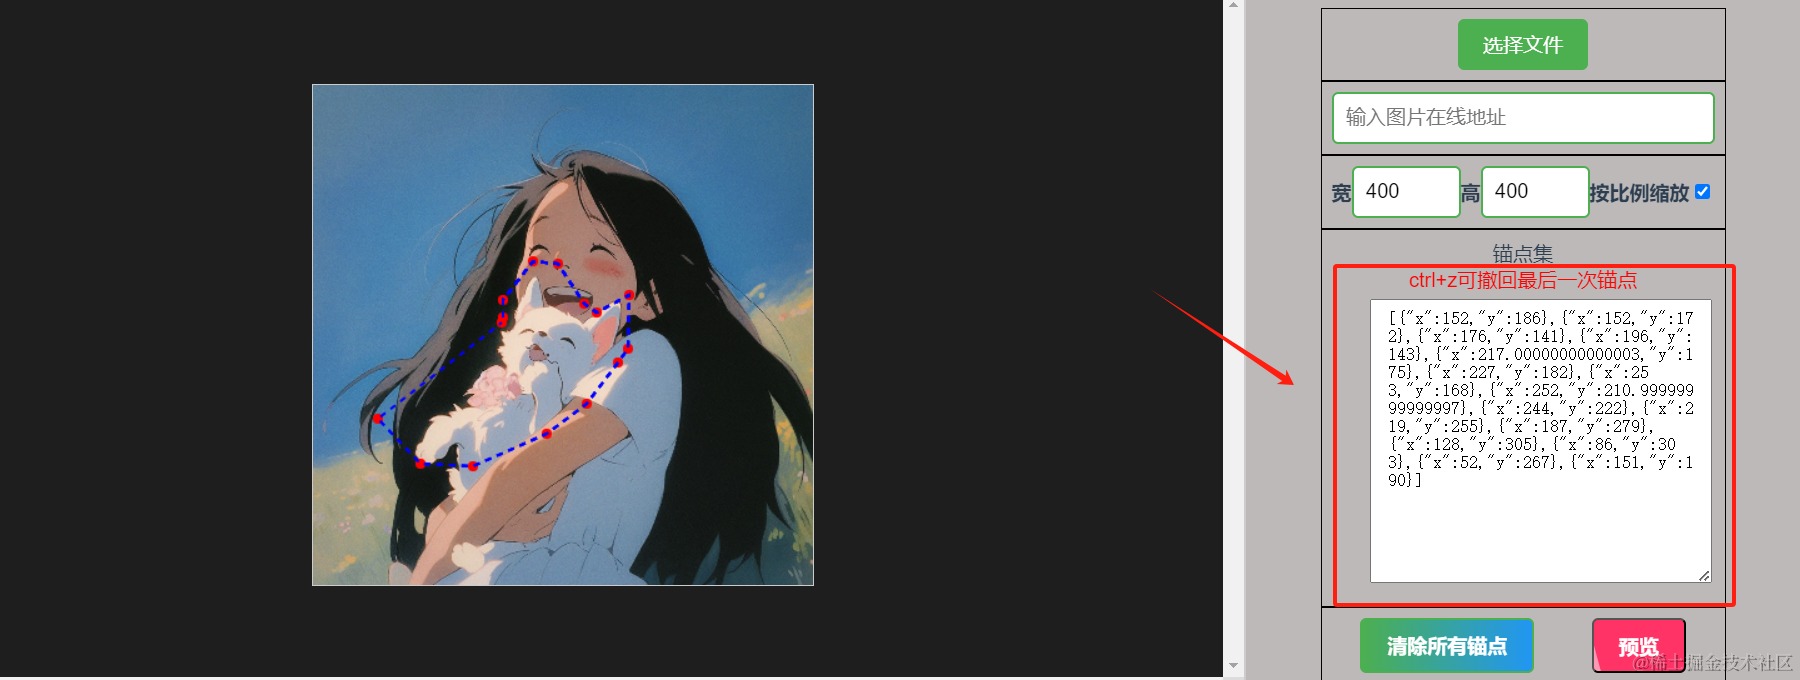
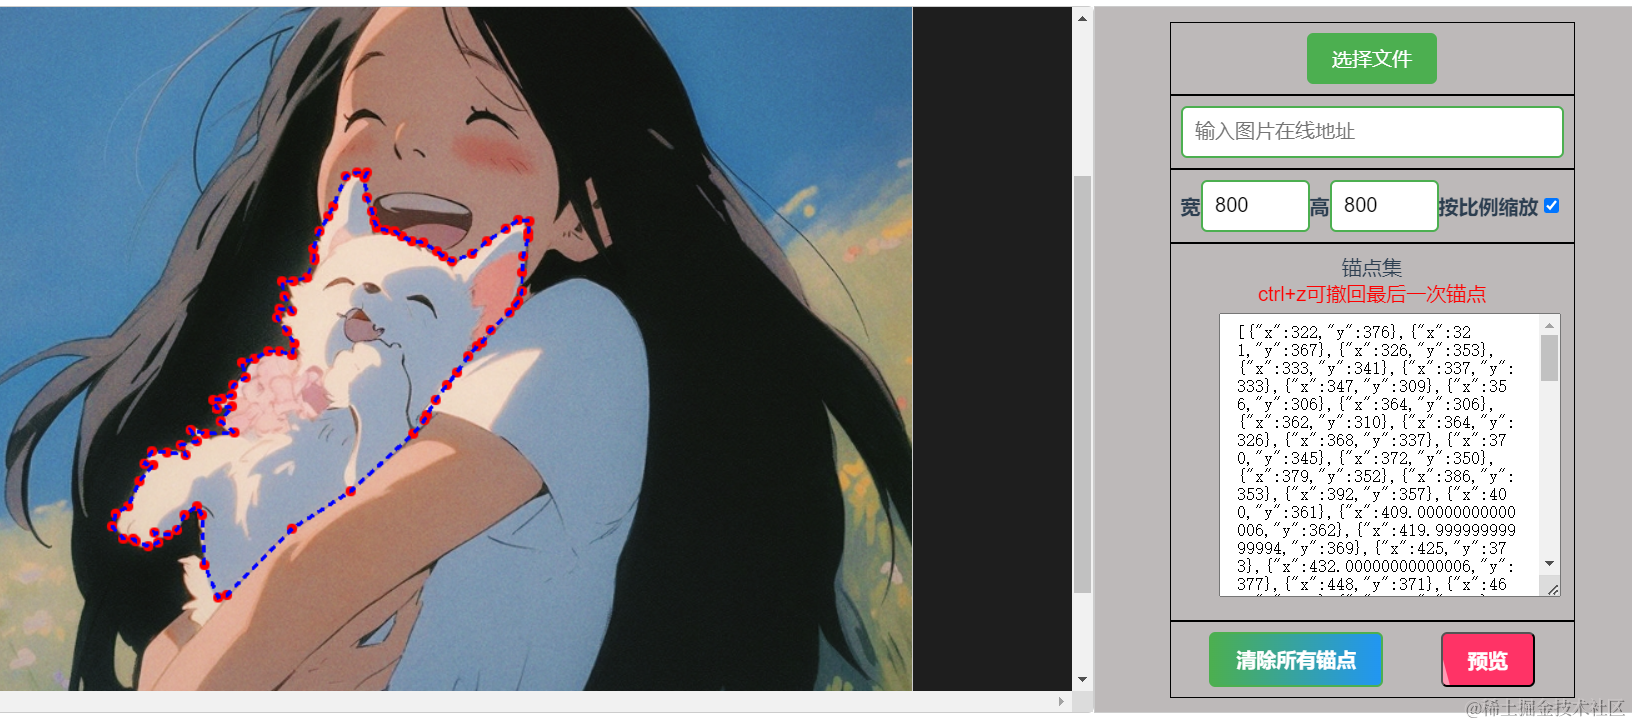
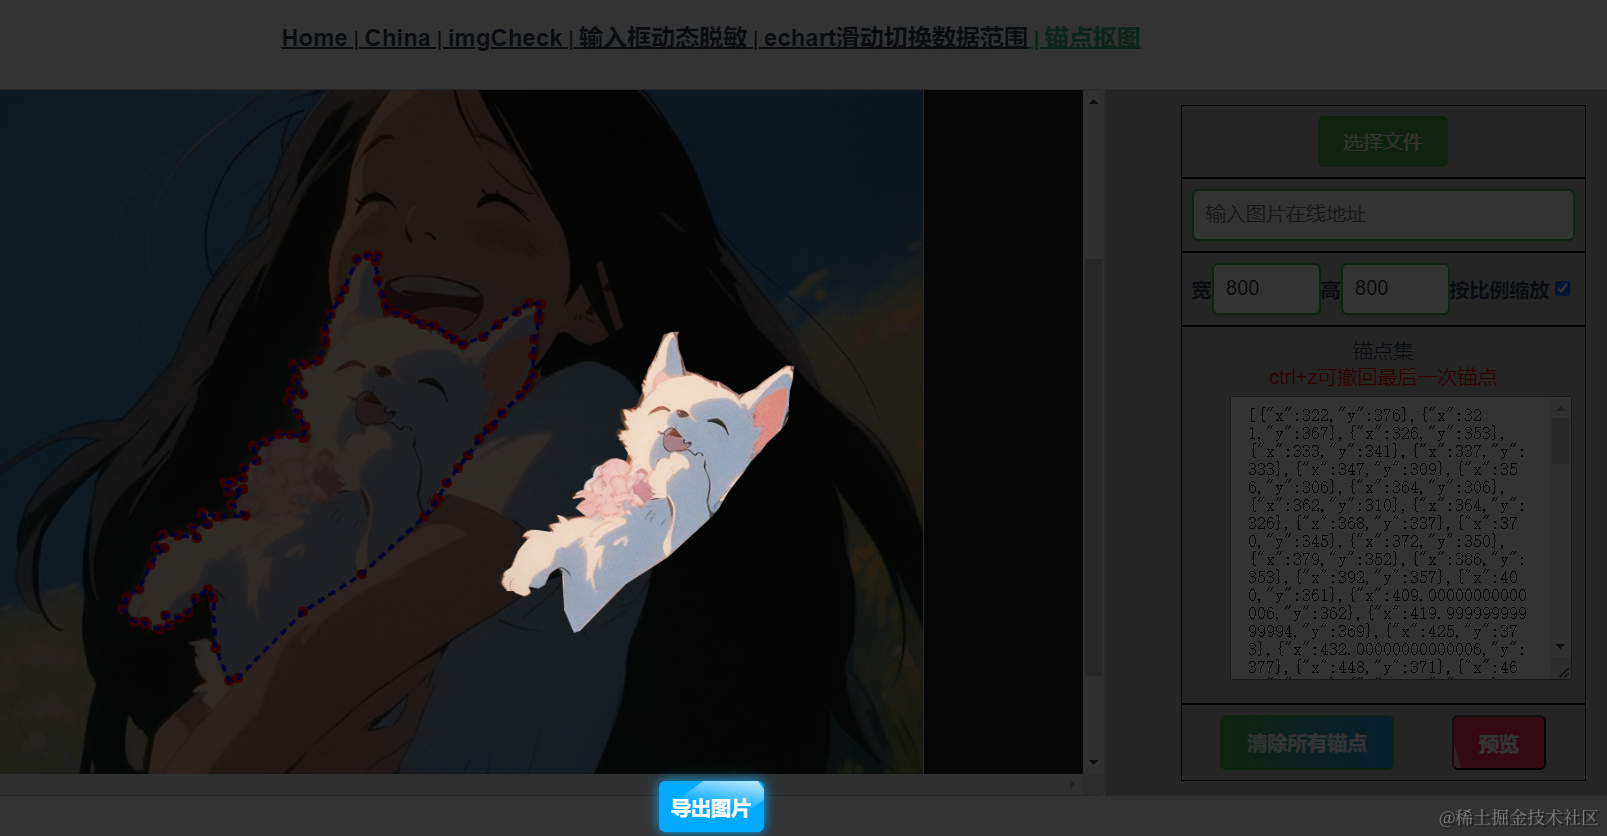
效果展示

体验地址
http://jyeontu.xyz/JDemo/#/imgCut
代码实现
一、图片上传
想要进行抠图的话我们得先有图片是吧,所以要有个图片上传的功能。
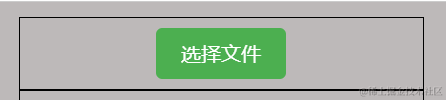
1、本地图片上传
这里我们使用简单的点击按钮上传,前面也有文章介绍过了拖拽上传功能的实现,这里就不赘述了,有兴趣的可以看下这篇文章:《文件拖拽上传功能已经烂大街了,你还不会吗?》
这里我们直接使用input标签来实现上传功能即可:
<label for="file-upload" class="custom-file-upload">
    <i class="fas fa-cloud-upload-alt"></i> 选择文件
</label>
<input
    v-show="false"
    id="file-upload"
    type="file"
    accept="image/*"
    @change="handleFileUpload"
/>
handleFileUpload(e) {
  let file = e.target.files[0];
  if (!file) return;
  this.srcLink = "";
  const reader = new FileReader();
  reader.onload = event => {
    const img = new Image();
    img.onload = () => {
      this.image = img;
      this.width = img.width;
      this.height = img.height;
      this.originWidth = img.width;
      this.originHeight = img.height;
      this.drawCanvas();
    };
    img.src = event.target.result;
  };
  reader.readAsDataURL(file);
}
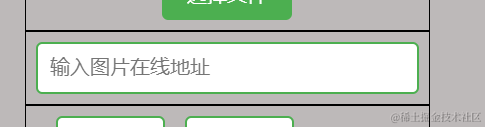
2、在线链接图片
使用Input输入在线图片链接:
<input
    type="input"
    @change="inputSrc"
    placeholder="输入图片在线地址"
    v-model="srcLink"
    class="input-style"
    style="width: 100%;"
/>
getImageBase64FromURL(url, callback) {
  return new Promise(resove => {
    const xhr = new XMLHttpRequest();
    xhr.onload = function() {
      const reader = new FileReader();
      reader.onloadend = function() {
        resove(reader.result);
      };
      reader.readAsDataURL(xhr.response);
    };
    xhr.open("GET", url);
    xhr.responseType = "blob";
    xhr.send();
  });
},
async inputSrc() {
  const src = await this.getImageBase64FromURL(this.srcLink);
  const img = new Image();
  img.onload = () => {
    this.image = img;
    this.width = img.width;
    this.height = img.height;
    this.drawCanvas();
  };
  img.src = src;
}
3、将上传的图片绘制到canvas中
drawCanvas() {
  setTimeout(() => {
    if (!this.image || !this.ctx) {
      return;
    }
    this.ctx.clearRect(0, 0, this.width, this.height);
    this.ctx.save();
    this.ctx.translate(this.width / 2, this.height / 2);
    this.ctx.drawImage(
      this.image,
      -this.width / 2,
      -this.height / 2,
      this.width,
      this.height
    );
    this.ctx.restore();
    this.realPoints.forEach(point => {
      this.drawPoint(point.x, point.y);
    });
    this.connectPoints(); // 每次绘制canvas后连接所有点
  }, 100);
}
使用ctx.clearRect()方法清除整个画布,以便在重新绘制之前清空之前的内容。然后,使用ctx.save()方法保存当前的绘图状态。
通过ctx.translate()方法将绘图原点移动到画布的中心位置(this.width / 2, this.height / 2),这样可以方便地绘制图像和点的坐标。
使用ctx.drawImage()方法绘制图像,参数分别为图像对象this.image、图像左上角的x和y坐标(-this.width / 2, -this.height / 2),以及图像的宽度和高度(this.width, this.height)。这样就在画布上绘制了图像。
接着使用ctx.restore()方法恢复之前保存的绘图状态。
然后,通过forEach循环遍历this.realPoints数组中的每个点,调用this.drawPoint()方法绘制每个点。
最后,调用this.connectPoints()方法连接所有的点,以绘制线条。
二、锚点选择与撤销
1、监听鼠标点击
这里我们使用canvas来展示图片:
<canvas
    ref="canvas"
    id="example-canvas"
    :width="width"
    :height="height"
    @click="canvasClick"
    tabindex="0"
></canvas>
监听canvas的点击事件并保存点击坐标
canvasClick(event) {
  if (!this.image || !this.ctx) {
    return;
  }
  const x = event.offsetX / (this.width / this.originWidth);
  const y = event.offsetY / (this.height / this.originHeight);
  this.points.push({ x, y }); // 将坐标添加到数组中
  const point = this.tranPoint({ x, y });
  this.drawPoint(point.x, point.y);
},
2、绘制锚点
前面我们获取到点击坐标了,这里我们需要在该坐标上绘制上锚点:
drawPoint(x, y) {
  // 绘制一个小圆点
  this.ctx.beginPath();
  this.ctx.arc(x, y, 4, 0, 2 * Math.PI);
  this.ctx.fillStyle = "red";
  this.ctx.fill();
  this.ctx.closePath();
  this.connectPoints(); // 每次点击后连接所有点
},
使用beginPath()方法创建路径,然后使用arc()方法绘制圆形,参数解释如下:
- x: 圆心的x轴坐标
- y: 圆心的y轴坐标
- 4: 圆的半径
- 0, 2 * Math.PI: 圆弧的起始角度和结束角度,这里表示绘制一个完整的圆
接下来设置fillStyle属性为红色,使用fill()方法填充圆形区域,并使用closePath()方法关闭路径。
3、连接锚点
用虚线将所有锚点按顺序连接起来:
connectPoints() {
  if (this.realPoints.length <= 1) {
    return;
  }
  this.ctx.beginPath();
  this.ctx.moveTo(this.realPoints[0].x, this.realPoints[0].y);
  for (let i = 1; i < this.realPoints.length; i++) {
    this.ctx.lineTo(this.realPoints[i].x, this.realPoints[i].y);
  }
  this.ctx.setLineDash([5, 5]);
  this.ctx.strokeStyle = "blue";
  this.ctx.lineWidth = 2;
  this.ctx.stroke();
  this.ctx.closePath();
}
如果realPoints数组长度大于1,接着使用beginPath()方法开始创建新的路径,并通过moveTo()方法将画笔移动到第一个点的位置(this.realPoints[0].x, this.realPoints[0].y)。随后使用for循环遍历realPoints数组中的每个点,使用lineTo()方法将画笔移动到下一个点的位置(this.realPoints[i].x, this.realPoints[i].y),从而连接所有的点。
在绘制线条之前,通过setLineDash()方法设置虚线的样式,这里是一个5像素的实线和5像素的空白,表示虚线的样式。然后设置线条的颜色为蓝色,线宽为2像素,最后通过stroke()方法绘制连接线条。最后使用closePath()方法关闭路径。
4、锚点撤销功能
平时我们都习惯了通过Ctrl+Z来撤销上一步操作,这里我们也加上,通过监听键盘按键事件来实现当用户按下Ctrl+Z组合键时,撤销最后一步锚点操作,也就是将锚点列表的最后一个删除即可:
document.addEventListener("keydown", event => {
  if (event.ctrlKey && event.key === "z") {
    event.preventDefault();
    that.undoPoint();
  }
});
undoPoint() {
  if (this.points.length > 0) {
    this.points.pop();
    this.drawCanvas();
  }
},
5、获取锚点集合
这里我们在右边预留了一个展示锚点列表的文本域
<textarea v-model="pointsStr" class="points-list"></textarea>
computed: {
    pointsStr() {
      return JSON.stringify(this.realPoints);
    }
}
大家觉得这里输出锚点集合可以做什么?这里先卖个关子,下一篇博客就会需要用到这里的锚点集合了。
三、尺寸修改
页面上我们可以对图片尺寸进行修改,便于获取不同比例下的锚点集:
1、页面图片尺寸修改
<label class="label-style">宽</label>
<input
    type="number"
    v-model="width"
    @input="resizeImage($event, 'width')"
    @keydown.ctrl.z.prevent
    class="input-style"
/>
<label class="label-style">高</label>
<input
    type="number"
    v-model="height"
    @input="resizeImage($event, 'height')"
    @keydown.ctrl.z.prevent
    class="input-style"
/>
<label class="label-style">按比例缩放</label>
<input type="checkbox" v-model="aspectRatio" class="checkbox-style" />
resizeImageByWidth(event) {
  this.width = event.target.value ? parseInt(event.target.value) : null;
  if (this.aspectRatio && this.width) {
    this.height = Math.round(
      (this.width / this.originWidth) * this.originHeight
    );
  }
},
resizeImageByHeight(event) {
  this.height = event.target.value ? parseInt(event.target.value) : null;
  if (this.aspectRatio && this.height) {
    this.width = Math.round(
      (this.height / this.originHeight) * this.originWidth
    );
  }
},
resizeImage(event, dimension) {
  if (!this.image) {
    return;
  }
  if (dimension === "width") {
    this.resizeImageByWidth(event);
  } else if (dimension === "height") {
    this.resizeImageByHeight(event);
  }
  if (
    this.aspectRatio &&
    (!event || event.target !== document.activeElement)
  ) {
    const aspectRatio = this.originWidth / this.originHeight;
    if (this.width && !this.height) {
      this.height = Math.round(this.originWidth / aspectRatio);
    } else if (!this.width && this.height) {
      this.width = Math.round(this.originHeight * aspectRatio);
    } else if (this.width / aspectRatio < this.height) {
      this.width = Math.round(this.originHeight * aspectRatio);
    } else {
      this.height = Math.round(this.originWidth / aspectRatio);
    }
  }
  this.$refs.canvas.width = this.width ? this.width : null;
  this.$refs.canvas.height = this.height ? this.height : null;
  this.image.width = this.width;
  this.image.height = this.height;
  this.drawCanvas();
}
根据 dimension 的值(可能是 “width” 或 “height”),调用相应的方法来调整图像的宽度或高度。
resizeImageByWidth(event) 方法用于根据给定的宽度调整图像的大小。它首先将 event.target.value 转换为整数,并将结果赋值给 this.width。然后,如果启用了纵横比 (this.aspectRatio) 并且 this.width 有值,则计算出相应的高度,使得调整后的图像与原始图像保持相同的纵横比。
resizeImageByHeight(event) 方法用于根据给定的高度调整图像的大小。它的逻辑与 resizeImageByWidth(event) 类似,只是操作的是 this.height 和宽高比的计算方式不同。
接下来,如果启用了纵横比 (this.aspectRatio) 并且没有通过键盘事件触发该方法,则根据原始图像的宽高比 (this.originWidth / this.originHeight) 进行额外的调整。具体的调整逻辑如下:
- 如果只设置了宽度 (
this.width) 而没有设置高度 (this.height),则根据原始图像的宽高比计算出相应的高度。 - 如果只设置了高度 (
this.height) 而没有设置宽度 (this.width),则根据原始图像的宽高比计算出相应的宽度。 - 如果设置了宽度和高度,并且根据当前的宽高比计算出的宽度小于当前的高度,则根据原始图像的宽高比计算出相应的宽度。
- 否则,根据原始图像的宽高比计算出相应的高度。
最后,根据调整后的宽度和高度,更新画布(this.$refs.canvas.width 和 this.$refs.canvas.height),以及图像的宽度和高度 (this.image.width 和 this.image.height)。然后调用 drawCanvas() 方法重新绘制画布。
2、锚点根据缩放比例进行修改
图片缩放之后,锚点位置也要进行对应的缩放。
tranPoint(point) {
  let { x, y } = point;
  x = x * (this.width / this.originWidth);
  y = y * (this.height / this.originHeight);
  return { x, y };
}
四、抠图预览
1、图片预览组件
这里我们简单编写一个图片预览弹窗组件:
<template>
  <div>
    <div class="preview-overlay" @click="hidePreview">
      <img :src="currentImage" alt="preview image" class="preview-image" />
      <div class="export-button" @click.stop="handleExport">
        <span>导出图片</span>
        <span class="shine"></span>
      </div>
    </div>
  </div>
</template>
<script>
export default {
  name: "previewImg",
  props: {
    imageList: {
      type: Array,
      default: () => []
    },
    currentImage: {
      type: String,
      default: ""
    }
  },
  data() {
    return {};
  },
  methods: {
    hidePreview() {
      this.$emit("close");
    },
    handleExport() {
      this.$emit("export", this.currentImage);
    }
  }
};
</script>
<style>
.preview-overlay {
  position: fixed;
  top: 0;
  left: 0;
  width: 100%;
  height: 100%;
  background-color: rgba(0, 0, 0, 0.8);
  display: flex;
  justify-content: center;
  align-items: center;
  z-index: 999;
}
.preview-image {
  max-width: 80%;
  max-height: 80%;
  object-fit: contain;
}
.export-button {
  position: absolute;
  bottom: 20px;
  padding: 10px;
  background-color: #00aaff;
  color: white;
  border-radius: 5px;
  cursor: pointer;
  display: flex;
  justify-content: center;
  align-items: center;
  font-size: 16px;
  font-weight: bold;
  text-align: center;
  box-shadow: 0 0 10px #00aaff;
  overflow: hidden;
}
.export-button:hover {
  background-color: #00e5ff;
}
.shine {
  position: absolute;
  top: 0;
  left: 0;
  width: 100%;
  height: 100%;
  background-image: linear-gradient(
    45deg,
    #ffffff 10%,
    rgba(255, 255, 255, 0) 50%,
    rgba(255, 255, 255, 0) 100%
  );
  animation: exportButtonShine 2s linear infinite;
}
@keyframes exportButtonShine {
  from {
    transform: rotate(0deg);
  }
  to {
    transform: rotate(360deg);
  }
}
</style>
模板部分包含了一个遮罩层和图片预览,以及一个导出按钮。当用户点击遮罩层时,会触发 hidePreview 方法,关闭预览。图片预览部分使用了动态绑定的 :src 属性来显示当前的图片,而导出按钮则绑定了 handleExport 方法,在点击时会触发导出操作。
脚本部分定义了名为 “previewImg” 的组件,其中包括了两个属性 imageList 和 currentImage,分别用于接收图片列表和当前显示的图片。在方法部分,定义了 hidePreview 方法用于关闭预览,并通过 $emit 向父组件发送 “close” 事件,以通知父组件关闭预览。另外还有 handleExport 方法,用于处理导出操作,并通过 $emit 向父组件发送 “export” 事件,并传递当前图片的路径。
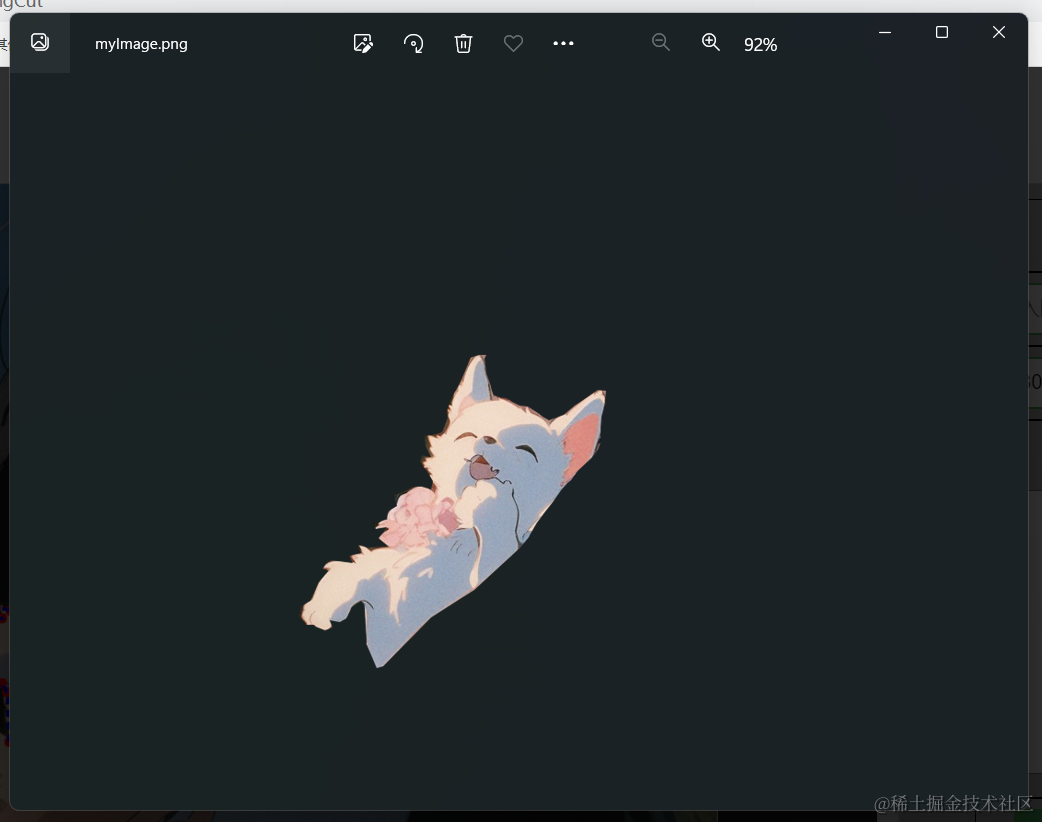
2、抠图操作
cutImg() {
  const canvas = document.createElement("canvas");
  const ctx = canvas.getContext("2d");
  if (!this.image || !ctx) {
    return;
  }
  const image = this.image;
  canvas.width = image.width;
  canvas.height = image.height;

  // 定义剪切路径
  const cutPath = this.realPoints;
  ctx.beginPath();
  ctx.moveTo(cutPath[0].x, cutPath[0].y);
  for (let i = 1; i < cutPath.length; i++) {
    ctx.lineTo(cutPath[i].x, cutPath[i].y);
  }
  ctx.closePath();
  ctx.clip();

  // 绘制图片
  ctx.drawImage(image, 0, 0, this.width, this.height);
  // 将Canvas元素转换为PNG图像
  const imgData = canvas.toDataURL("image/png");
  this.currentImage = imgData;
  this.showImg = true;
}
获取要剪切的图片对象,并根据该图片的宽度和高度设置 <canvas> 的宽度和高度。
然后,定义剪切路径,通过遍历 cutPath 数组中的点坐标,使用 ctx.lineTo() 方法绘制路径。最后使用 ctx.closePath() 方法闭合路径,并调用 ctx.clip() 方法将剪切路径应用于上下文。
接着,使用 ctx.drawImage() 方法绘制剪切后的图片。传入的参数包括原始图片对象、剪切后的起始点坐标以及剪切后的宽度和高度。
最后,使用 canvas.toDataURL() 方法将 <canvas> 元素转换为 base64 编码的 PNG 图像数据,并将该数据赋值给 imgData 变量。然后将 imgData 赋值给 currentImage 属性,将剪切后的图片显示出来(通过在模板中绑定 currentImage)。
五、导出抠图图片
downloadImg(imgData) {
  // 创建一个链接元素,将图像数据作为URL设置给它
  const link = document.createElement("a");
  link.download = "myImage.png";
  link.href = imgData;

  // 触发链接的下载事件
  link.click();
}
首先,通过 document.createElement("a") 创建一个 <a> 元素,并将该元素赋值给 link 变量。
然后,将要下载的图片的文件名设置为 “myImage.png”,可以根据实际需要修改。
接下来,将图片数据 imgData 设置为链接元素的 href 属性,这样点击链接时会下载该图片。
最后,通过调用 link.click() 方法触发链接的点击事件,从而触发下载操作。
源码地址
gitee
https://gitee.com/zheng_yongtao/jyeontu-vue-demo.git
公众号
关注公众号『前端也能这么有趣』发送 vueDemo即可获取源码。
说在后面
🎉 这里是 JYeontu,现在是一名前端工程师,有空会刷刷算法题,平时喜欢打羽毛球 🏸 ,平时也喜欢写些东西,既为自己记录 📋,也希望可以对大家有那么一丢丢的帮助,写的不好望多多谅解 🙇,写错的地方望指出,定会认真改进 😊,偶尔也会在自己的公众号『
前端也能这么有趣』发一些比较有趣的文章,有兴趣的也可以关注下。在此谢谢大家的支持,我们下文再见 🙌。