前言
(1)PLCT实验室实习生长期招聘:招聘信息链接
(2)本来是要跑RT-Thread的,搞了很久,一直没成功。哭死,后面mentor通电话,让我先跑一下freertos试试。有可能是因为RT-Thread Smart版本即使通过scons --menuconfig修改成标准版,也会在opensbi阶段会调用一些东西,而当前使用的duo-toolbox仓库,对这部分进行的精简,所以导致一直在sbi_call函数中卡死。
(3)不管问题到底是什么,先记录一下如何使用duo-toolbox仓库跑起freertos吧。一步一步来,哎,只能说,能力有限,还要准备期中考试(哭死)。
前期测试工作
接线说明
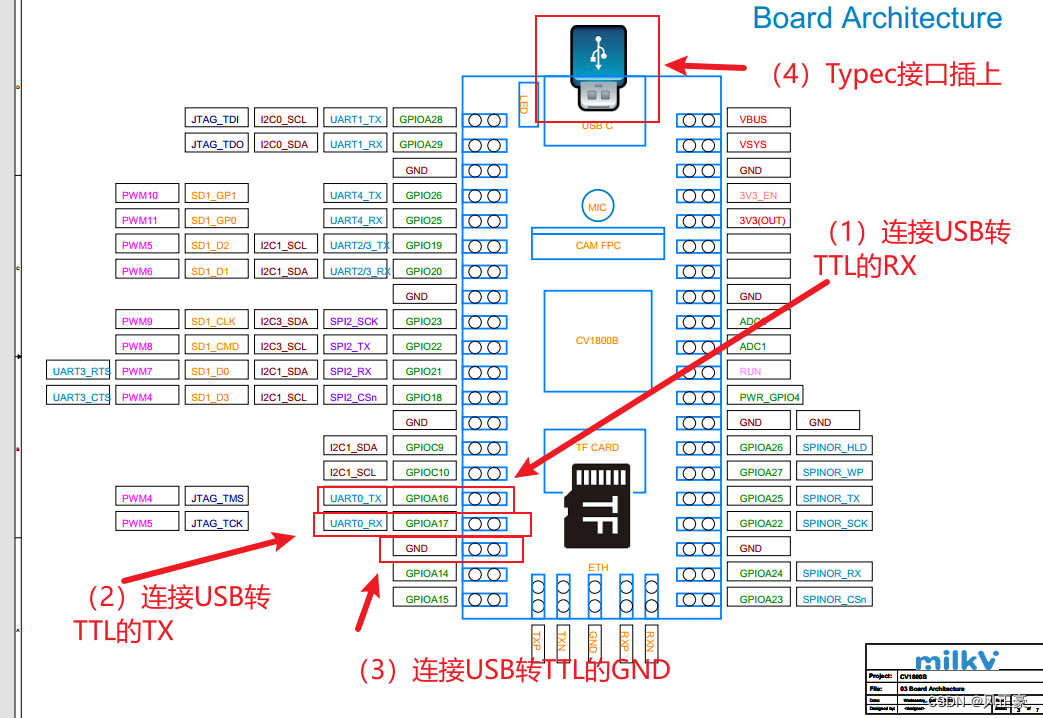
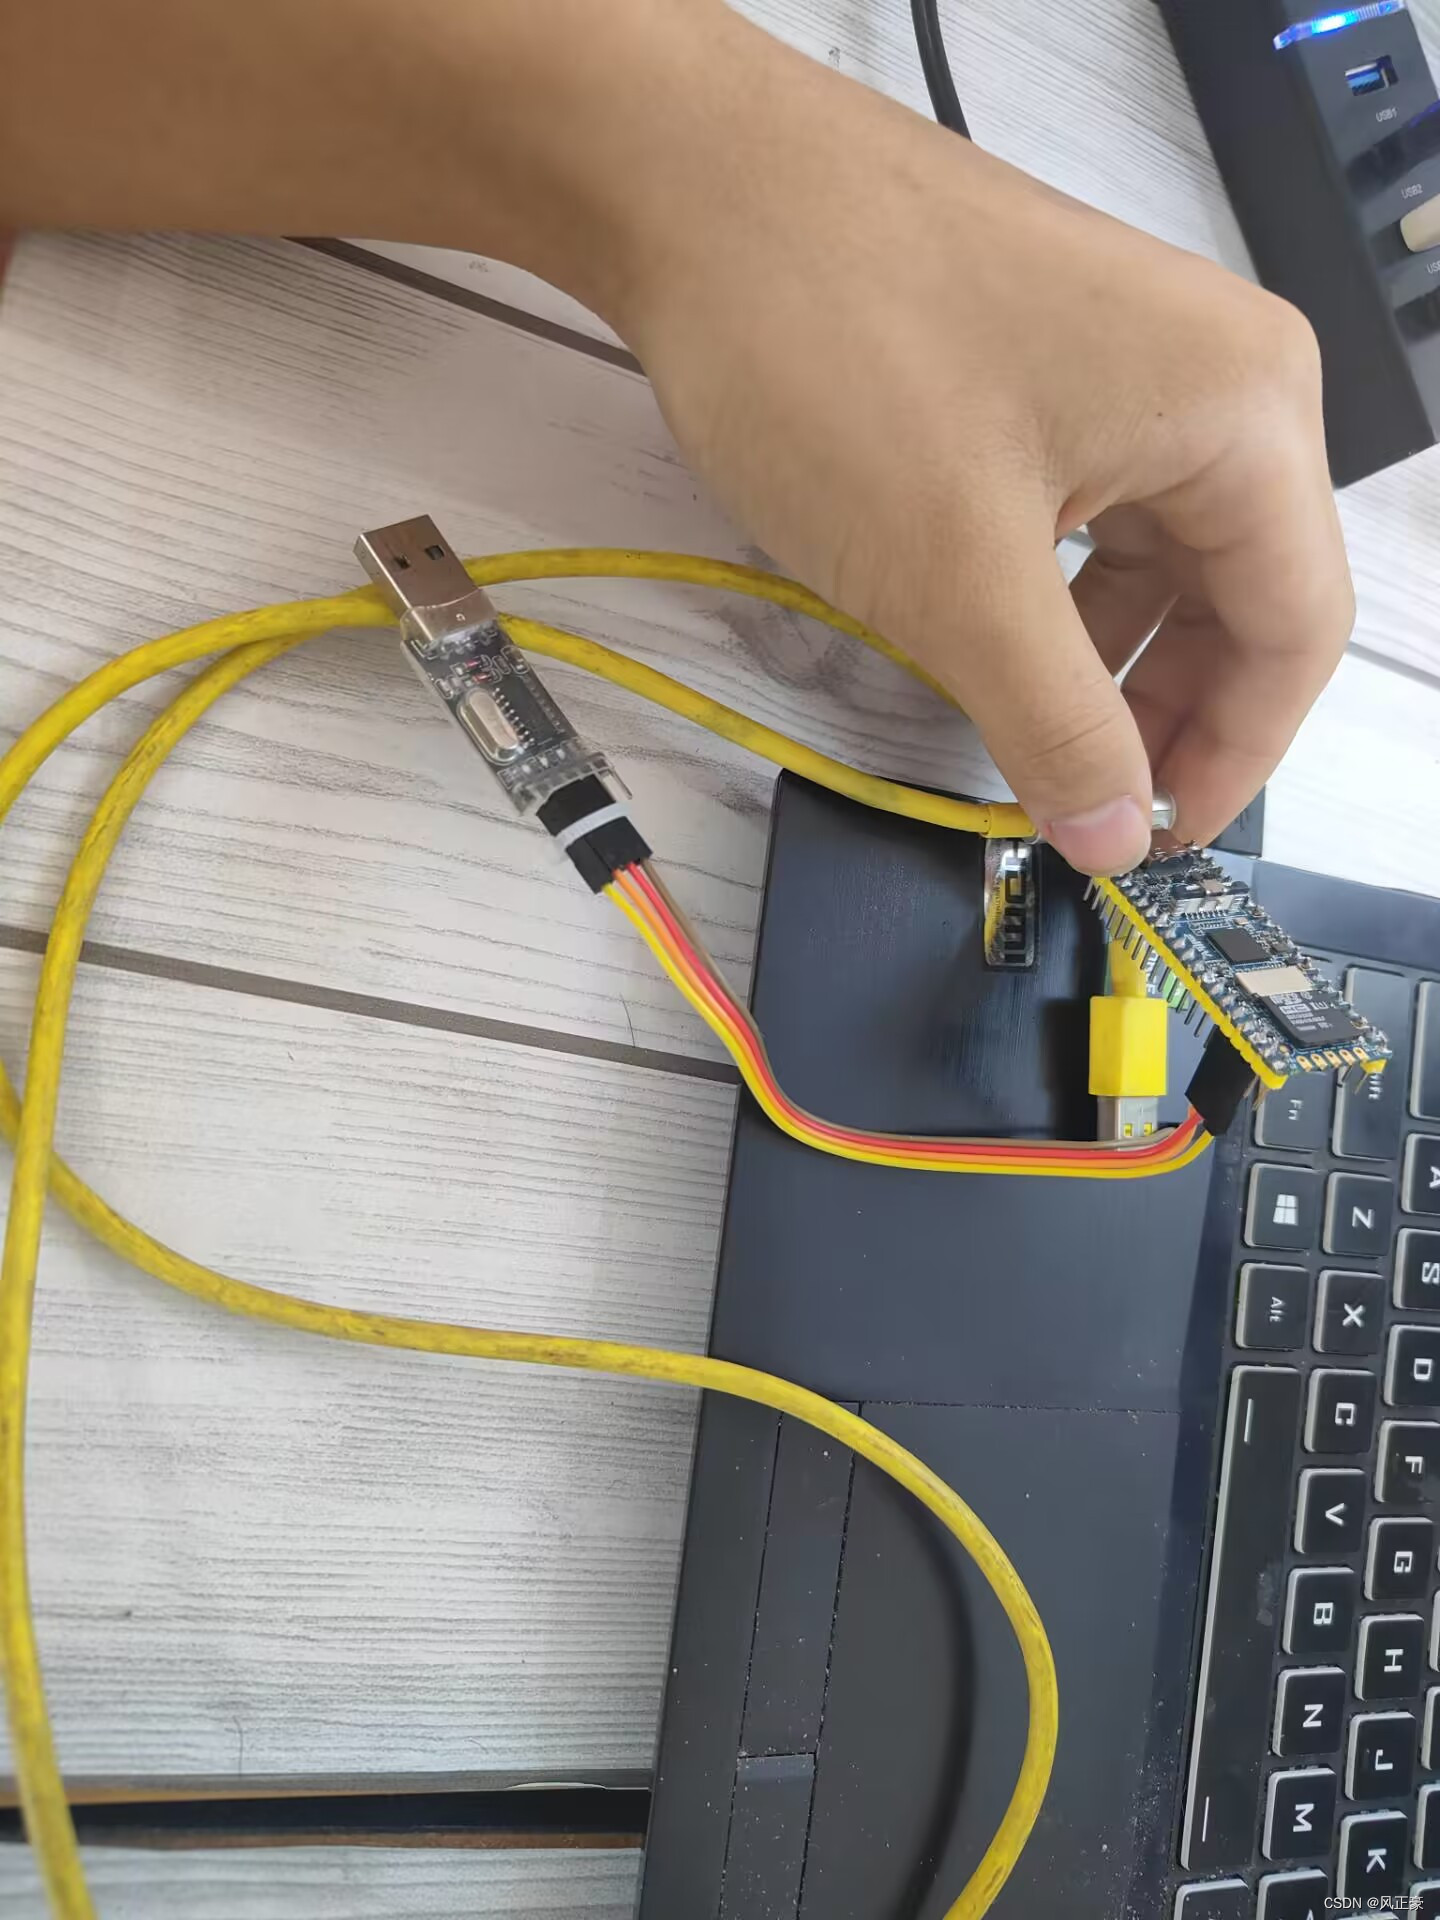
测试duo-toolbox仓库是否正常
(1)首先,我们先拉取
duo-toolbox仓库,先拿通用的duo-toolbox仓库代码进行测试一下。
(2)需要注意,export是临时添加环境变量的,如果将终端关闭,下一次重新打开终端,需要再次添加环境变量。
git clone https://github.com/GeassCore/duo-toolbox.git
cd duo-toolbox
./init.sh
cd fip
export PATH=`pwd`/../host-tools/gcc/riscv64-linux-musl-x86_64/bin:$PATH
export PATH=`pwd`/../host-tools/gcc/riscv64-elf-x86_64/bin:$PATH
make fsbl-build
(3)将生成的
fip/build路径下的fip.bin文件利用读卡器烧录进SD卡中。
注意:如果是已经上手了Milkv-duo同学可能会存在疑惑,怎么会只需要一个fip.bin文件呢?原因很简单,Milkv-duo是双核处理器,小核跑的时候,是使用的fip.bin文件中的代码,当跑大核的时候,是利用boot.sd文件中的代码。因为当前的duo-toolbox仓库是默认只跑小核心,所以无需boot.sd文件。而img文件就是fip.bin文件和boot.sd文件的打包。

(4)使用串口软件连接开发板,配置信息:波特率115200,数据位8,无校验位,1停止位,无流控。(注意,有些串口工具,例如
MobaXterm就只需要配置一个波特率)
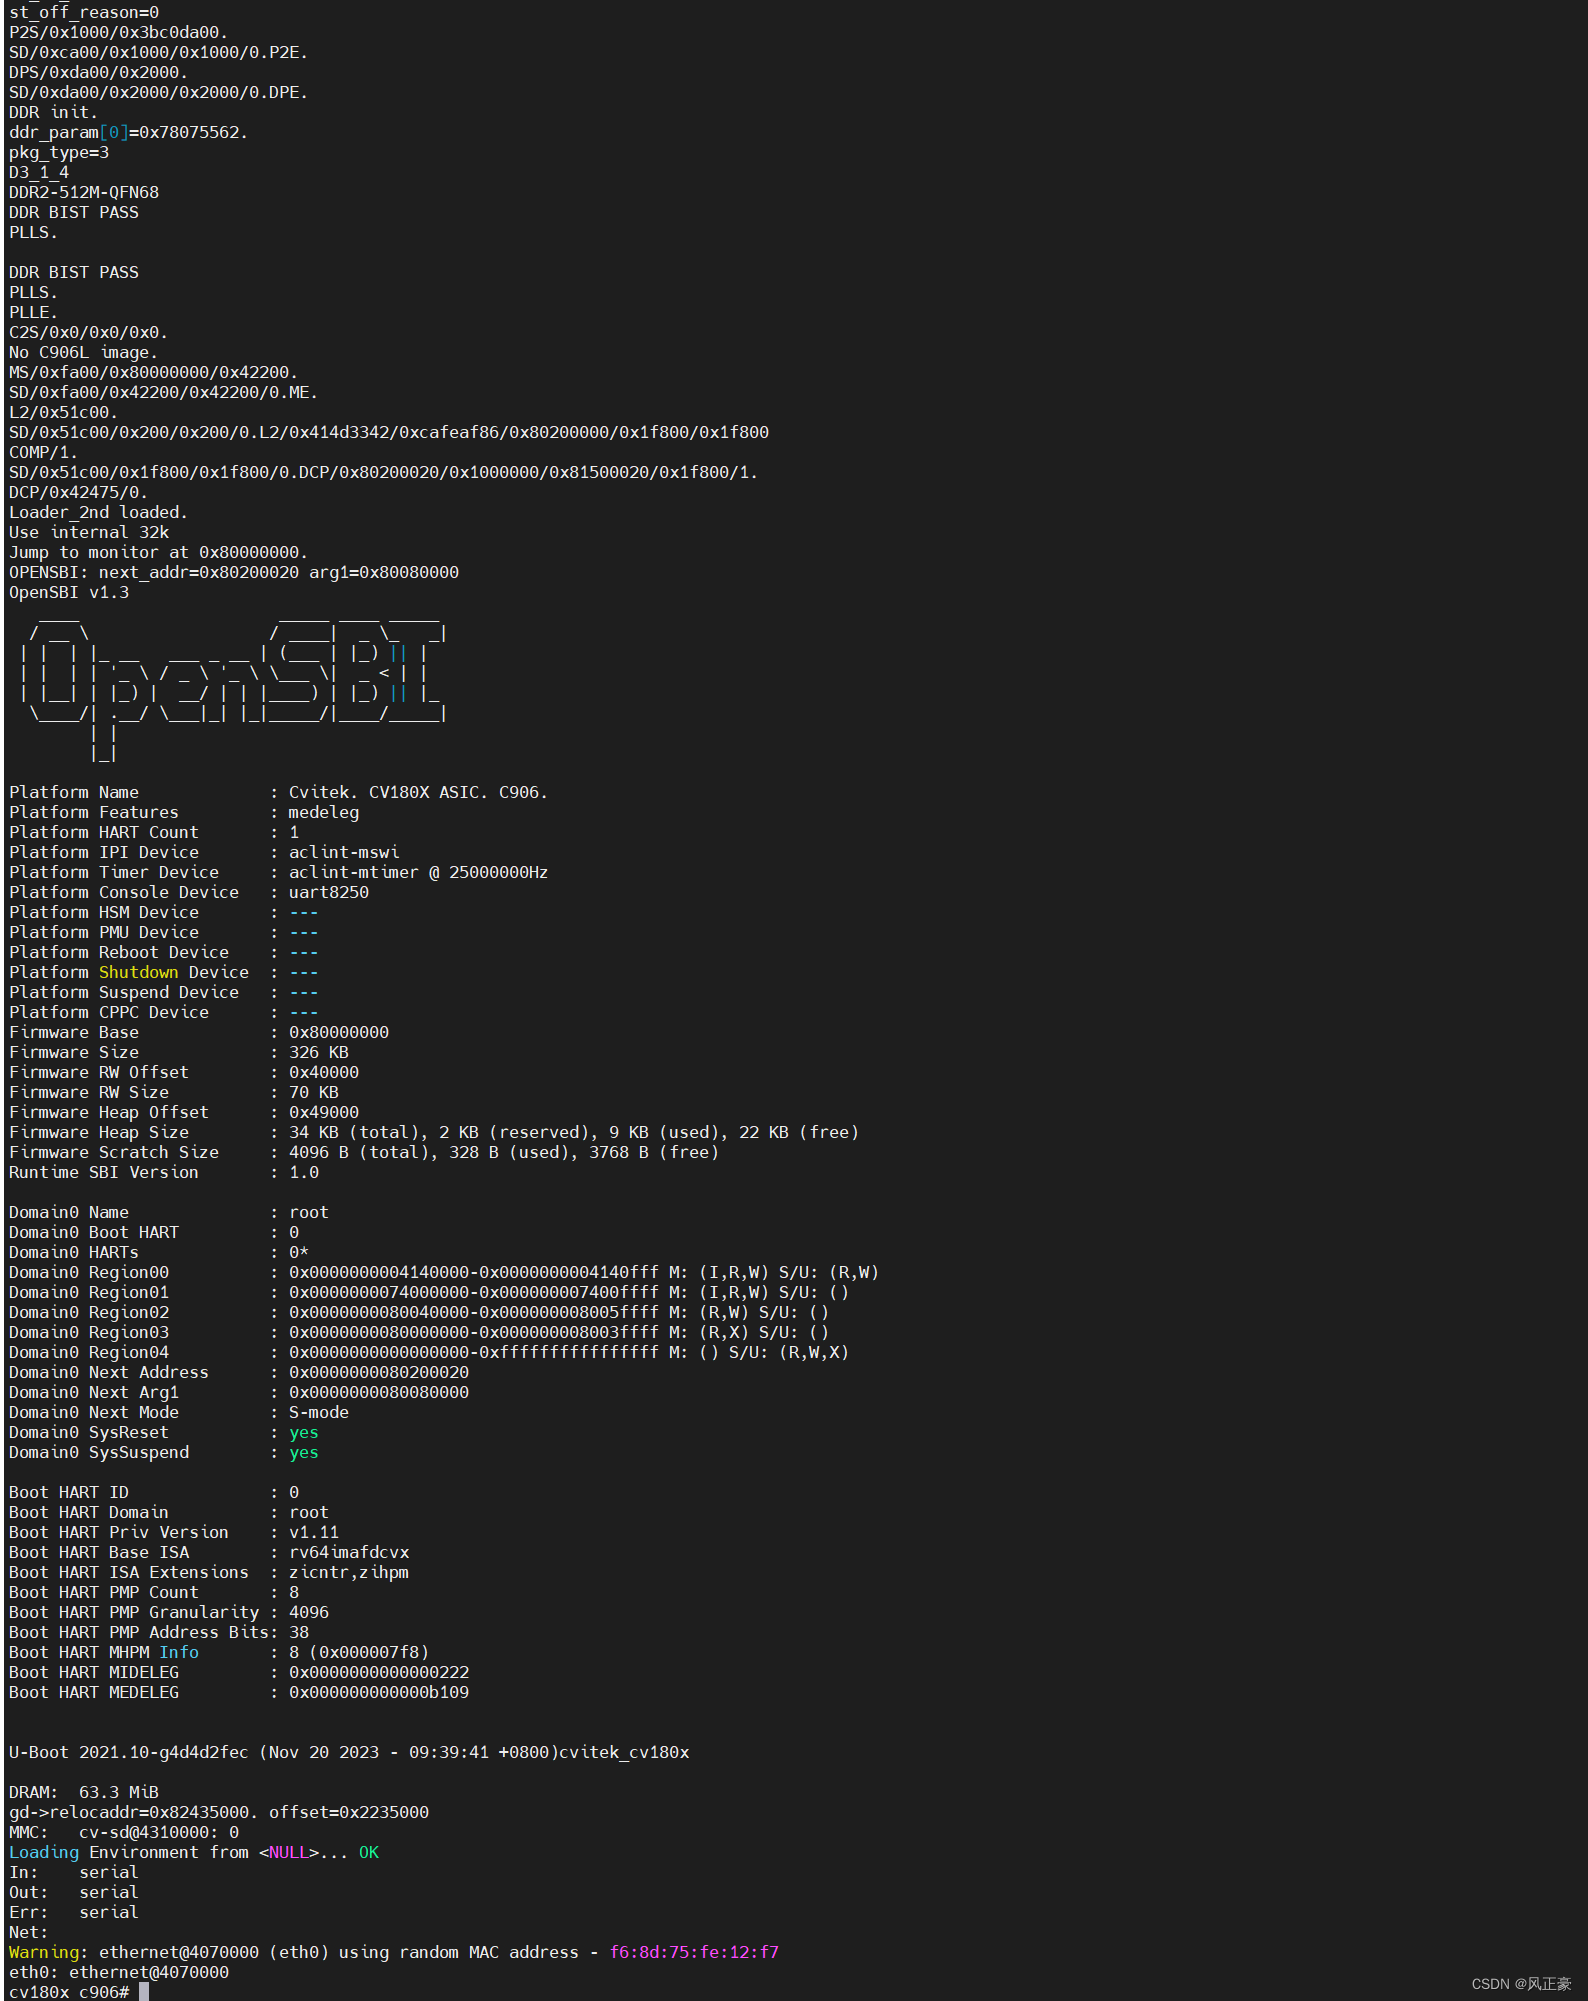
(5)测试结果如下,说明仓库配置完成。
测试duo-buildroot-sdk仓库跑freertos
(1)在
comm_main.c中利用freertos的xTaskCreate()函数创建一个my_task_test()的任务函数。
git clone https://github.com/milkv-duo/duo-buildroot-sdk.git
cd duo-buildroot-sdk
vim freertos/cvitek/task/comm/src/riscv64/comm_main.c
void my_task_test()
{
  int index = 0;
  for (;;)
  {
    printf("test the RTOS: %d\r\n", index);
    vTaskDelay(100);
    index++;
  }
}
void main_cvirtos(void)
{
  printf("create cvi task\n");

  xTaskCreate(my_task_test, "my_task", 1024 * 8, NULL, 1, NULL);

  vTaskStartScheduler();

  /* Start the tasks and timer running. */

  /* If all is well, the scheduler will now be running, and the following
    line will never be reached.  If the following line does execute, then
    there was either insufficient FreeRTOS heap memory available for the idle
    and/or timer tasks to be created, or vTaskStartScheduler() was called from
    User mode.  See the memory management section on the FreeRTOS web site for
    more details on the FreeRTOS heap http://www.freertos.org/a00111.html.  The
    mode from which main() is called is set in the C start up code and must be
    a privileged mode (not user mode). */
  printf("cvi task end\n");

  for (;;)
    ;
}
(2)进入
FreeRTOSConfig.h文件,关闭configUSE_TICK_HOOK这个宏。
vim freertos/cvitek/kernel/include/riscv64/FreeRTOSConfig.h
#define configUSE_TICK_HOOK 0
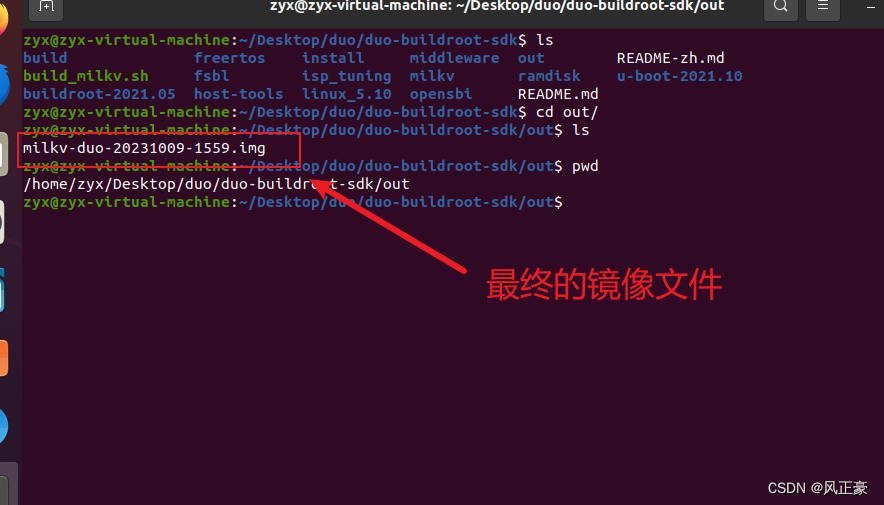
(3)编译文件,最终生成的镜像文件在
duo-buildroot-sdk/out这个路径下。
./build_milkv.sh
(4)烧录镜像,利用Win32DiskImager软件进行烧录镜像
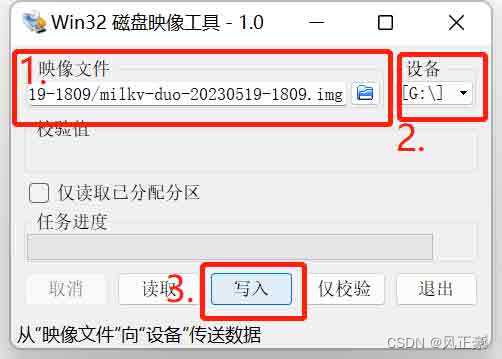
(5)上机测试结果如下,需要注意,当前仓库的小核
freertos和大核Linux都是公用的串口0,那么就会出现抢占情况。出现下图,表示测试成功。

自己生成fip.bin文件进行测试
修改代码
修改串口驱动代码
(1)进行完上述测试工作之后,我们开始尝试自己生成一个
fip.bin文件进行上机测试。这里进入duo-toolbox仓库路径。

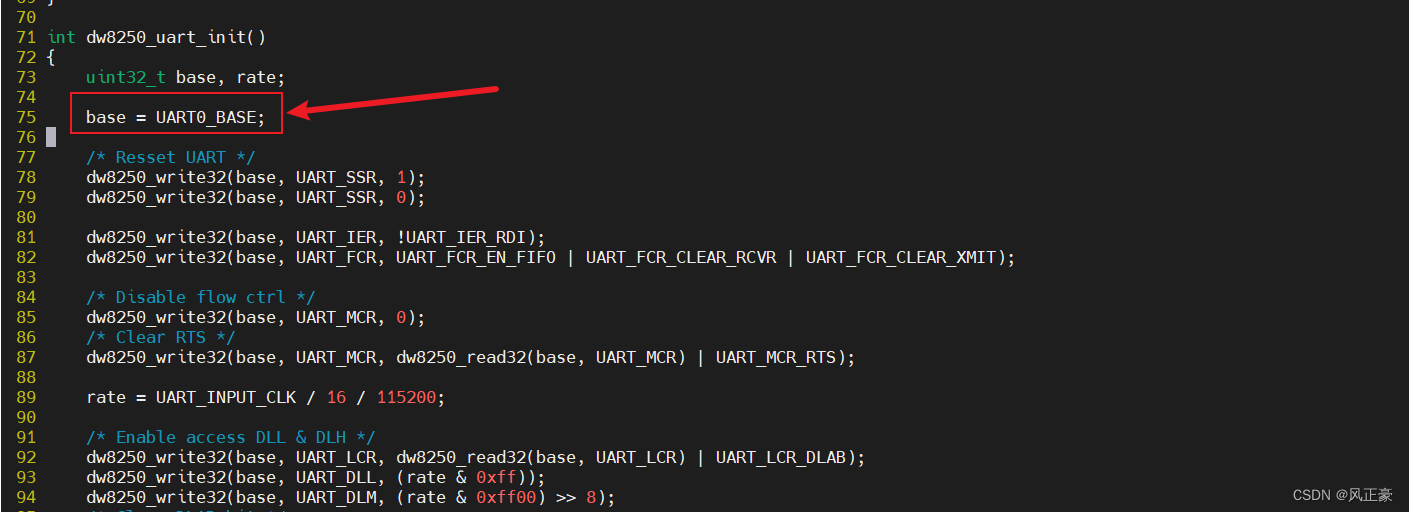
(2)进入
drv_uart.c文件,修改dw8250_uart_init()函数和dw8250_uart_putc()函数中的UART4_BASE变成UART0_BASE。
vim debugloader/duoRVOS/drv_uart.c

修改kernel.c代码
(1)进入
kernel.c文件,将start_kernel()函数调整如下。
vim debugloader/duoRVOS/kernel.c
void start_kernel(void)
{
    uint32_t sw = 0;
    sys_clock_init();
    board_pinmux_config();

    sdelay(1000000);
    dw8250_uart_init();
    dw8250_uart_putc('h');
    dw8250_uart_putc('e');
    dw8250_uart_putc('h');
    dw8250_uart_putc('e');
//    sys_led_ctrl(1);
//    sys_jtag_init();

        sdelay(1000000);
    /*while (1)
    {
        sdelay(1000000);
//        sw =!sw;
//        sys_led_ctrl(sw);
        dw8250_uart_putc('a');
    }*/


    void (*entry)() = (void *)0x80210000;
        sdelay(1000000);
    entry();
}
修改Makefile和fip.mk
(1)进入Makefile文件,将
LOADER_2ND_PATH=$ {TOP_DIR}/u-boot/build/u-boot-raw.bin修改为LOADER_2ND_PATH=$ {TOP_DIR}/os.bin
vim fip/Makefile

(2)修改
fip.mk中MONITOR_PATH =../opensbi/build/platform/generic/firmware/fw_dynamic.bin为MONITOR_PATH = ../sbi.bin
vim fip/fsbl/make_helpers/fip.mk

合成fip.bin
生成os.bin
(1)进入
duo-buildroot-sdk仓库的freertos/cvitek/install/bin/目录下。将cvirtos.bin复制一份,改名为rtos.bin。再将rtos.bin文件复制到duo-toolbox仓库的debugloader/duoRVOS路径下。
cd freertos/cvitek/install/bin/
cp cvirtos.bin rtos.bin
mv rtos.bin ${duo-toolbox_DIR}/debugloader/duoRVOS

(2)进入
duo-toolbox仓库的debugloader/duoRVOS/路径中,执行make指令即可。
cd ${duo-toolbox_DIR}/debugloader/duoRVOS/
make
生成sbi.bin
(1)进入
duo-toolbox仓库的debugloader/sbi/路径中,执行./build.sh编译脚本,最后在fw_bin文件夹中生成sbi.bin。
cd ${duo-toolbox_DIR}/debugloader/sbi/
./build.sh

合成fip.bin
(1)进入
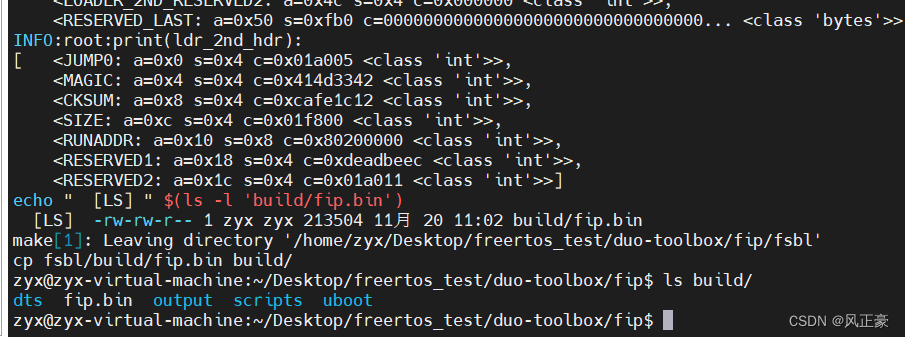
duo-toolbox仓库的fip文件夹中。将上述生成的os.bin和sbi.bin复制当fip文件夹中。执行编译脚本,最终在build文件夹中生成fip.bin文件。
cd ${duo-toolbox_DIR}/fip/
mv ../debugloader/sbi/fw_bin/sbi.bin .
mv ../debugloader/duoRVOS/os.bin .
make fsbl-build
测试
(1)最终生成的文件是91KB

(2)上机测试。
<1>如果测试过程中,发现没有打印hehe,表示没有进入${duo-toolbox_DIR}/debugloader/duoRVOS/kernel.c中的start_kernel()函数,或者是串口驱动初始化有问题。
<2>如果打印了hehe,但是发现没有create cvi task的打印,表面成功进入了start_kernel()函数,但是没有成功引导进入freertos,那么尝试重新编译测试duo-toolbox仓库,测试完成之后,重新将freertos/cvitek/install/bin/目录下cvirtos.bin修改名字为rtos.bin,然后替换${duo-toolbox_DIR}/debugloader/duoRVOS/中的rtos.bin重新编译。

参考文章
(1)知乎(燕十三):milk-v duo 编译流程二之小核 FreeRTOS 编译
(2)微信公众号(电气电子小倒腾):简单尝试Milk-V Duo的小核运行FreeRTOS
(3)Github的duo-toolbox仓库readme文件
(4)C站(风正豪):Milk-V Duo快速上手
(5)斑梨电子Milk-V Duo镜像烧写教程
感谢人员
(1)感谢PLCT的王俊强老师的指导。
(2)感谢PLCT的实习生许东和代韵涛两位大佬的帮助。

