对应的教程文章: https://codelabs.developers.google.com/your-first-webgpu-app?hl=zh-cn#4
对应的源码执行效果:
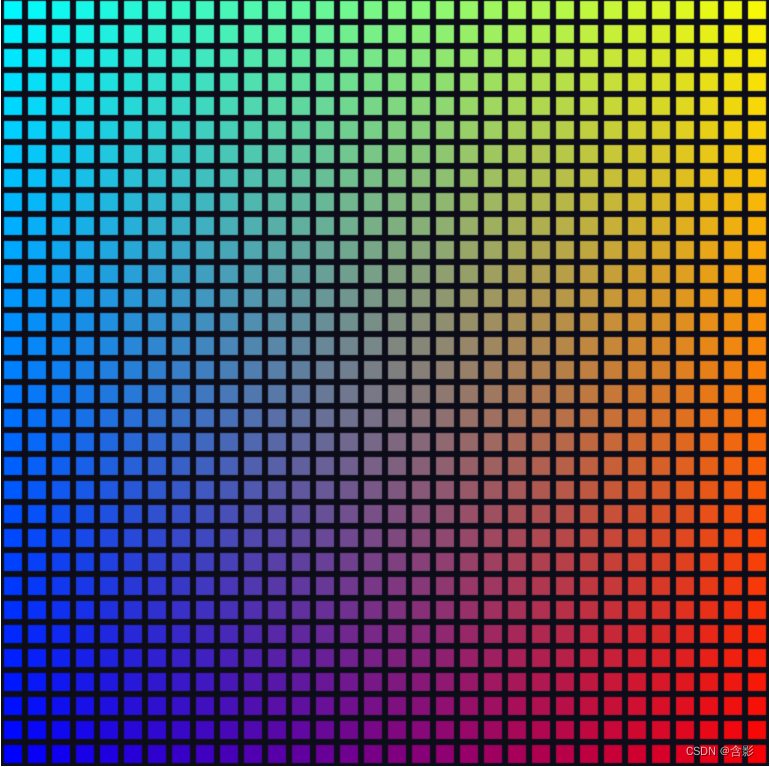
对应的教程源码:
此处源码和教程本身提供的部分代码可能存在一点差异。
class Color4 {

	r: number;
	g: number;
	b: number;
	a: number;

	constructor(pr = 1.0, pg = 1.0, pb = 1.0, pa = 1.0) {
		this.r = pr;
		this.g = pg;
		this.b = pb;
		this.a = pa;
	}
}

export class WGPURColorGrid {
	private mRVertices: Float32Array = null;
	private mRPipeline: any | null = null;
	private mVtxBuffer: any | null = null;
	private mCanvasFormat: any | null = null;
	private mWGPUDevice: any | null = null;
	private mWGPUContext: any | null = null;
	private mUniformBindGroup: any | null = null;
	private mGridSize = 32;
	constructor() {}
	initialize(): void {

		const canvas = document.createElement("canvas");
		canvas.width = 512;
		canvas.height = 512;
		document.body.appendChild(canvas);
		this.initWebGPU(canvas).then(() => {
			console.log("webgpu initialization finish ...");

			this.clearWGPUCanvas();
		});
		document.onmousedown = (evt):void => {
			this.clearWGPUCanvas( new Color4( Math.random(), Math.random(), Math.random()) );
		}
	}
	private createUniform(device: any, pipeline: any): void {
		// Create a uniform buffer that describes the grid.
		const uniformArray = new Float32Array([this.mGridSize, this.mGridSize]);
		const uniformBuffer = device.createBuffer({
			label: "Grid Uniforms",
			size: uniformArray.byteLength,
			usage: GPUBufferUsage.UNIFORM | GPUBufferUsage.COPY_DST,
		});
		device.queue.writeBuffer(uniformBuffer, 0, uniformArray);

		this.mUniformBindGroup = device.createBindGroup({
			label: "Cell renderer bind group",
			layout: pipeline.getBindGroupLayout(0),
			entries: [{
				binding: 0,
				resource: { buffer: uniformBuffer }
			}],
		});
	}
	private createRectGeometryData(device: any, pass: any): void {

		let vertices = this.mRVertices;
		let vertexBuffer = this.mVtxBuffer;
		let cellPipeline = this.mRPipeline;
		if(!cellPipeline) {
			let hsize = 0.8;
			vertices = new Float32Array([
			//   X,    Y,
				-hsize, -hsize, // Triangle 1 (Blue)
				 hsize, -hsize,
				 hsize,  hsize,

				-hsize, -hsize, // Triangle 2 (Red)
				 hsize,  hsize,
				-hsize,  hsize,
			]);

			vertexBuffer = device.createBuffer({
				label: "Cell vertices",
				size: vertices.byteLength,
				usage: GPUBufferUsage.VERTEX | GPUBufferUsage.COPY_DST,
			});
			device.queue.writeBuffer(vertexBuffer, /*bufferOffset=*/0, vertices);
			const vertexBufferLayout = {
				arrayStride: 8,
				attributes: [{
					format: "float32x2",
					offset: 0,
					shaderLocation: 0, // Position, see vertex shader
				}],
			};
			const shaderCodes = `
			struct VertexInput {
				@location(0) pos: vec2f,
				@builtin(instance_index) instance: u32,
			};

			struct VertexOutput {
				@builtin(position) pos: vec4f,
				@location(0) cell: vec2f,
			};

			@group(0) @binding(0) var<uniform> grid: vec2f;

			@vertex
			fn vertexMain(input: VertexInput) -> VertexOutput  {
				let i = f32(input.instance);
				let cell = vec2f(i % grid.x, floor(i / grid.x));
				let cellOffset = cell / grid * 2;
				let gridPos = (input.pos + 1) / grid - 1 + cellOffset;

				var output: VertexOutput;
				output.pos = vec4f(gridPos, 0, 1);
				output.cell = cell;
				return output;
			}

			@fragment
			fn fragmentMain(input: VertexOutput) -> @location(0) vec4f {
				let c = input.cell/grid;
				return vec4f(c, 1.0 - c.x, 1);
			}
			`;
			const cellShaderModule = device.createShaderModule({
				label: "Cell shader",
				code: shaderCodes
				});
			cellPipeline = device.createRenderPipeline({
				label: "Cell pipeline",
				layout: "auto",
				vertex: {
					module: cellShaderModule,
					entryPoint: "vertexMain",
					buffers: [vertexBufferLayout]
				},
				fragment: {
					module: cellShaderModule,
					entryPoint: "fragmentMain",
					targets: [{
						format: this.mCanvasFormat
					}]
				},
			});
			this.mRVertices = vertices;
			this.mVtxBuffer = vertexBuffer;
			this.mRPipeline = cellPipeline;

			this.createUniform(device, cellPipeline);
		}
		pass.setPipeline(cellPipeline);
		pass.setVertexBuffer(0, vertexBuffer);
		pass.setBindGroup(0, this.mUniformBindGroup);
		pass.draw(vertices.length / 2, this.mGridSize * this.mGridSize);
	}

	private clearWGPUCanvas(clearColor: Color4 = null): void {

		clearColor = clearColor ? clearColor : new Color4(0.05, 0.05, 0.1);
		const device = this.mWGPUDevice;
		const context = this.mWGPUContext;
		const rpassParam = {
			colorAttachments: [
				{
					clearValue: clearColor,
					// clearValue: [0.3,0.7,0.5,1.0], // yes
					view: context.getCurrentTexture().createView(),
					loadOp: "clear",
					storeOp: "store"
				}
			]
		};

		const encoder = device.createCommandEncoder();
		const pass = encoder.beginRenderPass( rpassParam );


		this.createRectGeometryData(device, pass);
		pass.end();
		const commandBuffer = encoder.finish();
		device.queue.submit([commandBuffer]);
	}
	private async initWebGPU(canvas: HTMLCanvasElement) {

		const gpu = (navigator as any).gpu;
		if (gpu) {
			console.log("WebGPU supported on this browser.");

			const adapter = await gpu.requestAdapter();
			if (adapter) {
				console.log("Appropriate GPUAdapter found.");
				const device = await adapter.requestDevice();
				if (device) {
					this.mWGPUDevice = device;
					console.log("Appropriate GPUDevice found.");
					const context = canvas.getContext("webgpu") as any;
					const canvasFormat = gpu.getPreferredCanvasFormat();
					this.mWGPUContext = context;
					this.mCanvasFormat = canvasFormat;
					console.log("canvasFormat: ", canvasFormat);
					context.configure({
						device: device,
						format: canvasFormat,
						alphaMode: "premultiplied"
					});
				} else {
					throw new Error("No appropriate GPUDevice found.");
				}
			} else {
				throw new Error("No appropriate GPUAdapter found.");
			}
		} else {
			throw new Error("WebGPU not supported on this browser.");
		}
	}
	run(): void {}
}