参考:MATLAB 全景图切割及盒图显示的实现步骤 | w3cschool笔记
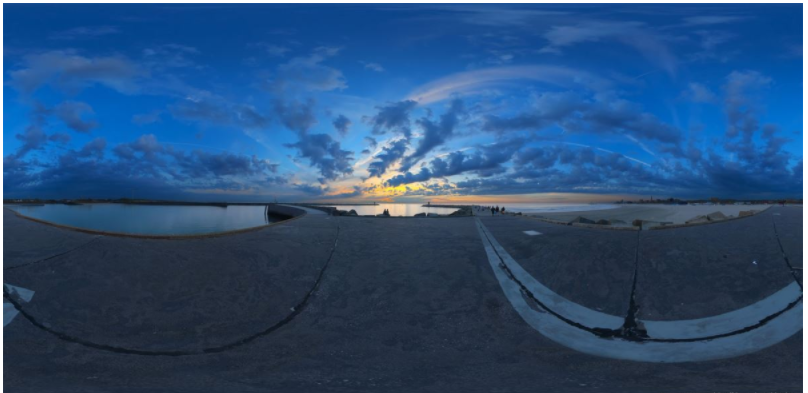
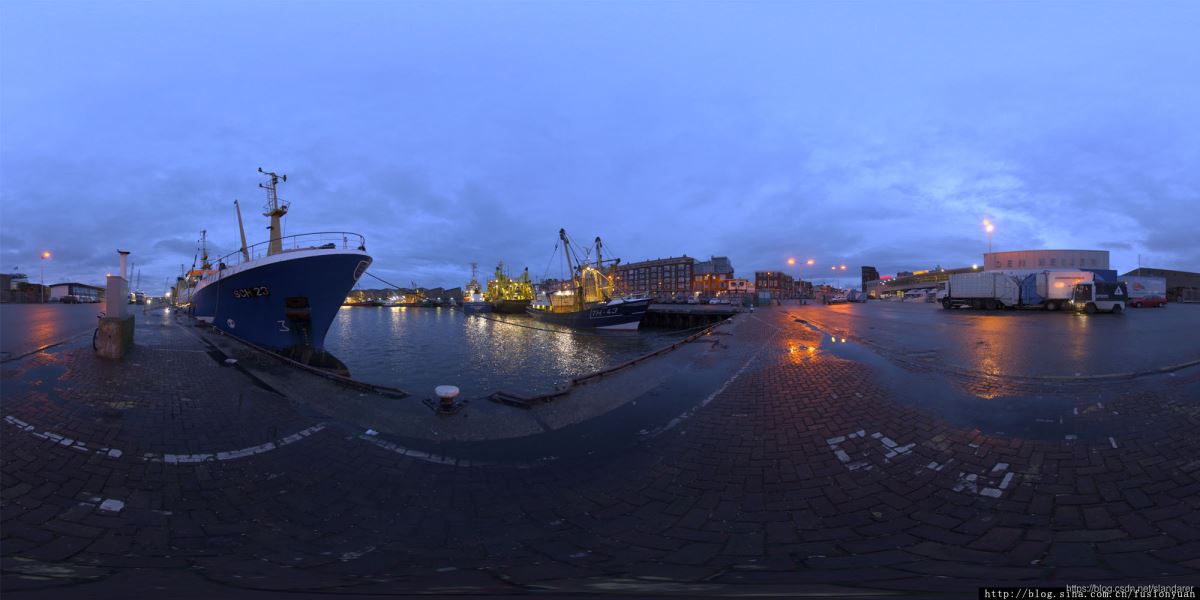
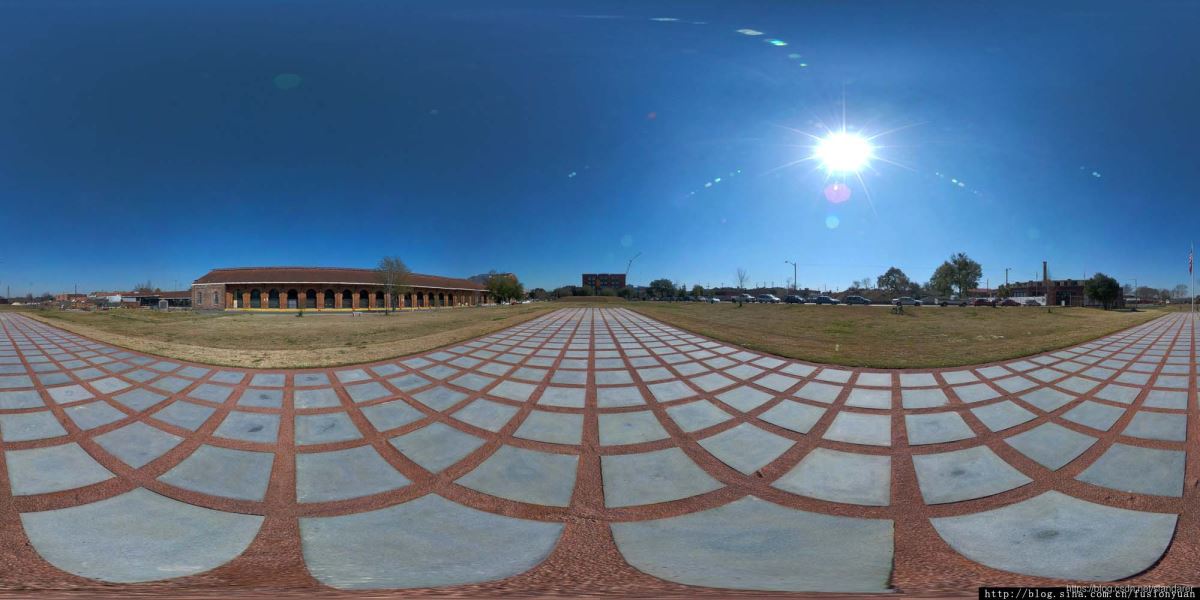
在摄像领域中全景图是一种可以将周围360度景象全部收录的一种拍照技术,但全景图的实际观感并不是那么好(可以看下文的全景图的样例)。我们可以通过matlab来进行全景图的切割,然后转化为盒图的方式显示出来。
part1 全景图切割
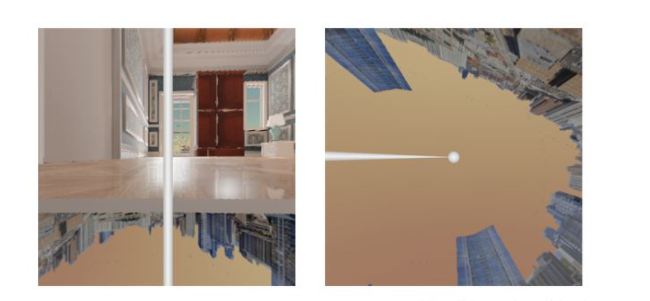
原图:
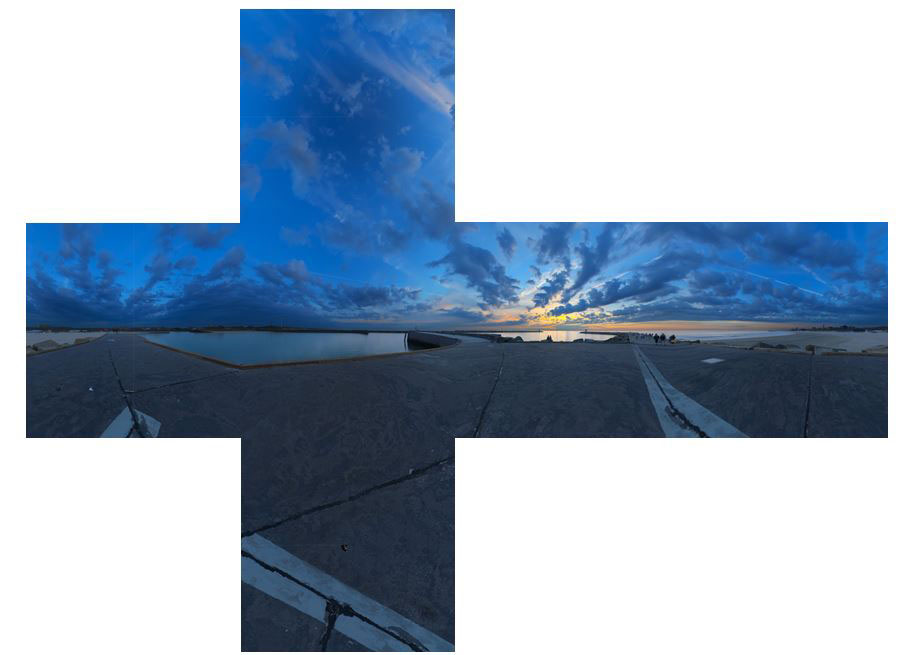
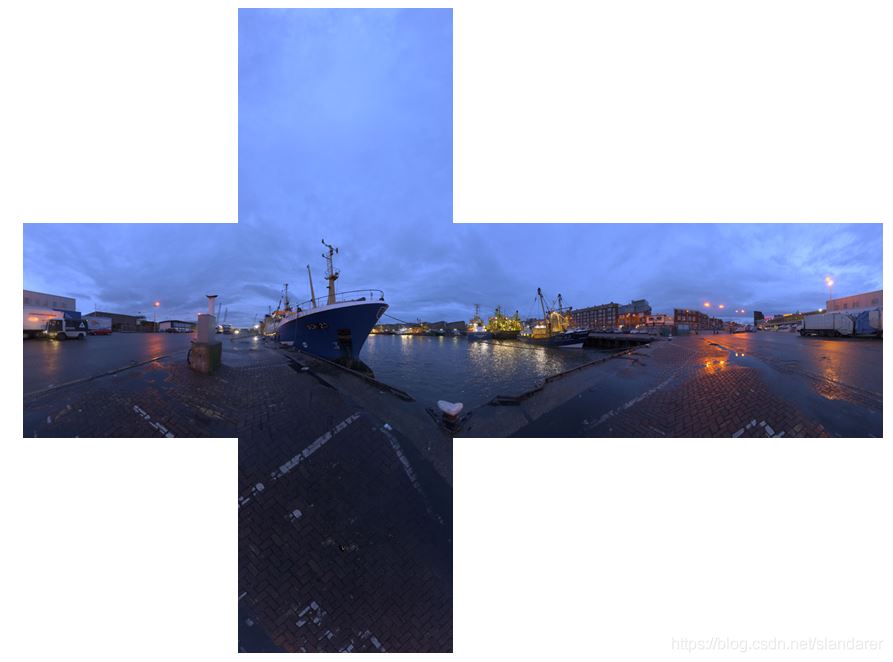
切割效果:
以下是切割部分步骤:
举这张图为例,图片格式hdr,jpg啥的都行:
1.1 边缘剔除
有些全景图会自带白灰色边缘,若是直接进行切割便会出现如下效果:
这时候我们首先要对原图进行白边剔除,代码如下:
oriPic=imread('test.hdr');
[rows,cols,~]=size(oriPic);

for i=cols:-1:1
    tempListR=oriPic(floor(rows/4):ceil(3*rows/4),i,1);
    tempListG=oriPic(floor(rows/4):ceil(3*rows/4),i,1);
    tempListB=oriPic(floor(rows/4):ceil(3*rows/4),i,1);
    if all(round(tempListR-mean(tempListR))==0)&&all(tempListR==tempListG)&&all(tempListR==tempListB)
        oriPic(:,i,:)=[];
    else
        break;
    end
end
oriPic=oriPic(:,end:-1:1,:);
for i=size(oriPic,2):-1:1
    tempListR=oriPic(floor(rows/4):ceil(3*rows/4),i,1);
    tempListG=oriPic(floor(rows/4):ceil(3*rows/4),i,1);
    tempListB=oriPic(floor(rows/4):ceil(3*rows/4),i,1);
    if all(round(tempListR-mean(tempListR))==0)&&all(tempListR==tempListG)&&all(tempListR==tempListB)
        oriPic(:,i,:)=[];
    else
        break;
    end
end
oriPic=oriPic(:,end:-1:1,:);
for i=rows:-1:1
    tempListR=oriPic(i,floor(cols/4):ceil(3*cols/4),1);
    tempListG=oriPic(i,floor(cols/4):ceil(3*cols/4),1);
    tempListB=oriPic(i,floor(cols/4):ceil(3*cols/4),1);
    if all(round(tempListR-mean(tempListR))==0)&&all(tempListR==tempListG)&&all(tempListR==tempListB)
        oriPic(i,:,:)=[];
    else
        break;
    end
end
oriPic=oriPic(end:-1:1,:,:);
for i=size(oriPic,1):-1:1
    tempListR=oriPic(i,floor(cols/4):ceil(3*cols/4),1);
    tempListG=oriPic(i,floor(cols/4):ceil(3*cols/4),1);
    tempListB=oriPic(i,floor(cols/4):ceil(3*cols/4),1);
    if all(round(tempListR-mean(tempListR))==0)&&all(tempListR==tempListG)&&all(tempListR==tempListB)
        oriPic(i,:,:)=[];
    else
        break;
    end
end
oriPic=oriPic(end:-1:1,:,:);
1.2 图像裁剪
我们要让完成的就是如下的变换和裁剪:

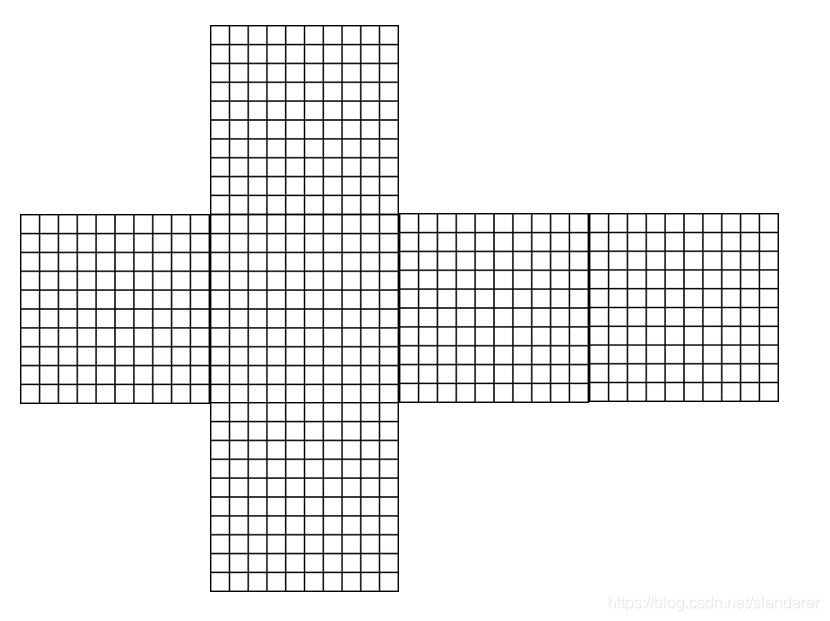
这部分其实已经有较为成熟的原理和代码:
代码参考:https://stackoverflow.com/questions/29678510/convert-21-equirectangular-panorama-to-cube-map
原理参考:
http://paulbourke.net/panorama/cubemaps/#1
http://paulbourke.net/panorama/cubemaps/
原理参考文章中更加清晰的变化图:
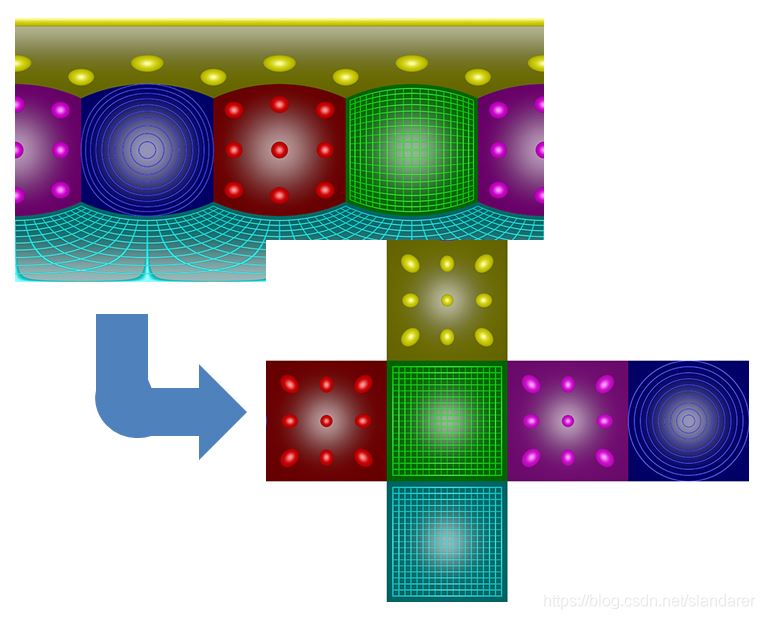
另:
在参考代码的基础上,对映射像素进行了插值处理,可以使图像更加平滑,原理如下:


主要函数代码:
function resultPic=createCubeMapFace(oriPic,id,height,width)
    [M,N,~]=size(oriPic);
    resultPic=zeros([height,width,3]);
    an=sin(pi/4);
    ak=cos(pi/4);

    faceTransform=[0,0;
               pi/2,0;
               pi,0;
               -pi/2,0;
               0,-pi/2;
               0,pi];
    ftu=faceTransform(id,1);
    ftv=faceTransform(id,2);

    for y=0:height-1
        for x=0:width-1
            nx=y/height-0.5;
            ny=x/width-0.5;

            nx=nx*2*an;
            ny=ny*2*an;

            if (ftv == 0)
                u=atan2(nx, ak);
                v=atan2(ny*cos(u),ak);
                u=u+ftu;
            elseif(ftv>0)
                d=sqrt(nx*nx+ny*ny);
                v=pi/2-atan2(d,ak);
                u=atan2(ny,nx);
            else
                d=sqrt(nx*nx+ny*ny);
                v=-pi/2+atan2(d,ak);
                u=atan2(-ny,nx);
            end

            u=u/(pi);
            v=v/(pi/2);

            while(v<-1)
                v=v+2;
                u=u+1;
            end
            while(v>1)
                v=v-2;
                u=u+1;
            end
            while(u<-1)
                u=u+2;
            end
            while(u>1)
                u=u-2;
            end
            u=u/2+0.5;
            v=v/2+0.5;

            u=u*(N-1)+1;
            v=v*(M-1)+1;

            fv=floor(v);fv1=floor(v)+1;pv=v-fv;fv1(fv1>M)=M;
            fu=floor(u);fu1=floor(u)+1;pu=u-fu;fu1(fu1>N)=N;
            resultPic(x+1,y+1,:)=double(oriPic(fv,fu,:)).*(1-pv).*(1-pu)+...
                                 double(oriPic(fv1,fu,:)).*(pv).*(1-pu)+...
                                 double(oriPic(fv,fu1,:)).*(1-pv).*(pu)+...
                                 double(oriPic(fv1,fu1,:)).*(pv).*(pu);
        end
    end
    resultPic=uint8(resultPic);
end
函数调用及图像存储:
这里后面长宽数值可以任意设定,但是要求长宽数值一致,如果按照当前写法,结果被存储至result文件夹:
if ~exist('result','dir')
mkdir('result');
end
for i=1:6
resultPic=createCubeMapFace(oriPic,i,500,500);
figure(i)
imshow(resultPic)
imwrite(resultPic,['result',num2str(i),'.jpg'])
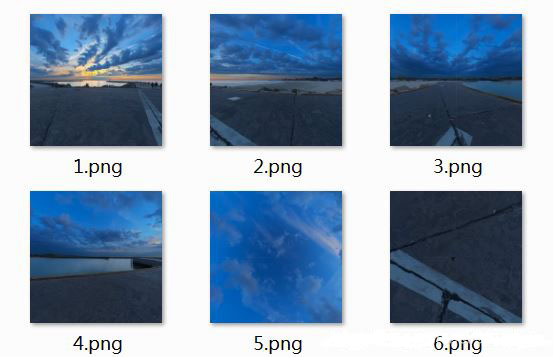
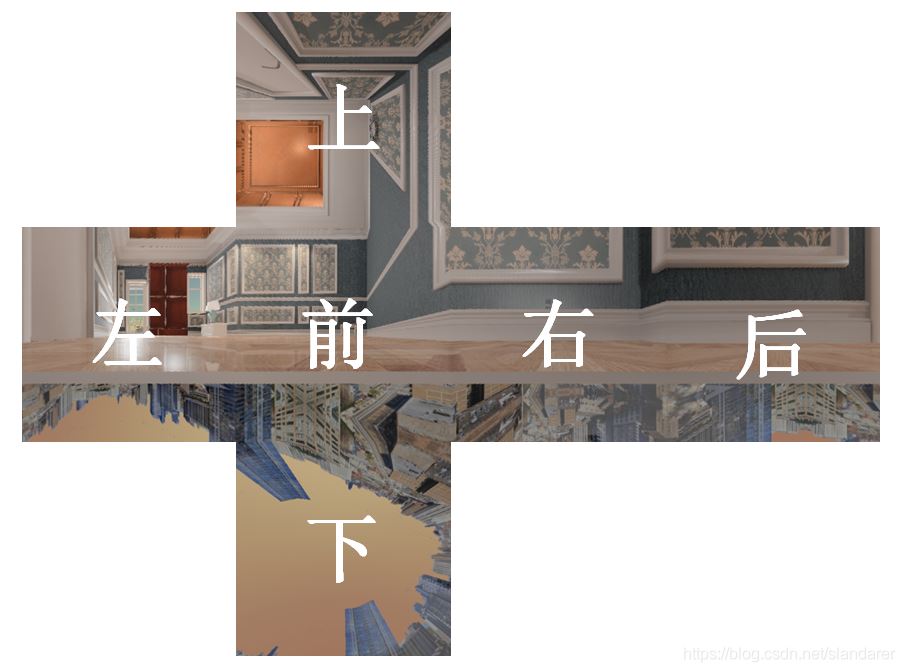
end另: 如图所示
图片序号[1,2,3,4,5,6]分别对应图片[右,后,左,前,上,下]
1.3 完整代码
function panoramic2box
oriPic=imread('889027-884424860.jpg');
[rows,cols,~]=size(oriPic);
for i=cols:-1:1
tempListR=oriPic(floor(rows/4):ceil(3*rows/4),i,1);
tempListG=oriPic(floor(rows/4):ceil(3*rows/4),i,1);
tempListB=oriPic(floor(rows/4):ceil(3*rows/4),i,1);
if all(round(tempListR-mean(tempListR))==0)&&all(tempListR==tempListG)&&all(tempListR==tempListB)
oriPic(:,i,:)=[];
else
break;
end
end
oriPic=oriPic(:,end:-1:1,:);
for i=size(oriPic,2):-1:1
tempListR=oriPic(floor(rows/4):ceil(3*rows/4),i,1);
tempListG=oriPic(floor(rows/4):ceil(3*rows/4),i,1);
tempListB=oriPic(floor(rows/4):ceil(3*rows/4),i,1);
if all(round(tempListR-mean(tempListR))==0)&&all(tempListR==tempListG)&&all(tempListR==tempListB)
oriPic(:,i,:)=[];
else
break;
end
end
oriPic=oriPic(:,end:-1:1,:);
for i=rows:-1:1
tempListR=oriPic(i,floor(cols/4):ceil(3*cols/4),1);
tempListG=oriPic(i,floor(cols/4):ceil(3*cols/4),1);
tempListB=oriPic(i,floor(cols/4):ceil(3*cols/4),1);
if all(round(tempListR-mean(tempListR))==0)&&all(tempListR==tempListG)&&all(tempListR==tempListB)
oriPic(i,:,:)=[];
else
break;
end
end
oriPic=oriPic(end:-1:1,:,:);
for i=size(oriPic,1):-1:1
tempListR=oriPic(i,floor(cols/4):ceil(3*cols/4),1);
tempListG=oriPic(i,floor(cols/4):ceil(3*cols/4),1);
tempListB=oriPic(i,floor(cols/4):ceil(3*cols/4),1);
if all(round(tempListR-mean(tempListR))==0)&&all(tempListR==tempListG)&&all(tempListR==tempListB)
oriPic(i,:,:)=[];
else
break;
end
end
oriPic=oriPic(end:-1:1,:,:);
% =========================================================================
if ~exist('result','dir')
mkdir('result');
end
for i=1:6
resultPic=createCubeMapFace(oriPic,i,500,500);
figure(i)
imshow(resultPic)
imwrite(resultPic,['result',num2str(i),'.jpg'])
end
% =========================================================================
function resultPic=createCubeMapFace(oriPic,id,height,width)
[M,N,~]=size(oriPic);
resultPic=zeros([height,width,3]);
an=sin(pi/4);
ak=cos(pi/4);
faceTransform=[0,0;
pi/2,0;
pi,0;
-pi/2,0;
0,-pi/2;
0,pi];
ftu=faceTransform(id,1);
ftv=faceTransform(id,2);
for y=0:height-1
for x=0:width-1
nx=y/height-0.5;
ny=x/width-0.5;
nx=nx*2*an;
ny=ny*2*an;
if (ftv == 0)
u=atan2(nx, ak);
v=atan2(ny*cos(u),ak);
u=u+ftu;
elseif(ftv>0)
d=sqrt(nx*nx+ny*ny);
v=pi/2-atan2(d,ak);
u=atan2(ny,nx);
else
d=sqrt(nx*nx+ny*ny);
v=-pi/2+atan2(d,ak);
u=atan2(-ny,nx);
end
u=u/(pi);
v=v/(pi/2);
while(v<-1)
v=v+2;
u=u+1;
end
while(v>1)
v=v-2;
u=u+1;
end
while(u<-1)
u=u+2;
end
while(u>1)
u=u-2;
end
u=u/2+0.5;
v=v/2+0.5;
u=u*(N-1)+1;
v=v*(M-1)+1;
fv=floor(v);fv1=floor(v)+1;pv=v-fv;fv1(fv1>M)=M;
fu=floor(u);fu1=floor(u)+1;pu=u-fu;fu1(fu1>N)=N;
resultPic(x+1,y+1,:)=double(oriPic(fv,fu,:)).*(1-pv).*(1-pu)+...
double(oriPic(fv1,fu,:)).*(pv).*(1-pu)+...
double(oriPic(fv,fu1,:)).*(1-pv).*(pu)+...
double(oriPic(fv1,fu1,:)).*(pv).*(pu);
end
end
resultPic=uint8(resultPic);
end
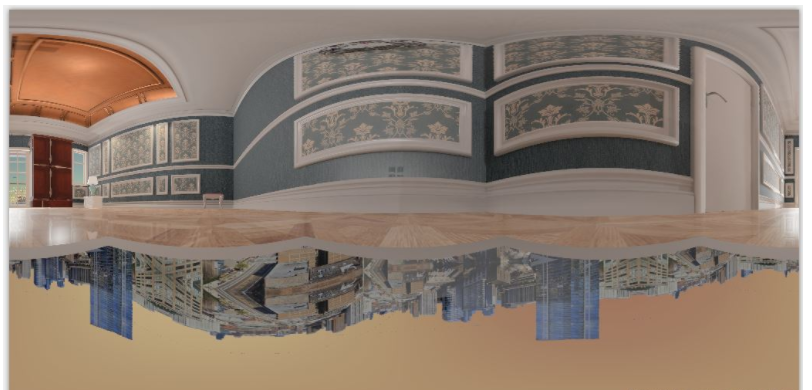
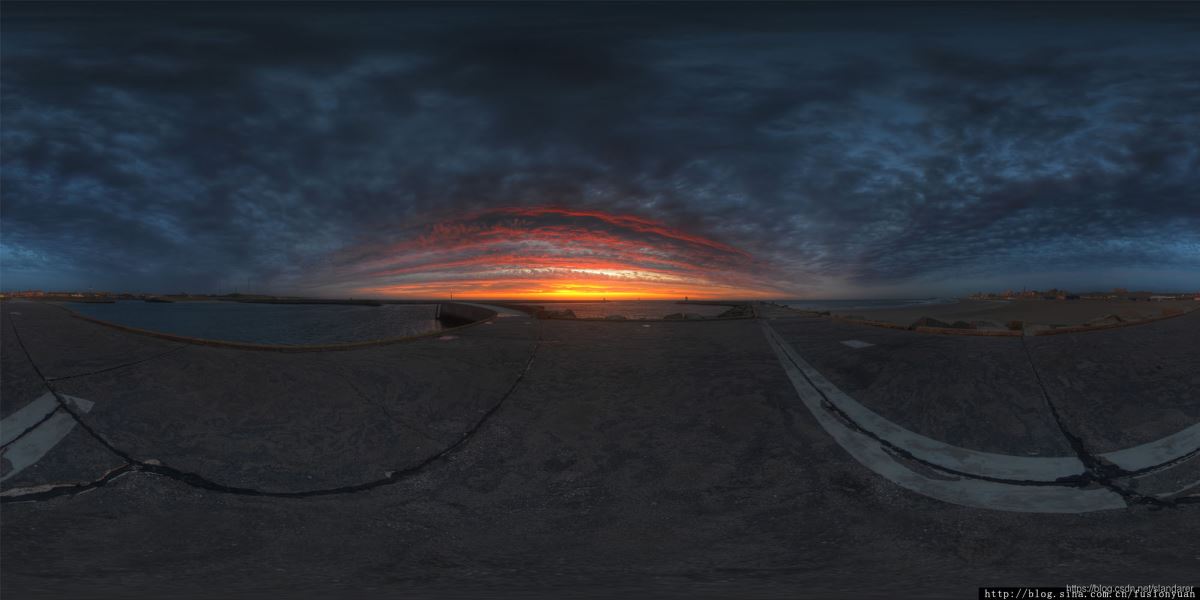
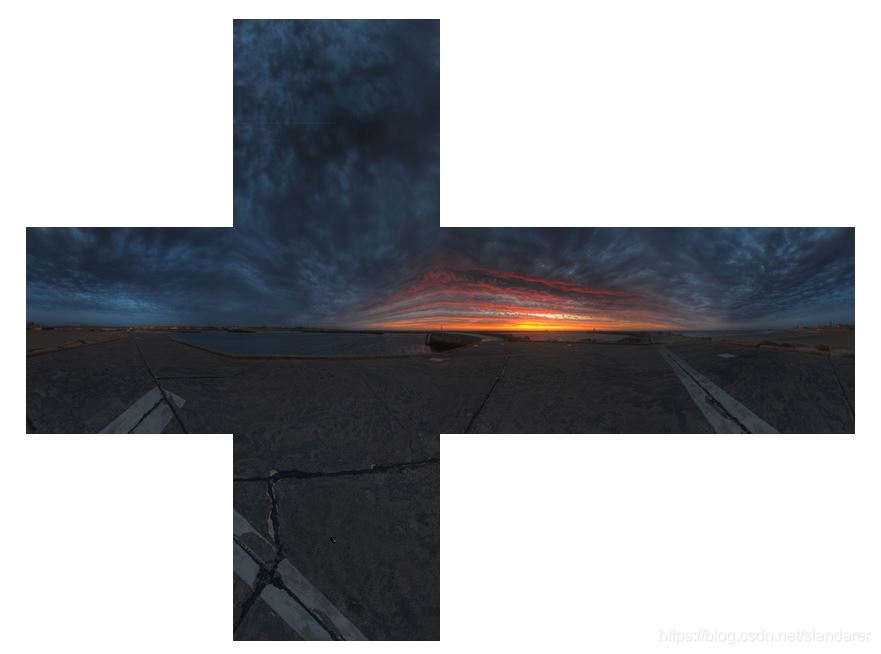
end1.4 其他几组切割结果
图片源自:https://www.cgmodel.com/article/9004.html

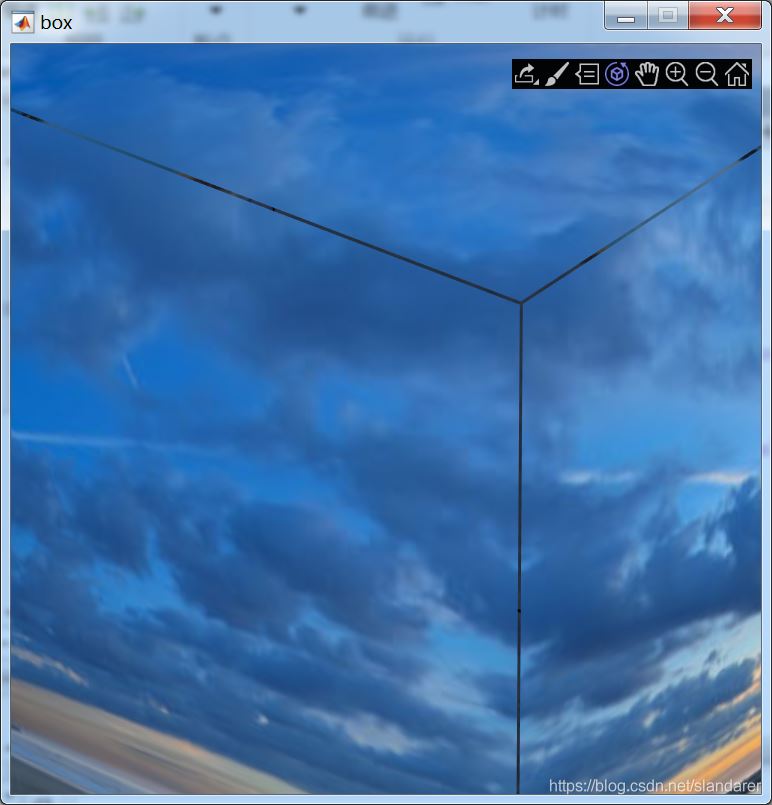
part2 盒图展示
2.1 曲面绘制
使用surf绘制各个曲面后,并为各个曲面贴图:
for i=1:6
    oriPic.(['p',num2str(i)])=imread(['result',num2str(i),'.jpg']);
end
[rows,cols,~]=size(oriPic.p1);
[baseXY,baseZ]=meshgrid(1:cols,rows:-1:1);

ax=gca;hold(ax,'on')


surf(baseXY(:,end:-1:1)-(1+rows)/2,-(rows-1)./2.*ones(size(baseXY)),baseZ,'CData',oriPic.p1,'EdgeColor','none','FaceColor','interp')
surf(-(rows-1)./2.*ones(size(baseXY)),baseXY-(1+rows)/2,baseZ,'CData',oriPic.p2,'EdgeColor','none','FaceColor','interp')
surf(baseXY-(1+rows)/2,(rows-1)./2.*ones(size(baseXY)),baseZ,'CData',oriPic.p3,'EdgeColor','none','FaceColor','interp')
surf((rows-1)./2.*ones(size(baseXY)),baseXY(:,end:-1:1)-(1+rows)/2,baseZ,'CData',oriPic.p4,'EdgeColor','none','FaceColor','interp')
surf(baseXY'-(1+rows)/2,baseXY-(1+rows)/2,ones(size(baseXY)),'CData',oriPic.p6(end:-1:1,end:-1:1,:),'EdgeColor','none','FaceColor','interp')
surf(baseXY'-(1+rows)/2,baseXY-(1+rows)/2,rows-1+ones(size(baseXY)),'CData',oriPic.p5(:,end:-1:1,:),'EdgeColor','none','FaceColor','interp')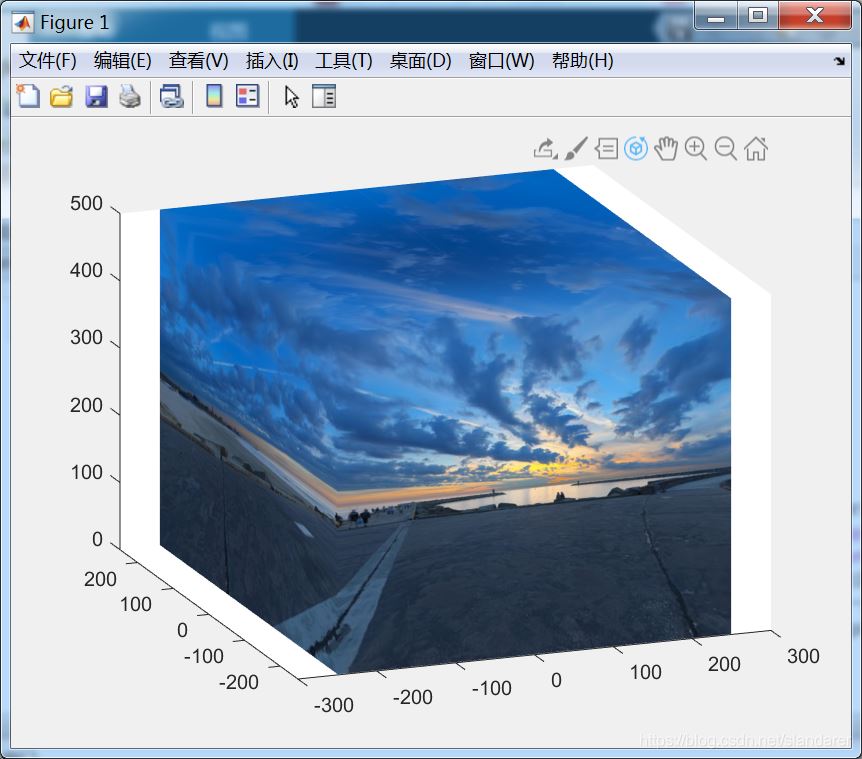
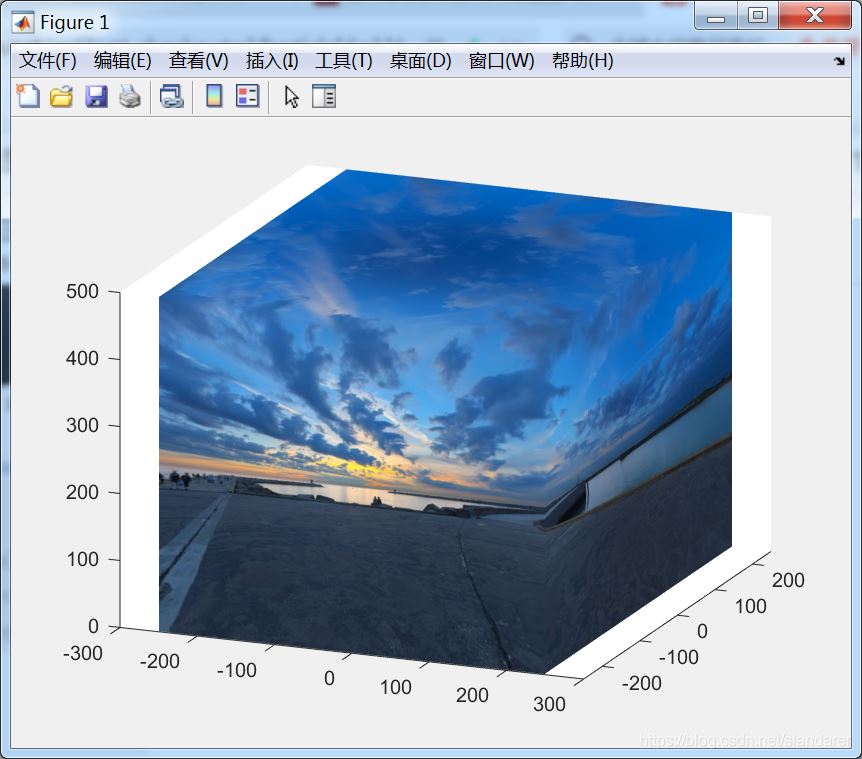
2.2 视角调整
通过设置axes属性将视角调整至盒子里面
ax=axes('parent',fig,'position',[-0.45 -0.45 1.9 1.9]);hold(ax,'on')
ax.ZLim=[0,rows+1];
ax.XLim=[0-(1+rows)/2,rows+1-(1+rows)/2];
ax.YLim=[0-(1+rows)/2,rows+1-(1+rows)/2];
ax.Color=[0 0 0];
ax.CameraPosition=[0,0,rows/2];
ax.CameraPositionMode='manual';
ax.DataAspectRatio=[1,1,1];
ax.DataAspectRatioMode='manual';
ax.Projection='perspective';
ax.CameraTargetMode='manual';
ax.CameraViewAngle = 7;
ax.View=[-2.7391 90.0000];
ax.CameraTarget=[0 0 (rows-1)/2];
ax.Toolbar.Visible='on';
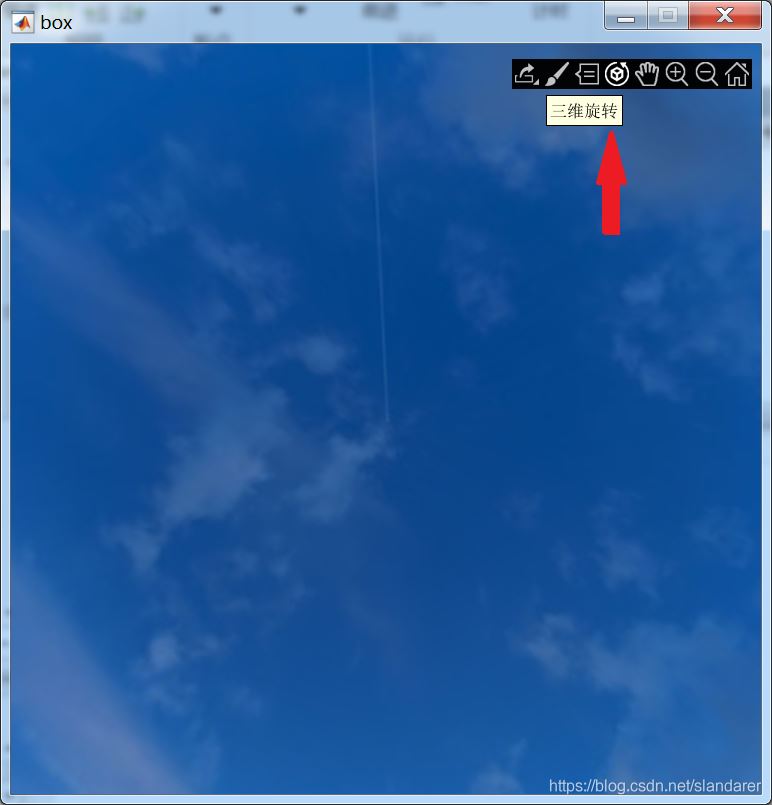
运行后点击那个三位旋转按钮即可开始漫游
此时的盒图是无缝隙版本,有缝隙版放在后面
2.3 完整代码
无缝隙版:
function showBox
for i=1:6
    oriPic.(['p',num2str(i)])=imread(['result',num2str(i),'.jpg']);
end
[rows,cols,~]=size(oriPic.p1);
[baseXY,baseZ]=meshgrid(1:cols,rows:-1:1);

fig=figure('units','pixels','position',[300 80 500 500],...
                       'Numbertitle','off','menubar','none','resize','off',...
                       'name','box');


ax=axes('parent',fig,'position',[-0.45 -0.45 1.9 1.9]);hold(ax,'on')
ax.ZLim=[0,rows+1];
ax.XLim=[0-(1+rows)/2,rows+1-(1+rows)/2];
ax.YLim=[0-(1+rows)/2,rows+1-(1+rows)/2];
ax.Color=[0 0 0];
ax.CameraPosition=[0,0,rows/2];
ax.CameraPositionMode='manual';
ax.DataAspectRatio=[1,1,1];
ax.DataAspectRatioMode='manual';
ax.Projection='perspective';
ax.CameraTargetMode='manual';
ax.CameraViewAngle = 7;
ax.View=[-2.7391 90.0000];
ax.CameraTarget=[0 0 (rows-1)/2];
ax.Toolbar.Visible='on';


surf(baseXY(:,end:-1:1)-(1+rows)/2,-(rows-1)./2.*ones(size(baseXY)),baseZ,'CData',oriPic.p1,'EdgeColor','none','FaceColor','interp')
surf(-(rows-1)./2.*ones(size(baseXY)),baseXY-(1+rows)/2,baseZ,'CData',oriPic.p2,'EdgeColor','none','FaceColor','interp')
surf(baseXY-(1+rows)/2,(rows-1)./2.*ones(size(baseXY)),baseZ,'CData',oriPic.p3,'EdgeColor','none','FaceColor','interp')
surf((rows-1)./2.*ones(size(baseXY)),baseXY(:,end:-1:1)-(1+rows)/2,baseZ,'CData',oriPic.p4,'EdgeColor','none','FaceColor','interp')
surf(baseXY'-(1+rows)/2,baseXY-(1+rows)/2,ones(size(baseXY)),'CData',oriPic.p6(end:-1:1,end:-1:1,:),'EdgeColor','none','FaceColor','interp')
surf(baseXY'-(1+rows)/2,baseXY-(1+rows)/2,rows-1+ones(size(baseXY)),'CData',oriPic.p5(:,end:-1:1,:),'EdgeColor','none','FaceColor','interp')

end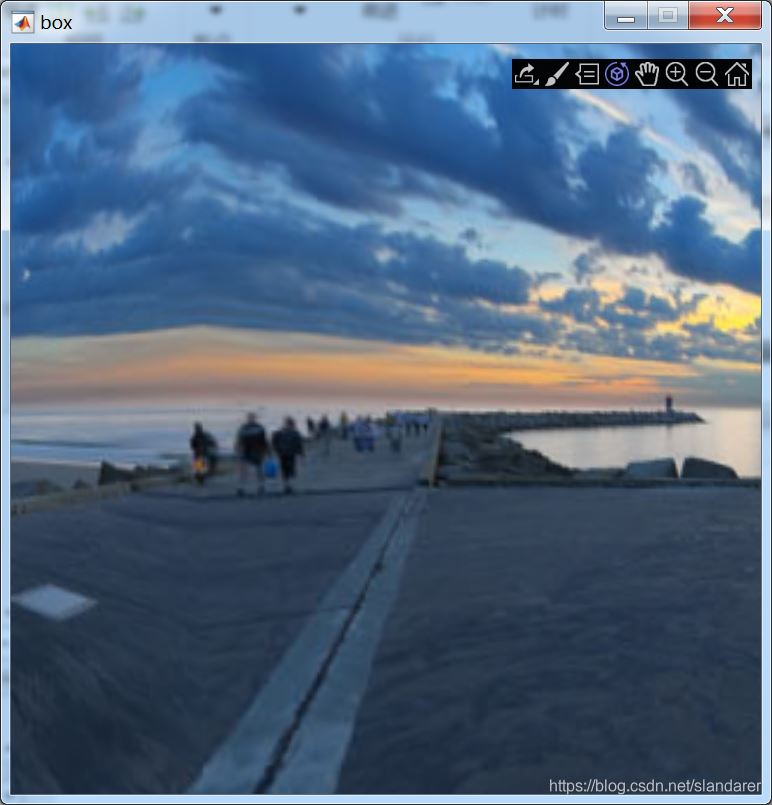
有缝隙版:
function showBox2
for i=1:6
    oriPic.(['p',num2str(i)])=imread(['result',num2str(i),'.jpg']);
end
[rows,cols,~]=size(oriPic.p1);
[baseXY,baseZ]=meshgrid(1:cols,rows:-1:1);

fig=figure('units','pixels','position',[300 80 500 500],...
                       'Numbertitle','off','menubar','none','resize','off',...
                       'name','box');


ax=axes('parent',fig,'position',[-0.45 -0.45 1.9 1.9]);hold(ax,'on')
ax.ZLim=[0,rows+1];
ax.XLim=[0-(1+rows)/2,rows+1-(1+rows)/2];
ax.YLim=[0-(1+rows)/2,rows+1-(1+rows)/2];
ax.Color=[0 0 0];
ax.CameraPosition=[0,0,rows/2];
ax.CameraPositionMode='manual';
ax.DataAspectRatio=[1,1,1];
ax.DataAspectRatioMode='manual';
ax.Projection='perspective';
ax.CameraTargetMode='manual';
ax.CameraViewAngle = 7;
ax.View=[-2.7391 90.0000];
ax.CameraTarget=[0 0 (rows+1)/2];
ax.Toolbar.Visible='on';


surf(baseXY(:,end:-1:1)-rows/2,-rows./2.*ones(size(baseXY)),baseZ,'CData',oriPic.p1,'EdgeColor','none','FaceColor','interp')
surf(-rows./2.*ones(size(baseXY)),baseXY-(1+rows)/2,baseZ,'CData',oriPic.p2,'EdgeColor','none','FaceColor','interp')
surf(baseXY-(1+rows)/2,rows./2.*ones(size(baseXY)),baseZ,'CData',oriPic.p3,'EdgeColor','none','FaceColor','interp')
surf(rows./2.*ones(size(baseXY)),baseXY(:,end:-1:1)-(1+rows)/2,baseZ,'CData',oriPic.p4,'EdgeColor','none','FaceColor','interp')
surf(baseXY'-(1+rows)/2,baseXY-(1+rows)/2,zeros(size(baseXY)),'CData',oriPic.p6(end:-1:1,end:-1:1,:),'EdgeColor','none','FaceColor','interp')
surf(baseXY'-(1+rows)/2,baseXY-(1+rows)/2,rows+ones(size(baseXY)),'CData',oriPic.p5(:,end:-1:1,:),'EdgeColor','none','FaceColor','interp')

end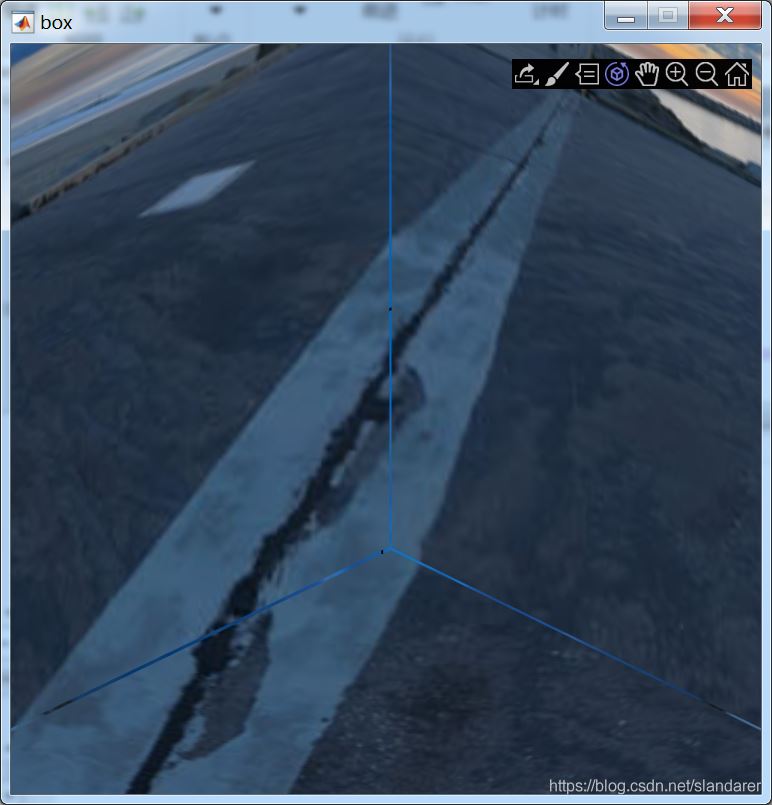
以上就是MATLAB 全景图切割及盒图显示的详细内容


![[量化投资-学习笔记011]Python+TDengine从零开始搭建量化分析平台-MACD金死叉策略回测](https://img-blog.csdnimg.cn/675ed52caf504b43a411a08574e48704.png#pic_center)