1. 方法1 (C++源码)
1.1 创建一个普通的qml工程,写入ListView测试代码
import QtQuick 2.15
import QtQuick.Window 2.15

Window {
    width: 640
    height: 500
    visible: true
    title: qsTr("Hello World")

    ListView{
        id:lv
        width: 100
        height: 500
        spacing: 5
        model: ListModel{
            ListElement{name: "Jack";  age: "18"}
            ListElement{name: "Tom";  age: "19"}
            ListElement{name: "Rose";  age: "20"}
        }

        delegate: Rectangle{
            id: dl
            required property int index
            required property string name
            required property string age

            height: 50
            width: 100
            color: "red"
            Text{
                text: dl.index +" "+ dl.name + " "+ dl.age
            }
        }
    }
}

1.2 下面我们用C++实现model部分
1.3 新建C++类
注意:C++文件不要加到*.qrc中
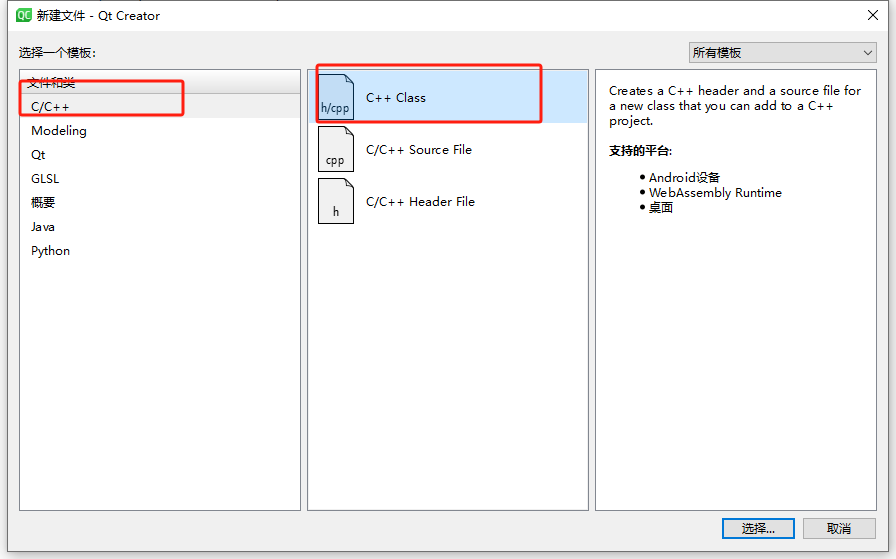
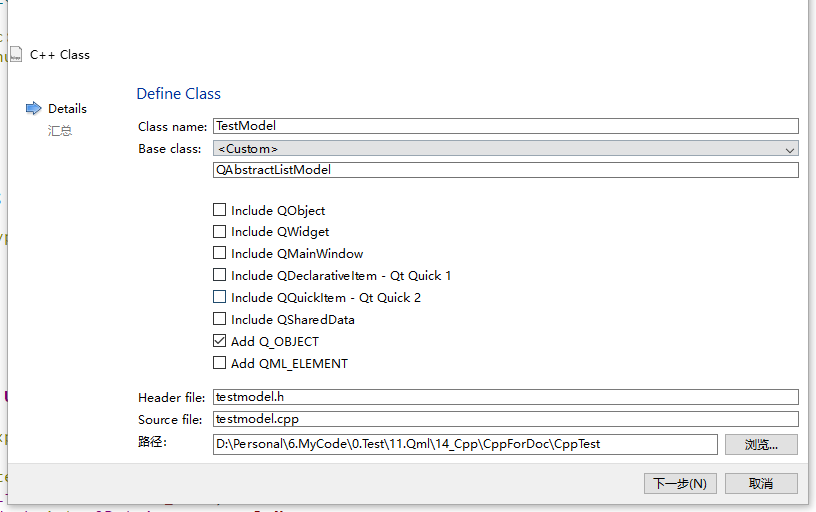
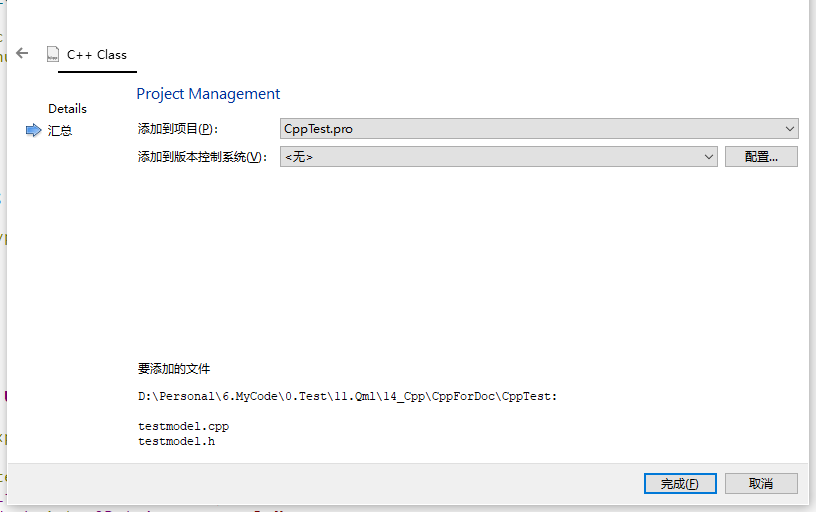
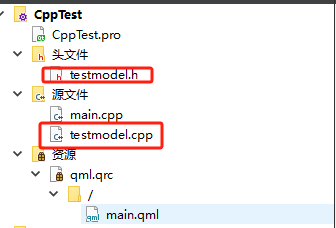
1.4 新建完成后,工程中多了两个文件
testmodel.cpp
testmodel.h
1.5 添加虚函数
- 选中类 -> 鼠标右键 -> 重构 -> 插入虚函数
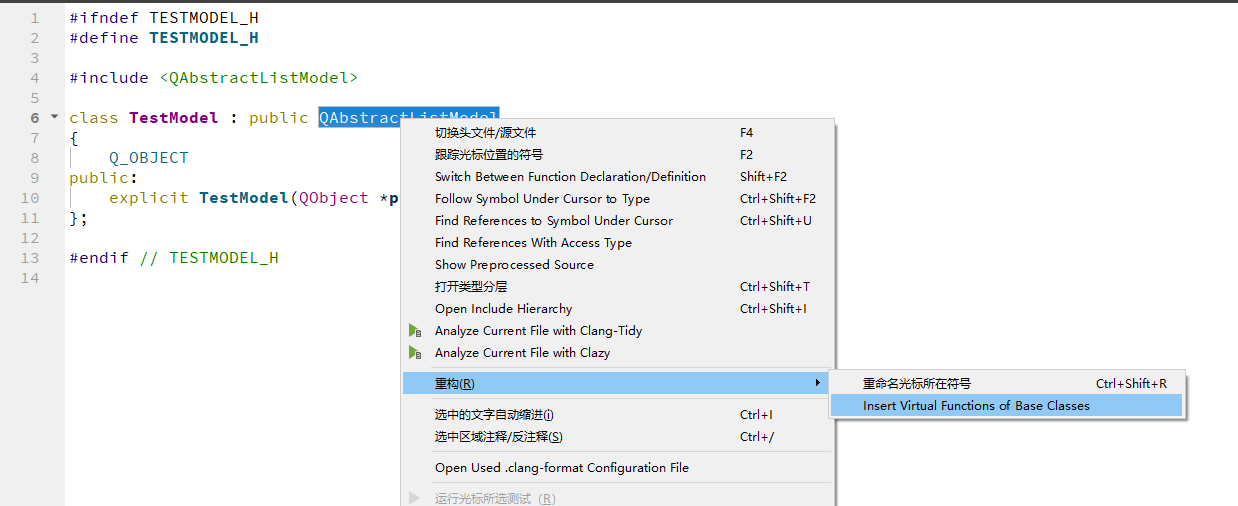
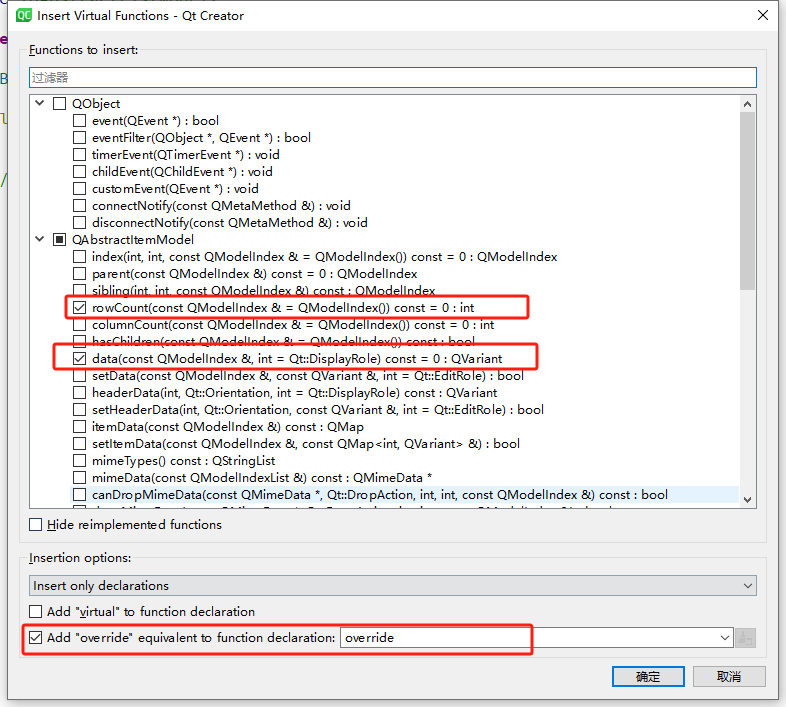
注意: 三个虚函数:

1.6 testmodel.h文件中添加如下内容
#ifndef TESTMODEL_H
#define TESTMODEL_H

#include <QAbstractListModel>

class TestModel : public QAbstractListModel
{
    Q_OBJECT
public:
    explicit TestModel(QObject *parent = nullptr);


    // QAbstractItemModel interface
public:
    int rowCount(const QModelIndex &parent) const override;
    QVariant data(const QModelIndex &index, int role) const override;
    QHash<int, QByteArray> roleNames() const override;

public:
    enum RoleNames{
        NameRole = 0,
        AgeRole,
    };

    typedef struct{
        QString name;
        QString age;
    } TestData_t;

private:
    QList<TestData_t>m_data;
    QHash<int, QByteArray>m_roleNames;
};

#endif // TESTMODEL_H
1.7 在textmodel.cpp代码中实现
- 添加实现
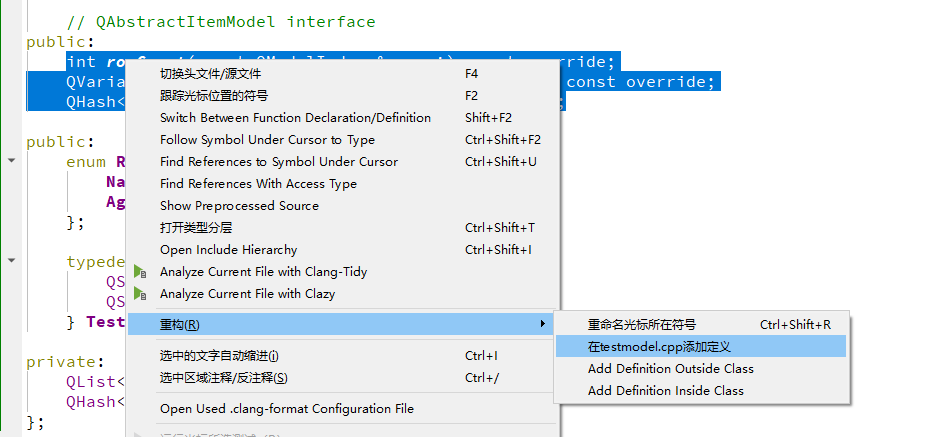
- 此时testmodel.cpp中的内容
#include "testmodel.h"

TestModel::TestModel(QObject *parent)
    : QAbstractListModel{parent}
{

}

int TestModel::rowCount(const QModelIndex &parent) const
{

}

QVariant TestModel::data(const QModelIndex &index, int role) const
{

}

QHash<int, QByteArray> TestModel::roleNames() const
{

}
- 添加如下内容
#include "testmodel.h"

TestModel::TestModel(QObject *parent)
    : QAbstractListModel{parent}
{
    //初始化角色
    m_roleNames[NameRole] = "name";
    m_roleNames[AgeRole] = "age";

    // 添加数据
    TestData_t testdata;
    testdata.name = "Jack";
    testdata.age = "18";
    m_data.append(testdata);

    testdata.name = "Tom";
    testdata.age = "19";
    m_data.append(testdata);

    testdata.name = "Rose";
    testdata.age = "20";
    m_data.append(testdata);
}

int TestModel::rowCount(const QModelIndex &parent) const
{
    return m_data.count();
}

QVariant TestModel::data(const QModelIndex &index, int role) const
{
    int row = index.row();

    if(row<0 || row>=m_data.count())
        return QVariant();

    const TestData_t & testData = m_data.at(row);

	//根据角色返回数据
    switch(role)
    {
    case NameRole:      return testData.name;
    case AgeRole:       return testData.age;
    }

    return QVariant();
}

QHash<int, QByteArray> TestModel::roleNames() const
{
    return m_roleNames;
}
1.8 在main.cpp中注册模块
- 添加两行代码
#include "testmodel.h"  //添加头文件

//注册类型
qmlRegisterType<TestModel>("org.test", 1, 0, "TestModel");
- 修改后的代码
#include <QGuiApplication>
#include <QQmlApplicationEngine>
#include "testmodel.h"  //添加头文件


int main(int argc, char *argv[])
{
#if QT_VERSION < QT_VERSION_CHECK(6, 0, 0)
    QCoreApplication::setAttribute(Qt::AA_EnableHighDpiScaling);
#endif
    QGuiApplication app(argc, argv);

    QQmlApplicationEngine engine;
    const QUrl url(QStringLiteral("qrc:/main.qml"));

    //注册类型
    qmlRegisterType<TestModel>("org.test", 1, 0, "TestModel");

    QObject::connect(&engine, &QQmlApplicationEngine::objectCreated,
        &app, [url](QObject *obj, const QUrl &objUrl) {
            if (!obj && url == objUrl)
                QCoreApplication::exit(-1);
        }, Qt::QueuedConnection);
    engine.load(url);

    return app.exec();
}
1.9 在qml中使用
- 导入模块
import org.test 1.0 //导入自定义模块
- 使用模块
model: TestModel{} //使用自定义的模块
- 新的代码
import QtQuick 2.15
import QtQuick.Window 2.15
import org.test 1.0 //导入自定义模块

Window {
    width: 640
    height: 500
    visible: true
    title: qsTr("Hello World")

    ListView{
        id:lv
        width: 100
        height: 500
        spacing: 5
        model: TestModel{}  //使用自定义的模块
//            ListModel{
//            ListElement{name: "Jack";  age: "18"}
//            ListElement{name: "Tom";  age: "19"}
//            ListElement{name: "Rose";  age: "20"}
//        }

        delegate: Rectangle{
            id: dl
            required property int index
            required property string name
            required property string age

            height: 50
            width: 100
            color: "red"
            Text{
                text: dl.index +" "+ dl.name + " "+ dl.age
            }
        }
    }
}
1. 10 运行效果(与之前的一样)

2. 方法2(DLL动态链接库)
2.1 生成库文件
1. 新建库
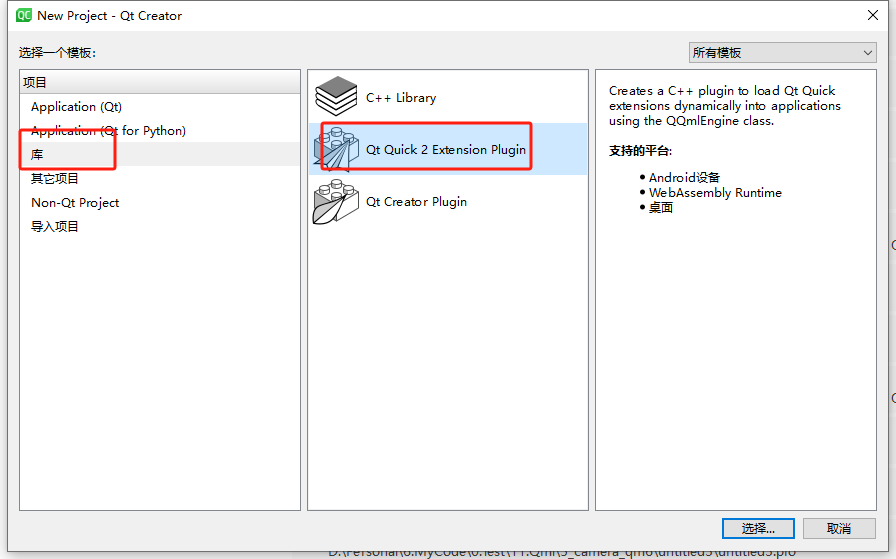
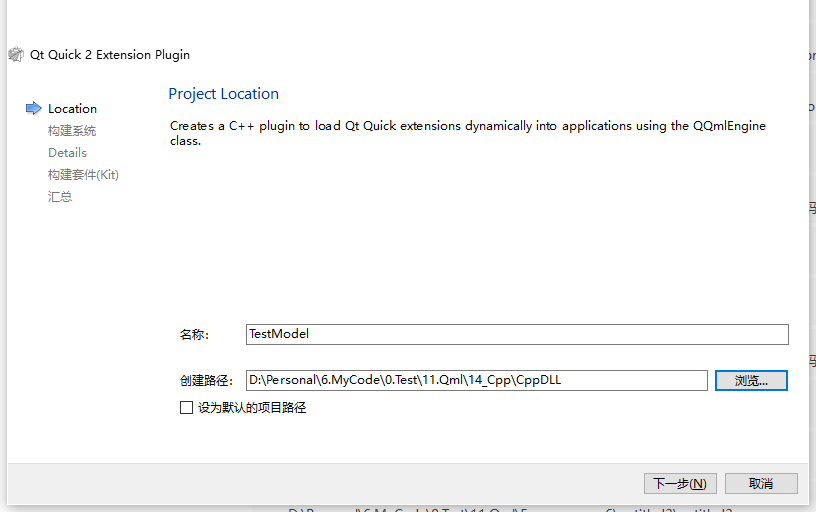
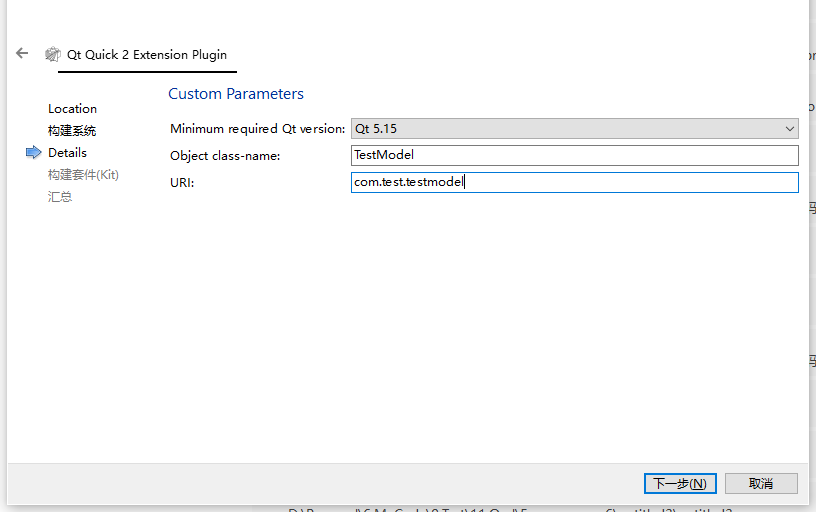
- 工程目录结构

2. 库代码
- 将方法1中的testmodel.h和testmodel.cpp两个文件覆盖本项目中的同名文件
3. 构建
- 点击
构建

4. 生成的库文件
- 在debug目录下生成了
TestModel.dll文件 - 把TestModel.dll和qmldir文件拷出来备用
2.2 使用库文件
1. 新建qml工程
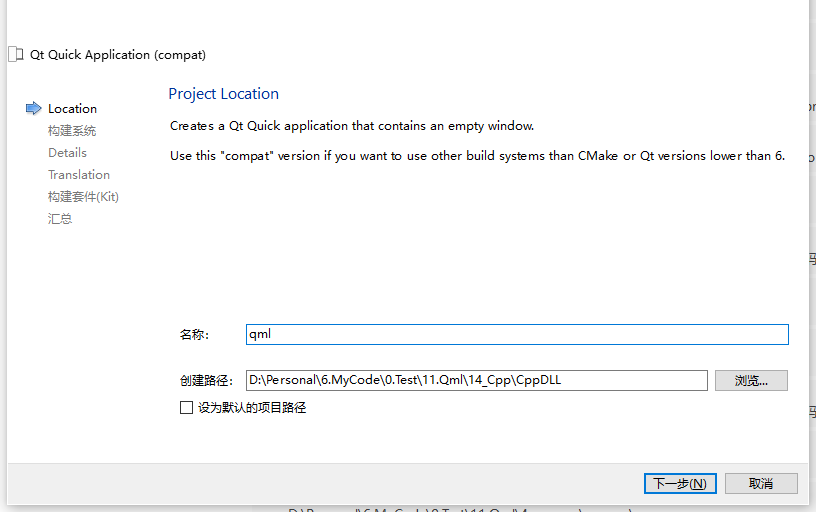
2. 添加代码
- 把方法1中main.qml的内容复制到新工程的main.qml中
- 修改模块导入
//import org.test 1.0
import com.test.testmodel 1.0 //导入自定义模块
4. 添加库文件
- 将生成的库文件复制到新工程中

5. 设置环境变量
windows
- 创建批处理文件
run.bat,根据实际情况修改
set QML2_IMPORT_PATH=D:\Personal\6.MyCode\0.Test\11.Qml\14_Cpp\CppDLL\dll
start D:\Soft\Qt6\Tools\QtCreator\bin\qtcreator.exe
- 关闭qtcreator,通过run.bat启动
- 打开刚才的qml工程
Linux - Ubuntu
- 创建脚本文件
run,根据实际情况修改
#!/bin/sh
export QML2_IMPORT_PATH=/home/book/qt_code/CppTest/DllTest/dll/
export QT_HOME=/opt/Qt/Tools/QtCreator/bin/
$QT_HOME/qtcreator $*
- 关闭qtcreator,通过run启动
- 打开刚才的qml工程
Linux - 开发板(qtcreator远程部署)
- 将
libTestModel.so和qmldir拷贝到/root/com/test/testmodel/中 - 项目 - 运行 - 环境 - 批量编辑,添加
QML2_IMPORT_PATH=/root/
Linux - 开发板(板子里直接运行)
- 将
libTestModel.so和qmldir拷贝到/root/com/test/testmodel/中 - 创建脚本文件
run,根据实际情况修改
#!/bin/sh
export QML2_IMPORT_PATH=/root/
./opt/DllTest
- 或是将
com文件夹直接拷贝到DllTest相同目录下,则不用配置环境变量,直接运行DllTest就行了。
6. 运行效果

