confluent是一款由JAVA编写用于企业知识库管理协同软件,多用于构建企业内部WIKI,支持多人协作,共享信息等。
当前系统环境Centos7.9,内存至少2G以上,数据库采用MySQL5.7,本机电脑系统Windows10
安装前准备工作
0. 下载破解文件
破解包下载: http://down.whsir.com/downloads/confluence_crack.zip
1、请将confluence7.4包下载到本机电脑上
https://down.whsir.com/downloads/confluence7.4pojie.zip
2、请将java8程序下载安装到本机电脑上
https://down.whsir.com/downloads/jdk-8u172-windows-x64.exe
注:安装java用于运行相关程序
3、将MySQL驱动插件下载至CentOS服务器上
https://down.whsir.com/downloads/mysql-connector-java-5.1.46.tar.gz
4、在CentOS服务器上添加wlnmp一键安装包源
rpm -ivh https://mirrors.wlnmp.com/centos/wlnmp-release-centos.noarch.rpm5、下载confluence7.4安装包至CentOS服务器上
https://down.whsir.com/downloads/atlassian-confluence-7.4.6-x64.bin
正式安装部署开始
1、通过wlnmp包安装jdk1.8及MySQL5.7
yum install jdk1.8 wmysql57 -y注:该jdk是oracle提供的包,wlnmp一键包将其镜像了过来
2、修改MySQL配置
编辑my.cnf文件
vi /etc/my.cnf将innodb_log_file_size = 32M改成innodb_log_file_size = 256M
将max_allowed_packet = 16M改成max_allowed_packet = 34M,注意此字段有两个
然后在[mysqld]字段下添加一行:transaction-isolation=READ-COMMITTED
保存退出,重启MySQL:/etc/init.d/mysql restart
3、创建数据库
注:通过wlnmp一键包安装的MySQL5.7默认密码是空
mysql -uroot -pmysql> create user confluence@localhost identified by 'blog.whsir.com';
mysql> create database confluence character set utf8 collate utf8_bin;
mysql> grant all privileges on confluence.* to confluence@'localhost';
mysql> set password = password('whsir');
mysql> quit此时数据库root默认密码更改为whsir,confluence使用单独的库、账号密码
4、安装confluence
chmod +x atlassian-confluence-7.4.6-x64.bin./atlassian-confluence-7.4.6-x64.bin
Unpacking JRE ...
Starting Installer ...
This will install Confluence 7.4.6 on your computer.
OK [o, Enter], Cancel [c]
输入字母o或者直接回车
Click Next to continue, or Cancel to exit Setup.
Choose the appropriate installation or upgrade option.
Please choose one of the following:
Express Install (uses default settings) [1],
Custom Install (recommended for advanced users) [2, Enter],
Upgrade an existing Confluence installation [3]
输入数字1,然后回车
See where Confluence will be installed and the settings that will be used.
Installation Directory: /opt/atlassian/confluence
Home Directory: /var/atlassian/application-data/confluence
HTTP Port: 8090
RMI Port: 8000
Install as service: Yes
Install [i, Enter], Exit [e]
输入字母i或者直接回车
Extracting files ...
Please wait a few moments while we configure Confluence.
Installation of Confluence 7.4.6 is complete
Start Confluence now?
Yes [y, Enter], No [n]
输入字母y或者直接回车
Please wait a few moments while Confluence starts up.
Launching Confluence ...
Installation of Confluence 7.4.6 is complete
Your installation of Confluence 7.4.6 is now ready and can be accessed via
your browser.
Confluence 7.4.6 can be accessed at http://localhost:8090
Finishing installation ...安装完成后confluence会自动启动
5、配置MySQL驱动
tar zxf mysql-connector-java-5.1.46.tar.gz
cd mysql-connector-java-5.1.46
mv mysql-connector-java-5.1.46-bin.jar /opt/atlassian/confluence/confluence/WEB-INF/lib
6、开始授权
授权需要两部,一是授权文件,二是获取授权码
一、授权文件
在CentOS服务器上下载/opt/atlassian/confluence/confluence/WEB-INF/lib/atlassian-extras-decoder-v2-3.4.1.jar文件到本地重命名为atlassian-extras-2.4.jar
通过java运行confluence_keygen.jar(文中最开始的那个授权包,在windows上运行,需要在windows上安装好java)
选择.patch!找到刚才重命名的那个文件打开

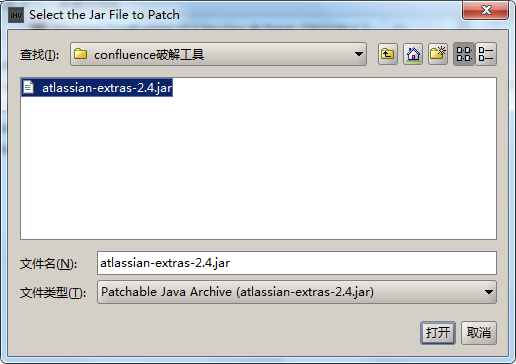
打开后在当前目录下可以看到atlassian-extras-2.4.jar和atlassian-extras-2.4.bak两个文件,这里atlassian-extras-2.4.jar已经是授权好的了,将atlassian-extras-2.4.jar名字改回atlassian-extras-decoder-v2-3.4.1.jar
然后上传回CentOS服务器/opt/atlassian/confluence/confluence/WEB-INF/lib/目录,覆盖掉原来的atlassian-extras-decoder-v2-3.4.1.jar文件
此时要重启confluence服务:/etc/init.d/confluence restart
二、获取授权码
访问web页面,获取服务器ID,http://IP:8090
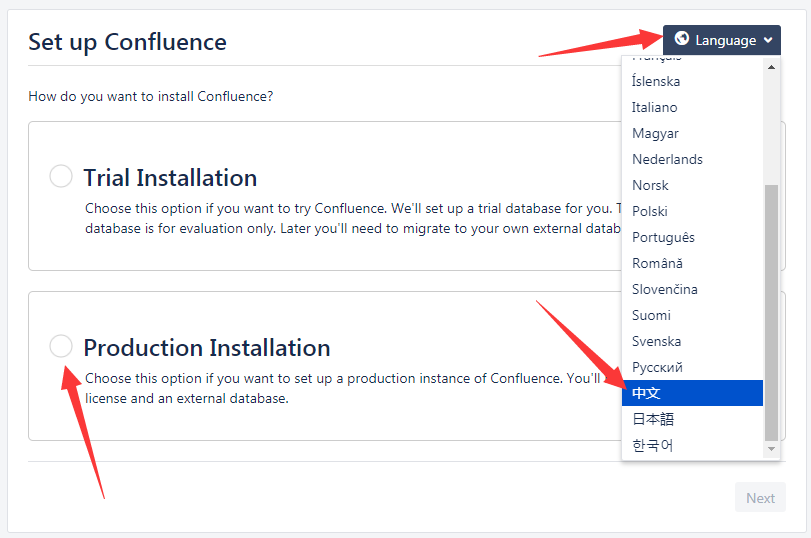
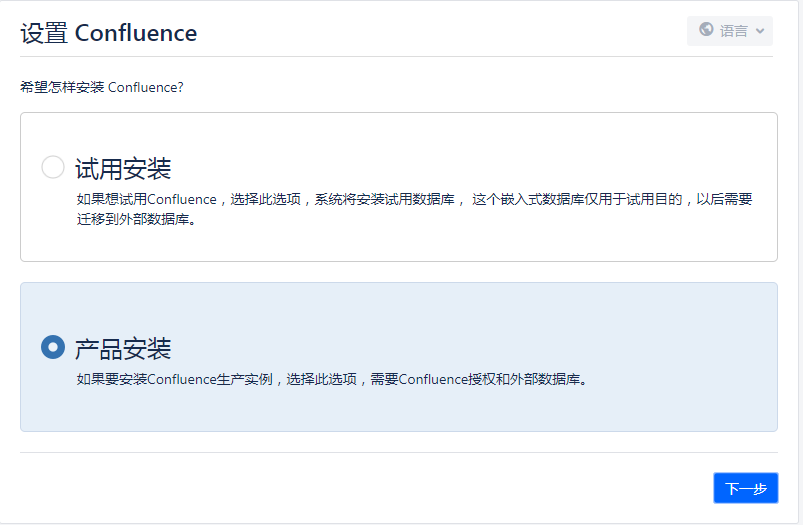
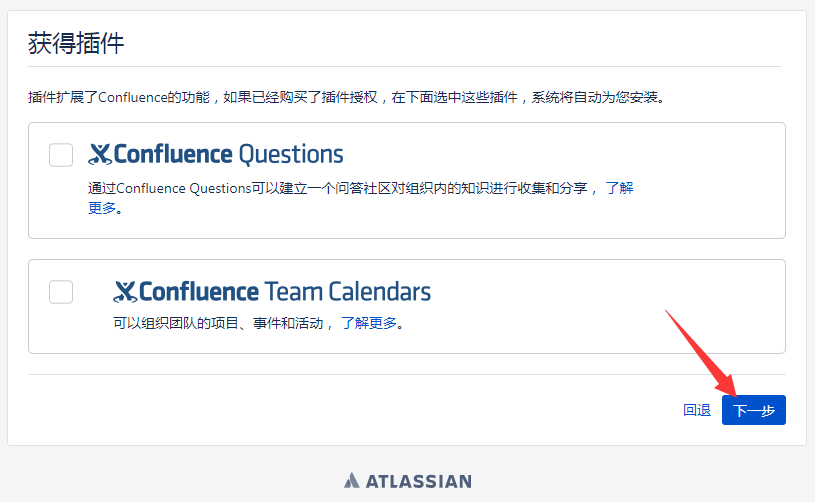
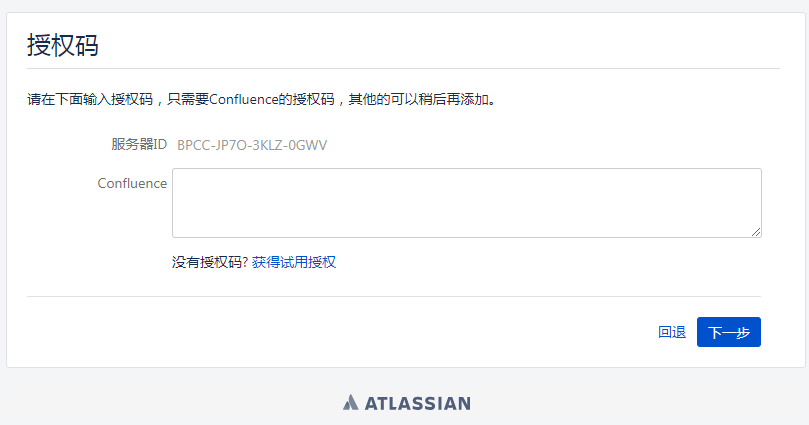
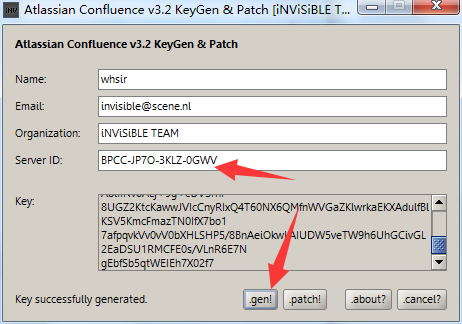
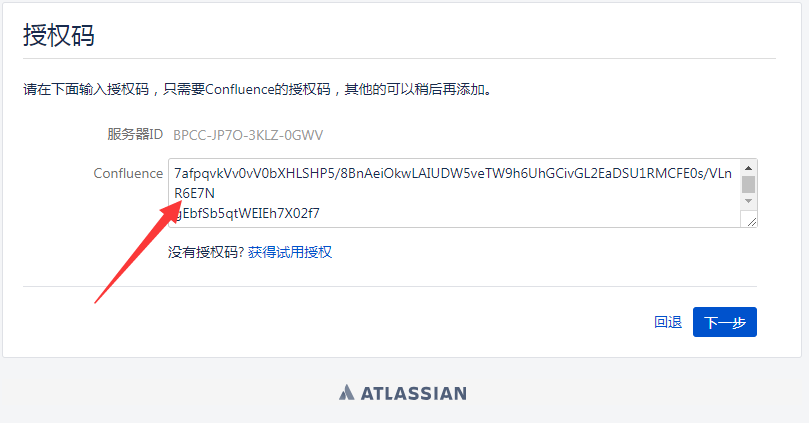
复制网页中的服务器ID,运行工具confluence_keygen.jar,复制Key到Confluence里,获得授权码,进行下一步
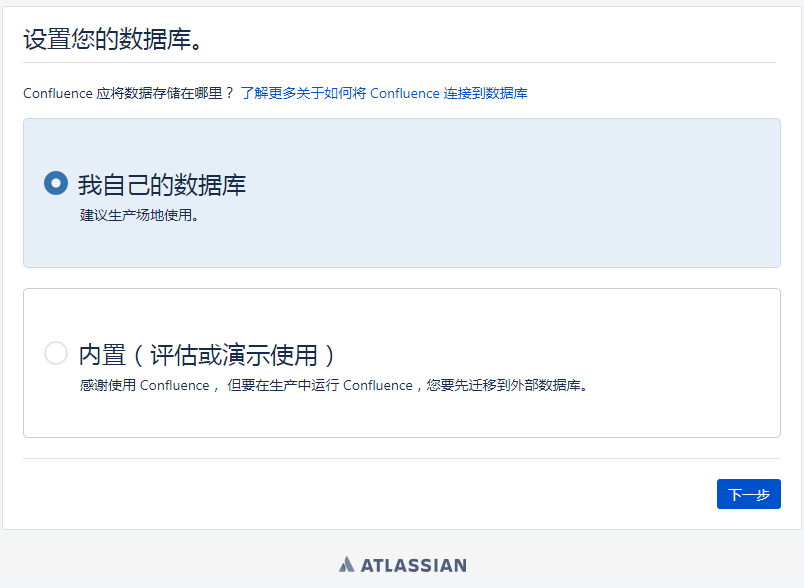
选择MySQL配置项,配置数据库即可
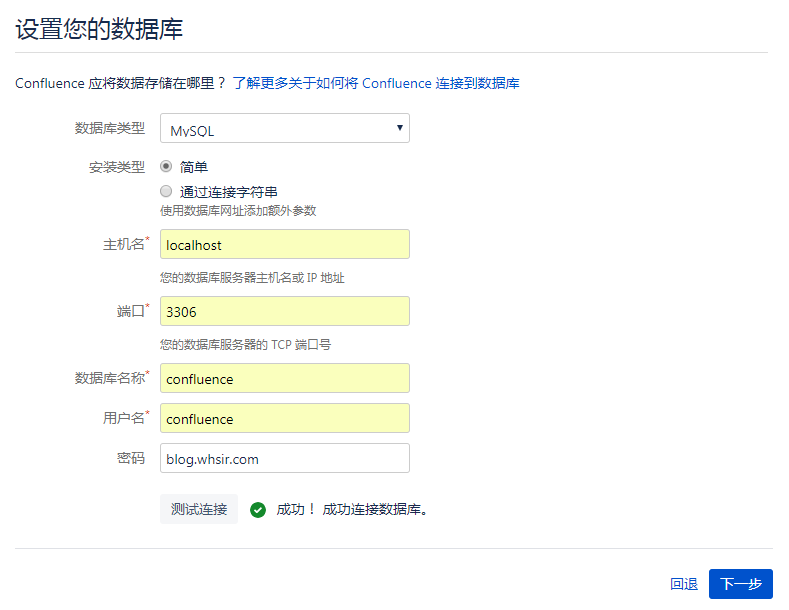
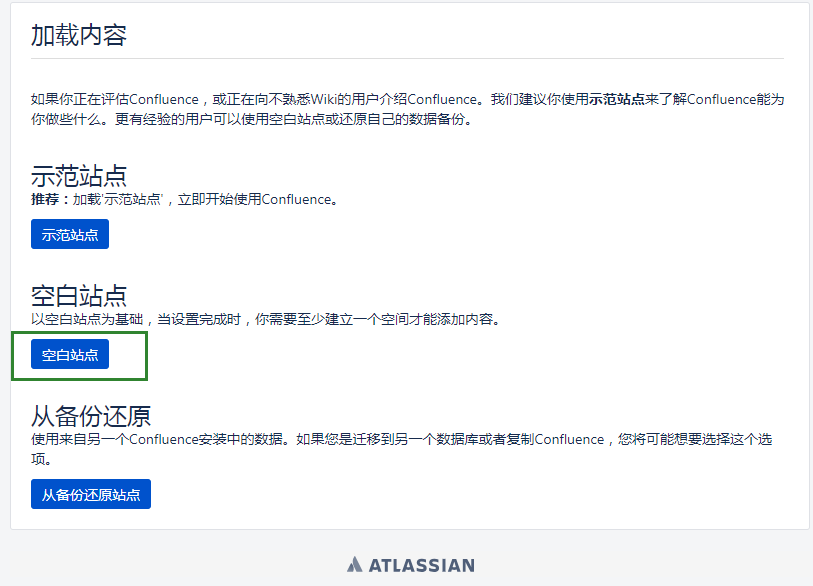
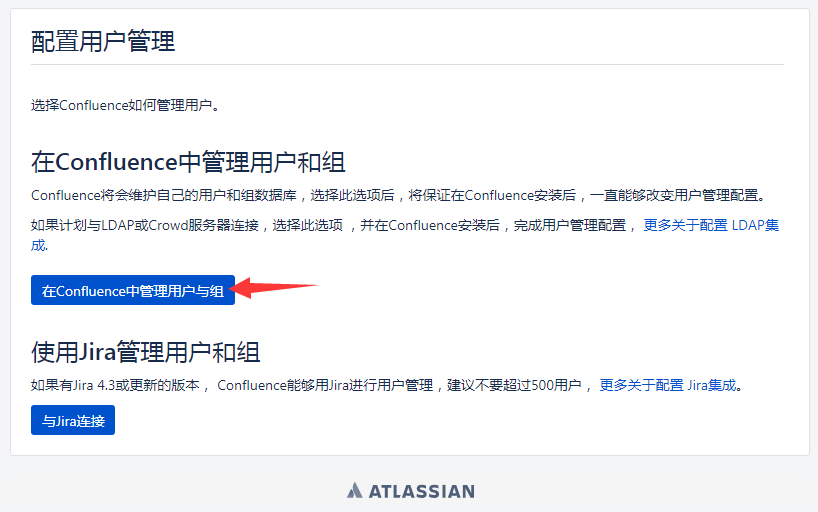


三、验证授权
右上角配置→一般配置→授权细节

授权成功





![[Python进阶] 消息框、弹窗:ctypes](https://img-blog.csdnimg.cn/4c1a986e92c041ca82c64c2c8f403996.png)