深度学习基础知识 最近邻插值法、双线性插值法、双三次插值算法
- 1、最近邻插值法
1、最近邻插值法
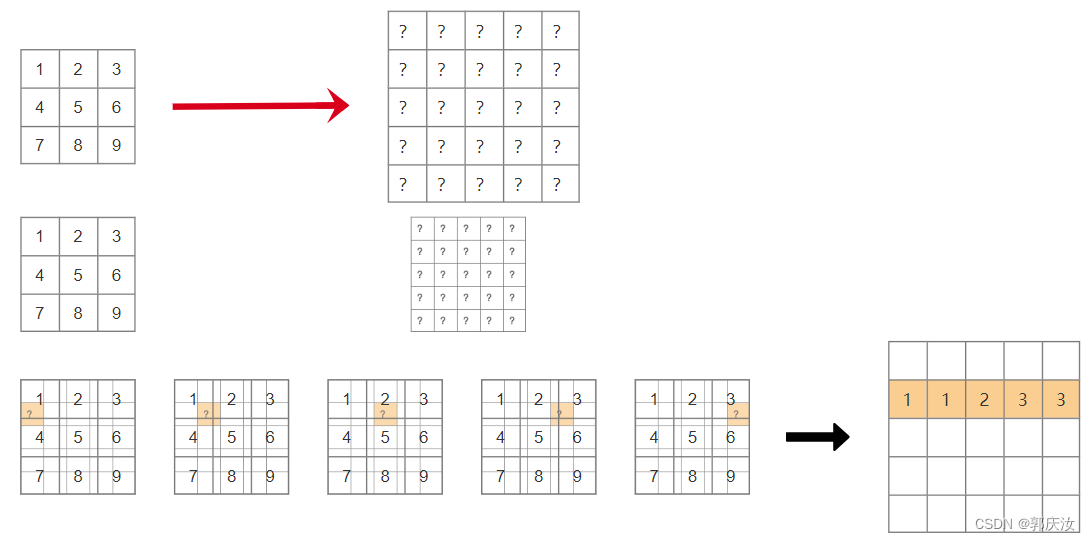
*最邻近插值:将每个目标像素找到距离它最近的原图像素点,然后将该像素的值直接赋值给目标像素
- 优点:实现简单,计算速度快
- 缺点:插值结果缺乏连续性,可能会产生锯齿状的边缘,对于图像质量影响较大,因此当处理精度要求较高的图像时,通常会采用更加精细的插值算法,例如:双线性插值、三次插值。
- 代码示例:

import numpy as np
from PIL import Image


def nearest_neighbor_interpolation(image,scale_factor):
    """
        image:输入图像数组
        scale_factor:图像缩放因子

    """

    # 得到输入图像的高与宽
    height,width=image.shape[:2]
    # 计算输出图像的高与宽
    out_height=int(height * scale_factor)
    out_width=int(width * scale_factor)

    # 创建爱你输出图像
    output_imaage=np.zeros((out_height,out_width,3),dtype=np.uint8)
    print(output_imaage.shape)

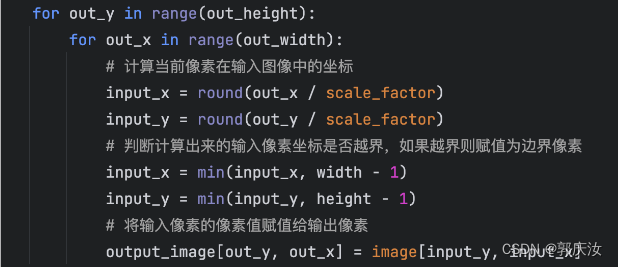
    # 遍历输出的每个像素,分别计算其在图像中最近邻的像素坐标,并将其像素值赋给当前像素
    for out_y in range(out_height):
        for out_x in range(out_width):
            # 计算当前像素在输入图像中的坐标
            input_x=int(round(out_x / scale_factor))
            input_y=int(round(out_y / scale_factor))
            # 判断计算出来的输入像素坐标是否越界,如果越界则赋值为边界像素
            input_x=min(input_x,width - 1)
            input_y=min(input_y,height - 1)
            # 将输入图像的像素值赋值给输出图像的对应位置上的像素值
            output_imaage[out_y,out_x]=image[input_y,input_x]

    return output_imaage


# 读取原始图像
input_image=Image.open("./test_image.PNG").convert("RGB")
print(input_image)

image_array=np.array(input_image)
print(image_array.shape)


output_imaage=nearest_neighbor_interpolation(image_array,5.0)


out_image_pil=Image.fromarray(output_imaage.astype("uint8"))
print(out_image_pil)

out_image_pil.save("./result.jpg")   # 保存数据图像
结果:





![2023年中国鸡蛋市场供需现状、市场规模及产品价格走势分析[图]](https://img-blog.csdnimg.cn/img_convert/f0f31525604669e6ac5336933bcbb06d.png)

