一、理解注解
1、注解是什么?
注解可以理解为一个标记或者标签,范围可以是类、方法、属性。
2、自定义一个注解,进行理解spring的自动装配。
自定义自己的注解:JDK官方提供提供了一些基础元注解,就是标记注解的注解。
2.1 查看spring如何写注解
例如Controller注解:

例如Override注解
@Target(ElementType.METHOD)
 //标记为方法上的注解,只能在方法上使用,如果在类上使用会报错。
@Retention(RetentionPolicy.SOURCE)
public @interface Override {
}
2.2 自行写一个注解
(1)写一个MyAnnotation 注解。
@Target(ElementType.TYPE) //标记该注解的类型。可以注解
@Retention(RetentionPolicy.RUNTIME) //标记该注解生命周期
@Documented
@Inherited  //标记为可继承性
public @interface MyAnnotation {
    //字段,通过方法的声明方式体现
     String name();
     int age() default 18;
     String hello() default "spring boot";
}
(2)注解的使用
/**
 * @Author taochui
 * @Description: 自行写的注解进行使用
 * @Date: 2022/12/6 10:32
 */
@MyAnnotation(name = "tc",age = 18) //可以设置值
public class UseAnnotation {
}
(3)测试
public class Test {
    public static void main(String[] args) {
        //1、获取需要解析注解的类
        Class<UseAnnotation> useAnnotationClass = UseAnnotation.class;
        //2.判断该类上是否有注解
        if(useAnnotationClass.isAnnotationPresent(MyAnnotation.class)){
            //3、获取该类上的注解
            MyAnnotation annotation = useAnnotationClass.getAnnotation(MyAnnotation.class);
            //4、打印useAnnotationClass上的MyAnnotation注解的内容
            System.out.println(annotation.name() + ":"+annotation.age());
        }

    }
}
(4)结果打印:

三、xml和注解获取Bean,@Configuration注解理解
3.1 xml获取Bean
resources下新建applicationContext.xml
<?xml version="1.0" encoding="UTF-8"?>
<beans xmlns="http://www.springframework.org/schema/beans"
       xmlns:xsi="http://www.w3.org/2001/XMLSchema-instance"
       xmlns:context="http://www.springframework.org/schema/context"
       xsi:schemaLocation="http://www.springframework.org/schema/beans http://www.springframework.org/schema/beans/spring-beans.xsd http://www.springframework.org/schema/context https://www.springframework.org/schema/context/spring-context.xsd">


    <context:component-scan base-package="com.redair.train.domain"/>
    <bean id="user" class="com.redair.train.domain.User">
        <property name="name" value="strangeBug"></property>
        <property name="age" value="18"></property>
        <property name="id" value="1"></property>
    </bean>

</beans>
3.2 注解获取bean,@Configuration注解实现一个配置类
MyConfiguration 注解类,@Configuration使该class成为配置类。 @Bean使该类成为Bean,由IOC容器管理。
@Configuration
public class MyConfiguration {
    @Bean
    public User user(){
        User user = new User();
        user.setName("tc");
        user.setAge(22);
        user.setId(2L);
        return user;
    }
}
3.3 测试xml和注解获取Bean
public class Test {
    public static void main(String[] args) {
        ClassPathXmlApplicationContext conetxt = new ClassPathXmlApplicationContext("applicationContext.xml");
        User user = conetxt.getBean(User.class);
        System.out.println("xml文件获取bean:"+user);

        AnnotationConfigApplicationContext configContext = new AnnotationConfigApplicationContext(MyConfiguration.class);
        User user1 = (User)configContext.getBean("user");
        System.out.println("注解形式获取bean:"+user1);

    }
}
结果:
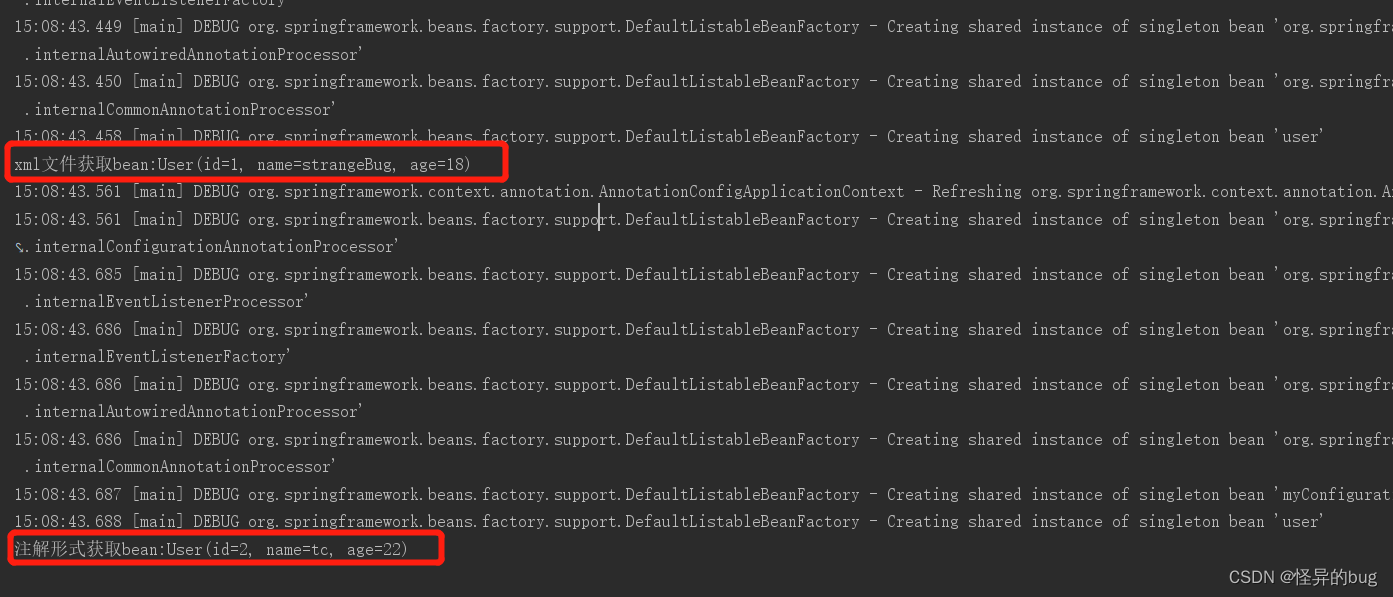
思考:那如果需要装配的Bean太多,不能疯狂的写Bean,都这么写就很麻烦。引出ComponentScan注解和Import。
四、 ComponentScan注解
使用ComponentScan扫描某个包下的所有Bean。
@Configuration
@ComponentScan("com.redair.train.domain")
public class MyConfiguration01 {

}
domain下示列:
@Data
@Controller("user")
public class User {
    private Long id;
    private String name;
    private Integer age;
}
测试:
public class Test {
    public static void main(String[] args) {
        AnnotationConfigApplicationContext configContext = new AnnotationConfigApplicationContext(MyConfiguration01.class);
        User user1 = (User)configContext.getBean("user");
        System.out.println("ComponentScan注解形式扫描获取bean:"+user1);
    }
}
打印ComponentScan注解形式扫描获取bean:

五、@Import注解
比如我现在有多个配置类MyConfig01和MyConfig02,如何通过一个配置类MyConfiguration获取多个配置类。
通过一个配置类得到所有Bean。
@Configuration
public class MyConfig01 {
    @Bean
    public User user(){
        return new User();
    }
}
@Configuration
public class MyConfig02 {
    @Bean
    public Student student(){
        return new Student();
    }
}
使用Import导入另外两个类中的Bean,使得到一个类中可以获取。多个配置类合并成一个配置类。
@Configuration
@Import({MyConfig01.class,MyConfig02.class})
public class MyConfig {
}
测试:
public class TestMyConfig {
public static void main(String[] args) {
AnnotationConfigApplicationContext context = new AnnotationConfigApplicationContext(MyConfig.class);
for(String s : context.getBeanDefinitionNames()){
System.out.println(“打印出MyConfig下所有Bean:”+s);
}
}
}
结果:

六、理解和spring源码思路
为什么加入Controller注解,就能够被IOC容器进行管理。
@Controller
public class HelloController {
@RequestMapping("/test")
@ResponseBody
public String index(){
    return "Hello spring";
}
}
IOC容器其实就是一个Map集合,通过map.put(“id”,“对象”)加入到IOC容器。
分析到目前,spring源码思路:
1、解析app.xml文件
2、Bean–>反射方式创建对象–>map.put(“user”,user)
例如@Autowired。即map.get(“user”);
3、XML<context:component-scan base-package=“com.redair.train.domain”/>或者
注解@ComponentScan(“com.redair.train.domain”)。两种(XML或者注解)方式扫描包下到底哪些类上加了Controller注解。则认为是IOC容器进行管理, 则反射创建该对象放入到IOC容器。
3、其实就是根据扫描这些大量的注解,根据注解做出对应的动作。
截止目前为止,我们IOC容器管理Bean几种方式:
1、@Bean
2、@Import({MyConfig01.class,MyConfig02.class})
3、@ComponentScan(“com.redair.train.domain”)。有局限性,只能触达包里面的Bean.
3、但是还有一个问题:我们要管理的Bean,不知道在不在业务范围。比如第三方包,未来会用,不在我们的包里面。com.taobao.xx,com.ali.yy,com.等。
用一个配置类,导入第三方的包,该如何做。比如tomact,Mq,redis等。
解决:使用ImportSelector 中selectImports方法读取外部类。
七、ImportSelector接口中selectImports方法
使用和理解:定义一个MyImportSelector,读取一个Bean打印进行理解。
/**
 * @Author taochui
 * @Description: 实现配置类能够导入第三方包。实现ImportSelector。
 * 根据第三方包或者配置文件寻找得到配置类
 * 使用:Import(MyImportSelector.class)获取到第三方Bean,自动调用selectImports方法获取到Bean。
 * @Date: 2022/12/6 22:49
 */
public class MyImportSelector implements ImportSelector {

    @Override
    public String[] selectImports(AnnotationMetadata importingClassMetadata) {
        return new String[]{"寻找一个spring.factories"};
    }
}
具体使用,实现ImportSelector 中selectImports方法,导入一个配置类。

1、MyImportSelectorTest ,通过ImportSelector导入user类。
public class MyImportSelectorTest implements ImportSelector {
    @Override
    public String[] selectImports(AnnotationMetadata importingClassMetadata) {
        return new String[]{"com.redair.train.domain.user"};
    }

}
2、通过Import导入MyImportSelectorTest类,获取到里面的Bean。
UserConfig类,配置类。
@Configuration
@Import(MyImportSelectorTest.class)
public class UserConfig {
}
3、测试。获取UserConfig的注册的bean。
public class TestRun {
    public static void main(String[] args) {
        AnnotationConfigApplicationContext configContext = new AnnotationConfigApplicationContext(UserConfig.class);
        for(String s : configContext.getBeanDefinitionNames()){
            System.out.println("UserConfig(通过ImportSelector导入外部或配置文件类)获取bean::"+s);
        }
    }
}
4、打印结果

八、设计Spring Boot的自动装配
根据上面分析,进行设计
范围:业务代码类 和 第三方类 —>自动被IOC容器进行管理。
大致原理:
@Configuration
@ComponentScan("com.redair.train")   //由ComponentScan导入业务代码类
@Import(MyImportSelectorTest.class)   //由Import导入外部类
public class UserConfig {
}
其中MyImportSelectorTest implements ImportSelector,selectImports方法读取一个配置文件(spring.factories),配置文件中包含Tomcat,Redis等配置信息。
分析@SpringBootApplication注解。
源码:

查看@SpringBootApplication注解,上面四个为元注解。主要看后面三个,其实就是和上面分析的三个注解对应。
@Configuration
@ComponentScan("com.redair.train")   //由ComponentScan导入业务代码类
@Import(MyImportSelectorTest.class)   //由Import导入外部类
我们分析的三个注解和@SpringBootApplication注解中对应关系:
@Configuration <—> @SpringBootConfiguration
@ComponentScan(“com.redair.train”) <—>@ComponentScan
@Import(MyImportSelectorTest.class) <—>@EnableAutoConfiguration
分析对应关系:
1、点击@SpringBootApplication中@SpringBootConfiguration注解源码如下:
即对应我们分析的注解@Configuration 。
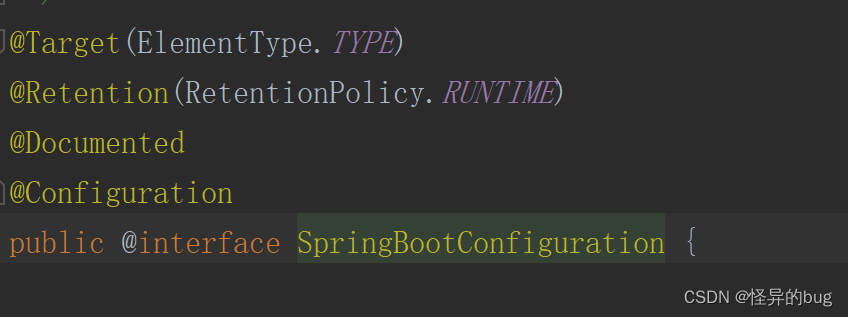
2、源码中@ComponentScan注解和我们@ComponentScan其实是一样的。
即 @Configuration和@ComponentScan 这两个注解就能完成我们业务代码的扫描。
解析到TrainApplication(运行类)上面的所有注解:
(1)有一个@Configuration--->认为TrainApplication具有配置类的功能。
(2)有哪些Bean呢?当前TrainApplication你们有没有@Bean。
(3)如果有怎么弄过来呢?根据@ComponentScan解析到--->com.redair.train---->当前TrainApplication所在根路径。
(4)扫描  com.redair.train -->得到很多的类。
(5)看这些类上是否有@Controller、@Service、@Repository、@Component --->想要被IOC容器管理---->map.put(id,对象)。
3、springboot 启动,日志打印出Tomcat也启动了,那Tomcat被自动装配了。
其实就是我们分析的外部类导入@Import(MyImportSelectorTest.class) <—>@EnableAutoConfiguration对应。
具体分析:
查看@EnableAutoConfiguration如下,
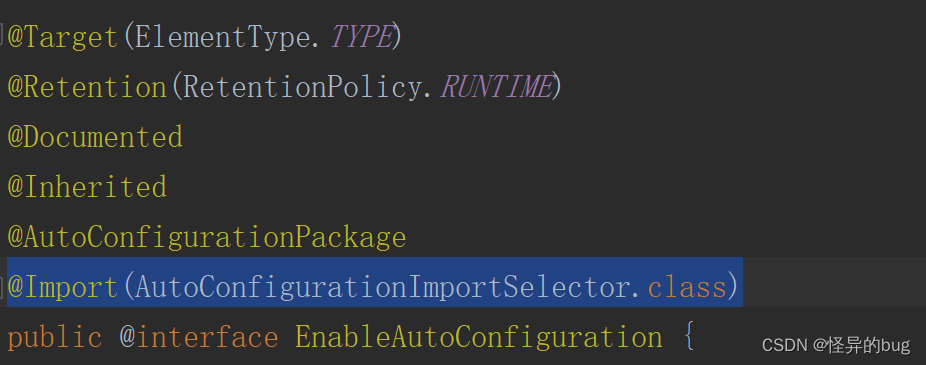
核心注解@Import(AutoConfigurationImportSelector.class)和我们分析的@Import(MyImportSelectorTest.class) 一致。
AutoConfigurationImportSelector应该会去实现ImportSelector接口中selectImports方法–>会去寻找spring.factories–>说明我们第三方需要装配的类有哪些?
点击进入AutoConfigurationImportSelector.class
1、查看类关系图,DeferredImportSelector实现了ImportSelector接口:

2、点击DeferredImportSelector查看。

一直点击进去能够看到实现了selectImports方法。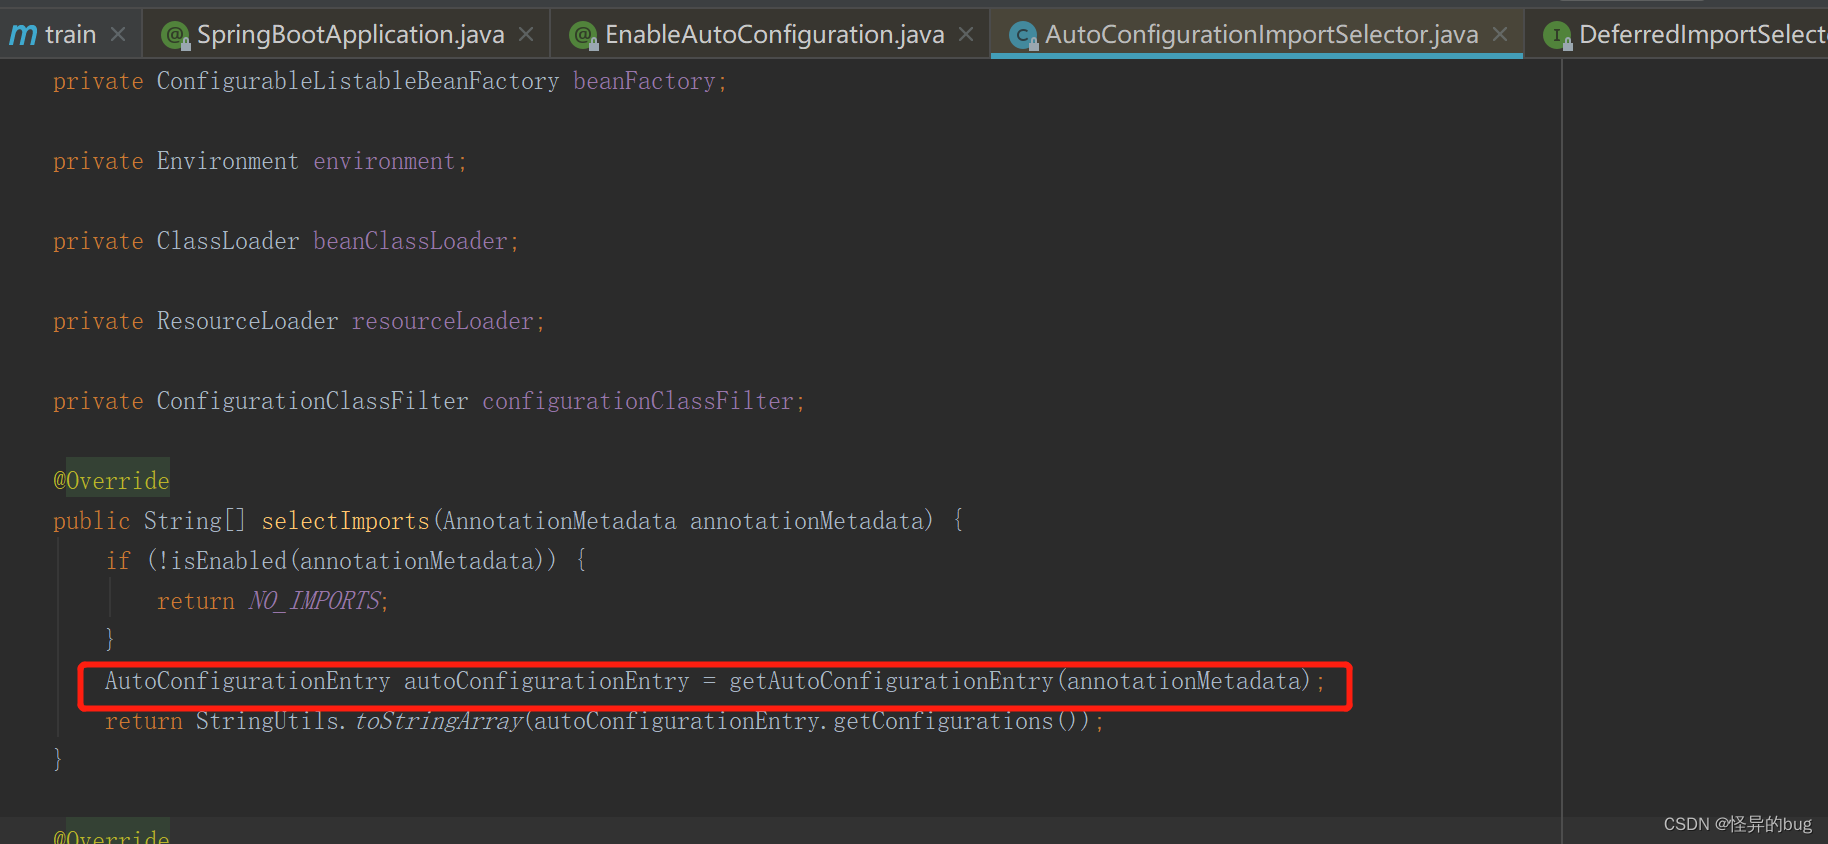
//寻找spring.factories文件
AutoConfigurationEntry autoConfigurationEntry = getAutoConfigurationEntry(annotationMetadata);
点击getAutoConfigurationEntry进去。
List<String> configurations = getCandidateConfigurations(annotationMetadata, attributes);
//List集合,有多个spring.factories文件对应的类加入到List集合。
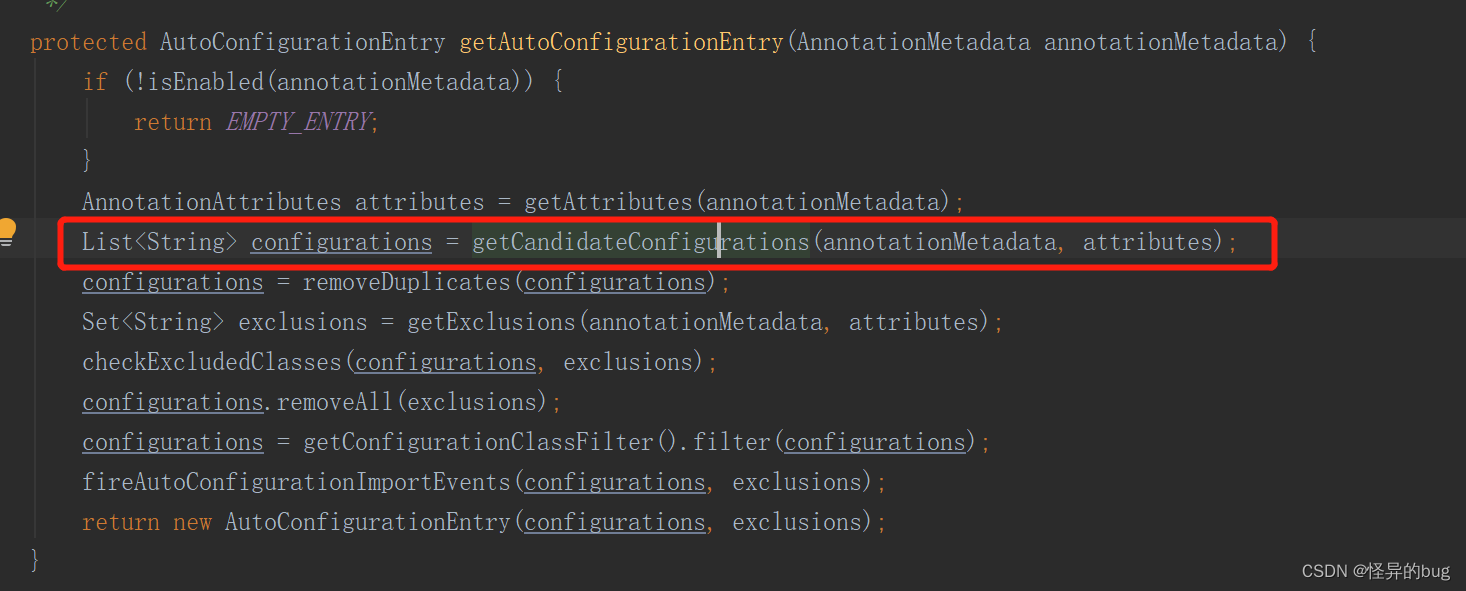
断点查看:
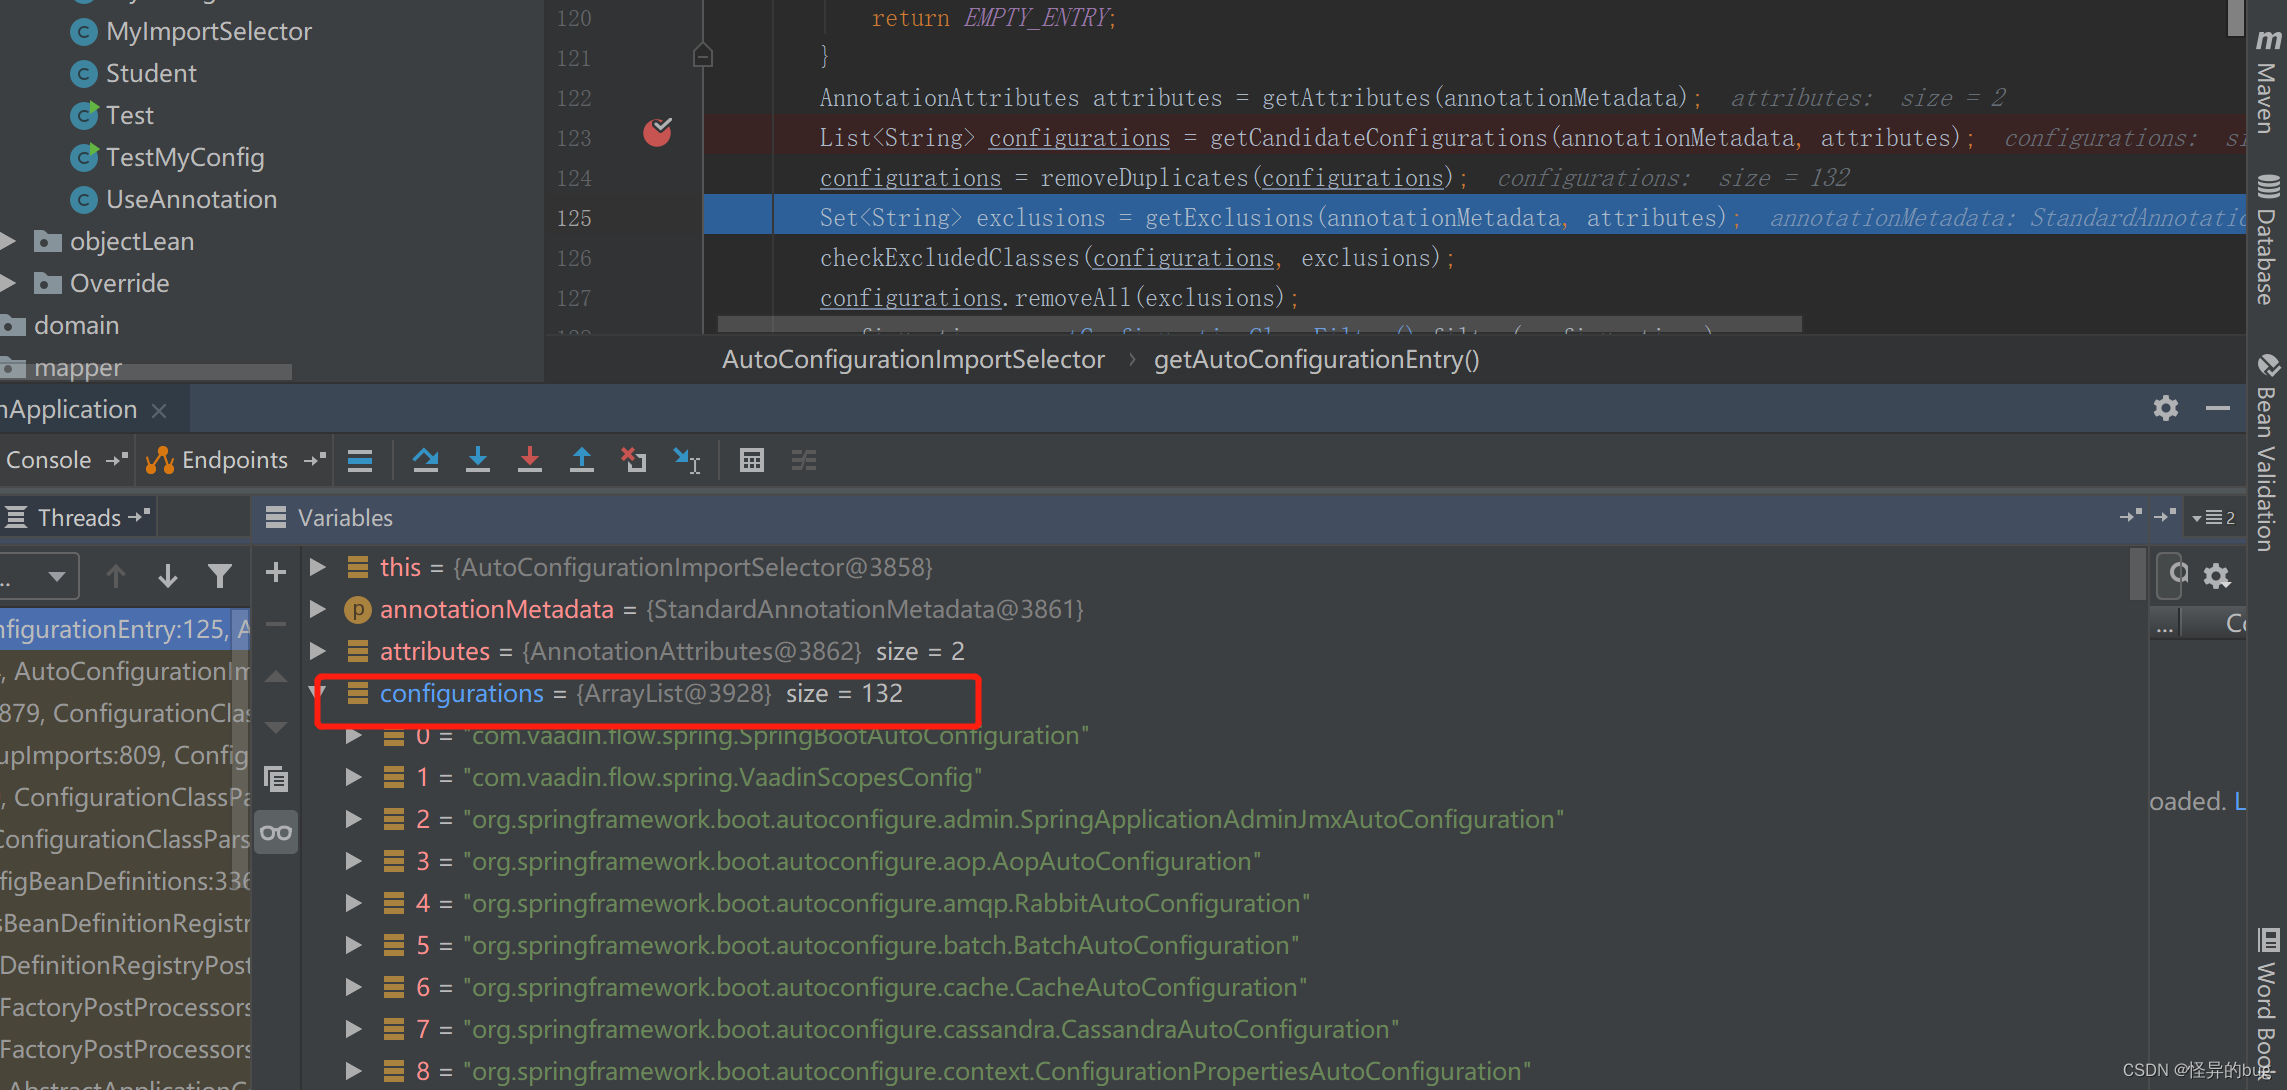
继续点击getCandidateConfigurations方法进去:
寻找spring.factories,如果没找到则没找到,并且文件约定位置为META-INF/spring.factories。

点击loadFactoryNames进去,发现调用loadSpringFactories,其中classLoader.getResources(FACTORIES_RESOURCE_LOCATION);读取配置文件信息spring.factories。


接下来把Tomcat这个类所在的spring.factories找到。
因为Tomcat随着springBoot启动而启动,说明它是优先级比较高的,会放在一个包,这个包是autoconfigure。
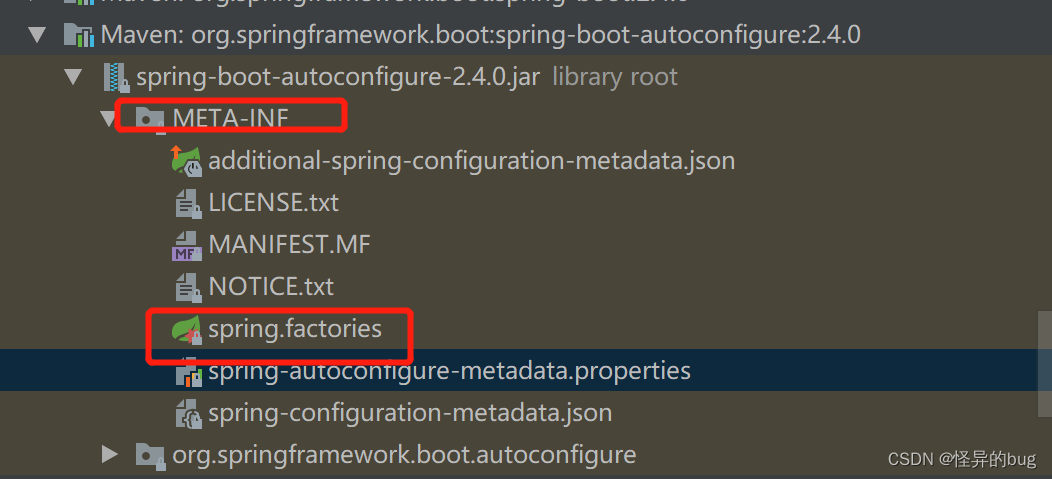
第三方需要装配的类就会放到spring.factories文件中。
比如redis,都是以AutoConfiguration结尾的。那么Tomcat就会有一个TomcatAutoConfiguration作为引导类,自动装配和Tomcat相关的类。但是TomcatAutoConfiguration没找到。

原因:因为springboot容器不止有Tomcat,还有jetty、undertow,那就直接用一个ServletWebServerFactoryAutoConfiguration引导类引导这些容器。
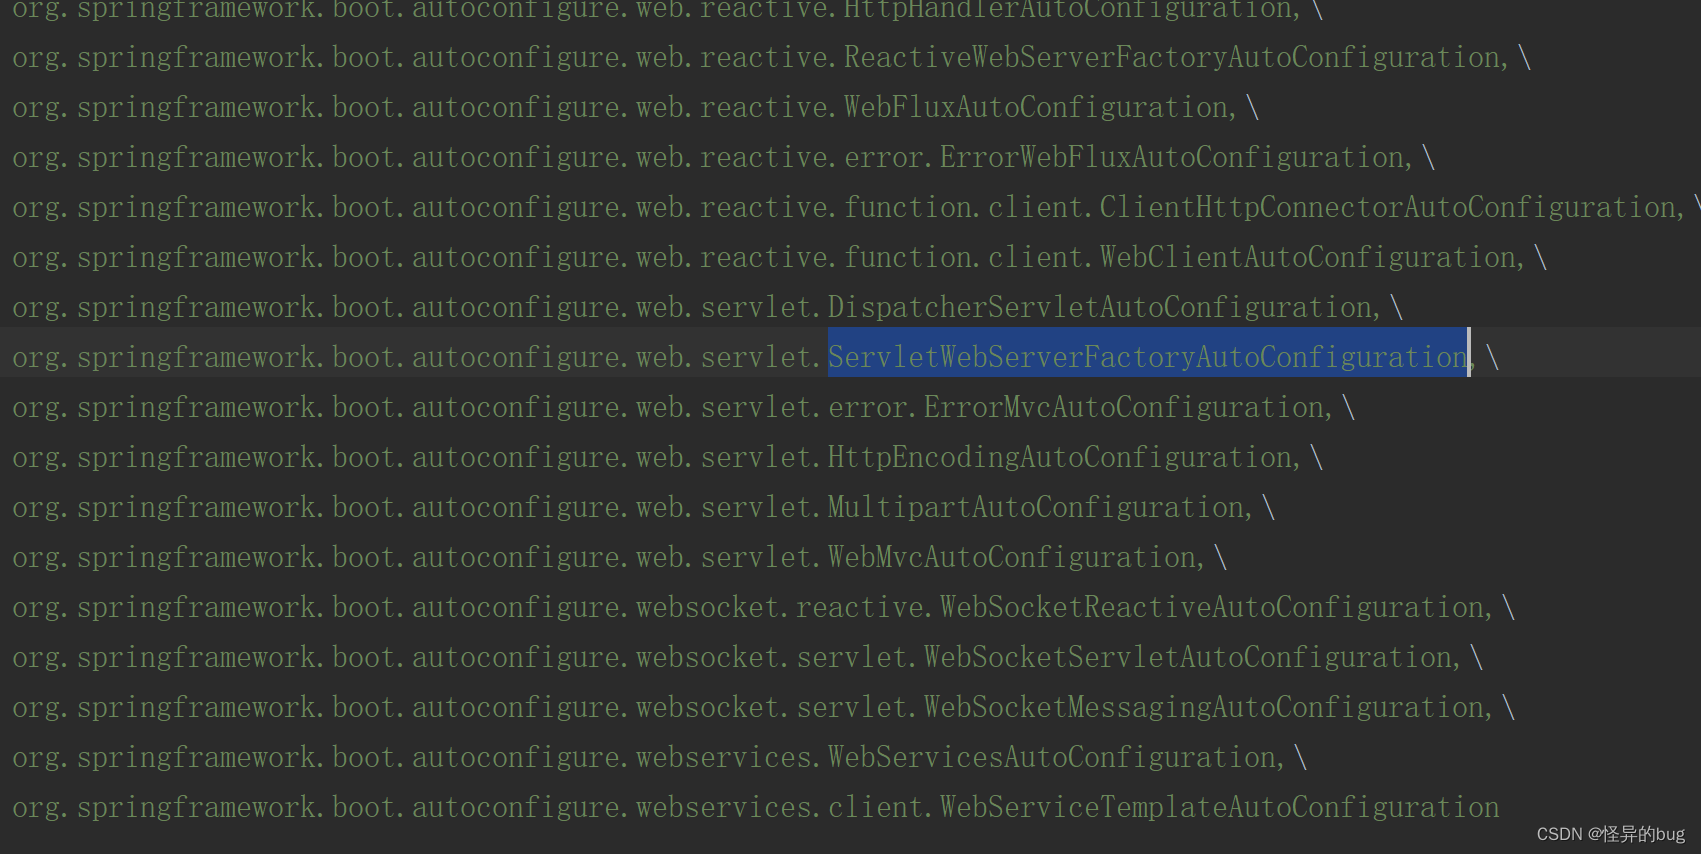
点击进去:
发现确实可以引导Tomcat、jetty、undertow三种容器的创建。
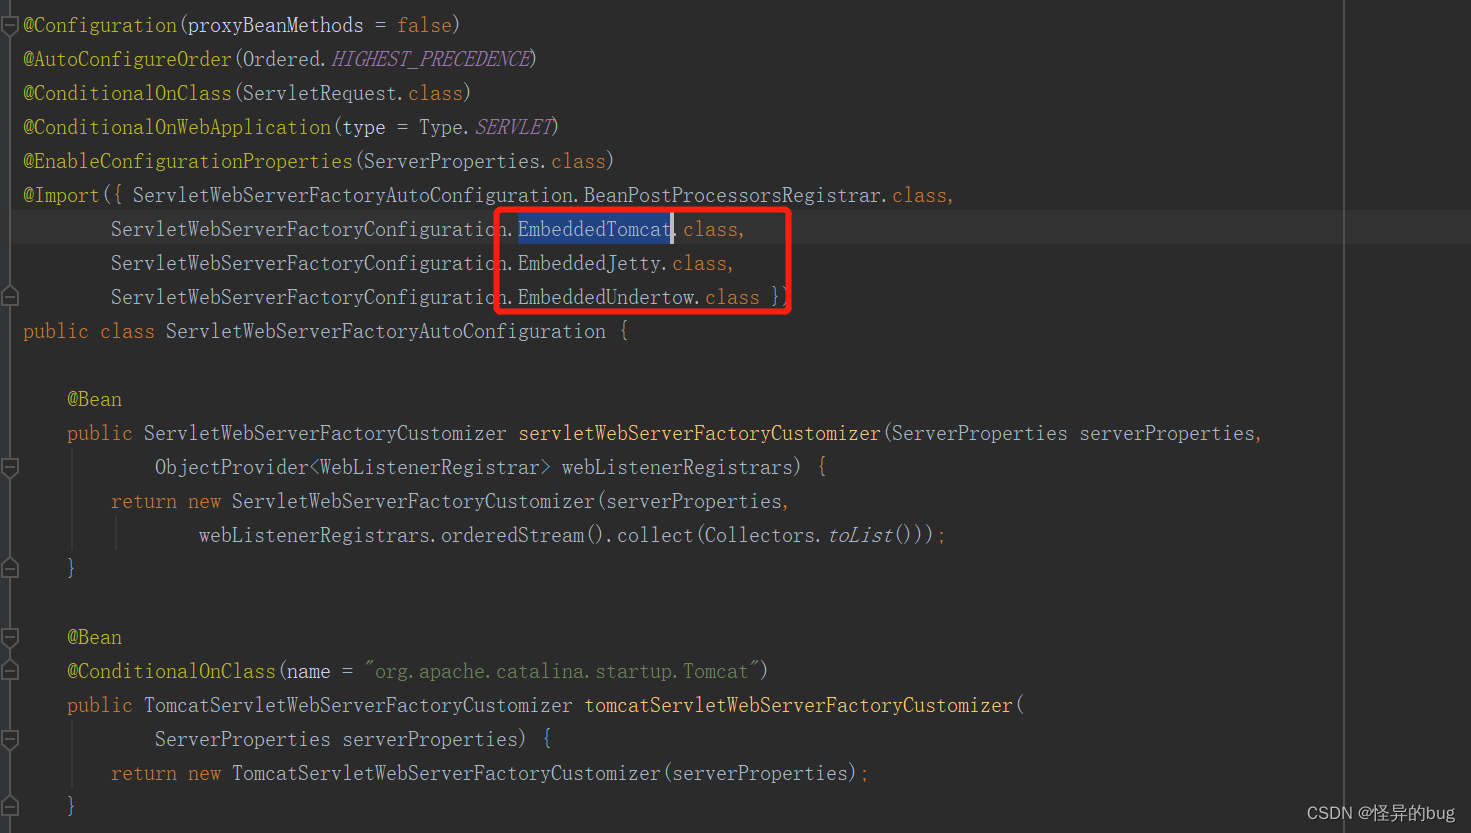
如果太多,可以在pom中进行排除,比如把Tomcat排除,就不会引导Tomcat的IOC化。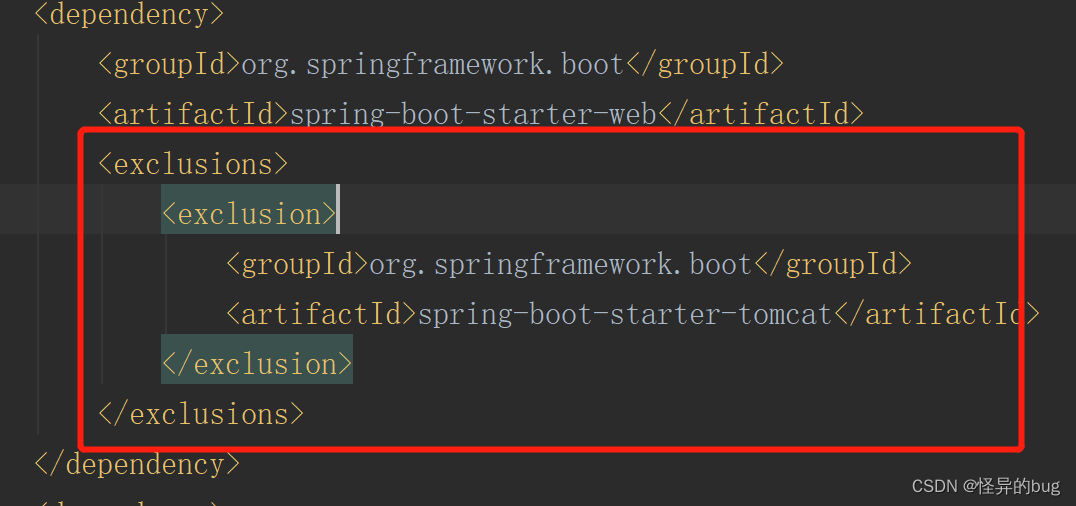
是不是在spring.factories文件中配置的第三方所有类的全路径都会引导IOC容器话吗?
其实不是!!!
spring应该提供一个功能,让开发者可以有选择的去转载Bean,根据某些条件转载Bean。
比如Tomcat,还有一个条件注解,满足该注解才进行装配。
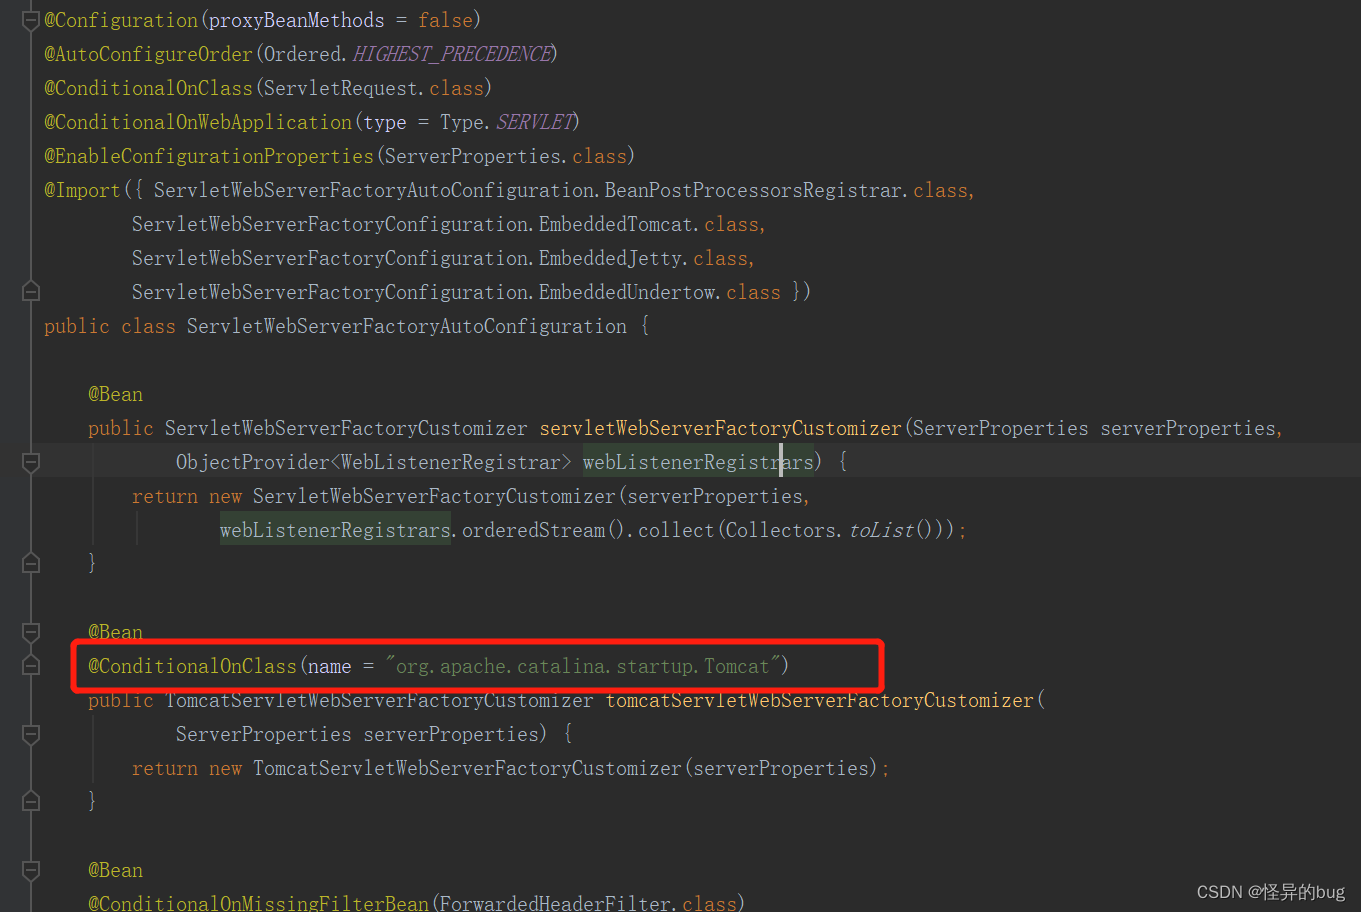
@ConditionalOnClass(name = "org.apache.catalina.startup.Tomcat")
满足org.apache.catalina.startup.Tomcat能够找到Tomcat才进行装载。
@Conditional注解去判断满足条件才进行IOC容器管理。
@Conditional,设计很多原则判断是否进行进行IOC容器管理。
1、写一个MyCondition条件判断
/**
- @Author taochui
- @Description: 自行写一个MyCondition条件判断,是否进行IOC容器化
- @Date: 2022/12/7 1:16
*/
public class MyCondition implements Condition {
@Override
public boolean matches(ConditionContext context, AnnotatedTypeMetadata metadata) {
不创建。如何是true,表示创建
return false;
}
}
2、使用@Conditional条件装配进行判断
@Configuration
public class ConditionConfig {
@Bean
@Conditional(MyCondition.class)
public User user(){
User user = new User();
user.setName(“tc”);
return user;
}
}
3、测试
public class Test {
public static void main(String[] args) {
AnnotationConfigApplicationContext configContext = new AnnotationConfigApplicationContext(MyCondition.class);
User user1 = (User)configContext.getBean(“user”);
System.out.println(“条件装配测试是否装配:”+user1);
}
}
4、结果,找不到这个Bean。
springboot核心还是spring,只是加上了springboot特有的东西
(1)创建spring context。
(2)创建Listener。
(3)IOC初始化把Bean都转载进来。
(4)DI 依赖注入。
根据应用类型决定接下来的spring上下文的解析方式。
static WebApplicationType deduceFromClasspath() {
	if (ClassUtils.isPresent(WEBFLUX_INDICATOR_CLASS, null) && !ClassUtils.isPresent(WEBMVC_INDICATOR_CLASS, null)
			&& !ClassUtils.isPresent(JERSEY_INDICATOR_CLASS, null)) {
		return WebApplicationType.REACTIVE;
	}
	for (String className : SERVLET_INDICATOR_CLASSES) {
		if (!ClassUtils.isPresent(className, null)) {
			return WebApplicationType.NONE;
		}
	}
	return WebApplicationType.SERVLET;
}
context = createApplicationContext();
context.setApplicationStartup(this.applicationStartup);
prepareContext(bootstrapContext, context, environment, listeners, applicationArguments, printedBanner);
refreshContext(context);
afterRefresh(context, applicationArguments);
上下文的context的处理阶段:
create 创建
prepare 准备
refresh 刷新 —>真正的核心
afterRefresh 刷新后
refresh 刷新 —>真正的核心
思路:
IOC容器 Map集合 (里面的属性,依赖注入、xml 、@value 、 @Reference)
Listeners 监听器
env 环境变量
支持国际化
包换Tomcat的启动过程(通过自动装配把tomcat的类搞进IOC容器,启动而启动)
前置后置的处理
refreshContext(context);
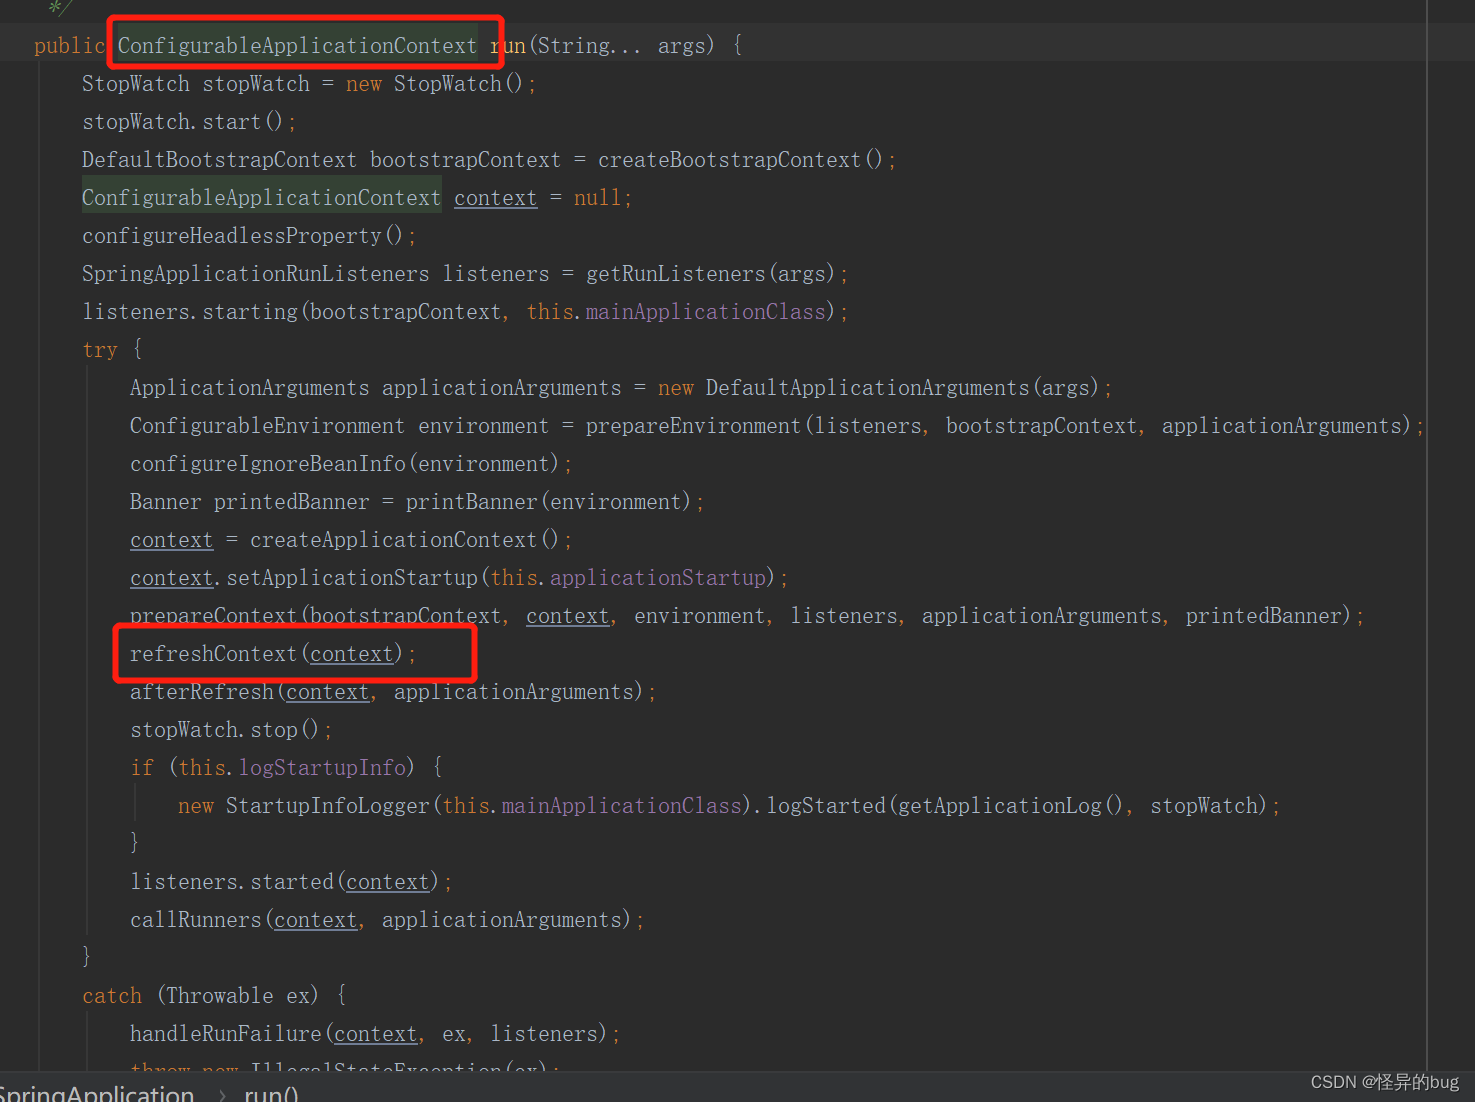

BeanFactory是xml、注解上下文顶层的接口。

不同的应用类型调用不同的方法。我们用的第三个web。
核心源码:
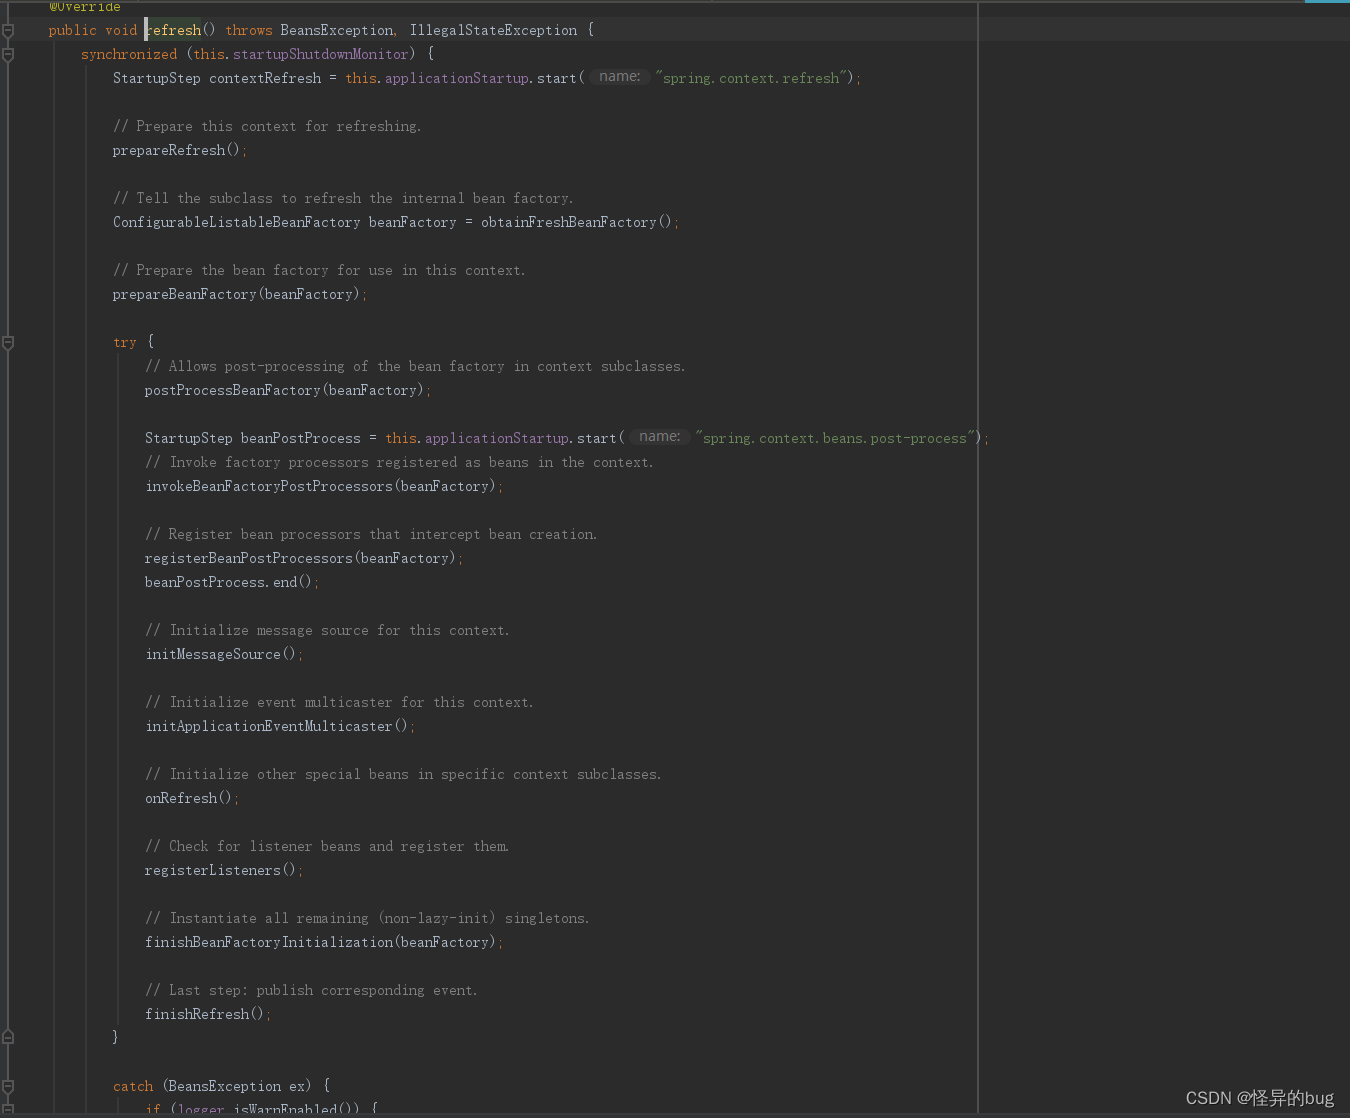
核心:
	// Initialize other special beans in specific context subclasses.
		onRefresh();
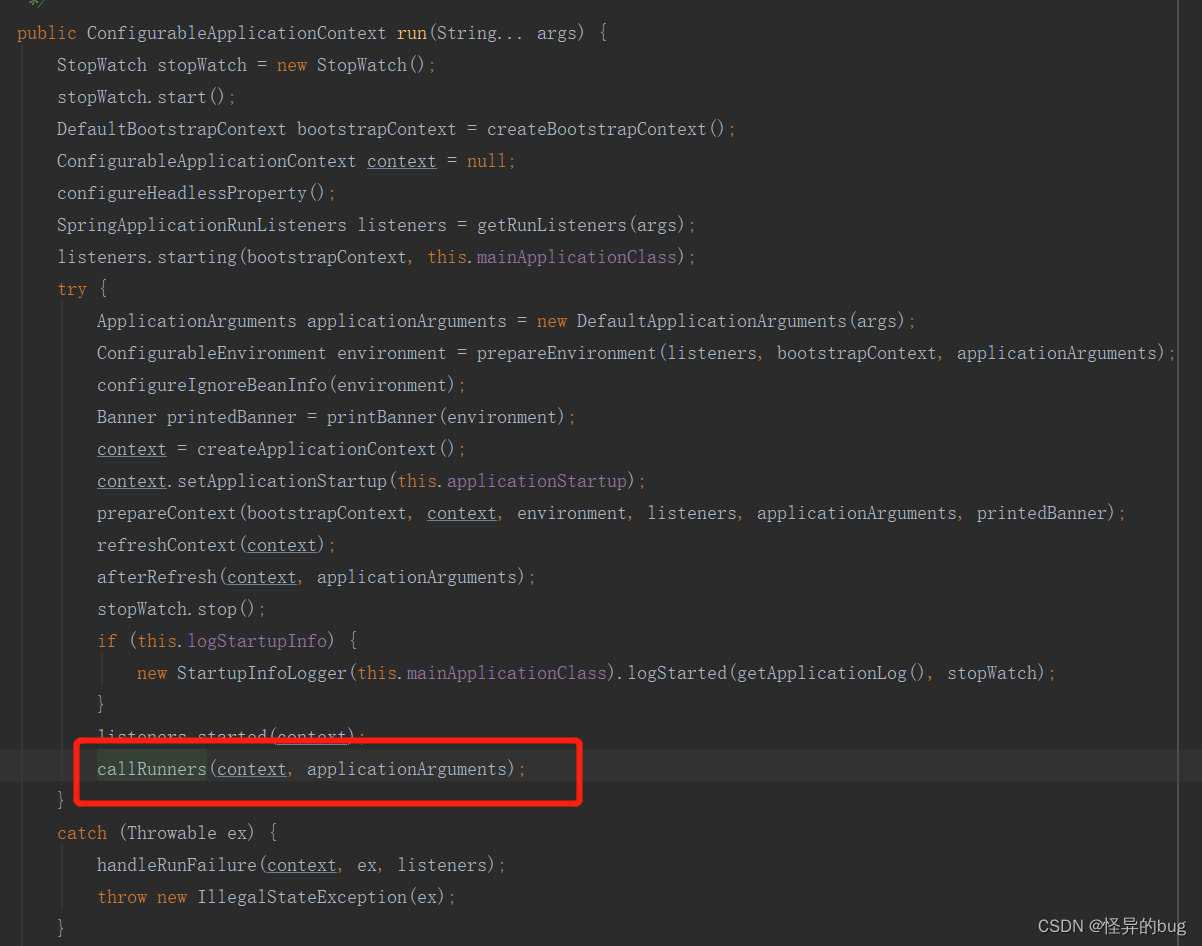
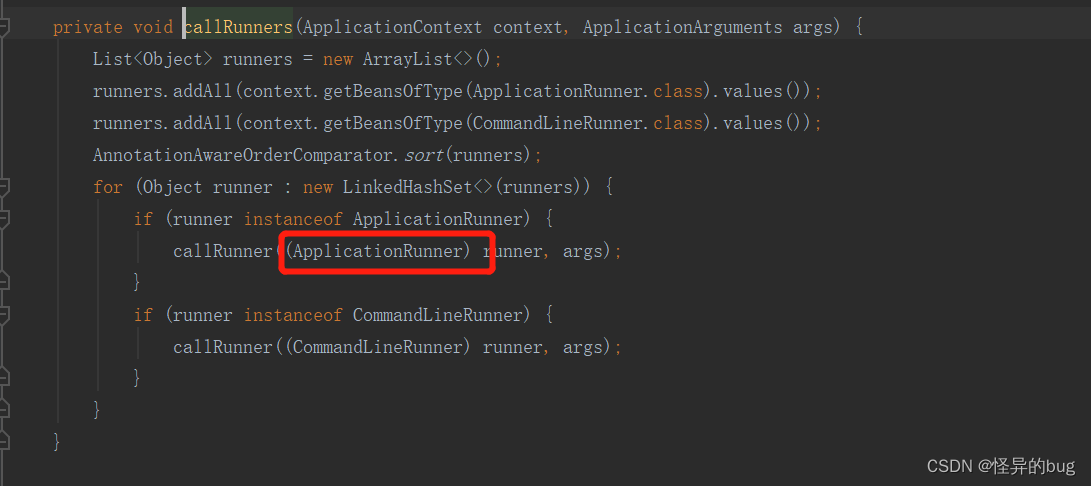
可以实现ApplicationRunner方法,启动时执行。
@SpringBootApplication
public class TrainApplication implements ApplicationRunner {

    public static void main(String[] args) {
        SpringApplication.run(TrainApplication.class, args);
        System.out.println("******************************启动springBoot******************************");
        System.out.println("**********************");

    }

    @Override
    public void run(ApplicationArguments args) throws Exception {
        System.out.println("启动时执行");
    }
}

